
Играйте на ПК с BlueStacks или через наше облако
Запустите TP-Link Tapo на PC или Mac
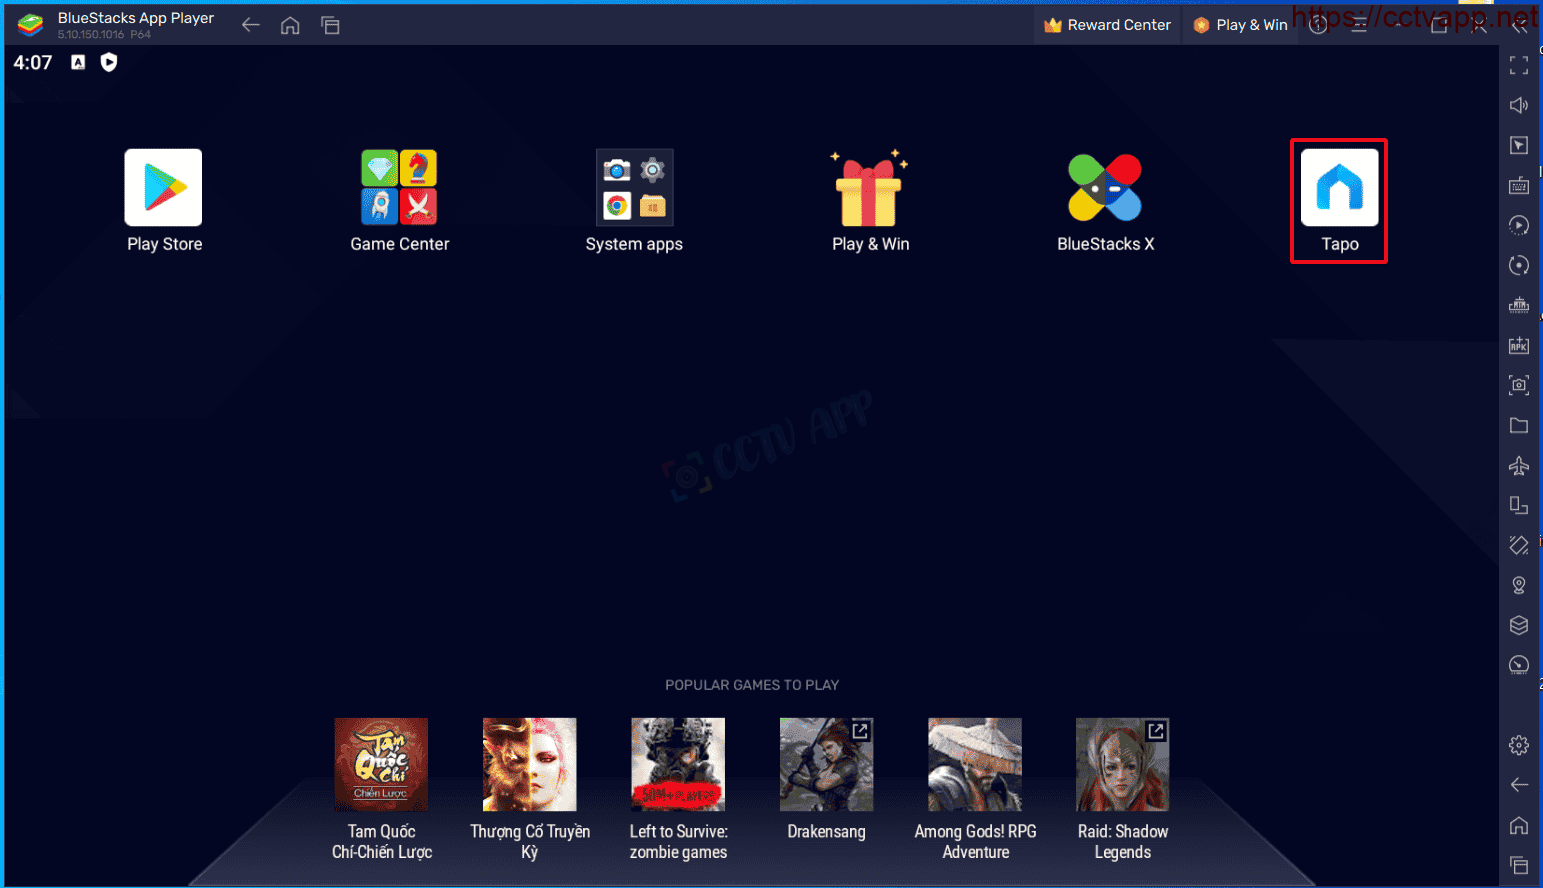
TP-Link Tapo — приложение категории Стиль жизни, разработанное студией TP-LINK GLOBAL INC. BlueStacks — лучшая платформа игр для Android на ПК или Mac. Получите незабываемый игровой опыт вместе с нами.
Приложение Tapo — это ключ к легкому контролю и управлению смарт-устройствами Tapo, что позволит вам без труда пользоваться всеми необходимыми возможностями. Настройка смарт-устройств Tapo займет считанные минуты благодаря удобному интерфейсу приложения. Вот как приложение Tapo может улучшить ваш умный дом:
1. Дистанционное управление: Наслаждайтесь свободой управления смарт-устройствами Tapo из любого места, тем самым обеспечивая невероятное удобство и доступность. Где бы вы ни находились — дома, на работе или в дороге, — ваши устройства будут всегда под рукой.
2. Голосовое управление: используйте возможности голосовых команд благодаря интеграции с Google Home и Amazon Echo. Управляйте устройствами с помощью простых голосовых команд, что делает управление умным домом более интуитивным.
3. Режим Away: Создайте ощущение присутствия, даже когда вас нет дома, активировав режим Away. Эта функция позволяет имитировать активность, отпугивая потенциальных злоумышленников и повышая безопасность дома.
4. Таймер обратного отсчета: установите таймер обратного отсчета, чтобы автоматизировать включение или выключение устройства. Идеально подходит для экономии энергии или создания определенной обстановки.
5. Автоматизация по расписанию: Планируйте свой день, составляя расписание автоматического включения/выключения устройств. Приложение позволяет создавать индивидуальные расписания, обеспечивая бесперебойную работу устройств в соответствии с вашим распорядком дня.
Легкая настройка, удобное управление и повышенная безопасность с приложением Tapo — все возможности управления «умным домом» у вас под рукой.
Как скачать и запустить TP-Link Tapo на ПК
-
Скачайте и установите BlueStacks на ваш ПК или Mac
-
Войдите в аккаунт Google, чтобы получить доступ к Google Play, или сделайте это позже.
-
В поле поиска, которое находится в правой части экрана, введите название игры – TP-Link Tapo.
-
Среди результатов поиска найдите игру TP-Link Tapo и нажмите на кнопку «Установить».
-
Завершите авторизацию в Google (если вы пропустили этот шаг в начале) и установите игру TP-Link Tapo.
-
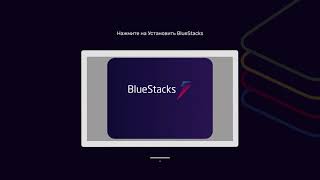
Нажмите на ярлык игры TP-Link Tapo на главном экране, чтобы начать играть.
Watch Video
Вам надоело прищуриваться во время игры в любимые Android игры на маленьком экране телефона? Вы хотели бы наслаждаться мобильными приложениями на большом экране без необходимости покупать отдельное устройство? Присмотритесь к BlueStacks!
BlueStacks — это бесплатный Android-эмулятор, позволяющий запускать Android-приложения на компьютере или ноутбуке. Благодаря разрешению высокой четкости и более плавной частоте кадров вы можете наслаждаться игрой на большом экране.
Одним из самых больших преимуществ BlueStacks является функция Расширенного игрового управления. Попрощайтесь с неточным сенсорным вводом — эта функция позволяет назначить управление на мышь, клавиатуру или геймпад для более точного и быстрого геймплея. Будь то динамичные файтинги или захватывающие ролевые игры — вы можете настроить управление в соответствии со своими предпочтениями.
Функция макросов — это еще одно нововведение, которое предлагает BlueStacks. Она позволяет записывать последовательности ввода и выполнять их одним нажатием кнопки, облегчая выполнение повторяющихся задач или сложных маневров в играх. С помощью этой функции вы сможете без особых усилий выполнять сложные и смертоносные комбинации действий.
Многозадачность — это просто, благодаря функции Мультиоконности в BlueStacks. Вы можете запускать несколько приложений или игр одновременно на одном устройстве, что позволит вам сделать больше за меньшее время.
С помощью BlueStacks вы можете легко делать скриншоты и записывать видео во время использования Android приложений. Это отличный способ продемонстрировать свои навыки или создать высококачественные обучающие ролики, которыми можно поделиться с друзьями и близкими в социальных сетях.
Последняя версия BlueStacks, BlueStacks 5, является самой быстрой и легкой на сегодняшний день. Ее изящный и современный интерфейс проще в использовании и интуитивно понятен, что значительно облегчает взаимодействие и делает процесс игры более плавным.
BlueStacks — это фантастическое программное обеспечение как для геймеров, так и для негеймеров. И неважно, играете ли вы в игры, пользуетесь приложениями социальных сетей или работаете с приложениями для повышения производительности, BlueStacks обеспечивает удобное использование мобильных приложений на большом экране. Благодаря широкому набору функций и обновлений, это оптимальное решение для тех, кто хочет наслаждаться Android приложениями на компьютере или ноутбуке.
Для BlueStacks 5 требуется ПК или Mac с оперативной памятью 4 ГБ и выше. Теперь параллельно поддерживаются 32- и 64-разрядные приложения.
Операционная система
Microsoft Windows 7 и выше, macOS 11 (Big Sur) и выше
Процессор
Intel, AMD или Apple Silicon Processor
ОЗУ
не менее 4 ГБ
Жесткий диск
10 ГБ свободного дискового пространства
Note:
* У вас должны быть права администратора на ПК. Актуальные драйверы видеокарты от производителя чипсета или Microsoft.
TP-Link Tapo — FAQ
-
Как запустить TP-Link Tapo на ПК с Windows и Mac?
Запустите TP-Link Tapo на своем ПК или Mac, выполнив следующие простые действия.
- Нажмите «Скачать TP-Link Tapo на ПК», чтобы загрузить BlueStacks.
- Установите его и авторизируйтесь в Google Play Store.
- Запустите приложение.
-
Почему BlueStacks — самая быстрая и безопасная платформа для игр на ПК?
BlueStacks уважает вашу конфиденциальность и всегда безопасен в использовании. Он не содержит вредоносных и шпионских программ или любого другого дополнительного программного обеспечения, которое может нанести вред вашему компьютеру.
Он разработан и оптимизирован чтобы обеспечивать ваш игровой процесс наилучшей производительностью.
-
Какие системные требования у TP-Link Tapo к ПК?
Минимальные требования для запуска TP-Link Tapo на вашем ПК
- ОС: Microsoft Windows 7 и выше
- Процессор: процессор Intel или AMD.
- Оперативная память: на вашем компьютере должно быть не менее 2 ГБ оперативной памяти. (Обратите внимание, что наличие 2 ГБ или более дискового пространства не заменяет ОЗУ)
- Жесткий диск: 5 ГБ свободного места на диске.
- Вы должны быть администратором на своем ПК.
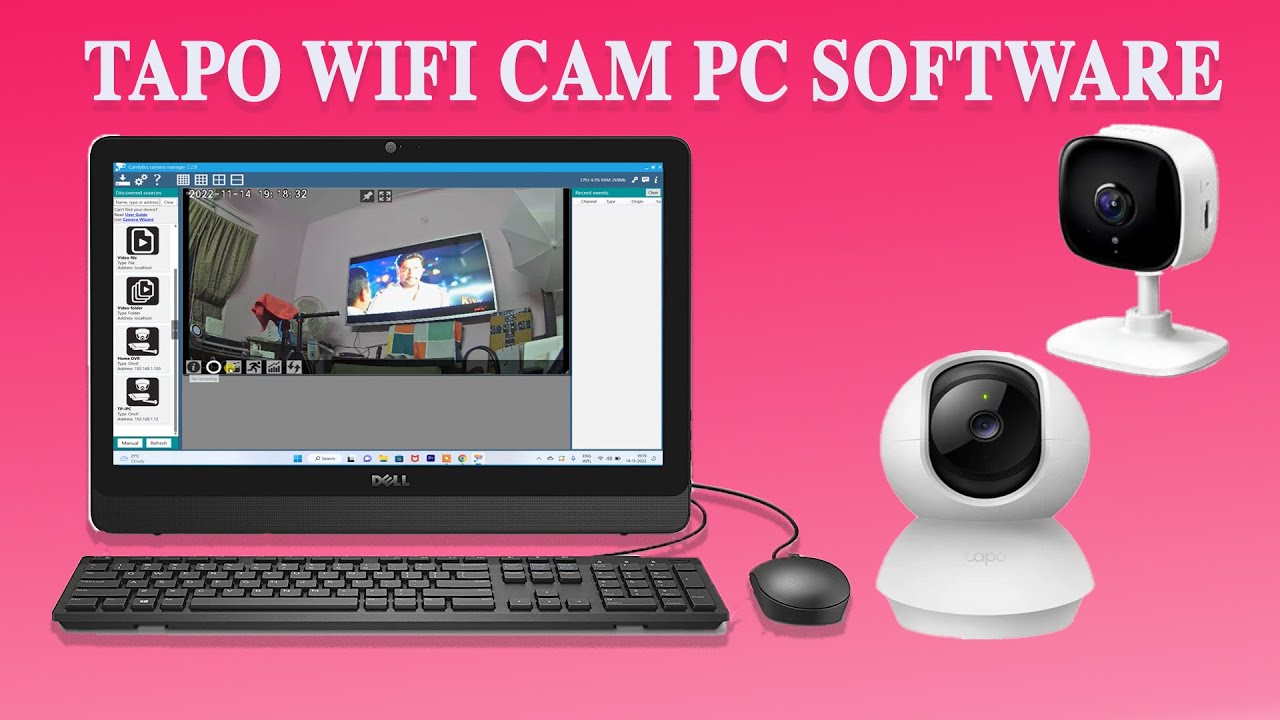
The TP-Link Tapo For PC App is used to monitor Tapo TP-Link CCTV cameras on PCs from remote locations. The complete installation process and device addition are shared in the post.
The TP-Link Tapo For PC Software is popular for its modern features and seamless performance.
The download button is given here for installing TP-Link Tapo For PC CMS on Windows OS. The software is shared in a compressed file format. Decompress it and then go for the installation.
The installation and configuration are shared along with images for proper understanding. After that, the Username and password generation are illustrated. It also demonstrated how to add devices for remote monitoring.
This security surveillance software will save you time and make you more efficient.
Basic Information Regarding the TP-Link Tapo For PC Software
It is a highly advanced surveillance software. It connects TP-Link Tapo Cameras and accesses them to users from remote areas. It protects your business and home.
Currently, this software is available for Windows-based PCs only (both x86 and 64-bit versions).
This has been tested on Windows 7, 8, and 10 but may work on other Windows variants that support the .Net v4 Framework.
You can also use it on Mac PCs by using Emulators like Bluestacks.
If your PC has 2GB of RAM and 200 GB of free hard disk space then you can easily connect and record 4 cameras at 320 x 240 resolution.
The performance record of the TP-Link Tapo App
You can add any number of cameras to your PC if your computer supports them. This software will support all of these Tapo devices and make them accessible to you from anywhere.
These are some of the recommendations for making the maximum out of this TP-Link Tapo software.
- Just decrease the frame rate of each camera to increase the number of connected cameras.
- You can also add more cams to this app by decreasing the resolution of the cams.
- For a better experience use 64-bit PCs.
- Save recording in AVI mode rather than MP4 mode to save space.
- Set Buffer Frames on the recording tab to 0.
Features & Functions of the TP-Link Tapo For PC CMS
It is important to know the features and functions of the software. When we know them clearly, we better use the software and get maximum benefit.
This software has all the latest functions possible. Let’s know them one by one.
- The advanced network technology is used for seamless data flow. It gives a continuous flow of network even in low network areas.
- The app provides live images and footage. There is no time lag between events happening and relaying.
- The software is designed in such a way that you can operate cameras from your remote areas. You can pan, tilt or zoom the device. It supports PTZ cameras as well.
- The playback can be viewed from away locations and you can even snatch images for evidence or protection.
- The app supports alert signals. It detects motion and audio. Any dubious movement or action sensed by the device sends alert signals and rings alarm bells through this application.
- You can set an alert zone through the software. If any person enters those areas, it sends you alert messages. This way it keeps you safe and alert from transgressors.
- You can communicate two-way through this software. You can send messages, listen to people, and instruct them through this feature.
- This 2-way audio feature is also handy in safeguarding people from impending threats. You can yell at suspects and scare them. You can also alert others with this function.
- You can witness 16 cameras on screen at a time.
- This app supports multiple users and remote access.
- It allows you to connect cameras through a QR code, serial number, and IP address.
These are some of the more useful functions of this CMS.
The download button is shared below. Press the button and get the application files. These files are in a squeezed form. Unsqueeze them for getting them on your PC.
This way you have to download the TP-Link Tapo For Windows software. The complete installation, device addition, and monitoring process are illustrated in the next section. You can refer to them for complete comprehension.
Download TP-Link Tapo For Mac Software on Macintosh PC
The company doesn’t provide TP-Link Tapo For Mac App. However, if you want to watch TP-Link cameras on a Macintosh PC, you have to take the support of the Bluestacks emulator.
Download the emulator. It is available for Mac OS. After that, the process is the same as mentioned in the below section.
Install TP-Link Tapo CMs & Add devices to Monitor on Windows OS
Get the download button and click it. You will get the zipped files. Unzip them and then go for the installation.
The installation process is defined below in the first step. In steps 2 & 3, the device addition User ID & password generation are shared.
Step 1- Install the Tapo Link App on Windows OS


Step 1- Install Tapo App on Windows OS
When we decompress the file and open it, we get this page. It is the first page of the application.
This page is for the Agent utility information regarding the installation of the software. Press the next button for the next action.
This page surfaces.
The package is downloaded here. When they are completely loaded the files are ready to transfer.
On this page, we have to give the path and location of the folder. Select the path and folder location.
After that, press the next button. When we press the next button the app begins to install.

As we can see here, the software is loafing all of its content. When the installation finishes completely, we get a notification page.
This page announces the installation process is complete now.
This way, we finish the first step. Now we move forward to the next step. It is about connecting cameras.
Step 2- Add Cameras
When the app is installed, we get its icon on the desktop. When we open that, we get this page.

This is the homepage. This page has all the menu for the next actions. There is an Add tab. Press it and the next page will appear.
It is about adding the camera. This settings column welcomes device addition.

Here, we get this window. It opens a new page. There is an ‘ONVIF Camera option on it.

Press the ONVIF button and get to this page.

Here you have to add the IP address of the camera.

It will automatically take the IP address of this camera. But we don’t know the username and password of the device. For that, we have to open the software on an Android mobile setup. For that, we have to open the mobile load this app, and connect the camera.
We have to open the settings tab on the mobile.

Then press the settings option.
The new page surfaces. On the new page, we get the IP address option.
Step 3- Generate Username & Password for Monitoring
Press the IP address option. The next page appears. We have to open camera settings for further actions.

When we click the IP address and then go to the ‘Advanced Setup Option.’

When we click this option, we reach the next step. This step asks us to create an account.
Create the account.

Create the account on your mobile device and save it.
Now come to the desktop and mention the same username and password on the desktop. This way we mention the required options and cameras appear on the desktop screen.
All cameras are added now.

You can remotely monitor these locations now.
Conclusion
The TP-Link Tapo For PC CMS installation and device addition procedures are demonstrated here. Every step and option is defined for the proper understanding.
This powerful app and its settings are expressed. If you have some queries regarding the process, please mention them in the comment section. We will respond to your queries.
Thank You.
Frequently Asked Questions
Can I use Tapo on my PC?
Yes, it is possible to use and view the camera on a PC. It supports the third-party application also.
Is Tapo the same as TP-Link?
Yes, both are the same. Now TP Link uses Tapo as its brand name to sell security products.
How do I access my Tapo TP-Link?
Follow these instructions.
1- Open the app, and log in with your TP-Link ID. …
2- Plug in your camera and wait about 30 seconds until the LED blinks red and green. …
3- It will start searching for your camera.
4- Monitor your location
Can I connect Tapo to Google?
Yes, you can. For that, you have to take the support of Google Chrome and Google Home Hub.
Is Tapo a Chinese company?
Yes, Tapo is a Chinese company.
Does TP-Link Tapo work without Wi-Fi?
Yes, these Tapo cameras work without WiFi. But for monitoring and setting, you require a WiFi connection.
Can I view the Tapo camera on TV?
You can watch, but the TV must be an Android or smart TV.
Does Tapo save electricity?
It uses extremely low power consumption.
How long does the Tapo battery last?
It lasts up to 3 months if fully charged.
How far can Tapo detect motion?
Topo can detect motion and view up to 23 feet.
TC40, TC40GW, TC41, TC53, TC55, TC60, TC65, TC70, TC71, TC72, TC73, Tapo C100, Tapo C101, Tapo C110, Tapo C110P2, Tapo C110P4, Tapo C111, Tapo C120, Tapo C125, Tapo C200, Tapo C200P2, Tapo C201, Tapo C202, Tapo C206, Tapo C210, Tapo C210P2, Tapo C211, Tapo C212, Tapo C216, Tapo C21A, Tapo C220, Tapo C222, Tapo C225, Tapo C230, Tapo C310, Tapo C310P2, Tapo C320WS, Tapo C325WB, Tapo C500, Tapo C501GW, Tapo C510W, Tapo C51A, Tapo C520WS, Tapo C52A, Tapo C530WS, Tapo C720
10-30-2019
3,171,140
Recent updates may have expanded access to feature(s) discussed in this FAQ. Visit your product’s support page, select the correct hardware version for your device, and check either the Datasheet or the firmware section for the latest improvements added to your product. Please note that product availability varies by region, and certain models may not be available in your region.
The Tapo wired camera supports the RTSP and ONVIF (Profile S) protocols, enabling compatibility with third-party NVR or NAS devices that also support RTSP/ONVIF.
This article will show you how to connect the Tapo camera to your NVR/NAS or a third-party client on PC like VLC Player and iSpy.
Important Notes:
1. For battery cameras/doorbells, only the special models (Tapo D235/D225/TD25) support RTSP streaming when hardwired, with a jumper cable installed, and the always-on mode turned on. Other models (such as Tapo C410/C420/C425/D230) do not support RTSP streaming due to battery and electronic design limitations.
2. It is not recommended to use this function on public networks. Only use it on trusted local networks and ensure that the Wi-Fi is encrypted.
3. Tapo Care cloud storage cannot be used simultaneously with NVR or a microSD card due to the limited number of streams supported by some models. If all three are used at the same time, recording on the NVR will be disabled. To restart recording on the NVR, remove the microSD card from the camera.
Before you start:
1. Before using this function, you need to create a camera account on the Tapo app. Set a highly secure and complex username and password that is different from your Tapo account password.
2. When adding the camera to an NVR or other third-party device, you will need the camera’s IP address. The IP address is usually assigned by your host router. You can find it on your host router’s DHCP list or in the Tapo app (go to the Device Settings page of the camera and tap Device Info to see its IP). For detailed instructions, please refer to the guide on how to find the IP address of your Tapo & Kasa cameras.
3. Ensure that the computer, NAS, NVR, and your camera are all connected to the same network or that they can access the public IP and port of your camera.
Step 1: Create a camera account in the Tapo app
1. On the Home page, tap on your camera model card to go to the camera Live View page (or you can click on Cameras tab>tap Manage on your camera model to go to the Live View page).
2. On the Live View page, tap the icon at the top right corner to enter the Device Settings page.
3. Tap Advanced Settings, then select Camera Account to create an account (username and password) for camera login on other portals.
You will see a prompt like below (About Camera Account), please read it and tap Understand and Agree to Use, then you can create an account for the camera.
Note: The username and password should contain 6 to 32 characters.
Step 2: Add your Tapo camera on PC/NAS/NVR
ONVIF (Open Network Video Interface Forum) and RTSP (Real-Time Streaming Protocol) are two commonly used protocols in video surveillance and streaming.
The Tapo camera can transmit real-time audio and video streams via the RTSP protocol. Additionally, if your PC, NAS, or NVR supports ONVIF, it can provide extra camera management features such as PTZ (pan-tilt-zoom) control.
Option 1: Using RTSP + ONVIF Protocol (using iSpy as an example)
1. Run the iSpy software on your computer.
2. Click Add on the top left menu and select ONVIF Camera.

3. Enter the Username and Password that you set for your camera on the pop-up window, select Network Address, and click Next. You can customize other parameters if needed.
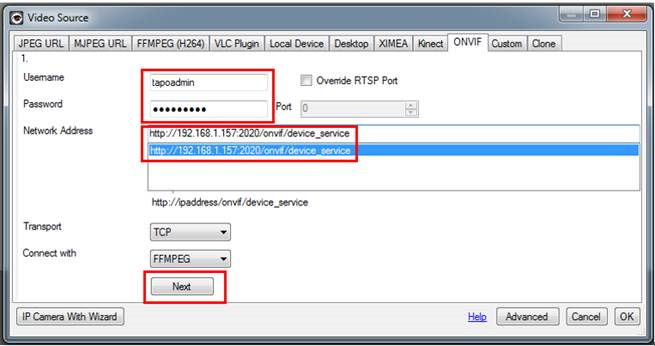
4. Choose the video resolution and click OK.

5. Customize the camera settings as needed, including Microphone, Talk, Motion Detection, Alerts, Recording, Images, Scheduling, and Storage. You can also change all the settings later. Click Finish to complete adding your camera to iSpy.

6. After adding your Tapo camera to iSpy, you can monitor and manage it using the app. View the live, customize motion detection, check the recordings when motion detected, set recording schedules, record videos and more.

Option 2: Using RTSP Protocol Only (using VLC as an example)

- Open the VLC software, select Media > Open Network Stream
- Fill in the URL of the Tapo camera

The URL of the RTSP live stream for the Tapo cameras will be:
For high quality stream1: rtsp://IP Address/stream1
For low quality stream2: rtsp:// IP Address/stream2
In some software, the URL need to add the port to access live stream, the default port is 554:
For high quality stream1: rtsp://IP Address:554/stream1
For low quality stream2: rtsp:// IP Address:554/stream2
If you fail to stream the Tapo camera via the RTSP/ONVIF protocol, you may refer to the article for the troubleshooting:
https://community.tp-link.com/en/smart-home/forum/topic/652710
Frequently Asked Questions
Q1: How can I view the live stream of the Tapo camera remotely from another network?
You can set up a VPN network or use your router’s port forwarding feature to allow external devices to access the public IP and reach the camera. However, please note that the RTSP/ONVIF protocols are not highly secure, so it is not advisable to expose the camera to a public IP via port forwarding for long periods. It is recommended to use a secure, encrypted VPN network.
Q2:What ports are used by the Tapo camera for RTSP/ONVIF?
The Tapo camera uses the following ports for RTSP/ONVIF: ONVIF Service Port: 2020 and RTSP Service Port: 554
Q3:Why is the resolution of RTSP Stream 1 lower than the camera’s maximum resolution?
For some models, like the C310, the resolution of Stream 1 (rtsp://IP Address/stream1) is determined by the video quality setting in the Tapo app. If you find that the resolution of Stream 1 is lower than the camera’s maximum supported resolution, try changing the video quality setting to «Best Quality» in the Tapo app.
Q4:What should I do if there is no or very little sound when watching the live stream using RTSP/ONVIF?
If you find that there is no or very little sound when using RTSP/ONVIF to watch the live stream, please adjust the camera microphone settings in the Tapo app.
Q5:Does the Tapo Camera support 2-way audio when connected via RTSP/ONVIF?
The ONVIF standard includes multiple profiles, and the Tapo Camera only supports Profile S. This profile does not include 2-way audio. Profile S only covers basic functionalities such as video/audio streaming, network configuration, event handling, and PTZ (pan-tilt-zoom) control.
According to my research, at the present time (February 2, 2023) TP-Link has not yet released an application to view Camera Tapo on computers. So you can act as instructed in your article.
How to do it: I will use Bluestacks as an Android phone, then install the Tapo app to view the camera to use.
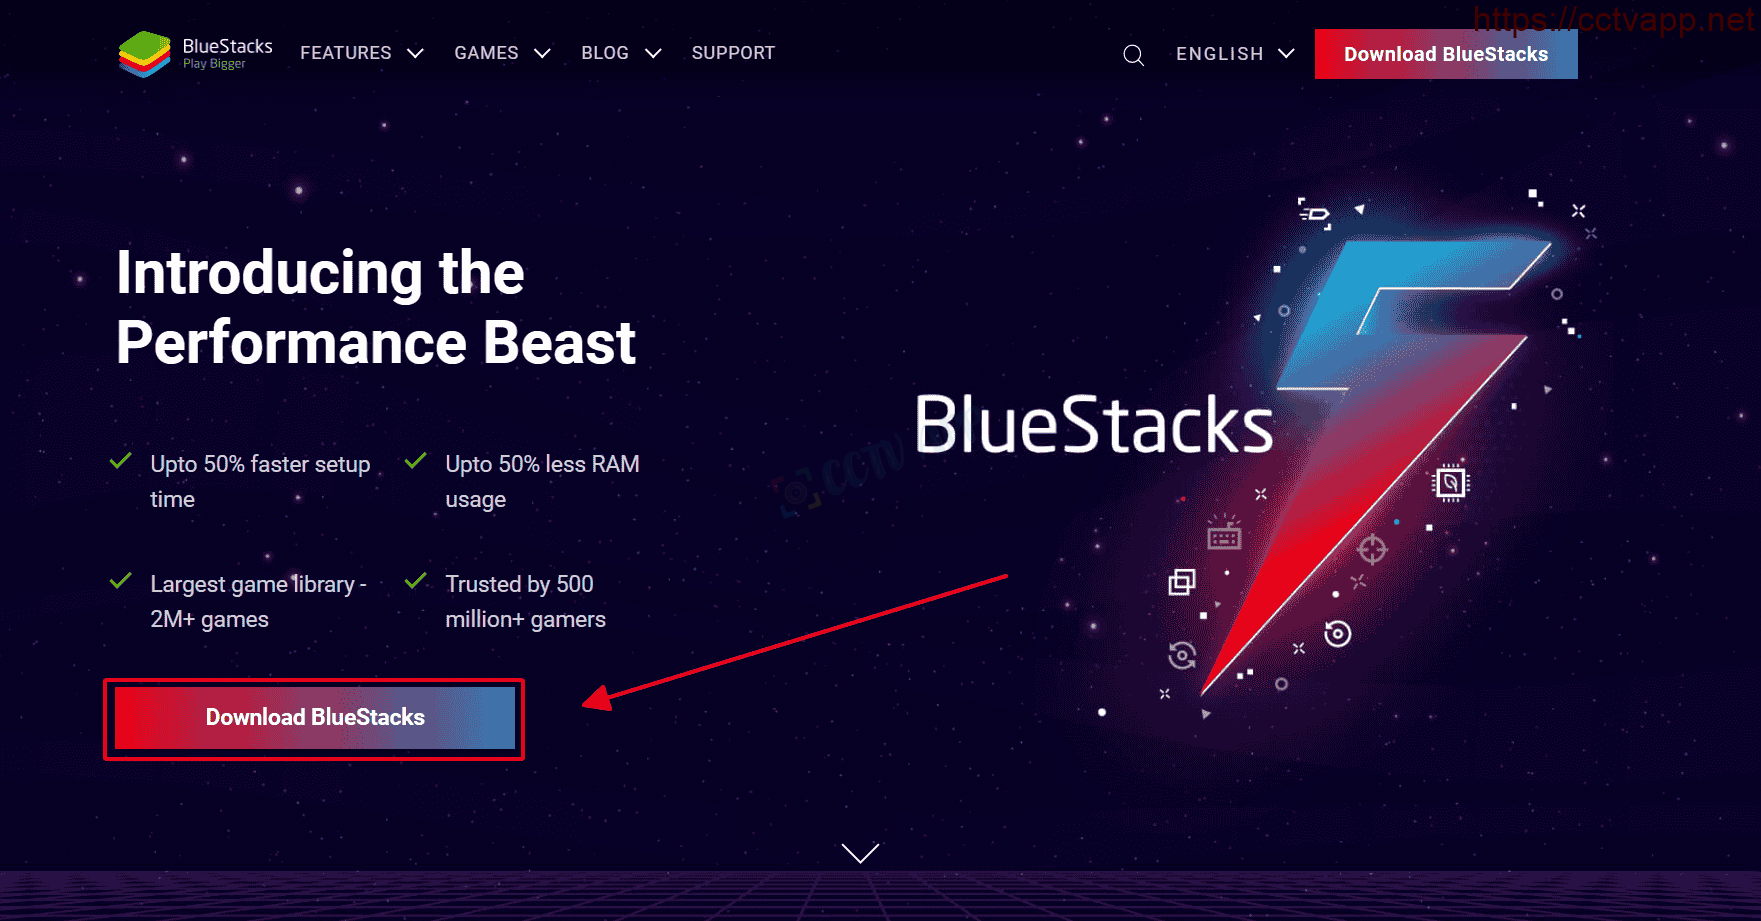
1. Download and install Bluestacks
First download and install the app Bluestacks here: https://www.bluestacks.com/bluestacks-5.html
2. Tapo App Settings
After installing Bluestacks, you can log in to Google Playstore to download and install the Tapo app (similar to your phone).
App Name: Tapo
Publisher: TP-Link Corporation Limited
| Num | Version | Release | Download |
|---|---|---|---|
| 1 | TP-Link Tapo_2.12.705.apk | Jan 14, 2023 | Download |
| 2 | TP-Link Tapo_3.3.513.apk | Apr 25, 2024 | Download |
| 3 | TP-Link Tapo_3.3.513.xapk | Apr 25, 2024 | Download |
Next, drag and drop the APK file into Bluestacks software to install it.
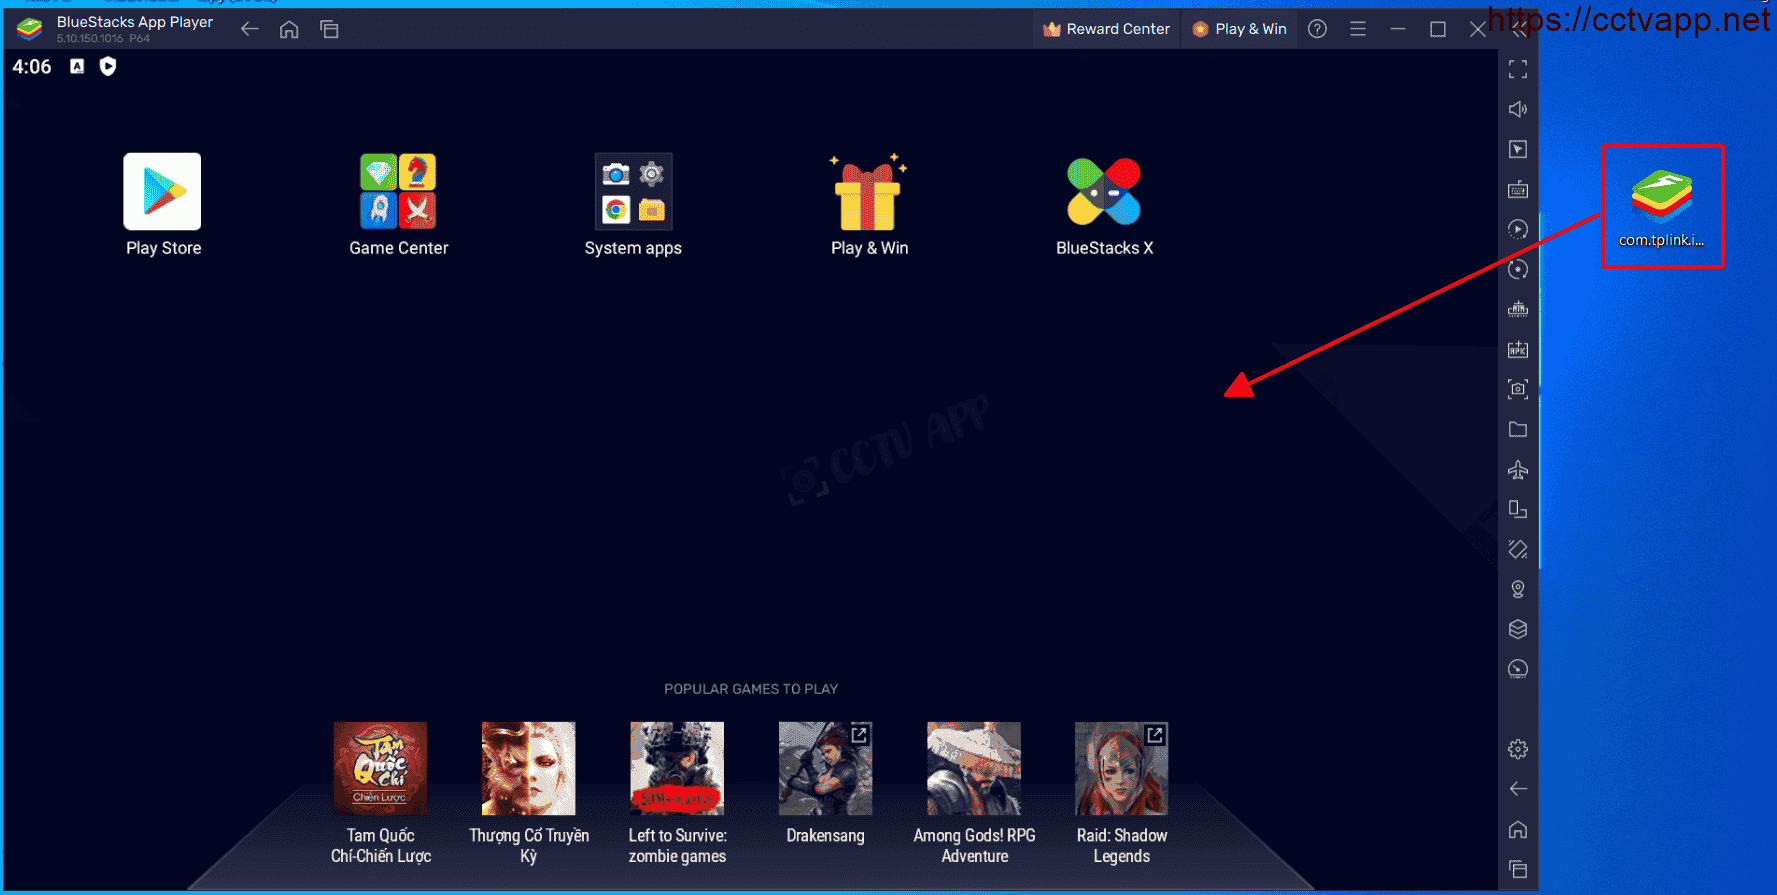
When the installation is complete, the output will look like this:

Wishing you a successful installation. Thank you for following the article!!!
The Tapo Camera is a great tool for home security. It helps you see what’s happening in your house. You can check it from anywhere. But how do you use it on your PC? This article will explain everything you need to know.
What is Tapo Camera?
The Tapo Camera is a smart camera made by TP-Link. It helps you monitor your home. You can watch live video feeds. It also has features like night vision and motion detection.
Why Use Tapo Camera on PC?
Using your Tapo Camera on your PC offers many benefits:
- Large Screen: Viewing on a larger screen is easier.
- Better Control: You can control settings more easily.
- Multiple Cameras: View multiple cameras at once.
How to Set Up Tapo Camera on PC
Setting up your Tapo Camera on your PC is simple. Follow these steps:
Step 1: Install Tapo App On Your Smartphone
You need to start with your smartphone. Download the Tapo app from your app store. Open the app and create an account.
Step 2: Connect Tapo Camera To Wi-fi
Connect your Tapo Camera to your Wi-Fi. Follow the instructions in the app. Make sure your camera is powered on.
Step 3: Link Camera To Tapo App
In the app, tap on “Add Device.” Select your camera model. Follow the prompts to link it.
Access Tapo Camera on PC
Now, let’s see how to access your Tapo Camera on your PC. You can do this in two ways:
Method 1: Using A Web Browser
You can access your camera using a web browser. Here’s how:
- Open your web browser.
- Type in the Tapo Camera IP address.
- Log in with your Tapo account credentials.
- You can now view the live feed!
Method 2: Using Tapo Software
TP-Link offers software for PC users. Here’s how to install it:
- Visit the TP-Link website.
- Download the Tapo software.
- Install the software on your PC.
- Open the software and log in.
- You can now view all connected cameras!
Features of Tapo Camera on PC
When you access your Tapo Camera on your PC, you enjoy many features:
- Live Streaming: Watch live video feeds anytime.
- Two-Way Audio: Talk through the camera.
- Motion Detection: Get alerts when motion is detected.
- Night Vision: See clearly in low light.
- Video Playback: Review recorded videos easily.
Troubleshooting Common Issues
Sometimes, you may face issues. Here are some common problems and solutions:
1. Camera Not Connecting
Check your Wi-Fi connection. Make sure your camera is powered on. Restart your router if needed.
2. Poor Video Quality
Ensure you have a strong internet connection. Check the camera lens for dirt or obstructions.
3. Software Not Opening
Make sure your PC meets the software requirements. Try reinstalling the software.
Best Practices for Using Tapo Camera
Here are some tips for optimal use:
- Regularly update the Tapo app and software.
- Keep your camera firmware up to date.
- Position your camera in areas with good visibility.
- Adjust motion sensitivity settings to avoid false alerts.
Frequently Asked Questions
How To Connect Tapo Camera To Pc?
You can connect your Tapo Camera to a PC using the Tapo app available on Windows or via a web browser.
What Software Is Needed For Tapo Camera?
The Tapo Camera requires the Tapo app for full functionality, available on both mobile devices and Windows PCs.
Can I View Tapo Camera Live Feed?
Yes, you can view the live feed from your Tapo Camera on your PC through the Tapo app or web interface.
Is Tapo Camera Compatible With Windows?
Yes, Tapo Cameras are compatible with Windows operating systems via the Tapo app or a supported web browser.
Conclusion
Using your Tapo Camera on your PC is easy and beneficial. You can monitor your home securely. With the large screen, it’s more convenient. Follow the steps above to get started. Enjoy peace of mind with Tapo Camera!