
Хочу поделиться с вами лайфхаком, которым пользуюсь ежедневно уже на протяжении нескольких лет. Работает безупречно, сберегает время. Так повелось, что у нас с женой разные учетные записи на одном домашнем компьютере. Это удобно: у каждого свой рабочий стол, свои обои, предпочтения, настройки приложений, кукисы в браузере. Я даже не представляю сейчас, как можно работать под одной учеткой. Но (без этого “но” не было бы и статьи), есть одна маленькая проблема. Переключение пользователей. Как это делается обычно: Пуск –> некая кнопочка, в зависимости от системы -> сменить пользователя. Появляется экран выбора пользователя. Тыкаем в нужного пользователя. Да, есть сочетание клавиш Win+L. После которого опять надо ткнуть смену пользователя и иконку. Итого минимум 3 действия. В Windows 8 сделали заметное улучшение в этом плане. нажимаем Win + иконку пользователя и в списке кликаем на другого. Но это без учета, что на учетке есть пароль. Вот тут-то уже начинаются существенные задержки. Вводить пароль каждый раз при каждом переключении надоест очень быстро. А пароль на свою учетку мне пришлось поставить, так как нужен был удаленный доступ. Да, можно было для удаленного доступа сделать другую учетку, но мой лайфхак уже был готов к тому моменту, и прекрасно работал вне зависимости от того, есть пароли на учетках или нет.
А идея была такая. Сделать так, чтобы быстрое переключение пользователей происходило за одно действие. По нажатию одного хоткея. Поиск в интернете (напомню, было это года 3 назад) принес свои плоды, и подобные решения были найдены. Но, бесплатные либо глючили, либо требовали установки какого-то стороннего софта. А платная, качественная, нашлась одна, и работала одна очень хорошо, но, во-первых, была платной, во-вторых, содержала лишний функционал – по нажатию хоткея не сразу переключался пользователь, а отображалось окошко (по подобию Alt+Tab) с пользователями. Было решено написать свое решение. Самое простое, с минимумом функционала: хоткей – переключение.
Гугление выдало:
- Для переключения сессий используйте функции wtsapi32.dll: WTSEnumerateSessions, WTSConnectSession, WTSDisconnectSession (Сейчас, когда смотрю описание этих функций, оно говорит что работает с удаленными рабочими сессиями, и честно-говоря, я в небольшом недоумении, но у меня работает локально, безупречно).
- Для хоткеев, используйте функции user32.dll: RegisterHotKey, UnregisterHotKey. Тут все просто.
Сразу оговорюсь, и можете кидать в меня помидорами, но писал я это дело на c#, хотя на плюсах, было бы конечно лучше, нативнее и проч, проч, проч… Но, тогда я только начал осваивать c# и нужен был опыт, а когда решение было написано, переписывать его не было необходимости, хотя перенос его не займет больше одного вечера.
Итак, для начала было написано простое win32 приложение с кнопочкой, по нажатию которой выполнялся примерно такой код:
private void SwitchUser()
{
    IntPtr buffer = IntPtr.Zero;
    int count = 0;

    // получаем список сессий, в которых выполнен вход
    if (WTSEnumerateSessions(WTS_CURRENT_SERVER_HANDLE, 0, 1, ref buffer, ref count))
    {
        WTS_SESSION_INFO[] sessionInfo = new WTS_SESSION_INFO[count];

        // самая сложная часть:
        // аккуратно преобразовать неуправляемую память в управляемую
        for (int index = 0; index < count; index++)
            sessionInfo[index] = (WTS_SESSION_INFO)Marshal.PtrToStructure((IntPtr)((int)buffer +
            (Marshal.SizeOf(new WTS_SESSION_INFO()) * index)), typeof(WTS_SESSION_INFO));

        int activeSessId = -1;
        int targetSessId = -1;

        // получаем Id активного, и неактивного сеанса
        // 0 пропускаем, там всегда "Services"
        for (int i = 1; i < count; i++)
        {
            if (sessionInfo[i].State == WTS_CONNECTSTATE_CLASS.WTSDisconnected)
                targetSessId = sessionInfo[i].SessionId;
            else if (sessionInfo[i].State == WTS_CONNECTSTATE_CLASS.WTSActive)
                activeSessId = sessionInfo[i].SessionId;
        }

        if ((activeSessId > 0) && (targetSessId > 0))
        {
            // если есть неактивный сеанс, то переключаемся на него.
            WTSConnectSession(Convert.ToUInt64(targetSessId), Convert.ToUInt64(activeSessId), "", false);
        }
        else
        {
            // если неактивных нет. просто отключаемся (переходим на экран выбора пользователя)
            WTSDisconnectSession(WTS_CURRENT_SERVER_HANDLE, activeSessId, false);
        }
    }

    // обязательно чистим память
    WTSFreeMemory(buffer);
}
При двух сеансах sessionInfo будет иметь 3 элемента: сеанс служб, сеанс 1-го пользователя, сеанс 2-го пользователя. Соответственно targetSessId и activeSessId определятся однозначно. При сеансах более 2, переключение будет происходить между активным и последним неактивным.
Но тут меня постигла небольшая неудача. Некоторые уже могли догадаться, что так дело не пойдет. В момент выполнения WTSConnectSession из приложения, отключение активного пользователя происходит, а вот включение второго пользователя – нет. Т.е. проще говоря, приложение одного пользователя не может инициировать вход другого пользователя. Но это может сделать служба! Да, очень жаль, но без системной службы у нас ничего не получится. Хорошо, создадим системную службу в которую закинем этот код. Вот тут-то и пригодится C# и .Net, так как написать службу на этих технологиях очень и очень просто. Теперь возникает следующая проблема: служба не имеет пользовательского интерфейса, т.е. пользователь не может напрямую повлиять на работу службы, а служба не может услышать действия пользователя. Навесить хоткей на службу нельзя.
Итак, вот наше решение:
Пользовательское приложение слушает пользователя, и при обнаружении хоткея, посылает сигнал системной службе, которая и выполняет переключение.
Осталось совсем немного, но и тут мне найдется что вам показать. Например то, что нам нужно десктопное приложение, без окон, но чтобы оно принимало хоткеи. Это можно сделать так, как делают все: Скрыть главное окно приложения и не показывать. Но есть решение лучше. Написать свой ApplicationContext.
С блэк
Например такой:
internal class SUApplicationContext: ApplicationContext
{
    private Hotkey hk;
    private Form form;
    private const int SWITCH_USER_COMMAND = 193;
    internal SUApplicationContext()
    {
        // только создаем форму, она все равно нужна
        // чтобы слушать хоткеи
        form = new Form();

        // создаем глобальный хоткей Win+A
        hk = new Hotkey(Keys.A, false, false, false, true);

        // делегируем обработчик события
        hk.Pressed += delegate { SendSwitchCommand(); };

        // регистрируем хоткей, если можем
        if (hk.GetCanRegister(form))
            hk.Register(form);

        // Вешаем событие на выход
        Application.ApplicationExit += Application_ApplicationExit;
    }

    private void SendSwitchCommand()
    {
        // Описываем нашу службу
        ServiceController sc = new ServiceController("Sus");
        try
        {
            // посылаем ей команду
            sc.ExecuteCommand(SWITCH_USER_COMMAND);
        }
        catch (Exception ex)
        {
            MessageBox.Show(ex.Message);
        }
    }

    void Application_ApplicationExit(object sender, EventArgs e)
    {
        // при выходе разрегистрируем хоткей
        if (hk.Registered)
            hk.Unregister();
    }
}

[STAThread]
static void Main()
{
    Application.EnableVisualStyles();
    Application.SetCompatibleTextRenderingDefault(false);
    Application.Run(new SUApplicationContext());
}
Здесь я использую найденный на просторах интернета интерфейс MovablePython.Hotkey над user32.dll функциями RegisterHotKey, UnregisterHotKey.
И пару строк о самой службе.
protected override void OnCustomCommand(int command)
{
    base.OnCustomCommand(command);
    if (command == SWITCH_USER_COMMAND)
    {
        SwitchUser();
    }
}
Переопределяем событие OnCustomCommand, и при получении нашей команды, выполняем уже известную нам функцию.
Осталось зарегистрировать и запустить службу, и поставить в автозагрузку каждому пользователю приложение.
Все. Теперь после того, как вошел первый пользователь после запуска компьютера и нажал Win+A, его сеанс отключается, и появляется окно выбора пользователя. Входит второй пользователь, нажимает Win+A – появляется сеанс первого пользователя. И т. д.
На github вы можете ознакомиться с исходниками. Либо можете скачать весь проект и скомпилированные и готовые к работе исполняемые файлы.
If you have more than one user account on your PC then using Fast User Switching you can easily switch between different user account without needing to sign out from any user account. But to do that you need to learn different methods to switch between user accounts in Windows 10 and this post, we will learn how to do so exactly. If you don’t have Fast User Switching enabled by default, then head over here to learn How to Enable or Disable Fast User Switching in Windows 10.

Once you have enabled Fast User Switching, then you can continue with this guide. Just make sure to save any work which you might be doing before switching user. The reason behind this is that you might lose your open word document or any other work as Windows doesn’t automatically save them for you. So without wasting any time let’s see How to Switch User in Windows 10 with the help of the below-listed tutorial.
Table of Contents
Make sure to create a restore point just in case something goes wrong.
Method 1: How to Switch User from the Start Menu
If you are already signed into Windows 10 with your user account, then don’t worry you can still switch to the different user account from Start Menu. Click on the Start button from the bottom-left then click on your user account picture and from the context menu select the user account you want to switch to.

You will be directly taken to the log-in screen of the user account you selected, enter the password or PIN, and you would successfully sign-in to this user account. You can again switch back to your original user account by following the same steps.
Method 2: How to Switch User using Windows Key + L
If you want to switch to a different user account while you have already sign-in into another user account, don’t worry press the Windows Key + L combination on the keyboard.

Once you do that, you would be directly taken to the lock screen, and in the process, you will be locked from your user account. Click anywhere on the lock screen, and you would be shown the login screen from where you can choose any user account that you wish to sign into.

Method 3: How to Switch User from Login Screen
The first thing you see when you start your PC is the sign-in screen, where by default the most recent user account you used to sign-in is selected and you could directly login by entering the password or PIN.
But if you want to select another user account from the sign-in screen, click on the available user accounts from the bottom-left corner of the screen. Select the account then enter password or PIN to sign-in to that particular account.
Method 4: How to Switch User using ALT + F4
Note: Make sure you have saved all of your work and close any open application before following this method, or pressing ALT + F4 will close all your apps.
Make sure you are on the desktop, if not then go to the desktop and make sure you click in an empty area on the desktop to make it your current focused (active) window once you have done that, press and hold ALT + F4 key combination together on your keyboard. This will show you the shut down prompt, from the shutdown drop-down select “Switch User” and click OK.

This will take you to the login screen where you can select any user account you want, enter the correct login information and you are good to go.
Method 5: How to Switch User using CTRL + ALT + DELETE
This method only works if you are already logged in with a user account, and you want to switch to another user account. Now press CTRL + ALT + DELETE key combination on your keyboard then you would be taken to a new screen, click “Switch user“. Again, this would take you to the login screen where you can select any user account you wish to switch to.

Method 6: How to Switch User from Task Manager
If you are already signed into Windows 10 with your user account, don’t worry, you can still switch to Task Manager’s different user account. To open Task Manager, simultaneously press CTRL + SHIFT + ESC key combination on your keyboard.

Now make sure to switch to Users tab then right-click on the already signed in the user account that you want to switch to and then click Switch user account. If this doesn’t work, select the already signed user that you want to switch to and click on the Switch user button. You will now be directly taken on the sign-in screen of the selected user account, enter the password or PIN to successfully sign-in to the particular user account.

Recommended:
- Fix Realtek High Definition Audio Driver Issue
- Fix Start Menu Not Working in Windows 10
- Enable Enhanced Anti-Spoofing for Windows Hello Face Authentication
- Fix Bluetooth can’t turn off on Windows 10
That’s it you have successfully learned How to Switch User in Windows 10 but if you still have any questions regarding this tutorial then feel free to ask them in the comment’s section.
Download Windows Speedup Tool to fix errors and make PC run faster
In today’s world, we keep on upgrading to a newer machines with the passage of time, and this also means that one needs to move the data from the older machine to the newer one. While there are many ways to do this, it is most likely that some of the data will be lost during the transition or the migration might have compatibility issues. Typical machine cloning software works, but only to a certain extent. Enter Transwiz User Profile Transfer Wizard, a simple and powerful tool that helps you move your personal stuff from one machine to another without much of a hassle, and yes, it is freeware.
Transwiz User Profile Transfer Wizard zips your existing data and settings into a standard file. The file must be copied to the new device, and the archive unpacked. The wizard will automatically restore your entire profile and will also rename the new computer and join it to a domain if necessary. Transwiz supports user profile data from Windows XP, Windows Vista, Windows 7, Windows 8 and Windows 11/10 to machines running Windows XP, Windows Vista, Windows 7, Windows 8, Windows 10, and Windows 11.
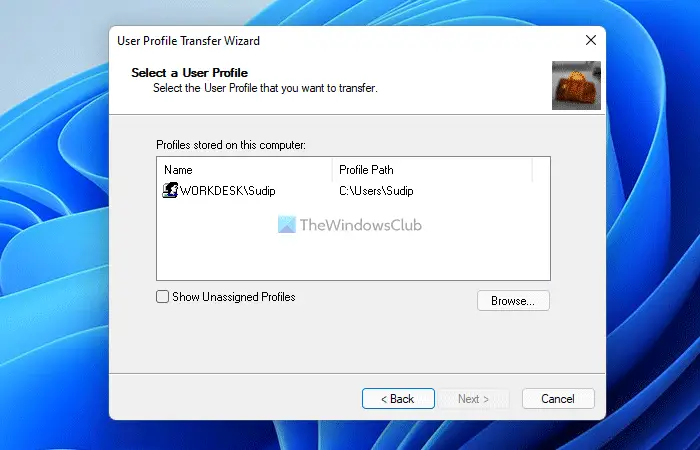
Choosing restore will ask you for a backup Zip file while backing up will ask you for the profile you need to back up. There does exist one caveat, though, to back up your profile you need to log out and sign in with other profile. In case you are just using a single User account on the PC, the TransWiz requires you to create another user.
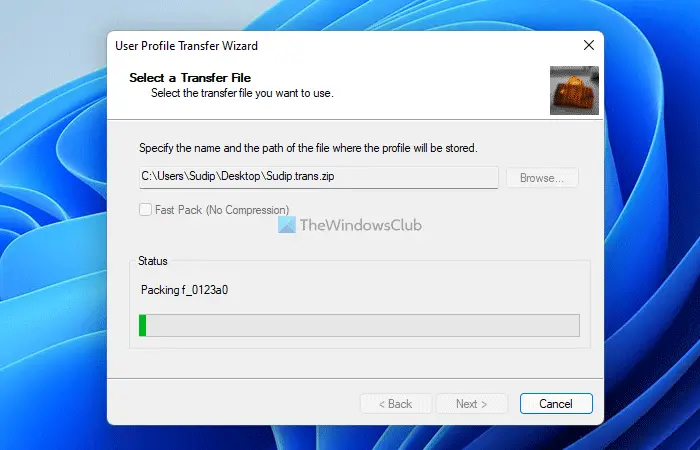
Once the profile is successfully backed up, we will be left with a backup file in Zip format. The file can be carried in a pen drive or even a DVD. Other notable features include the ability to convert XP user profiles to Windows 7, Windows 8 and Windows 10, supports multi-language, the backup file is a standard Zip, can also backup additional folder locations and it is a freeware. In case you need a much more improvised and sophisticated version for organizational use the Transwiz Professional Edition is a good bet.
The features of the free version are:
- Migrate user profiles with a simple wizard interface
- Join computers to all Windows domains
- Join a workgroup
- Delete local accounts
- Disable local accounts
- Migrate from an existing Windows network, a Novell network, or no network at all.
How do I transfer Windows profile to another computer?
There are mainly two ways to transfer Windows profile to another computer. You can use third-party software or manually transfer everything from one computer to another. Transwiz is such a tool, which helps you move your user account from one PC to another within moments. You do not need to worry about anything while migrating multiple accounts at once.
Related: How to move User Profile to another Drive in Windows
What is User Profile Migration?
When you set up a user account on a computer, you change settings, use customized wallpaper, personalized themes, etc. If you want the same thing on multiple computers or you are moving away from one PC to another, user profile migration might be handy for you. It lets you migrate your data, settings, and all the other things from the existing computer to another one.
Transwiz free download
You can download Transwiz from here. The Personal Edition of User Profile Wizard is free to download. It works with Windows 11/10/8/7/Vista/XP computers.
Windows Easy Transfer will also let you transfer User Profile in Windows OS. Some of you might want to take a look at ForensIT User Profile Transfer Wizard too.
Mahit Huilgol is a Windows enthusiast, a blogger & a keen follower of everything Microsoft. He loves to keep a track of the Windows ecosystem and enjoys covering Windows 10 features & freeware.
Здравствуйте админ! Попросил своего приятеля установить мне на ноутбук Windows 10 и он присвоил неблагозвучное имя моей учётной записи. Уже самостоятельно изменил имя учётной записи, но в проводнике имя папки пользователя осталось прежним. В сети говорят, что сделать ничего нельзя. Что же мне делать, переустанавливать операционную систему?
Как изменить имя учётной записи и папку пользователя в Windows 10
Автор Владимир!
При установке Windows мы создаём профиль пользователя: Имя, а также пароль (необязательно), при этом создаётся папка пользователя c именем, которое мы ввели.
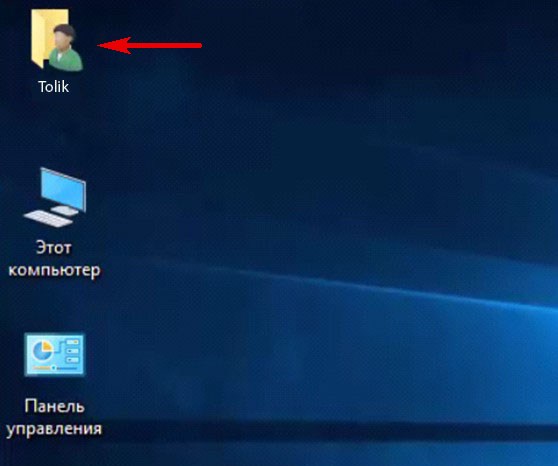
Можно иконку папки пользователя разместить на рабочем столе.
Иногда по тем или иным причинам нужно изменить имя пользователя. Сделать это можно, но что-то может пойти не так. Поэтому перед работой с папкой создадим точку восстановления.
Теперь можно изменить имя и переименовать папку пользователя в Windows 10.
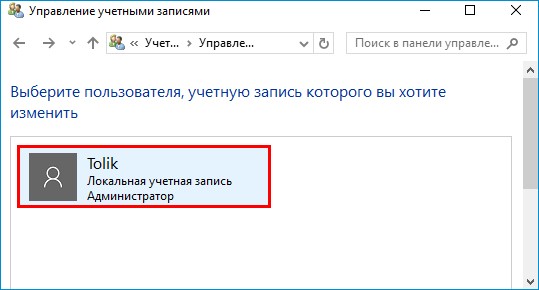
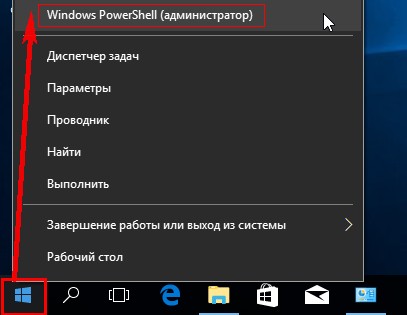
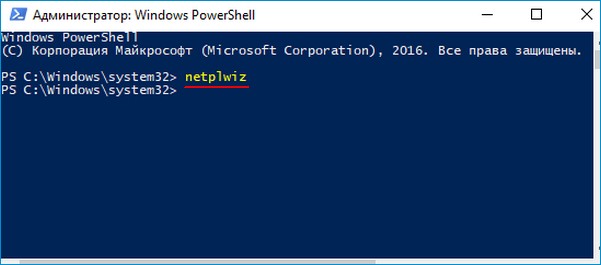
Запускаю командную строку от имени администратора или Windows PowerShell, ввожу команду netplwiz
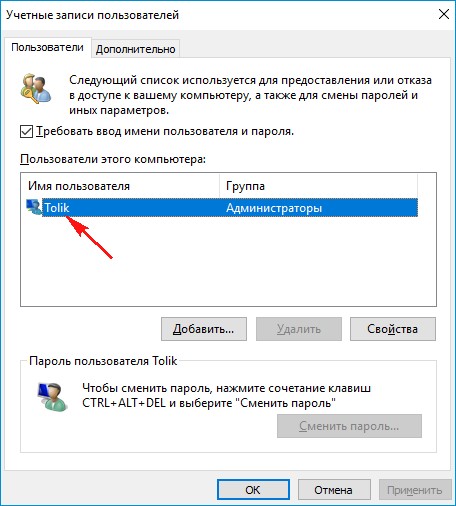
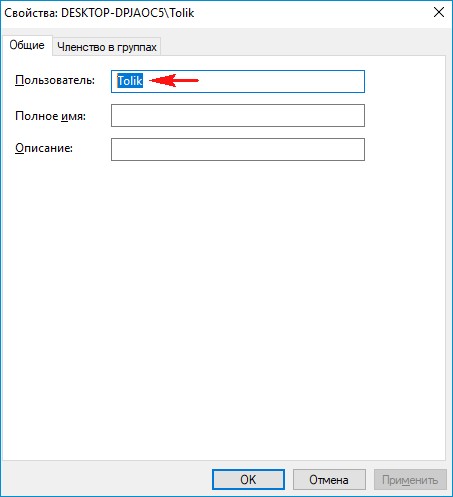
Щёлкаем двойным щелчком левой мыши на имени пользователя и переименовываем его.
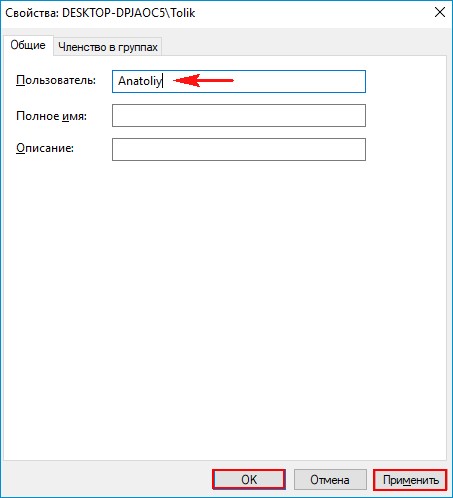
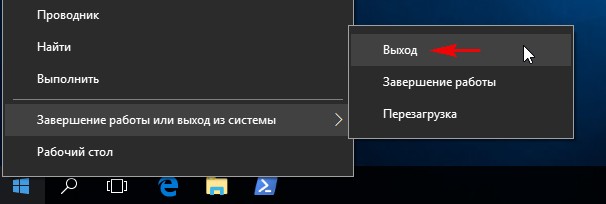
После этого выходим из системы или перезагружаемся и заходим с новым именем и старым паролем.
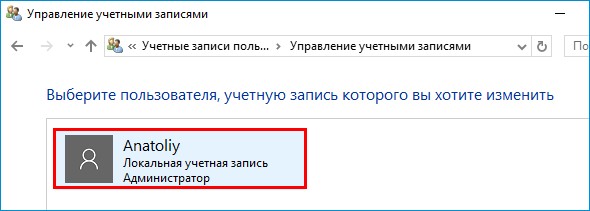
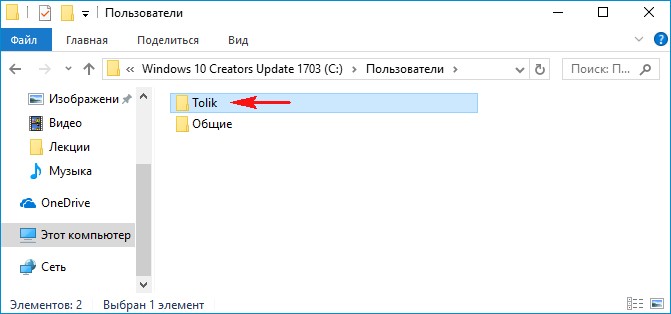
Имя папки на рабочем столе тоже изменилось,

но имя папки в проводнике осталось прежним.
Имя этой папки можно изменить, но есть программы, которые используют путь к этой папке. Например если у вас установлена виртуальная машина и в ней по умолчанию установлен путь к папке пользователя C:\Users\Ваше имя пользователя\VirtualBox, то после переименования сама виртуальная машина перестанет корректно работать. Так что имейте ввиду, что переименование папки может иметь негативные последствия. Править реестр в этом случае занятие муторное и можно наисправлять так, что OS совсем рухнет. Без проблем эту папку можно переименовать в том случае, если мы только что установили Windows и перепутали букву при написании имени.
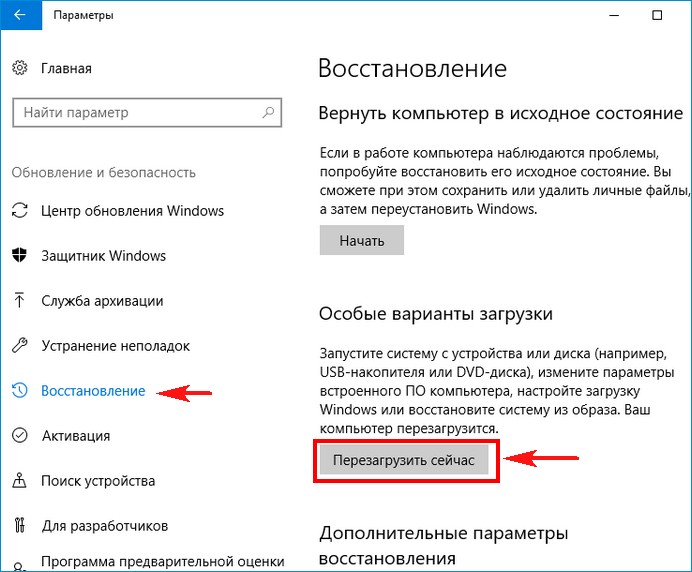
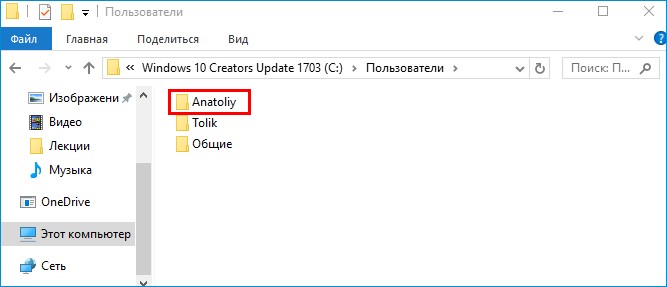
Для переименовании папки заходим в среду восстановления и выбираем командную строку

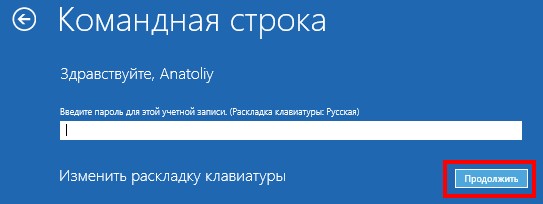
В командной строке вводим «notepad» и переименовываем папку,
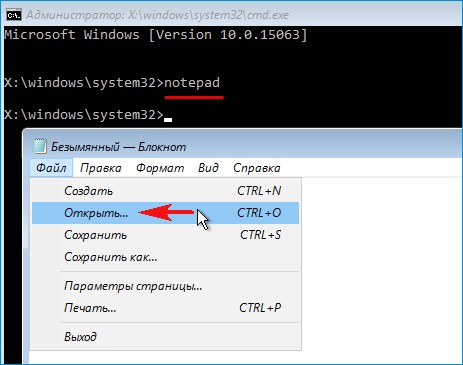
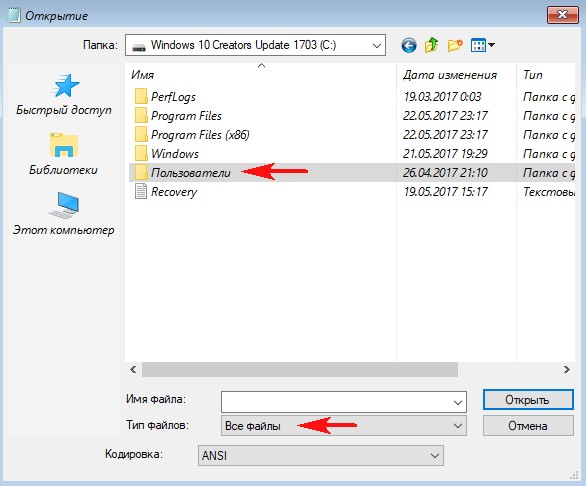
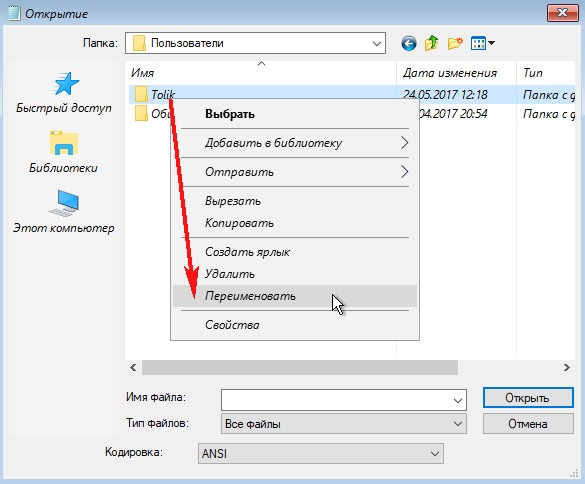
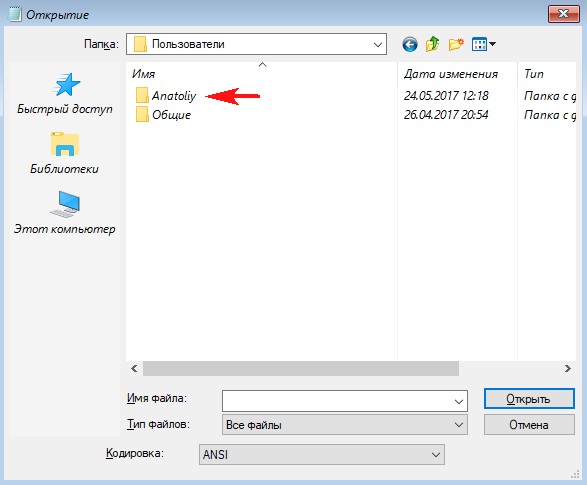
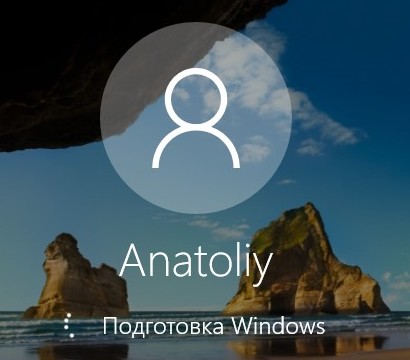
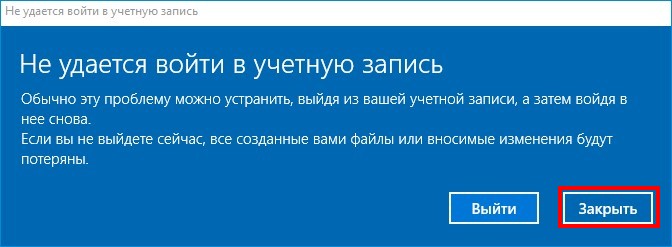
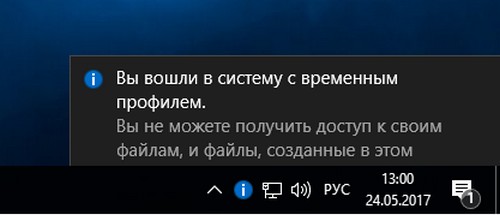
после этого перезагружаемся и входим в систему с временным профилем.
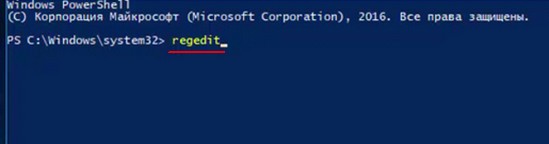
Запускаю командную строку от имени администратора или Windows PowerShell, ввожу команду regedit
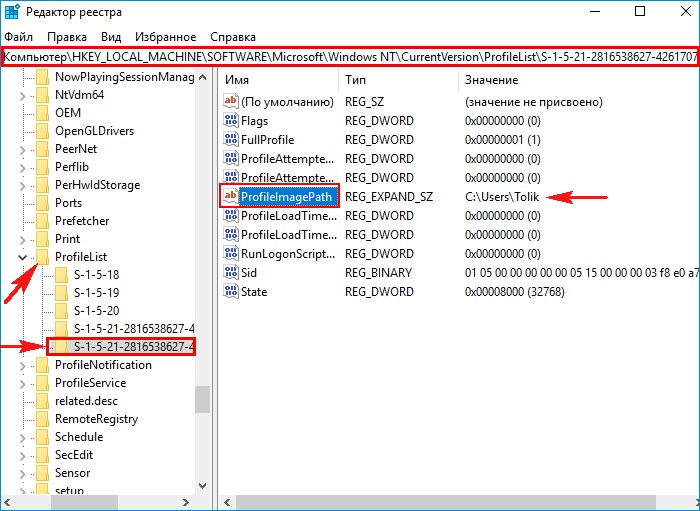
Открываем куст реестра:
HKEY_LOCAL_MACHINE\ SOFTWARE\ Microsoft\ Windows NT\ CurrentVersion\ ProfileList
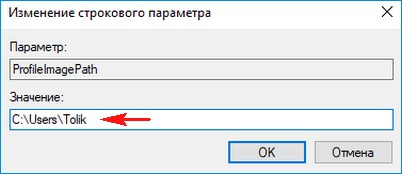
то что нам нужно обычно в последней строчке, открываем и редактируем.
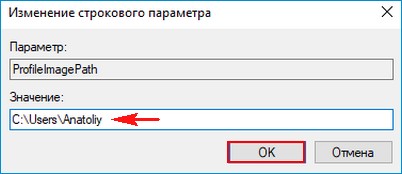
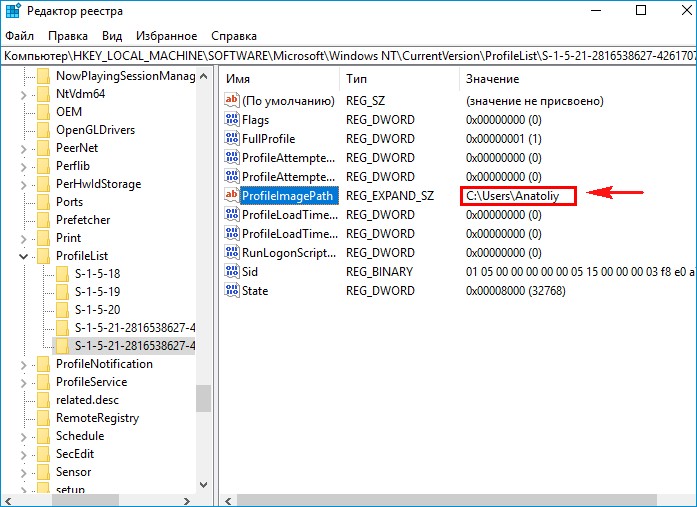
После этого выходим из системы и заходим в систему.
Если ОС будет из-за переименования папки плохо работать, то делаем откат с помощью точки восстановления.
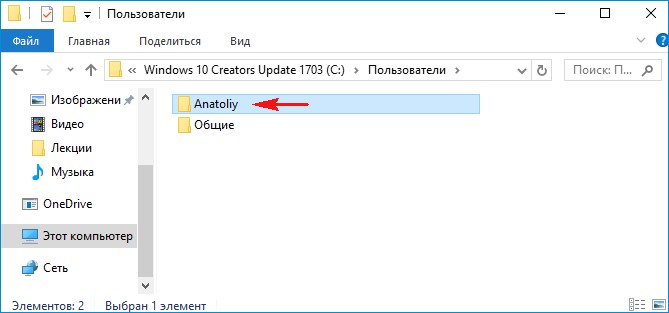
После восстановления папка Anatoliy останется, но в реестре записей о ней уже не будет и её можно удалить за ненадобностью.
- Если вы завели учётную запись Microsoft, то имя пользователя изменить невозможно. Можно изменить только имя папки.
Внимательный читатель, прочитав статью, может заметить, что изменить имя пользователя в Windows 10 можно ещё с помощью панели управления. Да, это так но,