
Все способы:
- Способ 1: Меню «Пуск»
- Способ 2: Окно «Выполнить»
- Способ 3: Консоль
- Способ 4: «Параметры»
- Способ 5: Контекстное меню кнопки «Пуск»
- Способ 6: Создание ярлыка
- Вопросы и ответы: 0
Способ 1: Меню «Пуск»
Первый, и самый логичный метод открыть всем известное приложение, заключается в использовании встроенного в меню «Пуск» поиска. Через него вы можете открыть как «Программы и компоненты», так и его отдельное окно — «Компоненты».
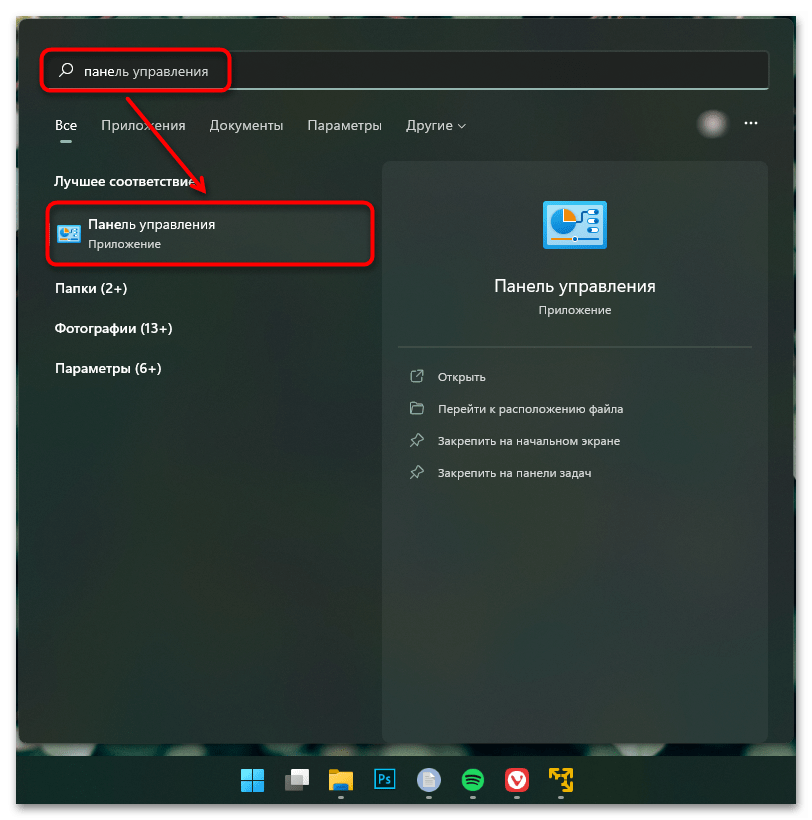
- Итак, для открытия основного окна «Программы и компоненты» вызовите меню «Пуск» и напишите «Панель управления».
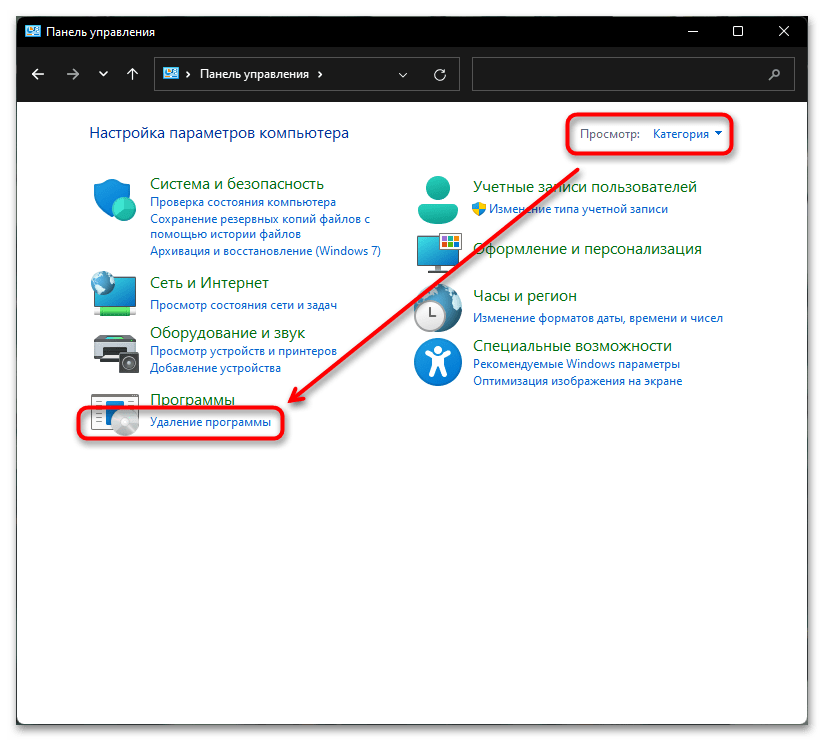
- Откройте приложение, где в зависимости от типа просмотра рассматриваемый элемент называется по-разному. Если это «Категория», то нажимайте на «Удаление программы».
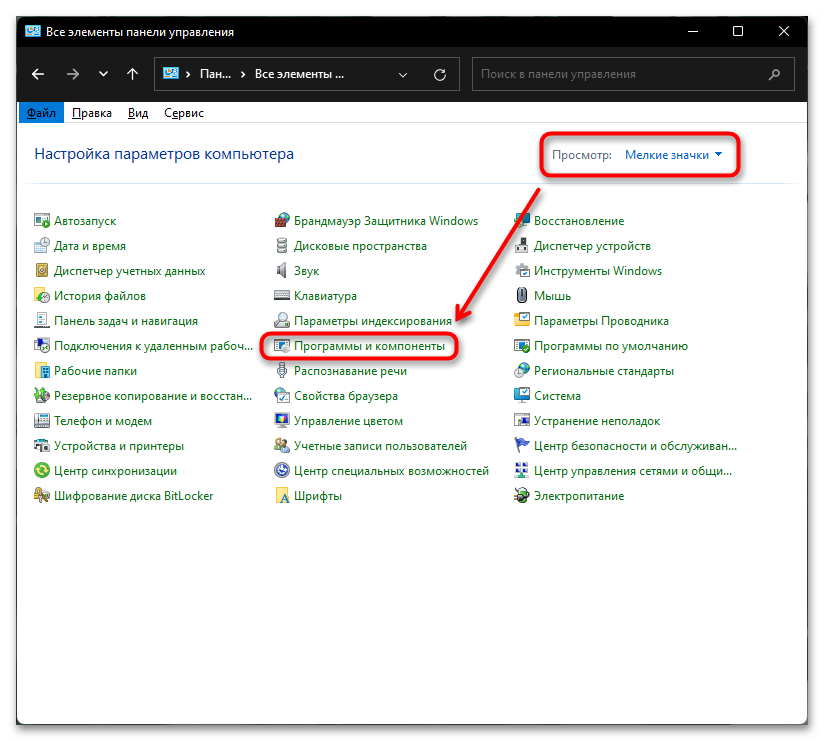
- А если «Значки» — то на «Программы и компоненты».
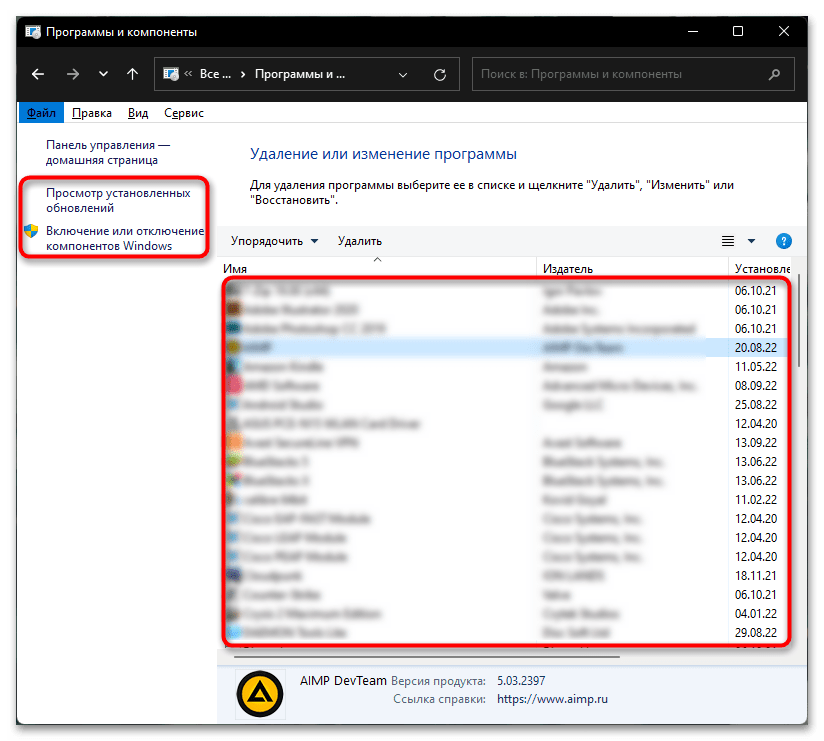
- Внутри нового окна в основной части вы увидите список установленных приложений, а на панели слева — дополнительные элементы, среди которых будут и «Компоненты Windows».
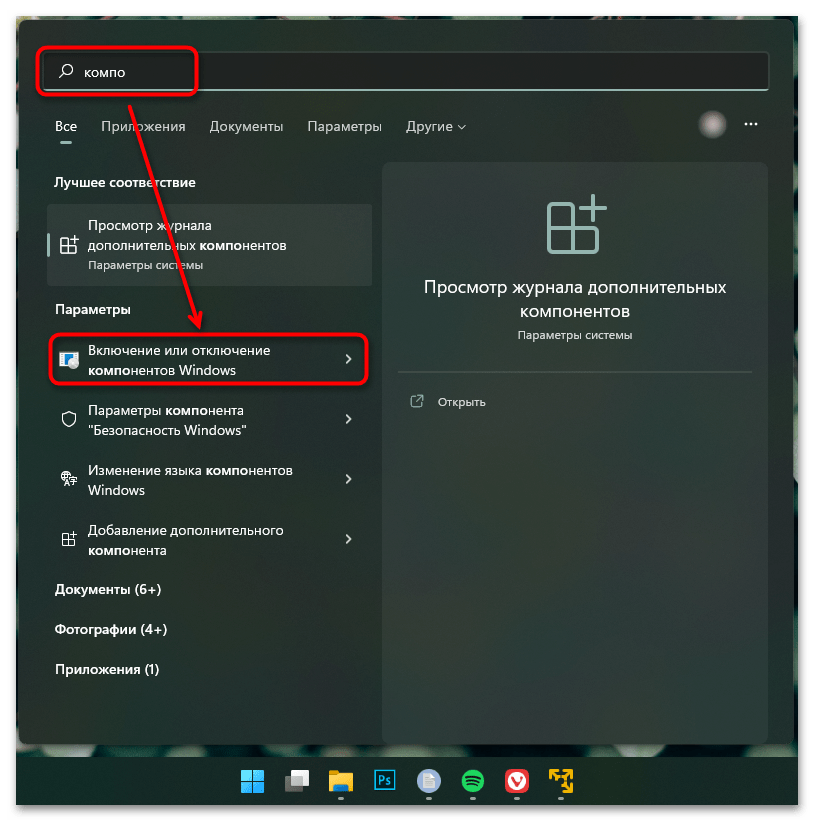
- «Компоненты Windows» можно открыть и отдельно, начав набирать название этого окна в «Пуске». Нужный вариант называется «Включение или отключение компонентов Windows».
Способ 2: Окно «Выполнить»
Запустить приложения можно и через ввод команд. Метод подойдет не всем, но актуален, если вы привыкли взаимодействовать с системой именно командами.
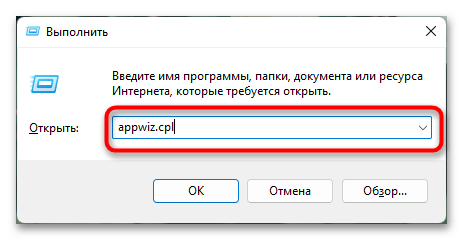
- Нажмите клавиши Win + R для вызова окна «Выполнить». Сюда в нашем случае можно ввести одну из двух команд. Чтобы открыть само окно «Программы и компоненты», напишите
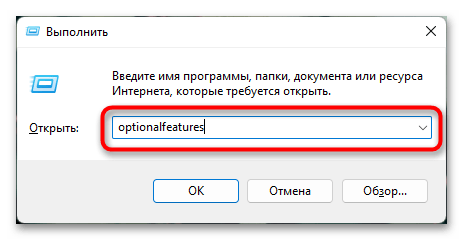
appwiz.cplи нажмите Enter. - Для открытия лишь только окна «Компоненты Windows» используйте команду
optionalfeatures.
Способ 3: Консоль
Тем, кто чаще работает с консолью, можно вызывать нужные приложения прямо отсюда.
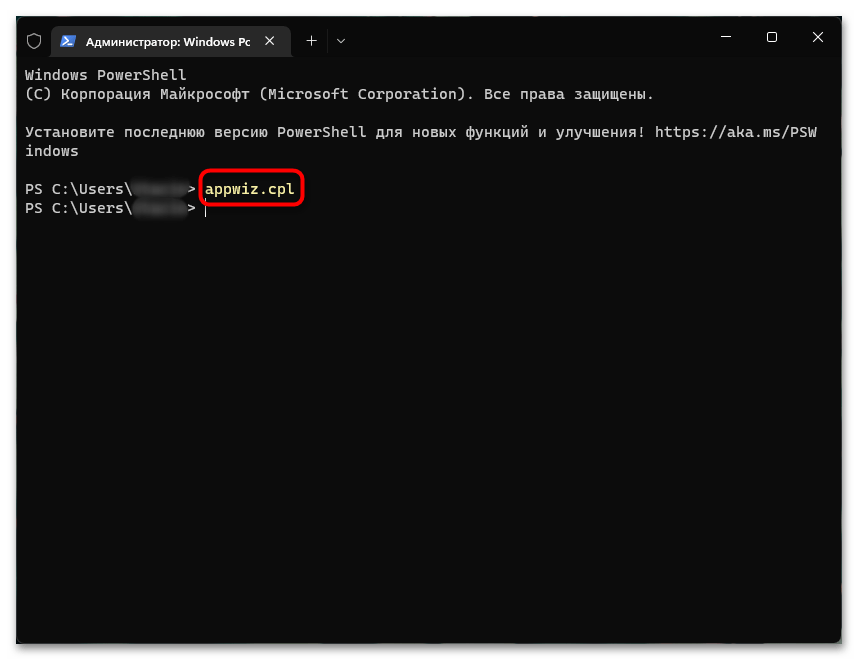
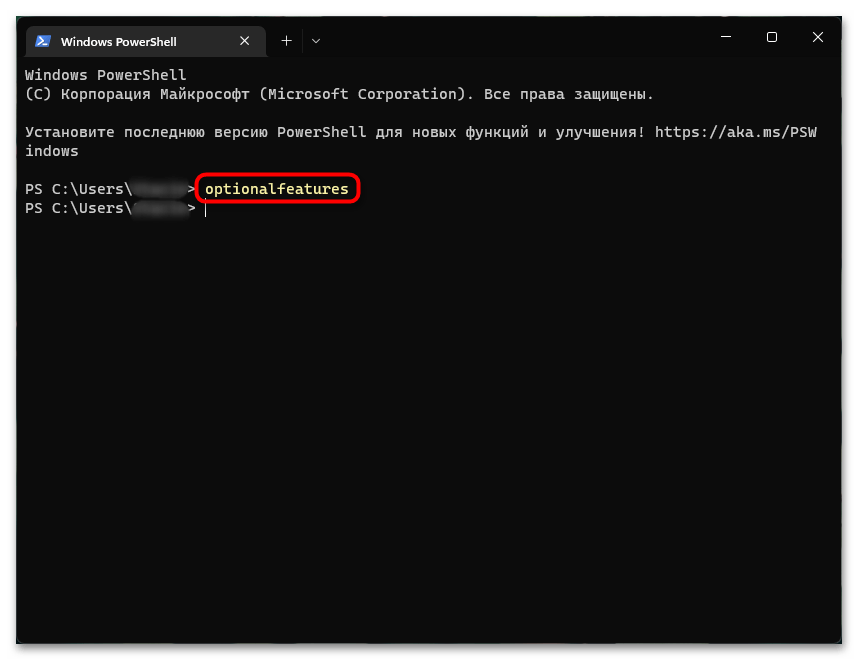
- Запустите «Командную строку», найдя ее по названию в «Пуске», или кликните ПКМ по кнопке «Пуск» и выберите вариант «Терминал Windows».
- Команды будут такими же, как в предыдущем способе:
appwiz.cpl— для запуска «Программы и компоненты». - И
optionalfeatures— для запуска «Компоненты Windows».
Способ 4: «Параметры»
Своеобразной заменой «Панели управления» является приложение «Параметры». Оно тоже позволяет просмотреть список установленного софта, а также некоторые компоненты.
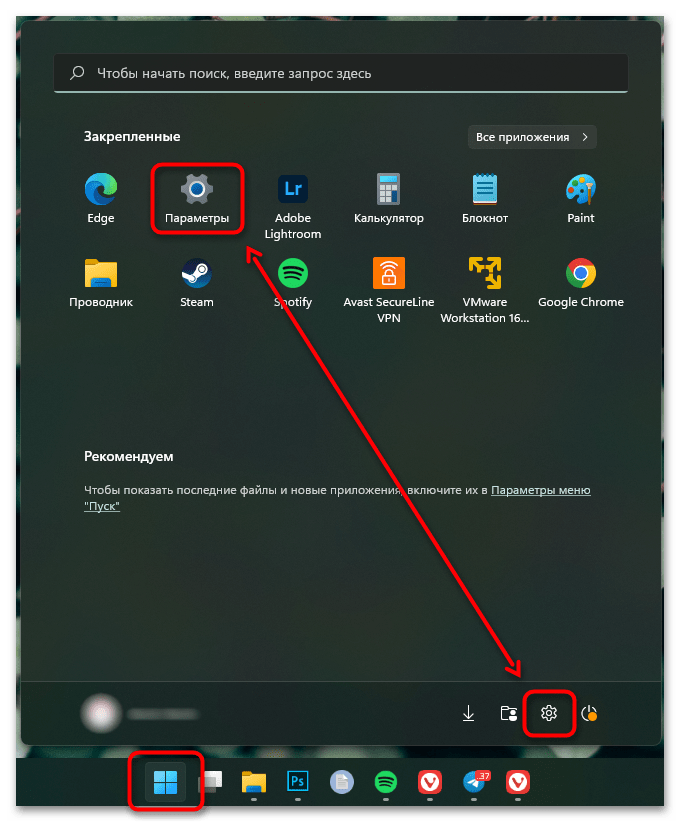
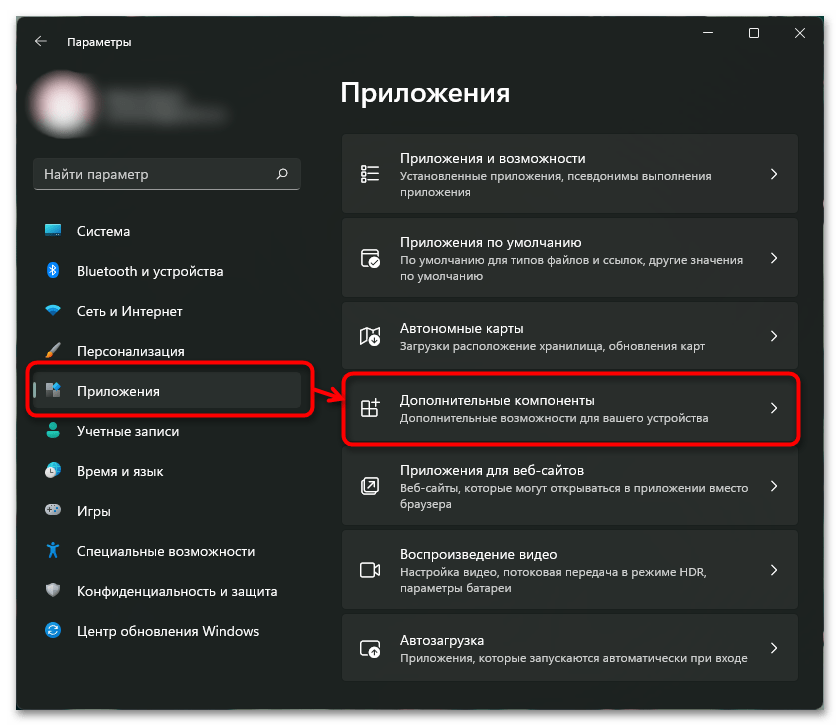
- Откройте «Параметры» через «Пуск».
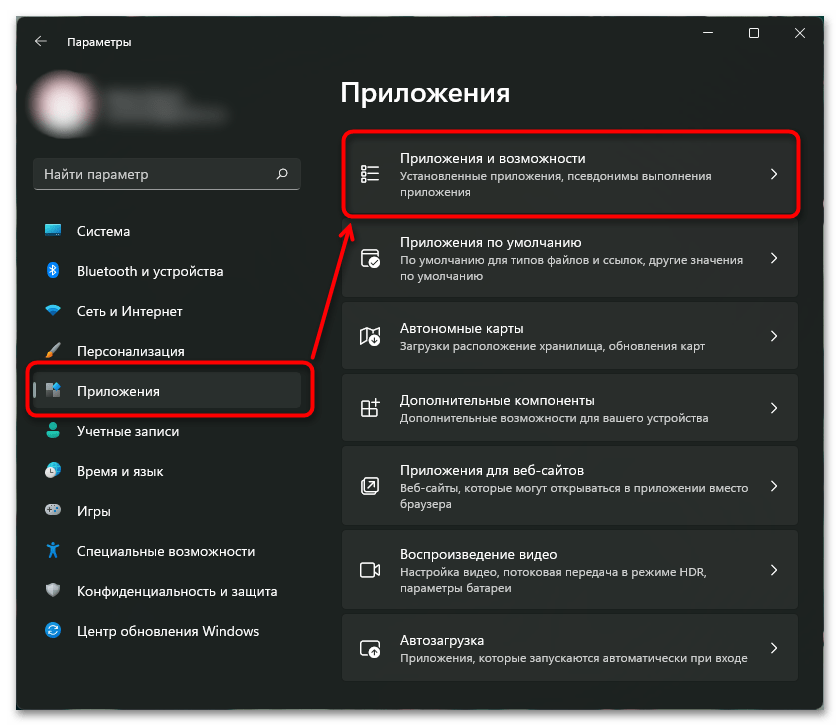
- Для отображения списка установленного ПО переключитесь на вкладку «Приложения» и щелкните по разделу «Приложения и возможности».
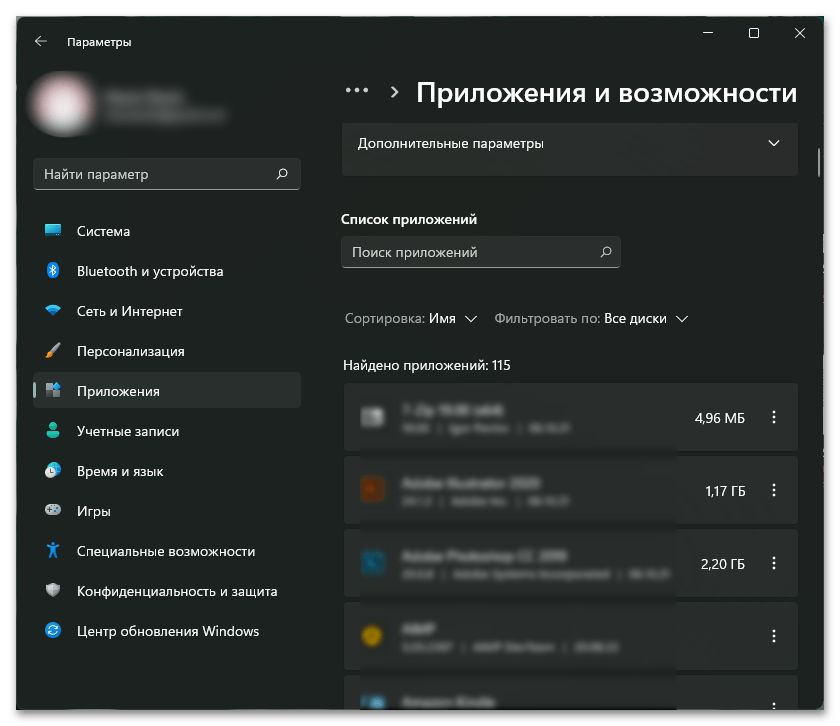
- Тут будет расположен список всего софта, который вы точно так же сможете отсортировать, посмотреть некоторые сведения и удалить.
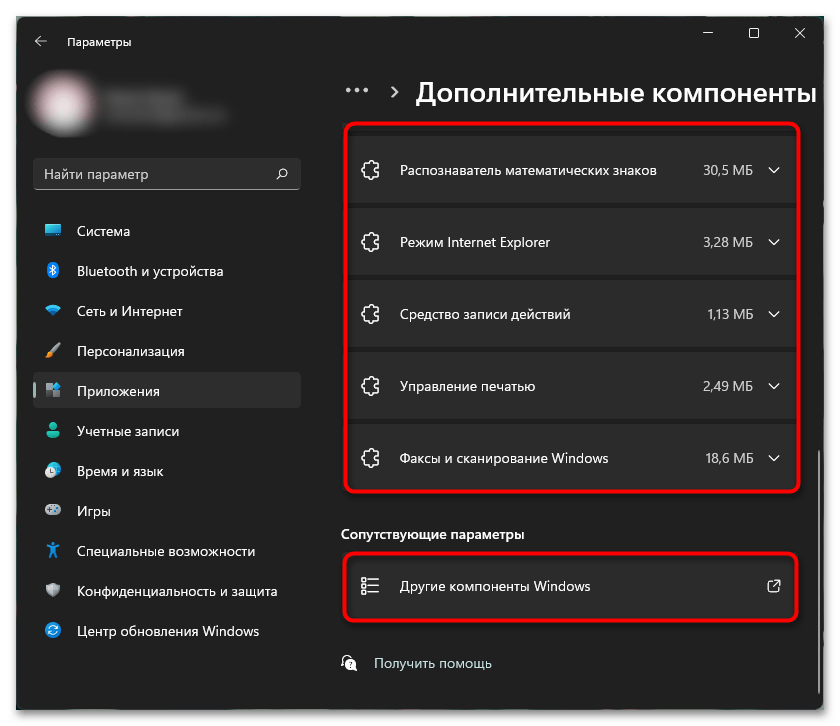
- Чтобы просмотреть «Компоненты Windows», нужно выбрать другой раздел — «Дополнительные компоненты».
- Появится список некоторых системных элементов, а если прокрутить страницу вниз, появится ссылка «Другие компоненты Windows». Нажатие по ней откроет привычное окно с названием «Компоненты Windows».
Способ 5: Контекстное меню кнопки «Пуск»
Если нажать правой кнопкой мыши по «Пуску», отобразится дополнительное меню, среди которых будет пункт «Приложения и возможности». Нажатие по нему сразу же откроет нужный раздел приложения «Параметры», через который вы увидите все программы на вашем компьютере, а также сможете переключиться в раздел с «Компонентами Windows» так же, как было показано в предыдущем способе.
Способ 6: Создание ярлыка
При необходимости часто открывать «Приложения и компоненты», можно либо закрепить это приложение в «Пуске», либо создать ярлык на рабочем столе. Для реализации последней упомянутой задачи выполните следующее:
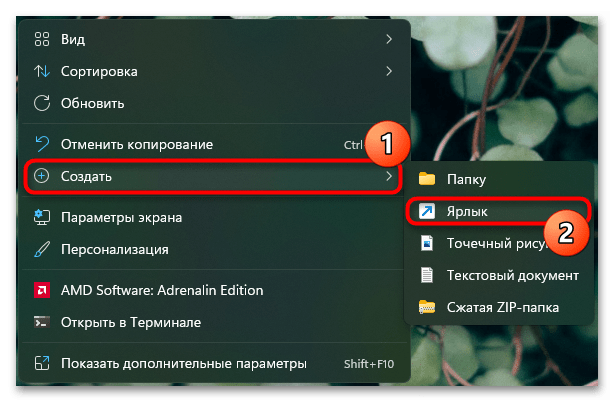
- Кликните правой кнопкой мыши по пустому месту на рабочем столе и выберите пункт «Создать» > «Ярлык».
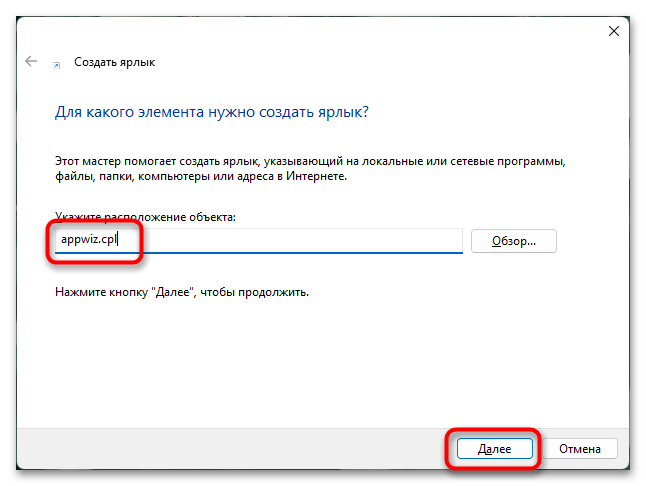
- В новом окне в единственное доступное поле введите
appwiz.cplи щелкните по «Далее». - Имя ярлыка впишите любое, на ваше усмотрение, и нажмите «Готово».
- Теперь вы сможете запускать приложение прямо с рабочего стола.
- То же самое можно сделать и с «Компонентами Windows», если вам нужно именно это приложение. Для этого в поле ввода команды напишите
optionalfeatures.

Для удобства в будущем можете поменять значок ярлыка на другой, более понятный.
Наша группа в TelegramПолезные советы и помощь
Have you ever had issues managing the apps installed on your Windows 11? Do you become confused about how to properly handle which apps are installed, running, or off on your computer? If you are, then you’re not alone. Many users have been overwhelmed by the barrage of various settings and options that exist in Windows 11, most specifically where managing programs and features is concerned.
Well, the Programs and Features Settings in Windows 11—a power tool at your fingertips is here to take real control of your computer’s software ecosystem.
From managing applications you no longer need to enable new features that will enhance the user experience, to turn off programs that might be impacting system performance, it is very important to learn about these settings.
In this detailed guide, we will cover everything from opening and enabling to disabling and optimizing Programs And Features Settings in Windows 11.
Overview of Programs and Features Settings in Windows 11

Programs And Features Settings in Windows 11 is a central hub for managing the software installed on your computer. It provides a user-friendly interface to view, install, uninstall, and modify programs, as well as control Windows features.
This powerful tool is an evolution of the “Add or Remove Programs” feature from earlier Windows versions, offering more functionality and control over your system’s software landscape.
Key aspects of Programs And Features Settings in Windows 11 include:
- List of the programs installed
- Uninstall/change the already installed software
- Allow/Disallow Windows features
- Size of the programs installed
- Install date of each program
- Publisher for a better identification of sources of the software
- Filter and sort options
- All settings for the system related to the installation and removal of programs are now available in one place
- Integration with Windows Update for a single feature management experience.
Understanding and effectively using Programs And Features Settings can significantly improve your Windows 11 experience, helping you maintain a clean, efficient, and personalized system.
How to Open Programs and Features Settings in Windows 11: 5 Methods.
Windows 11 offers multiple methods to access the Programs And Features Settings, catering to different user preferences and scenarios.
Let’s explore the various ways to open this essential tool.
Method 1: Using the Start Menu
Step 1: Open the Windows search bar and type “Apps and Features”.

Step 2: Click on the “Installed Apps” option that appears in the search results.
This method is quick and straightforward, especially if you’re comfortable with typing and searching.
Method 2: Through Settings
Step 1: Press the Windows key + I to open the Settings app. Click on “Apps” in the left sidebar.

Step 2: Select “Installed apps” from the options on the right.
While this method doesn’t directly open the classic Programs And Features interface, it provides a modern alternative with similar functionality.
Method 3: Via Power Menu
Step 1: Right-click on the Start button or press Windows key + X.

Step 2: Select “Installed Apps” from the menu that appears.
This method opens the traditional Programs And Features interface, which some users may find more familiar.
Method 4: Using Run Command
Step 1: Press the Windows key + R to open the Run dialog.

Step 2: Type “appwiz.cpl” and press Enter.
This method is the fastest for users who are comfortable with command shortcuts.
Method 5: Through File Explorer
Step 1: Open File Explorer. Navigate to this folder location:
Control Panel\All Control Panel Items\Programs and Features.

Step 2: Double-click on “Programs and Features.”
This method can be useful if you’re already working in File Explorer.
By familiarizing yourself with these various methods, you can quickly access Programs And Features Settings in Windows 11 regardless of your current task or preference.
How to Enable Programs and Features Settings in Windows 11
Enabling Programs And Features Settings in Windows 11 is typically not necessary, as it’s a built-in
tool that’s always available. However, there are related settings and features you might want to enable to enhance your control over programs and features.
Here’s how to Enable Programs And Features Settings in Windows 11:
Enable installation of apps from any source:
By default, Windows 11 only allows you to install apps from the Microsoft Store to keep your computer safe.
To enable installation from other sources:
Step 1: Open Settings (Windows key + I). Go to “Apps” > “Advanced App Settings”.

Step 2: Select the dropdown next to the”Choose where to get apps“. Pick “Anywhere”.
Enable Windows features:
Some advanced Windows features are not enabled by default. To turn them on:
Step 1: Open the Control Panel. Click on “Programs and Features” > “Turn Windows features on or off”.

Step 2: Check the boxes next to the features you want to enable.

Allow apps to run in the background:
To ensure all your apps function properly:
Step 1: Open Settings. Go to “System” > “Power & battery”.

Step 2: Click on “Battery usage”. Here you can check the individual app settings.
Enable notifications for app installations and removals:
To stay informed about changes to your installed programs:
Step 1: Open Settings. Go to “System” > “Notifications“. Scroll down to “Additional settings”.

Step 2: Turn on the “Show me the Windows welcome experience after updates and when Signed in” option.
By enabling these settings, you can enhance your control over Programs And Features Settings in Windows 11 and customize your system to better suit your needs.
Disable Programs and Features Settings in Windows 11
While you can’t entirely disable Programs And Features Settings in Windows 11 (as it’s an integral part of the operating system), there are related settings you might want to disable for various reasons, such as security, performance, or personal preference. Here’s how to turn off or disable certain aspects:
Disable automatic app updates:
To prevent apps from updating automatically:
Step 1: Open Microsoft Store. Click on your profile icon and select “Settings“.

Step 2: Toggle off the “App Updates” option.
Disable Windows features:
To turn off certain Windows features:
Step 1: Open the Control Panel. Click on “Programs and Features” > “Turn Windows features on or off”. Uncheck the boxes next to the features you want to disable.

Step 2: Click “OK” and restart your computer if prompted.
Disable automatic driver updates:
To prevent Windows from automatically updating device drivers:
Step 1: Open Settings. Go to “System” > “About”. Click on “Advanced system settings”.
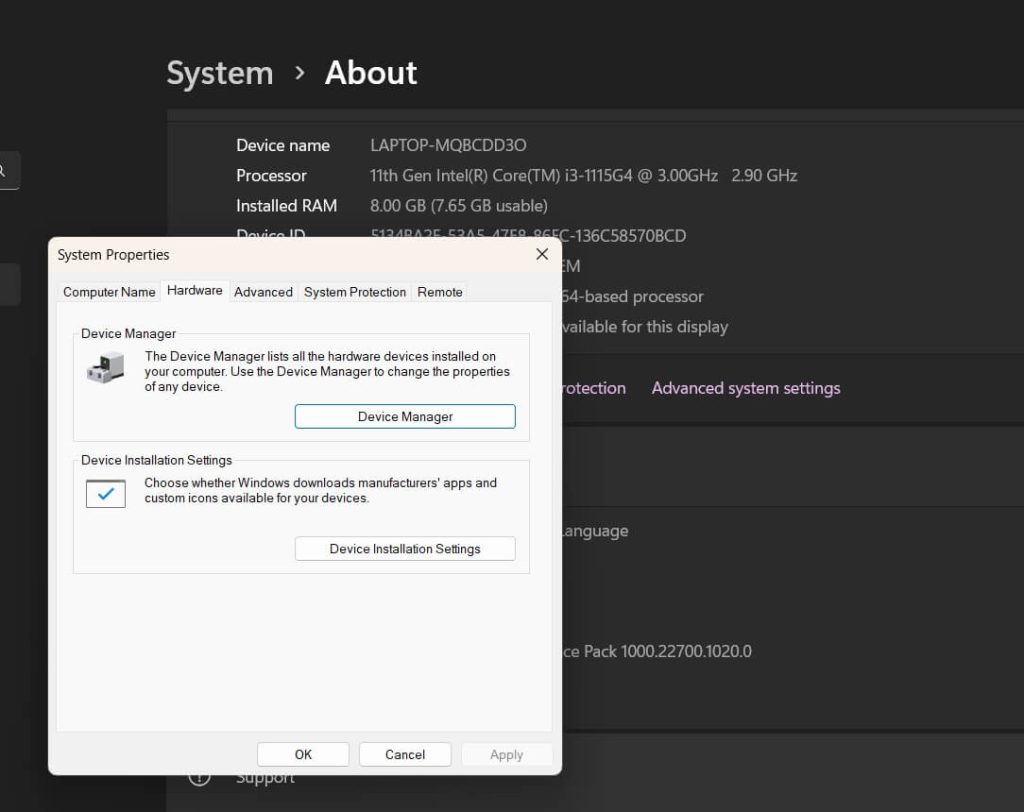
Step 2: In the “Hardware” tab, click on “Device Installation Settings“. Select “No (your device might not work as expected)” and click “Save Changes”.

Disable Windows Insider Program:
If you’re enrolled in the Windows Insider Program and want to disable it:
Step 1: Open Settings. Go to “Windows Update” > “Windows Insider Program”.

Step 2: Click on “Stop getting preview builds”.
By disabling these settings, you can customize your Windows 11 experience and potentially improve system performance or security, depending on your specific needs and preferences.
Tips to Make the Most of Programs and Features Settings in Windows 11
To optimize your experience with Programs And Features Settings in Windows 11, consider the following tips and best practices:
- Use the sorting and filtering options: Take advantage of the sorting and filtering capabilities in Programs And Features Settings. You can sort by name, size, or install date to quickly find the programs you’re looking for.
- Research before uninstalling: Before you uninstall a program, and especially if you’re not sure what it does, do a quick search online to make sure this isn’t some really important system component that isn’t obvious.
- Create a system restore point: Do this before you make major changes to programs that are installed, or to Windows features. That way you can go back in case of a problem.
- When available, use the “Repair” option: Some programs, when found problematic or not functioning correctly, can be accessed from Programs And Features Settings with the option “Repair”.
- Keep your programs up to date: Keep often-installed programs current with the newest features and security patches installed. Most programs have the option to turn on automatic updates for convenience.
- Use Windows Features: Go into Windows Features to toggle on more functionality that may be needed for workflow, such as Hyper-V for virtualization or Windows Subsystem for Linux for development.
- Be cautious with third-party uninstallers: While third-party uninstaller tools can be helpful, be cautious when using them. Stick to reputable options and always back up your system before using such tools.
- Use PowerShell for advanced management: For power users, PowerShell offers advanced capabilities for managing installed programs and features. Learn basic PowerShell commands to streamline your program management tasks.
- Group similar programs: If you have multiple versions or related programs installed, consider grouping them together for easier management. You can do this mentally or by using folder structures in your Start menu.
By implementing these tips, you can maintain a cleaner, more efficient Windows 11 system and make the most of the Programs And Features Settings.
Conclusion
Learning the Programs and Features Settings in Windows 11 is a must for any user who wants to keep his or her computer system in good order, organized, effective, and at one’s will. By this guide, you have learned how to open it, navigate this extremely powerful tool, enable or disable features, and now have complete control over the Windows 11 experience.
Regular maintenance, making informed decisions of uses for your programs and features, and the capability to consider all the options Windows 11 has in store for you are the keys to keeping them well.
With all this information and these various trips up your sleeve, you will definitely be able to utilize the full potential of the Programs And Features Settings under Windows 11 and be assured of a smoother, much more personalized computing experience.
FAQs:
Q: How often should I review my installed programs in Windows 11?
It’s a good practice to review your installed programs every 3-6 months, or more frequently if you install new software often. Regular reviews help maintain system performance and free up storage space.
Q: Can I recover a program if I accidentally uninstall it through Programs And Features Settings?
If you’ve accidentally uninstalled a program, you can try restoring your system to a previous point if you created a restore point. Otherwise, you’ll need to reinstall the program. Always be cautious when uninstalling software.
Q: Are there any risks in disabling Windows features?
Disabling certain Windows features can impact functionality or security. Before disabling any feature, research its purpose and potential consequences. If unsure, it’s best to leave features enabled, especially those related to security.
Q: How can I determine which programs are safe to uninstall?
Generally, it’s safe to uninstall programs you’ve installed yourself and no longer need. Be cautious with pre-installed programs or those with unfamiliar names. Research any program you’re unsure about before uninstalling, and avoid removing anything in the Windows folder.
The Windows Programs and Features tool is a built-in feature in Windows 10 that can be used to uninstall programs, change the settings of programs, and update or upgrade installed programs. It is also known as “appwiz cpl”, “appwiz cpl.exe”, or just “CPL”.
This tool has been around since Windows Vista and it was originally called Add or Remove Programs but was renamed to Programs and Features in Windows 7. It is a very simple interface that allows you to uninstall, change settings for, update or upgrade installed programs.
There are a number of ways to open the Windows Programs and Features tool, which we are going to look at in this article.
1). Using the Run Command Dialog Box
The Windows Programs and Features tool is a built-in utility that allows you to uninstall, change, or repair a program. It’s an appwiz.cpl file that can be accessed by using the Run command dialog box.
There are two ways to open the Run command dialog box:
1) Press the Windows key and type «appwiz cpl» in the search bar.
2) Press the Start button on your desktop and type «appwiz cpl» in the search bar. Then click Ok to open the Programs and Features Tool.
2). Using the Quick Access Menu
The Windows Programs and Features tool is available from the Quick Access Menu. It can help you find and remove programs that you no longer need.
Steps to Using the Quick Access Menu to open The Windows Programs and Features tool:
1) Open the Start menu.
2) Open the Settings app.
3) Click on «Apps» in the left-hand pane of Settings app.
4) Select «Appwiz.»
5) Click on «Cpl.»
3). Using the Windows Search Bar
The Windows Programs and Features tool is a useful tool that allows you to manage your installed programs. In order to access the tool, we will need to use the Search Bar.

To open the Windows Programs and Features tool in Windows 10, follow these steps:
- Click on the search bar at the bottom of your screen.
- Type «programs» and press enter.
- Press on «Windows Settings» under Programs and Features.
4). Using the Control Panel
The Control Panel is a tool in Windows that provides an easy way to manage all the different programs and features that are installed on your computer.

Steps to Use the Control Panel to open The Windows Programs and Features tool:
1. Press the Win+X keys on your keyboard simultaneously.
2. Click on «Control Panel».
3. Select «Programs and Features».
4. Click on «Windows» in the left-hand side of the window, then select «Windows 10».
5. You will now see a list of installed programs in Windows 10, including all programs you have installed as well as all programs installed by default when you first set up Windows 10.
5). Using the Command Prompt or PowerShell
When you want to use the Command Prompt or PowerShell to open The Windows Programs and Features tool, there are a few steps that you need to take.
1) Open Command Prompt or PowerShell (Command Prompt is recommended as it has a more user-friendly interface)
2) Type «appwiz cpl» without quotes and press Enter
3) Click on «Windows features» and then click on «Turn Windows features on or off»
4) Check all of the boxes to turn them on, then click ok.
6). Using the File Explorer
The Windows Programs and Features tool allows users to change settings for their apps and hardware. It is also a good way to find out what software is already installed on your computer.

There are three steps to using the File Explorer to open the Windows Programs and Features tool:
1. Launch File Explorer from the Start menu or taskbar.
2. Click on this icon in the toolbar of File Explorer:
3. Navigate through this folder until you see a file called «Programs and Features».
7). Through System Settings
In order to go through the steps to open The Windows Programs and Features tool, you need to follow a few steps.
Step 1: Press Windows Key + X.
Step 2: Type appwiz cpl in the search bar and hit enter.
Step 3: Click on the Programs and Features tab.
Step 4: Click on Turn Windows features on or off.
Step 5: Check out the checkbox next to Open The Windows Programs and Features tool in order to turn it on or off.
8). Creating a Shortcut For Programs and Features
A Programs and Features shortcut is an appwiz shortcut that automatically opens up the Programs and Features app when you tap on it. This appwiz shortcut is a quick way to find new apps or features in Windows. It lets you quickly get to the right place without having to search through the Start menu.
Creating a Programs and Features shortcut is easy! Here’s how:
- Create a new shortcut on your home screen and give it a name (e.g., «Programs»)
- Click on «Edit» and then click on «Add Shortcut» at the bottom left corner of your screen. This will open up another menu where you can find all your apps, features, and shortcuts.
- Click on your desired app or feature and drag it into this menu.
- When you’re done creating shortcuts, click on «Done.»
FAQs
1). How can I open the Windows Programs and Features Tool?
The Windows Programs and Features tool is a built-in tool in Windows 10 that allows you to manage your installed programs.
The Windows Programs and Features Tool is a built-in tool in Windows 10 that allows you to manage your installed programs. The tools can be accessed from the Control Panel, but it is easier to use this tool as it lets you manage the programs with just one click.
2). What is the Windows Programs and Features Tool?
The Windows Programs and Features tool is a Microsoft utility that allows users to easily manage installed software and features on their computer.
The Windows Programs and Features tool is a Microsoft utility that allows users to easily manage installed software and features on their computer. It can be accessed through the Control Panel of the PC. It can help you find out what programs should be removed, which ones are outdated, or which ones may cause problems with your computer.
The Windows Programs and Features tool is accessible through Control Panel in the PC’s operating system, but it also has an app for mobile devices called «Programs & Features.»
3). Why should I use the Windows Programs and Features Tool?
The Windows Programs and Features Tool is a utility that helps you to uninstall, disable, or change the settings of programs that are currently installed on your computer.
There are many reasons why you should use this tool. It allows you to uninstall unwanted programs and give more space for other programs that are important for your work. It also helps you to disable and change the settings of any program so that it doesn’t interfere with other software or hardware.
The Windows Programs and Features Tool is a must-have utility for all users who have Windows 10 operating system.
4). What does the Windows Programs and Features Tool do?
The Windows Programs and Features Tool is a tool that helps you uninstall, disable, or remove programs.
The Windows Programs and Features Tool is a tool that helps you uninstall, disable, or remove programs from your Windows 10 PC. It can also help you find the most appropriate driver for your device.
The Windows Programs and Features Tool has been available since the release of Windows 10 in 2015.
5). How can I use the Windows Programs and Features Tool?
The Windows Programs and Features Tool can be used to find and remove programs that you don’t need. If a program has been installed by accident, then you can use the tool to uninstall it.
The Windows Programs and Features Tool is a powerful tool for users who want to remove programs on their computer. The program is located in the Control Panel, and it has two main functions:
- Find programs that aren’t necessary
- Remove unnecessary programs
The Windows Programs and Features Tool can be used as a quick way to uninstall software if you have accidentally installed it or if you want to uninstall an application that was installed by mistake.
Sign in to your MUO account
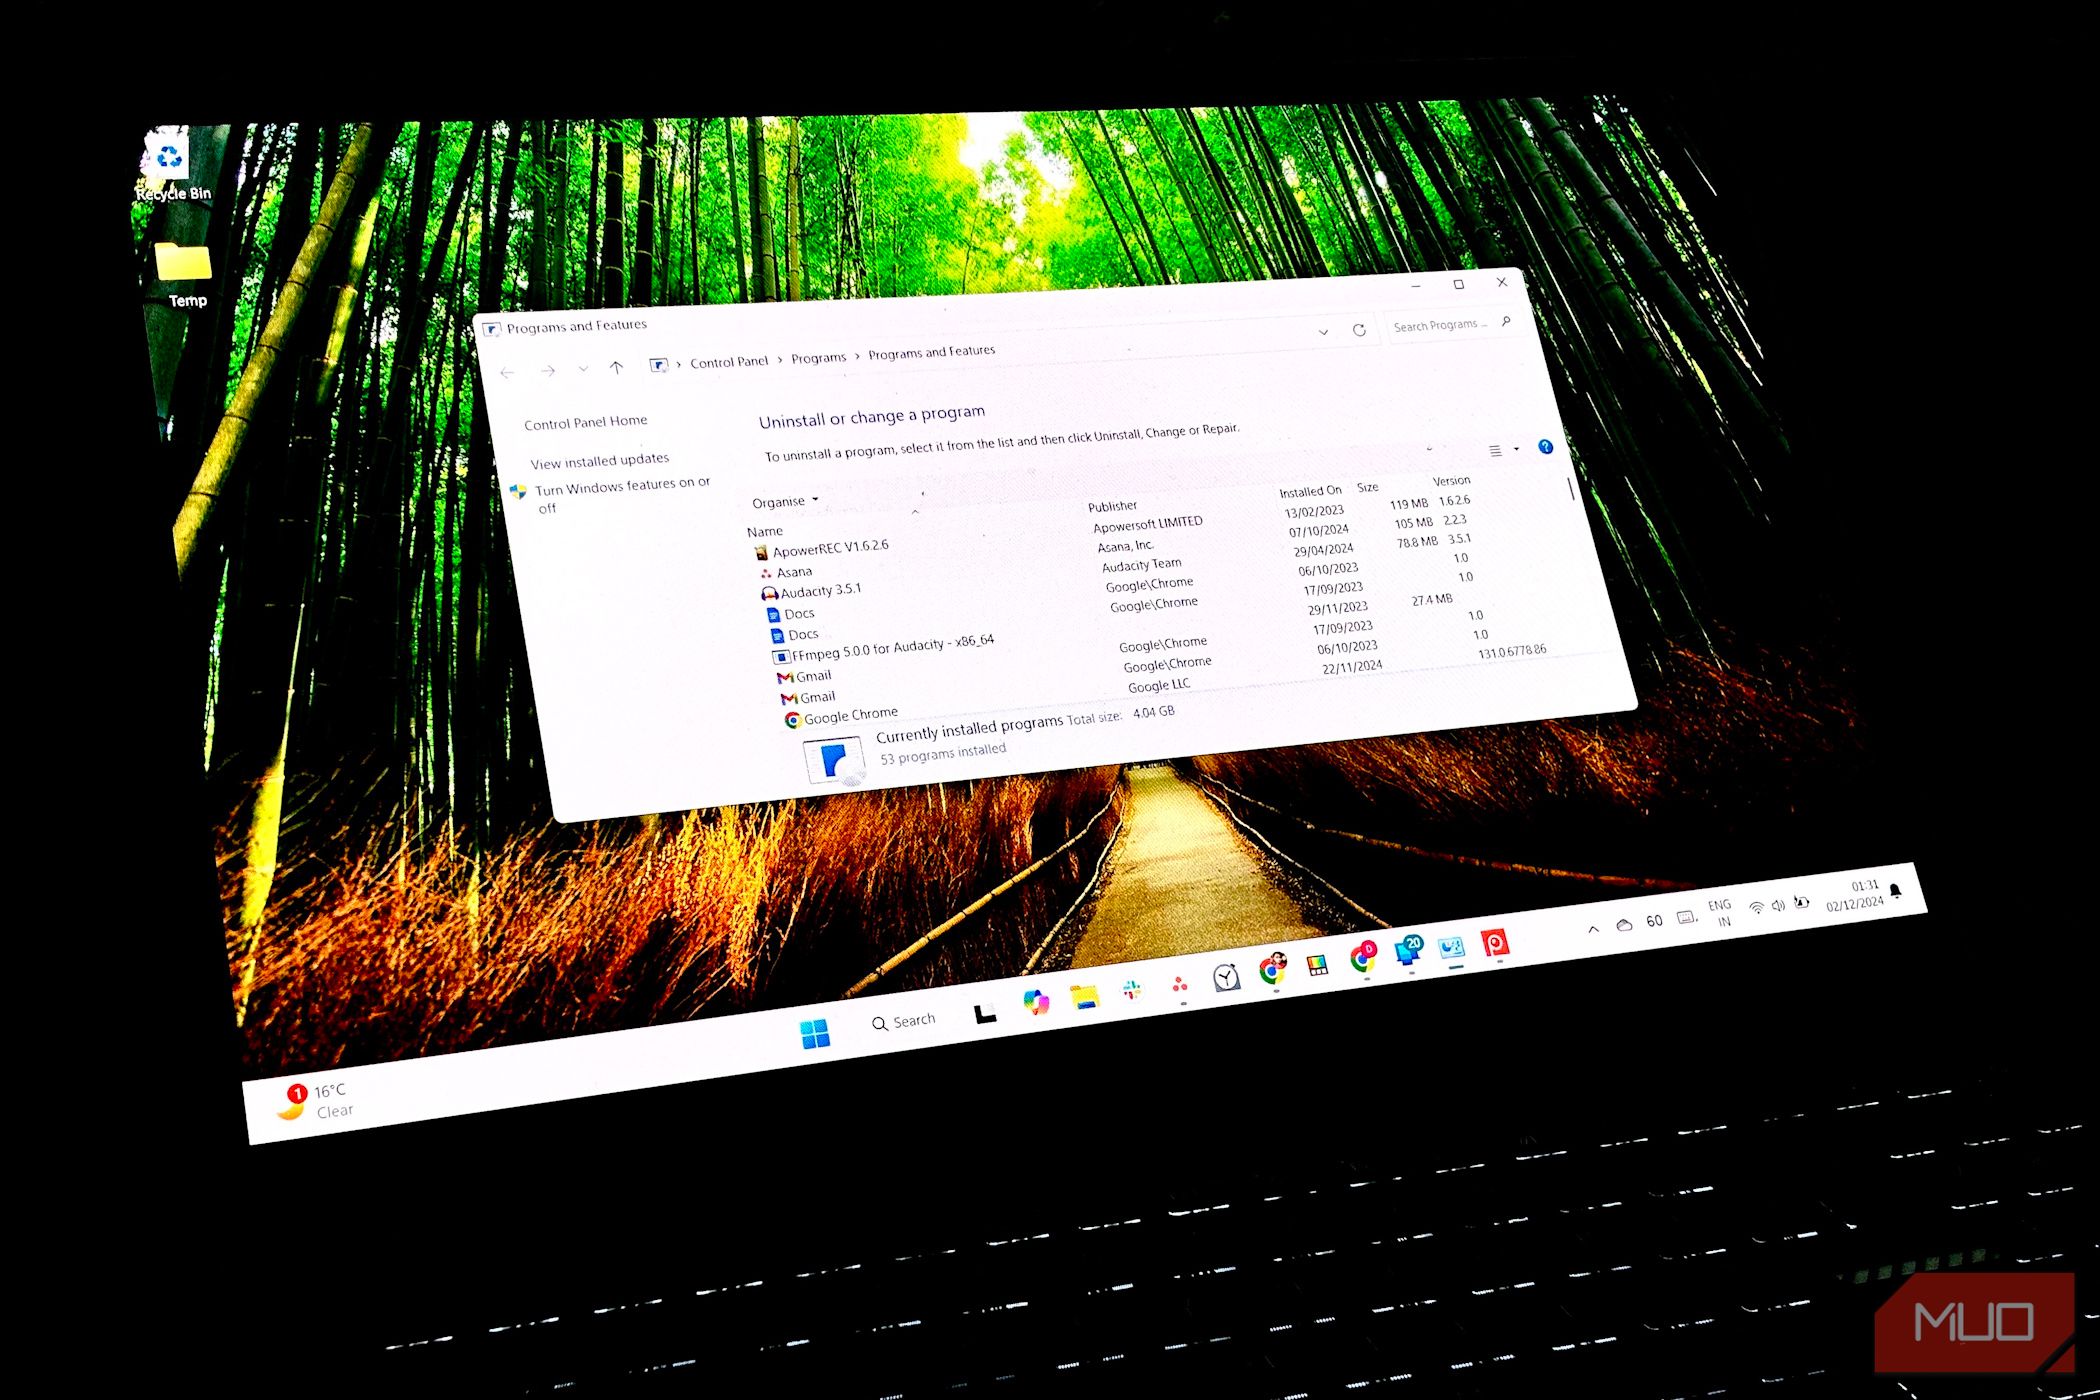
The Programs and Features tool lists all the apps on your PC. It’s a quick and easy way to manage installed programs, updates, and Windows features with just a few clicks. There are several ways to access it; I’ll show you three of the quickest.
1
Use the Run Command
The easiest way to open Programs and Features in Windows 11 or 10 is through the Run command dialog box. Just hit Win + R on your keyboard, and a small window will pop up. Type appwiz.cpl in the text field, then press Enter or click OK.
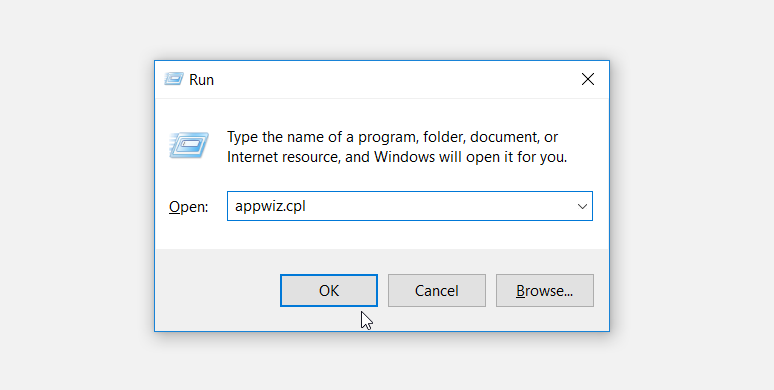
This action is a quick and easy way to get to Programs and Features without clicking through several menu options.
2
Use the Command Prompt
Another method to open Programs and Features is through the Command Prompt, PowerShell, or Windows Terminal. This is handy if you like working on the command line instead of the Windows graphical interface.
To open the Command Prompt, type cmd in the Windows search bar and press Enter. You can also press Win + X to open the Power User Menu and choose Terminal, Command Prompt, or PowerShell (depending on what you’ve selected as the default). For this purpose, they all work the same.
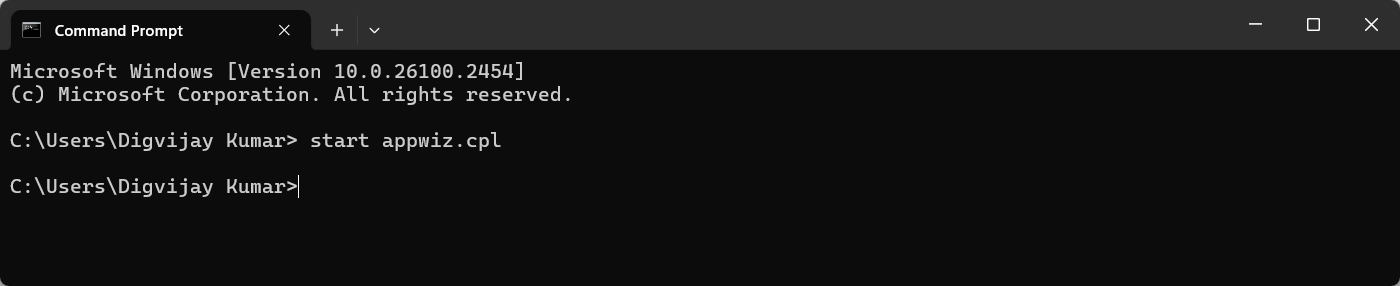
Next, type start appwiz.cpl in the command line and hit Enter. The panel will launch momentarily.
3
Use the Control Panel
The classic Control Panel is still available in Windows 11, and you can use it to access Programs and Features if you prefer clicking to typing. To open the Control Panel, press the Windows key and type «Control Panel» in the search bar. Then pick the option that pops up. Once you’re in, you can view by Category or Icons at the top-right.
For Category, click on Programs > Programs and Features. If you’re viewing by icons, select Programs and Features. Either way, you’ll end up in the Programs and Features window.
These are the easiest methods to access the Programs and Features window in Windows—through the Run menu, command line, or Control Panel. But don’t forget that this menu is old-school, and many of the same options are available in the modern Settings app under the Apps heading.
Windows 10 offers a practical feature known as “Programs and Features,” which allows users to manage both the installation and removal of software on their systems. Utilizing this function, we can effortlessly add or remove programs, inspect installed updates, and turn Windows features on or off. It serves as a centralized hub for software management tasks, simplifying what could otherwise be a complex process to navigate.

Gaining access to “Programs and Features” is straightforward, providing several methods depending on user preference. We might opt to open it through the Control Panel, execute a search directly from the taskbar, or employ the Run command with a specific instruction. Each approach is designed to offer convenience and flexibility, catering to various user habits and enhancing the overall user experience in Windows 10.
Considering personal use and technical support, mastering how to open “Programs and Features” shows to be invaluable. It equips us with the necessary tools to maintain the optimal performance and utility of our Windows 10 operating system. This knowledge ensures that we can troubleshoot issues, customize features, and maintain software with confidence and efficiency.
Contents
- 1 Accessing Programs and Features
- 1.1 Using Windows Search
- 1.2 Via Control Panel
- 1.3 Shortcut Command Via Run Box
- 1.4 Navigating Through Settings App
- 2 Managing Features and Programs
- 2.1 Uninstalling or Changing Programs
- 2.2 Turning Windows Features On or Off
- 2.3 Repairing or Modifying Installed Software
- 3 Troubleshooting and FAQs
- 4 Advanced Features and Administrative Tools
- 4.1 Accessing Optional Windows Features
- 4.2 Utilizing PowerShell and Command Prompt
Accessing Programs and Features

In Windows 10, managing installed software is crucial for both system performance and security. We’re going to look at several straightforward methods to access the Programs and Features so you can easily add or remove programs.
Using Windows Search
We can swiftly locate Programs and Features using the search box. Here’s how:
- Hit the magnifying glass icon on the taskbar.
- Type “Programs and Features” and select the top result.
Via Control Panel
Accessing Programs and Features through the Control Panel is a more traditional method.
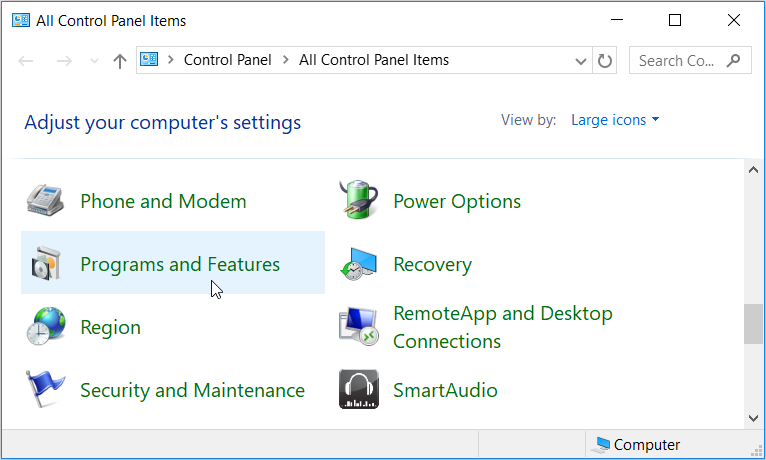
- Press Win+R, type %windir%\\system32\\control.exe, and hit Enter.
- Set the view to ‘Large icons’ and click ‘Programs and Features’.
Shortcut Command Via Run Box
For direct access, use the Run dialog box with a simple command.
- Use the keyboard combination Win+R.
- Type appwiz.cpl and press Enter.
Navigating Through Settings App
The Settings app houses a modern interface to uninstall apps or manage optional features.
- Open Settings with Win+I.
- Go to ‘Apps’ and select ‘Apps & Features’.
Managing Features and Programs
We must know how to effectively manage the applications installed on our PCs. With the correct tools, we can uninstall, repair, or change existing software, and toggle Windows features on or off for optimal system performance.
Uninstalling or Changing Programs
To remove or modify programs on a Windows 10 platform, we navigate to the Control Panel. We can select ‘Programs and Features’ if the display is in large icons. For the uninstallation process, we simply locate the unwanted program, select it, and click ‘Uninstall.’ If it is a matter of making changes, we select ‘Change’ and follow the prompts provided by the application.
Tip: Always check for a ‘Repair’ option, as this can resolve issues without the need to fully uninstall the application.
Turning Windows Features On or Off
Windows 10 comes with a variety of built-in features, some of which may not be necessary for all users. To enable or disable these, we can use the ‘Turn Windows features on or off’ option within ‘Programs and Features.’ By ticking checkboxes, we can control which optional features are active, helping to streamline our systems.
Repairing or Modifying Installed Software
Occasionally, programs may not function correctly. Before deciding to uninstall, we can attempt to repair the software. This is achieved by selecting the program in ‘Programs and Features’ and clicking ‘Repair.’ If the software supports modifications, we may also choose ‘Change’ to adjust the installation to our needs.
Understanding these management tools ensures our systems run with only the software we need and perform as expected.
Troubleshooting and FAQs
How do I open Programs and Features?
To access Programs and Features in Windows 10, we can type appwiz.cpl into the Start menu search bar and press Enter. Alternatively, we go to the Control Panel, select ‘Programs’ and then ‘Programs and Features’.
What should I do if Programs and Features won’t open?
It’s effective to perform a system file check. We open the Command Prompt as an administrator, type sfc /scannow, and press Enter. The tool will scan for and fix any integrity violations.
| FAQ | Issue | Solution |
| Can’t disable a Windows feature | Internet Information Services (IIS) won’t turn off | Use ‘Turn Windows features on or off’ in Programs and Features, and clear the checkbox next to IIS. |
| An app is malfunctioning | App errors or crashes | Visit Settings > Apps > Apps & features, select the app, and click ‘Advanced options’ to find Repair. |
| Failed updates | Windows Update issues | We run the Windows Update Troubleshooter available in Update & Security under Troubleshoot settings. |
In our experience, most problems with Programs and Features can be addressed via these methods. However, if problems persist, we may need to consider more advanced troubleshooting steps or seek professional assistance. It’s crucial that we keep our system settings up to date to minimize the need for frequent troubleshooting.
Advanced Features and Administrative Tools
In this section, we’ll guide you through the nuances of using Windows 10’s Advanced Features and Administrative Tools. You’ll learn how to access optional features and leverage the power of PowerShell and Command Prompt to manage your system effectively.
Accessing Optional Windows Features
Windows 10 comes with a suite of optional components that can be activated or deactivated based on your needs. To manage these components:
| Feature | Importance | Access Path |
| Internet Information Services (IIS) | Host and manage websites, services | Windows Settings -> Optional Features |
| Hyper-V | Create and manage virtual machines | Windows Features -> Turn Windows features on or off |
| .NET Framework 3.5 | Support for applications using older .NET versions | Windows Features -> Turn Windows features on or off |
By navigating to Settings -> Apps -> Optional Features, you can enable features like Hyper-V for virtualization or Internet Explorer for legacy web support. For developers and IT professionals, components such as Microsoft Message Queue (MSMQ) Server offer message queuing capabilities, while the RAS Connection Manager Administration Kit (CMAK) and Simple Network Management Protocol (SNMP) are essential for network management tasks.
Utilizing PowerShell and Command Prompt
PowerShell and Command Prompt are two integral parts of Windows 10 that provide a command-line interface for executing advanced administrative functions and automated tasks. Here’s how you use them:
We use PowerShell for complex scripting and automation. This modern command shell incorporates an integrated scripting environment with access to COM and WMI, allowing for the administration of every aspect of Windows.
Alternatively, Command Prompt is used for executing batch files or simple commands. Although less powerful than PowerShell, it’s often sufficient for routine tasks and system maintenance.
Remember, to run either tool with administrative privileges, right-click on their respective shortcuts and select “Run as administrator.”
Understanding and operating these tools efficiently can vastly enhance your capability to administer and fine-tune your Windows environment, crafting a more controlled and tailored user experience.