
Key Takeaways of USB Ports Not Working Windows 11:
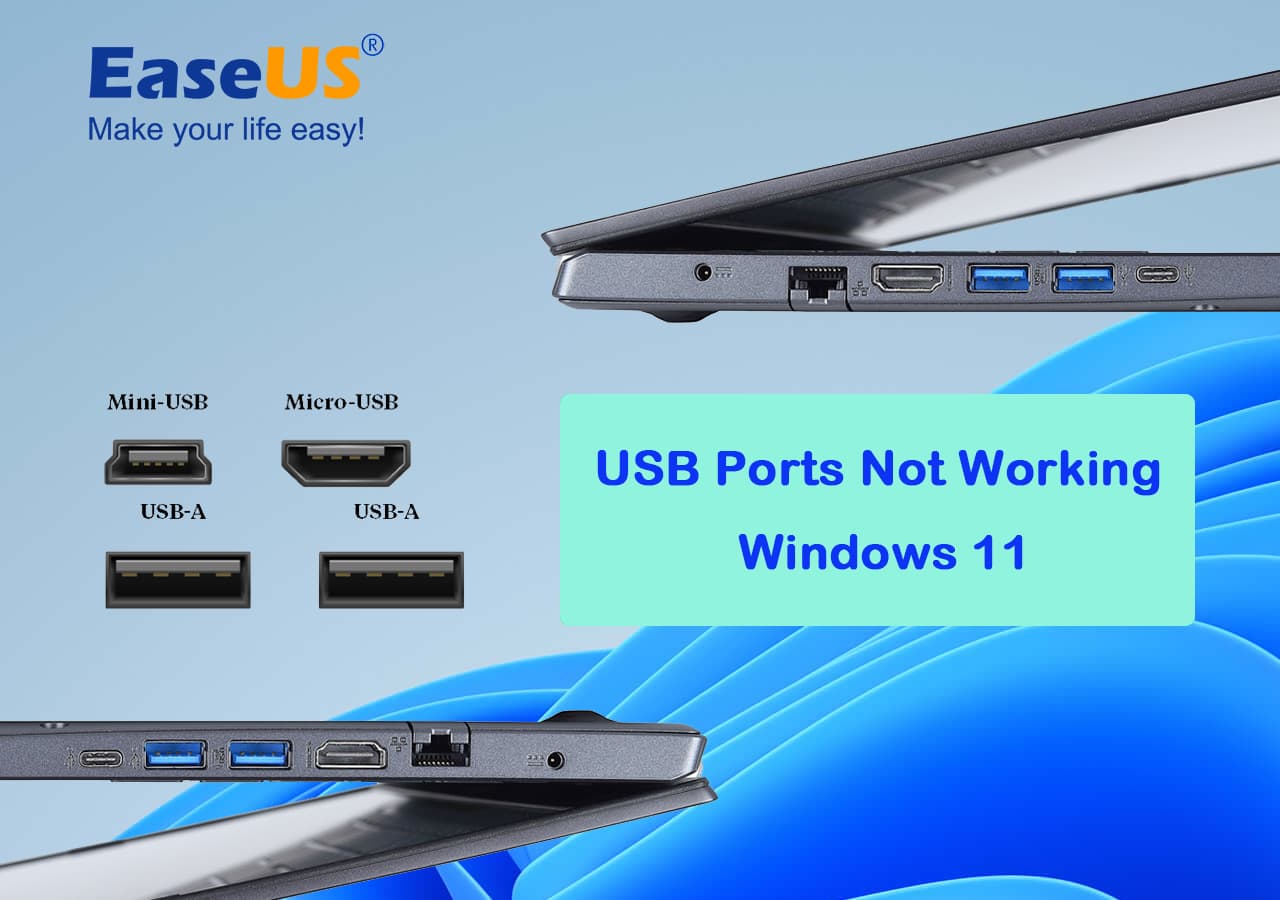
- USB ports are crucial components of a Windows computer. They allow users to connect various devices, such as printers, cameras, and smartphones, to their computers.
- The symptoms of USB ports not working on Windows 11 include unrecognized devices, failure to charge devices, and errors when transferring data through USB.
If you are experiencing issues with your USB ports on a Windows 11 computer, don’t panic. Follow the steps outlined in this tutorial guide to troubleshoot and fix the problem.
| Goal: | Fix USB ports not working issue in Windows 11 |
| Tools: |
|
| Duration: | 5-10 minutes |
Guide on Fixing USB Ports Not Working in Windows 11
If you’re experiencing issues with your USB ports not working in Windows 11, don’t worry — there are a number of solutions you can try to get your devices connected and working again. Before moving on to more advanced troubleshooting steps, it’s always a good idea to try some quick fixes, such as changing USB ports, clearing viruses or malware, or checking if the USB drive is encrypted or write-protected.
Here are a few quick solutions:
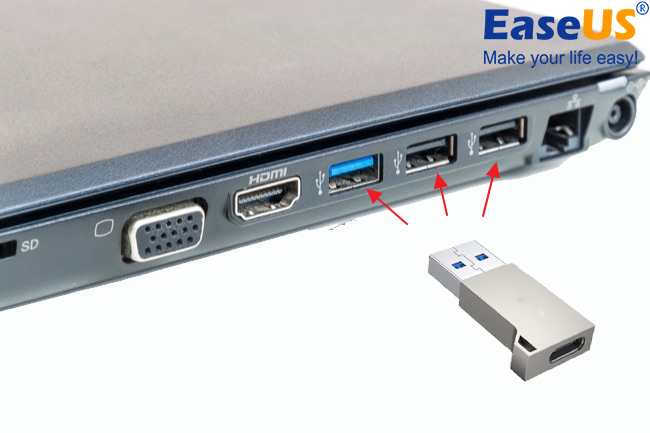
1️⃣Quick solution 1. Change USB ports and reconnect USB
Please follow the operational steps to switch the USB port; this method may resolve the issue:
Step 1. Disconnect the USB device from the current USB port.
Step 2. Insert the USB device into another USB port.
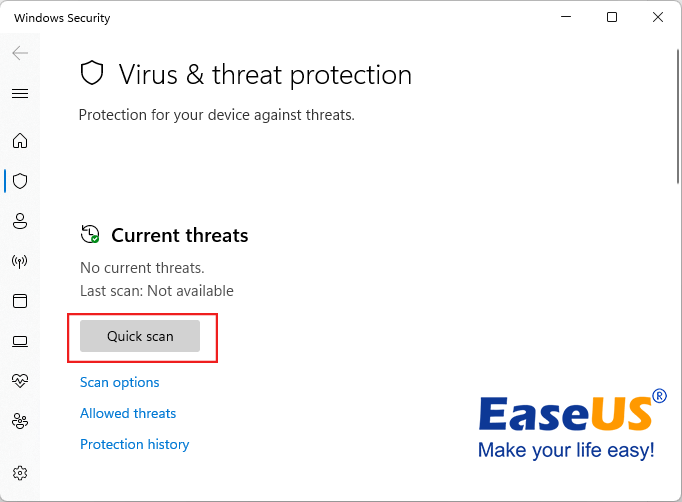
2️⃣Quick solution 2. Clear viruses and malware
You can clear viruses and malware to fix the issue of USB ports not working in Windows 11. Various reliable tools are available to clear viruses, and you’ll also find a built-in feature in Windows 11 named Virus & threat protection. I’m using Windows’ built-in feature, Virus & threat protection, to clear viruses and malware. Here’s how:
Step 1. Simply type «Virus & threat protection» in the taskbar’s search box.
Step 2. Click «Quick scan» and wait a few minutes.
3️⃣Quick solution 3. Unlock USB drive by moving its encryption or write-protection
If your USB ports aren’t working, possibly your USB is locked or write-protected you’re trying to connect. To fix this, you can unlock it. If your drive has a small switch on it, make sure it’s turned off, as this can activate write protection. However, newer USB drives may not have this switch, so check before assuming this method will work.
There are several ways to remove the encryption of the USB. We’ll do it through DiskParkt:
Step 1. Press Windows + R to open the «Run» box, then type «diskpart» and hit Enter.
Step 2. If prompted, click «Yes» to allow changes.
Step 3. Type «list disk» and hit Enter to see the disk sizes.
Step 4. Identify your USB drive by its size, for example, Disk 1 for a 14 GB drive.
Step 5. Type «select disk 1» where 1 is the number of your USB drive. This is just an example.
Step 6. Use the «attributes disk» command to view the disk’s attributes.
Step 7. Type «attributes disk clear readonly» to remove write-protection.
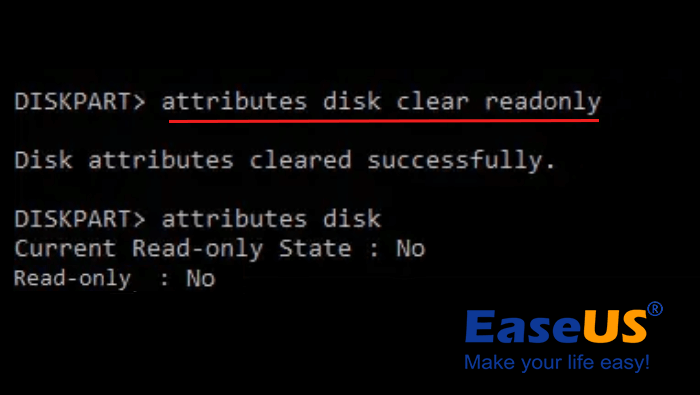
Step 8. Finally, type «exit» to close the program.
Note: There are many manual and automated ways to unlock your USB by moving its encryption or write protection. The above-discussed manual method may be too lengthy and challenging for you. To avoid long and difficult manual processes and enjoy a hassle-free experience, you should try EaseUS Partition Master. It has a remove write protection feature, and you can try to remove write protection in no time without following lengthy manual processes.
Now, let’s dive into some more in-depth solutions that can help you get your USB ports working again in Windows 11. Follow along, and you’ll be able to solve the problem with ease!
Method 1. Update USB Ports Driver with Driver Update Software
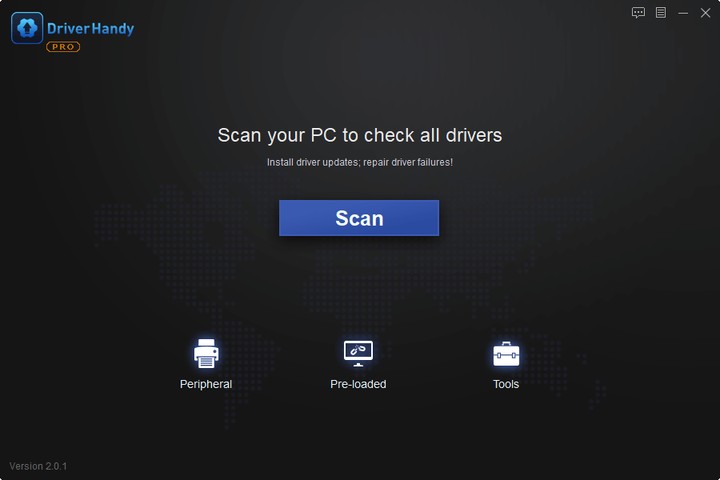
If you’re experiencing issues with your USB ports not functioning correctly in Windows 11, outdated USB drivers may be the culprit. Fortunately, updating drivers doesn’t have to be a daunting task. With the help of EaseUS DriverHandy, a reliable tool that automates the process of finding and installing the most appropriate and up-to-date drivers for your PC’s components and devices, you can easily solve this problem.
You no longer have to spend time researching and locating the correct drivers; simply let EaseUS DriverHandy handle the job for you. Its automated system ensures that you receive the latest and most appropriate drivers for your USB port or any other component/device in your PC. Save your precious time and avoid frustration by entrusting the task to EaseUS DriverHandy. Here’s how:
Step 1. Launch EaseUS DriverHandy on your PC and click «Scan» button.
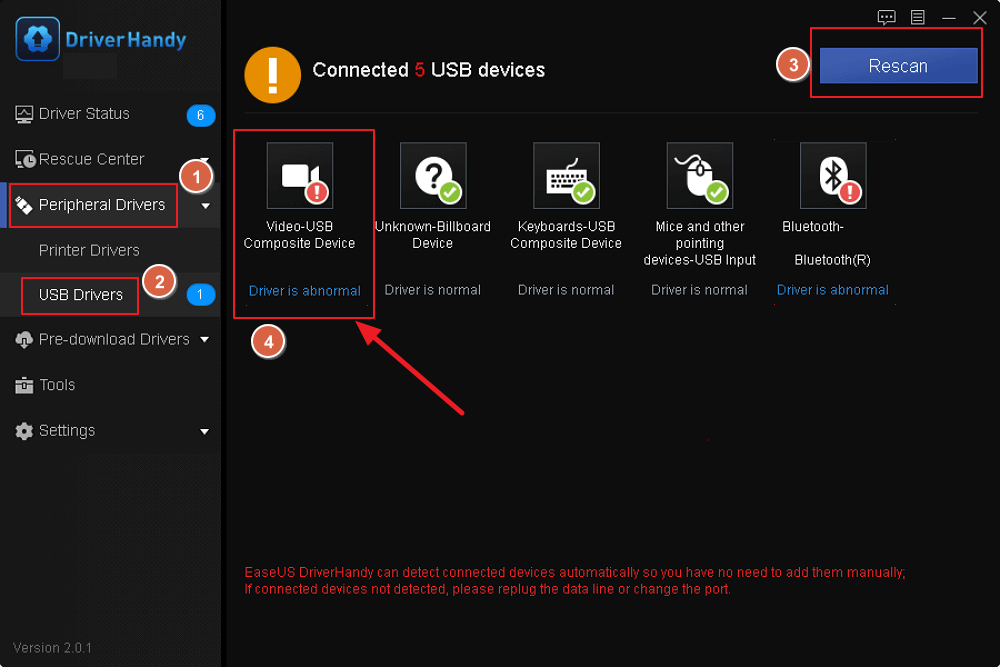
Step 2. Choose «USB Drivers» under the «Peripheral Drivers,» and click «Rescan.»
Step 3. If there is anything abnormal, navigate to the Driver Statuas and update it by updating the corresponding driver.
The provided method here is also applicable to fix similar issues on other Windows computers, such as:
Method 2. Update USB Ports Driver via Device Manager
Updating your USB driver manually via Device Manager is a straightforward process, and the following steps outline how to do so:
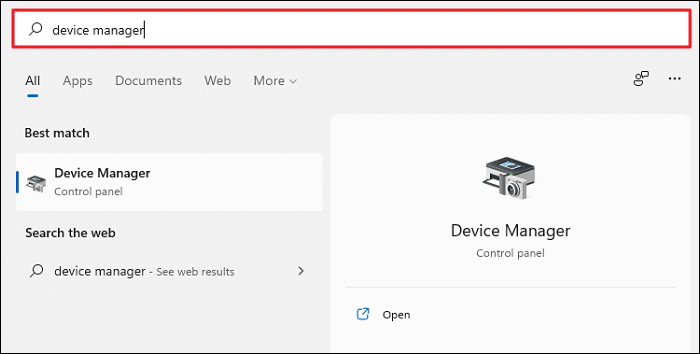
Step 1. Open «Device Manager» by typing it into the taskbar’s search box and clicking on it.
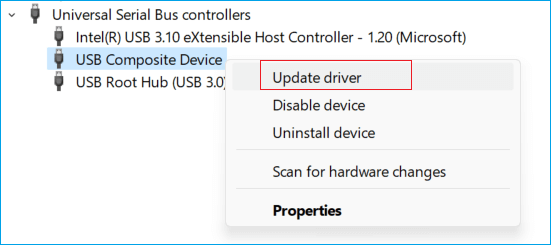
Step 2. Expand the «Disk drivers» category by clicking on the greater-than symbol (>) next to it.
Step 3. Right-click on the USB you want to update, and select «Update driver» from the drop-down menu.
Step 4. You have two options: «Search automatically for drivers» and «Browse my computer for drivers.» Choose the option that suits you best.
Step 5. Allow a few minutes for the driver to install. Once the installation is complete, restart your PC or laptop.
Note: If you choose the first option, the driver will automatically search and install over the internet. If you choose the second option, you must first arrange the driver files on your computer because this method involves manual updating.
Method 3. Update USB Ports Driver via Windows Update
To update your USB port driver via Windows Update in Windows 11, follow these simple steps:
Step 1. Launch the Settings app in Windows 11.
Step 2. Navigate to the Windows Update section.
Step 3. Click on the «Advanced options» located on the right-hand side of the window.
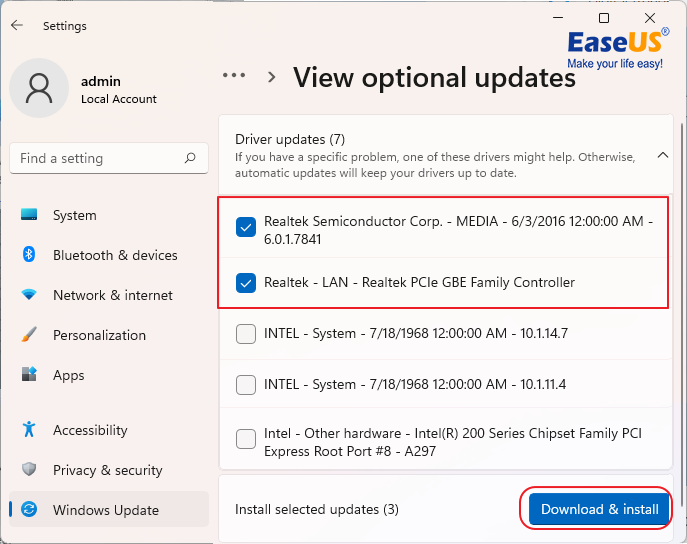
Step 4. Click «Optional updates» under «Additional updates».
Step 5. Choose the desired optional update or driver for Windows 11.
Step 6. Click the «Download & install» button to initiate the update installation.
Due to several causes, USB port malfunctioning in Windows 11, you may witness various symptoms. A few common symptoms are:
- USB flash drive not showing up in Windows 11
- USB devices not recognized Windows 11
- USB device not detected
- USB ports not working after Windows 11 update
- USB ports not providing power to connected devices
- USB devices randomly disconnect or not functioning properly
These are common symptoms, alright, but don’t worry and stay calm. The issue can be fixed with some troubleshooting steps. It’s also important to identify the causes. A few common causes are:
| USB ports driver needs update: | Outdated or corrupted drivers can prevent USB ports from functioning properly. |
| USB ports are not compatible with USB devices: | Sometimes, USB devices may not be compatible with the USB port on your computer. Check the device’s specifications and the computer’s USB ports to ensure they are compatible. |
| USB ports are not installed with compatible drivers on Windows 11: | If you have recently upgraded to Windows 11, the USB drivers may not be compatible with the new operating system. In this case, you need to install the latest USB drivers. |
| Virus infection: | Malware or viruses can corrupt the USB drivers and cause the USB ports to stop working. Use an antivirus program to scan for and remove any malicious software. |
| Hardware issues: | Faulty hardware, such as a damaged USB port or cable, can also cause USB port issues. |
| Power management settings: | Windows 11 has power management settings that can affect USB device connectivity. Ensure the power management settings do not turn off the USB ports to save power. |
| BIOS settings: | The BIOS settings on your computer can also affect USB device connectivity. Ensure USB ports are enabled in the BIOS and the settings are configured correctly. |
There can be various reasons why USB ports stop working in Windows 11. By identifying the cause of the issue, you can take appropriate steps to fix it.
What USB Port Is and Why It Matters
USB ports are essential components of computers. Users can connect various devices easily, such as printers, cameras, keyboards, and smartphones, transfer data quickly, and charge them conveniently through USB ports. USB ports are available on most modern computers and are designed to provide a fast, secure, and flexible way to transfer data between devices. Therefore, ensuring your USB ports function correctly is necessary to maintain your productivity and device compatibility.
USB ports matter because they make it easy for users to connect their devices to their computers. With the increasing number of USB devices in the market, having functional USB ports is crucial for productivity, data transfer, and charging. Without USB ports, users would have to rely on more complicated and less efficient methods to connect their devices, such as using serial or parallel ports.
Final Verdict
If your USB devices are undetected or unrecognized on Windows 11 PCs, the culprit could be an incompatible USB port driver and other causes, such as viruses. But don’t worry. The solution is simple — update your USB port driver and BUS controller driver. This will ensure that your USB devices can function properly and be recognized by your PC.
But who wants to spend hours searching for the right driver updates? That’s where EaseUS DriverHandy comes in. This driver update tool can quickly and easily update your drivers for you. Say goodbye to the headache of manually updating drivers and hello to hassle-free USB device usage. Don’t let driver issues hold you back — utilize EaseUS DriverHandy to keep your drivers up to date and prevent future problems with your USB devices.
FAQs
If you have any further queries or want to learn more, here are some frequently asked questions and answers to help you resolve the issue:
1. Why are my USB ports not working in Windows 11?
There could be several reasons why your USB ports are not working in Windows 11, including outdated or missing drivers, power management settings, or a hardware issue. It’s best to start by updating your drivers and checking your power settings to see if that resolves the problem.
2. How do I fix my USB ports in Windows 11?
To fix USB port issues in Windows 11, try the following steps:
- Update your USB port and BUS controller drivers.
- Check your power management settings to ensure that your USB ports are not being turned off.
- Scan your computer for malware or viruses.
- Try a different USB port or cable to see if the issue is with a specific port or cable.
- The BIOS settings on your computer can also affect USB device connectivity. Ensure USB ports are enabled in the BIOS and the settings are configured correctly.
3. USB-C ports not working in Windows 11, how to fix?
If your USB-C ports are not working in Windows 11, try the following steps to fix:
- Update your USB-C port and BUS controller drivers.
- Check your power management settings to ensure your USB-C ports are not turned off.
- Check your USB-C cable to ensure that it is not damaged or incompatible.
- Try a different USB-C port or cable to see if the issue is with a specific port or cable.
- If none of these solutions work, seek professional help.
Не работают USB-порты настольного ПК или ноутбука — рассмотрим устранение неполадки в Windows 11 в пошаговой инструкции.
Проблема с USB-портами, не работающими на компьютере с Windows 11, может быть вызвана различными причинами. Начиная устаревшими или поврежденными драйверов и заканчивая отключением питания USB-портов. Возможны и другие варианты.
Проблема не в USB-порте, а в устройстве или драйвере
Содержание
- Проблема не в USB-порте, а в устройстве или драйвере
- Подключите к USB-порту другое устройство или поменяйте кабель
- Перезагрузите ноутбук или настольный ПК
- Переустановите драйверы оборудования
- Измените настройки управления питанием
- Проверьте обновления Windows 11
- Отключите выборочную приостановку USB
Зачастую помогают самые простые действия. Перезапуск компьютера или переустановка драйверов — ПО, которое согласует устройство с операционной системой.
Подключите к USB-порту другое устройство или поменяйте кабель
Прежде чем приступать к устранению неполадок, подключите другое USB-устройство к тому же USB-порту. Например — заведомо исправную мышь вместо МФУ или внешнего диска. Убедитесь, что проблема связана с USB-портом, а не с самим USB-устройством или кабелем. С подобной накладкой «Блог системного администратора» столкнулся недавно, когда тестировал топовый ноутбук HUAWEI:
Был подключен принтер, который лет 10 лежал без дела. Исправлен, драйверы стали корректно. Но документ не распечатался. Заменил USB-кабель — все сработало на отлично.
Перезагрузите ноутбук или настольный ПК
Проблема может быть связана с ошибкой, препятствующей правильной работе USB-порта или устройства. В большинстве случаев такие проблемы легко исправить, перезагрузив компьютер. Как вариант — выключите и через некоторое время повторно включите ноутбук или настольный ПК. Рекомендовано не включать устройство ранее чем через 30 секунд после отключения.
Переустановите драйверы оборудования
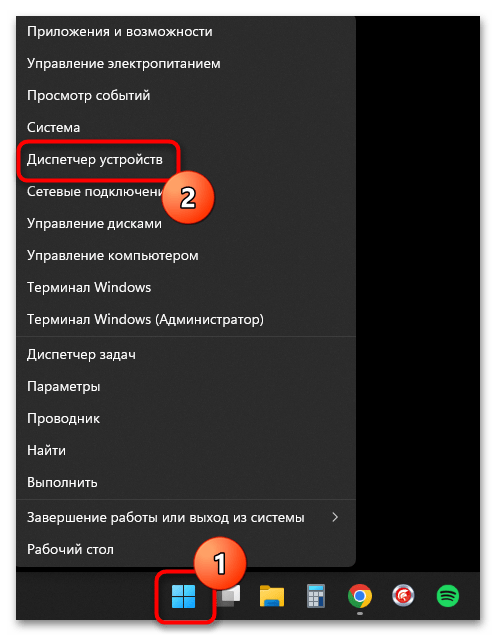
Кликните правой кнопкой мыши по кнопке «Пуск» на Панели задач. Выберите в меню «Диспетчер устройств».

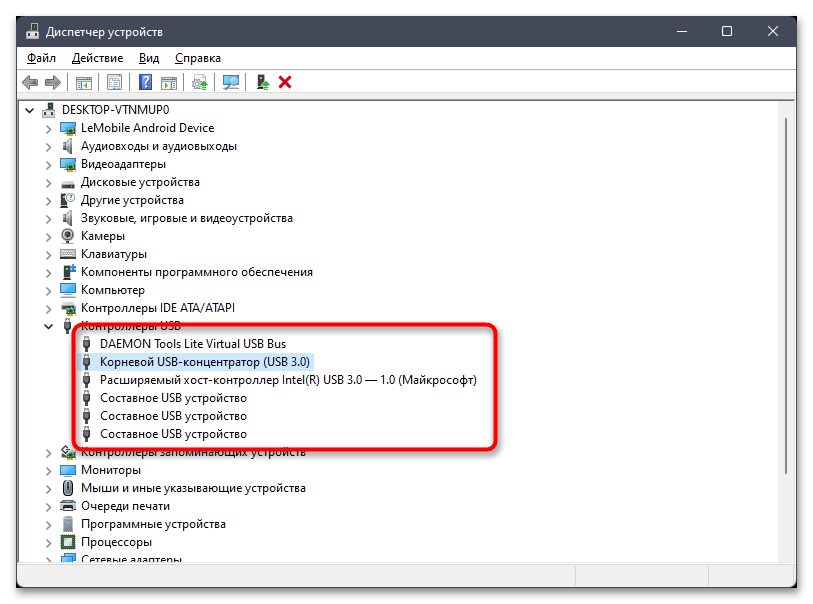
На экране диспетчера устройств разверните блок «Контроллеры USB». Кликните правой кнопкой мыши USB-контроллеры с восклицательным знаком. Выберите из контекстного меню параметр «Удалить устройство». Повторите вышеуказанные шаги для других USB-контроллеров с восклицательными знаками и перезагрузите компьютер.

После перезагрузки компьютера Windows 11 должна автоматически загрузить нужные драйверы для портов USB на вашем компьютере.
Измените настройки управления питанием
Windows 11 может по умолчанию отключать питание неиспользуемых USB-портов. Порой данное качество ОС приводит к тому, что USB-порты не работают.
Кликните правой кнопкой мыши кнопку «Пуск». Выберите «Диспетчер устройств» из меню.
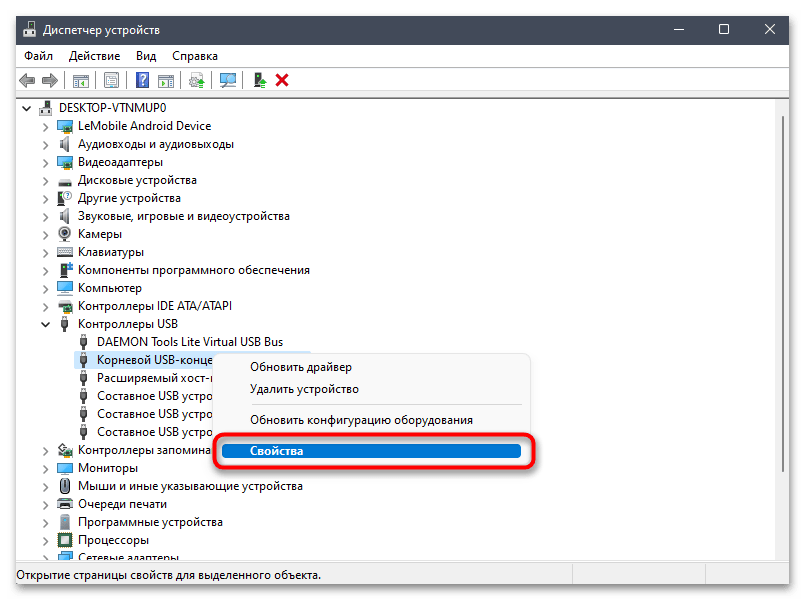
В окне «Диспетчера устройств» разверните блок «Контроллеры USB». Кликните правой кнопкой мыши «Корневой USB-концентратор». Выберите пункт «Свойства» из контекстного меню.
В новом окне перейдите на вкладку «Управление электропитанием». Снимите «птичку» «Разрешить отключение этого устройства для экономии энергии».
По умолчанию данная опция включена.

Нажмите кнопку «ОК» в нижней части окна «Свойства: Корневой USB-концентратор». Повторите описанные выше шаги для всех записей корневого концентратора USB.

Проверьте обновления Windows 11
Проблема с USB-портами может быть связана с загрузкой или ожиданием установки обновления Windows на компьютер. Кликните правой кнопкой мыши по «Пуску». В Windows 11 кнопка главного меню находится в центре Панели задач. Если непривычно, легко вернем на прежнее место, в левый нижний угол:
Выберите «Параметры».

На левой панели откройте «Центр обновлений Windows». На правой панели нажмите «Проверить наличие обновлений». Разрешите Windows проверять наличие обновлений. Если обновления доступны, следуйте инструкциям по загрузке и установке обновлений.

Отключите выборочную приостановку USB
Если на вашем компьютере не работают все USB-порты, вы можете отключить выборочную приостановку питания для всех USB-портов на вашем компьютере. Одновременно нажмите Win + R. Введите control.exe в поле «Открыть:». Кликните по кнопке «ОК» в нижней части окна.

Справа вверху выберите режим просмотра «Крупные значки» или «Мелкие значки». Перейдите в раздел «Электропитание».

На экране «Параметры электропитания» нажмите ссылку «Настройка схемы электропитания», которая расположена рядом с текущим планом электропитания.

На следующем экране выберите ссылку «Изменить дополнительные параметры питания».

Разверните «Параметры USB». Затем разверните вложенный пункт «Параметр временного отключения USB-порта». Выберите «Запрещено». Нажмите кнопку «ОК» для сохранения изменений на вашем ноутбуке или настольном ПК.

У вас бывало, что USB-порты не работают? Напишите как справились с проблемой.
3
2
голоса
Рейтинг статьи
Все способы:
- Способ 1: Изменение плана электропитания
- Способ 2: Управление электропитанием USB-портов
- Способ 3: Установка запрета на временное отключение USB-порта
- Способ 4: Подключение активного USB-хаба
- Вопросы и ответы: 1
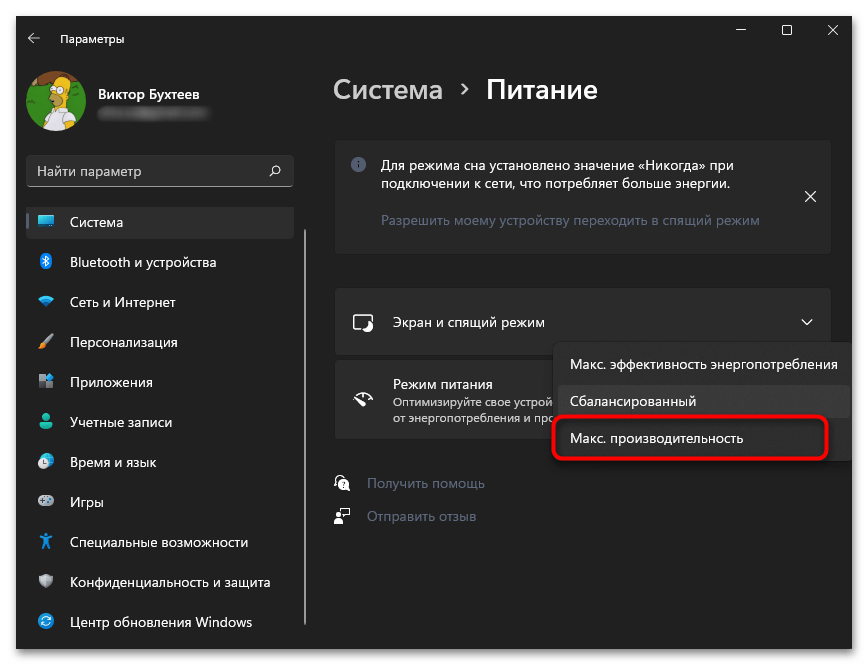
Способ 1: Изменение плана электропитания
Существует много разных причин, по которым появляется ошибка с информацией о нехватке электропитания для USB-порта в Windows 11. Она может быть связана как с аппаратными проблемами, так и с программными. Для начала стоит проверить второй тип проблем, поскольку их решить проще всего. Один из актуальных методов заключается в изменении плана электропитания в операционной системе с установкой его на максимальную производительность. Более детально об этом написано в другой статье на нашем сайте по следующей ссылке.
Подробнее: Использование режима максимальной производительности в Windows 11
Способ 2: Управление электропитанием USB-портов
По умолчанию для всех USB-портов в Виндовс 11 установлен параметр, при помощи которого устройство может быть отключено для экономии энергии. Иногда эта настройка как раз и является триггером рассматриваемой проблемы. Мы предлагаем отключить ее самостоятельно для всех портов и проверить, скажется ли это на работе разъемов и подключенных к ним устройств.
- Щелкните по кнопке «Пуск» правой кнопкой мыши и из появившегося контекстного меню выберите пункт «Диспетчер устройств».
- Разверните список «Контроллеры USB», чтобы обнаружить все порты и устройства.
- Обычно порт именуется как «Корневой USB-концентратор (USB 3.0)», однако это зависит от модели материнской платы и дополнительных подключений в виде передней панели корпуса компьютера. Поэтому мы рекомендуем по очереди выбрать каждое устройство из списка и выполнить одинаковую настройку.
- Щелкните по оборудованию правой кнопкой мыши и из контекстного меню выберите пункт «Свойства».
- Перейдите на вкладку «Управление электропитанием» и снимите галочку с пункта «Разрешить отключение этого устройства для экономии энергии».
- Вернитесь к списку контроллеров USB и произведите то же самое действие с оставшимися устройствами. Обычно их не бывает очень много, поэтому процесс займет считанные минуты.


Способ 3: Установка запрета на временное отключение USB-порта
Для каждого плана электропитания для ноутбука или ПК под управлением Windows 11 есть ряд дополнительных параметров, при помощи которых осуществляется распределение потребления ресурсов. Одна из настроек позволяет временно отключать USB-порты для экономии энергии, поэтому понадобится ее деактивировать. Это должно помочь исправить сложившуюся ситуацию.
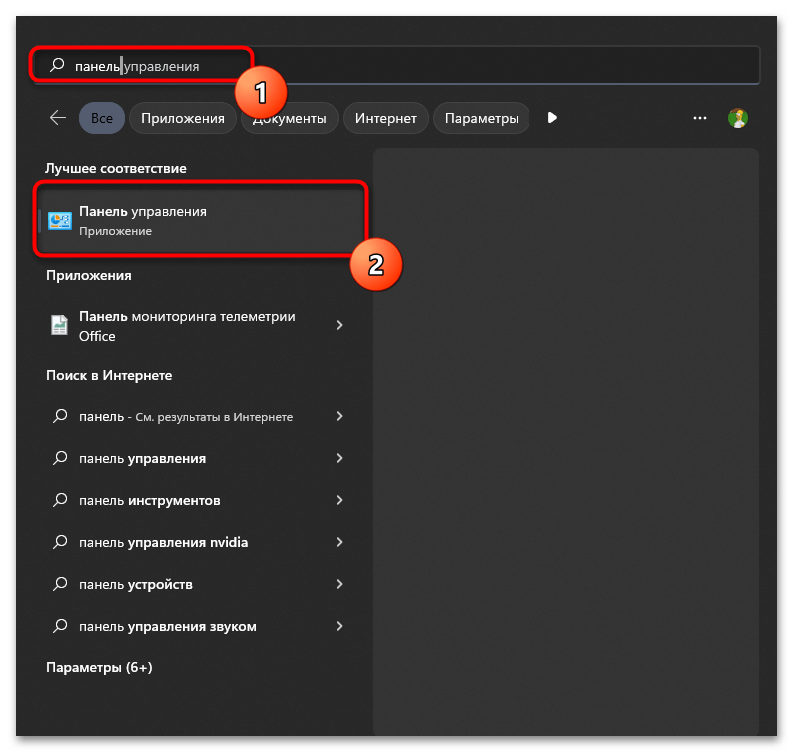
- Откройте меню «Пуск», через поиск отыщите классическое приложение «Панель управления» и перейдите к нему.
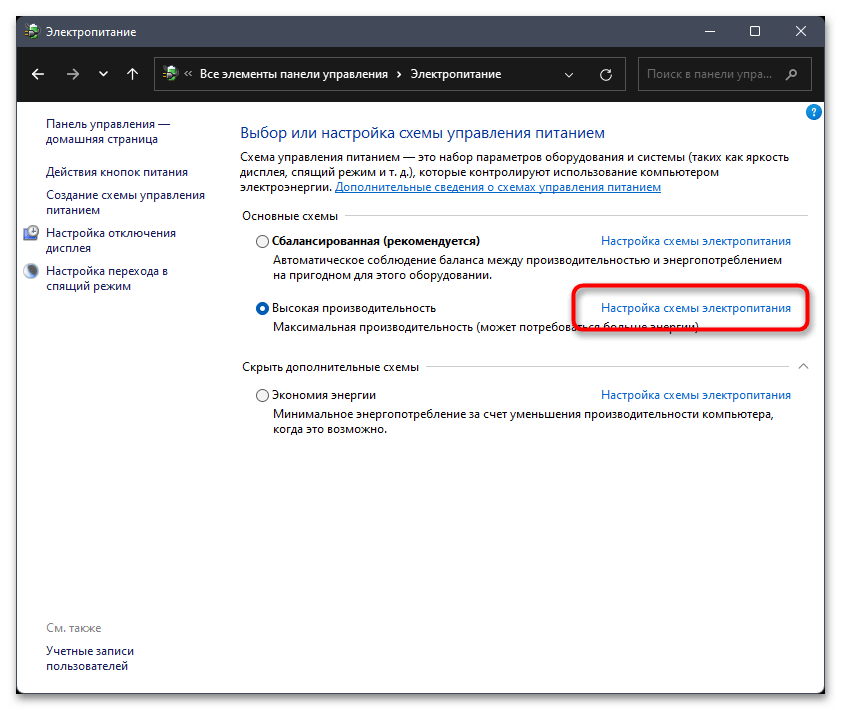
- Прокрутите колесико вниз, чтобы найти последний пункт с названием «Электропитание».
- После отображения на экране доступных схем нажмите по ссылке «Настройка схемы электропитания» для того режима, который сейчас активен.
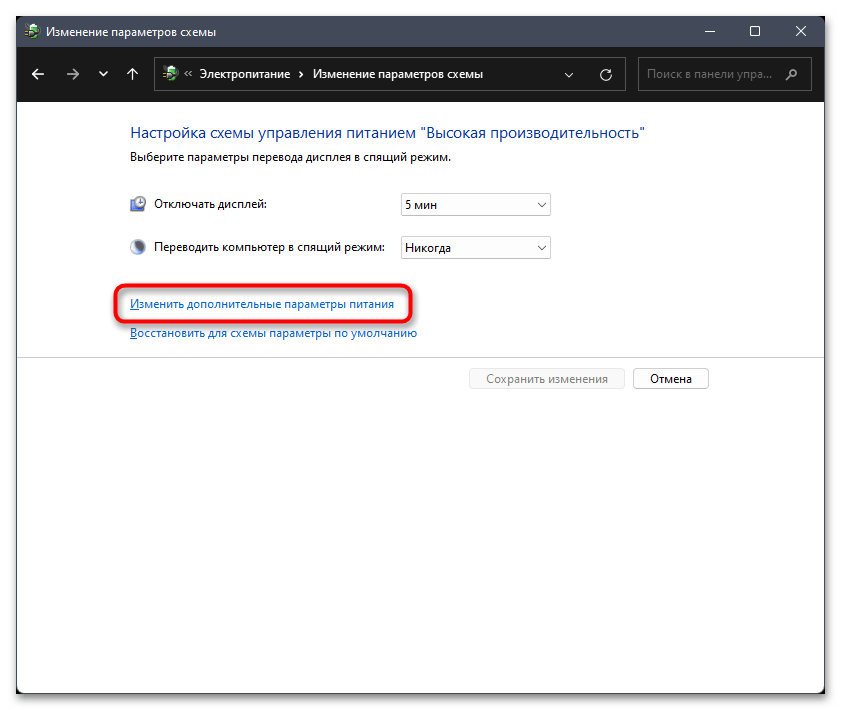
- В новом окне левой кнопкой мыши щелкните по другой ссылке с названием «Изменить дополнительные параметры питания».
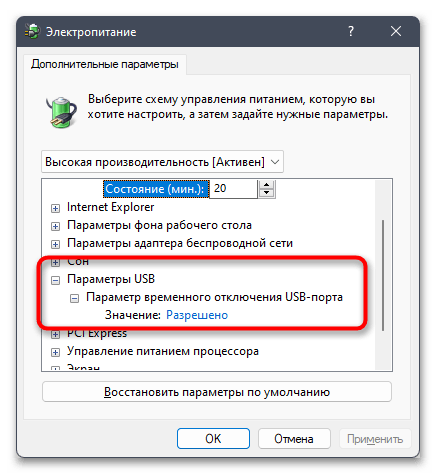
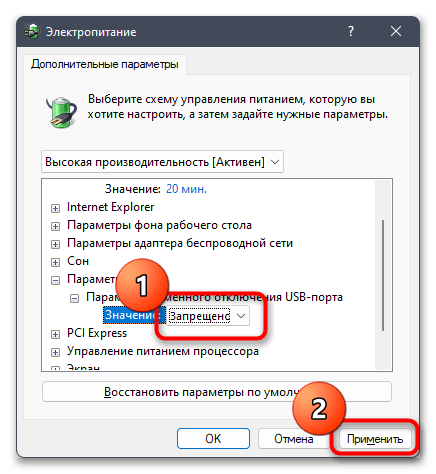
- Разверните раздел «Параметры USB», выберите «Параметр временного отключения USB-порта» и измените его значение.
- Установите его как «Запрещено», затем примените изменения и лучше перезагрузите компьютер, чтобы после перейти к проверке работы USB-разъемов.

Дополнительно предоставим инструкцию для тех пользователей, у кого не получилось отыскать нужный параметр в списке. Скорее всего, его отображение отключено через «Редактор реестра», поэтому понадобится изменить ключ вручную.
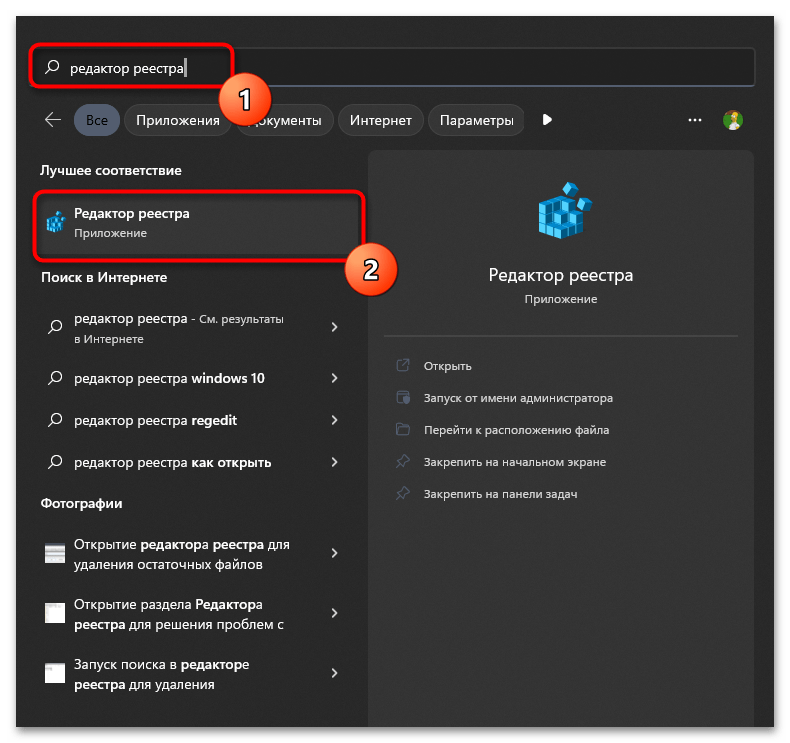
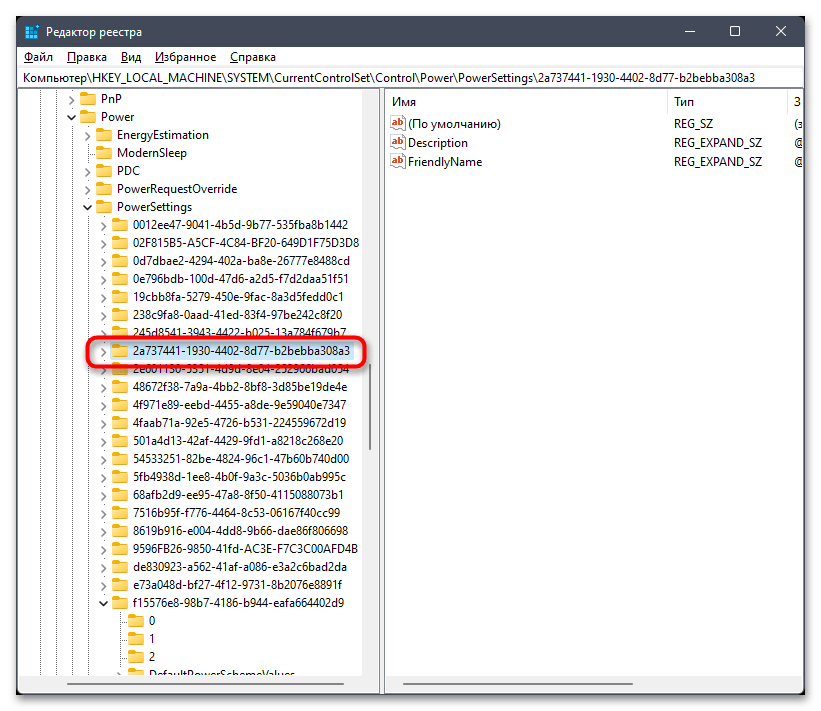
- Откройте «Пуск», найдите «Редактор реестра» и запустите приложение.
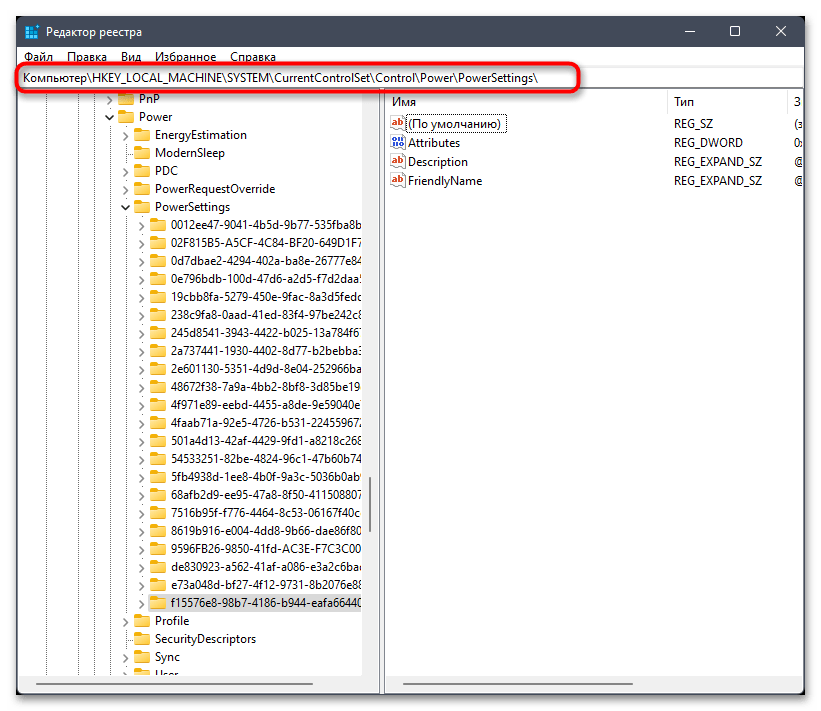
- В адресную строку вставьте путь
Компьютер\HKEY_LOCAL_MACHINE\SYSTEM\CurrentControlSet\Control\Power\PowerSettingsи перейдите по нему, нажав Enter. - В списке с ключами найдите директорию с названием «2a737441-1930-4402-8d77-b2bebba308a3e6b7a6-50f5-4782-a5d4-53bb8f07e226» и выделите ее левой кнопкой мыши.
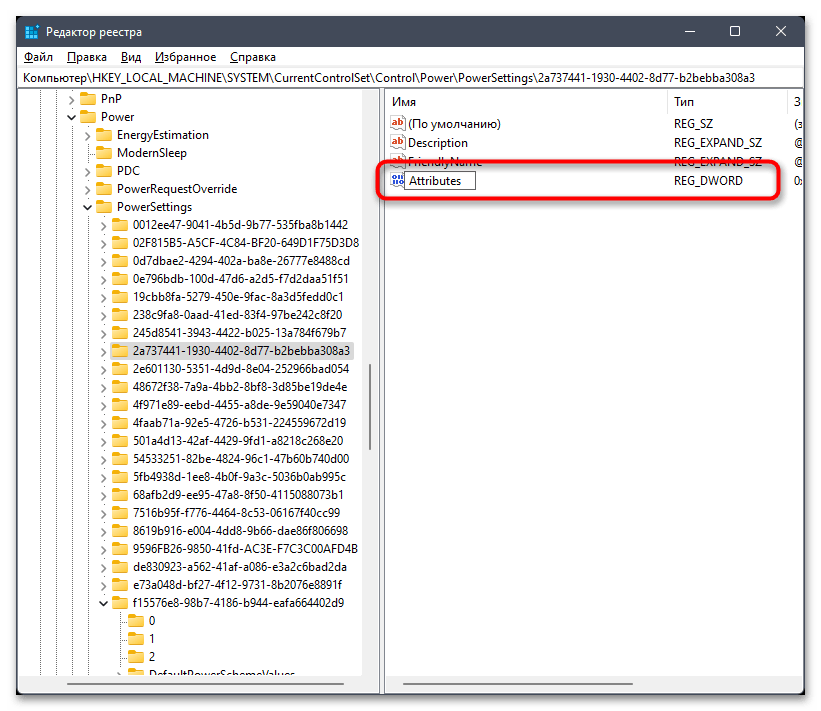
- Если в самой папке отсутствует параметр с названием «Attributes», его понадобится создать вручную. Для этого щелкните по пустому месту ПКМ, наведите курсор на «Создать» и выберите пункт «Параметр DWORD (32 бита)».
- Задайте для параметра название «Attributes», затем щелкните по нему дважды, чтобы открыть окно редактирования значения.
- Установите значение «2», примените изменения и перезагрузите компьютер. После этого вернитесь к предыдущей инструкции, чтобы снова попасть к дополнительным параметрам электропитания и внести свои коррективы.

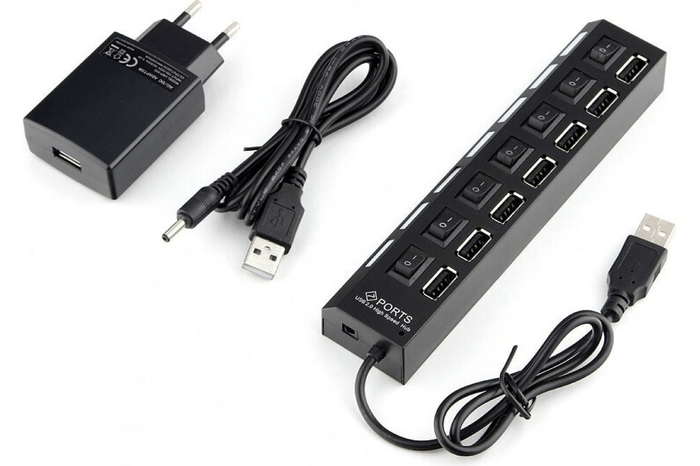
Способ 4: Подключение активного USB-хаба
Активный USB-хаб представляет собой переходник на несколько USB (иногда и с дополнительными разъемами), но при этом имеет дополнительное подключение к сети, чтобы компенсировать нехватку электропитания, получаемого через стандартный разъем на материнской плате. Использование подобных переходников актуально в тех случаях, когда к компьютеру или ноутбуку одновременно подключено множество USB-устройств и питания портов просто не хватает. Вы можете приобрести такой хаб, обязательно учитывая наличие активного питания, затем подключить его к розетке и материнской плате и направить на него несколько устройств, освободив тем самым немного электропитания на вашей системной плате.
Наша группа в TelegramПолезные советы и помощь
Quick Solutions
- Cleaning the USB port or trying a different one can prevent further troubleshooting.
- A quick system restart is also effective when minor glitches trigger the problem.
- Updating the computer and scanning for viruses are potential fixes for this problem.
Fix 1: Unlock and Trust the Device
Some devices, like iPhones or Androids, have an added layer of authentication to verify user identity. When you connect your phone for the first time to a computer, you need to unlock it; otherwise, the computer may not recognize it.
Step 1: Connect the phone to a USB.
Step 2: On an iOS device, tap the Trust option in the Trust This Computer pop-up.
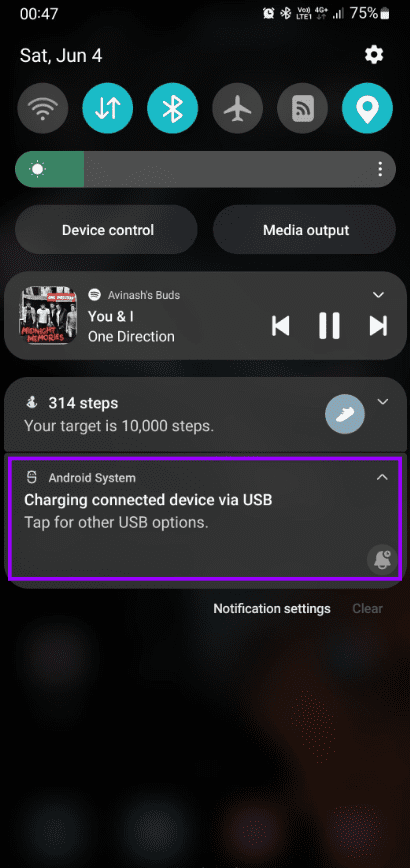
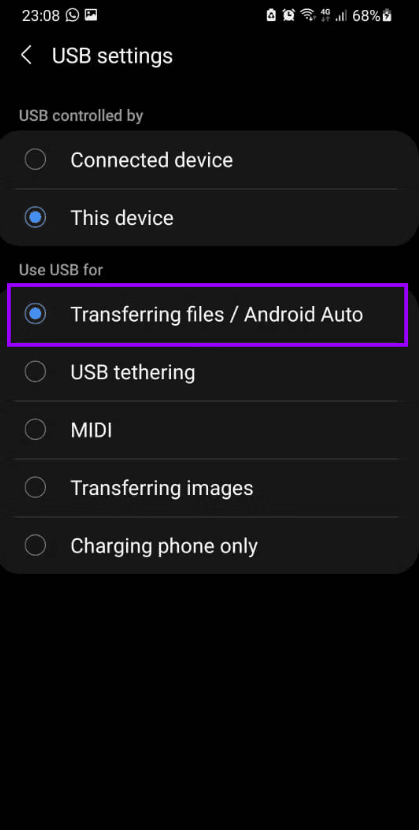
Alternatively, if it’s an Android phone, drag down the notification area > tap Charging connected device via USB > select Transferring files.
Fix 2: Check BIOS to See if USB Is Recognized
This fix is important because if the USB device is detected in the BIOS, the other solutions below may fix the issue. If it is not detected, there is a higher chance of hardware malfunction, so you may want to check cables or the device itself. You must first enter BIOS, then use the arrow keys to navigate to USB. Steps will vary depending on the manufacturer.
You may identify a recognized USB if the device is under the Listed Devices, and you should ensure a USB Controller Status, if available, is enabled.
Fix 3: Reinstall USB Drivers
Buggy USB drivers on your Windows 11 PC can cause problems recognizing USB devices. To fix this, uninstall the USB drivers from the Device Manager menu. Follow the steps below.
Step 1: Right-click on the Start menu and select Device Manager.

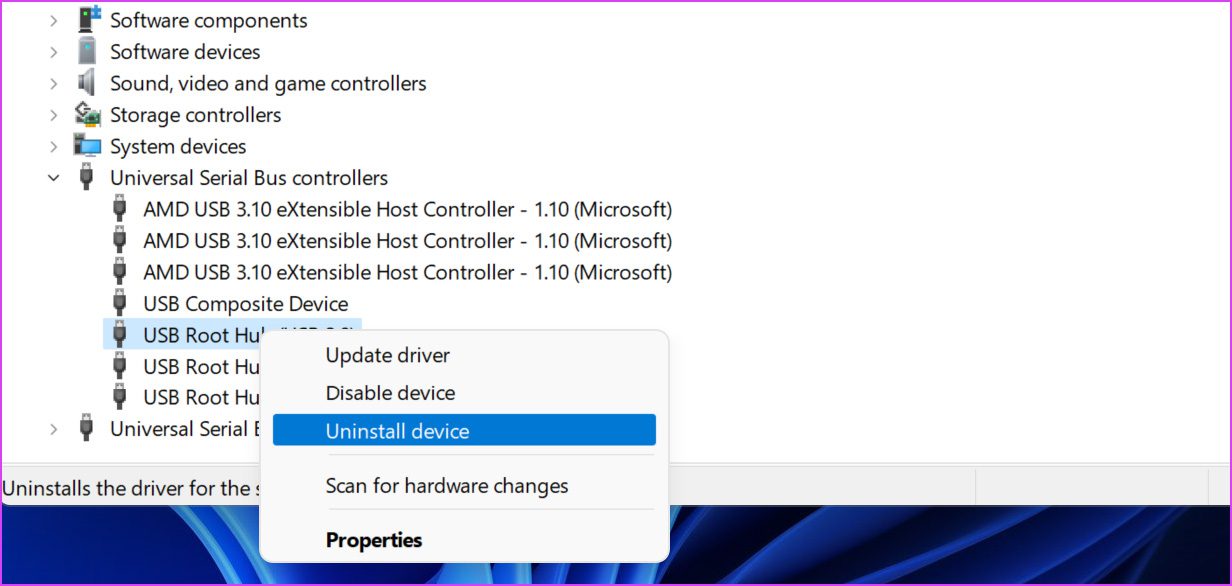
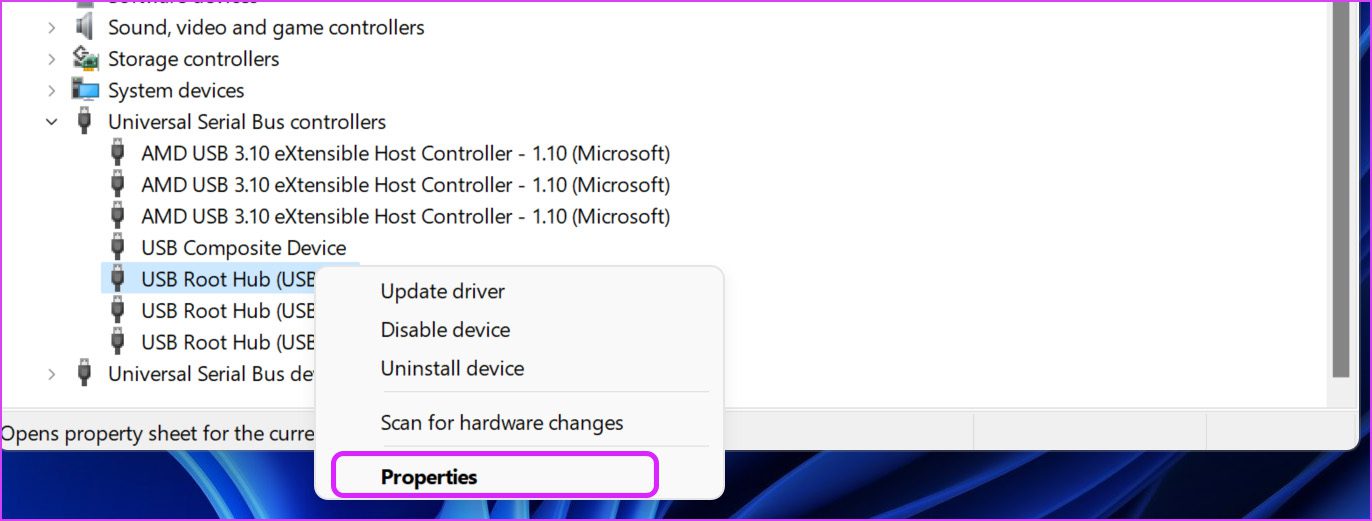
Step 2: When it opens, scroll down to the Universal Serial Bus Controllers section > locate and right-click on the USB Root Hub device.
Step 3: Select Uninstall Drivers and confirm your choice.
Step 4: Restart your PC and wait for Windows 11 to automatically install the required drivers after plugging in the USB device.
Fix 4: Update or Reinstall Chipset Drivers
Chipset drivers act as translators behind the scenes. They ensure that the PC’s motherboard communicates effectively with connected components. Updating them can fix the USB problem. The steps will depend on your manufacturer, but for AMD chipset drivers, you may download them on the AMD driver website.
Step 1: First, click on the magnifying lens on the Taskbar, type system info, and click on System Information.

Step 2. Take note of your BaseBoard Product value.
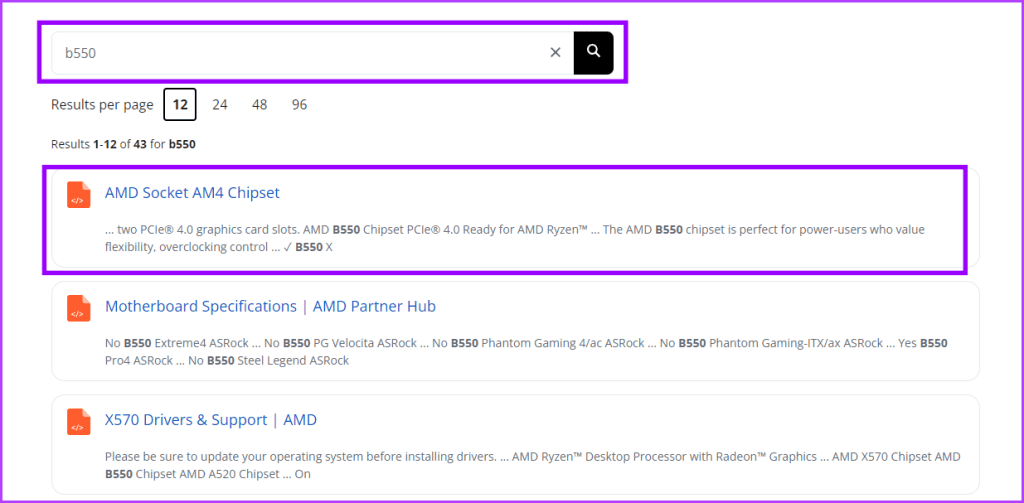
Step 3: Open the AMD driver website, type the BaseBoard Product value in the search field, and click Enter.
Step 4: Note the Chipset name—in our case, it is AMD Socket A4—and click on it.
Step 5: Select Chipset > select the Chipset name for your computer > choose your BaseBaord value > click Submit.

Step 6: Choose your operating system and click on Download for your Chipset driver.
Step 7: Double-click to run the downloaded setup file and click Install.
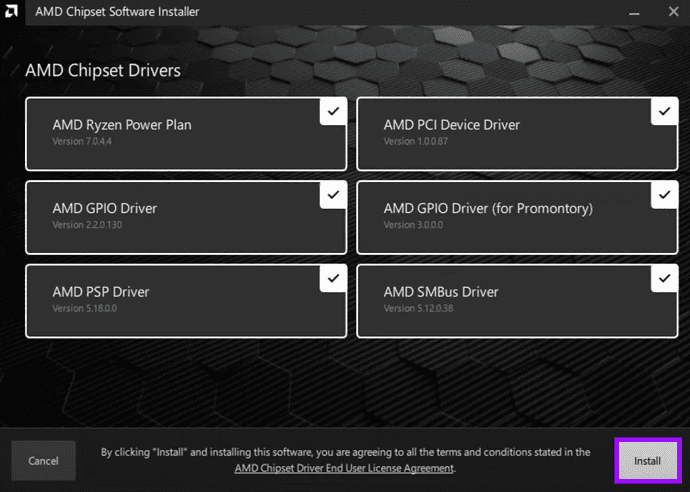
Step 8: Restart the computer once the installation is completed.
Fix 5: Disable USB Suspend Settings
This is yet another setting tweak that can affect USB operations on Windows. To reduce battery usage, Windows 11 suspends USB operations after a while. Let’s change the behavior.
Step 1: Press the Windows key, type edit power plan, and hit Enter. Windows will open Power options in the Control Panel.
Step 2: Select Change advanced power settings.

Step 3: Scroll down to USB settings > select USB selective suspend setting > choose Disabled.

Step 4: Click Apply and OK.
Fix 6: Change Power Management Settings
By default, Windows 11 suspends the USB device operations in the background to save power, especially on laptops. You can disable the tweak from the Device Manager menu.
Step 1: Right-click the Start menu > open the Device Manager menu.
Step 2: Expand Universal Serial Bus controllers, find the USB device from the list, and right-click on it.
Step 3: Select Properties from the context menu.
Step 4: Go to the Power Management menu, disable Allow the computer to turn off this device to save power, and click OK.
Was this helpful?
Thanks for your feedback!
The article above may contain affiliate links which help support Guiding Tech. The content remains unbiased and authentic and will never affect our editorial integrity.