
Applies ToOneNote для Microsoft 365 OneNote 2024 OneNote 2021 OneNote 2019 OneNote 2016
Виртуальные принтеры OneNote позволяют записывать данные из любого приложения и выводить их непосредственно на страницу записной книжки OneNote, помогая хранить цифровые копии содержимого при сохранении бумаги. После печати информации в OneNote вы можете получить доступ к ней с любого устройства, даже если вы находитесь в автономном режиме. Вы можете использовать возможности организации OneNote, чтобы упорядочить всю информацию или даже добавить заметки поверх этих страниц.
Печать любого типа файла в OneNote так же проста, как и на физическом принтере. Вы можете напечатать:
-
документы;
-
электронные таблицы;
-
сообщения электронной почты;
-
чертежи;
-
схемы;
-
веб-страницы.
Печать в OneNote
Чтобы распечатать содержимое в OneNote, выполните следующие действия.
-
Откройте документ или файл, которые нужно отправить в OneNote (например, Microsoft Word для файлов документов или браузер для веб-страниц).
-
В приложении выберите пункт Печать.
-
В списке принтеров выберите «OneNote — (desktop)» или «OneNote (Desktop) — Protected«.
-
Нажмите Печать, и OneNote откроется в фоновом режиме.
-
В появившемся окне выберите, куда вы хотите отправить файл. Содержимое добавляется в виде изображения на новой странице OneNote.
Форматирование и редактирование печатного содержимого
После печати документа, файла или веб-страницы в OneNote можно использовать массив инструментов рисования и форматирования, доступных в OneNote, для добавления или выделения важных сведений.
Если вам нужно отформатировать или изменить текст в содержимом, напечатанном в OneNote, выполните следующие действия:
-
Щелкните правой кнопкой мыши изображение распечатки.
-
Выберите Копировать текст на этой странице распечатки или Копировать текст со всех страниц распечатки.
-
Вставьте скопированный текст в нужное место.
Общие сведения о виртуальных принтерах OneNote

В приложении OneNote для Windows доступны два виртуальных принтера:
-
OneNote (классический)
-
OneNote (настольный компьютер) — защищено
Оба принтера работают одинаково и позволяют выполнять печать в OneNote с одинаковым качеством и производительностью. Для печати нужной информации в OneNote можно использовать любой из них. Принтер OneNote (Desktop) — protected — это приложение поддержки печати (PSA), основанное на драйвере принтера класса Microsoft IPP, представленном в соответствии с режимом защищенной печати Windows (WPP). Если wpp включен, удаляются все принтеры, не относящиеся к IPP, включая принтер OneNote (desktop). В этом случае для печати в OneNote можно использовать принтер «OneNote (desktop) — Protected».
Установка виртуальных принтеров OneNote
Виртуальный принтер OneNote (desktop) устанавливается по умолчанию вместе с приложением OneNote для Windows. Виртуальный принтер OneNote (desktop) — Protected устанавливается по умолчанию во всех приложениях OneNote для Windows версии 2410 и более поздних (включая подходящие розничные версии Office), работающих на Windows 11 версии 26100 или выше.
Если вы используете соответствующие версии Windows и OneNote, но не можете найти «OneNote (desktop) — Protected» в списке доступных принтеров, попробуйте следующее:
-
Если вы являетесь отдельным или личным пользователем OneNote, перейдите в параметры компьютера и убедитесь, что для параметра App> Дополнительные параметры приложения> Выберите, где получить приложения, задано значение «В любом месте» и перезапустите приложение.
-
Если вы являетесь корпоративным пользователем, обратитесь к ИТ-администратору, чтобы убедиться, что для групповых политик AllowAllTrustedApps и BlockNonAdminUserInstall заданы значения «Включено» и «Отключено» соответственно. Эти параметры необходимы для завершения установки этого нового виртуального принтера на устройстве. Дополнительные сведения о других параметрах политики и разделах реестра, которые могут препятствовать установке этого принтера, см. здесь.
-
Если вы случайно удалили или удалили принтер, попробуйте удалить и переустановить приложение OneNote, чтобы восстановить его. Перед удалением убедитесь, что заметки синхронизированы, чтобы избежать потери несинхронизированных изменений. Если у вас возникли проблемы с синхронизацией, узнайте, как устранить распространенные проблемы с синхронизацией, в нашей статье поддержки здесь.
Примечание: Принтер OneNote (desktop)» доступен только на 32-разрядных (x86) и 64-разрядных (x64) устройствах. Принтер OneNote (desktop) — Protected доступен на 32-разрядных (x86), 64-разрядных (x64) и arm-устройствах.
Нужна дополнительная помощь?
Нужны дополнительные параметры?
Изучите преимущества подписки, просмотрите учебные курсы, узнайте, как защитить свое устройство и т. д.
Applies ToOneNote для Windows 10
Важно: Поддержка OneNote для Windows 10 завершится в октябре 2025 года. Чтобы быть в курсе последних функций OneNote, загрузите OneNote из Microsoft Store или в составе Microsoft 365.
Вы можете легко распечатать одну страницу, полный раздел или всю записную книжку.
-
На любой странице OneNote для Windows 10 нажмите кнопку Параметры и дополнительно, расположенную в правом верхнем углу.
-
Нажмите кнопку Печать, а затем выполните одно из следующих действий:
-
В разделе Принтер выберите физический или виртуальный принтер, который вы хотите использовать.
Совет: Если нужный принтер недоступен, убедитесь, что он установлен правильно. В Windows 10 нажмите кнопку Пуск и выберите Параметры > Устройства > Принтеры & сканеры. В списке установленных принтеров щелкните принтер, которым вы хотите управлять, или нажмите кнопку + Добавить принтер или сканер , чтобы установить принтер. После успешной установки и настройки принтера перезапустите OneNote и повторите попытку выбора принтера.
-
В разделе Копии выберите, сколько копий необходимо распечатать. (Этот параметр отображается только в том случае, если выбран физический принтер.)
-
В разделе Ориентация выберите, хотите ли вы печатать в книжной (высокие страницы) или альбомной (широкие страницы).
-
В разделе Страницы выберите, хотите ли вы напечатать текущую страницу, текущий раздел или текущую записную книжку.
-
Чтобы экспортировать в PDF- файл, в списке принтеров выберите Microsoft Print to PDF.
-
Чтобы выбрать размер страницы, нажмите кнопку Дополнительные параметры , а затем выберите размер в разделе Бумага и качество.
Примечание: Для конкретной модели принтера могут быть доступны дополнительные параметры, например дуплексная печать, параметры цвета или параметры сортировки.
-
-
Нажмите кнопку Печать , чтобы распечатать заметки с выбранными параметрами.
Нужна дополнительная помощь?
Нужны дополнительные параметры?
Изучите преимущества подписки, просмотрите учебные курсы, узнайте, как защитить свое устройство и т. д.
Chances are – you have seen it while printing documents. But of course, you did not know what it is – so you never clicked on it. It is a very powerful feature of OneNote. Here is how to use it – why to use it and how to use it properly. (Reading time 7 min)

Contents
What is OneNote
Good question. It is something you MUST use. You NEED it. It starts as a simple note-taking app. But it has no end point. It is sophisticated beyond your wildest imagination.
Read these articles to know more about it: Knowledge Pack: OneNote
OneNote allows us to create as many electronic notebooks as we need. Each notebook has a multiple colored tabs for keeping track of different topics and each tab can have any number of pages. Notebooks – Sections – Pages. Lots of them.
The OneNote Printer
OneNote is designed to make it simple for us to put ANY kind of information into it. Printing implicitly means using paper. And OneNote is a substitute for a paper notepad or diary.
Therefore, OneNote can behave like a printer. Go to any application – choose the print menu and select Send to OneNote. Now the application thinks it is printing to a regular printer. But instead the printing is happening electronically. To a OneNote page.
Example: Print a PowerPoint presentation to OneNote
For example, here is a PowerPoint presentation.

File – Print shows the Send to OneNote printer. The number is the version number. I am using Office 2016. Therefore it says Send to OneNote 16.
Clicking on the Print button does NOT start printing!
Why so? Because OneNote needs to know where do you want to print. In a real printer, there is only one place for printing on the paper.
OneNote is different. We could have 20 different notebooks. This particular printout belongs to which of those notebooks, section and page? OneNote will never know the answer. So it asks you where to print.
In this dialog, you can choose the desired notebook, section and page. If you just choose a section, a new page will be added. If you choose a page, the printout will be appended to that page.
Also notice that it shows the current section and current page is shown. This is the commonest scenario.
Once you choose the destination, it prints. Each page of the printout becomes a separate image. A ten slide presentation will generate 10 images.
Print to one page or many pages?
Do all these images go into a single OneNote page? No. If there are more than 5 pages, individual pages get printed as Page1, Page2, etc. under a main page called Printout.
Otherwise, all printout pages are added one below another (as images) in the selected OneNote Page.
If you do not like separate printout pages, to to File – Options – Advanced in OneNote. Remove the checkbox Insert long printouts on multiple pages

I don’t like this setting. Usually we want all pages of printout to go into one page in OneNote. This way, we can also choose the character recognition option in the right click menu of the printout…
Character recognition is extremely useful for scanned documents.
Read more details here: Legal Professionals: Searching scanned documents
Why print to OneNote
Here are common reasons we print to OneNote.
- Annotation on top of the output from any application.
PDF and PowerPoint are the commonest. But any application works. - Searching within scanned documents
- Extracting text from scanned documents or documents which otherwise do not allow copying of text directly
Try it out. It works beautifully. If you like this article, do share it with your friends.
***
3 Responses
-
I like this and very much appreciate this blog. One of the few places that a person can go to and learn just enough at a time to actually learn something. So thanks for that.
-
Thanks Terry. Appreciate your feedback. Small, random steps …
-
-
I was reading this particular One Note article where you pointed out feature by going to File->Options->Advance-> and look for particular option. Had it been the case that I could have right click on the Advance Option itself and printed to One Note and then could have found the option easily ;). BTW the option you mentioned “Insert Long Printouts…” is not available in Microsoft One Note 2010. and I tried printing your website to One Note then every image was automatically printed on single page, no separate pages. I am using it for the first time. I feel It is like a offline printer to me, i.e. when you don’t have a printer attached but still want to capture text, this option is best.
Queries | Comments | Suggestions | Wish list
OneNote for Windows 10 is a popular digital note-taking app that makes it easy and convenient to store and organize your notes. The app is equipped with several features that make it effortless to take notes, organize your notes, and even print them out when you need a physical copy.
Printing from OneNote for Windows 10 is a straightforward process that doesn’t require much effort or technical knowledge. The following steps will guide you through the process of printing from OneNote for Windows 10:
Step 1:
Open the OneNote app on your Windows 10 device.
Step 2:
Navigate to the page that you want to print. You can do this by clicking on the notebook section that contains the page you want to print or scrolling through your pages until you find the one you’re looking for.
Step 3:
After you’ve located the page you want to print, click on the “File” tab located in the top left corner of the app window.
Step 4:
Next, click on the “Print” option from the drop-down menu.
Step 5:
A dialogue box will appear, presenting you with several printing options. From here, you can select the printer you want to use, specify the number of copies you want to print, and choose the layout and orientation for your printed page.
Step 6:
If you want to print specific portions of the page, you can specify the pages or sections you want to print by selecting the “Pages” or “Sections” option in the dialogue box.
Step 7:
Once you’ve selected your printing options, click on the “Print” button to initiate the printing process.
Step 8:
Wait for the printing process to complete, then retrieve your printed copy from the printer.
Printing from OneNote for Windows 10 is a relatively straightforward process that doesn’t require much effort or technical knowledge. By following these simple steps, you can easily print your notes whenever you need a physical copy of your notes. OneNote for Windows 10 is a powerful tool for taking and keeping tabs on notes that you can access anytime, and with the ability to print right from the app, it becomes even more versatile.
For a long time, it’s been possible to ‘print’ from any program and put the result directly into OneNote desktop program. Now you can ‘print’ to the OneNote for Windows 10 app.
Once the ‘printed’ pages are in OneNote, they’ll get a text version added in the background.
You’ll need the separate Send to OneNote app plus, of course, OneNote for Windows 10 app.
This has been a notably missing feature from the OneNote app. It’s of limited use on a standard computer (desktop/laptop) but a welcome addition for Windows 10 tablets and phones.
How ‘Send to OneNote’ printing works
Once installed, you’ll find a new ‘printer’ on your list called ‘Send to OneNote’ which is the modern UWP app.

If you also have OneNote desktop on the same machine, there’ll also be a ‘Send to OneNote (desktop)’ or ‘Send to OneNote 2016’ printer as well.
Printing to OneNote
From any program or app with a print option choose Print as usual.
Select the ‘Send to OneNote’ printer and then print.
OneNote for Windows will appear (start, if necessary) and you can choose which notebook will save the printout.

The printout then appears in OneNote as a picture. One picture per page.
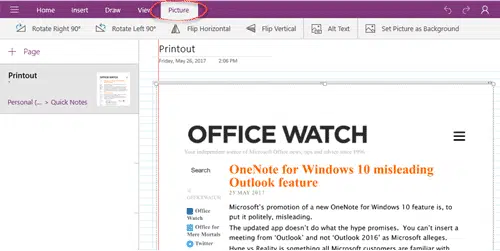
All the usual OneNote app picture tools are available.
Copy text from picture in OneNote
OneNote has a useful ‘Copy text from picture’ feature. It uses OCR (optical character recognition) to convert an image into text. The OCR isn’t perfect but it’s usually enough to make the picture searchable.
In most situations, you would not need ‘text from picture’ from a printout. Presumably you’d be able to copy the original text (from a document or web page).
When you first ‘print’ into OneNote, the alt text for each page/picture is blank.
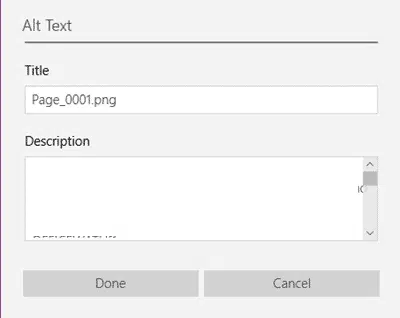
The current OneNote for Windows app does not support ‘copy text from picture’. The online service does have the option, also OneNote desktop.
We opened the same notebook in ‘OneNote Online’ and the OCR automatically did it’s thing. That work synced back to the OneNote app and the alt text changed to a version of the text.

It’s possible that the ‘text from image’ OCR would have happened without opening OneNote Online but, in our tests, nothing happened until we opened the browser based version of OneNote.
Quickly see which OneNote app you have on Windows
Understanding all the parts of OneNote
Immersive Reader returns to OneNote
OneNote can now sort pages!