
Пользователи Windows 11, 10 и других версий ОС могут столкнуться с кодом ошибки 0x80070017 при различных действиях: чистая установка системы, восстановление с использованием точек восстановления, установка обновлений. Причины ошибки обычно схожи.
В этой инструкции подробно о том, чем может быть вызвана ошибка 0x80070017 и подходах к решению проблемы.
Основные причины ошибки и методы исправления
Как было отмечено, ошибка с кодом 0x80070017 может возникать при различных действиях и иметь отличающиеся пояснения:
- «Нам не удалось создать новый раздел»,» Windows не удается скопировать файлы, необходимые для установки» или «Windows не удается установить необходимые файлы» при установке Windows.

- Восстановление системы не было успешно завершено с пояснением, как правило, касающимся невозможности скопировать какие-либо файлы или восстановить реестр.

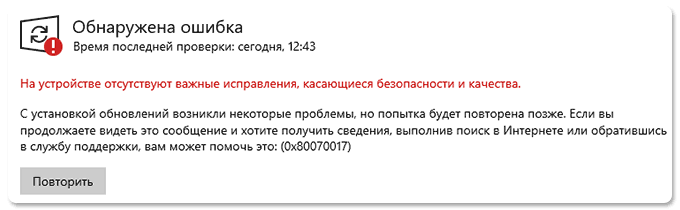
- При обновлении — обычно просто код ошибки и общее сообщение о том, что при установке некоторых обновлений возникли проблемы.


В большинстве случаев проблема заключается в одном из:
- Проблемы с жестким диском или SSD, его подключением, файловой системой на разделе. Иногда — проблемы с блоком питания (диск «отваливается» из-за просадок питания).
- Ошибки в файлах установки Windows, точек восстановления, обновления (иногда вызванные причинами из предыдущего пункта).
- Проблемы с накопителем, с которого производится установка Windows.
Отсюда следуют действия, которые можно предпринять для исправления ошибки 0x80070017.
При установке Windows
Если ошибка возникла при установке Windows 11/10, можно попробовать следующие подходы:
- Отключить все диски (даже если уверены в их работоспособности) кроме того, на который производится установка. Для SATA-накопителей можно также рекомендовать подключение другим кабелем SATA.
- Если установка производится без создания новых разделов, проверить имеющиеся с помощью chkdsk — нажать клавиши Shift+F10 в программе установки, использовать команды
diskpart
list volume
exit
чтобы просмотреть буквы разделов (при установке они могут отличаться от привычных), после чего использовать команду (пример для буквы C: )
chkdsk C: /f
для проверки диска на ошибки и исправления ошибок.
- Запись образа (лучше — оригинального) на другой установочный накопитель, другой программой. Из рекомендуемых: Rufus и Ventoy.
- По наличии нескольких физических дисков проверить, возникают ли ошибки при установке на другой физический диск. Так же, как и в 1-м пункте при рассматриваемой ошибке рекомендую оставлять подключенным единственный локальный накопитель, так как проблемы в работе любого из дисков могут приводить к рассматриваемой ошибке (даже если система устанавливается не на него).
Даже если вы уверены в «проверенности» образа, флешки, дисков и их подключении и уже не раз устанавливали ОС с их использованием, эта уверенность не отменяет факта, что причина ошибки вероятнее всего в чём-то из перечисленного.
Ошибка восстановления системы
Ошибка 0x80070017 в процессе восстановления системы обычно говорит о том, что по какой-то причине не удалось прочитать файлы из точки восстановления либо записать их. Варианты решения:
- Проверить файловую систему и исправить ошибки на системном разделе диска с помощью команды
chkdsk C: /f
- Попробовать использовать точки восстановления системы из среды восстановления Windows или с WinPE.
- При наличии — проверить, сработают ли другие точки восстановления.
В случае, если ни один из вариантов не сработал, вероятнее всего, от использования точек восстановления придётся отказаться. Дополнительные варианты действий (зависит от ситуации): Восстановление системных файлов, Обновление на месте.
При обновлении
Та же ошибка при обновлении обычно исправляется без каких-либо проблем: как правило, достаточно очистить кэш обновлений, скачать их заново и установить. Подробно по вариантам решения:
- Запустить командную строку от имени администратора и по порядку выполнить команды
net stop wuauserv
net stop cryptSvc
net stop bits
net stop msiserver
ren C:\Windows\System32\catroot2 catroot2.old
ren C:\Windows\SoftwareDistribution SoftwareDistribution.old
net start cryptSvc
net start bits
net start msiserver
net start wuauserv
после чего обязательно перезагрузить компьютер и попробовать выполнить установку обновлений повторно.
- Если 1-й пункт не помог, попробовать выполнить сброс всех компонентов Центра обновления.
- Аналогично первым двум сценариям выполнить проверку системного раздела диска с помощью
chkdsk C: /f
Надеюсь, один из предложенных методов поможет исправить ошибку 0x80070017, и проблема будет решена. Если нет, опишите ситуацию детально в комментариях ниже, я постараюсь помочь.
Issue: I have problems upgrading to Windows 10 V1703 via Windows Update. The process keeps crashing, so I created a bootable USB drive. Sadly, but the drive fails to run the update either as it gets stuck with the error “There was a problem running this tool.” Have you any ideas what could be the culprit and how can I solve it?
Solved Answer
If you want to upgrade Windows 10 or repair the operating system errors using Windows Media Creation Tool because other methods did not work, you may be negatively surprised by “There was a problem running this tool” error message, which prevents the tool from being loaded. In this case, the PC’s or laptop’s owner may start feeling trapped since they can neither fix errors nor upgrade the system.
Usually, the “There was a problem running this tool” error bears an error code, for example, 0x8007005-0x9002, 800704DD – 0x90016 or 0x80070015. The code may differ according to the culprit of the problem, but, in most of the cases, the same fixes can be applied to all of them.
Usually, the “There was a problem running this tool” error accompanied by an error code 0x80070015 occurs when the PC’s owner attempts to create the Media Creation Tool for Windows 10 (both Anniversary and Creators updates) or run the Media Creation Tool to restore/upgrade the system.

There may be many diverse reasons why the bug occurs, for example, disabled processes, incorrect language settings, OS and antivirus conflict or wrong registry entries. Therefore, try to fix “There was a problem running this tool” error by following the methods given below one-by-one.
Method 1. Run Media Creation Tool as administrator
If you encounter the error when running the Media Creation Tool, the most primitive solution for “There was a problem running this tool” error would be to run the tool as administrator.
- Once you plug-in the bootable USB drive with the Media Creation Tool, right-click its icon.
- From the context menu select Run as administrator.

Method 2. Enable required services
Fix it now!
To repair damaged system, you will have a 24hr Free Trial and the ability to purchase the licensed version of the Fortect.
You may encounter the “There was a problem running this tool” error code 0x80070015 if several required services are disabled. Therefore, before creating or running the Media Creation Tool, check the status of the following processes:
- Press Windows key + R, type services.msc, and hit Enter.
- On the list of services, find the services listed below and check their status. The Startup Type of them all should be set to Automatic.
Windows Update
Background Intelligent Transfer Service
Server
Workstation
TCP/IP NetBIOS Helper
IKE and AuthIP IPsec Keying Modules

- If any of them are set to Manual, right-click on it, and select Start.
- Then set Startup Type to Automatic and close Services window.
Method 3. Check language settings
Windows Media Creation Tool problems like “There was a problem running this tool” error may happen if the locate of your system and the language of the downloaded Windows 10 setup file do not match. The easiest way would be to set your PC’s or laptop’s language to English:
- Open Control Panel and select Clock, Language, and Region.
- Under Region section, click the Change date, time, or number format.

- Open Administrative tab and select Change system locale.
- Set Locale to English and press OK.
- Go back to the Administrative tab and navigate to Copy settings.
- Mark the Welcome screen and system accounts and New user accounts (if not marked) check boxes.

- Click Apply and OK to save the changes.
- After that, reboot the system.
Method 4. Run Registry Editor
Fix it now!
To repair damaged system, you will have a 24hr Free Trial and the ability to purchase the licensed version of the Fortect.
If none of the previous methods helped, you may need to modify registries. Be very careful because inaccurate removal or modification of the wrong key may cause serious damage to the OS. To prevent problems from happening, we would strongly recommend creating a backup for Windows Registry and we’ll explain how to do that down below:
- Press Windows key + R, type regedit and hit Enter.
- Click File at the top of the window and select Export.
- Select the location on the left pane.
- Type the name of the backup in the File Name field and click Export.
- When the backup is ready, navigate to the DDHKEY_LOCAL_MACHINE\\SOFTWARE\\Microsoft\\Windows\\Current Version\\WindowsUpdate\\OSUpgrade key using the left pane.

- Right-click on the empty space and select New -> DWORD.
- Name it AllowOSUpgrade and set its value to 1.
- Close Registry Editor and restart the PC.
Method 5. Disable your antivirus
If software runs into conflict with the antivirus tool, various problems, including “There was a problem running this tool” error, can occur and distort the performance of OS. Therefore, if none of the methods above helped you to resolve the Media Creation Tool bug, we would recommend disabling your antivirus temporarily. To do so, click Ctrl + Alt + Delete to open Task Manager. Find the process of your antivirus, click on it, and select End Task. The find its icon on the taskbar, right-click it, and select Disable.
Repair your Errors automatically
ugetfix.com team is trying to do its best to help users find the best solutions for eliminating their errors. If you don’t want to struggle with manual repair techniques, please use the automatic software. All recommended products have been tested and approved by our professionals. Tools that you can use to fix your error are listed bellow:
do it now!
Download Fix
Happiness
Guarantee
Compatible with Microsoft Windows
Still having problems?
If you failed to fix your error using Fortect, reach our support team for help. Please, let us know all details that you think we should know about your problem.
Fortect will diagnose your damaged PC. It will scan all System Files that have been damaged by security threats. To repair damaged system, you will have a 24hr Free Trial and the ability to purchase the licensed version of the Fortect malware removal tool.
Protect your online privacy with a VPN client
A VPN is crucial when it comes to user privacy. Online trackers such as cookies can not only be used by social media platforms and other websites but also your Internet Service Provider and the government. Even if you apply the most secure settings via your web browser, you can still be tracked via apps that are connected to the internet. Besides, privacy-focused browsers like Tor is are not an optimal choice due to diminished connection speeds. The best solution for your ultimate privacy is Private Internet Access – be anonymous and secure online.
Data recovery tools can prevent permanent file loss
Data recovery software is one of the options that could help you recover your files. Once you delete a file, it does not vanish into thin air – it remains on your system as long as no new data is written on top of it. Data Recovery Pro is recovery software that searchers for working copies of deleted files within your hard drive. By using the tool, you can prevent loss of valuable documents, school work, personal pictures, and other crucial files.
The media creation tool serves a prominent function as it lets you download a Windows 11 or 10 installation file to a flash drive (or DVD) which can be used later in reinstalling the same. This backup option is critical if something goes wrong with your computer and can throw an error 0x8007043C-0x90018. Furthermore, having a physical copy of the operating system is advantageous.
However, despite how beneficial this tool may sound it’s prone to errors like the recent ones with the code 0x8007043C-0x90018. For a user, it may become irritating to witness such an error code, so we have found some ways to resolve this issue which this post will deal with. See – Fix: Error 0xa0000400 Media Creation Tool or Update Assistant Windows 10.
Media Creation Tool Error code 0x8007043C-0x90018 in Windows 11 or 10
Here is how to fix Media Creation Tool Error code 0x8007043C-0x90018 in Windows 11 or 10 –
Way-1: Create AllowOSUpgrade Registry key
The registry database can be crucial in resolving the error code 0x8007043C-0x90018 as you’ll see an OSUpgrade key associated with the latest Windows update there. For Media Creation Tool OR MCT to function and perform the necessary upgrades, you must first set up an “AllowOSUpgrade” entry.
- Click the search icon in the taskbar
- Type – regedit.exe.
- Press Enter.
- If the User Account Control interface appears, click the Yes option to continue.
- Follow the path indicated. You may copy and paste this path straight into the address bar, then press Enter to open it.
Computer\HKEY_LOCAL_MACHINE\SOFTWARE\Microsoft\Windows\CurrentVersion\WindowsUpdate\OSUpgrade- Right click on WindowsUpdate.
- Select New followed by Key.
- Name this entry OSUpgrade.
- Now, go to the right pane and right click on an empty space.
- Select New => DWORD (32-bit) Value.
- Rename the newly created value to AllowOSUpgrade.
- To open the newly generated value, double-click it. Then, replace the data value with 1.
- Click OK to save the modification.
- Then, Restart the PC.
Way-2: Turn on the Services related to Windows update
If Media Creation Tool doesn’t work and is continuously showing 0x8007043C-0x90018 error, you should check if the Windows update services are turned on or not.
You might have accidentally turned off one or more of the services like TCP/IP, NetBIOS Helper, Background Intelligent Transfer Service (BITS), Server, Workstation, Windows Update or IKE, and AuthIP IPsec Keying Modules.
The Windows 10/11 Media Creation Tool is affected by any of these aforementioned services’ status. To rectify it, follow the below-mentioned steps:
- To open Run, press Windows + R.
- Type services.msc and hit Enter.
- Look for Background Intelligent Transfer Service (BITS) and right-click on it.
- From the context menu, select Properties.
- Click the Start button in the Properties dialog. If the service is currently running, you can restart it. For this click on Stop and then on Start.
- Select Automatic as the Startup type.
- Follow the same procedure for the other services like TCP/IP, NetBIOS Helper, Background Intelligent Transfer Service (BITS), Server, Workstation, Windows Update or IKE, and AuthIP IPsec Keying Modules.
- Close the Services window and verify if you can now use the Media Creation tool without any problems.
Most of the time this way proves to be useful and helps in termination of the such error, however, if you still witness it, try following the next way.
Way-3: Run MCT as Administrator
Running Windows as an administrator gives you the authority to make system-wide modifications and provides you complete control over the system.
Furthermore, it allows making changes to any aspect including security, software, hardware, user accounts, and file access. To fix 0x8007043C-0x90018 this issue, follow these steps:
- Right-click on Media Creation Tool (such as MediaCreationTool22H2.exe).
- Then, choose from the drop-down list to Run as administrator.
- If the User Account Control dialog box appears, you must click the Yes option to proceed.
See – How to Fix Media Creation Tool Won’t Open in Windows 10.
Way-4: Maintain Enough Space in your PC
To resolve the error code 0x8007043C-0x90018 you would need to allocate at least 8 GB of free space for the Media Creation Tool on the C drive.
You may use File Explorer to see if there is enough room. If not, you can free up space on the concerned disc by deleting irrelevant files. Additionally, you can run Disk Cleanup to arrange additional space.
- Click Start.
- Type cleanmgr and press Enter.
- Select (C:) from the drop-down and click on OK.
- On the next window, click on Clean up system files.
- Again, choose the same disk and click on OK.
- When the Disk Cleanup for (C:) window appears, click on OK.
- Select Yes on the verification prompt.
Way-5: Delete and Redownload the Media Creation Tool
Media Creation Tool does not work problem can be rescued by removing and redownloading the same setup file. Because this is the easiest approach to address the issue of 0x8007043C-0x90018, ensure that your concerned download is complete.
Way-6: Ensure that pending updates are installed
Keeping Windows up-to-date is essential. The most recent upgrades include new features and ensure that your computer and its apps remain compatible. The majority of updates also include security patches and bug fixes, allowing you to eliminate Windows difficulties with no effort.
If your version of Windows is out-of-date, you may experience troubles with the Media Creation tool that might show error codes like 0x8007043C-0x90018. Follow the procedures below to install the most recent Windows updates –
- Right click on Start and select Settings.
- Select Windows Update from the menu on the left.
- Click the check for Updates on the window’s right side.
- The system will check for available updates and alert you if any are found. Install any pending updates individually if any are found.
Way-7: Use Rufus to create bootable media
Encountering 0x8007043C-0x90018 is not a problem when you use an alternative like Rufus to create bootable media. Even this tool will remove the system requirements restrictions imposed for Windows 11 like TPM and Secure Boot hence go ahead with it –
- Follow How to Use Rufus to Install Windows 10.
- Then plug in the USB and power on the computer.
- Select the peripheral in Boot device option.
- Go with the instructions on setup and complete installation.
We are certain that any of the 7 ways presented should be effective in repairing the Media Creation Tool error code 0x8007043C-0x90018 on Windows 11 or 10.
Methods:
Way-1: Create AllowOSUpgrade Registry key
Way-2: Turn on the Services related to Windows update
Way-3: Run MCT as Administrator
Way-4: Maintain Enough Space in your PC
Way-5: Delete and Redownload the Media Creation Tool
Way-6: Ensure that pending updates are installed
Way-7: Use Rufus to create bootable media
That’s all!!
Ошибка 0x80072f8f 0x20000 появляется при двух распространенных ситуациях. Первая из них – при обновлении с Windows 7 до более свежей версии или просто при установке Windows 10. Вторая частая ситуация заключается в появлении ошибки при запуске Media Creation Tool. Причины появления, как и особенности проявления в каждой них, будут разными. Но есть и хорошая новость, она заключается в том, что есть довольно четкое представление об ошибке и эффективное решение к каждой вариации проблемы.

Почему появляется ошибка 0x80072f8f 0x20000?
Нам придется разделять две ситуации появления ошибки. Хотя они и имеют идентичный код, но во всем остальном сильно отличаются. Основная причина сбой с кодом 0x80072f8f 0x20000 при установке Windows 10 – отсутствие поддержки протоколов безопасности TLS. В Windows 7 Service Pack 1 по умолчанию включена поддержка только TLS 1.0. Сейчас же сервера Microsoft более не поддерживают столь устаревший стандарт. Требуется версия TLS 1.1 и TLS 1.2, которые по умолчанию отключены в старой операционной системе Windows 7. Их включение должно исправить проблему.
Если ошибка появляется при обновлении Windows, в основном через официальную утилиту Media Creation Tool, то проблема в некорректных файлах обновления. Видимо, система пыталась загрузить файлы для апдейта, но они оказались поврежденными. Нужно принудительно удалить их.
Как исправить ошибку 0x80072f8f 0x20000 при установке Windows 10?
Как мы и писали, нам нужно заставить Windows 7 работать с TLS 1.1 и TLS 1.2. Это вполне реально сделать, если подкорректировать реестр операционной системы. Можно запустить Windows в безопасном режиме и сделать необходимые изменения. Это можно сделать вручную, но есть и более быстрый способ – запустить файл. Нам нужен один из файлов Microsoft, вот ссылка. Скачиваем его, запускаем и через пару секунд исправления должны быть внесены. Можно перезагружать ПК и снова пытаться установить Windows 10.
Что нужно сделать вручную:
- Нажимаем комбинацию Win + R, вводим regedit и нажимаем Enter.
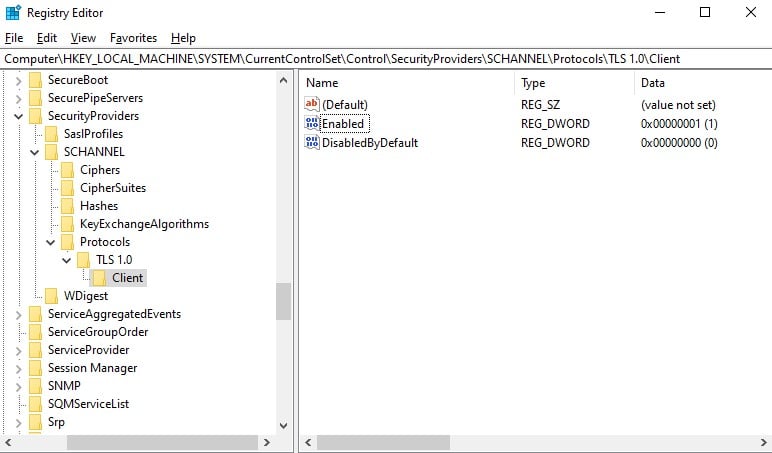
- Идем по пути HKEY_LOCAL_MACHINE\SYSTEM\CurrentControlSet\Control\SecurityProviders\SCHANNEL\Protocols\TLS 1.1\Client.
- Изменяем значение параметра DisabledByDefault на 0 (если его нет, то просто создаем его).
- Переходим в ветку HKEY_LOCAL_MACHINE\SYSTEM\CurrentControlSet\Control\SecurityProviders\SCHANNEL\Protocols\TLS 1.2\Client.
- Тоже создаем или изменяем существующий параметр DisabledByDefault в значение 0.
Важно! Есть еще один интересный способ – запустить установку через ISO. Для этого нужно войти на сайт Microsoft с клиентом Windows и скачать его. Обязательно следует использовать для этого телефон. Затем передаем файл на ПК и запускаем его. У многих такое решение сработало.
Как исправить ошибку при обновлении через Media Creation Tool?
Для решения проблемы нужно зачистить файлы в одной из важных директорий, а также запустить обновление другим способом.
Пошаговая инструкция:
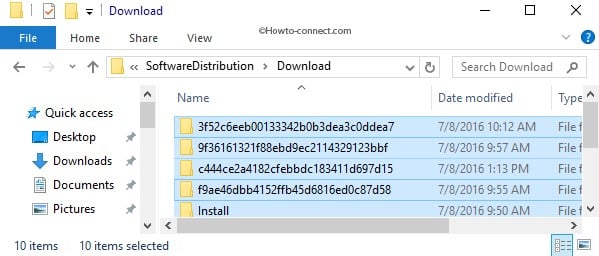
- Переходим по пути C:\Windows\SoftwareDistribution\Download.
- Удаляем все файлы, которые хранятся в этой папке.
- Кликаем правой кнопкой мыши по Пуску и выбираем «Командная строка (администратор).
- Вводим команду wuauclt.exe /updatenow.
Теперь вы знаете, что делать, если появляется ошибка 0x80072f8f 0x20000 при разных обстоятельствах. Включение поддержки TLS 1.1 и новее поможет успешно завершить установку операционной системы, а очистка файлов и обновление через консоль избавит от неполадки при апдейте Windows.
Будем рады увидеть ваши комментарии в отношении данной ошибки. Давайте вместе сделаем статью максимально полной.
Приветствую всех читателей моего блога! Сегодня я решил поделиться историей, которая, я уверен, окажется полезной для многих. Кто-то из вас, возможно, сталкивался с ситуацией, когда Media Creation Tool в Windows 10 не запускается. Именно такая проблема возникла у меня на днях. Сегодня я расскажу, как я с ней боролся.
Начало начал…
Однажды утром, планируя обновить свою версию Windows, я решил использовать Media Creation Tool. Но, увы, при попытке запустить программу, она лишь мельком показалась на экране и исчезла. Мое удивление не имело границ!
Шаг 1: Перезагрузка — наш верный друг
Первое, что приходит на ум в таких случаях — это перезагрузить компьютер. Это часто помогает. Но, к моему удивлению, в этот раз перезагрузка не дала результата.
Шаг 2: Запуск от имени администратора
Я подумал, что, возможно, программа требует прав администратора. Я кликнул правой кнопкой мыши по иконке Media Creation Tool и выбрал «Запустить от имени администратора«. Но и это не помогло.
Шаг 3: Проверка на наличие обновлений
Иногда проблема может заключаться в устаревшей версии программы или операционной системы. Я проверил обновления Windows и удостоверился, что все из них установлены.
Шаг 4: Установка заново
Подумав немного, я решил удалить Media Creation Tool и установить ее заново. Возможно, какие-то файлы были повреждены или утеряны. После переустановки, к моему восторгу, программа запустилась!
Шаг 5: Временное отключение антивируса
В процессе решения проблемы я также решил временно отключить свой антивирус. Иногда он может конфликтовать с некоторыми программами. Хотя в моем случае это не дало результатов, это может помочь в аналогичных ситуациях.
Эпилог: Проблема решена!
Через некоторое время и ряд попыток мне удалось решить проблему с Media Creation Tool. Этот опыт напомнил мне о том, что даже казалось бы незначительные проблемы требуют внимания и терпения.
Заключение
Друзья, если вы сталкиваетесь с проблемами в работе программ или компьютера, не отчаивайтесь! Шаг за шагом, методом проб и ошибок, вы найдете решение. Надеюсь, моя история поможет кому-то из вас в будущем.
Спасибо за внимание! И до новых встреч на страницах моего блога!