
После того как было принято решение перевести домашние компьютеры на операционную систему Windows 10 обновив предыдущую Windows 8.1. я был неприятно удивлен, когда одна машина напрочь отказывалась обновляться до Windows 10, в процессе обновления получал ошибку 0xc0000017.
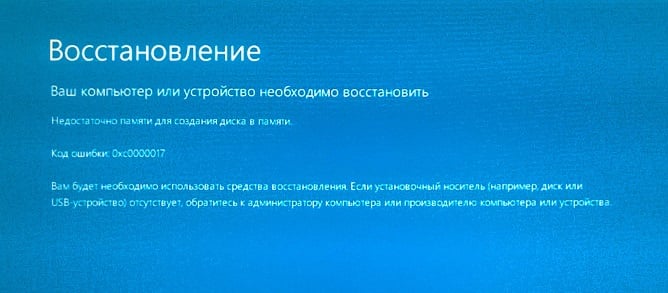
Первоначально я пытался установить обновление Windows, несколько раз, все попытки были неудачны. Сообщение об ошибке появлялось каждый раз, подумав, что проблема с моим подключением к интернету я прервал загрузку, но это казалось маловероятным. После многочисленных попыток, я решил обновиться с помощью USB-накопителя. Записав образ системы на флешку, с помощью MediaCreationTool, повторил операцию. Это тоже не помогло, но на этот раз с ошибкой 0xc0000017: «Недостаточно памяти, для создания диска в памяти устройства».
К счастью, эта проблема с ошибкой 0xc0000017 может быть решена — вот то, что вы должны сделать.
Есть много совершенно бессмысленных решений — от отключения антивируса и периферийных устройств, встроенной графики. Ни один из них не являются правильным. Проблема связана с областями памяти, которые имеют ошибки, это мешает установщику Windows 10, создать в памяти устройства временное хранилище для данных. Вполне возможно, есть вероятность, что вы можете просто проигнорировать проблему и обновится до Windows 10 – но это не работало в моем случае.
Решение поставляется в виде данных конфигурации загрузки (BCD) Windows.
Используйте следующие шаги:
- Запустите Командную строку от имени Администратора.
- В командной строке наберите:
bcdedit /enum all
и нажмите клавишу Enter.

- Вы увидите список всех ячеек памяти, которые содержат ошибки.
Список плохих ячеек памяти необходимо удалить, выполните команду:
bcdedit /deletevalue {badmemory} badmemorylist
и нажмите Enter.
- Закройте окно командной строки и перезагрузите компьютер.
Теперь вы можете запустить установку Windows 10 еще раз, вы избавитесь от проблемы.
Ошибка 0xc0000017 является довольно неприятной проблемой, которая может возникнуть во время чрезвычайно деликатного процесса — обновления до Windows 10. Перед вами возникает синий экран, на скриншот которого можно посмотреть чуть ниже.
Исходя из сообщения, можно было бы предположить, что на вашем диске просто не хватает места для проведения обновления до новой версии операционной системы от Майкрософт. Однако, так может показаться только с первого взгляда. Причина ошибки 0xc0000017 заключается в некорректно работающей оперативной памяти, которая установлена в систему.
К счастью, компания Майкрософт давно уже знает об этой проблеме, и она предложила пользователям пару способов, которые, в теории, могут помочь избавить их ошибки 0xc0000017. Тем не менее, как стало понятно, эти способы довольно редко могут разрешить проблему, но мы все равно включим их в эту статью.
Ошибка 0xc0000017 при установке Windows 10
Так как же все-таки избавиться от такой неприятной проблемы, как код ошибки 0xc0000017? Ну, давайте для начала взглянем на способы, который были предложены самими разработчиками, т.е. Майкрософт. Вот что ими было предложено:
- Отключение периферии. Подключенные к вашему компьютеру периферийные устройства и их драйверы имеют все шансы вызвать конфликт во время перехода на новую операционную систему Windows 10. Попробуйте отключить все ненужное от вашего компьютера, например, геймпад, USB-колонки, камеру, микрофон и прочее, а затем снова попытайтесь установить Windows 10. Пользователи отмечают, что такой шаг помогает крайне редко, но все же порой срабатывает.
- Отключение антивирусного ПО. Майкрософт советует при возникновении ошибки 0xc0000017 отключить установленный у вас в системе антивирус, так как он может вступать в конфликт с файлами обновления, необходимыми для перехода на Windows 10. Соответственно, если у вас сторонний антивирус — отключите через его настройки, а если стороннего нет — нужно отключить Защитник Windows. Про антивирусное ПО от сторонних разработчиков мы рассказать ничего не можем, но вот показать как отключить активную защиту от вирусов и прочих угроз Защитника Windows — это запросто. Чтобы отключить защиту системного антивируса, сделайте следующее: Win+S→Центр безопасности Защитника Windows→Защита от вирусов и угроз→Параметры защиты от вирусов и других угроз→Откл. Как только отключите Защитник Windows, снова попробуйте выполнить переход на Windows 10 и проверьте, будет ли присутствовать ошибка 0xc0000017.
Попробуйте все вышеописанное, чтобы разрешить проблему при обновлении до Windows 10. Если ничего из этого не сработало, то, вероятно, за ошибкой 0xc0000017 стоит все же ваша оперативная память. Тут мы и подошли к самой главной части статьи, в которой мы будем проверять ОЗУ, а также пытаться устранить с ней проблемы, если таковые имеются.
Проверка оперативной памяти
Проверку ОЗУ мы будем проводить с помощью Командной строки. Добраться до нее чрезвычайно просто в любой версии операционной системы Windows. Просто нажмите Windows+X и выберите из контекстного меню пункт «Командная строка(администратор)». Если же вы переходите от Windows 7 к Windows 10, то у вас Командная строка располагается немного в ином месте: Все программы→Стандартные.
Как только вы откроете перед собой консоль системы, пропишите в нее команду bcdedit /enum all и нажмите Enter. В консоли появится огромный список, который представляет собой данные о конфигурации загрузки ОС. Вам нужно спуститься по списку до раздела «Дефекты ОЗУ».
Вы сразу же поймете, если с вашей оперативной памятью действительно что-то не так: большой список с проблемными ячейками памяти и куча цифро-буквенных кодов, к примеру, начинающихся с 0xbc, 0xbd или 0xbe. Однако, положение с оперативкой еще можно исправить: впишите в консоль команду bcdedit /deletevalue {badmemory} badmemorylist и нажмите на Enter.
Как только процедура будет завершена, выполните перезагрузку своего ПК, после чего войдите в систему и попытайтесь снова обновиться до Windows 10. Если повезет — никакой ошибки с кодом 0xc0000017 на вашем пути не встанет. Однако, если же она возникла, то мы рекомендуем провести более тщательную проверку с помощью Memtest86+.
5 Ways to Fix Error Code 0xc0000017 in Windows 10
One common issue of Windows 10 upgrade/update is «There isn’t enough memory available to create a ramdisk device» (error code 0xc0000017). A fresh install is undesirable. Therefore, check the workaround in the following content, and fix Windows 10 upgrade error 0xc0000017 during installation by yourself.
| Workable Solutions | Step-by-step Troubleshooting |
|---|---|
| Fix 1. Copy System Files to Config | Download and install WinPE. Enter Windows Preinstallation Environment…Full steps |
| Fix 2. Clean Up Bad Memory Entries | Since the computer is unbootable, you need the help of the recovery drive…Full steps |
| Fix 3. Disconnect External Devices | Disconnect the external devices. Reboot your computer and check…Full steps |
| Fix 4. Update Motherboard Drivers | Download the professional software: EaseUS DriverHandy to scan and update Motherboard drivers…Full steps |
| Fix 5. Disable Hybrid Graphics | Press the power button to turn off the workstation. Press the power button again to turn on…Full steps |
Overview — What Is Error Code 0xc0000017
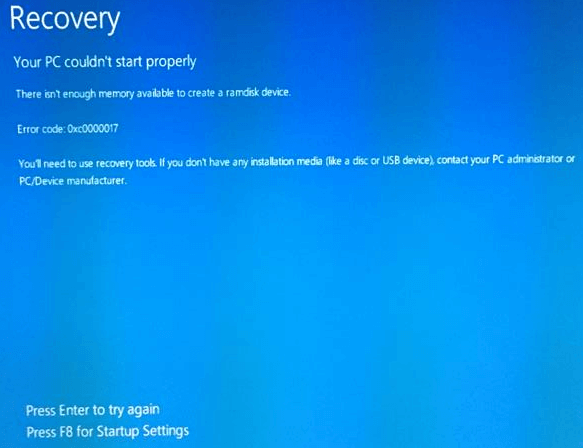
Error code 0xc0000017 stands for STATUS_NO_MEMORY – There are not enough virtual memory or swap file quotas for the specified operation. This error occurs if Windows 10 (or Windows 8.1) is rebooting after installing an update. A blue screen appears with the following message:
- Your PC/Device needs to be repaired.
- There isn’t enough memory available to create a ramdisk device.
- Error code: 0xc0000017
- You’ll need to use recovery tools. If you don’t have any installation media (like a disc or USB device), contact your PC administrator or PC/Device manufacturer.
Also Read: How to Fix Error Code 0x80070002 in Windows Update
Scene — Not Enough Memory Available to Create a Ramdisk Device
«Trying to upgrade via Windows Update, and was asked to reboot the computer and then start the upgrade. Did as told. While during the rebooting process, whoops, error 0xc0000017 occurred, displaying a message ‘There isn’t enough memory available to create a ramdisk device’. In fact, the computer’s hard drive has ENOUGH unused disk space available. How to fix the error and finish Windows 10 upgrade?»
Even with plenty of RAM unused, you’re still likely to get stuck in Windows 10 upgrade due to insufficient hard drive memory. To put it more accurately, not enough CONTIGUOUS space. What does the error code 0xc0000017 imply then? The problem stems from areas of memory having been marked as bad by Windows built-in Boot Configuration Data (BCD), and this interferes with the Windows 10 installer’s ability to make use of RAM as a temporary store for data. Since this is not a practical memory issue, it can be easily resolved by doing as follows.
Read Also: Blue Screen of Death Error 0x000000C5
Resolution — How to Fix Error Code 0xc0000017 (5 Ways)
Here, you are going to learn five ways to fix error code 0xc0000017 due to insufficient RAM, the conflicts of external devices, bad memory blocks, and more. Read on to get more details.
?Note: After fixing the error, you can try to manage your hard drive memory with Techradar-Recommended software.
Fix 1. Fix Error 0xc0000017 by Copying System Files
You could be faced with this error if your system files are lost. If you want to fix error code 0xc0000017, follow the steps below.
Step 1. Download and install WinPE.
Step 2. Enter Windows Preinstallation Environment and navigate to C:\Windows\System32\config\RegBack.
Step 3. Copy the backed up system file to config, then you can boot normally.
Fix 2. Clean Up Bad Memory Entries to Fix Error Code 0xc0000017
Error code 0xc0000017 means not enough memory available to create a ramdisk device. Therefore, you can fix the error code 0xc0000017 in Windows 10 by cleaning up bad memory entries.
Step 1. Because the computer is unbootable, you need the help of a Windows 10 recovery drive or Windows 10 installation disk.
Step 2. Connect the installation disk to your computer.
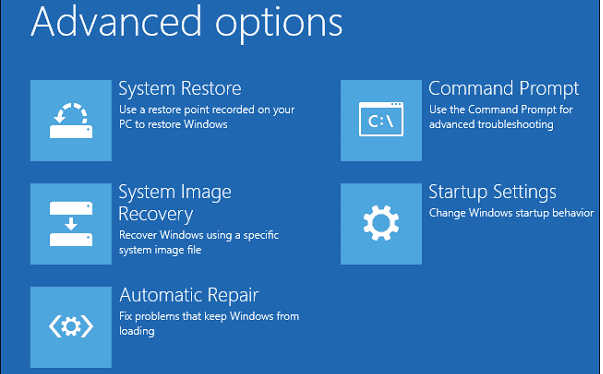
Step 3. Then click «Troubleshoot > Advanced options > Command Prompt» to continue.
Step 4. Type bcdedit /enum all and press «Enter». A list of all memory locations labeled as «bad» will appear. This list can be removed or deleted.
Step 5. Type bcdedit /deletevalue {badmemory} badmemorylist and hit «Enter».
Then you can exit and restart your PC and perform the update.
Fix 3. Disconnect External Devices to Fix 0xc0000017 Error
Another easy and quick way to fix error 0xc0000017 is to disconnect external devices. The error code 0xc0000017 may be caused by the conflict of the external devices.
Step 1. Disconnect the external devices.
Step 2. Reboot your computer and check if you have solved the error
Fix 4. Update Motherboard Drivers to Fix 0xc0000017 Error
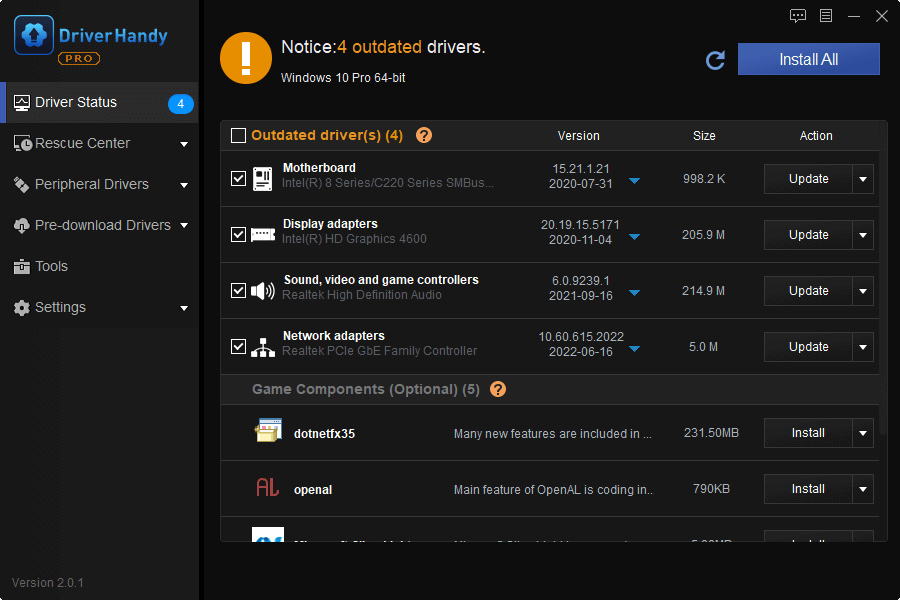
Last but not least, you can update motherboard drivers. You can be faced with a 0xc0000017 error if your driver is outdated. You also need a recovery drive or WinPE USB because your computer cannot boot. You can use EaseUS DriverHandy to automatically scan for outdated drivers and update them.
Then, follow the steps below to update the motherboard drivers.
Step 1. Open EaseUS DriverHandy and click «Scan».
Step 2. Choose the outdated motherboard drivers and click «Update».
Fix 5. Disable Hybrid Graphics If Error 0xc0000017 Occurs
Hybrid graphics is a concept involving two graphics cards on the same computer. It has been developed to support both high performance and power saving use cases. Some users say they solved error 0xc0000017 after disabling hybrid graphics.
Step 1. Press the power button to turn off the workstation.
Step 2. Press the power button again to turn on the workstation, and then repeatedly press the ESC key to enter the Startup Menu.
Step 3. From the Startup Menu, press the F10 key to enter the BIOS setup utility.
Step 4. Click «Advanced > Device Configurations > Hybrid Graphics», and then click «Disable».
Step 5. Click «Save > Save changes» and exit BIOS.

Conclusion
This post has introduced 5 ways to fix error code 0xc0000017. You can try any one of them to fix the error. If you want to partition a hard drive or change the file system, you can always run EaseUS Partition Master.
Error Code 0xc0000017 Related Questions
If you still have problems, you can read these questions and answers.
How do I fix error code 0xc0000017?
To fix 0xc0000017:
- Fix 1. Fix Error 0xc0000017 by Copying System Files
- Fix 2. Clean Up Bad Memory Entries
- Fix 3. Disconnect External Devices
- Fix 4. Update Motherboard Drivers
- Fix 5. Disable Hybrid Graphics
What is error 0x8007139f?
Windows Update error 0x8007139f usually appears after some failed Windows updates or bugs during the update downloading/installing process. Such a problem might also occur because there are some corrupted system components or software that have been provoking the error code to appear on your computer screen.
How do I fix error code 0x8007139f?
To fix Windows update error:
- Check your antivirus
- Run Windows Update troubleshooter
- Run SFC and DISM scans
- Create a new user account
- Reset Windows Update components
- Perform a System Restore
- Try to install the update manually
- Perform an in-place upgrade
What is error code 0xc00000e9?
Windows error code 0xc00000e9 is a common Windows Boot Manager error that indicates either a hardware failure or a corrupted system file encountered during the boot process.
Readers help support Windows Report. We may get a commission if you buy through our links.
Read our disclosure page to find out how can you help Windows Report sustain the editorial team. Read more
You finally decided to upgrade to Windows 10 and, suddenly, as the blast from the sky, an error occurs. For example, the error with the code 0xc0000017.
This is a usual error that many users run into while upgrading to Windows 10. For that purpose, we enlisted some solutions that should help you resolve the issue at hand.
If you’ve had a hard time with the upgrading, make sure to check the steps below.
But before you do, make sure your computer is compatible with the latest major update for Windows 10, because some users have already reported some incompatibility problems with older hardware.
How can I resolve the Windows 10 upgrade error 0xc0000017?
Table of contents:
- Run DISM
- Delete the Boot Configuration bad memory
- Run the Update troubleshooter
- Run the SFC scan
- Reset Windows Update components
- Make sure the Windows Update service is running
- Make sure the BITS service is running
- Change DNS settings
- Perform a clean installation
Fix – Upgrade error 0xc0000017 in Windows 10
Solution 1 – Run DISM
The first thing you can do is to run the Deployment Image Servicing and Management tool.
Namely, this advanced troubleshooting tool is basically a built-in command in the elevated command prompt.
With it, you can scan and repair corrupted or incomplete system files.
In addition, you can use DISM in various scenarios and various ways, including the usage of the installation media as a source.
We’ll walk you through both standard and the procedure that utilizes the installation media below:
- Standard way
- Right-click Start and open Command Prompt (Admin).
- Paste the following command and press Enter:
-
- DISM /Online /Cleanup-Image /RestoreHealth

- DISM /Online /Cleanup-Image /RestoreHealth
-
- Wait until the scan is finished.
- Restart your computer and try updating again.

- With the Windows installation media
- Insert your Windows installation media.
- Right-click the Start menu and, from the menu, choose the Command Prompt (Admin).
- In the command line, type the following commands and press Enter after each:
- dism /online /cleanup-image /scanhealth
- dism /online /cleanup-image /restorehealth
- Now, type the following command and press Enter:
- DISM /Online /Cleanup-Image /RestoreHealth /source:WIM:X:SourcesInstall.wim:1 /LimitAccess
- Make sure to change an X value with the letter of the mounted drive with Windows 10 installation.
- After the procedure is finished, restart your computer.
Solution 2 – Delete the Boot Configuration bad memory
However, there’s a probability that an unusual culprit is behind this. Namely, a bad memory list that can be deleted is preventing you from upgrading.
Luckily, Boot Configuration Data can be cleared of those bad sectors so you can easily get back in the saddle.
Follow the instructions below to clear bad memory sectors and resolve the issue:
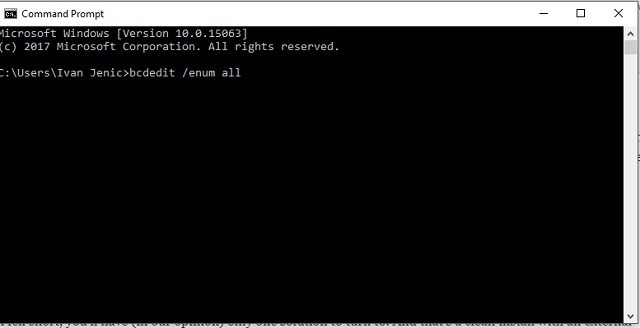
- Right-click the Start menu and run Command Prompt (Admin).
- In the command line, type the following commands and press Enter after each:
- bcdedit /enum all
If this solution fell short, you’ll have (in our opinion) only one solution to turn to. And that’s a clean install with an external installation media.
Solution 3 – Run the Update troubleshooter
Fortunately, Windows 10 comes with various troubleshooters that can fix common problems on your PC with ease.
There’s even a special Windows Update troubleshooter that you can use, and in order to run it, you need to do the following:
- Go to Settings.
- Head over to Updates & Security > Troubleshoot.
- Select Windows Update, and go to Run the Troubleshooter.

- Follow further on-screen instructions and let the process finish.
- Restart your computer.

Solution 4 – Run the SFC scan
If you keep getting the update error 0xc0000017 on your PC, the issue might be your installation. Y
our Windows installation might be damaged or corrupted, and that can lead to this error.
However, you can fix the problem simply by performing an SFC scan. To do that, just follow these steps:
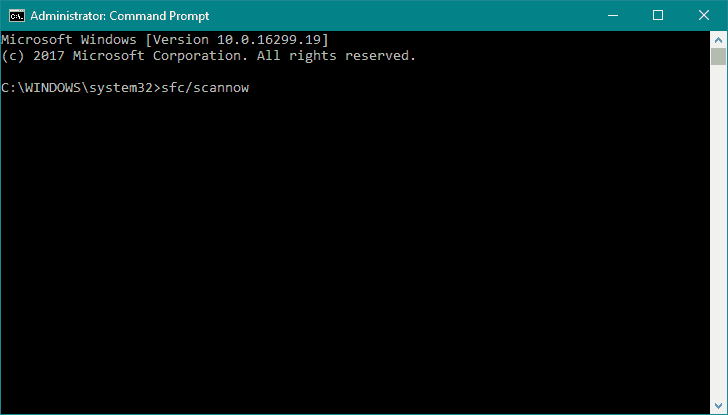
- Right-click on the Start Menu button, and open Command Prompt (Admin).
- Enter the following line and press Enter: sfc/scannow

- Wait until the process is done (it may take a while).
- If the solution is found, it will automatically be applied.
- Now, close the Command Prompt and restart your computer.
Solution 5 – Reset Windows Update components
If none of the troubleshooting tools managed to resolve the problem, let’s try with resetting crucial update components. Here’s what you need to do:
- Start Command Prompt as administrator.
- When Command Prompt starts, run the following commands:
- net stop wuauserv

- net stop cryptSvc
- net stop msiserver
- ren C:\Windows\SoftwareDistribution SoftwareDistribution.old
- ren C:\Windows\System32\catroot2 Catroot2.old
- net start wuauserv
- net start cryptSvc
- net start msiserver

Solution 6 – Make sure the Windows Update service is running
The most crucial service for receiving updates in Windows 10 is the Windows Update service. If this service is not running properly, well, you won’t be able to get any updates.
So, make sure it runs by doing the following:
- Go to Search, type services.msc, and open Services.
- Find the Windows Update service. Right-click and open Properties.

- On the General tab, find Startup type and choose Automatic.
- If the service is not running, right-click and choose Start.
- Confirm selection and close window.

Solution 7 – Make sure the BITS service is running
Background Intelligent Transfer Service (BITS) is another essential service for receiving Windows updates. So, you might want to check that one as well:
- Press Windows key + R. In search line type services.mscand press Enter.
- Look for Background Intelligent Transfer Service (BITS) and double-click it to open its properties.
- If the service isn’t running, click the Start button.
- Choose Recovery tab and make sure that First failure and Second failure are set to Restart service.
- Confirm selection and check for updates.

Solution 8 – Change DNS settings
If none of the previous workarounds resolve the problem, we’ll try and change the DNS settings. Here’s how to do that:
- Go to Windows Search, type control panel, and open Control Panel.
- Go to Network and Sharing Center, and click on Change adapter settings from the left pane.
- Choose the network you’re currently using, right-click it, and choose Properties.
- Scroll down to Internet protocol version 4 (TCP/IPv4), and choose Properties.
- Now, choose Use the following DNS Server addresses
- Enter the following values: DNS Server – 8.8.8.8 and Alternate DNS Server – 8.8.4.4
- Save changes, and restart your computer
Solution 9 – Perform a clean installation
In the end, if you’re still unable to resolve the issue at hand and Windows 10 just refuses to comply, you should take a different approach.
Namely, if you’re unable to upgrade your OS through the built-in procedure, it’s time to turn to an old school method.
Just download the Media Creation Tool, create a bootable installation media and install the system from a scratch. That should be enough to relieve you of the problems.
If you’re unsure how to do it, you can find a detailed explanation in this article.
Just don’t forget to backup your data before the procedure starts.
That should be enough to get you out of problems. In case you have anything to add or some questions to ask, feel free to do so in the comments section below.
Ivan Jenic
Windows Hardware Expert
Passionate about all elements related to Windows and combined with his innate curiosity, Ivan has delved deep into understanding this operating system, with a specialization in drivers and driver troubleshooting.
When he’s not tackling diverse driver-related problems, Ivan enjoys watching good movies and spending time hiking with his family and friends.