
Если при включении компьютера с Windows 11 на экране входа в систему (экране блокировки) отображаются 2 одинаковых пользователя с одним именем — это сравнительно распространенная проблема, присутствовавшая и в предыдущей версии системы. Решение обычно сравнительно простое.
В этой простой инструкции подробно о том, почему возникает проблема и как убрать показ дублей пользователей при входе в Windows 11.
Причина проблемы и основной метод решения
Рассматриваемая проблема возникает при отключении запроса пароля при входе в Windows 11, что многие делают при начале использования системы. Обычно происходит следующее:
- Пользователь снимает отметку «Требовать ввод имени пользователя и пароля», при этом запрашивается текущий пароль пользователя.

- Если ввести неправильный пароль (например, не в той раскладке или с включенным Caps Lock) или неверное имя пользователя (обычно вводить его или изменять не требуется), ошибка выдана не будет.

- При этом, если выполнен пункт 2, на экране блокировки появится дубль текущего пользователя, а автоматический вход происходить не будет.


Бывают и другие варианты причин проблемы: иногда обычный сбой системы, иногда тот же результат можно получить при использовании сторонних утилит, призванных изменить параметры входа.
Основное решение для данной ситуации состоит из следующих простых шагов:
- В Windows 11 нажмите клавиши Win+R на клавиатуре, введите netplwiz или control userpasswords2 и нажмите Enter.
- Установите отметку «Требовать ввод имени пользователя и пароля», примените настройки и перезагрузите компьютер.
- При следующем входе в систему второй пользователь исчезнет, но пароль вводить придется. Обратите внимание на то, в какой раскладке (отображается справа на экране блокировки), заглавными или строчными буквами вы его пишете.
- Теперь, если вы хотите включить вход без пароля, снова выполните 1-й шаг, но в этот раз снимите отметку «Требовать ввод имени пользователя и пароля», а затем очень внимательно введите пароль текущего пользователя и его подтверждения, обращая внимание на такие нюансы как раскладка клавиатуры и регистр. Подробнее: Как убрать пароль и ПИН-код при входе в Windows 11.
В результате выполнения этих действий два одинаковых пользователя должны перестать появляться, а вход будет выполняться автоматически.
Если приведённый метод не сработал для вашего случая и существует предположение, что проблема связана с системным сбоем, попробуйте использовать точки восстановления Windows 11 на дату, когда проблема не наблюдалась. Один из быстрых способов запустить восстановление — нажать клавиши Win+R на клавиатуре, ввести rstrui и нажать Enter.
Multiple accounts come in handy when you have several users on the same PC. Not only it helps you avoid the disruption caused by an online administrator account, but it also gives you some ease of privacy protection. However, if you feel you’ve reached a point where multiple accounts have exceeded their utility, you don’t have to keep them.
In this article, we’ll go over the various methods you can use for deleting user accounts in Windows 11.
How to Remove User Accounts in Windows 11
Before we begin to remove user accounts, it’s crucial that you back up your Windows files. It’s a good habit that you should do on a regular basis; however, creating a Windows backup before removing a user account is crucial in case something goes wrong.
You can store the backup anywhere you’d like; your hard drive, an external drive, or even the cloud. Here, we’ll store the backup on a USB stick.
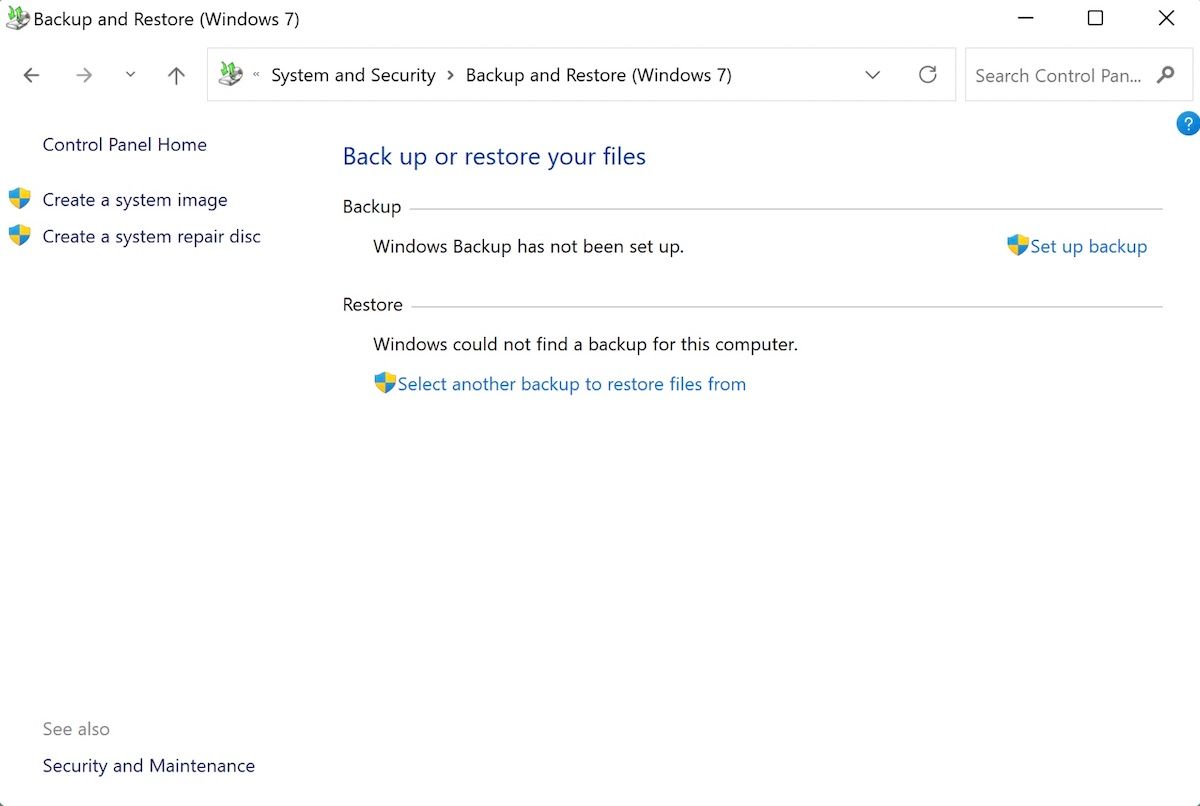
To get started with the backup, click on the Start menu search bar, type in ‘control panel,’ and select the Best match. Then follow the steps below:
- Click on System and Security.
-
Then, click on Backup and Restore.

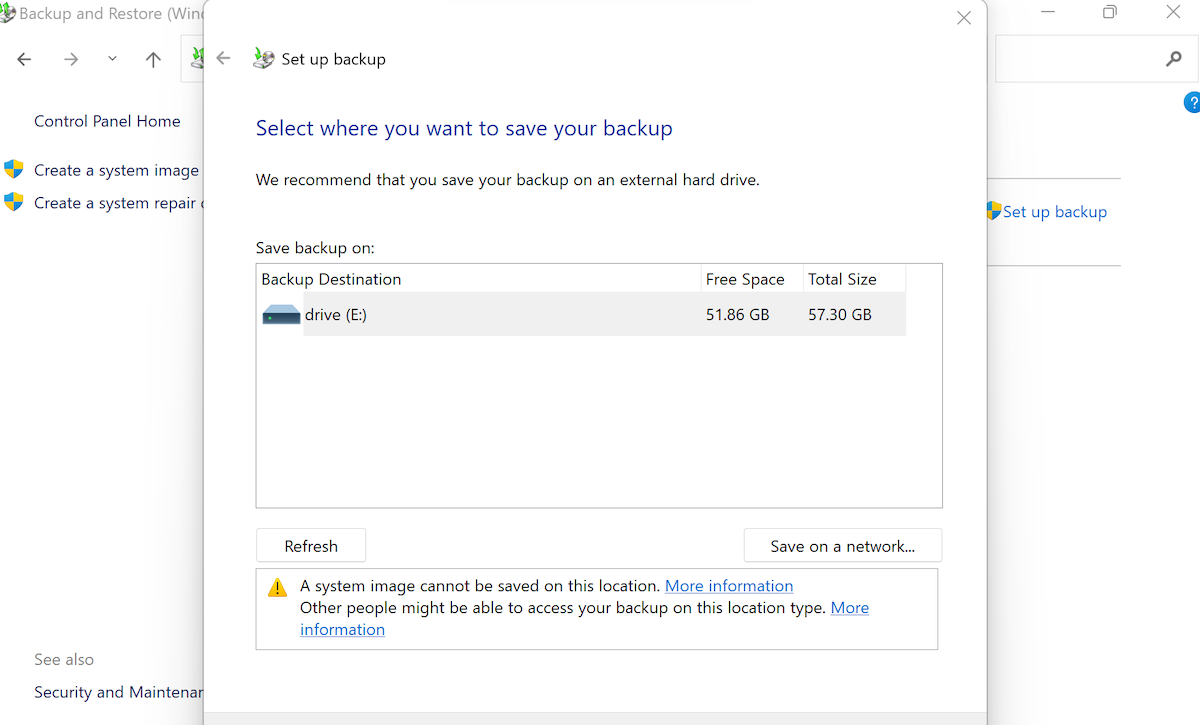
- Select Set up backup.
-
Choose a Backup Destination and click on Next.

- Select Let Windows Choose and click on Next.
-
Finally, click on Save settings and run backup.

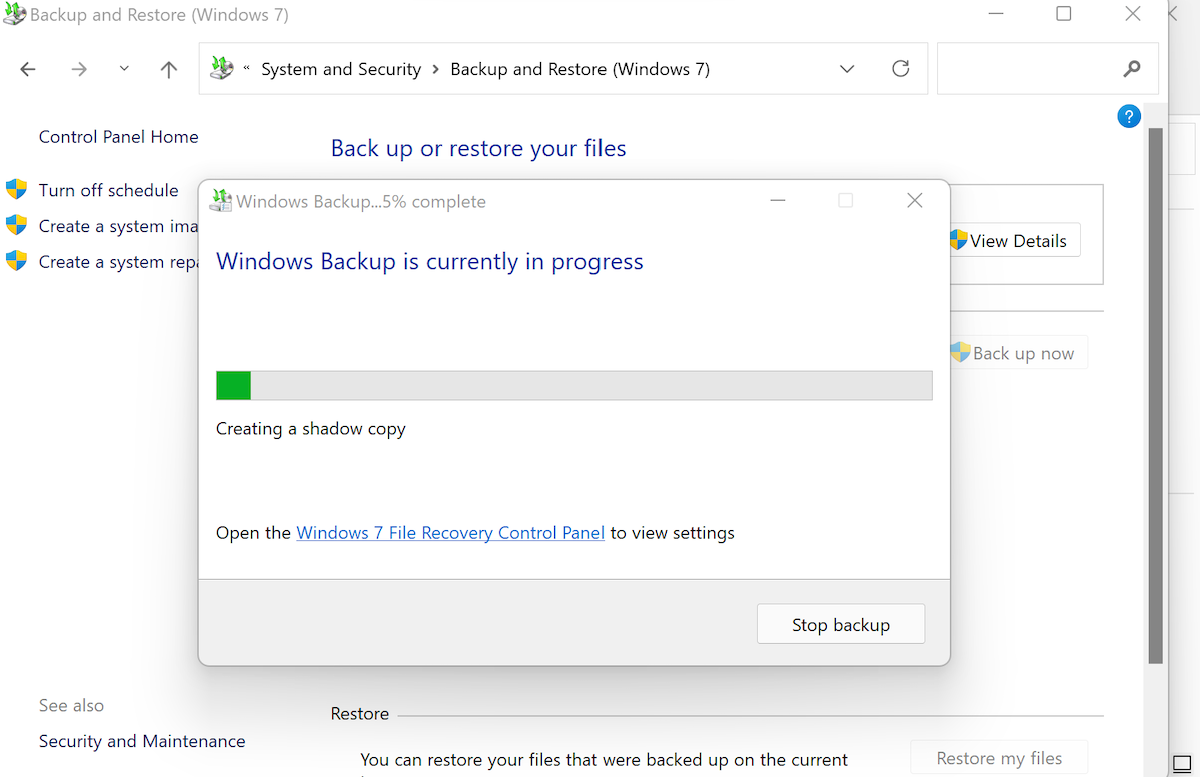
As soon as you do that, the backup process for your entire PC will begin.
Note: When creating a backup, always make sure that you save the backup in a drive beside the one where you’ve installed your Windows on.
With a full backup in place, you can then move on to the deletion of your Windows user accounts, starting with the help of Windows Settings.
1. Deleting User Accounts via Settings
You can delete the multiple user accounts from Windows Settings. Here’s how:
- Go to the Start menu search bar, type in ‘settings,’ and select the Best match. Alternatively, you can press the Windows key + I shortcut.
- Select Accounts > Family & other users.
- Pick the user account you’d like to remove and click on Remove.
- Finally, click on Delete account and data.
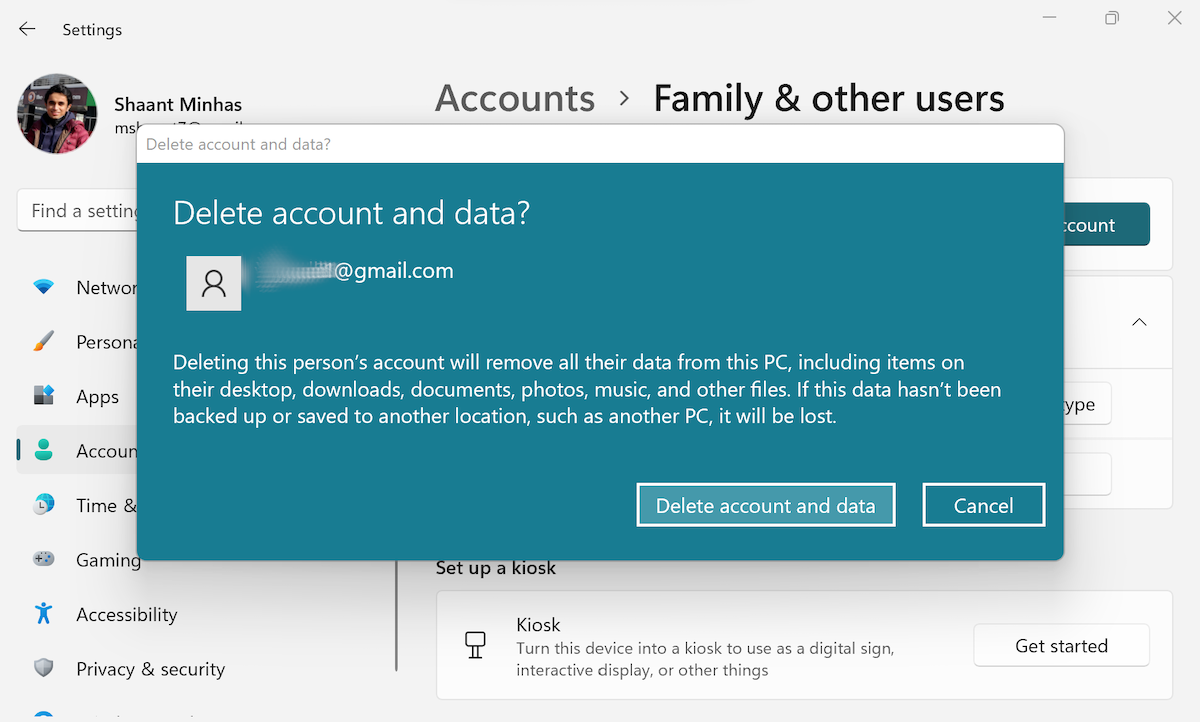
Do this and your user account information will be deleted.
2. Deleting User Accounts via Control Panel
If for some reason, the Settings method from above doesn’t help you fix the problem, then you can use the Control Panel. Here’s how you get started.
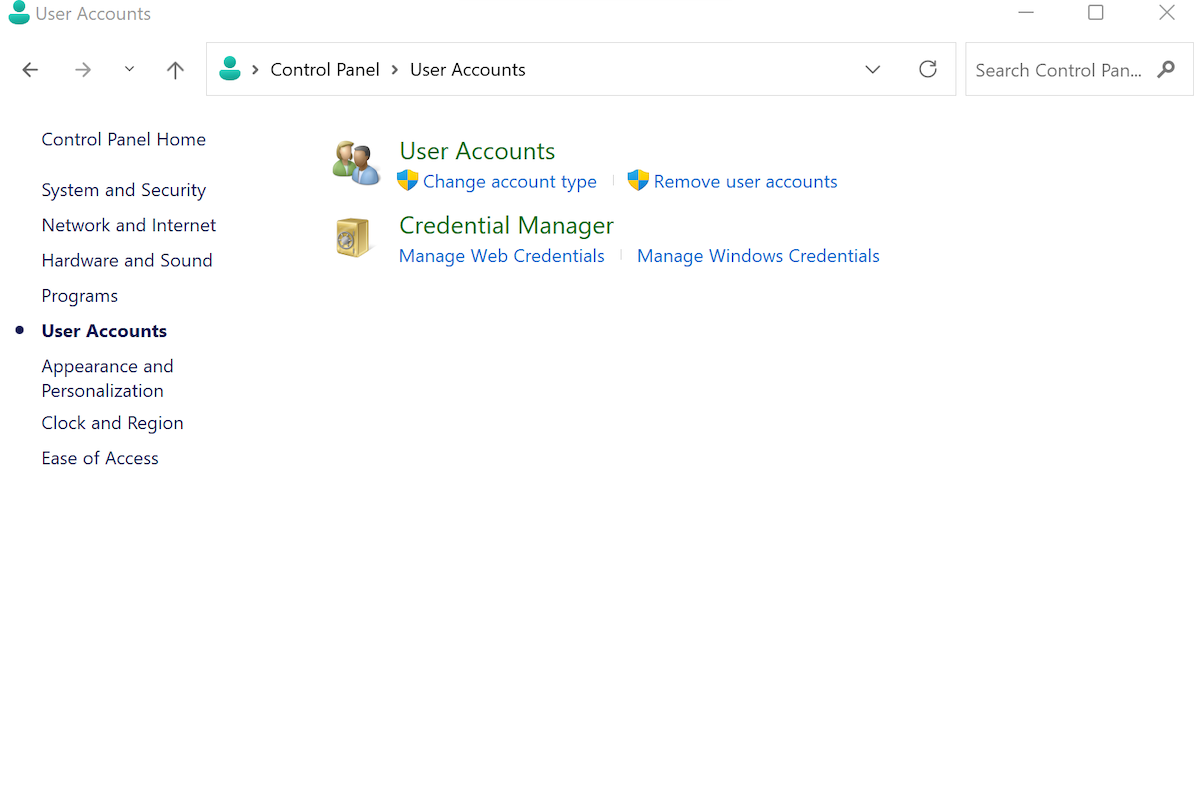
- Click on the Start menu and open the Control Panel.
- Click on User Accounts > Remove user accounts.
- Choose the account you want to remove and select Delete the account.
- Finally, select Delete files > Delete Account.
Do this, and your account and all files related to it will be successfully deleted.
3. Deleting User Accounts via Command Prompt
The Command line is a text-based interface useful in running and managing all Windows programs from the ease of your keystrokes.
First, to launch the Command prompt, go to the Start menu search bar, type in ‘command prompt,’ and then run it as Administrator.
Type the following command in the interface and hit Enter:
net user
It’ll show all the different user accounts present on your PC. Pick the one you’d like to delete, type the following command, and hit Enter:
net user <username> /delete
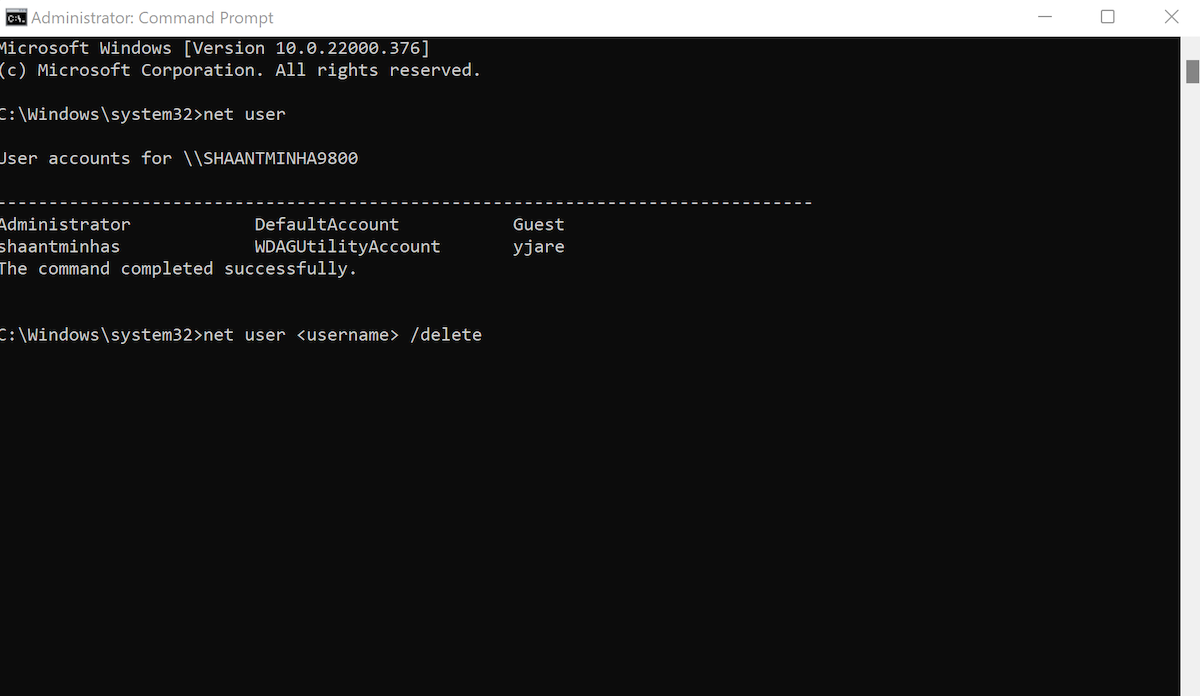
Here, replace the <username> with the account you want to delete. Follow the above steps and the account will be deleted instantly.
Removing User Accounts in Windows 11
A useful hack when you have to share a single machine, multiple user accounts can become a hassle and seem like an unnecessary complication otherwise. Follow the methods from above, and you’ll be able to delete the user accounts in Windows 11
(Image credit: Mauro Huculak)
On Windows 11, you can quickly create multiple accounts to share a computer with multiple people. However, when you no longer need an account or need to block access to a user, it’s also possible to disable an account instead of deleting it to preserve its settings and files if you have to restore access.
You can perform this task in at least four ways, including using Computer Management, Settings, Command Prompt, and PowerShell. Once the account is disabled, Windows 11 will revoke access and remove it from the user menu in the Start menu and the sign-in screen.
In this how-to guide, I will explain how to disable an account without removing it or deleting its files.
How to disable account from Computer Management
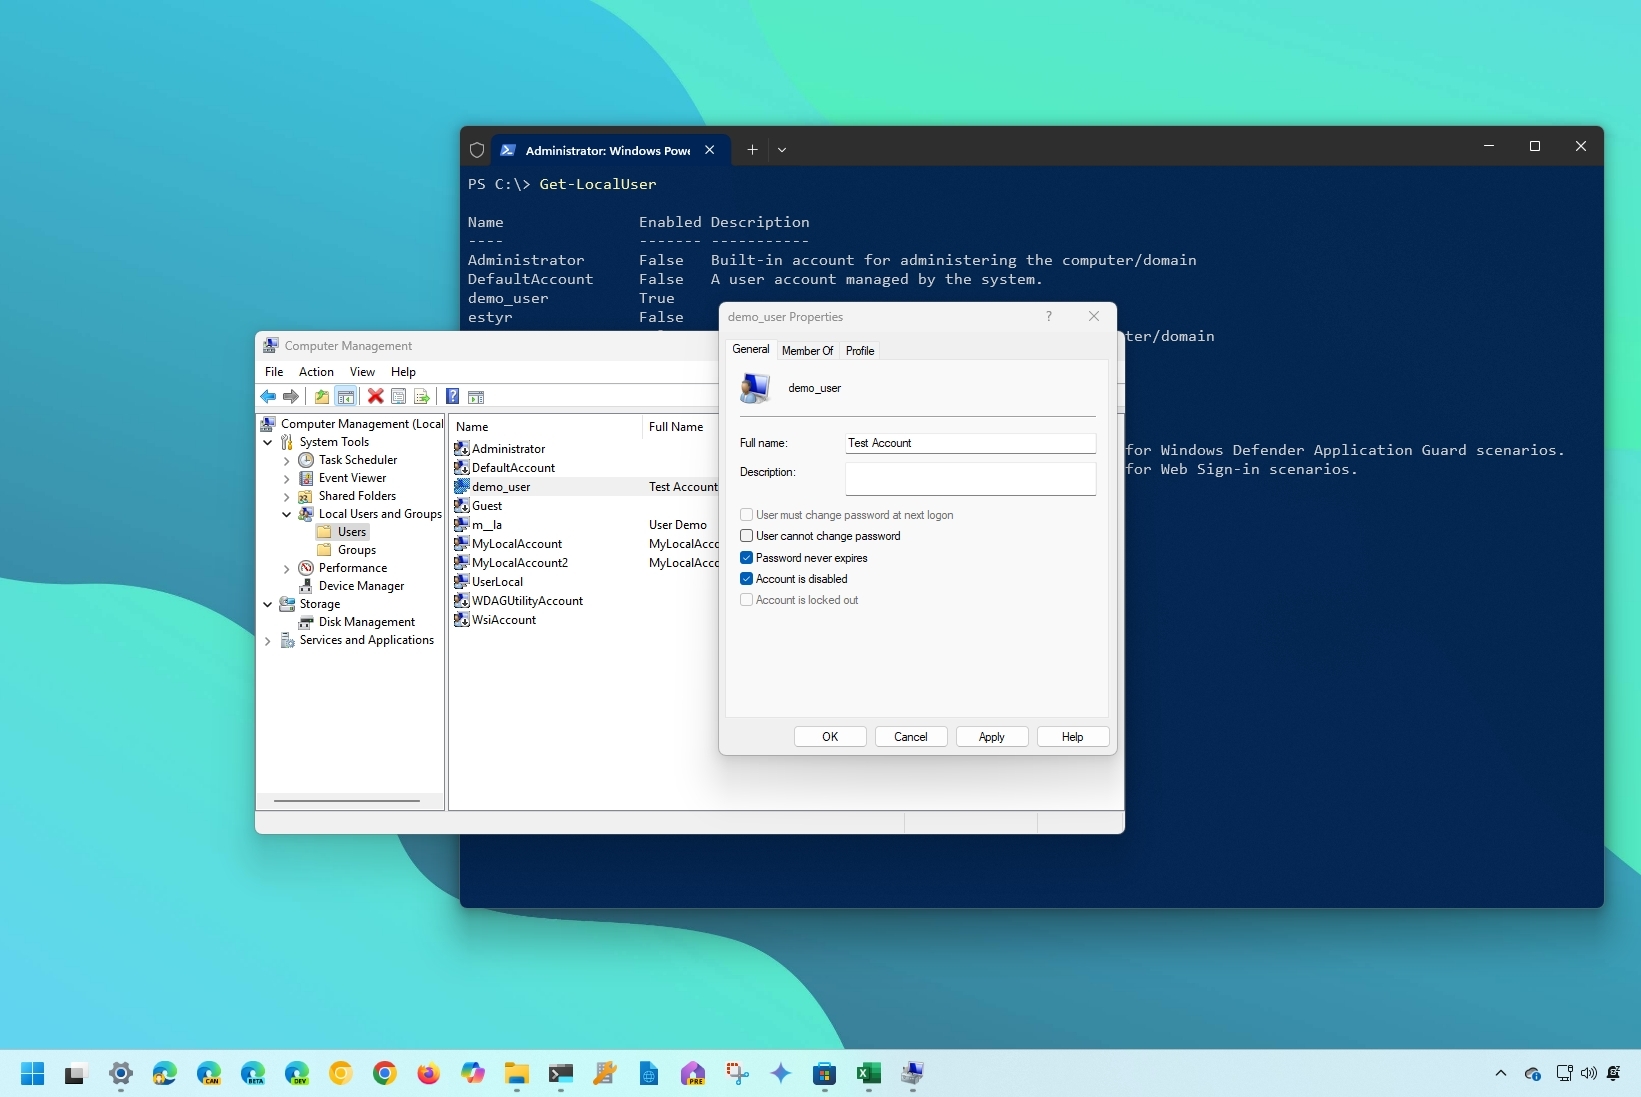
To disable accounts on Windows 11 without removing them, use these steps:
- Open Start.
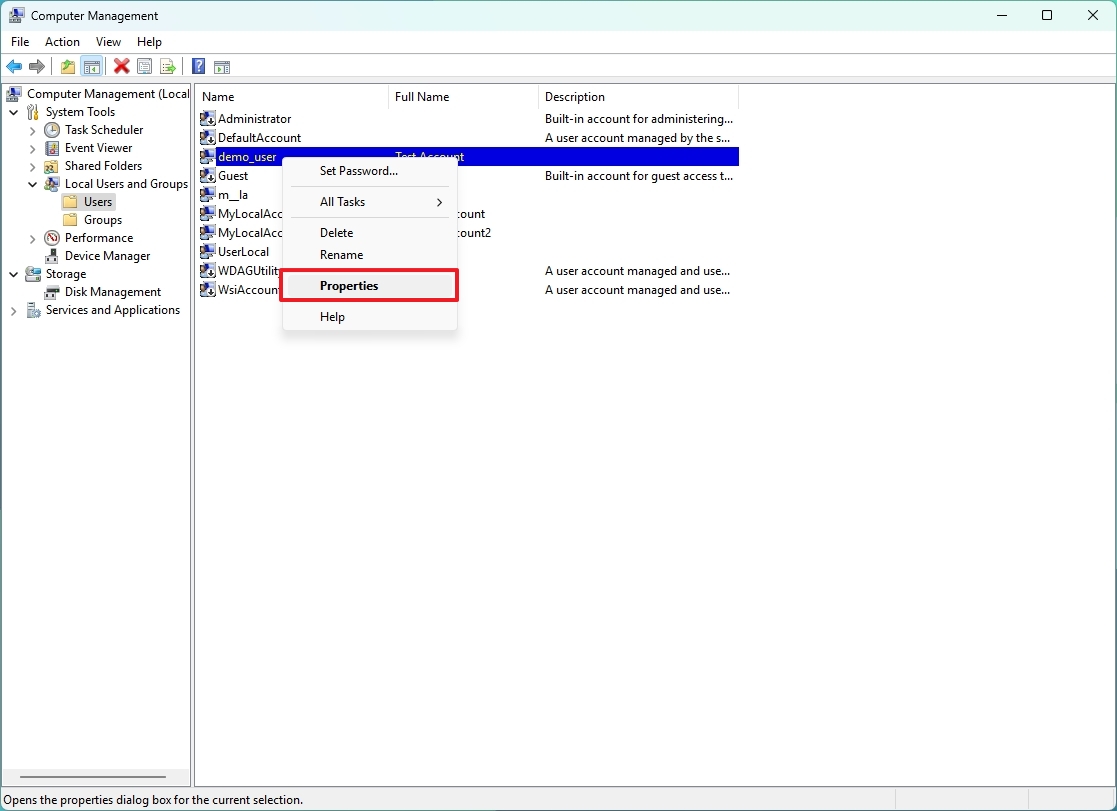
- Search for Computer Management and click the top result to open the app.
- Navigate the following path: Computer Management > System Tools > Local Users and Groups > Users
- Right-click the user and select the Properties option.
- Click the General tab.
- Check the «Account is disabled» option.
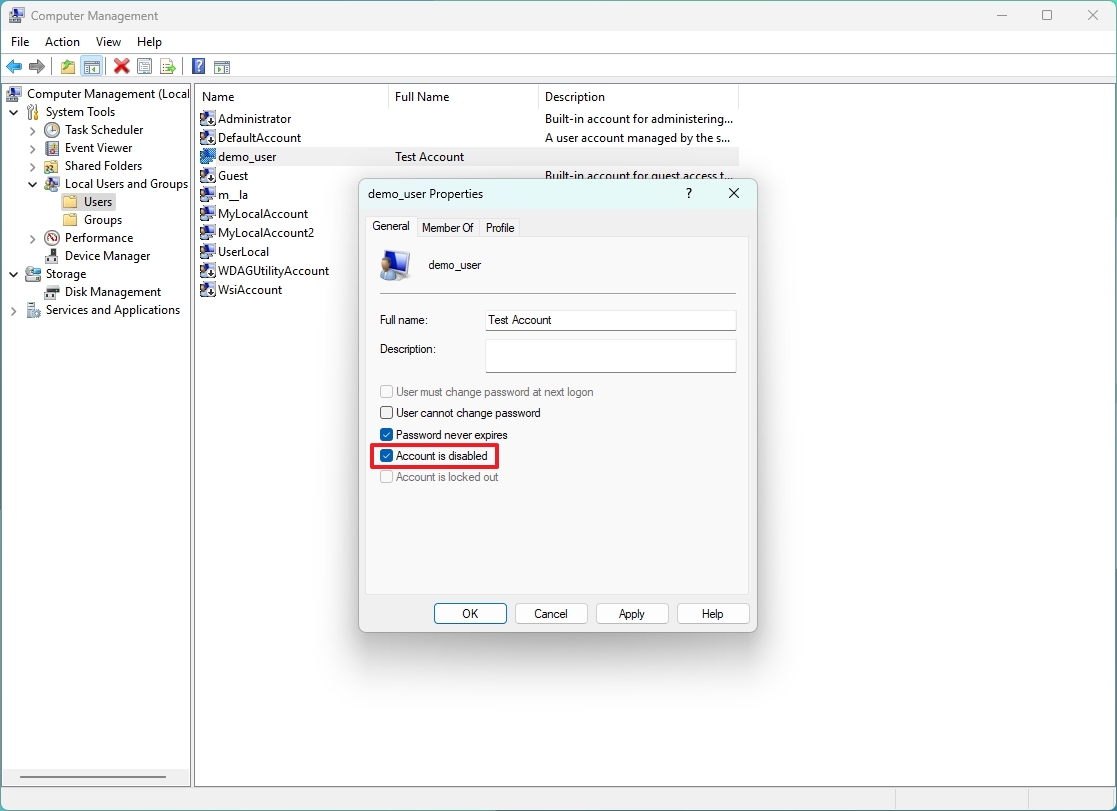
- Click the Apply button.
- Click the OK button.
Once you complete the steps, the user will no longer be able to sign in, but the account will continue to be available in the system until it’s removed.
Enable account with Computer Management
To enable an account with Computer Management, use these steps:
- Open Start.
- Search for Computer Management and click the top result to open the app.
- Navigate the following path: Computer Management > System Tools > Local Users and Groups > Users
- Right-click the user and select the Properties option.
- Click the General tab.
- Clear the «Account is disabled» option.
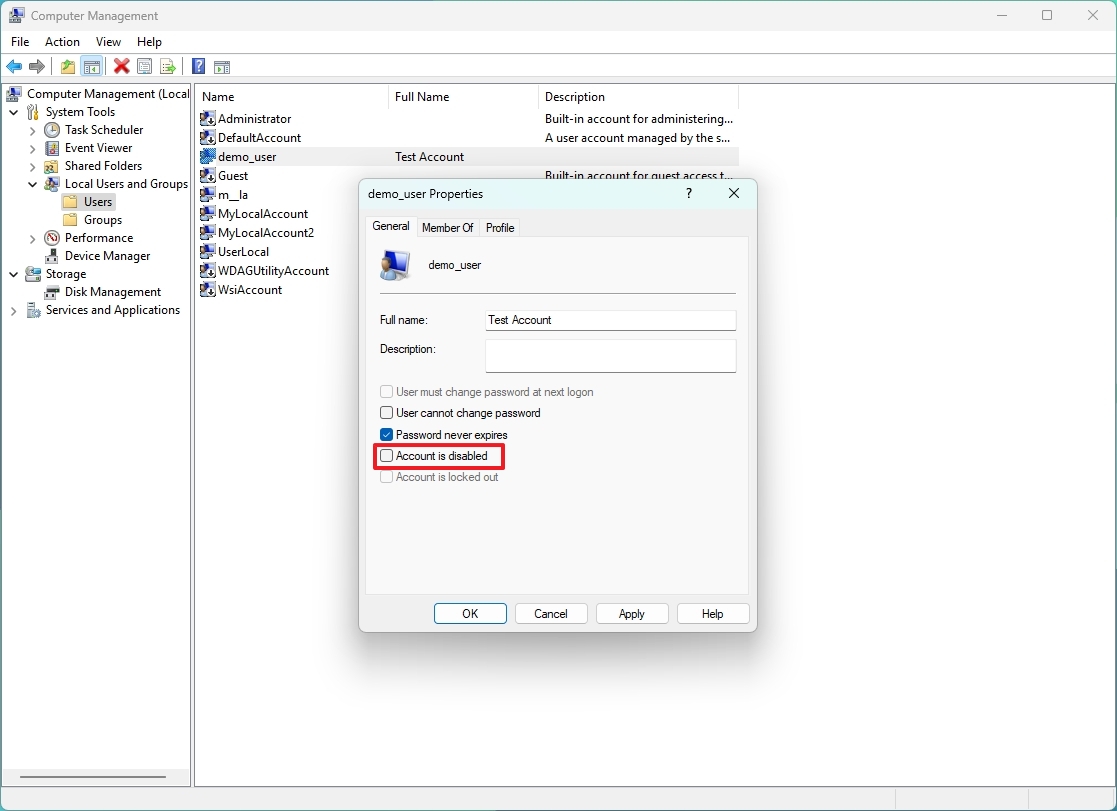
- Click the Apply button.
- Click the OK button.
After you complete the steps, the user will be able to sign in and access the Windows 11 account.
All the latest news, reviews, and guides for Windows and Xbox diehards.
How to disable account from Settings
In the Settings app, you can only disable family members’ accounts. You cannot disable Microsoft accounts or local accounts.
To disable a family member account with Settings, use these steps:
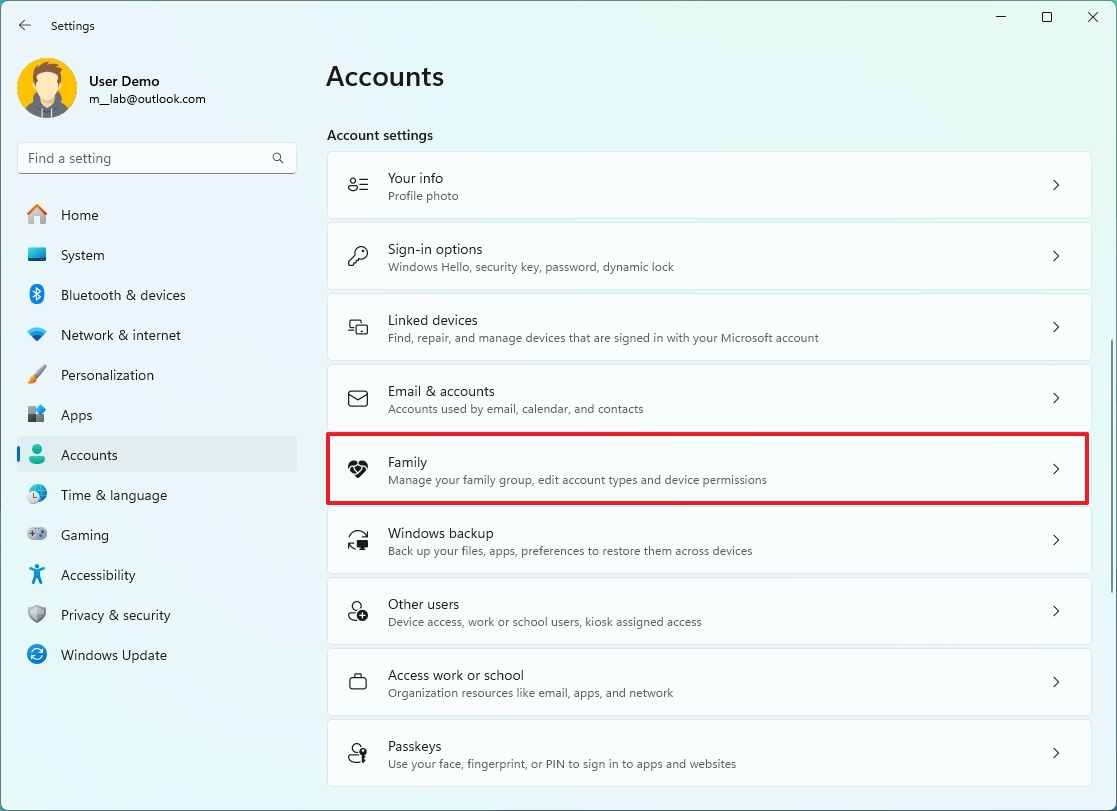
- Open Settings.
- Click on Accounts.
- Click the Family page on the right side.
- Select the account and click the «Block sign in» button under the «Your family» section.
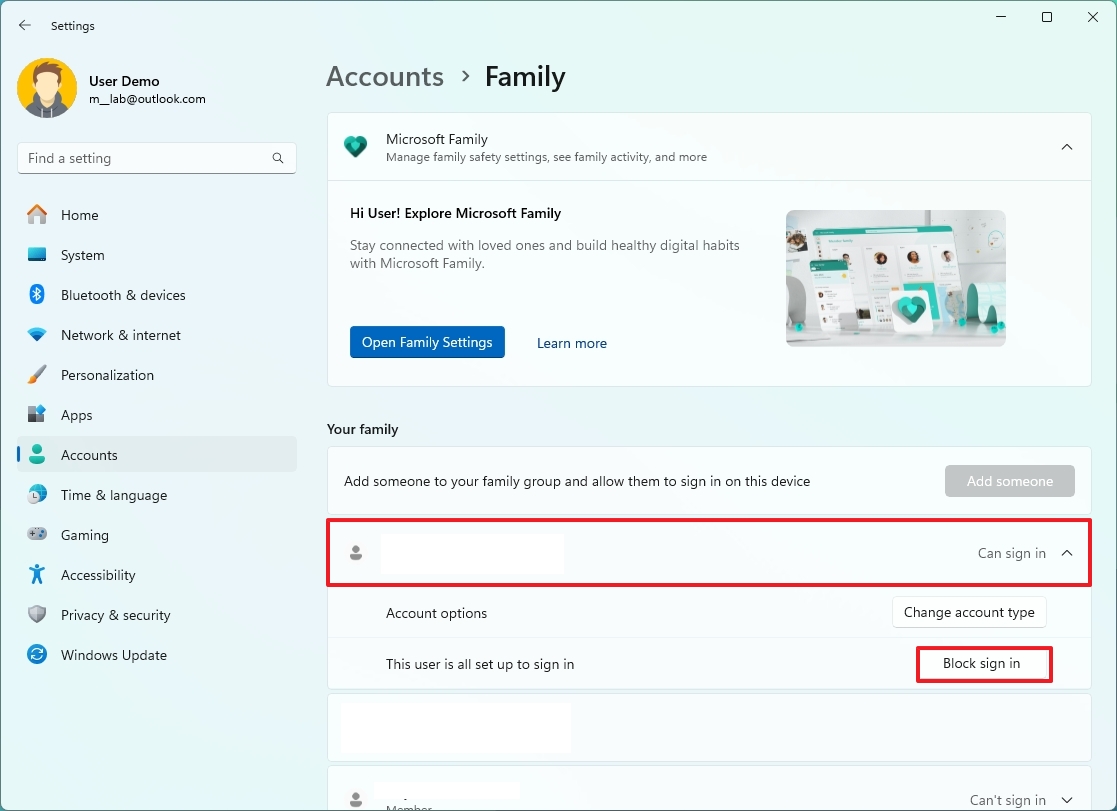
- Click the Block button.
Once you complete the steps, the family member will no longer be able to sign in, nor will the account be visible on the sign-in screen.
Enable account with Settings
To enable a family account with Settings, use these steps:
- Open Settings.
- Click on Accounts.
- Click the Family page on the right side.
- Select the account and click the «Allow sign in» button under the «Your family» section.
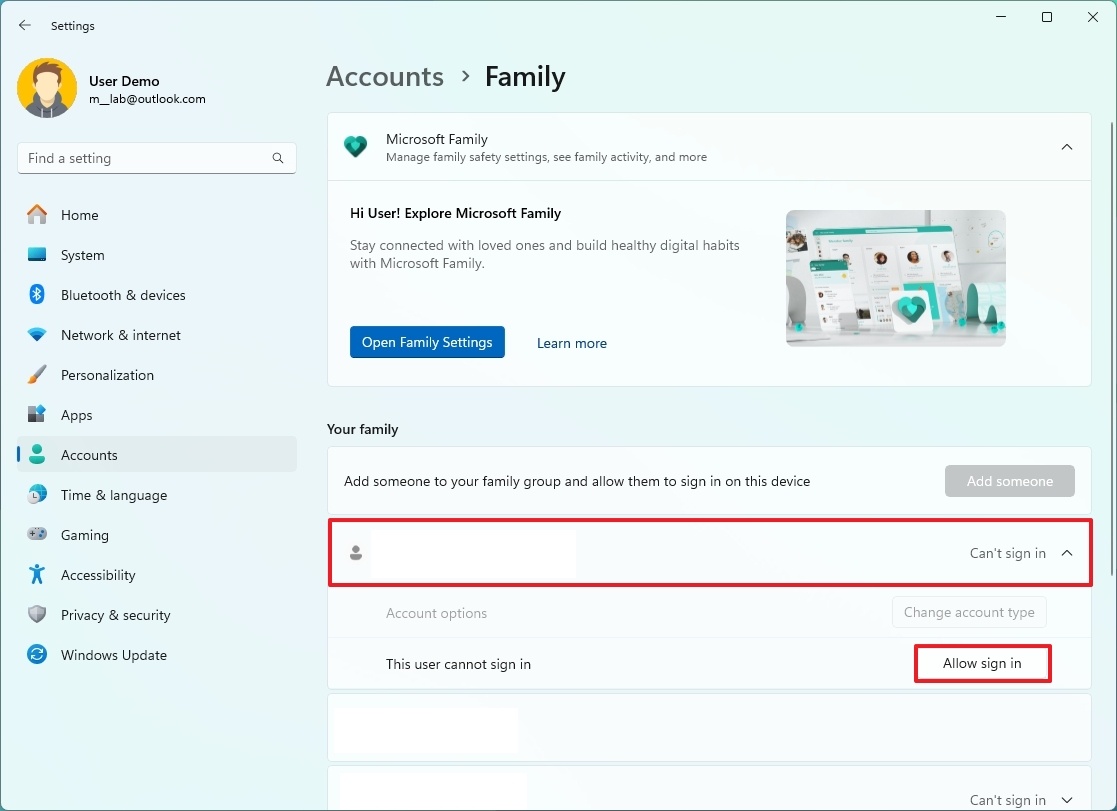
- Click the «Allow sign in» button.
After you complete the steps, the account will appear again on the sign-in screen, allowing the users to log in normally.
How to disable account from Command Prompt
To disable a local account or Microsoft account with commands on Windows 11, use these steps:
- Open Start.
- Search for Command Prompt, right-click the top result, and select the Run as administrator option.
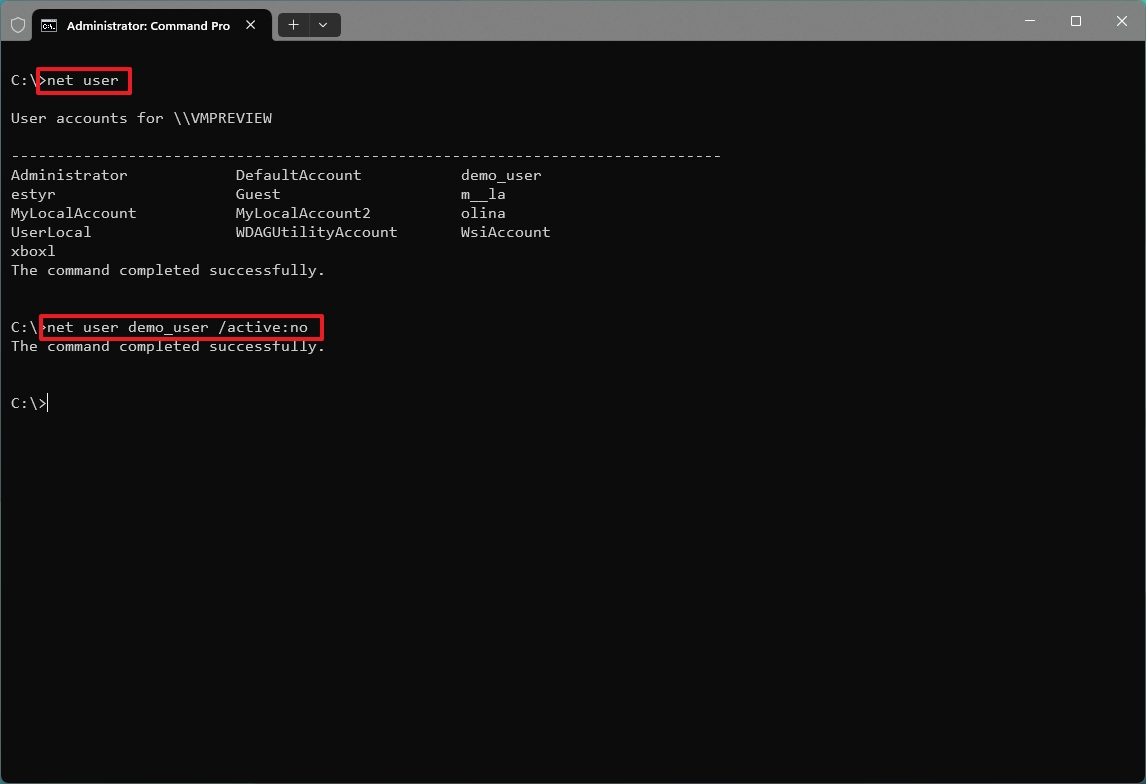
- Type the following command to view the available accounts and press Enter: net user
- Type the following command to disable the Windows 11 account and press Enter: net user ACCOUNT-NAME /active:no
In the command, replace «ACCOUNT-NAME» with the account’s name to disable. This example disables the «admin_demo» account on Windows 11: net user demo_user /active:no
Once you complete the steps, the account will deactivate and not be visible on the sign-in screen. However, the account and data will remain on Windows 11.
Enable account with Command Prompt
To enable an account with Command Prompt, use these steps:
- Open Start.
- Search for Command Prompt, right-click the top result, and select the Run as administrator option.
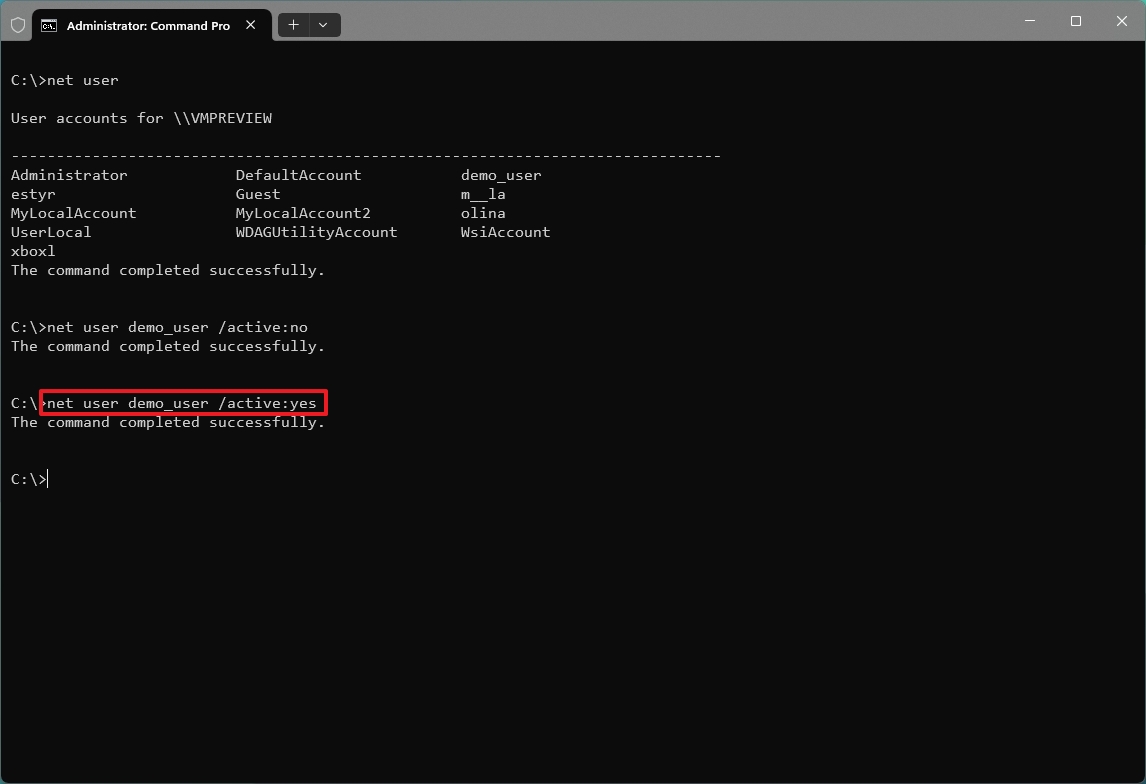
- Type the following command to disable the Windows 11 account and press Enter: net user ACCOUNT-NAME /active:yes
In the command, replace «ACCOUNT-NAME» with the account’s name to enable.This example enables the «admin_demo» account on Windows 11: net user admin_demo /active:yes
After you complete the steps, the Windows 11 account will enable, and the user will be able to reaccess the desktop and their files.
How to disable account from PowerShell
To disable a Windows 11 account with PowerShell commands, use these steps:
- Open Start.
- Search for PowerShell, right-click the top result, and select the Run as administrator option.
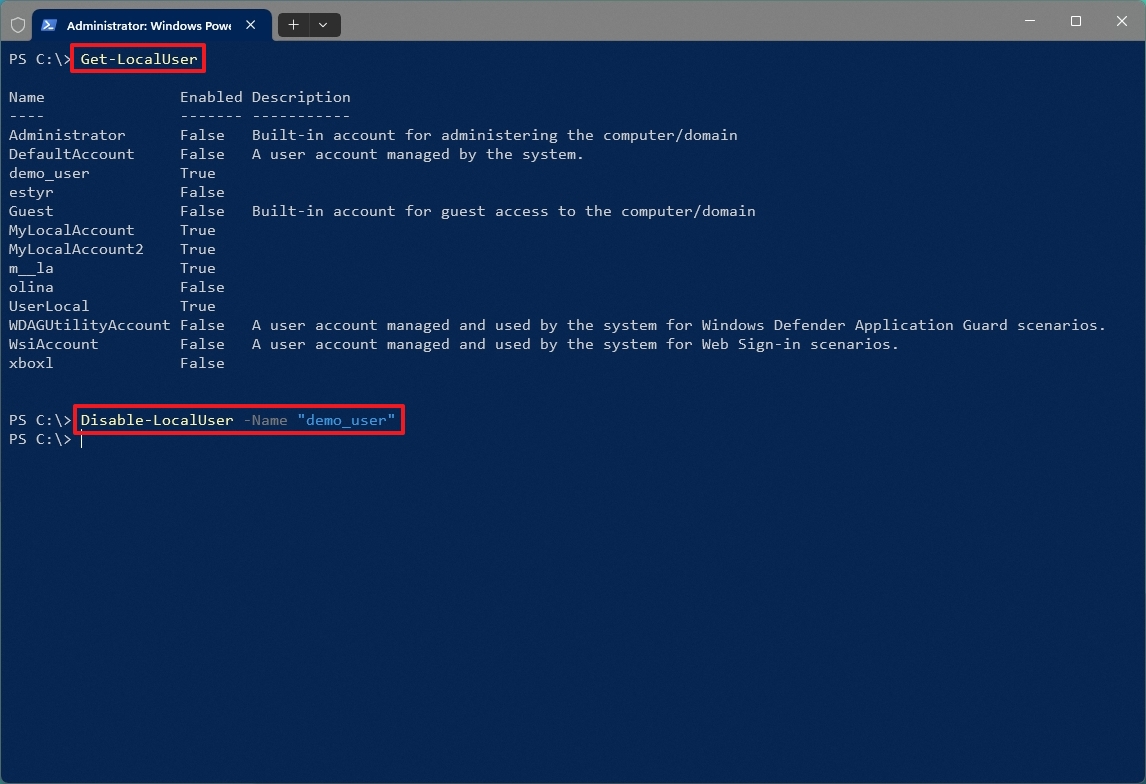
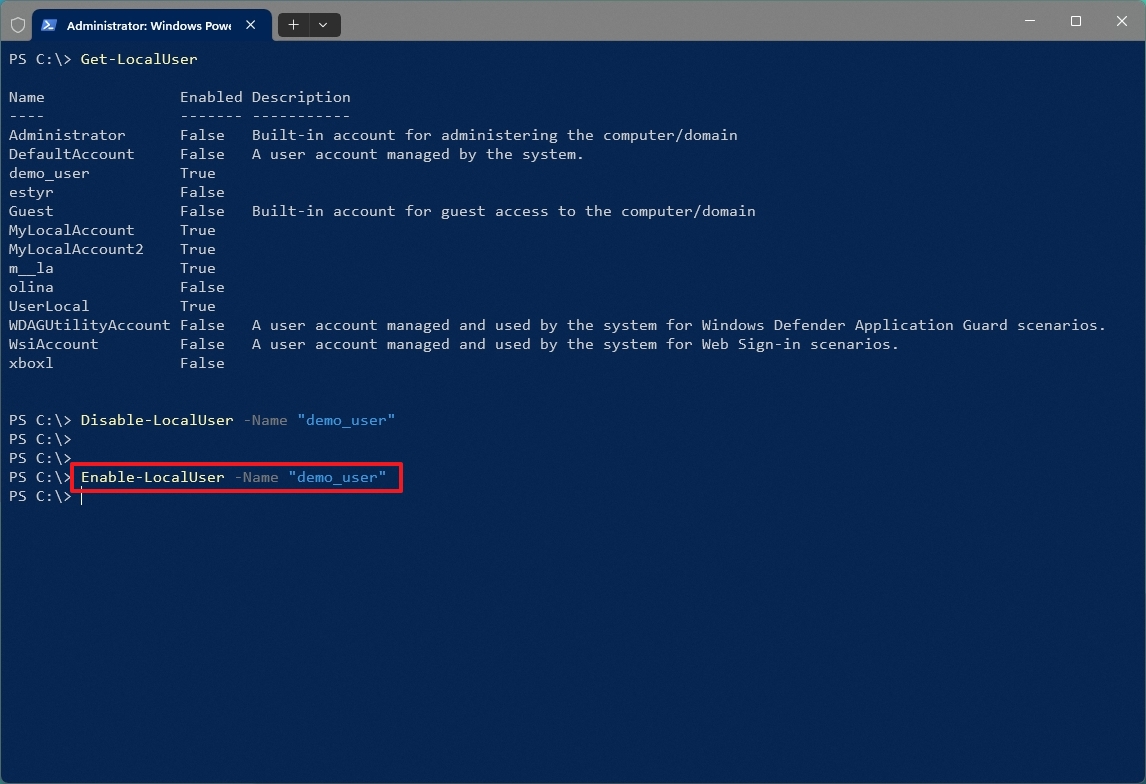
- Type the following command to view the available accounts and press Enter: Get-LocalUser
- Type the following command to disable the Windows 11 account and press Enter: Disable-LocalUser -Name «ACCOUNT-NAME»
In the command, replace «ACCOUNT-NAME» with the account’s name to disable. This example disables the «admin_demo» account on Windows 11: Disable-LocalUser -Name «demo_user»
Once you complete the steps, the PowerShell command will disable the account, but the account and files won’t be deleted from the system.
Enable account with PowerShell
To enable an account with PowerShell on Windows 11, use these steps:
- Open Start.
- Search for PowerShell, right-click the top result, and select the Run as administrator option.
- Type the following command to disable the Windows 11 account and press Enter: Enable-LocalUser -Name «ACCOUNT-NAME»
In the command, replace «ACCOUNT-NAME» with the account’s name to enable.This example enables the «admin_demo» account on Windows 11: Enable-LocalUser -Name «demo_user»
After you complete the steps, the account will enable again on the system.
More resources
For more helpful articles, coverage, and answers to common questions about Windows 10 and Windows 11, visit the following resources:
- Windows 11 on Windows Central — All you need to know
- Windows 10 on Windows Central — All you need to know
Mauro Huculak has been a Windows How-To Expert contributor for WindowsCentral.com for nearly a decade and has over 15 years of experience writing comprehensive guides. He also has an IT background and has achieved different professional certifications from Microsoft, Cisco, VMware, and CompTIA. He has been recognized as a Microsoft MVP for many years.
Операционная система Windows может хранить несколько профилей пользователей на одном компьютере, если он используется несколькими людьми (пользователями ПК).
Каждый профиль пользователя хранит персональные настройки и файлы. Случаются ситуации, когда профиль пользователя уже не пользуется и его необходимо удалить за ненадобностью или для очистки от ненужных файлов, которые занимают место на жестком диске компьютера.
Процесс удаления профиля пользователя (учетной записи пользователя) в Windows 11 не очень сложный. Способ удаления одинаков для локальной учетной записи и для учетной записи Microsoft.
Способ удаления профиля пользователя через приложения «Параметры» очень прост, но сперва необходимо войти в систему под учетной записью (УЗ) администратора или иметь учетные данные (логин и пароль) администратора, чтобы удалить любую УЗ.
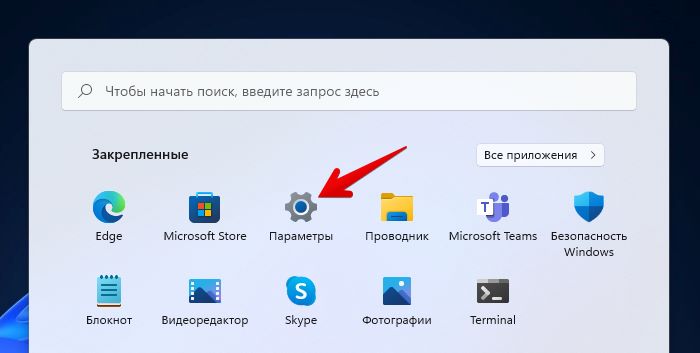
Итак, переходим в приложение «Параметры» Windows 11 — кликаем по кнопке меню «Пуск» и находим в закрепленных иконку «Параметры». Если такой иконки нет, можно использовать горячие клавиши — «Win+I».
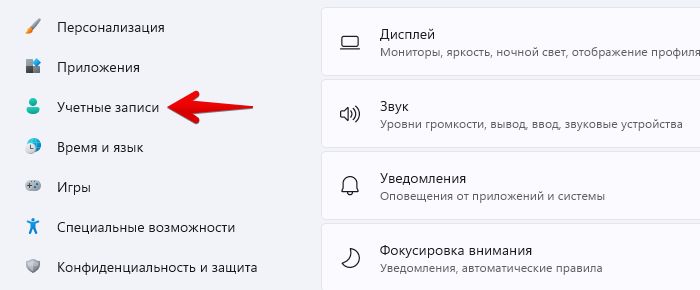
Затем находим и переходим на вкладку «Учетные записи» на левой боковой панели в окне параметров, чтобы продолжить.
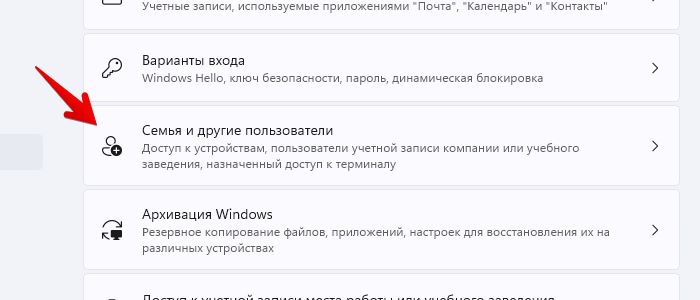
После этого в правой части окна щелкаем плитку «Семья и другие пользователи», чтобы продолжить.
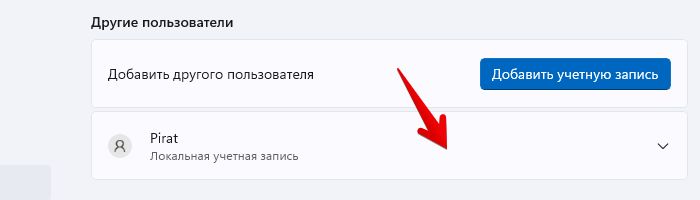
Находим раздел «Другие пользователи» и щелкаем плитку пользователя, которого хотим удалить, чтобы раскрыть дополнительные параметры.
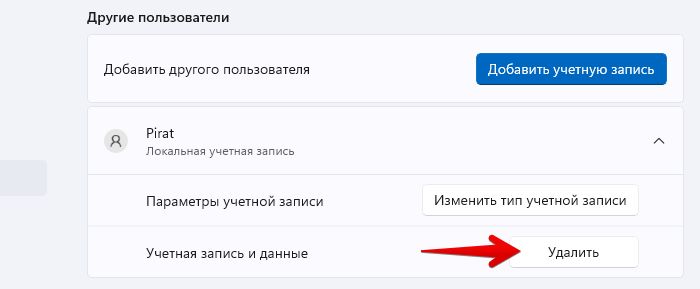
Находим кнопку «Удалить» в разделе «Учетная запись и данные» и щелкаем по ней, чтобы приступить к процессу удаления.
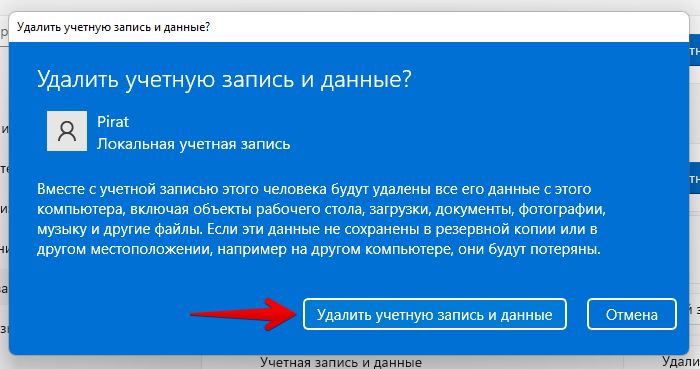
Появится окно «Удалить учетную запись и данные?», для подтверждения нажимаем кнопку «Удалить учетную запись и данные».
Удаляем учетную запись пользователя через Панель управления Windows 11
Если по каким-либо причинам не подходит способ удаления УЗ через параметры Windows 11, всегда есть альтернативный способ — через панель управления.
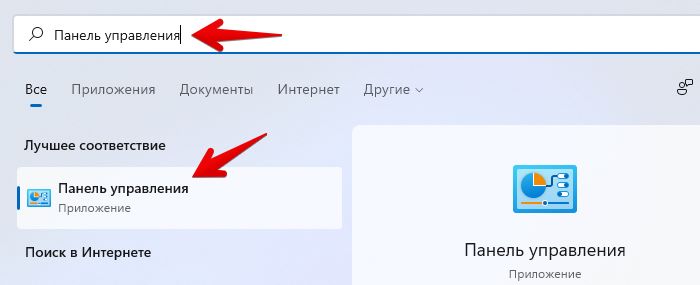
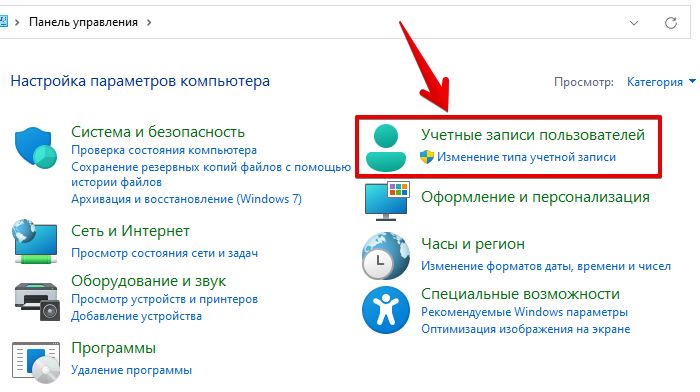
Открываем меню «Пуск» и находим Панель управления через поисковую строку.
В окне панели управления кликаем по пункту «Учетные записи пользователей», чтобы перейти к следующему окну с настройками.
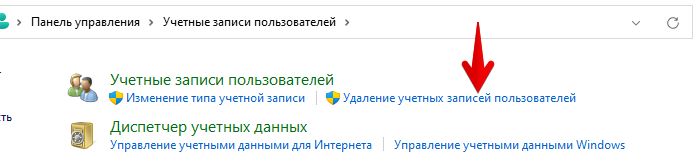
Затем щелкаем левой кнопкой мыши «Удаление учетных записей пользователей».
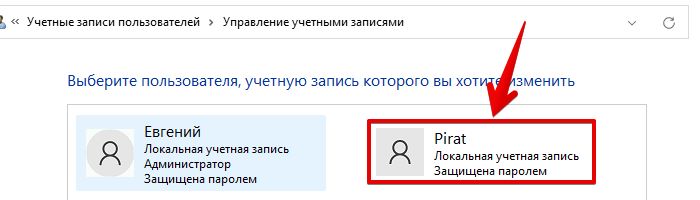
Появится список с учетными записями, щелкаем по той, которую хотим удалить.
В окне «Внесение изменений в учетную запись», в меню слева кликаем по ссылке «Удаление учетной записи».
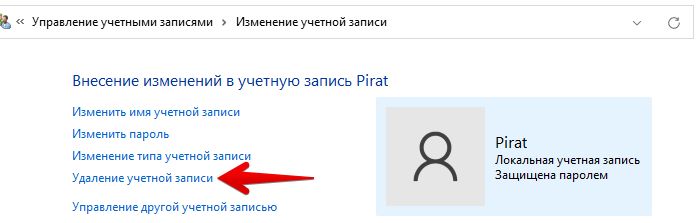
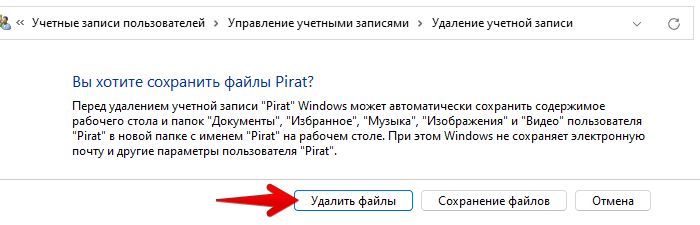
После этого Windows 11 спросит, хотим ли мы сохранить файлы, связанные с учетной записью пользователя. Если мы хотим сохранить файлы — нажимаем «Сохранение файлов». Если необходимо полностью стереть профиль пользователя вместе с данными — нажимаем кнопку «Удалить файлы».
Удаляем УЗ через мастера учетных записей (netplwiz)
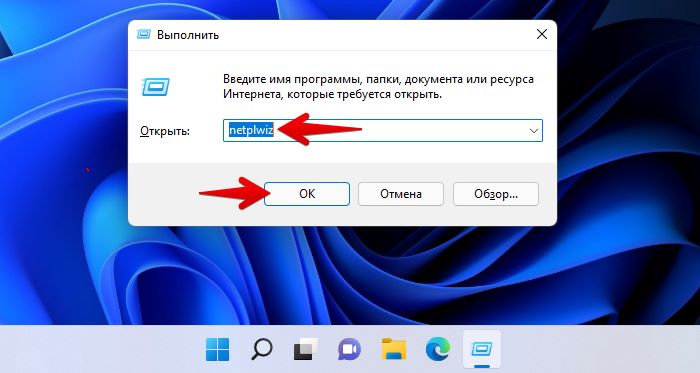
Еще один простой способ для удаления учетных записей — через мастера УЗ. Открываем окно «Выполнить», нажав на клавиатуре клавиши «Win+R» и вводим команду «netplwiz». Для перехода в следующее окно, кликаем по кнопке «ОК».
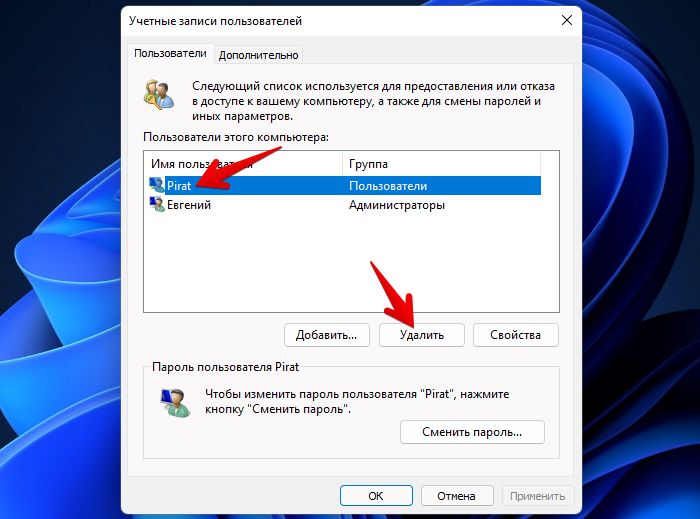
В окне мастера учетных записей пользователей выбираем пользователя и нажимаем кнопку «Удалить«.
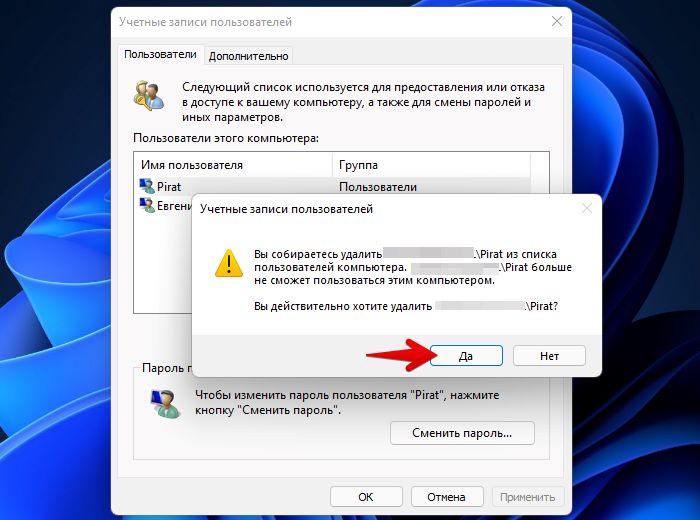
В окне подтверждения нажимаем «Да«, если хотим удалить УЗ и нажимаем «Нет» для отмены удаления.
Итак, друзья, надеюсь, эта инструкция поможет вам удалить ненужные профили пользователей с ваших ПК.