В этой статье мы рассмотрим, как обновить версию Windows PowerShell до актуальной 5.1 и установить (обновить) PowerShell Core 7.3. В предыдущей статье мы рассказывали, что на данный момент есть две ветки PowerShell:
- старая версия Windows PowerShell (максимальная версия 5.1, которая более не развивается);
- новая платформа PowerShell Core (сейчас доступна версия 7.3).
Несмотря на то, что нумерация версий PowerShell продолжается с 5.1 (6.0, 6.1, 7.0 и т.д.), это две разные платформы. Соответственно мы отдельно рассмотрим как обновить Windows PowerShell и PowerShell Core.
PowerShell Core 7.x максимально совместима с Windows PowerShell. Это означает, что вы можете запускать свои старые скрипты и командлеты в PowerShell Core.
Содержание:
- Обновление Windows PowerShell до 5.1
- Установка/обновление PowerShell Core 7.x
- Установка/обновление PowerShell Core на удаленных комьютерах
- Обновление PowerShell через Windows Update или WSUS
Обновление Windows PowerShell до 5.1
Во всех версиях, начиная с Windows 10 и Windows Server 2016, Windows PowerShell 5.1 уже установлен по-умолчанию.
В предыдущих версиях (Windows 7/8.1 и Windows 2008 R2/2012) обновление до PowerShell 5.1 нужно выполнять вручную. Например, в Windows Server 2012 R2 (Windows 8.1) установлен PowerShell 4.0.
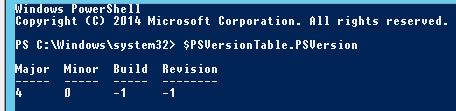
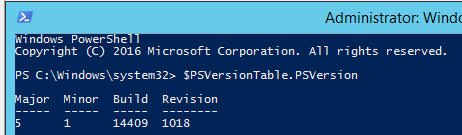
Попробуем обновить версию Windows PowerShell в Windows Server 2012 R2 до версии 5.1.
Сначала проверьте текущую версию PowerShell (на скриншоте видно, что это PowerShell 4.0):
$PSVersionTable.PSVersion

Чтобы обновить вашу версию PowerShell до 5.1, нужно установить пакет Windows Management Framework (WMF) 5.1, который в свою очередь требует наличия .NET Framework 4.5.2 (или более поздней версии). Убедитесь, что у вас установлена версий .NET 4.5.2 или выше командой:
(Get-ItemProperty ‘HKLM:\SOFTWARE\Microsoft\NET Framework Setup\NDP\v4\Full’ -Name Release).Release

В моем случае код 378675 говорит о том, что установлена версия .NET 4.5.1. Поэтому мне нужно скачать и установить более новую .NET Framework 4.8 (ссылка на офлайн установщик https://go.microsoft.com/fwlink/?linkid=2088631 —
ndp48-x86-x64-allos-enu.exe
).
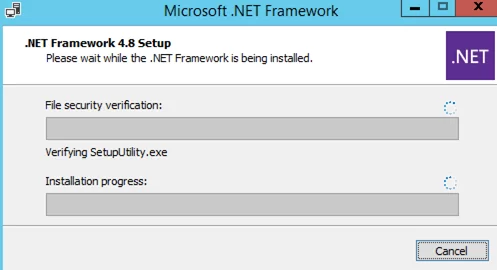
Установите .NET 4.8 (потребуется перезагрузка).

Если установить WMF 5.1, но не установить .NET 4.5.2 (или более новый), часть функций PowerShell не будет работать.
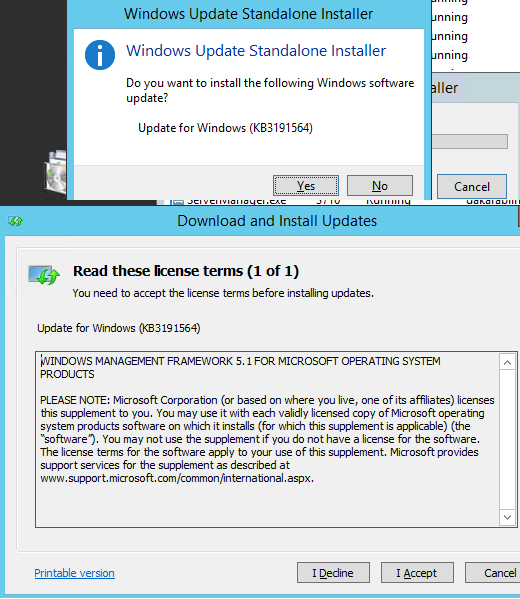
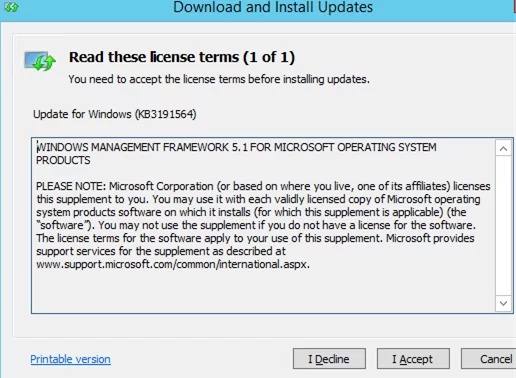
Скачайте WMF 5.1 для Windows Server 2012 R2 —
Win8.1AndW2K12R2-KB3191564-x64.msu
(https://go.microsoft.com/fwlink/?linkid=839516).
Установите MSU файл Windows Management Framework 5.1.
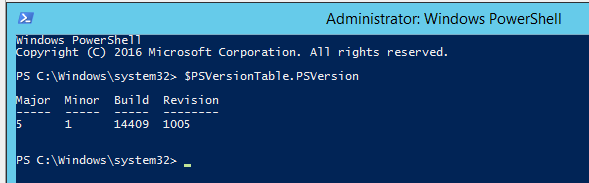
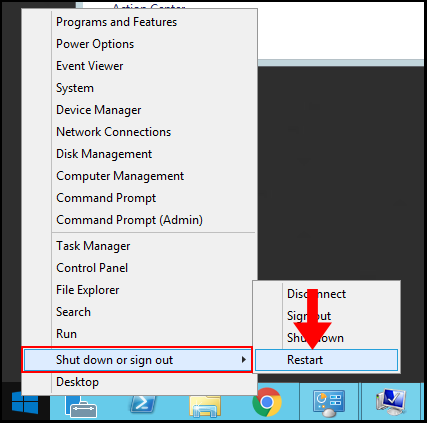
После перезагрузки сервера, запустите консоль powershell.exe и убедитесь, что версия была обновлена до PowerShell 5.1.
Если у вас остались снятые с поддержки Windows Server 2008 R2 и Windows 7, вы можете обновить на них версию PowerShell с 2.0 до 5.1 аналогичным способом. Сначала устанавливается .Net Framework 4.5.2 (или выше) и затем WMF 5.1 (ссылки загрузки будут другими, чем для Windows Server 2012 R2).
Установка/обновление PowerShell Core 7.x
PowerShell Core является кроссплатформенной и находится в стадии активной разработки (в отличии от Windows PoweShell 5.1). По сути, PowerShell Core это новая платформа, которая устанавливается в операционной системе вместе с классическим Windows PowerShell. Т.е. нельзя обновить PowerShell 5.1 до PowerShell Core 7.1. PowerShell 7 устанавливается на компьютере отдельно от Windows PowerShell 5.1 (side by side).
На данный момент доступны версии PowerShell Core 6.x и 7.x. Рекомендуется всегда устанавливать последнюю версиях PowerShell (сейчас это 7.3), если вам не требуется особая совместимость с legacy скриптами.
Вы можете обновить (установить) версию PowerShell Core в Windows 10 и 11 несколькими способами:
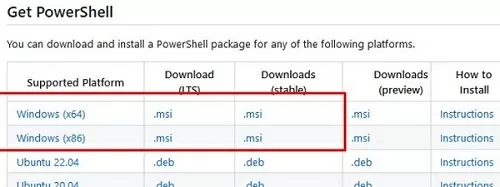
- С помощью MSI установщика PowerShell Core, который можно скачать на GitHub
- С помощью менеджера пакетов WinGet
- С помощью магазина приложений Microsoft
Далее мы рассмотрим все эти способы на примере обновления PowerShell Core до 7.3 в Windows 10 22H2
Обновить PowerShell Core с помощью MSI установщика
Если вы хотите установить PowerShell Core с помощью MSI пакета, перейдите на старицу проекта https://github.com/PowerShell/PowerShell и скачайте установочный пакет для вашей версии ОС. На момент написания статьи последняя версия v7.3.3 Release of PowerShell от 24 февраля 2023 (например, PowerShell-7.3.3-win-x64.msi или PowerShell-7.3.3-win-x86.msi). Для продуктивной среды используйте Stable или LTS релизы.
Скачайте msi файл и установите его.
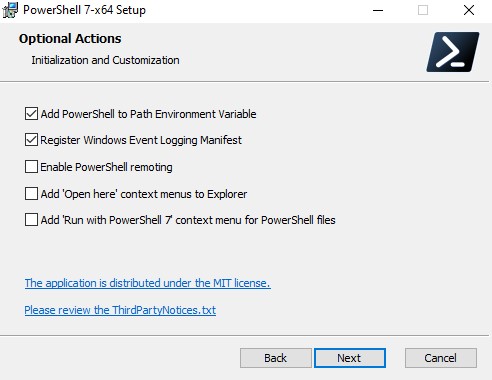
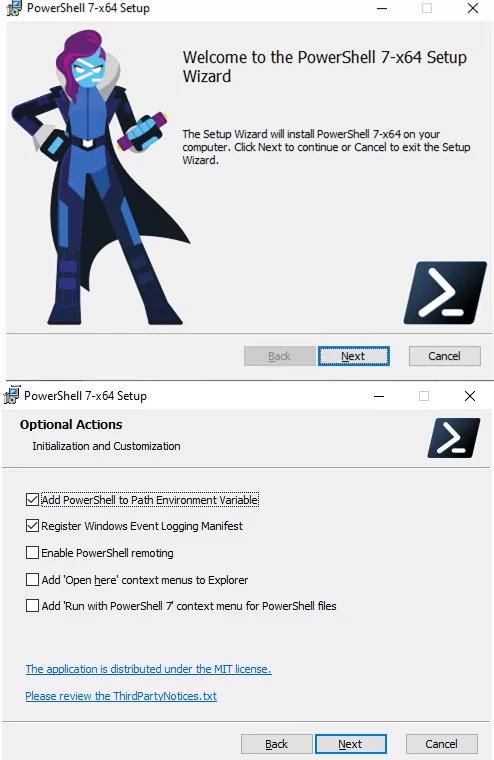
Доступны следующие опции установки:
- Add PowerShell to Path Environment Variable
- Register Windows Event Logging Manifest (для событий PowerShell будет создан отдельный журнал Event Viewer
%SystemRoot%\System32\Winevt\Logs\PowerShellCore%4Operational.evtx
) - Enable PowerShell Remoting (включает и настраивает WinRM для PowerShell Remoting)
- Add ‘Open here’ context menu to Explorer
- Add ‘Run with PowerShell 7’ context menu for PowerShell files
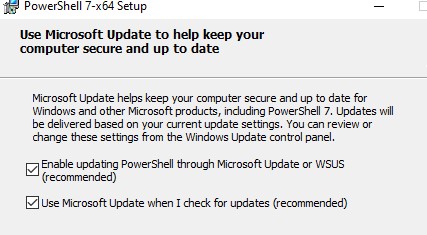
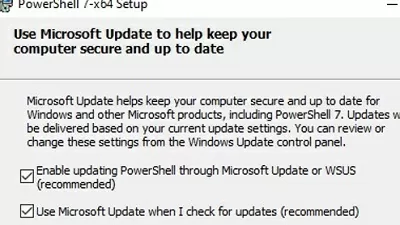
Далее вы можете включить автоматическое обновление PowerShell Core через WIndows Update/WSUS (рассмотрено ниже).
Для установки PowerShell Core из MSI пакета средствами SCCM/MDT/скриптами в тихом режиме можно использовать команду установки со следующими параметрами:
- ADD_EXPLORER_CONTEXT_MENU_OPENPOWERSHELL
- ADD_FILE_CONTEXT_MENU_RUNPOWERSHELL
- ENABLE_PSREMOTING
- REGISTER_MANIFEST
- ADD_PATH
- DISABLE_TELEMETRY
- USE_MU – использовать Microsoft Update для получения обновлений PSCore
- ENABLE_MU – разрешить обновление PowerShell Core через Windows Update
Например, команда установки может выглядеть так:
msiexec.exe /package PowerShell-7.3.3-win-x64.msi /quiet ADD_EXPLORER_CONTEXT_MENU_OPENPOWERSHELL=1 ENABLE_PSREMOTING=1 REGISTER_MANIFEST=1 ADD_PATH=1 ENABLE_MU=1 ADD_PATH=1
Вы можете обновить PowerShell непосредственно из консоли. Чтобы установить или обновиться до последней версии PoSh Core, выполните команду:
iex "& { $(irm https://aka.ms/install-powershell.ps1) } -UseMSI"
Данная команда загружает установочный MSI файл PowerShell 7.3 с GitHub и запускает установку через MSI Installer.

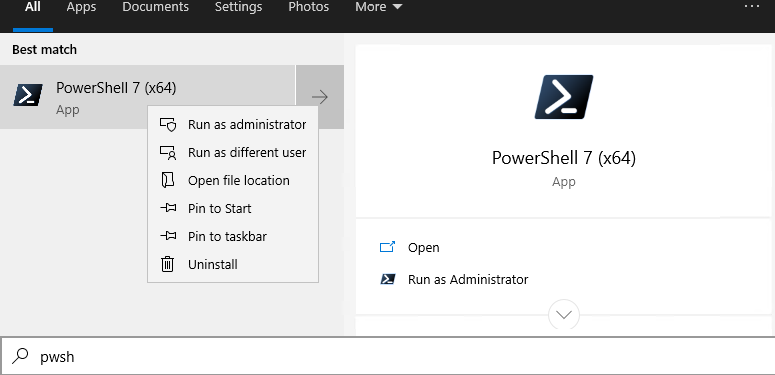
После окончания установки открывается окно PowerShell Core (pwsh.exe), проверьте версию PowerShell и убедитесь, что теперь это PoSh 7.3.3.
Используем менеджер пакетов WinGet для установки/обновления PowerShell Core
Если у вас установлен пакетный менеджер WinGet, вы можете установить или обновить версию PowerShell до актуальной командой:
winget install --id Microsoft.Powershell --source winget
Либо можно установить конкретную версию PowerShell Core:
winget install --id=Microsoft.PowerShell -v "7.1.2" -e
При использовании менеджера пакетов Chocolatey, используйте команды (для 5.1):
choco install powershell -y
choco upgrade powershell -y
Для обновления PowerShell 7.x:
choco upgrade pwsh -y
Обратите внимание на каталоги различных версий PowerShell:
- Windows PowerShell 5.1:
$env:WINDIR\System32\WindowsPowerShell\v1.0 - PowerShell Core 6.x:
$env:ProgramFiles\PowerShell\6 - PowerShell 7.x:
$env:ProgramFiles\PowerShell\7
Если на компьютере был установлен PowerShell 6.x, то при установке PowerShell 7.3 каталог
$env:ProgramFiles\PowerShell\6
автоматически удаляется.
Обратите внимание, что имя исполняемого файла среды PowerShell изменился. Теперь это
c:\Program Files\PowerShell\7\pwsh.exe
. У него собственная иконка в меню Start.
- Для запуска Windows PowerShell, основанного на .NET Framework используется команда
powershell.exe - Для запуска PowerShell Core, основанного на .NET Core, нужно использовать команду
pwsh.exe
Т.е. теперь на этом компьютере есть две версии: Windows PowerShell 5.1 и PowerShell Core 7.3.
Чтобы узнать версию PowerShell можно проверять версию файла pwsh.exe:
(Get-Command 'C:\Program Files\PowerShell\7\pwsh.exe').Version
Так можно проверить версию файла на удаленном компьютере:
Invoke-Command -Computername computer1 -Scriptblock {(Get-Command 'C:\Program Files\PowerShell\7\pwsh.exe').Version}
Чтобы запустить предыдущую версию PowerShell (например 4), используйте команду:
C:\Windows\System32\WindowsPowerShell\v1.0\powershell.exe -Version 4
Установка PowerShell Core через Microsoft Store
В Windows 10 и 11вы можете установить или обновить PowerShell через магазин приложений Microsoft Store. Приложение PowerShell можно найти в магазине вручную, или воспользуйтесь этой ссылкой.
Также вы можете установить магазинную версию PowerShell через WinGet:
winget search powershell --source msstore
winget install --id 9MZ1SNWT0N5D
Преимущество установки PowerShell Core через Microsoft Store в том, что магазин прилжений будет автоматически контролировать установленную версию PowerShell и автоматически устанавливать обновления по мере их появления.
Вы можете проверить, установлена ли у вас Store версия PowerShell Coreс помощью команды:
Get-AppPackage Microsoft.PowerShell
В этом примере пакет Microsoft.PowerShell_7.3.3.0_x64__8wekyb3d8bbwe установлен.
Но есть и недостатки, связанные с тем, что такой PowerShell будет запускаться в песочнице.
Установка/обновление PowerShell Core на удаленных комьютерах
Рассмотрим два сценария установки или обновления версии PowerShell Core на множестве компьютерах.
Обновление PowerShell Core с помощью GPO
В домене Active Directory вы можете централизованно установить и обновить PowerShell Core с помощью групповой политики. Воспользуйтесь возможностями установки программ с помощью MSI пакетов в GPO.
- Скачайте установочный MSI файл PowerShell и скопируйте его в каталог SYSVOL на контроллере домена;
- Откройте консоль управления доменными GPO (
gpmc.msc
), создайте новую GPO и назначьте ее на OU с компьютерами и серверами; - Перейдите в раздел GPO Computer Configuration –> Software Settings, создайте новый пакет и укажите для него путь к установочному MSI файлу PowerShell в SYSVOL;

Для более тонкого нацеливания политики на клиентов можно использовать WMI фильтры GPO.
- Для обновления групповых политик установки ПО нужно перезагрузить компьютеры. Во время загрузки на всех компьютерах будет установлена новая версия PowerShell.

Обновление PowerShell на удаленных компьютерах из командной строки
Вы можете обновлять PowerShell на удаленных компьютерах из командной строки.
- Первый способ позволяет удаленно обновить PowerShell на компьютере с помощью MSI установщика в сетевом каталоге:
Invoke-Command -ComputerName dc01 -ScriptBlock {Start-Process msiexec.exe -ArgumentList '/package "\\srv1\share\PowerShell-7.3.3-win-x64.msi" /quiet ADD_EXPLORER_CONTEXT_MENU_OPENPOWERSHELL=1 ENABLE_PSREMOTING=1 REGISTER_MANIFEST=1' -Wait} - Следующий скрипт позволит выбрать все активные компьютеры с Windows 10 из домена Active Directory и запустить на каждом из них загрузку и установку PowerShell Core:
$creds = $(Get-Credential)
$computers = Get-ADComputer -Filter 'operatingsystem -like "*Windows 10*" -and enabled -eq "true"'
ForEach ($computer in $computers) {
Invoke-Command -ComputerName $computer -Credential $creds {iex "& { $(irm https://aka.ms/install-powershell.ps1) } -UseMSI -Quiet"}
}
Будьте внимательными при использовании команд PowerShell Remoting при подключении к удаленным компьютерам (Enter-PSSession, Invoke-Command). Если вам нужно подключиться к точке управления PowerShell 7 нужно использовать команду:
Enter-PSSession -ComputerName dc01 -ConfigurationName "powershell.7"
Иначе вы подключитесь к точке PowerShell Remoting 5.1.
Обновление PowerShell в Linux дистрибутивах чаще проще всего выполняется через нативный менеджер пакетов.
Обновление PowerShell через Windows Update или WSUS
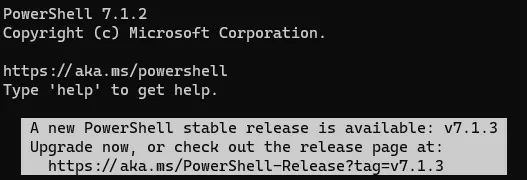
До версии PowerShell Core 7.2 не поддерживалось автоматическое обновление pwsh.exe. После выхода нового релиза в консоли появилось уведомление:
A new PowerShell stable release is available. Upgrade now, or check out the release page at: https://aka.ms/PowerShell-Release?tag=v7.1.3
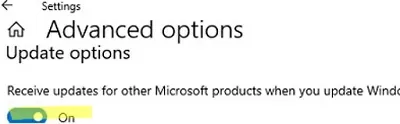
Начиная с версии 7.2, PowerShell Core поддерживает автоматическое обновление через Windows Update ( Microsoft Update, Windows Update for Business, внутренний WSUS сервер или SCCM). Для этого при установке MSI пакета нужно включить соответствующие опции.
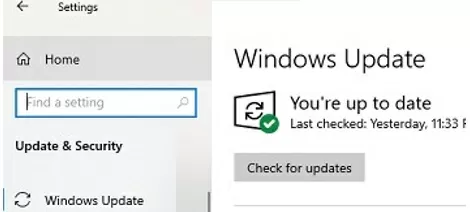
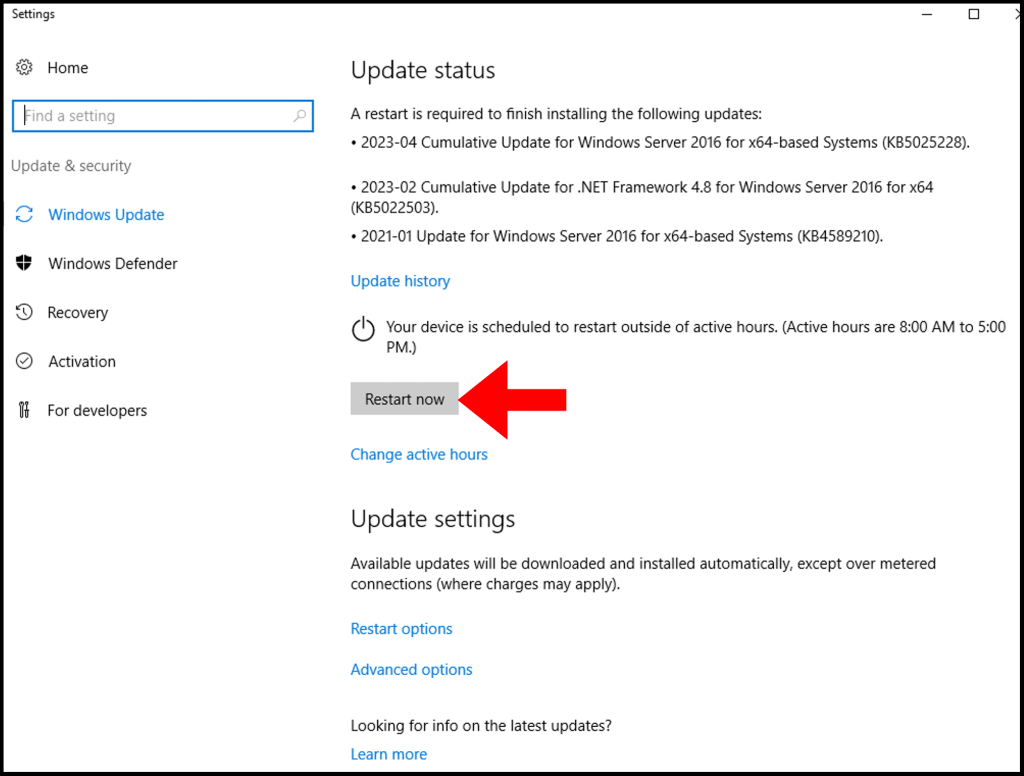
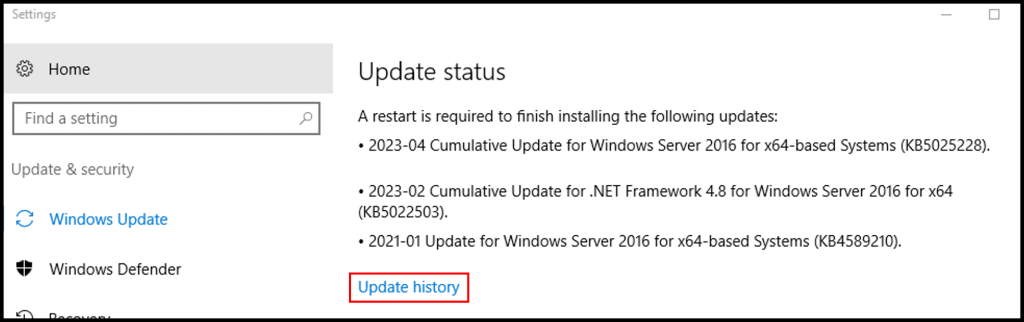
Проверьте, что в панели управления Settings -> Update and Security -> Windows Update -> Advanced Options теперь включена опция Receive updates for other Microsoft products when you update Windows.

Теперь, когда вы нажимаете кнопку Check for Updates или запускаете сканирование обновлений через модуль PSWindowsUpdate, вы также будете получать обновления для PowerShell Core.
По умолчанию в только что установленной ОС из дистрибутива SW_DVD9_Windows_Svr_Std_and_DataCtr_2012_R2_64Bit_English_-4_MLF_X19-82891.iso Windows Server 2012 R2 Std версия PowerShell имеет версию 4.0, а чтобы поставить версию 5.1 нужно установить пакет .NET Framework 4.7.1
Действия ниже выполняю при авторизации в системе с правами Администратора (Login: ekzorchik):
Win + X → Command prompt (Admin)
C:\Windows\system32>powershell
PS C:\Windows\system32> get-host | findstr /I “Version”
Version: 4.0
устанавливаю NDP471-KB4033342-x86-x64-AllOS-ENU.exe, не перезагружаюсь после, а выбираю Restart Later
а после
windowsblue-kb3191564-x64_91d95a0ca035587d4c1babe491f51e06a1529843.msu
и вот только после нужно отправить систему в перезагрузку
нажимаю на Restart Now от инсталлятора пакета обновления KB3191564
проверяю
Win + X → Command prompt (Admin)
C:\Windows\system32>powershell
PS C:\Windows\system32> get-host | findstr /I “Version”
Version: 5.1.14409.1005
Отлично, что мне и требовалось. Ну а далее, уже перехожу к настройке системы на дальнейшее использования.
На этом моя заметка для себя завершена и уже не нужно искать по заметкам на компьютере, что и как нужно сделать дабы обновить PowerShell на Windows Server 2012 R2 Std, тут просто открываю свой блок и знаю от и до, что нужно сделать. С уважением, автор блога Олло Александр aka ekzorchik.
Powershell Windows Server 2012 Windows Update
Keeping your Windows Server 2012 up-to-date with the latest patches and updates is absolutely critical, not only for stability and reliability purposes, but also from a security standpoint, as hackers are becoming more and more sophisticated in their methods of attack.

In order to make the process of Windows updates more efficient, Microsoft introduced Powershell, which is essentially a command-line shell and scripting language designed specifically for Windows.
How to Use Powershell for Windows Update
The first step to using Powershell for Windows updates is to familiarize yourself with the basic commands, which include:
- Get-WindowsUpdate: This command retrieves a list of available updates that are applicable to the system.
- Install-WindowsUpdate: This command installs the updates that are specified in the command.
- Get-Hotfix: This command retrieves a list of installed hotfixes, which are typically small software patches that address specific issues.
- Get-WUInstall: This command downloads and installs the latest updates from the Windows Update server.

Once you have a basic understanding of these commands, you can begin using Powershell for Windows updates by opening up the Powershell console and typing in the appropriate command.
Benefits of Using Powershell for Windows Update
There are a number of benefits to using Powershell for Windows updates, including:
- Efficiency: By using Powershell to download and install updates, you can save a significant amount of time, as Powershell is designed to automate tasks.
- Flexibility: Powershell is highly customizable, which means you can use it to download and install updates in a way that is tailored to your specific needs.
- Centralization: Powershell can be used to manage updates on multiple systems from a central location, which makes it ideal for large-scale deployments.
- Remote Management: Powershell allows you to manage updates on remote systems, which means you can update servers that are located in other parts of the world without having to physically access them.
Best Practices for Using Powershell for Windows Update
While Powershell can be a powerful tool for managing Windows updates, there are a number of best practices that you should follow, including:
- Always backup your system before installing updates, as updates can sometimes cause issues.
- Keep your system up-to-date with the latest patches and updates, as outdated systems are more vulnerable to attacks.
- Test updates on a non-production system before deploying them on a production system, as updates can sometimes cause issues.
- Periodically audit your system to ensure that all updates have been installed, as missing updates can leave your system vulnerable.
In conclusion, Powershell is a powerful tool that can be used to manage Windows updates in a highly efficient and effective manner. By following best practices and familiarizing yourself with the basic commands, you can ensure that your Windows Server 2012 is always up-to-date with the latest patches and updates, which is critical for both stability and security purposes.
Powershell Windows Server 2012 Windows Update
Windows Server 2012 is a server operating system developed and released by Microsoft in 2012. It is the successor to Windows Server 2008 and is a part of the Windows NT family of operating systems. One of the essential tasks for any server administrator is to make sure the operating system and its components are up-to-date. Windows Update is a built-in feature of Windows Server 2012 that can help automate this task. In this article, we will be discussing how to use Powershell to perform Windows updates on Windows Server 2012.
What is Powershell?

Powershell is a command-line shell and scripting language developed by Microsoft. It is built on top of the .NET Framework and is designed to automate and simplify system administration tasks. Powershell is included in Windows Server 2012 by default and can be used to perform a wide range of tasks, including managing the Windows Update service.
Using Powershell to Perform Windows Updates
To use Powershell to perform Windows updates, you will first need to open a Powershell console. You can do this by navigating to the start menu and typing «Powershell» in the search bar. Once the console is open, you can use the following commands to manage Windows updates:
Get-WindowsUpdate: This command will check for available updates.Install-WindowsUpdate: This command will install any available updates.Get-WUInstall: This command will give you information about the Windows Update service.Add-WUServiceManager: This command will add a new Windows Update service.

You can also use Powershell to schedule Windows updates. To do this, you can use the following command:
Register-ScheduledJob –Name "Windows Update" –ScriptBlock { Install-WindowsUpdate -AcceptAll -AutoReboot } –Trigger (New-ScheduledTaskTrigger -Daily –At 2AM)
This command will create a new scheduled task that will run Install-WindowsUpdate every day at 2AM. The -AcceptAll parameter will automatically accept any prompts and the -AutoReboot parameter will automatically reboot the server if necessary.
Conclusion
Windows Server 2012 is a powerful operating system that is used by many organizations around the world. Keeping the operating system and its components up-to-date is essential for security and stability. By using Powershell, you can automate the process of installing and managing Windows updates, making your job as a server administrator much easier.
Powershell в Windows Server 2012 и обновление Windows
Windows Server 2012 — это мощная операционная система, которая используется многими компаниями для управления и хранения данных. Она также имеет фантастический инструмент под названием Powershell, который является мощным и гибким средством автоматизации и управления средой Windows. В этой статье мы рассмотрим использование Powershell для обновления Windows, чтобы оставаться в безопасности и получать самые последние функции Windows.
Что такое обновление Windows?
Обновление Windows — это процесс, в котором компьютер загружает и устанавливает последние исправления и функции операционной системы Windows. Эти обновления могут содержать исправления безопасности, новые функции, исправления ошибок и улучшения производительности. Обновления Windows играют важную роль в обеспечении безопасности и эффективности вашего компьютера.
Почему важно обновлять Windows Server 2012?
Обновления Windows Server 2012 — это необходимый процесс для обеспечения безопасности и эффективности сервера. Без обновлений сервер может оставаться уязвимым для атак и вредоносных программ. Кроме того, обновления могут содержать исправления ошибок и улучшения производительности, которые могут значительно улучшить работу сервера.
Как Powershell может упростить процесс обновления Windows?
Powershell — это мощный инструмент, который может значительно упростить процесс обновления Windows. С помощью Powershell вы можете автоматизировать процесс установки обновлений, настроить расписание установки обновлений и многое другое.
Например, вы можете создать скрипт PowerShell, который автоматически загружает и устанавливает все последние обновления Windows Server 2012. Это может значительно сэкономить время и усилия, позволяя вам сконцентрироваться на более важных задачах.
Как использовать Powershell для обновления Windows Server 2012?
Для использования Powershell для обновления Windows Server 2012 вы можете использовать следующие команды:
- Get-WindowsUpdate — получение списка всех доступных обновлений
- Install-WindowsUpdate — установка всех доступных обновлений
- Add-WindowsUpdate — добавление новых обновлений в очередь
- Remove-WindowsUpdate — удаление конкретных обновлений из очереди
Эти команды могут значительно упростить процесс установки обновлений Windows Server 2012 и упростить его автоматизацию.
Как настроить расписание установки обновлений?

Вы также можете использовать Powershell для настройки расписания установки обновлений Windows Server 2012. Для этого вам необходимо использовать следующие команды:
- Get-ScheduledTask — получение списка текущих задач
- New-ScheduledTaskTrigger — добавление новой задачи
- Set-ScheduledTask — настройка параметров задачи
С помощью этих команд вы можете настроить расписание установки обновлений Windows Server 2012, что позволит вам автоматически загружать и устанавливать все последние обновления без простоя сервера.
Заключение

В этой статье мы рассмотрели использование Powershell для обновления Windows Server 2012. Powershell — это мощный и гибкий инструмент, который может значительно упростить процесс установки обновлений и настройки расписания установки. Обновление Windows Server 2012 — это необходимый процесс для обеспечения безопасности и эффективности сервера, и с помощью Powershell вы можете упростить и автоматизировать процесс обновления. Не забывайте регулярно обновлять ваш сервер, чтобы защитить его от уязвимостей и получить все последние функции Windows.
Windows Updates play a great role in security. We always recommend installing updates that are marked as Important. If you are having automatic update installation setting enabled then; you do not need to worry about anything, as Windows install all the updates from the background. For some reason, if your server does not have automatic update installation enabled, you must install all the important updates manually, or set it to automatic according to your preference.
Method 1 – Using Windows Updater
Windows Server 2016 & 2019
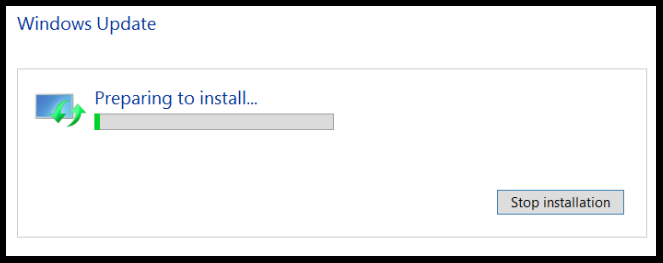
1. First, log in to your Windows Server then search, and open Check for updates.
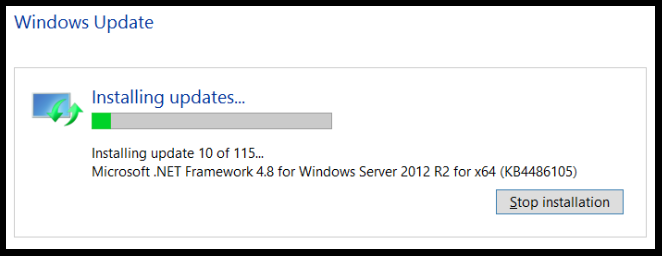
2. Now click Check for updates and Windows will begin to check for updates. Then it will start to download them.
3. After finishing the download, Windows will begin to prepare the update for installation.
4. Once the installation is done, you will be prompted to restart the server. Click Restart now to complete the update.
5. (Optional) You can check the recent installed Updates from “Update History“.
Windows Server 2012 R2
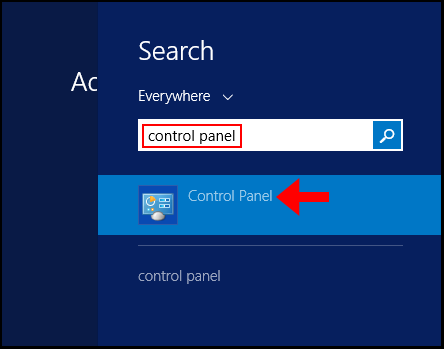
1. First, log in to your Windows Server then search and open Control Panel.
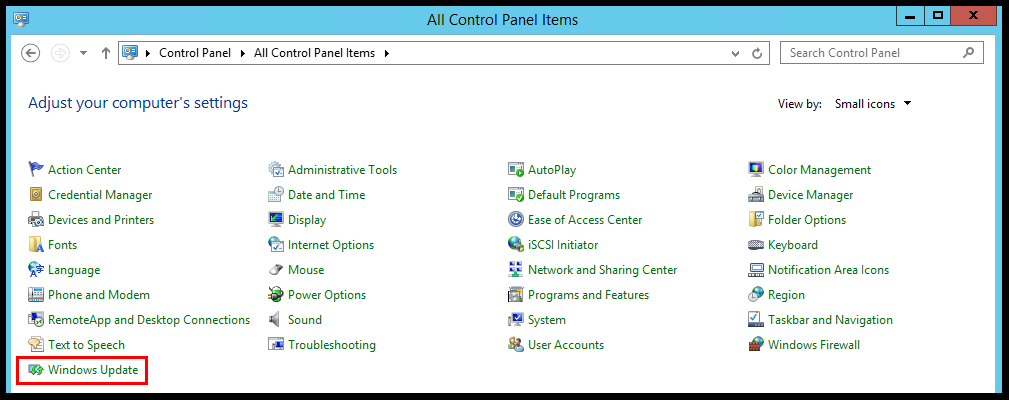
2. Expand the View by dropdown and select Small Icons to enable the view of all the options.
3. Then, click on Windows Update.
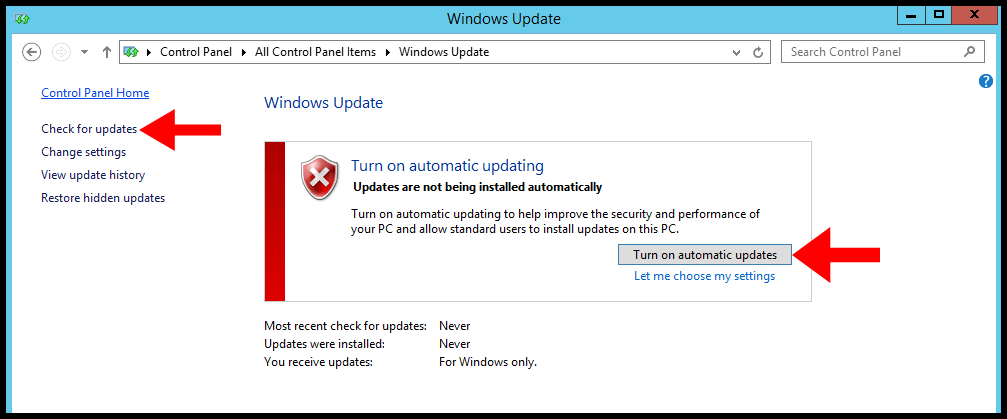
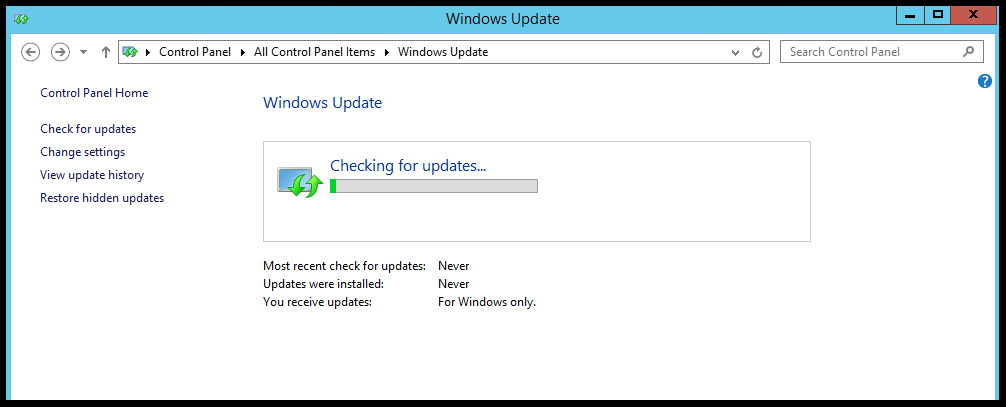
4. In Windows Server 2012 R2, automatic updates are disabled, for that, you need to Turn on automatic updates or click on Check for the updates. Once, you do that, Windows will begin looking for available updates.
5. Next, Windows will display all the available updates and click important updates are available.
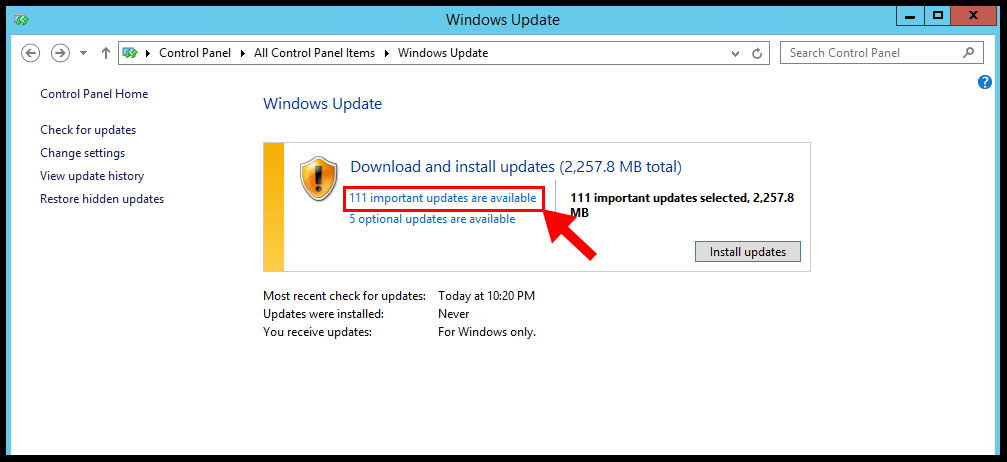
6. Select, all the important updates from the list and click on Install.
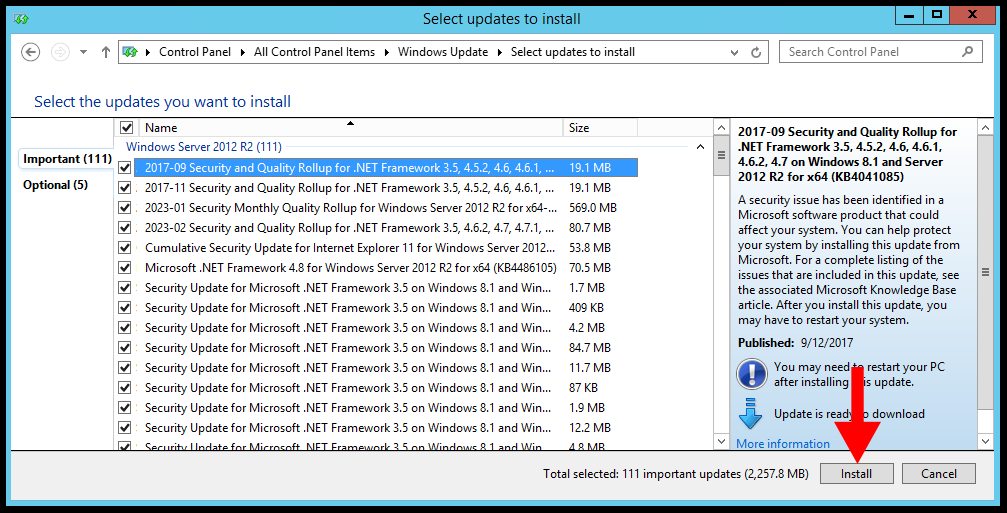
7. Windows will prepare for the installation and instantly starts the installation of selected updates after download,
8. Finally, once the installation is done you must reboot the server.
Method 2 – Using Windows Powershell
1. Log in to Windows Server then search and open Windows Powershell.
2. First, we need to check the available updates, for that windows, PowerShell has a separate module, first install the update module using the following command,
Install-Module PSWindowsUpdate3. Once update module installation is done, check the available update using the following command,
Get-WindowsUpdate4. Now, run the following command to install the updates,
Install-WindowsUpdateConclusion
In the article, we went through how to apply windows updates for servers 2012 R2 and 2016. We always recommend updating the windows servers with the latest security patches.
Hyonix was founded in early 2018, as we believed the current pricing of Windows VPS was far too overpriced for most consumers. This makes it nonuser and budget-friendly for many people around the world. Our main goal is to change that – providing powerful licensed Windows VPS at a reasonable price so that everyone can grab one without thinking twice about the performance/price that you will get. Get yourself fully optimized Windows VPS starting @ $6.5/mo from Hyonix.com.
This article describes how to update Windows PowerShell to the latest version 5.1 and how to install (upgrade) PowerShell Core 7.3. There are currently two branches of PowerShell:
- The classic Windows PowerShell (the maximum version is 5.1, which is no longer being developed.);
- The new PowerShell Core platform (version 7.3 is available now).
Although the PowerShell version numbering continues from 5.1 (6.0, 6.1, 7.0, 7.1, and so on), they are two different platforms. Therefore, updating Windows PowerShell and PowerShell Core will be covered separately.
PowerShell Core 7.x is the version that is most compatible with classic Windows PowerShell. This means that you can easily run your old PS1 script files and cmdlets in PowerShell Core.
Contents:
- Upgrading to Windows PowerShell 5.1
- How to Install or Update PowerShell Core 7?
- Installing/Updating PowerShell Core on Remote Computers
- Updating PowerShell via Windows Update or WSUS
Upgrading to Windows PowerShell 5.1
Windows PowerShell 5.1 is already installed by default in all versions, starting with Windows 10 and Windows Server 2016.
You must manually upgrade to PowerShell 5.1 for earlier versions (Windows 7/8.1 and Windows 2008 R2/2012). For example, Windows Server 2012 R2 (Windows 8.1) has PowerShell 4.0 installed.
Let’s try upgrading the Windows PowerShell version to 5.1 in Windows Server 2012 R2.
First, check the current PowerShell version (the screenshot shows that it’s PowerShell 4.0):
$PSVersionTable.PSVersion
To upgrade your PowerShell version to 5.1, install the Windows Management Framework 5.1, which requires the .NET Framework 4.5.2 (or later). Make sure that .NET 4.5.2 or higher is installed using this command:
(Get-ItemProperty ‘HKLM:\SOFTWARE\Microsoft\NET Framework Setup\NDP\v4\Full’ -Name Release).Release

In my case, the release version 378675 means that the .NET Framework version 4.5.1 is installed. So, I have to download and install the latest .NET Framework 4.8 (here is the link to the offline installer: https://go.microsoft.com/fwlink/?linkid=2088631 — ndp48-x86-x64-allos-enu.exe).
Install the .NET 4.8 package (you will need to restart your computer):
If you install WMF 5.1 without .NET 4.5.2, some PowerShell features will not be available.
Download WMF 5.1 for Windows Server 2012 R2 — Win8.1AndW2K12R2-KB3191564-x64.msu (https://go.microsoft.com/fwlink/?linkid=839516).
Install the Windows Management Framework 5.1 from the MSU file.
After you restart the server, open the powershell.exe console and make sure that the PowerShell version has been updated to 5.1.
If you have unsupported Windows 7 or Windows Server 2008 R2, you can upgrade the PowerShell version from 2.0 to 5.1 in the same way. First, install .Net Framework 4.5.2 (or newer), then WMF 5.1 (the download links will be different from those for Windows Server 2012 R2).
How to Install or Update PowerShell Core 7?
PowerShell Core is cross-platform and under active development (unlike Windows PowerShell 5.1). Actually, PowerShell Core is a new platform installed on the operating system alongside the classic Windows PowerShell. This means that you cannot upgrade from PowerShell 5.1 to PowerShell Core 7.3. PowerShell 7.x is installed on your computer separately from Windows PowerShell 5.1 (side-by-side).
PowerShell Core 6.x and 7.x are available at this time. It is recommended that you always install the latest version of PowerShell (currently 7.3) unless you need special compatibility with legacy scripts.
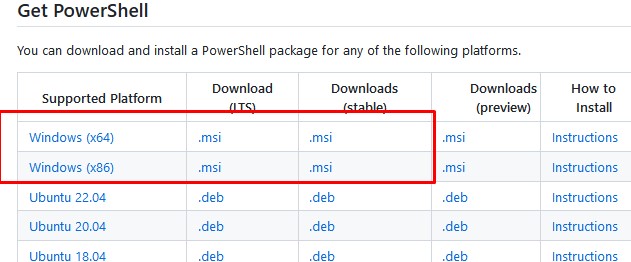
There are several ways to upgrade (install) the PowerShell Core version on Windows 10 and 11:
- Use the PowerShell Core MSI installer, which is available to download from GitHub;
- Using the built-in Windows 10/11 package manager WinGet;
- Using the Microsoft Store.
Next, using the example of updating PowerShell Core to 7.3 on Windows 10 22H2, we will look at all of these methods.
Upgrading the PowerShell Core Using MSI installation
If you want to install PowerShell Core using the MSI package, go to the project page https://github.com/PowerShell/PowerShell and download the installation package for your OS version. At the time of writing, the most recent release of PowerShell is v7.3.3, dated 24 February 2023 (for example, PowerShell-7.3.3-win-x64.msi or PowerShell-7.3.3-win-x86.msi). Use only stable or LTS releases for a production environment.
Download the MSI file and install it.
The following installation options are available:
- Add PowerShell to Path Environment Variable
- Register Windows Event Logging Manifest (a separate Event Viewer log is created for PowerShell events.
%SystemRoot%\System32\Winevt\Logs\PowerShellCore%4Operational.evtx) - Enable PowerShell Remoting (enables and configures WinRM for PowerShell Remoting)
- Add ‘Open here’ context menu to Explorer
- Add ‘Run with PowerShell 7’ context menu for PowerShell files
Next, you can enable automatic updates of the PowerShell Core through Windows Update/WSUS (see below).
To install PowerShell Core from an MSI package using SCCM/MDT/scripts in quiet mode, you can use a command with the following parameters:
- ADD_EXPLORER_CONTEXT_MENU_OPENPOWERSHELL
- ADD_FILE_CONTEXT_MENU_RUNPOWERSHELL
- ENABLE_PSREMOTING
- REGISTER_MANIFEST
- ADD_PATH
- DISABLE_TELEMETRY
- USE_MU – use the Microsoft Update to get PSCore updates
- ENABLE_MU – allow the PowerShell Core to be updated through Windows Update
For example, the command for a silent installation might look something like this:
msiexec.exe /package PowerShell-7.3.3-win-x64.msi /quiet ADD_EXPLORER_CONTEXT_MENU_OPENPOWERSHELL=1 ENABLE_PSREMOTING=1 REGISTER_MANIFEST=1 ADD_PATH=1 ENABLE_MU=1 ADD_PATH=1
You can upgrade PowerShell directly from the console. To install or upgrade to the latest version of PowerShell Core, run the following command:
iex "& { $(irm https://aka.ms/install-powershell.ps1) } -UseMSI"
This command downloads the PowerShell 7.3 MSI file from GitHub and then starts the installation via the MSI installer.

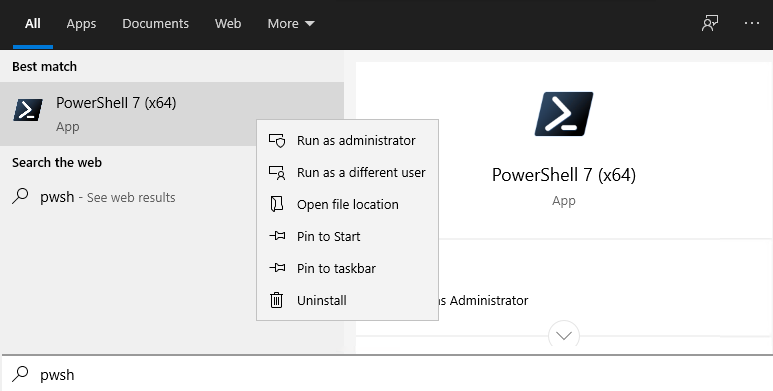
When the installation is complete, the PowerShell Core (pwsh.exe) window appears. Check the PowerShell version to ensure that it is updated to PoSh 7.3.3.
Using WinGet Package Manager to Install or Update PowerShell Core
If you have the WinGet package manager installed, you can install or update your PowerShell version to the latest command:
winget install --id Microsoft.Powershell --source winget
Or, you can install a specific version of PowerShell Core:
winget install --id=Microsoft.PowerShell -v "7.1.2" -e
If you have the Chocolatey package manager installed, use the commands (for 5.1):
choco install powershell -y
 choco upgrade powershell -y
or for PowerShell 7.x:
choco install pwsh -y
 choco install pwsh -y
Note the default directories for different versions of PowerShell:
- Windows PowerShell 5.1:
$env:WINDIR\System32\WindowsPowerShell\v1.0 - PowerShell Core 6.x:
$env:ProgramFiles\PowerShell\6 - PowerShell Core 7.x:
$env:ProgramFiles\PowerShell\7
If PowerShell 6.x was installed on your computer, the $env:ProgramFiles\PowerShell\6directory is automatically removed when you install PowerShell 7.3.
Note that the name of the PowerShell executable file has changed. In PowerShell Core, it is c:\Program Files\PowerShell\7\pwsh.exe. It has its icon in the Start menu.
- To run .NET Framework-based Windows PowerShell, the
powershell.execommand is used - To run .NET Core-based PowerShell Core, use the
pwsh.exe
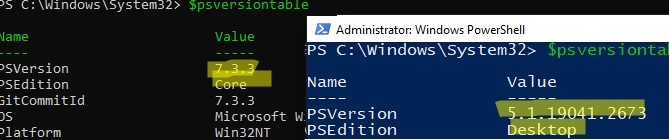
This means that you have both Windows PowerShell 5.1 and PowerShell Core 7.3 installed on your computer.
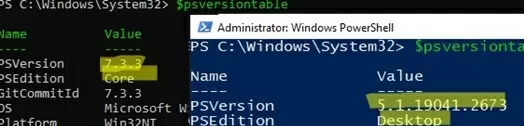
To find the version and build of PowerShell that is installed on your device, you can check the version of the pwsh.exe file:
(Get-Command 'C:\Program Files\PowerShell\7\pwsh.exe').Version

This is how you can check the version of a file on a remote computer:
Invoke-Command -Computername computer1 -Scriptblock {(Get-Command 'C:\Program Files\PowerShell\7\pwsh.exe').Version}
Windows PowerShell provides a special backward compatibility mode that allows you to run an older version of PowerShell even if you have newer versions installed. You can use the following command to run a specific version of PowerShell example, 4.0):
C:\Windows\System32\WindowsPowerShell\v1.0\powershell.exe -Version 4
Install PowerShell Core on Windows 10 and 11 via Microsoft Store
On Windows 10 and 11, you can install or update PowerShell through the Microsoft Store. You can manually find the PowerShell app in the Store or use this link.
You can also use WinGet to install the Store version of PowerShell:
winget search powershell --source msstore
 winget install --id 9MZ1SNWT0N5D
The advantage of installing PowerShell Core from the Microsoft Store is that the App Store automatically checks your installed version of PowerShell and automatically installs updates as they become available.
To verify that you have installed the Store version of PowerShell Core, use the command:
Get-AppPackage Microsoft.PowerShell
The Microsoft.PowerShell_7.3.3.0_x64__8wekyb3d8bbwe package is installed in this example.
However, there are also drawbacks to the fact that such an instance of PowerShell will be running in a sandbox environment.
Installing/Updating PowerShell Core on Remote Computers
Consider two scenarios for installing or updating the PowerShell Core on multiple remote computers.
Deploying PowerShell Core with Group Policy
You can use Group Policy to centrally deploy and update PowerShell Core in an Active Directory domain. Use the features of the GPO to deploy MSI packages to domain computers.
- Download the PowerShell MSI installation file and copy it to the SYSVOL directory on the domain controller;
- Open the Domain Group Policy Management Console (
gpmc.msc), create a new GPO and link it to the OU with computers and servers; - Go to the GPO section Computer Configuration -> Software Settings, create a new package, and specify the path to the PowerShell MSI installation file in the SYSVOL folder in the domain (use the UNC path);

To more accurately target your policy to domain devices, you can use the GPO WMI filters.
- To update the Group Policy settings for the software installation, you must restart the computers. The new version of PowerShell will be installed on all computers at startup.

How to Update PowerShell on a Remote Computer from the Command Prompt?
You can use the command line prompt to update PowerShell on a remote computer.
- The first method uses an MSI installer in a shared network folder to remotely update PowerShell on a computer:
Invoke-Command -ComputerName mun-srv01 -ScriptBlock {Start-Process msiexec.exe -ArgumentList '/package "\\mun-fs01\install\PowerShell-7.3.3-win-x64.msi" /quiet ADD_EXPLORER_CONTEXT_MENU_OPENPOWERSHELL=1 ENABLE_PSREMOTING=1 REGISTER_MANIFEST=1' -Wait}
- The following script selects all enabled computers running Windows 10 from the Active Directory domain and starts downloading and installing PowerShell Core on each of them:
$ADComputers = Get-ADComputer -Filter 'operatingsystem -like "*Windows 10*" -and enabled -eq "true"'
 ForEach ($computer in $ADcomputers) {
 Invoke-Command -ComputerName $computer {iex "& { $(irm https://aka.ms/install-powershell.ps1) } -UseMSI -Quiet"}
 }
Take care when using PowerShell Remoting commands when connecting to remote computers (with the Enter-PSSession and Invoke-Command cmdlets). If you need to connect to a PowerShell 7 endpoint, you must use the command:
Enter-PSSession -ComputerName dc01 -ConfigurationName "powershell.7"
Otherwise, you will connect to the PowerShell Remoting 5.1 endpoint.
Updating PowerShell via Windows Update or WSUS
Before PowerShell Core version 7.2, pwsh.exe was not automatically updated. There was only a notification in the console after the release of a new version:
A new PowerShell stable release is available. Upgrade now, or check out the release page at: https://aka.ms/PowerShell-Release?tag=v7.1.3
Starting with version 7.2, PowerShell Core supports automatic updates through Windows Update (Microsoft Update, Windows Update for Business, internal WSUS server, or SCCM). To do this, you must enable the appropriate options during the installation of the MSI package.
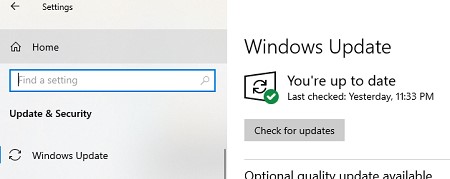
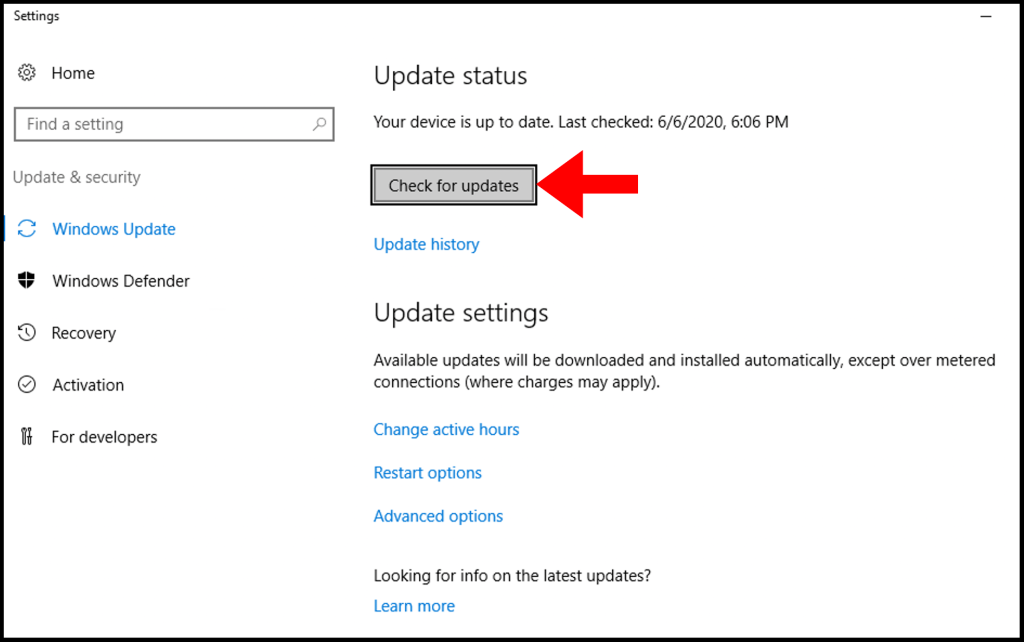
Check that the Receive updates for other Microsoft products when you update Windows option is now enabled under Settings -> Update and Security -> Windows Update -> Advanced options.
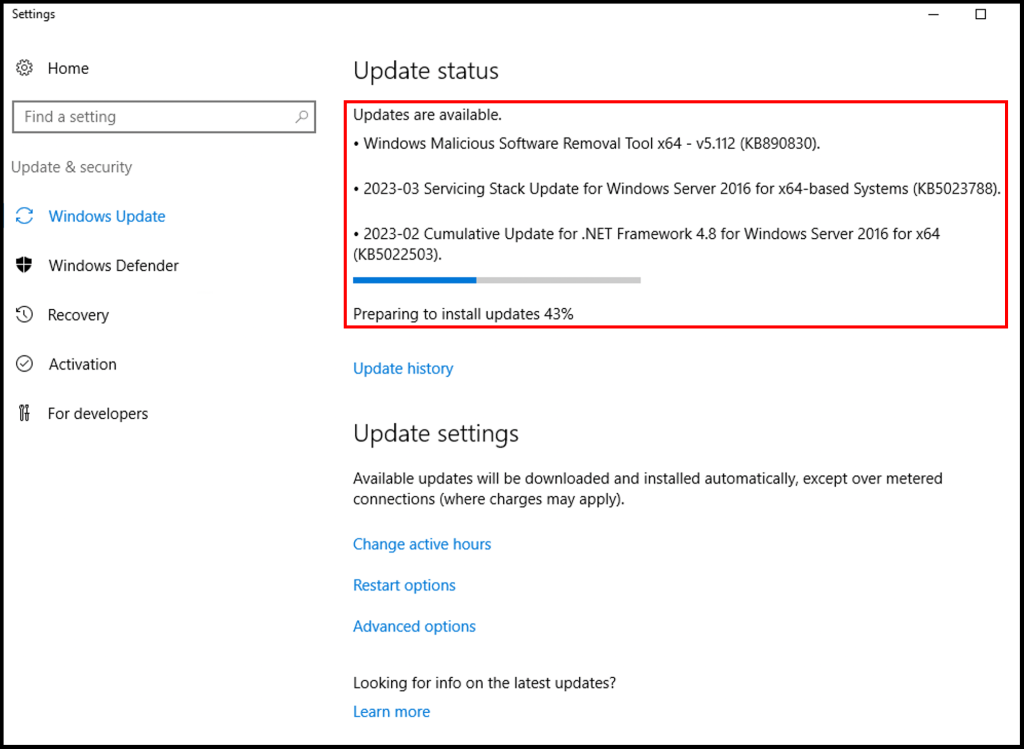
Now, when you click the Check for Updates button or run an update scan through the PSWindowsUpdate module, you will also receive updates for PowerShell Core.