
Как известно, Windows Server Core — это Windows без Windows (с небольшими исключениям) и все управление им происходит либо удаленно — оснастки, PowerShell — либо локально — опять же PowerShell и разные утилиты командной строки, среди которых отдельно стоит выделить sconfig и SCRegEdit.wsf.
Но сегодня мы поговорим о методах изменения разрешения экрана на Server Core.
Для этого существует отдельный модуль PowerShell, обладающий лаконичным названием — ServerCore.
Входят в него два коммандлета — Get-DisplayResolution и Set-DisplayResolution.
Как можно понять из названия, Get-DisplayResolution отображает настройки разрешения экрана, а Set-DisplayResolution — их изменяет.
Например, так:
Set-DisplayResolution -Width 1920 -Height 1080
Страницы в социальных сетях:
Twitter: https://twitter.com/vsseth
Facebook: https://fb.com/inpowershell
VKontakte: https://vk.com/inpowershell
Set custom scaling option for Server 2012+ RDS
If you log into a Server 2012+ RDS from a Windows 7 machine you will find that you cannot change the scaling (Text Size, DPI, etc.) of the desktop. This is due to the fact that by default, Server 2012 RDS will use the scaling settings of your Windows 8+ machine. If you are on Windows 7 you will only have the option for the default resolution.
Thankfully, there are some reg keys that allow us to work around this.
For all users on a machine (this will break auto scaling for Win 8 machines):
Create the following reg key on the RDS server
HKEY_LOCAL_MACHINE\SYSTEM\CurrentControlSet\Control\Terminal Server\WinStations\IgnoreClientDesktopScaleFactor
DWORD
Value: 1
For select users (if you only have a few Win 7 machines to deal with):
HKEY_CURRENT_USER\Control Panel\Desktop\LogPixels
DWORD
Value: 78 (hex) for 120 DPI (you can find other values in the links below)
References
https://docs.microsoft.com/en-us/windows-hardware/manufacture/desktop/dpi-related-apis-and-registry-settings
https://support.microsoft.com/en-us/help/3026738/remoteapp-window-is-too-large-or-too-small-when-you-use-rdp-to-run-a-r
Popular posts from this blog
FSLogix Troubleshooting guide
Have an issue you can’t solve? I offer consulting engagements and can be reached here: consulting[а 𝐭 ]amorales[․]org This article will cover some common issues I have ran into, and steps on how to resolve them. The guide should be followed in order since most of the advanced items are usually not the cause of a problem. If you just set up FSLogix, make sure that you followed every step under Deploying FSLogix Office 365 Containers and Deploying FSLogix Profile Containers Terminology ODFC = Office Data File Containers This is there Office (Outlook, Teams, Licensing) data is stored This can be used in conjunction with UPDs FSL Profiles Replacement for UPDs User profiles are stored here (Office data is stored in the ODFC) Cannot be used in conjunction with UPDs Non-Issues The items below should be ignored when troubleshooting Local_ files under C:\Users If FSLogix profiles are enabled, these folders can be ignored. They…
Best Practices for Deploying User Profile Disks
Have an issue you can’t solve? I offer consulting engagements and can be reached here: consulting[а 𝐭 ]amorales[․]org Last Updated 2020-01-03 After months of testing I recommend deploying FSLogix Profile Containers instead of User Profile Disks. You can find my guide here . Some of the items below apply to FSL Profile Containers. User Profile Disks (UPDs) are great for load balanced RDS farms since it allows users to seamlessly roam from server to server. The goal of this article will be to configure the RDS and file servers in a way that maximizes performance and reduces the likelihood of UPD disconnects. I’ll keep this updated any time I find new improvements. Use FSLogix Before you even consider deploying UPDs you need to be aware of this limitation . On Server 2012 and 2016 (Server 2019 does not have this issue, but it doesn’t support Office ) the Windows Search index is machine wide. This means that when a UPD is disconnected the user’s index data is d…
Removing Application UAC Requirements with Shims
This guide will show you how to create shims that allow regular users to run applications that normally require local admin. Shims should only be used as a measure of last resort. In many cases simply granting users to certain folders or reg keys eliminates the need to create a shim. You can use LUA Buglight to identify what those reg keys/files are. How it works The shim will force the application to use «RunAsInvoker» when it is launched. RunAsInvoker tells the application to open with the privilege level of whatever launched it. For example, if a regular user opens the application through explorer.exe (a non admin process) then the application will open with regular user permissions. Things to keep in mind: Shims should be installed after the application Shims might need to be re-installed if an application is updated Not all apps play well with shims. Make sure to test the application before putting it into production Pre-Requisites Install the Microsoft Applicati…
Установка и настройка PostgreSQL на Windows Server 2012
PostgreSQL — это бесплатная СУБД c открытым исходным кодом, предназначенная для высоких нагрузок. PostgreSQL используется IT-гигантами, например, Яндексом. В этой статье мы расскажем как легко и быстро можно установить и настроить PostgreSQL на Windows Server 2012.
PostgreSQL можно скачать с официального сайта.
1. После того как установочный файл скачан, необходимо найти его в папке с Вашими загрузками и запустить его на исполнение двойным щелчком мыши.
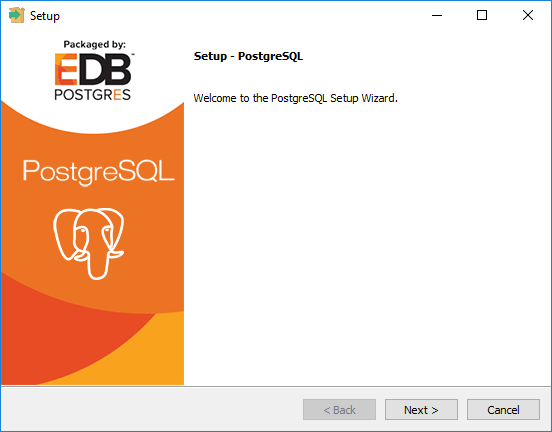
2. После этого запустится приветственное окно установки, жмем Next
3. На этом этапе можно выбрать каталог для установки PostgreSQL

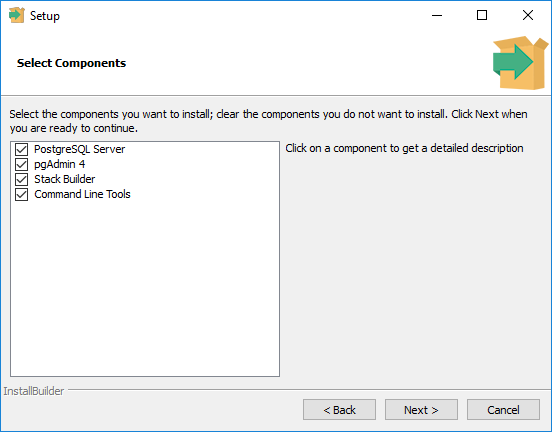
4. На этом этапе выбираем компоненты для установки — сам сервер PostgreSQL, графическая утилита администрирования pgAdmin, инструменты командной строки и утилита stack builder для установки дополнительных компонентов. Выберем все и нажмем Next
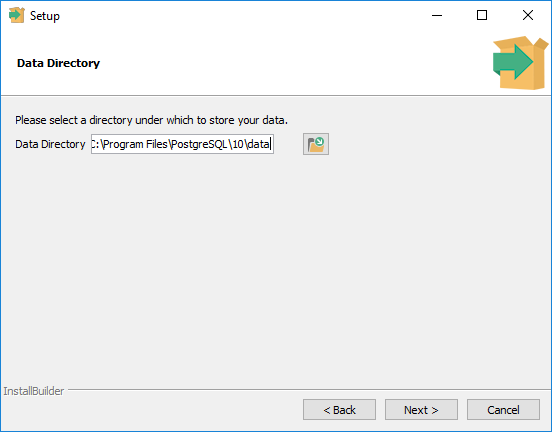
5. Выберем каталог, где будут храниться наши базы
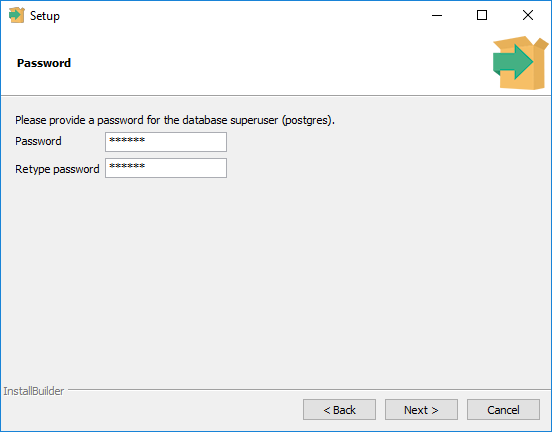
6. Зададим пароль Администратора СУБД (postgres)
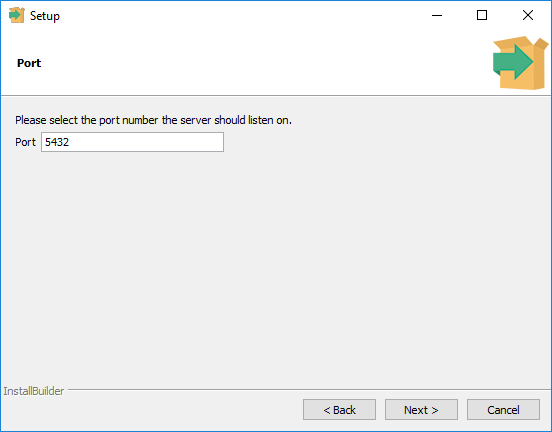
7. Можно переопределить порт по которому будет происходить соединение с БД. По умолчанию это порт 5432. Оставим.
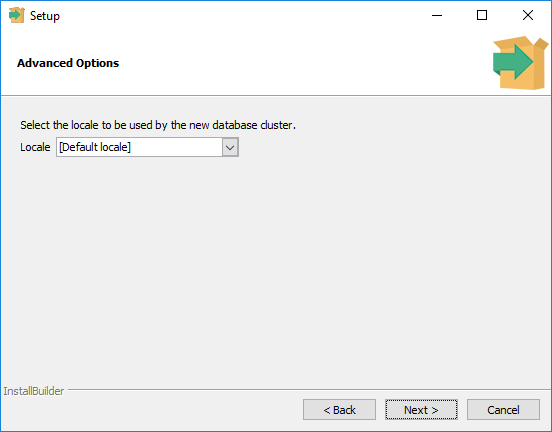
8. Выберем локализацию (региональные настройки) для наших баз или оставим по умолчанию
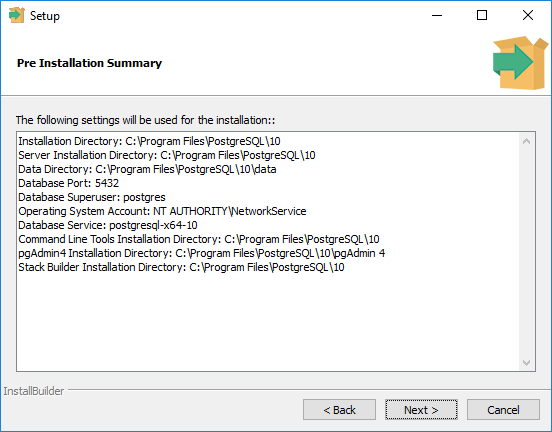
9. На этой странице нам выведут суммарную информацию о нашем выборе
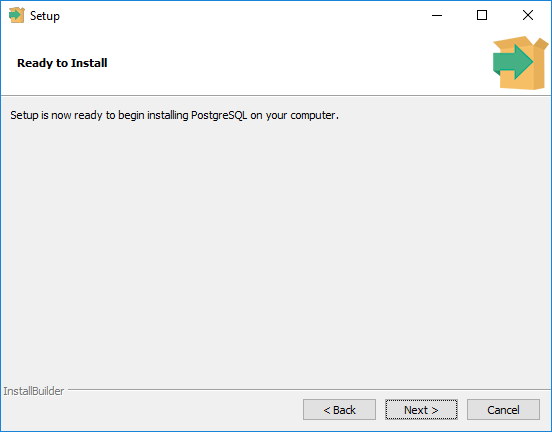
10. А на этой странице сообщают, что система готова к установке
11. Система устанавливается
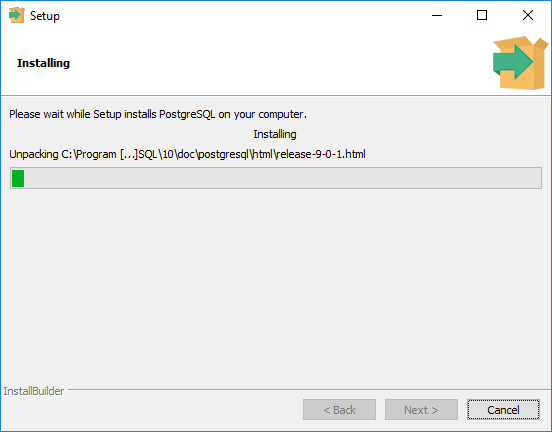
12. После окончания установки система предложит запустить Stack Builder — откажемся от установки сняв соответствующую галочку, и нажимаем Finish
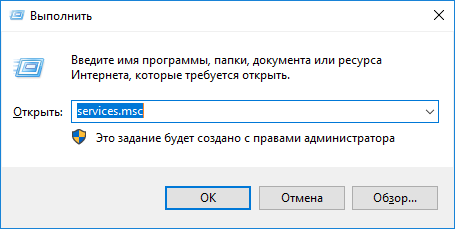
На этом установка завершена. Проверить корректность установки можно также удостоверившись что запущена соответствующая служба. Для этого надо запустить оснастку “Службы” . Для этого нажмите комбинацию Win+R и в открывшееся окно написать services.msc
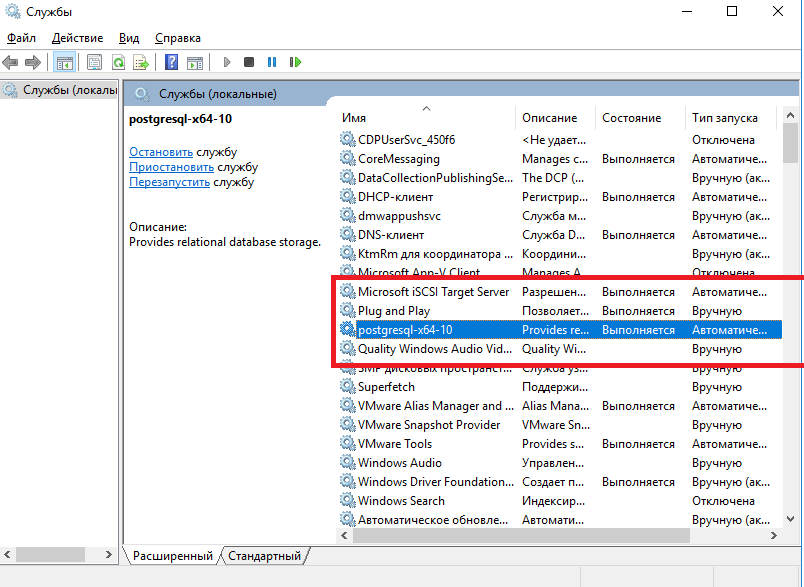
Далее необходимо найти там службу с именем начинающимся с postgresql и удостовериться что она запущена (статус службы “выполняется”)
Вместе с сервером СУБД устанавливается клиент командной строки PostgreSQL и утилита pgAdmin, которые можно также использовать для проверки корректности установки.
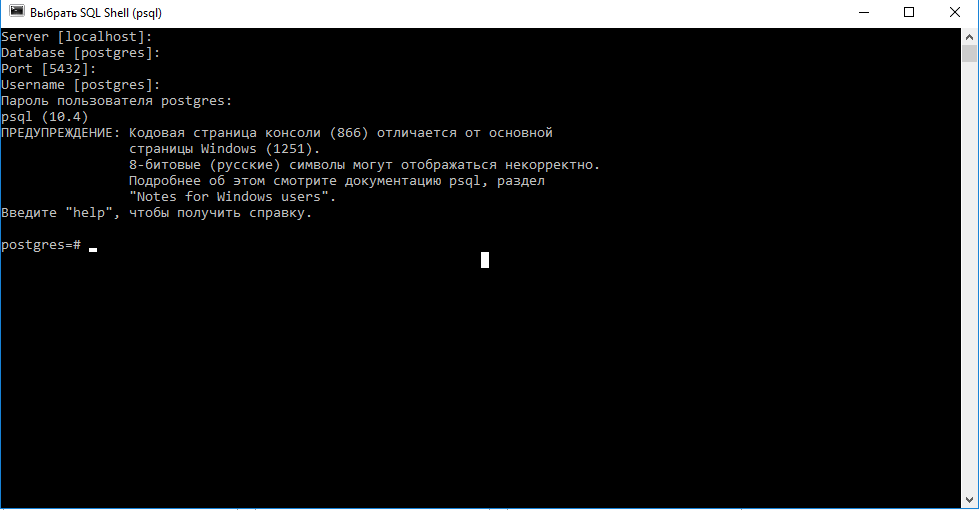
Например запустим консольный клиент psql из меню “Пуск” и попробуем соединиться c сервером PostgreSQL
Psql спросит вас к какому серверу, к какой базе и каким пользователей Вы хотите подключиться. Можно просто нажать Enter чтобы принять значения по умолчанию в квадратных скобках и в конце спросит пароль администратора , который Мы задавали на шаге 6.
В случае успешного подключения вы должны попасть в командную строку PostgreSQL которая выглядит как показано на рисунке
На этом установка и настройка PostgreSQL на Windows Server 2012 окончена. В нашей базе знаний вы найдёте ещё множество статей посвящённых различным аспектам работы в Windows, а если вы ищете надежный виртуальный сервер под управлением Windows, обратите внимания на нашу услугу — Аренда виртуального сервера Windows.
Последнее обновление: 25.09.2024
Средняя оценка: 1256993,6, всего оценок: 8
Спасибо за Вашу оценку!
К сожалению, проголосовать не получилось. Попробуйте позже
В этой инструкции пошагово описаны способы изменить разрешение экрана в Windows 10, а также представлены решения возможных проблем, имеющих отношение к разрешению: недоступно нужное разрешение, изображение выглядит размытым или мелким и других. Также приведено видео, в котором весь процесс показан наглядно.
Прежде чем говорить непосредственно об изменении разрешения, напишу несколько могущих быть полезными для начинающих пользователей вещей. Также может пригодиться: Изменение разрешение горячими клавишами, Как изменить частоту обновления экрана монитора, Как изменить размер шрифта в Windows 10, Как исправить размытые шрифты Windows 10.
Разрешение экрана монитора определяет количество точек по горизонтали и вертикали в изображении. При более высоких разрешениях изображение, как правило, выглядит мельче. Для современных жидкокристаллических мониторов во избежание видимых «дефектов» картинки следует устанавливать разрешение, равное физическому разрешению экрана (узнать которое можно из его технических характеристик).
- Изменяем разрешение экрана Windows 10 в Параметрах
- Как изменить разрешение с помощью программ видеокарты
- В панели управления (метод недоступен в новых версиях ОС)
- Видео инструкция по изменению разрешения экрана монитора Windows 10
- Проблемы при выборе нужного разрешения
Изменение разрешения экрана в настройках Windows 10
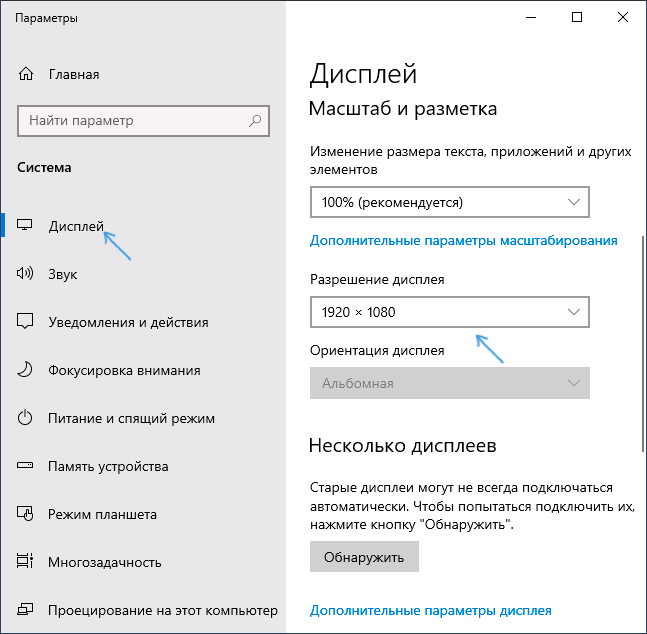
Первый и самый просто способ изменения разрешения — вход в новый интерфейс настроек Windows 10 в раздел «Дисплей» (или «Экран» в ранних версиях ОС):
- Быстрее всего открыть параметры экрана можно следующим методом: кликнуть правой кнопкой мыши по рабочему столу и выбрать пункт меню «Параметры экрана».
- Убедитесь, что в списке слева выбран пункт «Дисплей». Внизу страницы вы увидите пункт для изменения разрешения экрана (в более ранних версиях Windows 10 нужно сначала открыть «Дополнительные параметры экрана», где вы увидите возможность изменения разрешения). Если у вас несколько мониторов, то выбрав соответствующий монитор вы сможете установить для него свое собственное разрешение.

- После выбора разрешения экрана, настройки применяются сразу (в последней версии системы, ранее требовалось нажать кнопку «Применить»). При этом, если вдруг изображение с экрана пропадет, не предпринимайте никаких действий: через 15 секунд, если не подтвердить изменения, разрешение вернется к исходному.

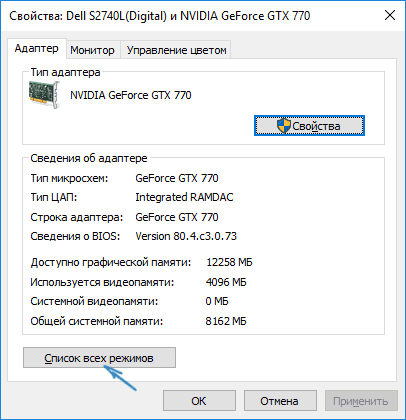
- Если на той же странице параметров открыть пункт «Дополнительные параметры дисплея» — «Свойства видеоадаптера для дисплея», а потом нажать по пункту «Список всех режимов», вы увидите окно с доступными разрешениями, глубиной цветности и частотой обновления экрана, которые также можно применить для изменения разрешения.


Если выбор разрешения не доступен, должна помочь инструкция: Не меняется разрешение экрана Windows 10.
Напомню: если при установке разрешение экрана, которое рекомендуется Windows 10 текст и элементы кажутся вам мелкими, не следует увеличивать их с помощью установки разрешения, не соответствующего физическому разрешению матрицы монитора: это ведет к искажениям. Лучше использовать встроенные средства масштабирования и изменения размеров шрифта и иконок, доступные в системе.
Изменение разрешения экрана монитора с помощью утилит видеокарты
При установке драйверов популярных видеокарт от NVIDIA, AMD или Intel, в панель управления (а также в меню по правому клику на рабочем столе) добавляется утилита настройки этой видеокарты — панель управления NVIDIA, AMD Catalyst для управления графикой Radeon, панель управления графики Intel HD. Для входа в панель управления вы можете использовать поиск в панели задач Windows 10, а после входа в неё, чтобы увидеть нужный элемент поле «Просмотр» справа вверху измените с «Категории» на «Значки».
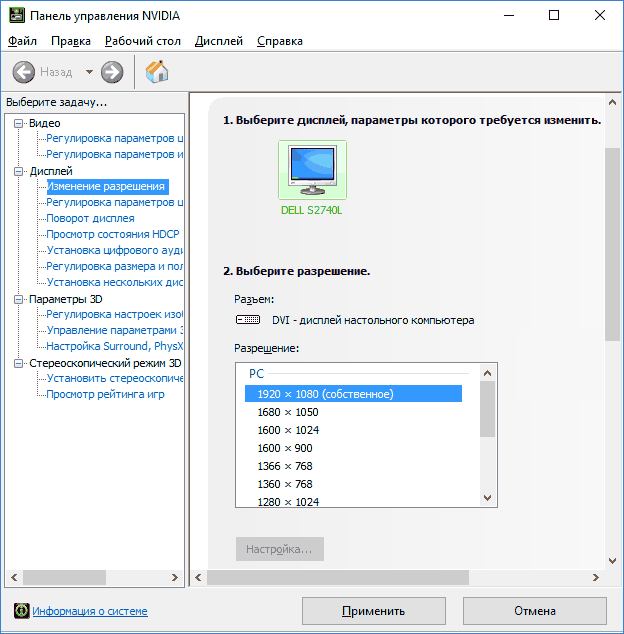
В этих утилитах, помимо прочего, присутствует и возможность изменить разрешение экрана монитора, пример — на скриншоте выше.
С помощью панели управления
Разрешение экрана также можно изменить в панели управления в более знакомом «старом» интерфейсе параметров экрана. Обновление: указанную возможность изменения разрешения убрали в последних версия Windows 10 — при выборе соответствующих пунктов вы попадете в новые Параметры системы.
Для этого, зайдите в панель управления (вид: значки) и выберите пункт «Экран» (или наберите «Экран» в поле поиска — на момент написания статьи он выдает именно элемент панели управления, а не настроек Windows 10).

В списке слева выберите пункт «Настройка разрешения экрана» и укажите нужное разрешение для одного или нескольких мониторов. При нажатии «Применить» вы также, как и в предыдущем способе можете либо подтвердить, либо отменить изменения (или подождать, и они отменятся сами).

Видео инструкция
Сначала — видео, в котором демонстрируется изменение разрешения экрана Windows 10 различными способами, а ниже вы найдете решения типичных проблем, которые могут возникнуть при этой процедуре.
Проблемы при выборе разрешения
В Windows 10 имеется встроенная поддержка разрешений 4K и 8K, а по умолчанию система выбирает оптимальное разрешение для вашего экрана (соответствующие его характеристикам). Однако, при некоторых типах подключения и для некоторых мониторов автоматическое определение может и не сработать, а в списке доступных разрешений вы можете не увидеть нужного.
В этом случае попробуйте следующие варианты:
- В окне дополнительных параметров экрана (в новом интерфейсе настроек) внизу выберите пункт «Свойства графического адаптера», а затем нажмите кнопку «Список всех режимов». И посмотрите, имеется ли в списке необходимое разрешение. В свойства адаптера также можно попасть через «Дополнительные параметры» в окне изменения разрешения экрана панели управления из второго способа.
- Проверьте, а установлены ли у вас последние официальные драйвера видеокарты. Кроме этого, при обновлении до Windows 10 даже они могут работать неправильно. Возможно, вам стоит выполнить их чистую установку, см. Установка драйверов NVidia в Windows 10 (подойдет для AMD и Intel).
- Для некоторых нестандартных мониторов могут потребоваться собственные драйвера. Проверьте, нет ли таковых на сайте производителя для вашей модели.
- Проблемы с установкой разрешения также могут возникать при использовании переходников, адаптеров и китайских HDMI кабелей для подключения монитора. Стоит попробовать другой вариант подключения, если возможно.
Еще одна типичная проблема при изменении разрешения — некачественное изображение на экране (в этом контексте может пригодиться: Плохое качество изображения по HDMI на мониторе). Обычно это вызвано тем, что устанавливается изображение, не соответствующее физическому разрешению монитора. А делается это, как правило, потому, что изображение слишком мелкое. В этом случае лучше вернуть рекомендованное разрешение, после чего увеличить масштаб (правый клик по рабочему столу — параметры экрана — изменение размера текста, приложений и других элементов) и перезагрузить компьютер.
Кажется, ответил на все возможные вопросы по теме. Но если вдруг нет — спрашивайте в комментариях, решение найдется.
Dear readers of our blog, we’d like to recommend you to visit the main page of our website, where you can learn about our product SQLS*Plus and its advantages.
SQLS*Plus — best SQL Server command line reporting and automation tool! SQLS*Plus is several orders of magnitude better than SQL Server sqlcmd and osql command line tools.
Enteros UpBeat offers a patented database performance management SaaS platform. It proactively identifies root causes of complex revenue-impacting database performance issues across a growing number of RDBMS, NoSQL, and deep/machine learning database platforms. We support Oracle, SQL Server, IBM DB2, MongoDB, Casandra, MySQL, Amazon Aurora, and other database systems.
17 August 2020
You will study in detail the process of installing PostgreSQL 12 on Windows 10.
In addition, we will also install and configure pgAdmin 4, which is a standard and free graphical tool for PostgreSQL DBMS management that we can use for writing SQL queries, developing procedures, functions, as well as for PostgreSQL administration.
What is PostgreSQL?
PostgreSQL is a free object-relational database management system (DBMS). PostgreSQL is implemented for many operating systems such as: BSD, Linux, macOS, Solaris and Windows.
PostgreSQL uses the PL/pgSQL language.
PL/pgSQL is a procedural extension of the SQL language, developed and used in PostgreSQL DBMS.
PL/pgSQL language is designed to create functions, triggers, it adds control structures to SQL language, and it helps us to perform complex calculations.
PostgreSQL is one of the most popular database management systems (TOP 5 popular database management systems).
At the time of writing, the most up-to-date version of PostgreSQL 12 is the one we will be installing.
System requirements for PostgreSQL 12 installation on Windows
PostgreSQL 12 can not be installed on all versions of Windows, in particular, the following versions are officially supported and only 64-bit:
- Windows Server 2012 R2;
- Windows Server 2016;
- Windows Server 2019.
As you can see, there’s no Windows 10 on the official list, but installation on this system goes smoothly, as does subsequent PostgreSQL functioning.
In addition, there are other requirements:
- Processor with at least 1 GHz;
- 2 gigabytes of RAM;
- At least 512 megabytes of free disk space (more for installing additional components is recommended);
- It is also recommended that all Windows operating system updates be installed.
Installing PostgreSQL 12 and pgAdmin 4 on Windows 10
So let’s move on to the installation process and look at all the steps that need to be followed in order to install PostgreSQL 12 and pgAdmin 4 on Windows 10.
Step 1 – Downloading the installer for Windows
As mentioned earlier, PostgreSQL is implemented for many platforms, but since we will be installing PostgreSQL on Windows, we need a Windows installer accordingly. You can of course download this distribution from the official PostgreSQL website, here is the download page – https://www.postgresql.org/download/windows/.
After going to the page you need to click on the link “Download the installer”, as a result you will be taken to the site of EnterpriseDB, which prepares graphical distributions of PostgreSQL for many platforms, including Windows, so you can immediately go to this site, here is the link to the download page https://www.enterprisedb.com/downloads/postgres-postgresql-downloads.
Here you need to select the PostgreSQL version and platform, in our case choose PostgreSQL 12 and Windows x86-64.

As a result, you should download the file postgresql-12.2-2-windows-x64.exe with the size of about 191 Mbytes (version 12.2-2 is available at the time of writing).
Step 2 – Starting the PostgreSQL installer
Now in order to start the installation you need to run the downloaded file (PostgreSQL installation requires administrator rights).
After the launch, a welcome screen will open, click “Next”.

Step 3 – Specify the directory to install PostgreSQL 12
Next, if necessary, we can specify the path to the directory where we want to install PostgreSQL 12, but we can leave it by default. Click “Next”.

Step 4 – Choose components for installation
Then select the components that we need to install, to do this we leave the checkboxes for the components that we need, and be sure we need PostgreSQL Server and pgAdmin 4.
You can install the command line utilities and Stack Builder on your own, i.e. you can not install them. Press “Next.”

Step 5 – Specify a directory to store database files
On this step, we need to specify the directory where the database files will be located by default.
In the case of a test installation, for example, for training, you can leave it by default, but “combat” databases should always be stored in a separate location, so if you plan to use the PostgreSQL server for some other purposes, it is better to specify a separate disk.
Click “Next”.

Step 6 – Set a password for the postgres system user
Next we need to set a password for a postgres user – this is a PostgreSQL Server administrator with maximum rights.
We enter and confirm the password. Click “Next”.

Step 7 – Specify the port for your PostgreSQL instance
On this step, if necessary, we can change the port on which PostgreSQL Server will work, if you do not have such a need, then leave it by default.
Click “Next”.

Step 8 – Specify the encoding in the database
Then we can specify a specific data encoding in the database, for this purpose we need to select the desired Locale from the drop-down list.
However, you can also leave it by default by clicking “Next”.

Step 9 – Checking PostgreSQL installation parameters
Everything is ready for installation, at this step we check the parameters we entered earlier and if everything is correct, i.e. everything we entered, we press “Next”.

Step 10 – Start the installation process
Next you will see another additional window where we must click “Next” to start the PostgreSQL installation process on your computer.

The installation has begun, it will last literally one minute.

Step 11 – Finishing the installation
When the “Completing the PostgreSQL Setup Wizard” message window is displayed, the installation of PostgreSQL 12, pgAdmin 4 and other components will be completed.
Also in this window we will be offered to run Stack Builder to download and install additional components, if you do not need it, then uncheck “Lanch Stack Builder at exit?
Click “Finish”.

Run and configure pgAdmin 4
PostgreSQL 12 and pgAdmin 4 we have installed, now let’s start pgAdmin 4, connect to the server and configure the pgAdmin work environment.
To start pgAdmin 4, go to the start menu, find PostgreSQL 12 and pgAdmin 4 in it.
Connecting to the PostgreSQL 12 server
pgAdmin 4 has a web interface, so as a result you should run your browser and open the pgAdmin 4 application.
The first time you start pgAdmin 4, you will see a “Set Master Password” window, where we must set a “master password”, this may not be done, but if we save the user’s password (“Save password” checkbox), for example, so that every time you connect you do not need to enter it, it is strongly recommended to invent and specify an additional password here, it is done once.
Enter it and click “OK”.

To connect to the newly installed local PostgreSQL server in the server browser, click on “PostgreSQL 12”.
The “Connect to Server” window will start, where you need to enter the password of the postgres system user, i.e. this is the password that you invented when you installed PostgreSQL.
Enter the password, tick “Save Password” to save the password and each time you do not enter it (thanks to the “master password” functionality, all passwords saved in this way will be additionally encrypted).
Click on “OK”.

As a result you will connect to the local PostgreSQL 12 server and see all the objects that are located on this server.

In order to make sure that our PostgreSQL server is running, let’s write a simple SELECT query that will show us the PostgreSQL server version.
To write SQL queries in pgAdmin 4, you can use Query Tool or Russian “Query”, you can run it using the icon on the panel or from the menu “Tools”.
After you open the Query Tool, write.
SELECT VERSION()
This query shows the PostgreSQL version. As you can see, everything works!
How to Install PostgreSQL 12 and pgAdmin 4 on Windows 10
Tags: PostgreSQL, PostgreSQL 12, PostgreSQL data types