
Установка и настройка PostgreSQL на Windows Server 2012
PostgreSQL — это бесплатная СУБД c открытым исходным кодом, предназначенная для высоких нагрузок. PostgreSQL используется IT-гигантами, например, Яндексом. В этой статье мы расскажем как легко и быстро можно установить и настроить PostgreSQL на Windows Server 2012.
PostgreSQL можно скачать с официального сайта.
1. После того как установочный файл скачан, необходимо найти его в папке с Вашими загрузками и запустить его на исполнение двойным щелчком мыши.
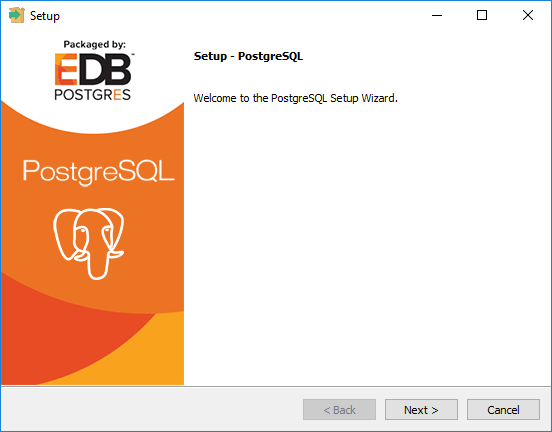
2. После этого запустится приветственное окно установки, жмем Next
3. На этом этапе можно выбрать каталог для установки PostgreSQL

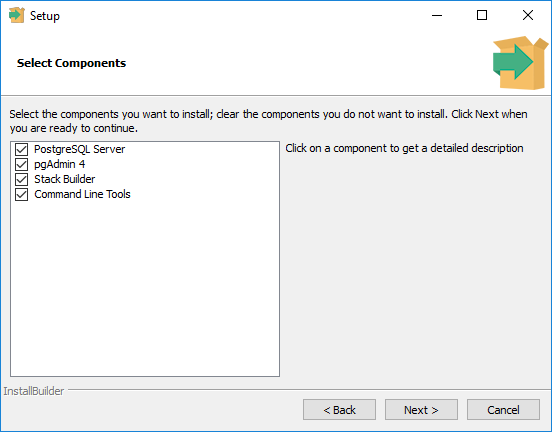
4. На этом этапе выбираем компоненты для установки — сам сервер PostgreSQL, графическая утилита администрирования pgAdmin, инструменты командной строки и утилита stack builder для установки дополнительных компонентов. Выберем все и нажмем Next
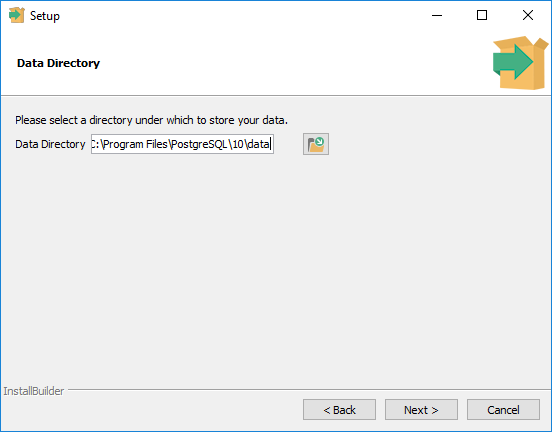
5. Выберем каталог, где будут храниться наши базы
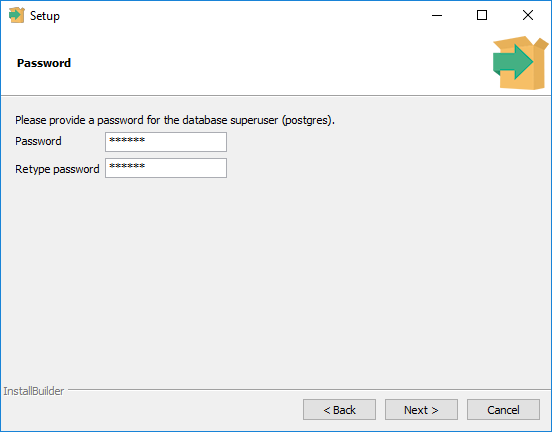
6. Зададим пароль Администратора СУБД (postgres)
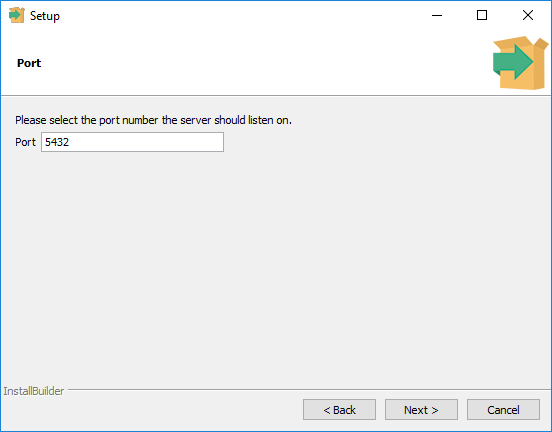
7. Можно переопределить порт по которому будет происходить соединение с БД. По умолчанию это порт 5432. Оставим.
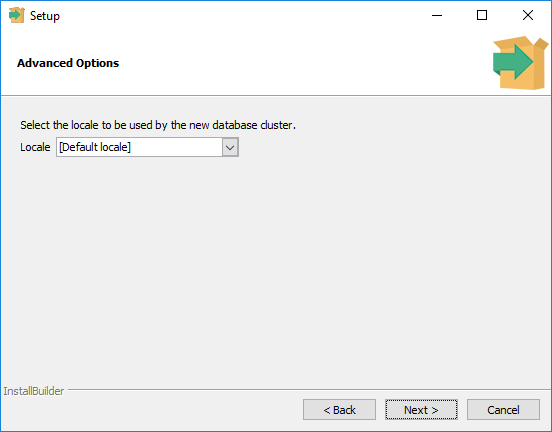
8. Выберем локализацию (региональные настройки) для наших баз или оставим по умолчанию
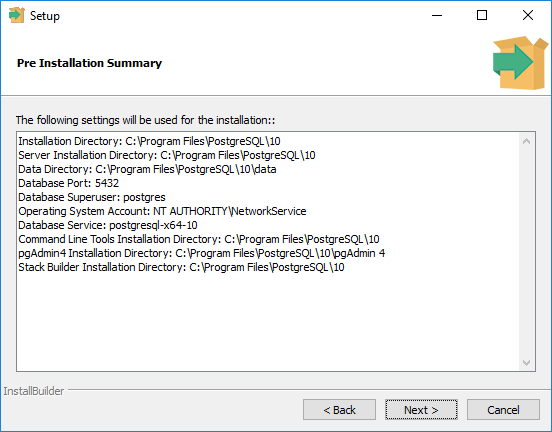
9. На этой странице нам выведут суммарную информацию о нашем выборе
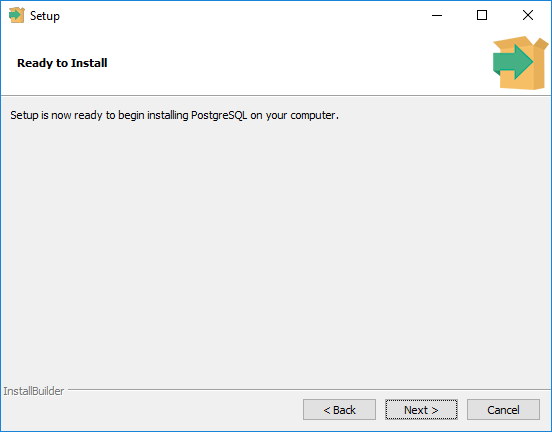
10. А на этой странице сообщают, что система готова к установке
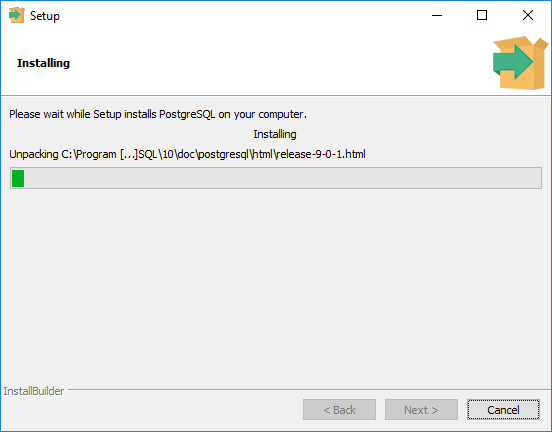
11. Система устанавливается
12. После окончания установки система предложит запустить Stack Builder — откажемся от установки сняв соответствующую галочку, и нажимаем Finish
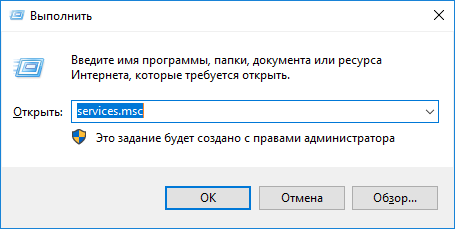
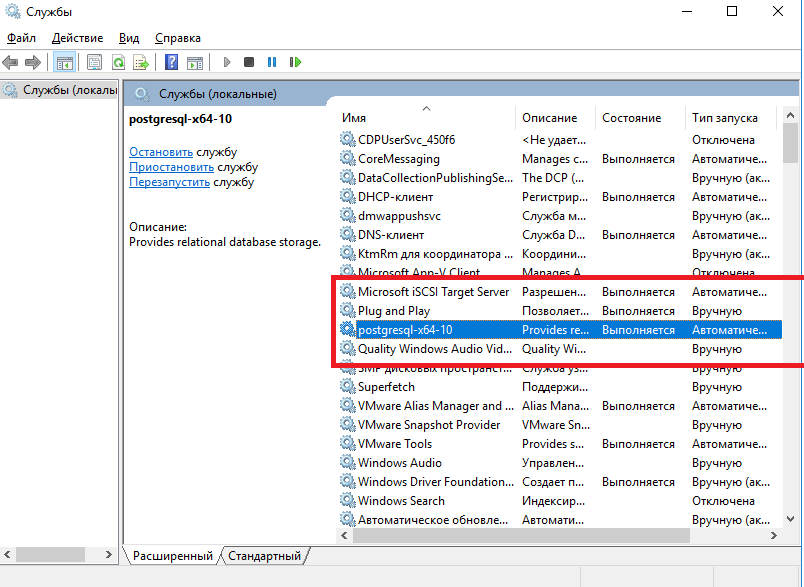
На этом установка завершена. Проверить корректность установки можно также удостоверившись что запущена соответствующая служба. Для этого надо запустить оснастку “Службы” . Для этого нажмите комбинацию Win+R и в открывшееся окно написать services.msc
Далее необходимо найти там службу с именем начинающимся с postgresql и удостовериться что она запущена (статус службы “выполняется”)
Вместе с сервером СУБД устанавливается клиент командной строки PostgreSQL и утилита pgAdmin, которые можно также использовать для проверки корректности установки.
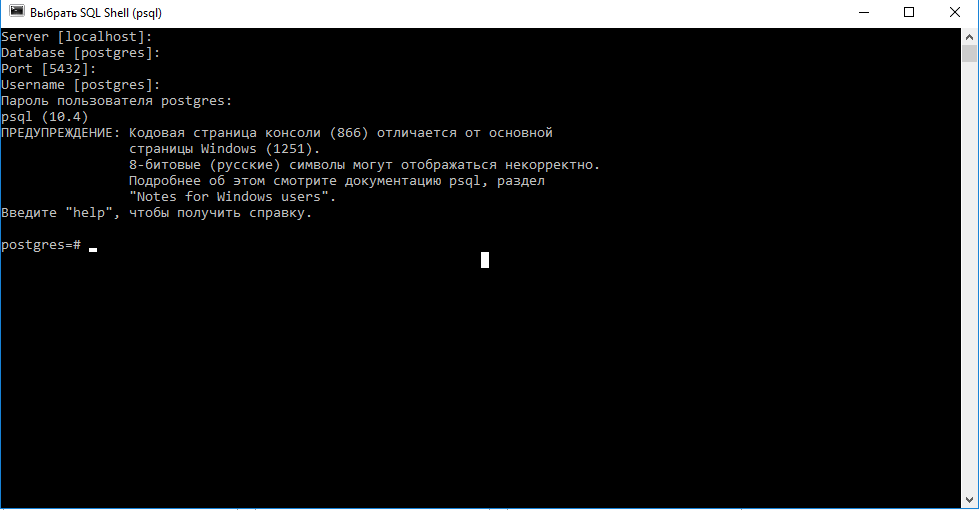
Например запустим консольный клиент psql из меню “Пуск” и попробуем соединиться c сервером PostgreSQL
Psql спросит вас к какому серверу, к какой базе и каким пользователей Вы хотите подключиться. Можно просто нажать Enter чтобы принять значения по умолчанию в квадратных скобках и в конце спросит пароль администратора , который Мы задавали на шаге 6.
В случае успешного подключения вы должны попасть в командную строку PostgreSQL которая выглядит как показано на рисунке
На этом установка и настройка PostgreSQL на Windows Server 2012 окончена. В нашей базе знаний вы найдёте ещё множество статей посвящённых различным аспектам работы в Windows, а если вы ищете надежный виртуальный сервер под управлением Windows, обратите внимания на нашу услугу — Аренда виртуального сервера Windows.
Последнее обновление: 25.09.2024
Средняя оценка: 1256993,6, всего оценок: 8
Спасибо за Вашу оценку!
К сожалению, проголосовать не получилось. Попробуйте позже
This article describes How To Install PostgreSql 12.2 1 on Microsoft Windows Server 2012
PostgreSQL is a powerful, open source object-relational database system that uses and extends the SQL language combined with many features that safely store and scale the most complicated data workloads. The origins of PostgreSQL date back to 1986 as part of the POSTGRES project at the University of California at Berkeley and has more than 30 years of active development on the core platform.
PostgreSQL has earned a strong reputation for its proven architecture, reliability, data integrity, robust feature set, extensibility, and the dedication of the open source community behind the software to consistently deliver performant and innovative solutions. PostgreSQL runs on all major operating systems, has been ACID-compliant since 2001, and has powerful add-ons such as the popular PostGIS geospatial database extender. It is no surprise that PostgreSQL has become the open source relational database of choice for many people and organisations.
PostgreSQL comes with many features aimed to help developers build applications, administrators to protect data integrity and build fault-tolerant environments, and help you manage your data no matter how big or small the dataset. In addition to being free and open source, PostgreSQL is highly extensible. For example, you can define your own data types, build out custom functions, even write code from different programming languages without recompiling your database!
PostgreSQL tries to conform with the SQL standard where such conformance does not contradict traditional features or could lead to poor architectural decisions. Many of the features required by the SQL standard are supported, though sometimes with slightly differing syntax or function. Further moves towards conformance can be expected over time. As of the version 12 release in October 2019, PostgreSQL conforms to at least 160 of the 179 mandatory features for SQL:2016 Core conformance. As of this writing, no relational database meets full conformance with this standard.
PostgreSQL is the first database management system that implements multi-version concurrency control (MVCC) feature, even before Oracle. The MVCC feature is known as snapshot isolation in Oracle.
PostgreSQL is a general-purpose object-relational database management system. It allows you to add custom functions developed using different programming languages such as C/C++, Java, etc.
PostgreSQL is designed to be extensible. In PostgreSQL, you can define your own data types, index types, functional languages, etc. If you don’t like any part of the system, you can always develop a custom plugin to enhance it to meet your requirements e.g., adding a new optimizer.
If you need any support, an active community is available to help. You can always find the answers from the PostgreSQL’s community for the issues that you may have when working with PostgreSQL. Many companies offer commercial support services in case you need one.
Many companies have built products and solutions using PostgreSQL. Some featured companies are Apple, Fujitsu, Red Hat, Cisco, Juniper Network, etc.
Now you can find some examples in this video.
Please subscribe to support our channel.
To be aware of our new videos please subscribe our channel.
Visit our website https://sdk-it.com
Visit our youtube channel
Watch IT & Learn IT & Apply IT.
Enjoy!
Установка PostgreSQL
- Содержание
- Установка PostgreSQL
- Windows
- PostgreSQL Server
- PgAdmin
- Linux
- PostgreSQL Server
- ALT Linux
- Astra Linux
- PostgreSQL Server
- Действия после установки
- Настройка
- Импорт БД Omega Production
- Windows
Windows
PostgreSQL Server
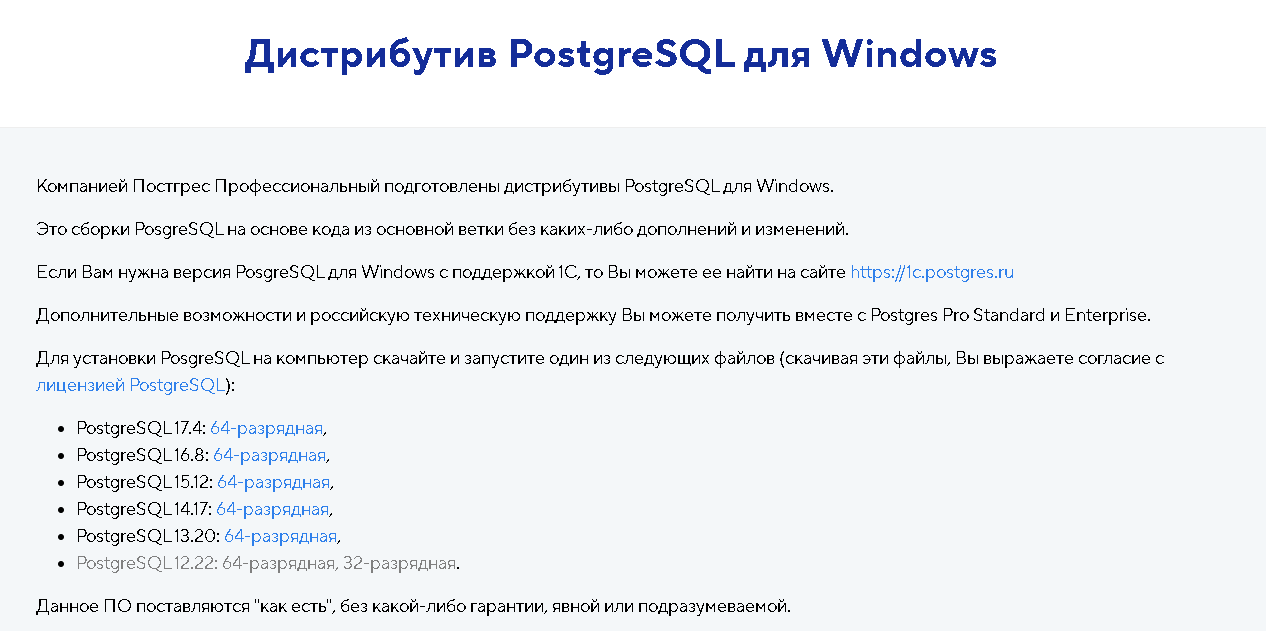
- Перейдите на официальный сайт Postgres Professional: https://postgrespro.ru/windows.
Выберите версию PostgreSQL. Для серверов со старой windows server (2012) необходимо установить 12-ую версию. Иначе устанавливайте 14-ую.
Скачайте установочный файл.exeдля Windows (64-bit).
Дальнейшую установку можно производить по инструкциям на сайте. Но если она не понятна то можно воспользоваться нашей инструкцией описанной ниже
- Запуск установщика. Откройте скачанный файл.
- Выбор компонентов
Установите все компоненты указанные на изображении:
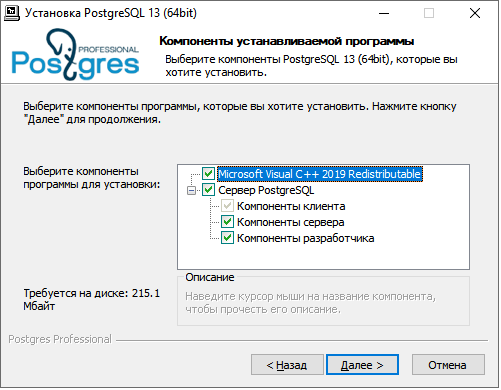
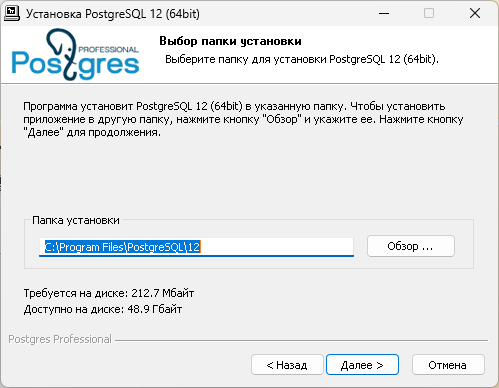
- Пути установки
— Каталог установки: можно оставить по умолчанию
— Каталог данных: укажите, где будут храниться БД. Рекомендуется указать путь на диске с наибольшим дисковым пространством
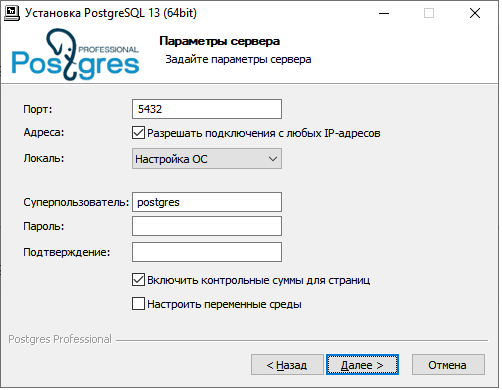
- Параметры сервера
— Порт: Оставьте5432если не занят.
— Локаль: оставить по умолчанию «Настройка ОС»
— Суперпользователь: имя суперпользователя. Можно оставить значение по умолчанию
— Пароль: Задайте надежный пароль для суперпользователя (запомните его!).
— Разрешить подключения с любых IP адресов: дожна стоять галочка
Остальные параметры оставить по умолчанию
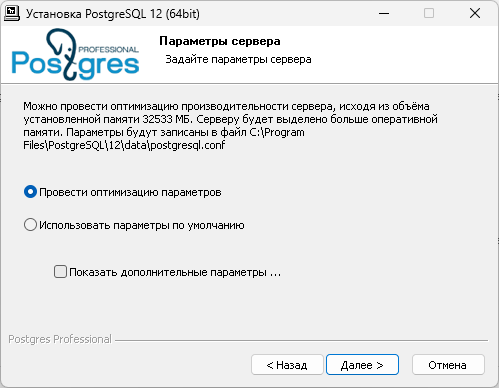
- Дополнительные параметры:
Оставить чек выбранным на «Провести оптимизацию параметров»
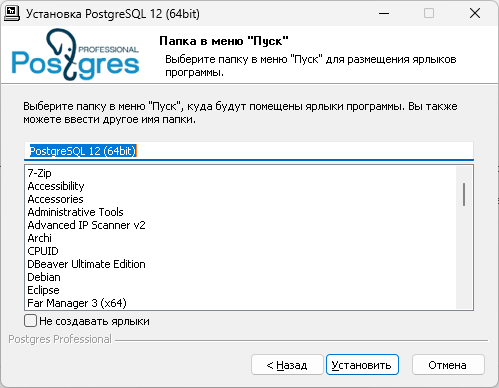
- Завершение установки
Перед запуском установки можете настроить ярлыки в меню «Пуск» если вам это необходимо. Проверьте параметры и нажмите «Установить». Дождитесь окончания установки.
- Дополнительные настройки
— Настроить брандмауэр: Разрешите подключения к порту, который указали при установке PostgreSQL Server, в Windows Firewall или при помощи команды в powershell:New-NetFirewallRule -Name "PostgreSQL" -DisplayName "PostgreSQL Server" -Direction Inbound -Protocol TCP -LocalPort <порт> -Action Allow
PgAdmin
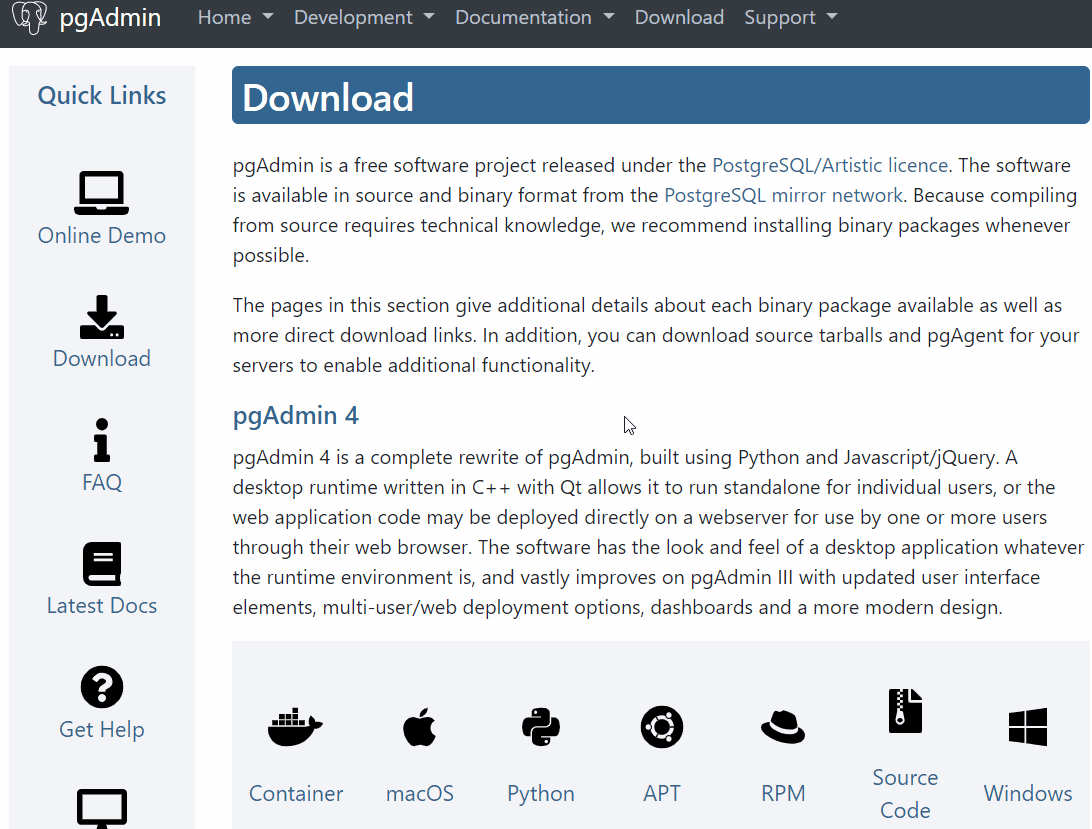
- Скачивание дистрибутива программы pgAdmin
Страница загрузки pgAdmin: https://www.pgadmin.org/download/
Переходим на официальный сайт в раздел «Download».
Затем выбираем «Windows», далее выбираем версию pgAdmin.
Щелкаем по ссылке, в результате нас перенесет на сайт PostgreSQL, здесь выбрать разрядность операционной системы, кликаем по соответствующей ссылке.
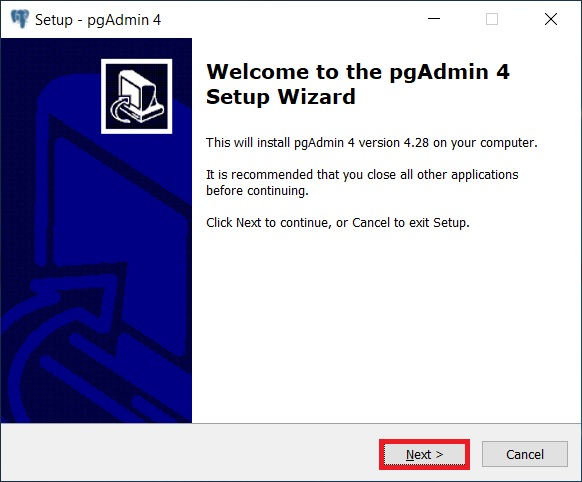
- Запуск установки pgAdmin
Запускаем скаченный файл.
- Принятие условий лицензионного соглашения
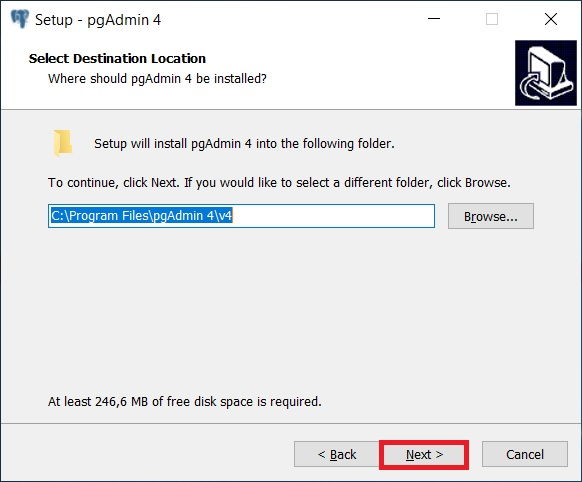
- Выбор каталога для установки pgAdmin
Потом мы можем указать путь к каталогу, однако можно оставить и по умолчанию, нажимаем «Next».
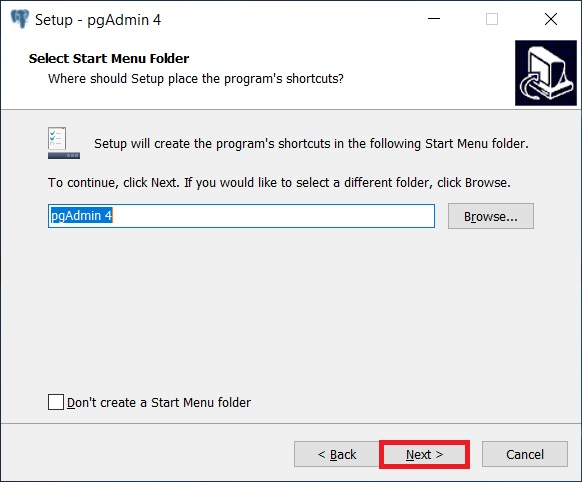
- Настройка ярлыка pgAdmin
В данном окне в случае необходимости можно настроить ярлык для запуска pgAdmin. Нажимаем «Next».
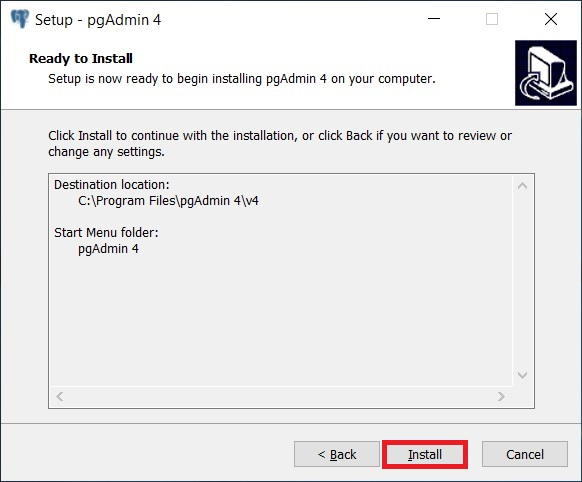
- Запуск установки pgAdmin
Все готово для установки, нажимаем «Install».
Установка началась, она продлится буквально пару минут.
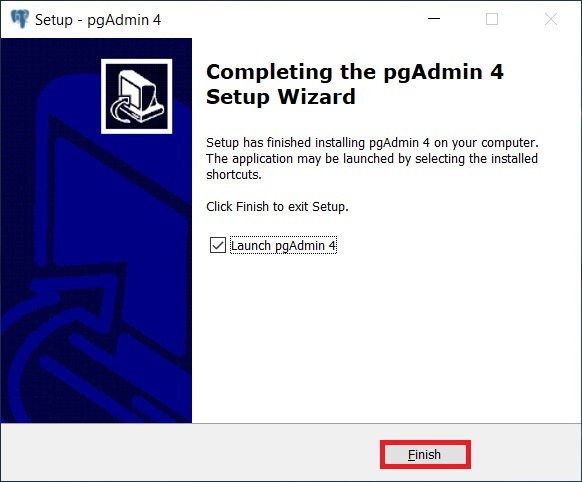
- Завершение установки pgAdmin
Жмем «Finish» (если галочка «Launch pgAdmin 4» будет стоять, то после нажатия на кнопку «Finish» запустится программа pgAdmin 4).

Linux
PostgreSQL Server
Предварительно проверить файл /etc/apt/sources.list, на наличие сетевого репозитория в котором находится пакет postgresql.
В большинстве линукс дистрибутивов PostgreSQL Server доступен из репозитория Debian и устанавливается при помощи пакетного менеджера apt.
Установку PostgreSQL Server на не Debian подобные дистрибутивы уточняйте на их вики и в сети интернет.
ALT Linux
Вики по установке: https://www.altlinux.org/PostgreSQL
Astra Linux
Вики по установке: https://wiki.astralinux.ru/termidesk-help/5.1/dokumentatsiya/termidesk-ustanovka-programmnogo-kompleksa/podgotovka-sredy-funktsionirovaniya-pered-ustanovkoj/ustanovka-i-nastrojka-subd-postgresql
Действия после установки
Настройка
Для изменения конфигурации СУБД Файлы postgresql.conf и pg_hba.conf находятся в каталоге данных, указанный при установке PostgreSQL Server.
До выполнения настроек указанных ниже предварительно ознакомиться с инструментом pgAdmin. Инструкция по инмтрументу для пуска скриптов: ссыдка
Для корректной работы базы данных Omega Production необходимо:
- установить плагин orafce и добавить в search_path:
CREATE EXTENSION orafce; set search_path="$user",oracle,public; COMMIT: - установить плагин fuzzymatch:
CREATE EXTENSION fuzzystrmatch;
COMMIT;
Импорт БД Omega Production
После установки и настройки PostgreSQL Server необходимо импортировать БД Omega Production. Это можно сделать при помощи консольных утилит предоставляемые:
- В вики Импорт и экспорт
- В файлах скачанных из фтп сервера (
ServerDistr\DB\omp\cmd\postgres)

A Step By Step Guide For Installing Postgresql On Windows Download the installer certified by edb for all supported postgres versions. note! this installer is hosted by edb and not on the postgresql community servers. if you have issues with the website it’s hosted on, please contact webmaster@enterprisedb . this installer includes:. Can we install postgresql database for windows server 2012 r2 ? do we need any commercial license for redistributing it with our’s windows desktop application?.

A Step By Step Guide For Installing Postgresql On Windows This article describes how to install postgresql 12.2 1 on microsoft windows server 2012 postgresql is a powerful, open source object relational database system that uses and extends the sql language combined with many features that safely store and scale the most complicated data workloads. How to install postgresql version 9.2 database on windows server 2012. This page explains how to install and configure a postgresql database server and the psql command line client. this guide will cover how to install and set up these components on your computer for local access. You can use the graphical installation wizard to install postgresql on windows. when the postgresql installation finishes, you can optionally invoke the stack builder package manager.

A Step By Step Guide For Installing Postgresql On Windows This page explains how to install and configure a postgresql database server and the psql command line client. this guide will cover how to install and set up these components on your computer for local access. You can use the graphical installation wizard to install postgresql on windows. when the postgresql installation finishes, you can optionally invoke the stack builder package manager. Open a browser tab and go to the postgresql enterprisedb website to download the installer. select the latest version (version 10.3 at the time of writing of this article). then select your operating system. finally click the “ download now” link to complete the process. To install postgresql locally on your computer, visit the installer by edb, and download the newest version compatible with your operating system. i will choose the newest windows version:. In this postgresql tutorial, we are diving into the realm of database management by demonstrating how to install postgresql on a windows operating system. to download and install postgresql on windows, follow the below steps. from the official postgresql website, first download the windows installer. Setting up postgresql along with pgadmin on windows can significantly streamline database management tasks. this guide will lead you through the steps for a smooth installation and configuration process.

A Step By Step Guide For Installing Postgresql On Windows Open a browser tab and go to the postgresql enterprisedb website to download the installer. select the latest version (version 10.3 at the time of writing of this article). then select your operating system. finally click the “ download now” link to complete the process. To install postgresql locally on your computer, visit the installer by edb, and download the newest version compatible with your operating system. i will choose the newest windows version:. In this postgresql tutorial, we are diving into the realm of database management by demonstrating how to install postgresql on a windows operating system. to download and install postgresql on windows, follow the below steps. from the official postgresql website, first download the windows installer. Setting up postgresql along with pgadmin on windows can significantly streamline database management tasks. this guide will lead you through the steps for a smooth installation and configuration process.
This document provides a Windows Server 2012/2016 install guide. The guide can be followed for Windows Server 2012/2016 installation or serve as a starting point for installing on later Windows Server OS. You should read the Deployment documentation beforehand, in order to understand the components and their roles.
The Sirenia solutions are capable of being installed and operated on a Windows Server 2012/2016 platform as selfcontained windows services. Further more, the deployment is dependant on a postgres instance, which should also be installed.
System requirements
The minimum system requirements for a minimal installation on Windows Server 2012/2016. For more then a minimal installation referer to the sizing guidelines of the Sirenia software components.
- OS Versions: Server 2012, Server 2016
- RAM: 8GB
- Disk space: 64GB minimum recommendation for Windows
Prepare Install
The first step is to prepare an administrator PowerShell
- Log in to Windows Server.
- Click the Search icon in the taskbar and type powershell in the search box.
- Right-click Windows PowerShell in the search results and select Run as administrator from the menu.
- Enter administrator credentials as prompted.
Install Postgres 10
At the powershell command prompt, use this command
powershell
cd ~
Import-Module BitsTransfer
Start-BitsTransfer -source "https://oscg-downloads.s3.amazonaws.com/packages/PostgreSQL-10.7-1-win64-bigsql.exe"
.\PostgreSQL-10.7-1-win64-bigsql.exe
Follow onscreen install. Set username and password to postgres for testing. For production you should use a harder password.
Find PostgreSQL 10.5-1 Server in the service panel. Open Properties. Select Recovery tab. Select Restart the Service on all three drop downs Firstfailure, Second failure, and Subsequent failures. Press Apply and OK
Obtain and unpack the Sirenia Software
Get Kwanza and Cuesta from your proviede software repository. In powershell
powershell
mkdir "C:\Program Files (x86)\Sirenia\Deploy"
cd "C:\Program Files (x86)\Sirenia\Deploy"- Extract Kwanza in
C:\Program Files (x86)\Sirenia\Deploy - Extract Cuesta in
C:\Program Files (x86)\Sirenia\Deploy
Install Kwanza as a Service
Kwanza is the backend application used for configuration and communication. First Kwanza must be installed.
Create key.pem and cert.pem using kwanza. Replace localhost with your needed Fully Qualified Domain Name(s). You MUST use all small letters in the fqdn. eg. some.sirenia.io
powershell
cd "C:\Program Files (x86)\Sirenia\Deploy"
./kwanza_windows_amd64.exe cert --subjects localhost
Create kwanza conf
powershell
notepad .kwanza.confAdd lines like these
yaml
users:
  admin: d224cfd091471383708424f3e494f8029b456b0e559fe82ee9adb5b66a7f1e55
  john: d224cfd091471383708424f3e494f8029b456b0e559fe82ee9adb5b66a7f1e55
  jonathan: d224cfd091471383708424f3e494f8029b456b0e559fe82ee9adb5b66a7f1e55
Test Kwanza configuration. The format of the database string is pg://user:pass@localhost/database change to fit your installation. Also note that you can adjust TLS version and supported cipher suites.
powershell
cmd /c kwanza_windows_amd64.exe serve --database pg://postgres:postgres@localhost/kwanza --minTlsVersion 1.2 --cipherSuites "TLS_ECDHE_RSA_WITH_AES_128_GCM_SHA256,TLS_RSA_WITH_AES_128_GCM_SHA256,TLS_ECDHE_ECDSA_WITH_AES_256_CBC_SHA,TLS_ECDHE_ECDSA_WITH_AES_128_CBC_SHA256" --preferServerCipherSuites "true" --cert "$(pwd)\cert.pem" --key "$(pwd)\key.pem" --strictTransportSecurity "true" --auth jwt --config "$(pwd)\.kwanza.conf" --logFile "/kwanza.log" --port 8000If no errors are displayed, stop again with ctrl^c and install Kwanza service
powershell
cmd /c kwanza_windows_amd64.exe serve --database pg://postgres:postgres@localhost/kwanza --minTlsVersion 1.2 --cipherSuites "TLS_ECDHE_RSA_WITH_AES_128_GCM_SHA256,TLS_RSA_WITH_AES_128_GCM_SHA256,TLS_ECDHE_ECDSA_WITH_AES_256_CBC_SHA,TLS_ECDHE_ECDSA_WITH_AES_128_CBC_SHA256" --preferServerCipherSuites "true" --cert "$(pwd)\cert.pem" --key "$(pwd)\key.pem" --strictTransportSecurity "true" --auth jwt --config "$(pwd)\.kwanza.conf" --logFile "/kwanza.log" --port 8000 --install
cmd /c sc config eu.sirenia.kwanza depend="PostgreSQL 10.5-1 Server"
Find Sirenia Context Management Registry in the service panel. Open Properties. Select Recovery tab. Select Restart the Service on all three drop downs Firstfailure, Second failure, and Subsequent failures. Press Apply and OK
Start Kwanza service in services. Find “Sirenia Context Management Registry” in the service panel. Push start. Check the status from powershell. Or start the service from powershell.
powershell
net start eu.sirenia.kwanza
service eu.sirenia.kwanza
Should display
Status   Name               DisplayName
------   ----               -----------
Running  eu.sirenia.kwanza  Sirenia Context Management Registry
Kwanza will use the self-signed cert created earlier. Alternatively copy valid cert for prod here C:\Program Files (x86)\Sirenia\Deploy It must be a valid x.509 certificate with a full trust chain to a CA in PEM format.
Install Cuesta as a Service
Cuesta is the graphical web application used for configuration on top of the Kwanza application. Cuesta must now be installed. Change settings.js for cuesta
powershell
cd "C:\Program Files (x86)\Sirenia\Deploy"
notepad settings.js
Add lines like these (change localhost with your FQDN
bash
window.env = window.env || {};
window.env['KWANZA_URL'] = 'https://localhost:8000/v1';
window.env['KWANZA_STREAMURL'] = 'wss://localhost:8000/v1/stream';
Test Cuesta configuration
powershell
cmd /c cuesta_windows_amd64.exe serve --cert "$(pwd)\cert.pem" --key "$(pwd)\key.pem" --strictTransportSecurity "true" --extras /settings.js="$(pwd)\settings.js"If no errors are displayed, stop again with ctrl^c and install Cuesta service
powershell
cmd /c cuesta_windows_amd64.exe serve --cert "$(pwd)\cert.pem" --key "$(pwd)\key.pem" --strictTransportSecurity "true" --extras /settings.js="$(pwd)\settings.js" --installFind Cuesta_Windows in the service panel. Open Properties. Select Recovery tab. Select Restart the Service on all three drop downs Firstfailure, Second failure, and Subsequent failures. Press Apply and OK
Start Cuesta service in services. Find Cuesta_Windows in the service panel. Push start. Check the status from powershell. Or start the service from powershell.
powershell
net start eu.sirenia.static.cuesta_windows_amd64.exe
service eu.sirenia.*
Should display two services running
Status   Name               DisplayName
------   ----               -----------
Running  eu.sirenia.kwanza  Sirenia Context Management Registry
Running  eu.sirenia.stat... cuesta_windows_amd64.exe is a serve...
Open Firewall
If your server is deployig a firewall, you must grant open access to the following ports
- TCP/80 — For Cuesta
- TCP/443 — For Cuesta
- TCP/8000 — For Kwanza
- TCP/8001 — For Kwanza
Test
Ok, we are ready to test the complete setup
Login to Cuesta
https://localhost/user:john pass:1234
If no errors show up, we are ready to go.
Upgrade Procedure
If you need to install a newer version of the Cuesta og Kwanza service, follow these steps. At the powershell command prompt:
powershell
service eu.sirenia.*Should display two services running
Status   Name               DisplayName
------   ----               -----------
Running  eu.sirenia.kwanza  Sirenia Context Management Registry
Running  eu.sirenia.stat... cuesta_windows_amd64.exe is a serve...
Stop Kwanza and Cuesta service in the service panel. Push stop for both services.
powershell
service eu.sirenia.*Should display two services stopped.
Status   Name               DisplayName
------   ----               -----------
Stopped  eu.sirenia.kwanza  Sirenia Context Management Registry
Stopped  eu.sirenia.stat... cuesta_windows_amd64.exe is a serve...
Uninstall one or both services.
powershell
cd "C:\Program Files (x86)\Sirenia\Deploy"
cmd /c cuesta_windows_amd64.exe serve --uninstall
cmd /c kwanza_windows_amd64.exe serve --config "$(pwd)\.kwanza.conf" --uninstall
service eu.sirenia.*
Should now display no services.
Now follow the install procedure as explained earlier in this document.
Sirenia Analytics
If you have acquired a license to the Data Driven Operational Intelligence solution Sirenia Analytics, follow the instalation guide here. You can deploy this on the same server as Cuesta and Kwanza (assuming it is sized coorectly), or on is’s own. If you install on a new server.
Install Fluentd as a Service
Install td-agent. Download the .msi file and install the software. At the powershell command prompt, use this command
powershell
cd ~
Import-Module BitsTransfer
Start-BitsTransfer -source "http://packages.treasuredata.com.s3.amazonaws.com/3/windows/td-agent-3.4.1-0-x64.msi"
.\td-agent-3.4.1-0-x64.msi
To configure Fluentd do the following. First, please prepare your config file
powershell
cd /opt/td-agent/etc/td-agent/
move td-agent.conf td-agent.conf-orig
notepad td-agent.conf
Add this to the file
#UDP input
<source>
  @type udp
  #8081 is stats (info-log)
  tag manatee.8081 # required
  format none
  port 8081 # optional. 5160 by default
  bind 0.0.0.0 # optional. 0.0.0.0 by default
  message_length_limit 1MB
</source>

<source>
  @type udp
  #8082 is everything (debug-log)
  tag manatee.8082 # required
  format none
  port 8082 # optional. 5160 by default
  bind 0.0.0.0 # optional. 0.0.0.0 by default
  message_length_limit 1MB
</source>

#Filters. Everything to stdout
<filter **>
  @type stdout
</filter>

#Output
<match manatee.8081>
  @type file
  format single_value
  path          /fluentd/log/stats.manatee
  buffer_type memory
  flush_interval 0s
  append       true
</match>

<match manatee.8082>
  @type file
  format single_value
  path          /fluentd/log/all.manatee
  buffer_type memory
  flush_interval 0s
  append       true
</match>
After you’ve installed .msi package, you’ll see the program called Td-agent Command Prompt installed. Please execute Td-agent Command Prompt with administrative privilege, and type the two commands below.
powershell
fluentd --reg-winsvc i
fluentd --reg-winsvc-fluentdopt '-c C:/opt/td-agent/etc/td-agent/td-agent.conf -o C:/opt/td-agent/td-agent.log'
Start Fluentd service in services. Find “Fluentd” in the service panel. Push start. Check the status from powershell. Or start the service from powershell.
powershell
cmd /c sc config fluentdwinsvc start="auto"
net start fluentdwinsvc
service fluentd*
Should display the fluentd service as running.
Status   Name               DisplayName
------   ----               -----------
Running  fluentdwinsvc      Fluentd Windows Service
Logfiles collected from the Manatee clients will be in C:\fluentd\log\
Restart Server
You should always finish an install procedure with a complete servere restart, to test that all services starts after a complete host restart
powershell
Restart-Computer