
-
Optionally move the old cluster
If you are using a version-specific installation directory, e.g.,
/opt/PostgreSQL/17, you do not need to move the old cluster. The graphical installers all use version-specific installation directories.If your installation directory is not version-specific, e.g.,
/usr/local/pgsql, it is necessary to move the current PostgreSQL install directory so it does not interfere with the new PostgreSQL installation. Once the current PostgreSQL server is shut down, it is safe to rename the PostgreSQL installation directory; assuming the old directory is/usr/local/pgsql, you can do:mv /usr/local/pgsql /usr/local/pgsql.old
to rename the directory.
-
For source installs, build the new version
Build the new PostgreSQL source with
configureflags that are compatible with the old cluster. pg_upgrade will checkpg_controldatato make sure all settings are compatible before starting the upgrade. -
Install the new PostgreSQL binaries
Install the new server’s binaries and support files. pg_upgrade is included in a default installation.
For source installs, if you wish to install the new server in a custom location, use the
prefixvariable:make prefix=/usr/local/pgsql.new install
-
Initialize the new PostgreSQL cluster
Initialize the new cluster using
initdb. Again, use compatibleinitdbflags that match the old cluster. Many prebuilt installers do this step automatically. There is no need to start the new cluster. -
Install extension shared object files
Many extensions and custom modules, whether from
contribor another source, use shared object files (or DLLs), e.g.,pgcrypto.so. If the old cluster used these, shared object files matching the new server binary must be installed in the new cluster, usually via operating system commands. Do not load the schema definitions, e.g.,CREATE EXTENSION pgcrypto, because these will be duplicated from the old cluster. If extension updates are available, pg_upgrade will report this and create a script that can be run later to update them. -
Copy custom full-text search files
Copy any custom full text search files (dictionary, synonym, thesaurus, stop words) from the old to the new cluster.
-
Adjust authentication
pg_upgradewill connect to the old and new servers several times, so you might want to set authentication topeerinpg_hba.confor use a~/.pgpassfile (see Section 32.16). -
Prepare for publisher upgrades
pg_upgrade attempts to migrate logical slots. This helps avoid the need for manually defining the same logical slots on the new publisher. Migration of logical slots is only supported when the old cluster is version 17.0 or later. Logical slots on clusters before version 17.0 will silently be ignored.
Before you start upgrading the publisher cluster, ensure that the subscription is temporarily disabled, by executing
ALTER SUBSCRIPTION ... DISABLE. Re-enable the subscription after the upgrade.There are some prerequisites for pg_upgrade to be able to upgrade the logical slots. If these are not met an error will be reported.
-
The new cluster must have
wal_levelaslogical. -
The new cluster must have
max_replication_slotsconfigured to a value greater than or equal to the number of slots present in the old cluster. -
The output plugins referenced by the slots on the old cluster must be installed in the new PostgreSQL executable directory.
-
The old cluster has replicated all the transactions and logical decoding messages to subscribers.
-
All slots on the old cluster must be usable, i.e., there are no slots whose pg_replication_slots.
conflictingis nottrue. -
The new cluster must not have permanent logical slots, i.e., there must be no slots where pg_replication_slots.
temporaryisfalse.
-
-
Prepare for subscriber upgrades
Setup the subscriber configurations in the new subscriber. pg_upgrade attempts to migrate subscription dependencies which includes the subscription’s table information present in pg_subscription_rel system catalog and also the subscription’s replication origin. This allows logical replication on the new subscriber to continue from where the old subscriber was up to. Migration of subscription dependencies is only supported when the old cluster is version 17.0 or later. Subscription dependencies on clusters before version 17.0 will silently be ignored.
There are some prerequisites for pg_upgrade to be able to upgrade the subscriptions. If these are not met an error will be reported.
-
All the subscription tables in the old subscriber should be in state
i(initialize) orr(ready). This can be verified by checking pg_subscription_rel.srsubstate. -
The replication origin entry corresponding to each of the subscriptions should exist in the old cluster. This can be found by checking pg_subscription and pg_replication_origin system tables.
-
The new cluster must have
max_replication_slotsconfigured to a value greater than or equal to the number of subscriptions present in the old cluster.
-
-
Stop both servers
Make sure both database servers are stopped using, on Unix, e.g.:
pg_ctl -D /opt/PostgreSQL/12 stop
pg_ctl -D /opt/PostgreSQL/17 stop
or on Windows, using the proper service names:
NET STOP postgresql-12
NET STOP postgresql-17
Streaming replication and log-shipping standby servers must be running during this shutdown so they receive all changes.
-
Prepare for standby server upgrades
If you are upgrading standby servers using methods outlined in section Step 13, verify that the old standby servers are caught up by running pg_controldata against the old primary and standby clusters. Verify that the “Latest checkpoint location” values match in all clusters. Also, make sure
wal_levelis not set tominimalin thepostgresql.conffile on the new primary cluster. -
Run pg_upgrade
Always run the pg_upgrade binary of the new server, not the old one. pg_upgrade requires the specification of the old and new cluster’s data and executable (
bin) directories. You can also specify user and port values, and whether you want the data files linked or cloned instead of the default copy behavior.If you use link mode, the upgrade will be much faster (no file copying) and use less disk space, but you will not be able to access your old cluster once you start the new cluster after the upgrade. Link mode also requires that the old and new cluster data directories be in the same file system. (Tablespaces and
pg_walcan be on different file systems.) Clone mode provides the same speed and disk space advantages but does not cause the old cluster to be unusable once the new cluster is started. Clone mode also requires that the old and new data directories be in the same file system. This mode is only available on certain operating systems and file systems.The
--jobsoption allows multiple CPU cores to be used for copying/linking of files and to dump and restore database schemas in parallel; a good place to start is the maximum of the number of CPU cores and tablespaces. This option can dramatically reduce the time to upgrade a multi-database server running on a multiprocessor machine.For Windows users, you must be logged into an administrative account, and then run pg_upgrade with quoted directories, e.g.:
pg_upgrade.exe
        --old-datadir "C:/Program Files/PostgreSQL/12/data"
        --new-datadir "C:/Program Files/PostgreSQL/17/data"
        --old-bindir "C:/Program Files/PostgreSQL/12/bin"
        --new-bindir "C:/Program Files/PostgreSQL/17/bin"
Once started,
pg_upgradewill verify the two clusters are compatible and then do the upgrade. You can usepg_upgrade --checkto perform only the checks, even if the old server is still running.pg_upgrade --checkwill also outline any manual adjustments you will need to make after the upgrade. If you are going to be using link or clone mode, you should use the option--linkor--clonewith--checkto enable mode-specific checks.pg_upgraderequires write permission in the current directory.Obviously, no one should be accessing the clusters during the upgrade. pg_upgrade defaults to running servers on port 50432 to avoid unintended client connections. You can use the same port number for both clusters when doing an upgrade because the old and new clusters will not be running at the same time. However, when checking an old running server, the old and new port numbers must be different.
If an error occurs while restoring the database schema,
pg_upgradewill exit and you will have to revert to the old cluster as outlined in Step 19 below. To trypg_upgradeagain, you will need to modify the old cluster so the pg_upgrade schema restore succeeds. If the problem is acontribmodule, you might need to uninstall thecontribmodule from the old cluster and install it in the new cluster after the upgrade, assuming the module is not being used to store user data. -
Upgrade streaming replication and log-shipping standby servers
If you used link mode and have Streaming Replication (see Section 26.2.5) or Log-Shipping (see Section 26.2) standby servers, you can follow these steps to quickly upgrade them. You will not be running pg_upgrade on the standby servers, but rather rsync on the primary. Do not start any servers yet.
If you did not use link mode, do not have or do not want to use rsync, or want an easier solution, skip the instructions in this section and simply recreate the standby servers once pg_upgrade completes and the new primary is running.
-
Install the new PostgreSQL binaries on standby servers
Make sure the new binaries and support files are installed on all standby servers.
-
Make sure the new standby data directories do not exist
Make sure the new standby data directories do not exist or are empty. If initdb was run, delete the standby servers’ new data directories.
-
Install extension shared object files
Install the same extension shared object files on the new standbys that you installed in the new primary cluster.
-
Stop standby servers
If the standby servers are still running, stop them now using the above instructions.
-
Save configuration files
Save any configuration files from the old standbys’ configuration directories you need to keep, e.g.,
postgresql.conf(and any files included by it),postgresql.auto.conf,pg_hba.conf, because these will be overwritten or removed in the next step. -
Run rsync
When using link mode, standby servers can be quickly upgraded using rsync. To accomplish this, from a directory on the primary server that is above the old and new database cluster directories, run this on the primary for each standby server:
rsync --archive --delete --hard-links --size-only --no-inc-recursive old_cluster new_cluster remote_dir
where
old_clusterandnew_clusterare relative to the current directory on the primary, andremote_diris above the old and new cluster directories on the standby. The directory structure under the specified directories on the primary and standbys must match. Consult the rsync manual page for details on specifying the remote directory, e.g.,rsync --archive --delete --hard-links --size-only --no-inc-recursive /opt/PostgreSQL/12 \ /opt/PostgreSQL/17 standby.example.com:/opt/PostgreSQLYou can verify what the command will do using rsync‘s
--dry-runoption. While rsync must be run on the primary for at least one standby, it is possible to run rsync on an upgraded standby to upgrade other standbys, as long as the upgraded standby has not been started.What this does is to record the links created by pg_upgrade‘s link mode that connect files in the old and new clusters on the primary server. It then finds matching files in the standby’s old cluster and creates links for them in the standby’s new cluster. Files that were not linked on the primary are copied from the primary to the standby. (They are usually small.) This provides rapid standby upgrades. Unfortunately, rsync needlessly copies files associated with temporary and unlogged tables because these files don’t normally exist on standby servers.
If you have tablespaces, you will need to run a similar rsync command for each tablespace directory, e.g.:
rsync --archive --delete --hard-links --size-only --no-inc-recursive /vol1/pg_tblsp/PG_12_201909212 \
      /vol1/pg_tblsp/PG_17_202307071 standby.example.com:/vol1/pg_tblsp
If you have relocated
pg_waloutside the data directories, rsync must be run on those directories too. -
Configure streaming replication and log-shipping standby servers
Configure the servers for log shipping. (You do not need to run
pg_backup_start()andpg_backup_stop()or take a file system backup as the standbys are still synchronized with the primary.) If the old primary is prior to version 17.0, then no slots on the primary are copied to the new standby, so all the slots on the old standby must be recreated manually. If the old primary is version 17.0 or later, then only logical slots on the primary are copied to the new standby, but other slots on the old standby are not copied, so must be recreated manually.
-
-
Restore
pg_hba.confIf you modified
pg_hba.conf, restore its original settings. It might also be necessary to adjust other configuration files in the new cluster to match the old cluster, e.g.,postgresql.conf(and any files included by it),postgresql.auto.conf. -
Start the new server
The new server can now be safely started, and then any rsync‘ed standby servers.
-
Post-upgrade processing
If any post-upgrade processing is required, pg_upgrade will issue warnings as it completes. It will also generate script files that must be run by the administrator. The script files will connect to each database that needs post-upgrade processing. Each script should be run using:
psql --username=postgres --file=script.sql postgres
The scripts can be run in any order and can be deleted once they have been run.
Caution
In general it is unsafe to access tables referenced in rebuild scripts until the rebuild scripts have run to completion; doing so could yield incorrect results or poor performance. Tables not referenced in rebuild scripts can be accessed immediately.
-
Statistics
Because optimizer statistics are not transferred by
pg_upgrade, you will be instructed to run a command to regenerate that information at the end of the upgrade. You might need to set connection parameters to match your new cluster.Using
vacuumdb --all --analyze-onlycan efficiently generate such statistics, and the use of--jobscan speed it up. Option--analyze-in-stagescan be used to generate minimal statistics quickly. Ifvacuum_cost_delayis set to a non-zero value, this can be overridden to speed up statistics generation usingPGOPTIONS, e.g.,PGOPTIONS='-c vacuum_cost_delay=0' vacuumdb .... -
Delete old cluster
Once you are satisfied with the upgrade, you can delete the old cluster’s data directories by running the script mentioned when
pg_upgradecompletes. (Automatic deletion is not possible if you have user-defined tablespaces inside the old data directory.) You can also delete the old installation directories (e.g.,bin,share). -
Reverting to old cluster
If, after running
pg_upgrade, you wish to revert to the old cluster, there are several options:-
If the
--checkoption was used, the old cluster was unmodified; it can be restarted. -
If the
--linkoption was not used, the old cluster was unmodified; it can be restarted. -
If the
--linkoption was used, the data files might be shared between the old and new cluster:-
If
pg_upgradeaborted before linking started, the old cluster was unmodified; it can be restarted. -
If you did not start the new cluster, the old cluster was unmodified except that, when linking started, a
.oldsuffix was appended to$PGDATA/global/pg_control. To reuse the old cluster, remove the.oldsuffix from$PGDATA/global/pg_control; you can then restart the old cluster. -
If you did start the new cluster, it has written to shared files and it is unsafe to use the old cluster. The old cluster will need to be restored from backup in this case.
-
-
The official documentation for PostgreSQL provides a guide to upgrading using pg_upgrade. However, it can be a bit like a treasure hunt with hidden traps. This gist will walk you through a clear and robust method for upgrading PostgreSQL on Windows, using the upgrade from version 14 to 16 as an example.
1. Install the New Version of PostgreSQL
Before you embark on the upgrade journey, make sure you have the new version installed. This is because the pg_upgrade utility used during the upgrade process belongs to the newer version.
To get started, visit the official download page, download the installer, and run it. A word of caution: do not overwrite the old installation, as you’ll need its binaries and data for the upgrade.
2. Stop Both PostgreSQL Services
To ensure a smooth transition, you’ll need to stop both the old and new PostgreSQL services. Here’s how you can do it:
- Press
Win+Rand type inservices.mscto open the Services application. - Look for services with names like
postgresql-{major_version}(orpostgresql-x64-{major_version}for x64 machines), and stop them manually. - Alternatively, you can use PowerShell to stop the services with these commands:
Stop-Service -Name postgresql-x64-14
Stop-Service -Name postgresql-x64-16
3. Configure Authentication
During the PostgreSQL upgrade, pg_upgrade connects to both the old and new PostgreSQL instances. However, there isn’t an obvious way to specify credentials (or perhaps there is, but it’s well-hidden). To work around this, you’ll need to temporarily modify the authentication settings in {data_dir}/pg_hba.conf.
Open the {data_dir}/pg_hba.conf file, which should resemble the following at the bottom:
# TYPE  DATABASE        USER            ADDRESS                 METHOD

# "local" is for Unix domain socket connections only
local   all             all                                     scram-sha-256
# IPv4 local connections:
host    all             all             127.0.0.1/32            scram-sha-256
# IPv6 local connections:
host    all             all             ::1/128                 scram-sha-256
# Allow replication connections from localhost, by a user with the
# replication privilege.
local   replication     all                                     scram-sha-256
host    replication     all             127.0.0.1/32            scram-sha-256
host    replication     all             ::1/128                 scram-sha-256
Change the METHOD of IPv4 and IPv6 local connections to trust, like this:
# TYPE  DATABASE        USER            ADDRESS                 METHOD

# "local" is for Unix domain socket connections only
local   all             all                                     scram-sha-256
# IPv4 local connections:
host    all             all             127.0.0.1/32            trust
# IPv6 local connections:
host    all             all             ::1/128                 trust
# Allow replication connections from localhost, by a user with the
# replication privilege.
local   replication     all                                     scram-sha-256
host    replication     all             127.0.0.1/32            scram-sha-256
host    replication     all             ::1/128                 scram-sha-256
Don’t forget to update the authentication configurations for both the old and new PostgreSQL services.
4. Create Temporary Directory
pg_upgrade requires write permission in the directory where it’s executed. You can easily solve this by creating a temporary directory, let’s say D:\Temp, and granting Write permission to «Everyone.»
5. Check Release Notes
The release notes of each PostgreSQL version list the breaking changes that may cause incompatibility issues and corresponding solutions during an upgrade. You may skip this step and come back to it when you encounter unexpected errors when executing pg_upgrade.
6. Execute pg_upgrade
Now, navigate to the temporary directory you configured in step 5 (you can run cd D:/Temp for my example).
It’s finally time to execute the actual command. Run the following command:
{new_bin_dir}/pg_upgrade.exe --old-datadir {old_data_dir} --new-datadir {new_data_dir} --old-bindir {old_bin_dir} --new-bindir {new_bin_dir} -U postgres
For example, this command expands to for my example:
D:\Program Files\PostgreSQL\16\bin\pg_upgrade.exe --old-datadir 'D:\Data\PostgreSQL\14.4' --new-datadir 'D:\Data\PostgreSQL\16' --old-bindir 'D:\Program Files\PostgreSQL\14.4\bin' --new-bindir 'D:\Program Files\PostgreSQL\16\bin' -U postgres
But don’t hit enter just yet. There’s a subtle bug: spaces in the binary path can cause issues. Typically, you’d wrap the path in quotes and use the call operator & to run the command. However, this approach doesn’t work here. When you use &, the standard input of the command isn’t redirected, leading to a bug in xcopy, an old Windows command used by pg_upgrade for copying directories.
If you run the command with &, it’s likely that the upgrade will fail when copying pg_xact from the old data directory to the new one. The log might look like this:
command: xcopy /e /y /q /r "D:/Data/PostgreSQL/14.4/pg_xact" "D:/Data/PostgreSQL/16/pg_xact\" >> "D:/Data/PostgreSQL/16/pg_upgrade_output.d/20231009T132036.390/log/pg_upgrade_utility.log" 2>&1
Invalid path
0 files copied
I discovered this after much trial and error, and you can find more details in this post.
To avoid this issue, use the PowerShell escape character ` to escape the spaces in the path of the binary. It should look like this:
D:\Program` Files\PostgreSQL\16\bin\pg_upgrade.exe --old-datadir 'D:\Data\PostgreSQL\14.4' --new-datadir 'D:\Data\PostgreSQL\16' --old-bindir 'D:\Program Files\PostgreSQL\14.4\bin' --new-bindir 'D:\Program Files\PostgreSQL\16\bin'
Now everything should work smoothly (at least to the best of my knowledge).
7. Clean Up
To wrap up the upgrade, you’ll need to revert the temporary adjustments you made. Here’s a checklist:
- Delete the temporary directory used as the current directory to execute
pg_upgrade. - Change the authentication methods of localhost back to
scram-sha-256inpg_hba.conf. - Start the new PostgreSQL service (or the old one if needed).
With these steps, you’ll have successfully upgraded PostgreSQL on Windows while ensuring a smooth transition and cleaning up any temporary changes made during the process.
Внимание!
При использовании схемы с разделением базы данных на отдельный сервер обновление должно быть произведено на обоих серверах.
Производить обновление на сервере, где установлен WildFly, необходимо дополнительным скриптами согласно инструкции:
-
CentOS — upgrade_pg_centos_app_only.sh
-
Ubuntu — upgrade_pg_ubuntu_app_only.sh
Внимание!
- Инструмент производит обновление сервера СУБД PostgreSQL с версии 11 на версию 15.
- Обновление предназначено только для процессоров с разрядностью 64 бит.
- На время обновления обязательно отключите антивирусное ПО.
- Установка поддерживается только на 64х-битных ОС следующих версий:
- Windows 7
- Windows 10
- Windows 11
- 2008
- 2012
- 2016
- 2019
- 2022
Архив лог-файлов для передачи в службу поддержки:
- При обращении в службу поддержку обязательно прикладывайте архив папки с лог-файлами.
- В папке инструмента запустите файл archive_logs.cmd.
- Сформируется файл LOG-ДД.ММ.ГГГГ.zip.
- Обязательно приложите файл архива с лог-файлами к заявке.

Описание процесса
Данный процесс предусматривает перевод сервера PostgreSQL с версии 11 до версии 15. Обращаем ваше внимание на то, что, обновление сервера PostgreSQL должно осуществляться опытными ИТ-специалистами.
Дистрибутив
- Используйте данные учетной записи, которая предназначена для загрузки патчей и дистрибутивов SetRetail10.
- Для предоставления учетной записи обратитесь к вашему менеджеру, или в службу поддержки.
| Патч обновления на PostgreSQL 15 для Windows | Загрузить |
Подготовка к обновлению
Основные шаги подготовки
1. Перевод на новую версию PostgreSQL 11 осуществляется только для 64-х битных операционных систем.
2. Внимание! Перед началом процедур по переводу на новую версию PostgreSQL, обязательно обновите вашу операционную систему, установив последние обновления.
3. Проводите обновление только на активированной версии ОС Windows.
4. В некоторых случаях, в не актированной версии, могут отсутствовать необходимые обновления для запуска установщика PostgreSQL 15.
5. На время обновления PostgreSQL 11 на версию 15 не планируйте никаких работ на продуктивной среде так и с сервером магазина.
6. Следуйте только шагам описанным в данной инструкции!
7. Обязательно проверьте наличие свободного дискового пространства, оно должно быть достаточным, в зависимости от размеров вашей БД, так как в следующих шагах восстановление базы данных будет в новую версию сервера СУБД PostgreSQL 15, и при этом, версия PostgreSQL 11 будет установлена на момент развертывания архивов БД.
На данном изображении достаточно места для проведения операции обновления.

Отключение выдачи уведомлений UAC
На время проведения обновления отключите выдачу уведомлений UAC
1. В командной строке от Администратора введите UserAccountControlSettings.exe

2. Установите в положение Никогда не уведомлять → кликните OK.

Обновление на PostgreSQL 15 для ОС Windows
Все шаги выполняются только от пользователя с локальными правами администратора.
1. Разархивируйте файл UPGRADEvXX_PUBLIC.zip.

2. Выберите пусть распаковки → нажмите Извлечь.

3. В папке со скриптами обновления откройте на редактирование optionfile любым текстовым редактором.

4. Отредактируйте следующие параметры для установки PostgreSQL 15, если требуется:
| Параметр | |
|---|---|
| superaccount | Имя пользователя с глобальным с правами для сервера СУБД PostgreSQl 15. |
| superpassword | Пароль пользователя с глобальным с правами для сервера СУБД PostgreSQl 15. |
| create_shortcuts |
Создавать ярлык на PgAdmin4 на рабочем столе:
|
| prefix |
Полный путь установки программных компонентов PostgreSQL 15. В пути установки можно использовать только английские буквы, без специальных символов или русского алфавита. Нельзя использовать буквы русского алфавита. |
| datadir |
Полный путь установки файлов для хранения данных БД PostgreSQL 15 Для папки с данными, которая располагается на другом диске, указывается полный путь, например: E:/DB/data |

5. Откройте на редактирование в любом текстовом редакторе файл passwordfile для установки пароля доступа к серверу PostgreSQL 11.

6. Установите пароль → сохраните файл.

7. Запустите файл backup.cmd с правами администратора для создания архива текущего сервера баз данных.

Если появится окно фильтра SmartScreen → нажмите Запустить.

8. Начнется выполнение операции по сохранению резервной копии баз данных СУБД PostgreSQl 11.
Не закрывайте окно.
Сначала скрипт проверит готовность к резервному копированию → после окончания процесс проверки нажмите любую клавишу для продолжения.

Дождитесь окончания операции и обратите внимание на сообщение скрипта резервного копирования.

9. Перейдите в папку current для проверки созданных резервных копий баз данных PostgreSQL 11.

10. Проверьте, что все файлы резервных копий, что созданы следующие файлы резервных копий СУБД:
- postgres.backup;
- set.backup;
- set_loyal.backup;
- set_operday.backup;
- sg.backup;
- XXXX.backup — любые другие базы данных продуктов семейства Set и сторонних информационных систем.

11. Откройте папку log для проверки лог-файлов.
Для просмотра лог-файлов используйте Notepad++

12. Откройте файл status.txt для просмотра статуса завершения операции бэкапирования.

13. Напротив каждой из баз данных должен быть установлен статус OK — это обозначает, что все базы данных успешно сохранены в резервные копии.

14. Откройте лог-файл backup.txt.

15. Просмотрите, что во время процесса бэкапирования службы PostgreSQL 11. успешно запускались и останавливались.

16. Также откройте любой из лог-файлов с наименованием баз данных SetRetail/SetCentrum.

17. Проверьте, что процесс резервного копирования не содержит ошибок.

18. Запустите скрипт обновления upgrade.cmd с правами администратора.

Если появится окно фильтра SmartScreen → нажмите Запустить.

19. Начнётся проверка окружения для запуска установщика PostgreSQL 11.
После проверки введите символ Y → нажмите Enter.
Установка будет производиться в тихом режиме (визуальный инсталлятор отображаться не будет).
Во время выполнения скрипта сервер баз данных службы будут перезапускаться, а также автоматически произойдет восстановление баз данных на новую версию сервера СУБД всех резервных копий.

Дождитесь окончания процесса обновления.

20. За ходом процесса обновления также следите в папке log в файле upgrade.txt. (Обновляйте отображение файла, открывая его повторно).


21. По окончанию процесса, в лог-файле также появится сообщение о том, что обновление прошло успешно.

22. Проверьте в оснастке служб, что сервис postgresql-x64-15 в статусе Работает.

23. Проверьте, что визуализация сервера открывается, и вы можете воспользоваться стандартной функциональностью.

24. Запустите командную строку и наберите команду для проверки актуального пути установленного сервера СУБД PostgreSQL 15.
Должен отобразится актуальный путь к СУБД PostgreSQL 15!

Внимание! Если, после обновления и стабильной работы сервера отображается старый путь установки СУБД, тогда выполните команду для установки актуального пути в переменную среды PostgreSQL → перезапустите службу МУК.
setx SET_POSTGRES_BIN "C:\Program Files\PostgreSQL\11\bin" /m
Очистка места на диске после обновления
Внимание!
Выполняйте этот шаг, если:
-
Прошло минимум 7 дней после обновления
-
На диске недостаточно места после обновления. В иных случаях, данный шаг не является обязательным.
-
Обязательно! Произведена полная проверка того, что все бизнес-процессы по работе сервера работают стабильно: связь и обмен между кассам, импорт и экспорт в ERP. Иначе, после удаления бэкапа и обнаружения проблем с БД, будет невозможно исправить ситуацию, для устранения придется переустанавливать сервер без бэкапов!
-
Обновления МУКом патчами производятся стабильно!
1. Удалите всю папку с пакетом обновления, включая файлы резервных копий.

2. Откройте сеанс командной строки от имени администратора и выполните команду на удаление службы PostgreSQL 11
sc delete postgresql-x64-11

3. Удалите папку СУБД PostgreSQL 11.

Today we will be upgrading PostgreSql from version 14 to 15, which would be considered a Major upgrade (14->15). Below, I provide step-by-step instructions on how to do this on Windows.
Step 1: Install postgres 15 on the machine, this will create a seperate folder in the install directory /14 vs /15
- Recommend you keep the postgres user password the same
Step 2: Stop both versions of pg running on the system, here is the powershell to do that
net stop postgresql-x64-14net stop postgresql-x64-15Step 3: In the /data directory of each version, keep around the existing pg_hba.config files. I typcially rename them to pg_hba.conf.org
Step 4: Drop in a new pg_hba.conf in each /data directory with the following contents, this helps security getting in the way of this upgrade, full local trust
host		all		postgres		127.0.0.1/32	trust
host		all		postgres		::1/128		trust
Step 5: Upgrade Data
Our server has the bin directories located here:
C:\\Program Files\\PostgreSQL\\14\\bin
C:\\Program Files\\PostgreSQL\\15\\bin
And our data directories located here:
D:\\Data\\PgSql\\14
D:\\Data\\PgSql\\15
To upgrade the data to 15 we will be using pg_upgrade.exe. I typically like to execute this in a temp directory to isolate the files that get generated during this process. The pattern for updating via pg_upgrade.exe is as follows:
NEWVERSION\\bin\\pg_upgrade.exe --old-datadir "OLDVERSION\\data" --new-datadir "NEWVERSION\\data" --old-bindir "OLDVERSION\\bin" --new-bindir "NEWVERSION\\bin" -U USERSo for us it would be as follows (NOTE: I’m executing this command in C:\\Temp via powershell, note the & » is just to handle the space in the executable path)
& 'C:\\Program Files\\PostgreSQL\\15\\bin\\pg_upgrade.exe' --old-datadir "D:\\Data\\PgSql\\14" --new-datadir "D:\\Data\\PgSql\\15" --old-bindir "C:\\Program Files\\PostgreSQL\\14\\bin" --new-bindir "C:\\Program Files\\PostgreSQL\\15\\bin" -U postgresStep 6: Post Upgrade: After you have a successful upgrade you still need to do a few things to get your server back up
- Copy your pg_hba.conf from the old version into your new version data directory (remove the .org also if you don’t need it)
- Update your postgresql.conf file in the new version. The install probably saw that port 5432 was in use (from the old version running) and gave you something like 5433. Change this to 5432.
- Move any SSL data over to the new version. See our ssl post here.
-
Start the new server (with powershell)
net start postgresql-x64-15 - Uninstall old version
- Clear data old version
After this, you should be up and running in version 15.
Feedback? Better Idea? General Comment?
Overview
At work I needed to upgrade from PostgreSQL from 15 to 17.
The process is not that different than upgrading in Ubuntu but there were a couple
of items that threw me off.
Perform Backup
This should be done prior to the update in case something goes wrong:
This was based on the documentation
PostgreSQL: Documentation: 17: pg_dumpall.
Note keep in mind that you should create a pgpass.conf
(or .pgpass for Linux):
This file is located C:\Users\ctyler\AppData\Roaming\postgresql
(or chmod 0600 ~/.pgpass with the right permissions).
PostgreSQL: Documentation: The Password File.
Remove admipack extension
This extension will need to be removed as it have been deprecated:
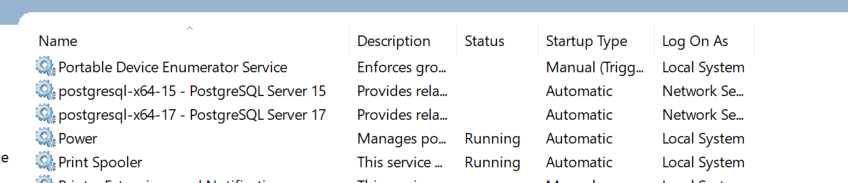
Stop Both Servers
Go to Start->Search->Serivces and stop both services:
Update pg_hba.conf
Make the following changes:
This remove the permissions so that you don’t error during upgrade.
This need to be done on both clusters.
Run pg_upgrade
Now let’s perform the upgrade.
Open PowerShell as Adminstrator.
I had to add ports and postgres user.
I got this info from
Upgrading PostgreSQL in Windows · GitHub
Once complete you should get:
Next Steps
After you verify that PostgreSQL 17 works as intended, you can then remove 15.
I would suggest having a backup strategy.
For example on Ubuntu, I use ZFS to create snapshots and push those snapshots to
a backup server and an external hard disk.
On Windows, I have a simple PowerShell script that will use pg_dump and
pg_dumpall.
pg_dump is for the tables that I need to backup monthly.
Most of the data in my databases come from other data sources and don’t really
need to be backed up.
The total downtime was only a couple of hours and I shouldn’t have a reason not
to upgrade PostgreSQL yearly.