
Все способы:
- Способ 1: Активация мини-приложений
- Способ 2: Добавление мини-приложения «Погода» на общую панель
- Способ 3: Установка ViVeTool
- Изменение города для виджета погоды
- Способ 4: Widget Launcher
- Вопросы и ответы: 2
Способ 1: Активация мини-приложений
Если вы начали пользоваться Windows 11 и в левом углу панели задач не обнаружили виджета погоды, который по умолчанию используется в мини-приложениях, значит, вся эта панель по каким-то причинам отключена в вашей сборке операционной системы. Понадобится активировать ее отображение, организовав тем самым и показ погоды в вашем городе. Для выполнения этой задачи следуйте инструкции.
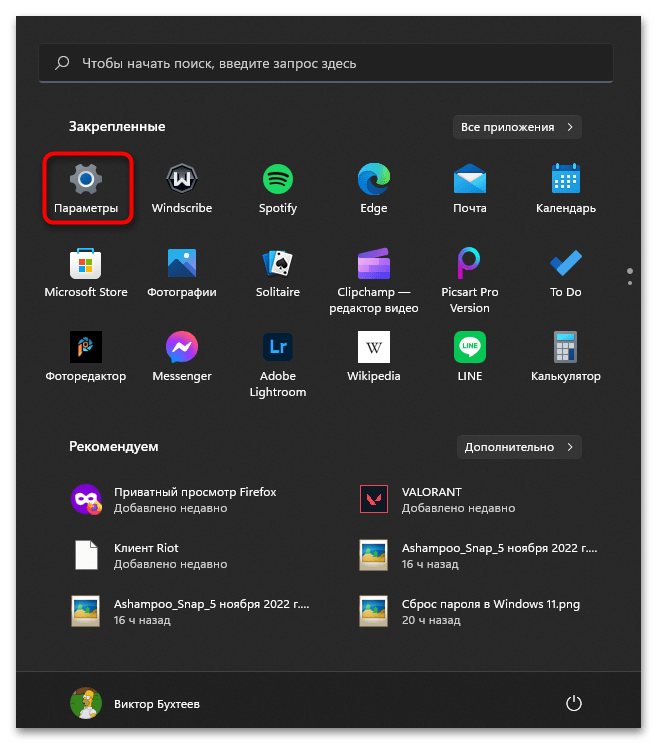
- Откройте меню «Пуск» и нажмите по значку с изображением шестеренки для перехода в «Параметры».
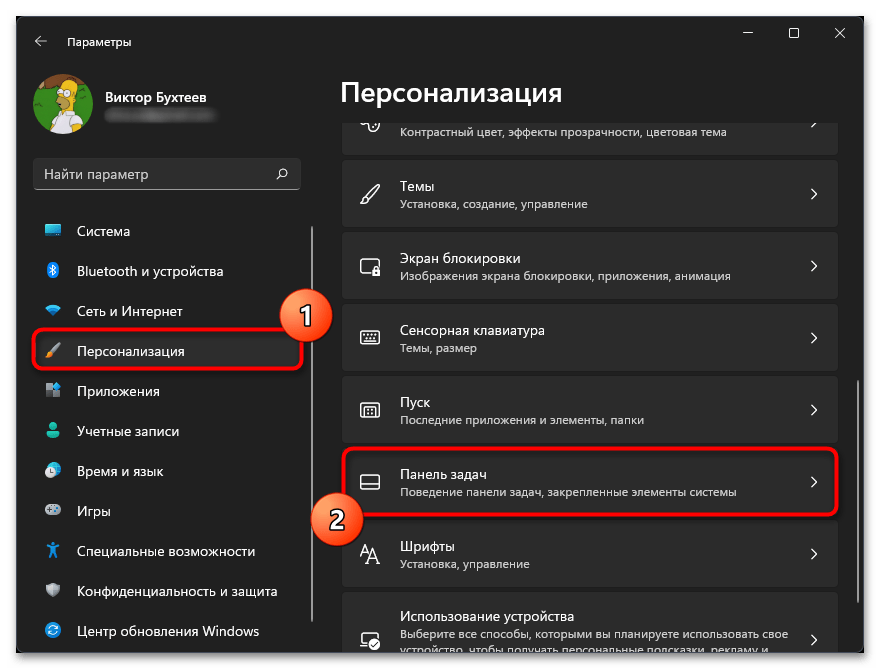
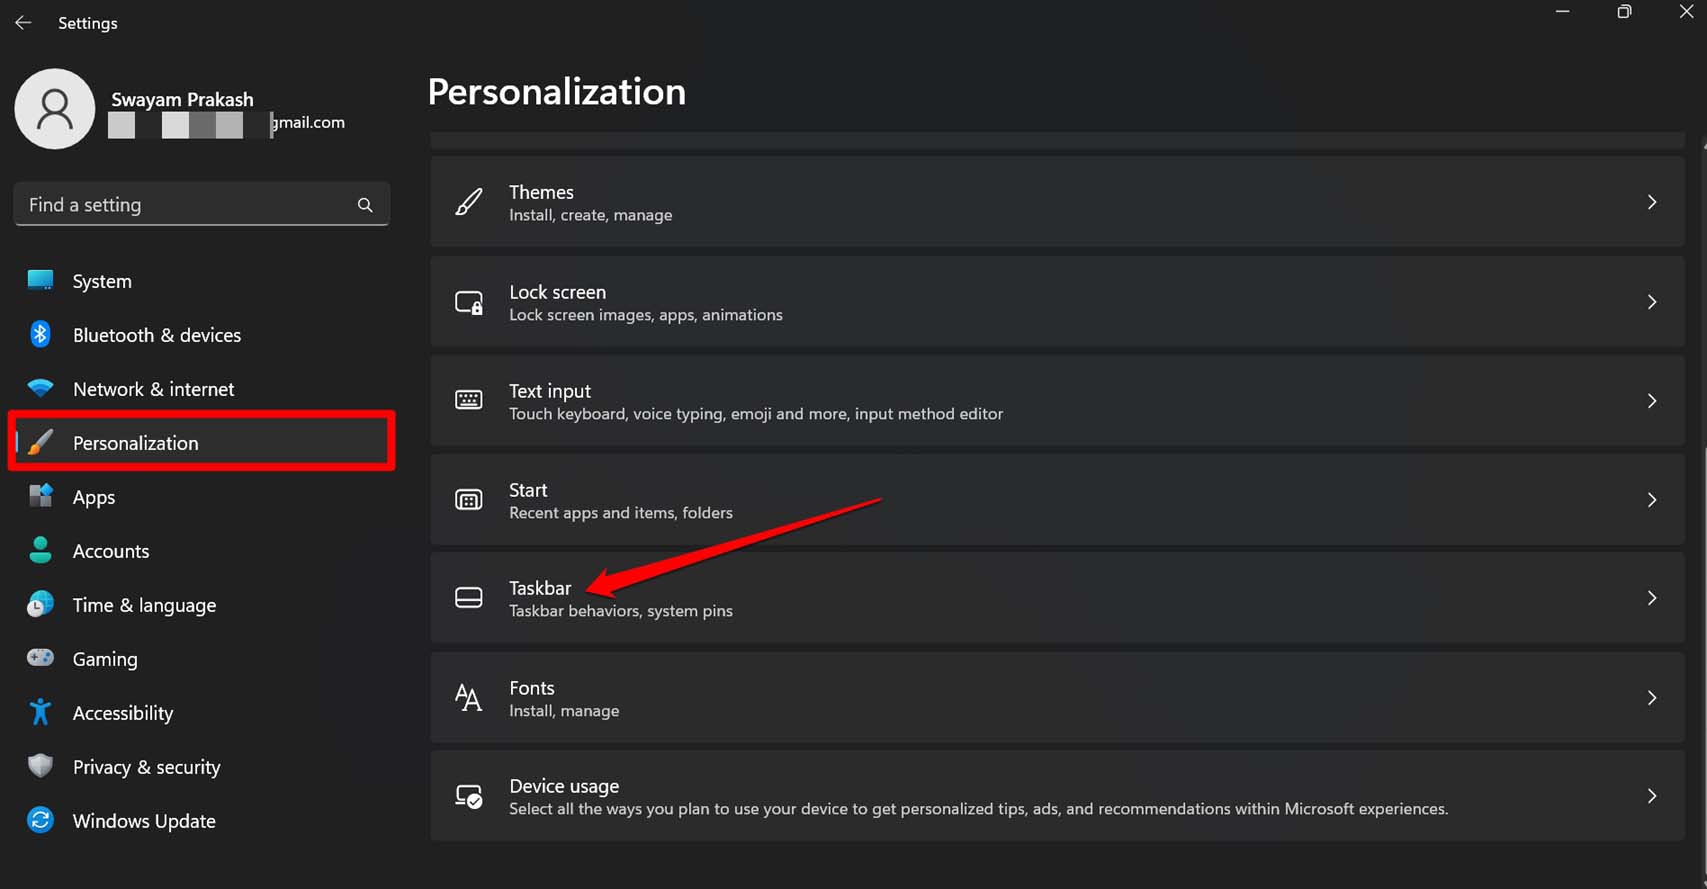
- В новом окне перейдите к разделу «Персонализация» и выберите категорию «Панель задач».
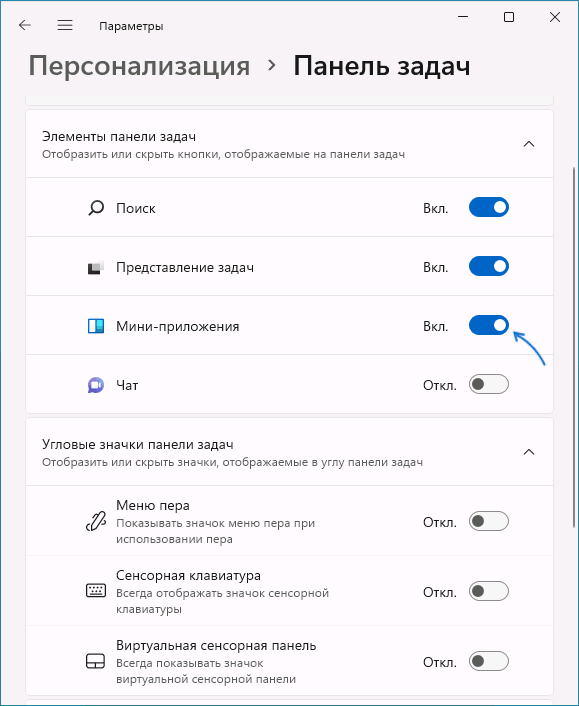
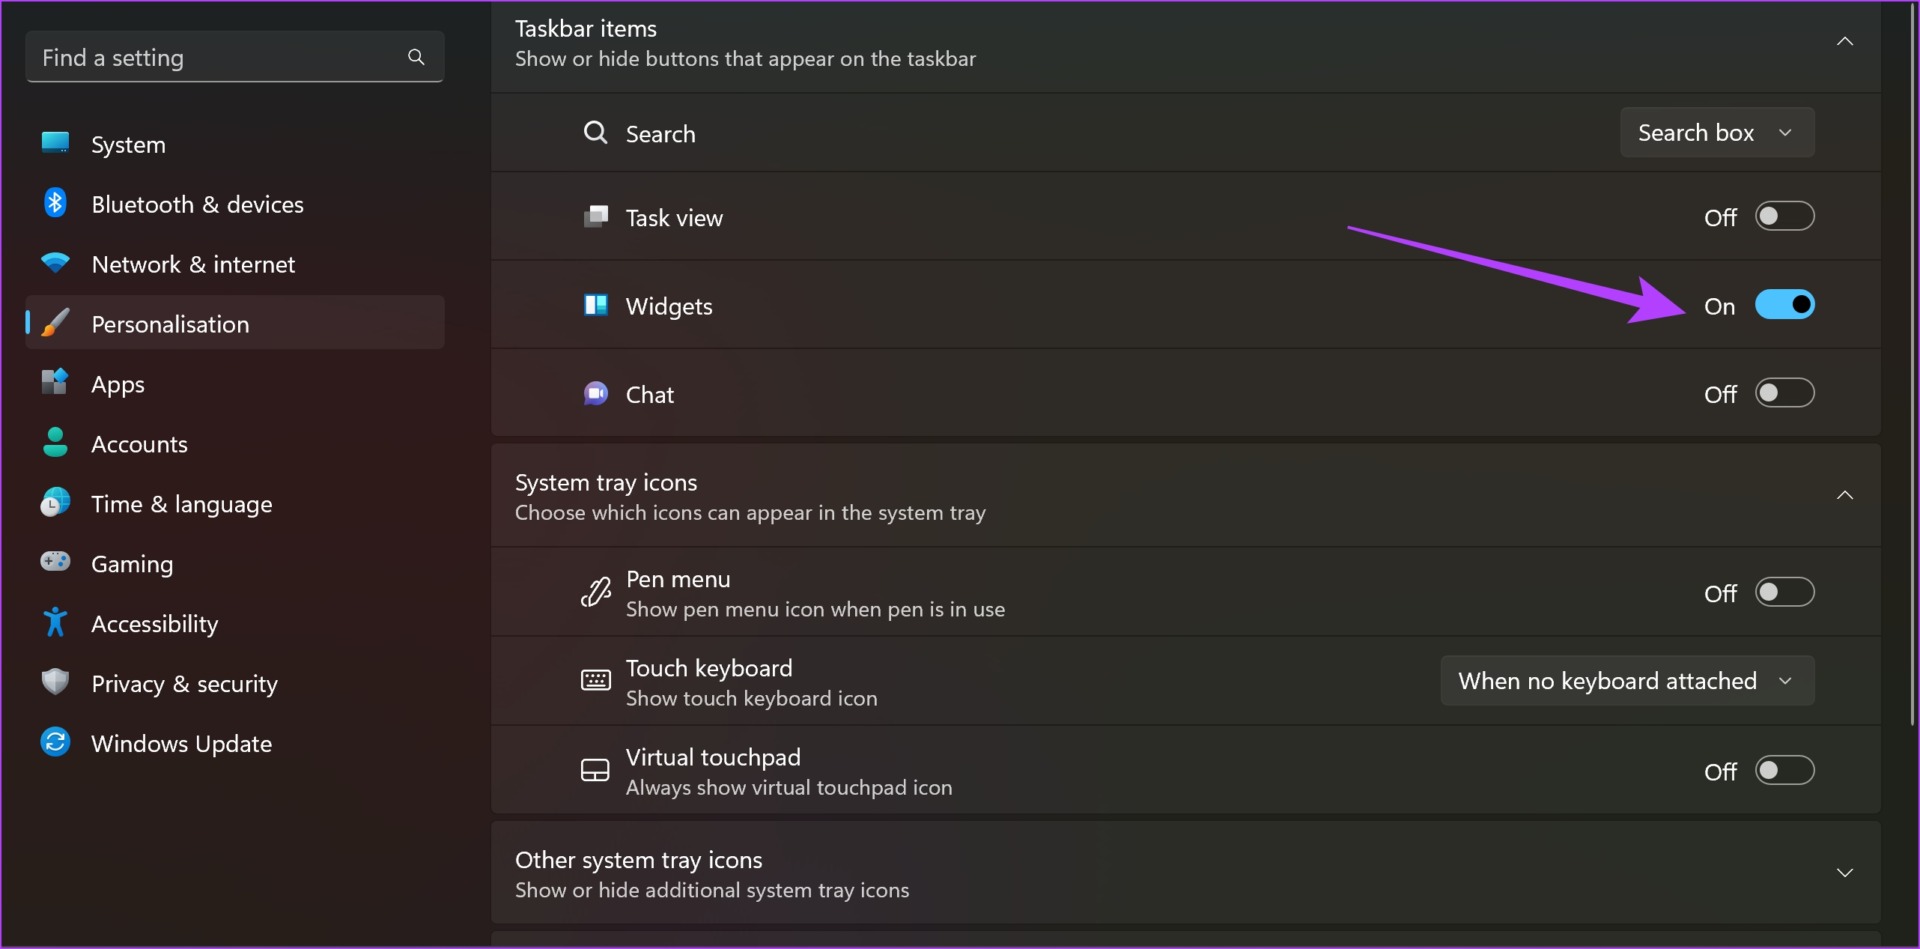
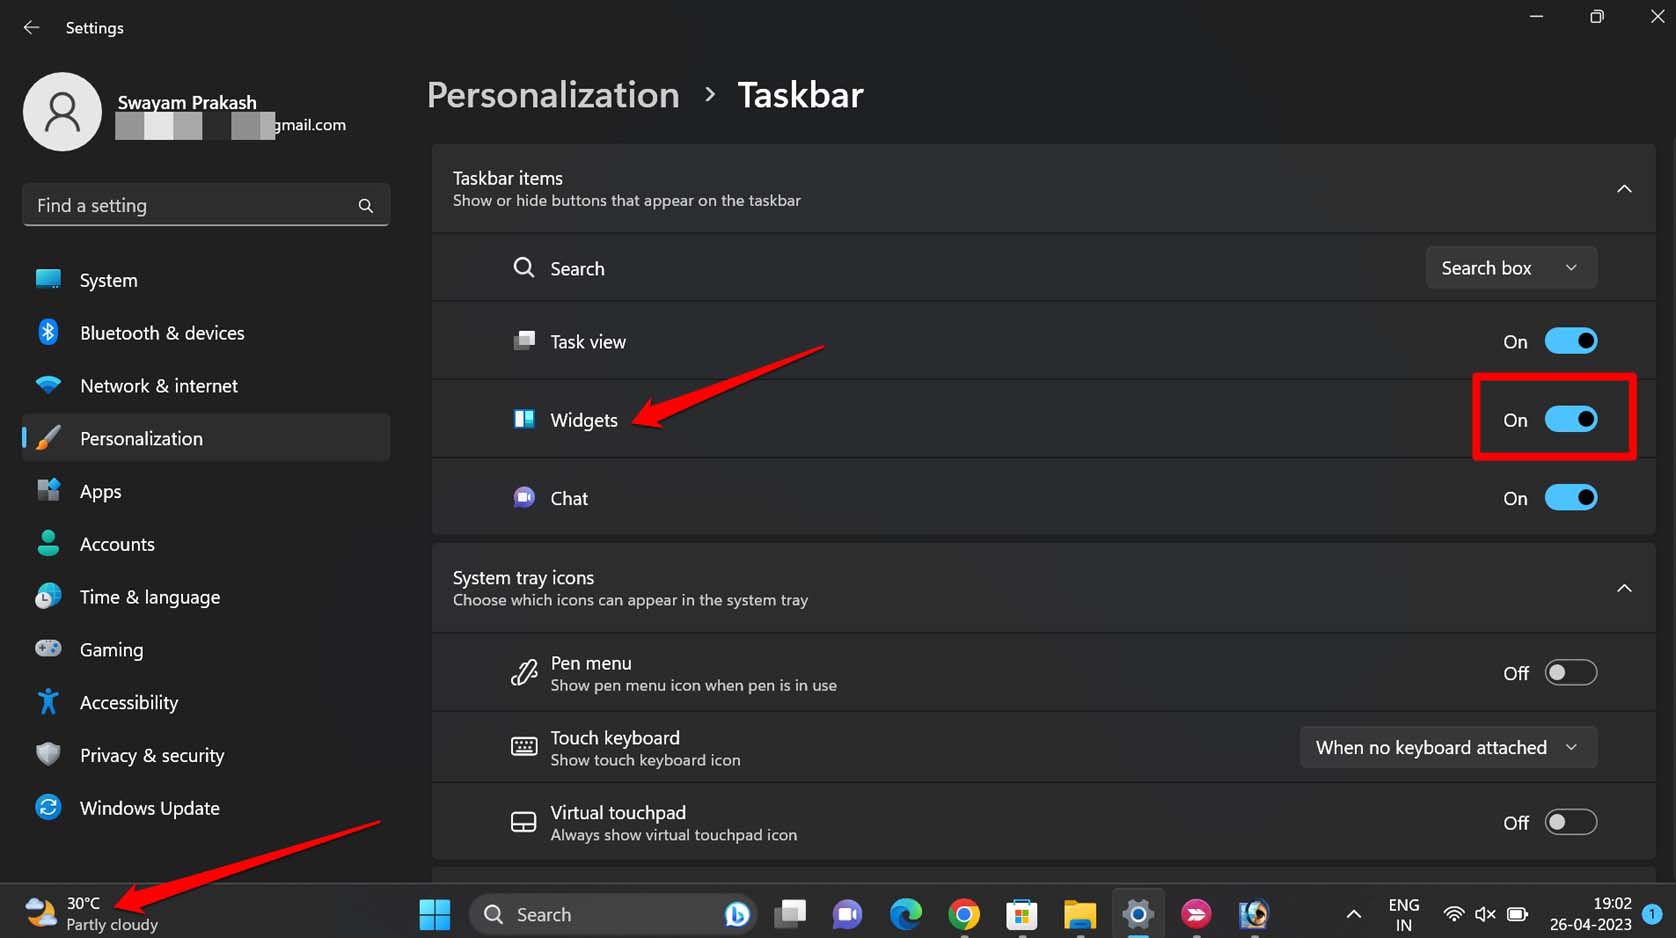
- Теперь вам предстоит отыскать группу «Элементы панели задач» и переключить ползунок возле «Мини-приложения» в состояние «Вкл.».
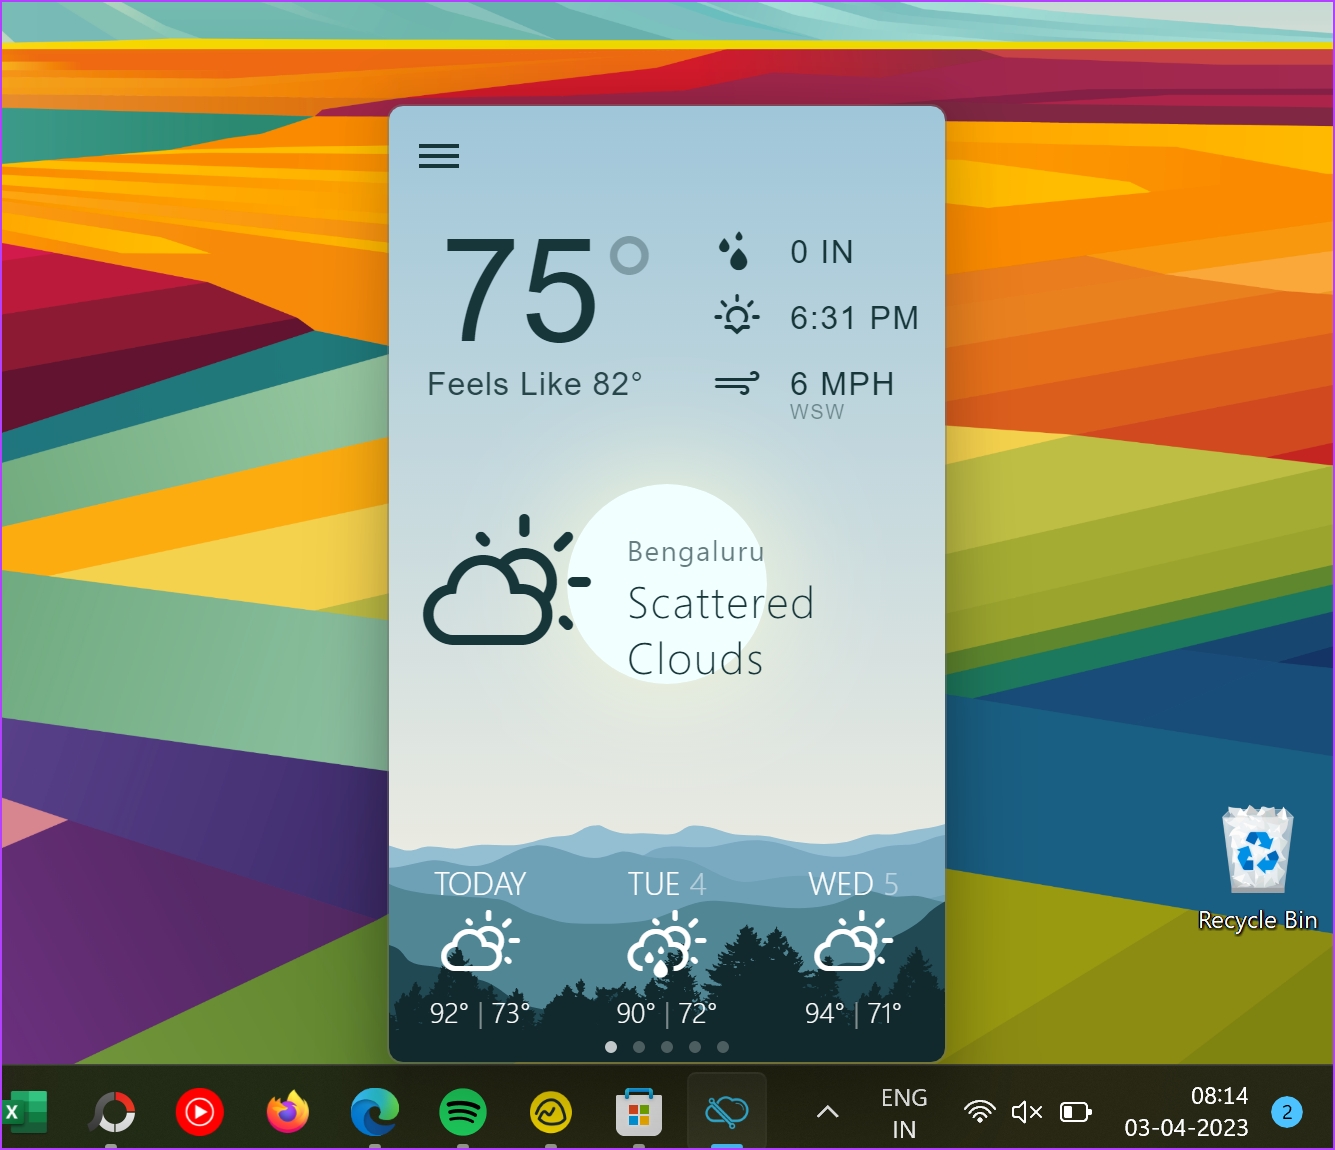
- Перезагружать ОС или «Проводник» в этом случае не нужно, просто обратите внимание на левую часть панели задач и убедитесь в том, что там присутствует отображение погоды.


Способ 2: Добавление мини-приложения «Погода» на общую панель
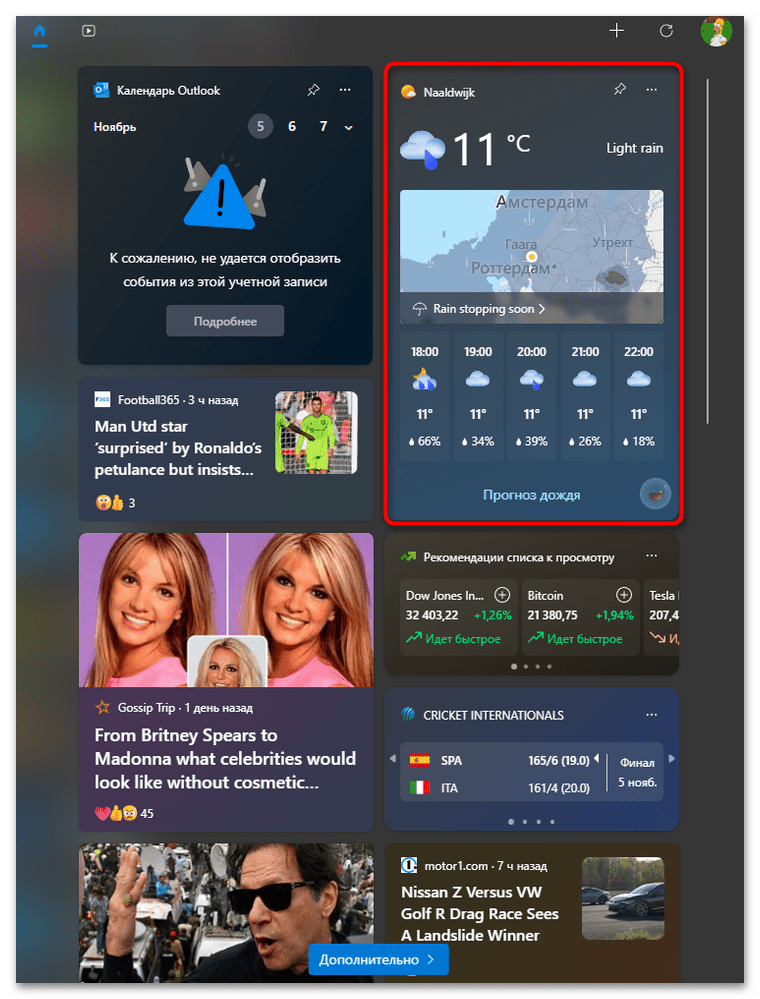
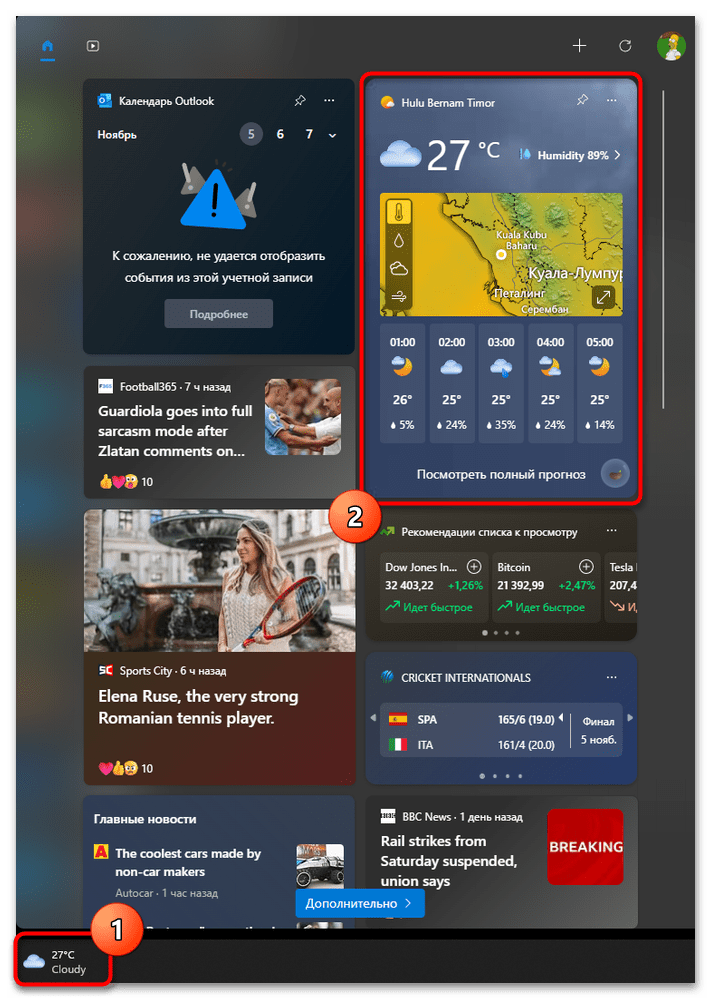
Если погода отображается у вас на нижней панели, но в списке мини-приложений отсутствует, из-за чего не получается получить дополнительную информацию или изменить настройки, значит, это мини-приложение отключено на панели. Вам понадобится вручную его активировать и закрепить в удобном месте, чтобы использовать по необходимости.
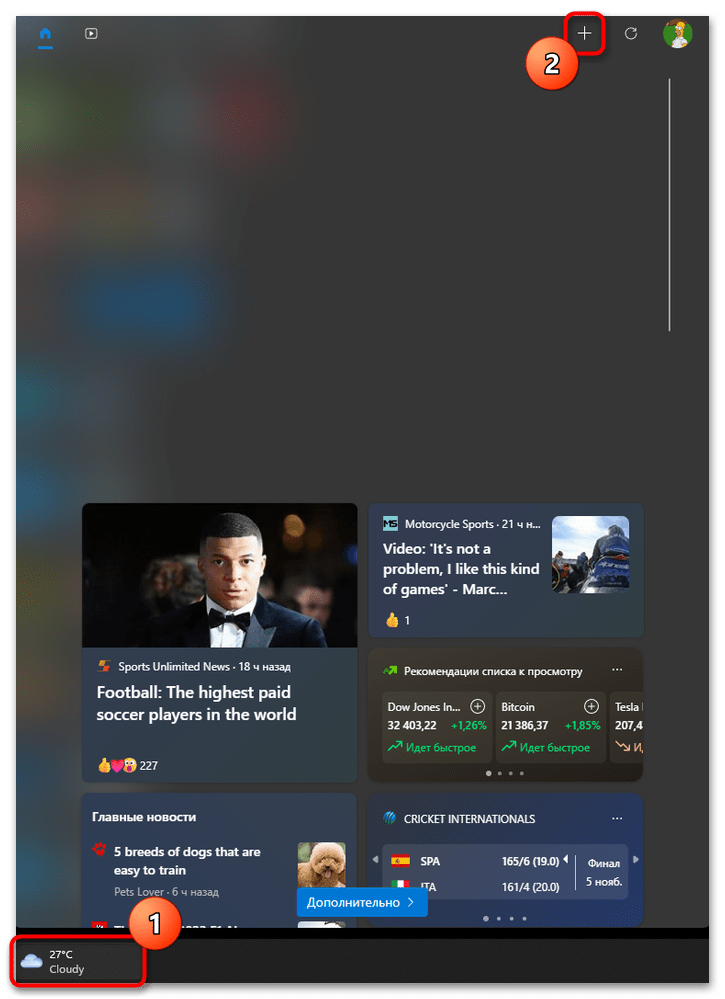
- Нажмите по значку погоды на панели задач, чтобы развернуть общую панель мини-приложений. Справа вверху щелкните по кнопке с плюсом для открытия всех доступных мини-приложений.
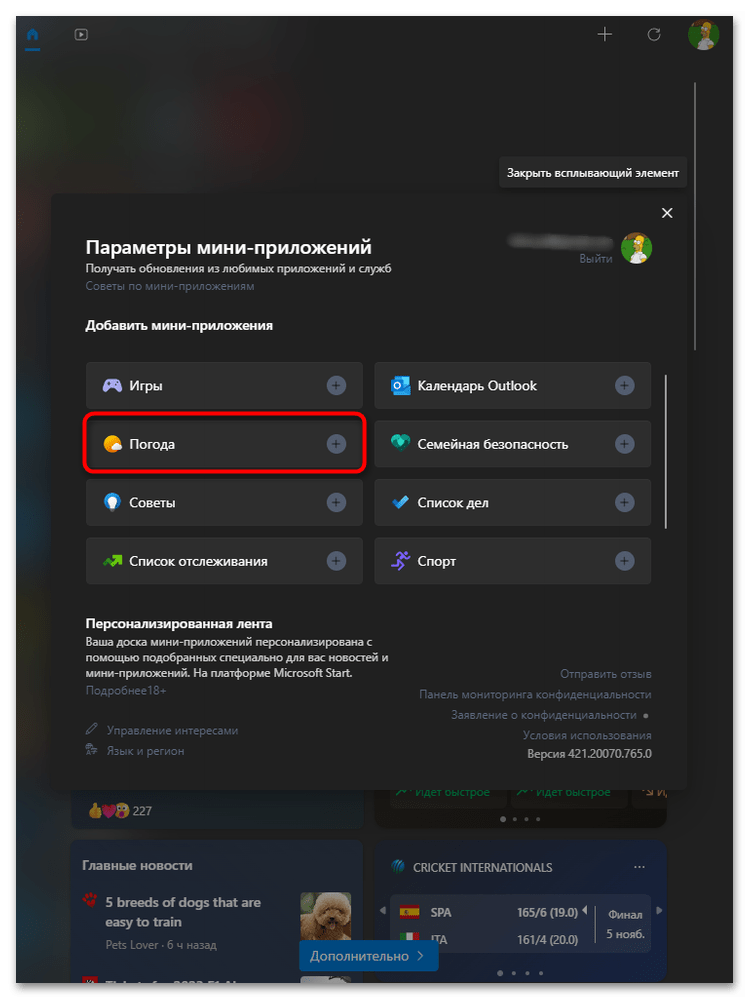
- Найдите в списке «Добавить мини-приложения» строку «Погода» и нажмите по плюсику рядом с ней.
- Вы увидите, как виджет появился на пустом месте панели. Можете закрепить его при помощи скрепки или перетащить в любое место, зажав левой кнопкой мыши.
Способ 3: Установка ViVeTool
Метод с использованием ViVeTool актуален в тех случаях, когда мини-приложения в вашей сборке Windows 11 отсутствуют. Это может быть связано с их удалением, если речь идет о любительских сборках, или с использованием старой версии ОС, которая не обновляется до следующих сборок. В таком случае на помощь приходит сторонняя вспомогательная утилита с названием ViVeTool.
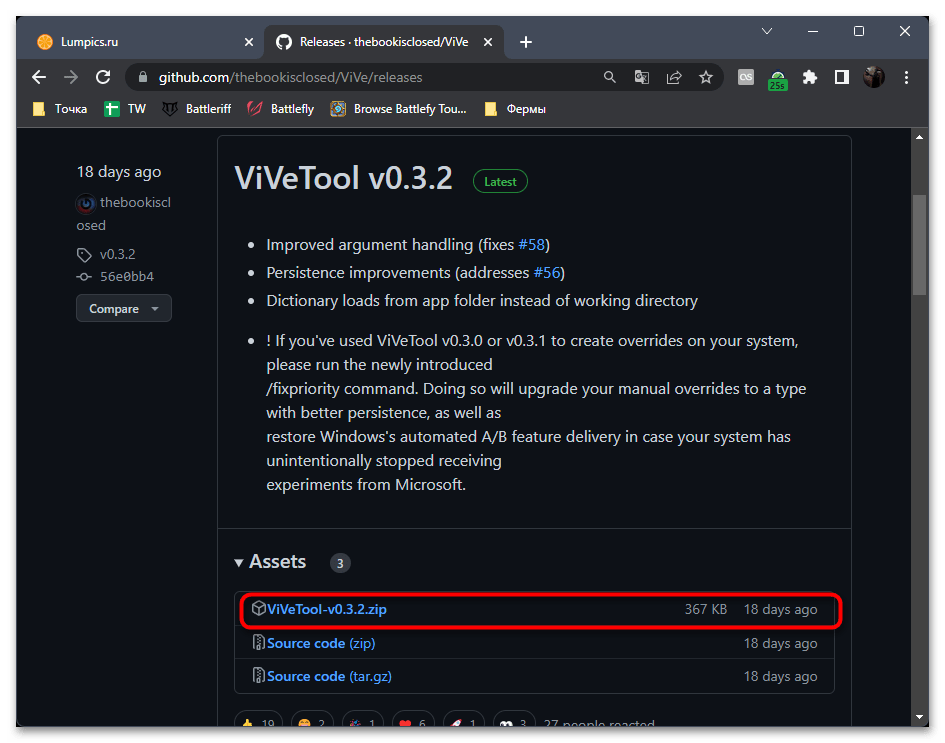
Скачать ViVeTool с GitHub с официального сайта
- Утилита ViVeTool имеет открытый исходный код, соответственно, распространяется бесплатно. Перейдите по ссылке выше, чтобы найти последнюю версию программы и скачать ее архив на свой компьютер.
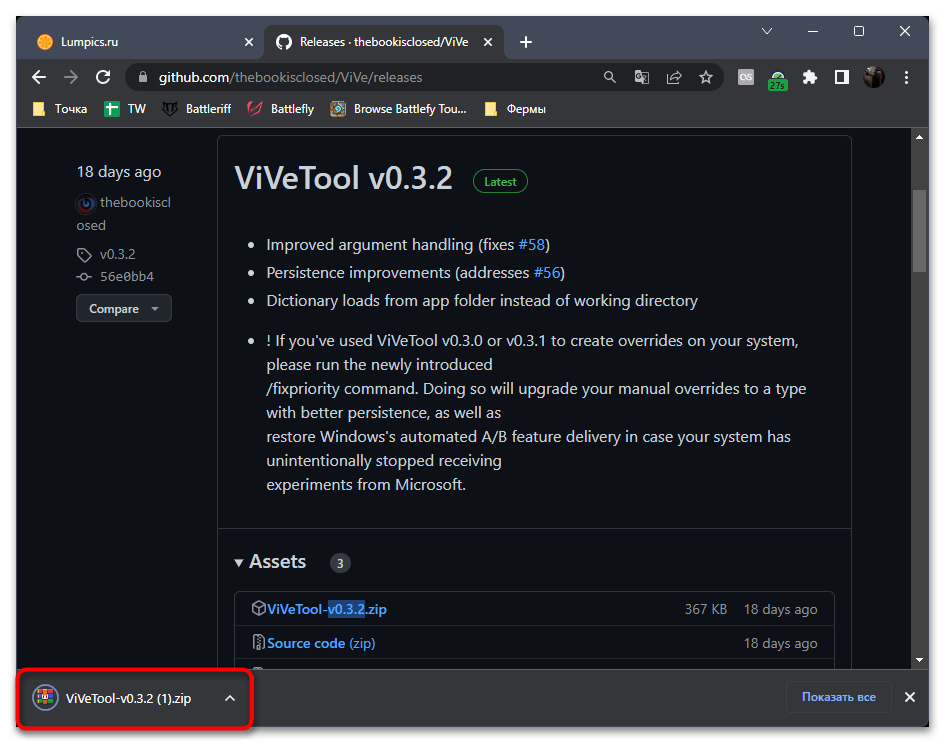
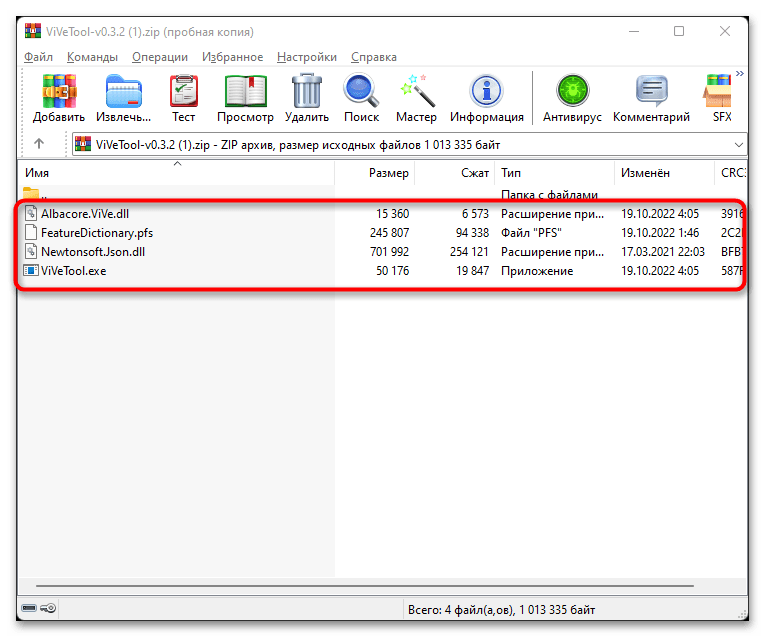
- По завершении скачивания откройте этот архив через удобный для вас сторонний архиватор или стандартное средство просмотра архивов в Windows.
- Распакуйте находящиеся файлы в любой каталог на вашем жестком диске или SSD.
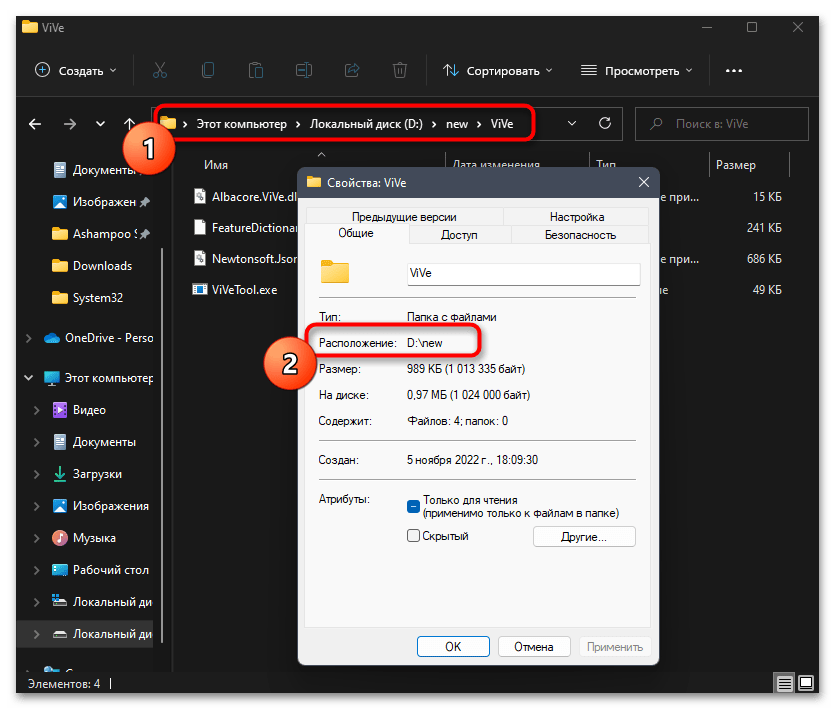
- Теперь понадобится запомнить полный путь к конечной папке с исполняемым файлом ViVeTool. Вы можете скопировать его из адресной строки в «Проводнике» или получить расположение через свойства файла.
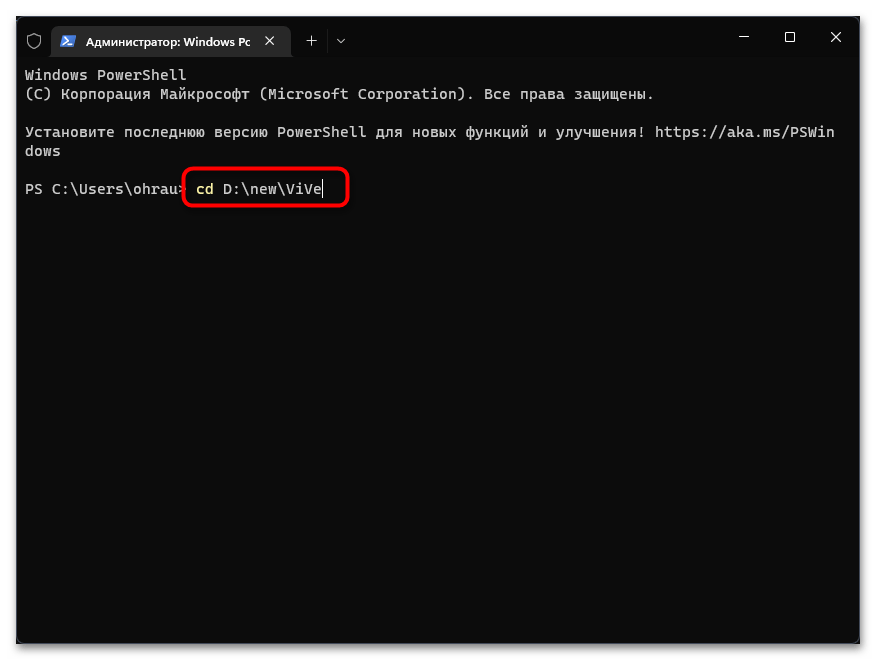
- Щелкните правой кнопкой мыши по кнопке «Пуск» и из появившегося контекстного меню выберите вариант «Терминал Windows (Администратор)», чтобы запустить консоль с повышенными правами.
- В консоли понадобится перейти по пути к исполняемому файлу ViVeTool, используя команду
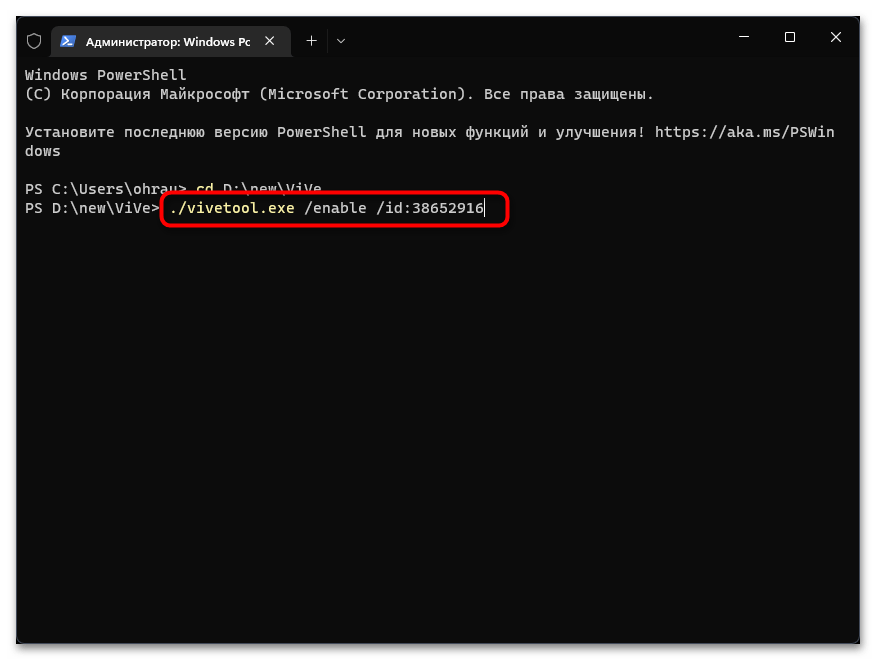
cd. - Последующая команда будет выполняться из места расположения файла. Введите
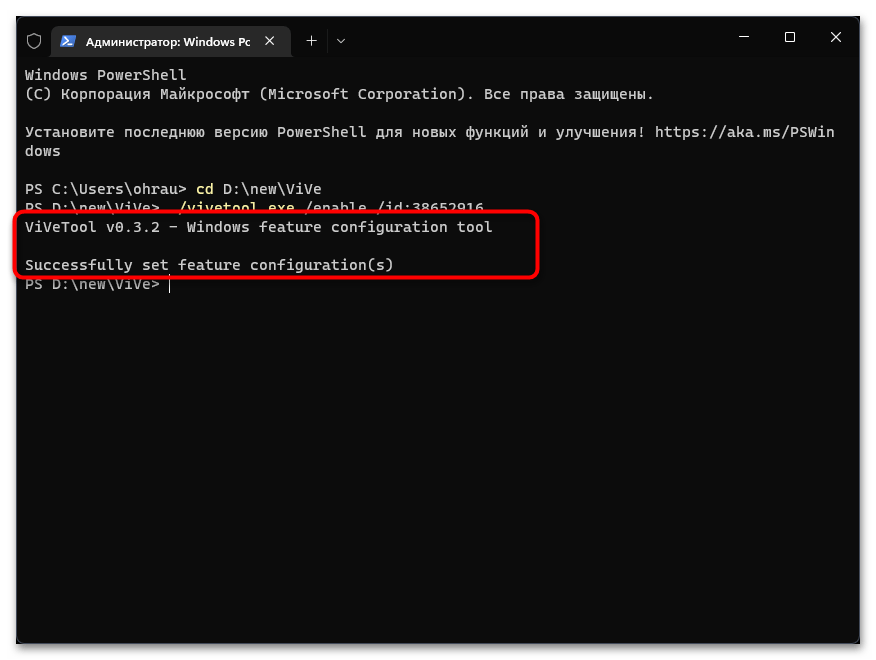
./vivetool.exe /enable /id:38652916и нажмите Enter для применения команды. - Она отвечает за включение отключенной ранее возможности, идентификатор которой подразумевает активацию мини-приложений на панели задач. Вы должны получить уведомление о том, что функция успешно включена, после чего можете закрыть консоль.
- Перезагрузите ПК или только «Проводник», после чего проверьте, добавился ли виджет погоды на нижнюю панель и появился ли в списке мини-приложений.
Изменение города для виджета погоды
В завершение работы со стандартным виджетом рассмотрим, как поменять город для отображения погоды в настройках мини-приложения. По умолчанию Windows получает доступ к вашему текущему местоположению, но если город должен отличаться от определенного автоматически, это нужно указать для самого мини-приложения, что осуществляется так:
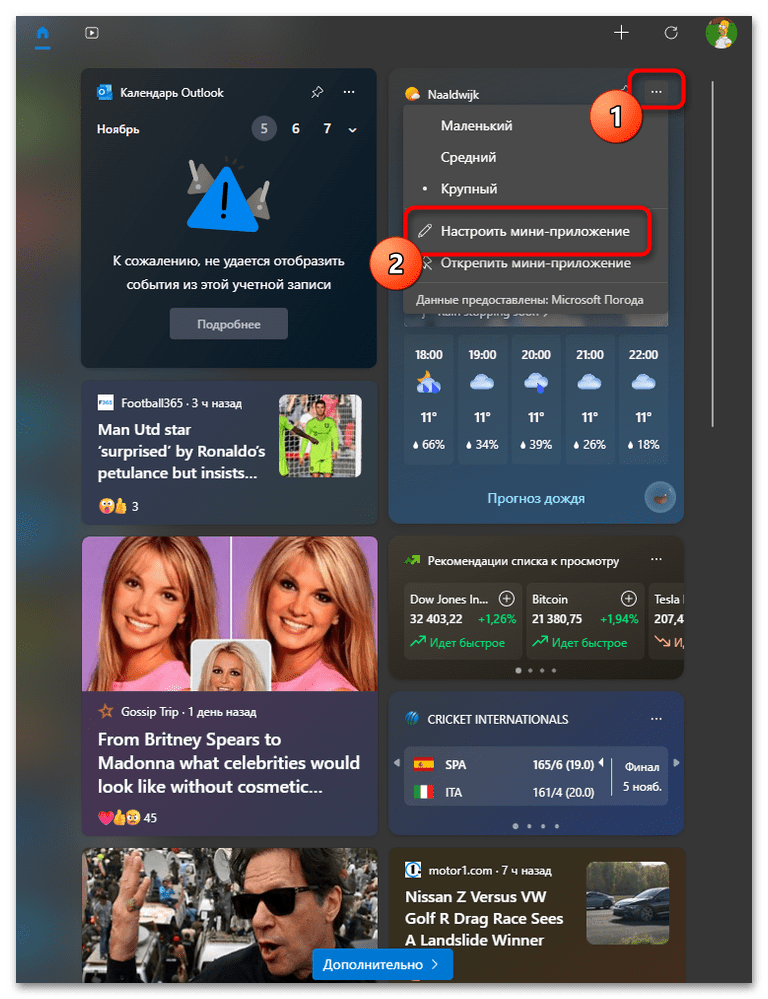
- Найдите мини-приложение на общей панели, затем нажмите по трем точкам справа вверху. Из появившегося списка выберите пункт «Настроить мини-приложение».
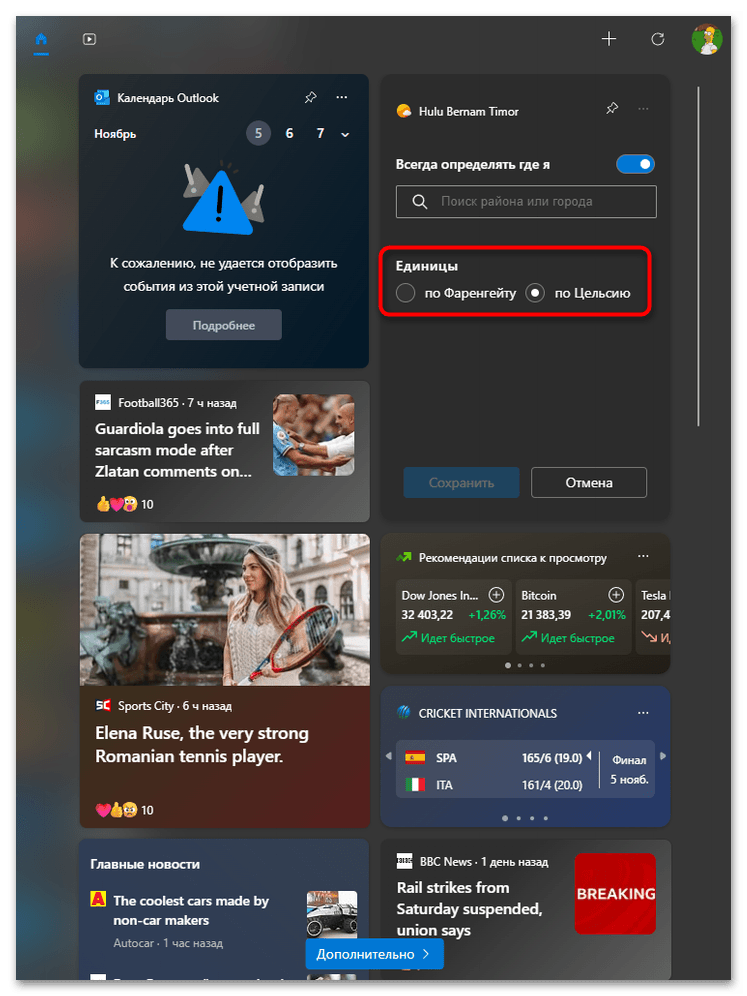
- Можете отключить автоматическое определение, а также через поиск ввести название населенного пункта или индекс, чтобы определить его.
- Вместе с этим поддерживается переключение единицы измерения с по Цельсию на по Фаренгейту или наоборот. Перед выходом не забудьте нажать «Сохранить», чтобы применить изменения.

Способ 4: Widget Launcher
Widget Launcher — решение для тех пользователей, кого не устраивает стандартное мини-приложение, установленное в Windows 11. К тому же его нельзя вывести на экран для постоянного отображения погоды, а вот в упомянутой программе такой недостаток отсутствует. Скачивание приложения осуществляется через Microsoft Store, после чего можно будет приступить к его настройке.
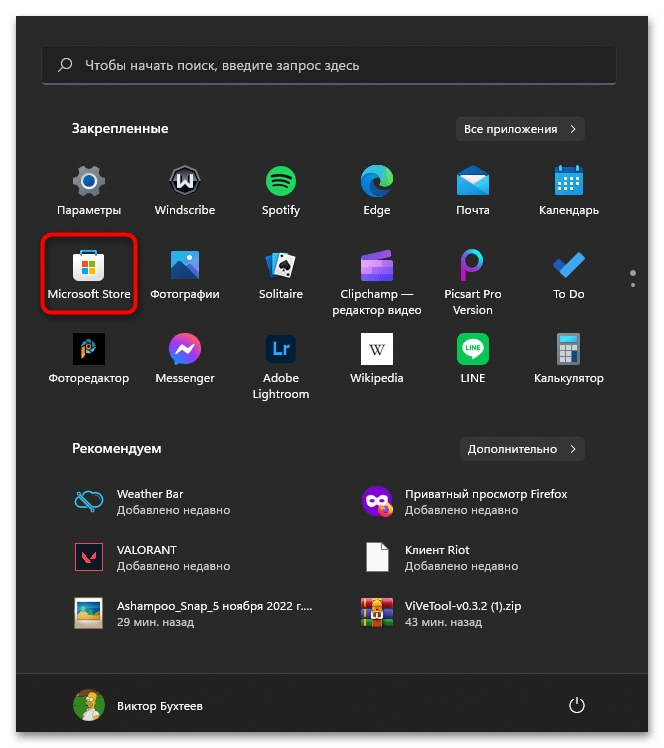
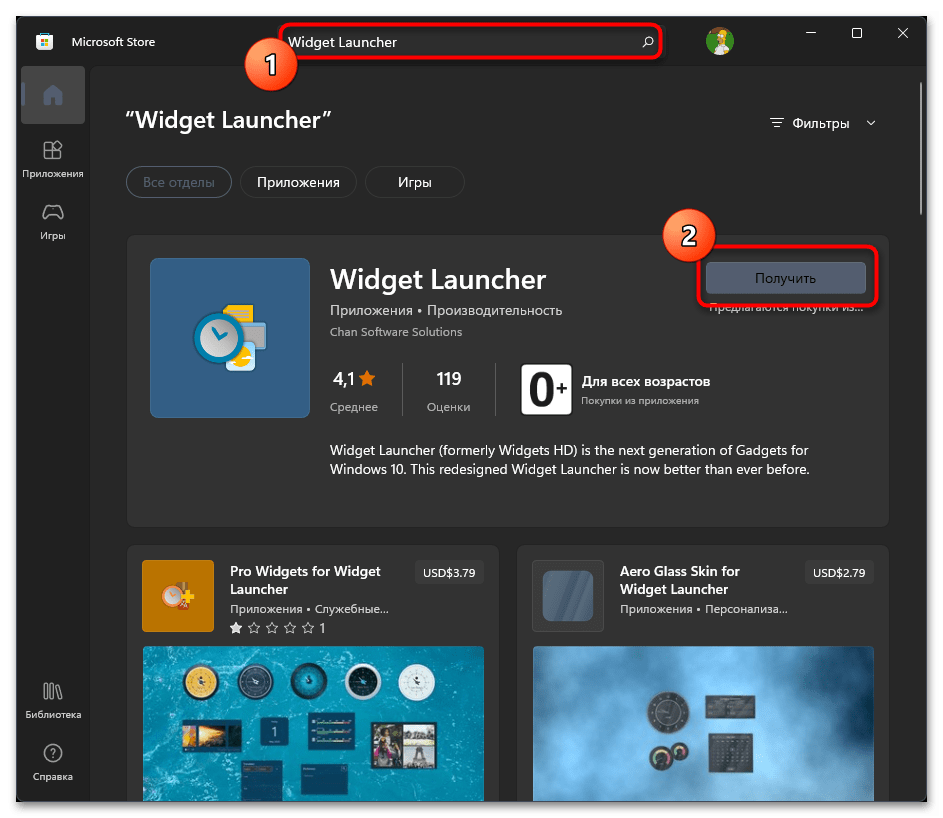
- Откройте «Пуск», в списке закрепленных приложений найдите «Microsoft Store» и запустите данное приложение.
- В поиске найдите «Widget Launcher» и дождитесь получения лучшего соответствия. Справа от названия приложения щелкните по «Получить».
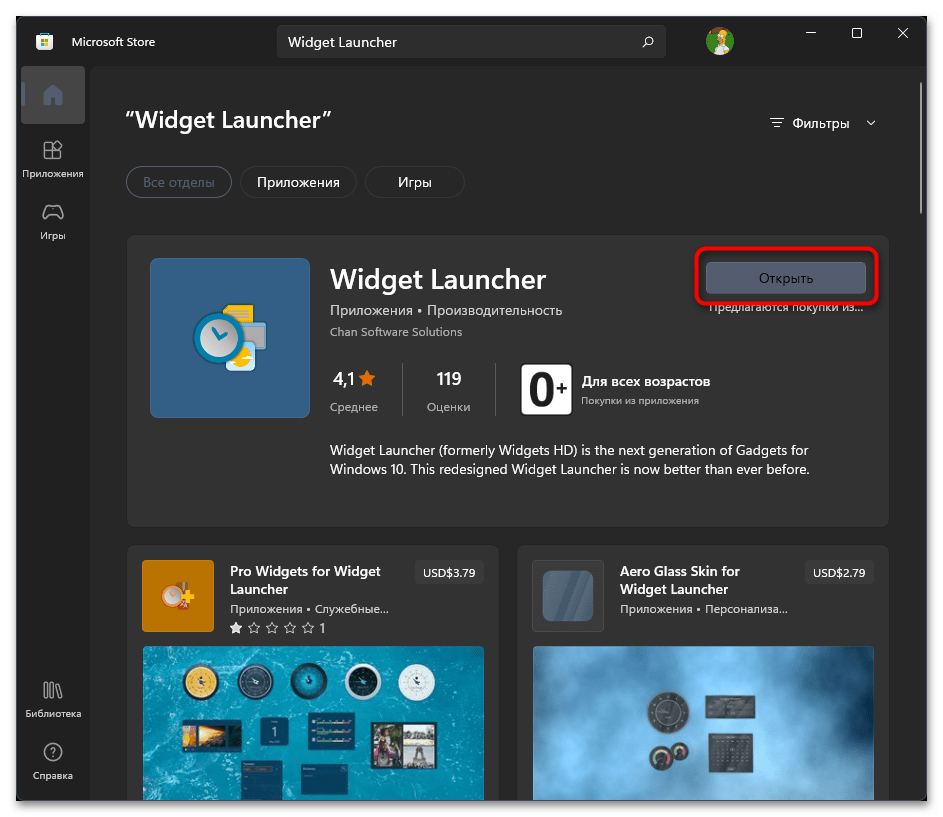
- Ожидайте окончания установки, после чего запустите программу. В будущем вы можете самостоятельно поместить ее в автозагрузку или открывать по необходимости через значок, который добавится в меню «Пуск».
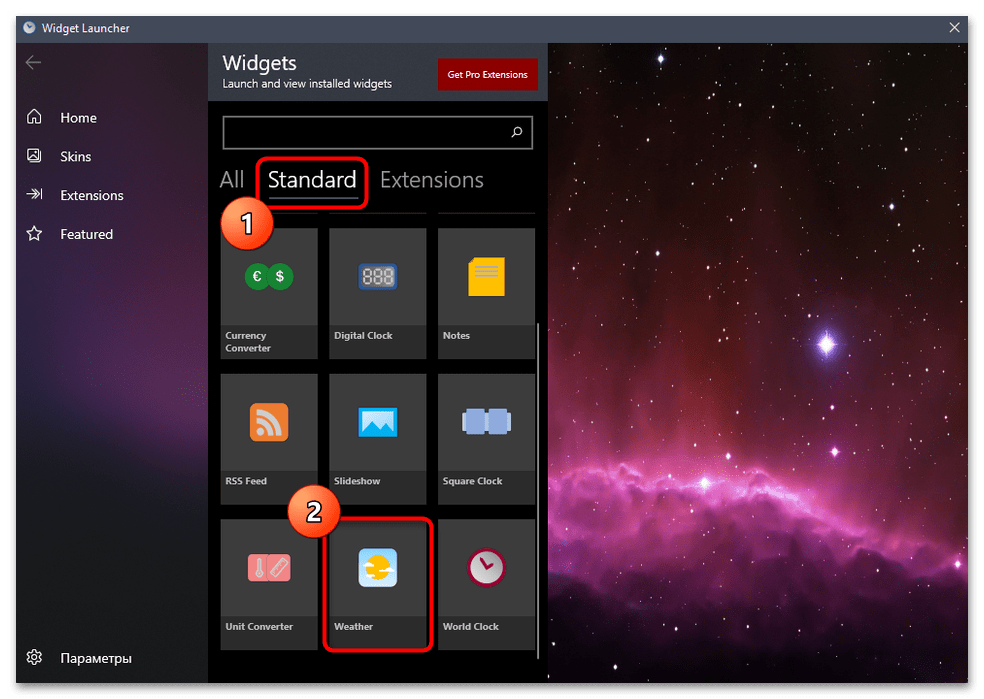
- В самой программе переключитесь на вкладку «Standard» и нажмите левой кнопкой мыши по «Weather».
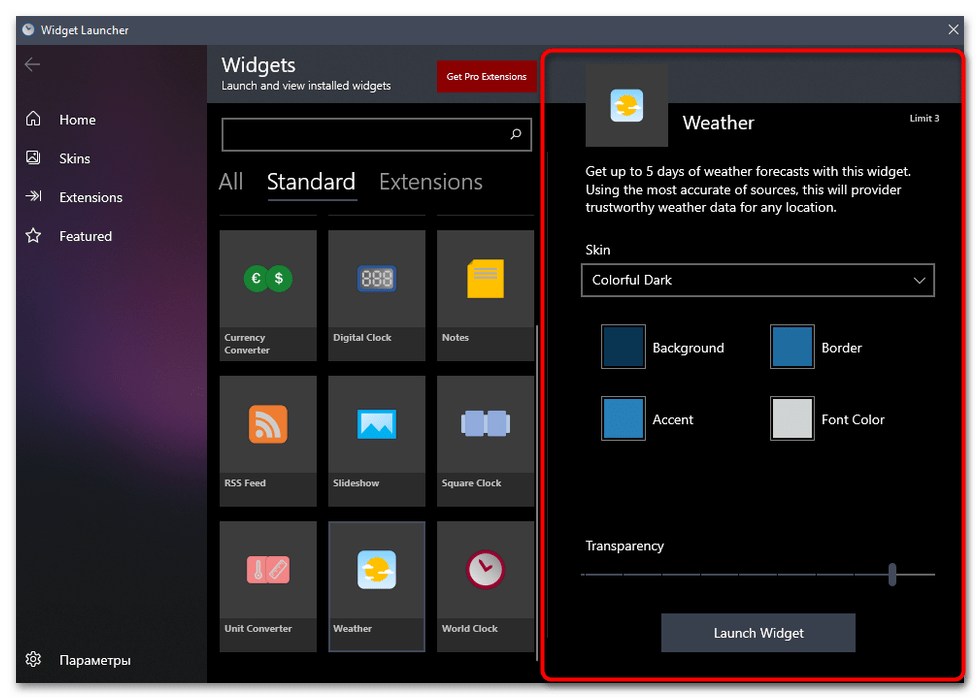
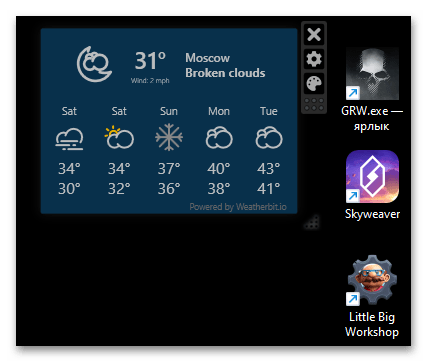
- Сразу будет предложено настроить внешний вид виджета, включая его прозрачность. Можете сделать это сейчас или остановить на потом. Нажмите «Launch Widget» для запуска виджета погоды.
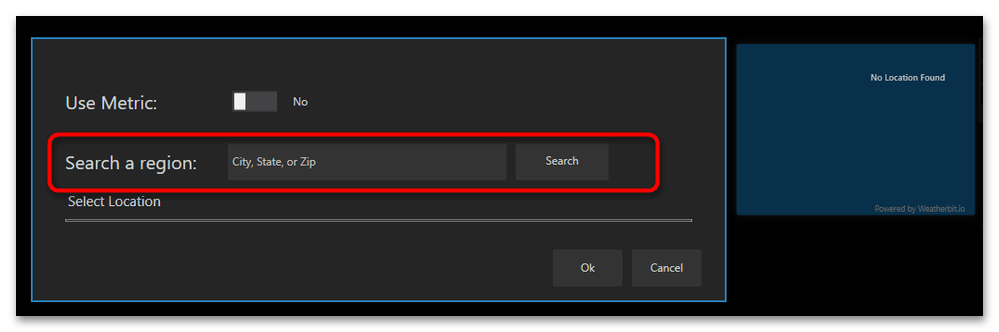
- Зажмите его левой кнопкой мыши и перетащите в любое место на рабочем столе. По умолчанию локация выбрана не будет, поэтому понадобится открыть настройки для ее установки.
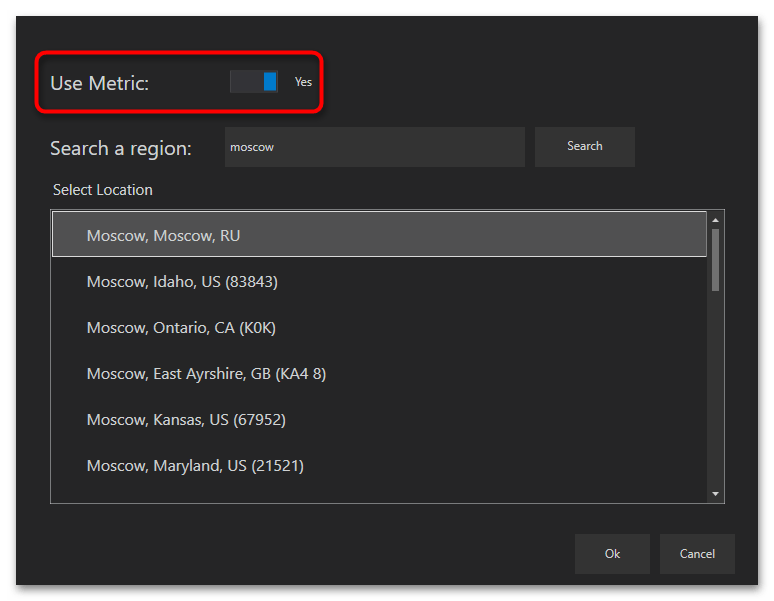
- Введите название своего города или индекса в отведенное для этого поле, выберите подходящий результат из списка и примените его.
- Ознакомьтесь с отображением погоды на пять дней. Если значения температуры отображаются в градусах по Фаренгейту, понадобится вернуться в настройки.
- В окне активируйте переключатель на «Use Metric», чтобы переключиться на погоду по Цельсию.
- Если понадобится изменить внешний вид виджета или уменьшить непрозрачность, нажмите по значку с изображением палитры, чтобы попасть в то же самое окно, которое вы уже видели перед запуском виджета.


Наша группа в TelegramПолезные советы и помощь
Некоторые пользователи Windows 11 в последнее время могли заметить, что в углу панели задач слева показывается виджет погоды, другие — напротив, могут не наблюдать у себя такого индикатора, но хотели бы его включить.
В этой простой инструкции для начинающих о том, как включить или, наоборот, убрать погоду с панели задач Windows 11 и какой компонент системы отвечает за её отображение.
Кнопка «Мини-приложения» теперь показывает погоду
За показ погоды на панели задач отвечает кнопка «Мини-приложения» (виджеты). В связи с тем, что особой пользы для русскоязычного пользователя она не несла, многие её отключили или даже удалили ранее, когда Windows 11 только вышла. Если вы хотите видеть погоду — кнопку мини-приложений потребуется включить и наоборот.
Для того, чтобы включить или отключить кнопку виджетов и, соответственно — погоды на панели задач, выполните следующие шаги:
- Нажмите правой кнопкой мыши в пустом месте панели задач.
- Выберите пункт «Параметры панели задач».
- Включите «Мини-приложения» в разделе «Элементы панели задач». Или, если показ погоды не нужен — отключите этот пункт.

Если после этого ничего кроме кнопки виджетов, возможно не выровненной по левому краю, не появилось, обновите приложения Microsoft Store:
- Откройте Microsoft Store и перейдите в пункт «Библиотека».
- Нажмите «Обновить все» (возможно, сначала потребуется нажать «Проверить обновления»).
- После обновления потребуется перезагрузка компьютера.
В результате на панели задач будет (или, если вы отключили — не будет) отображаться погода в автоматически определенном местоположении, либо, если вы настроили расположение вручную в мини-приложениях — погода в указанном вами месте:
Чтобы настроить город, для которого показывается погода, нажмите по кнопке погоды на панели задач, затем — по трем точкам у соответствующего виджета и выберите «Настроить мини-приложение». В настройках можно будет отключить автоматическое определение местоположения и вручную ввести нужный город.
Helping millions of people navigate the world of technology.
Quick Tips
- Ensure you have enabled widgets in Settings > Personalization > Taskbar.
- Try updating the Windows Web Experience Pack from the Microsoft Store to fix issues with widgets.
- If nothing works, you can always download and use a third-party weather widget app.
The default widget icon on the latest version of the Windows 11 taskbar is the weather icon. Therefore, as long as you have the widgets enabled, you should be able to see the weather icon on the taskbar.
Step 1: Open the Settings app on Windows. Click on Personalization on the sidebar, and select Taskbar.

Step 2: Turn on the toggle for Widgets.
Also Read: How to fix widgets not working on Windows 11.
Method 2: Update Windows Web Experience Pack
The Windows Web Experience Pack is responsible for widgets to retrieve and present data to you from the internet which includes the weather data. Try updating the service from the Microsoft Store to fix issues with the weather widget.
However, if it is already updated, you will not see an option to do it. So, do not worry.

Also Read: How to fix Microsoft Store apps not updating automatically.
We understand that the weather widget on Windows is essential and it is disappointing if you couldn’t enable the same. But you do have an alternative – you can install a third-party weather widget on Windows.
We will be using Weather Bar, an open-source application that adds the weather widget to your Windows 11 home screen. Follow along.
Step 1: Open the official download page for Weather Bar.
Step 2: Click on the download button for Windows.

Step 3: A set-up file will be downloaded. Open the downloaded .exe file.
As soon as you open the downloaded file, Weather Bar will be installed and you can see the weather in the expanded taskbar options.

You can also click on the weather icon to expand and find a detailed weather widget.
Also Read: How to change taskbar color in Windows.
Was this helpful?
Thanks for your feedback!
Last updated on 14 May, 2024
The article above may contain affiliate links which help support Guiding Tech. The content remains unbiased and authentic and will never affect our editorial integrity.
Readers help support Windows Report. We may get a commission if you buy through our links.
Read our disclosure page to find out how can you help Windows Report sustain the editorial team. Read more
We all need to check the weather forecasts now and then, right? There are many ways you can check weather details for your location on a Windows 11 PC. Most users will probably look at online forecasts or the Weather app that comes with Windows.
However, you can also add weather details to Windows 11’s taskbar with its Weather widget and the Weather Bar app. By doing so, you’ll be able to view weather info for your location from the taskbar and its system tray area. This is how to add weather info to Windows 11’s taskbar.
How do I get the weather forecast on my taskbar in Windows 11?
1. Enable Windows 11’s Weather widget
- First, right-click the Windows 11 desktop to select the Personalize option on its context menu.
- Select Taskbar to view the options in the screenshot directly below.

- Turn on the Widgets option if it’s disabled.
- Click the Widgets button on Windows 11’s taskbar.

- Select the + Add widgets button shown directly below.

- Then select the Weather widget.


Selecting the Weather widget adds a forecast icon to the taskbar as shown directly below. Hover your cursor over that icon to view weather info for your area. You can view more detailed forecasts for your region by looking at the widget panel.

NOTE
Windows 11’s Weather widget won’t show any weather info on the taskbar if your PC hasn’t received the KB5010414 update. You can download and install that update from its Microsoft Update Catalog page. Alternatively, check for new updates via the Windows Update tab in Settings.
2. Add weather details to the system tray
- Open the Weather Bar webpage.
- Then click the EXE Windows button on that page.

- Bring up the folder in which Weather Bug downloaded.
- Double-click the win32-weather-bar-1.0.0.exe to install the app.
- Then double-click the Weather Bar shortcut that appears on the desktop after installation.
- Click the Weather Bar system tray icon to open the app.
- Press the Weather App’s hamburger button.
- Select the New Location option.

- Then enter your city or town within the search text box. If you don’t live in a city or large town, input your nearest city location.

- Now you can hover the cursor over the Weather Bar system tray icon to view further weather info for your geographical area.


- How to Delete Windows 11 Saved Passwords
- How to Download DirectX 12 Agility SDK [Installation Guide]
- Saved Passwords in Edge on Windows 11: How to Manage Them
- How to Open PPTX File in Windows 11? Use These 4 Ways
How do I change the weather language on Windows 11?
You can change the display language of the Weather widget, and others, in Windows 11 by configuring language and region settings. Settings include a Windows display language option with which you can change the language for features. This is how to change the Weather widget’s language in Settings:
- Press the Windows + I keyboard key combination to view Settings.
- Click Time & language > Language & region in Settings.

- Select the Add & language option.

- Input a language in the search box, and then select the one you want.

- Click Next and Install to add the language.
- Then select the language you just added in the Windows display language drop-down menu.

- Click Sign out to apply the new language settings.


How can I fix the Windows 11 weather in the taskbar not updating?
Some users have said in forum posts that the temperature in Windows 11’s Weather widget not updating. Consequently, that widget always displays the same temperature and weather info (even after restarting Windows). If the same thing happens for your Weather widget, try restarting its process.
- Press the Windows + X keyboard keys, and select the Task Manager menu option.

- Click the Processes tab if it’s not already selected.
- Scroll down to and select Windows Widgets.
- Press the End task button.

- Click the Widgets taskbar button to restart the process.


How do I turn off the weather info in Windows 11’s taskbar?
You can turn off the taskbar’s weather info by unpinning the Weather widget. Click the Widgets button to open its panel. Then click the More options button at the top right of the Weather widget to select Unpin widget. The original Widgets button will be restored after restarting Windows.

Both the Weather widget and Weather Bar will display current weather info for your location along the taskbar. You can click their icons to quickly check forecasts for upcoming days. Both taskbar additions make weather info more directly accessible in Windows 11.
So, you won’t need to open your browser to check weather forecasts ever again with the Weather widget enabled or Weather Bar installed. Do you prefer Weather Bar or the Weather widget? Let us know which one you prefer in the comments section below.
Matthew Adams
Windows Hardware Expert
Matthew is a freelancer who has produced a variety of articles on various topics related to technology. His main focus is the Windows OS and all the things surrounding it.
He is passionate about the tech world, always staying up-to-date with the latest and greatest. With an analytical view, he likes problem-solving, focusing on errors and their causes.
In his free time, he likes to read and write about history and tries to always develop new skills.
In this guide, I have explained how to add the weather widget to the taskbar in Windows 11. Sometimes, the weather widget just goes missing from the taskbar, and often users forget to enable the widget in the settings. Both ways, the weather widget becomes unavailable on the taskbar. The weather widget adds to the aesthetics and makes the desktop look more organized.
Sometimes due to bugs on the Windows OS version installed on the PC, the widgets may malfunction. That leads to the weather widget not appearing on the taskbar even if it has been enabled within the settings. If you use a PC prominently throughout the day, having the weather widget will make it easier for you to know the latest weather conditions.
Here I have shown how to enable the weather widget on Windows 11 and how to fix the bug if the weather widget is not appearing on the taskbar of your PC.
1. Enable the Weather Widget on Your PC
The PC offers default built in option to enbale Weather Widget on Your PC. Below are the steps you can follow.
- Press Windows + I to open the Settings of Windows 11.
- On the left-hand panel, click on Personalization.
- Click on Taskbar from the list of options.

- Under that scroll to Widget and click the toggle beside the feature to enable it.

Make sure that the PC is connected to a stable network. This will enable you to see the latest weather information on the concerned widget on the taskbar.
2. Update the Windows Web Experience Pack
The Windows Web Experience pack is a system app from Microsoft. You can find it on the Microsoft Store. This component needs to be updated to make the widgets on the PC function perfectly and fetch the updated information from the web without any hassle.
As the Windows Web Experience Pack is a system app, you have to update it from the Microsoft Store.
- Launch the Microsoft Store app.
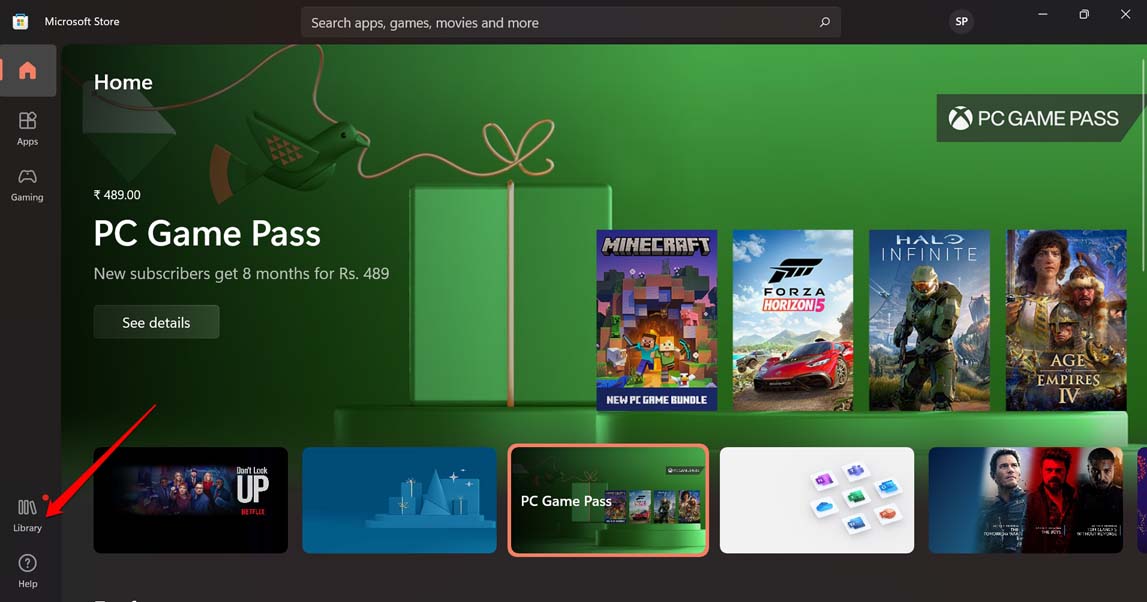
- On the left-hand side, click on Library.

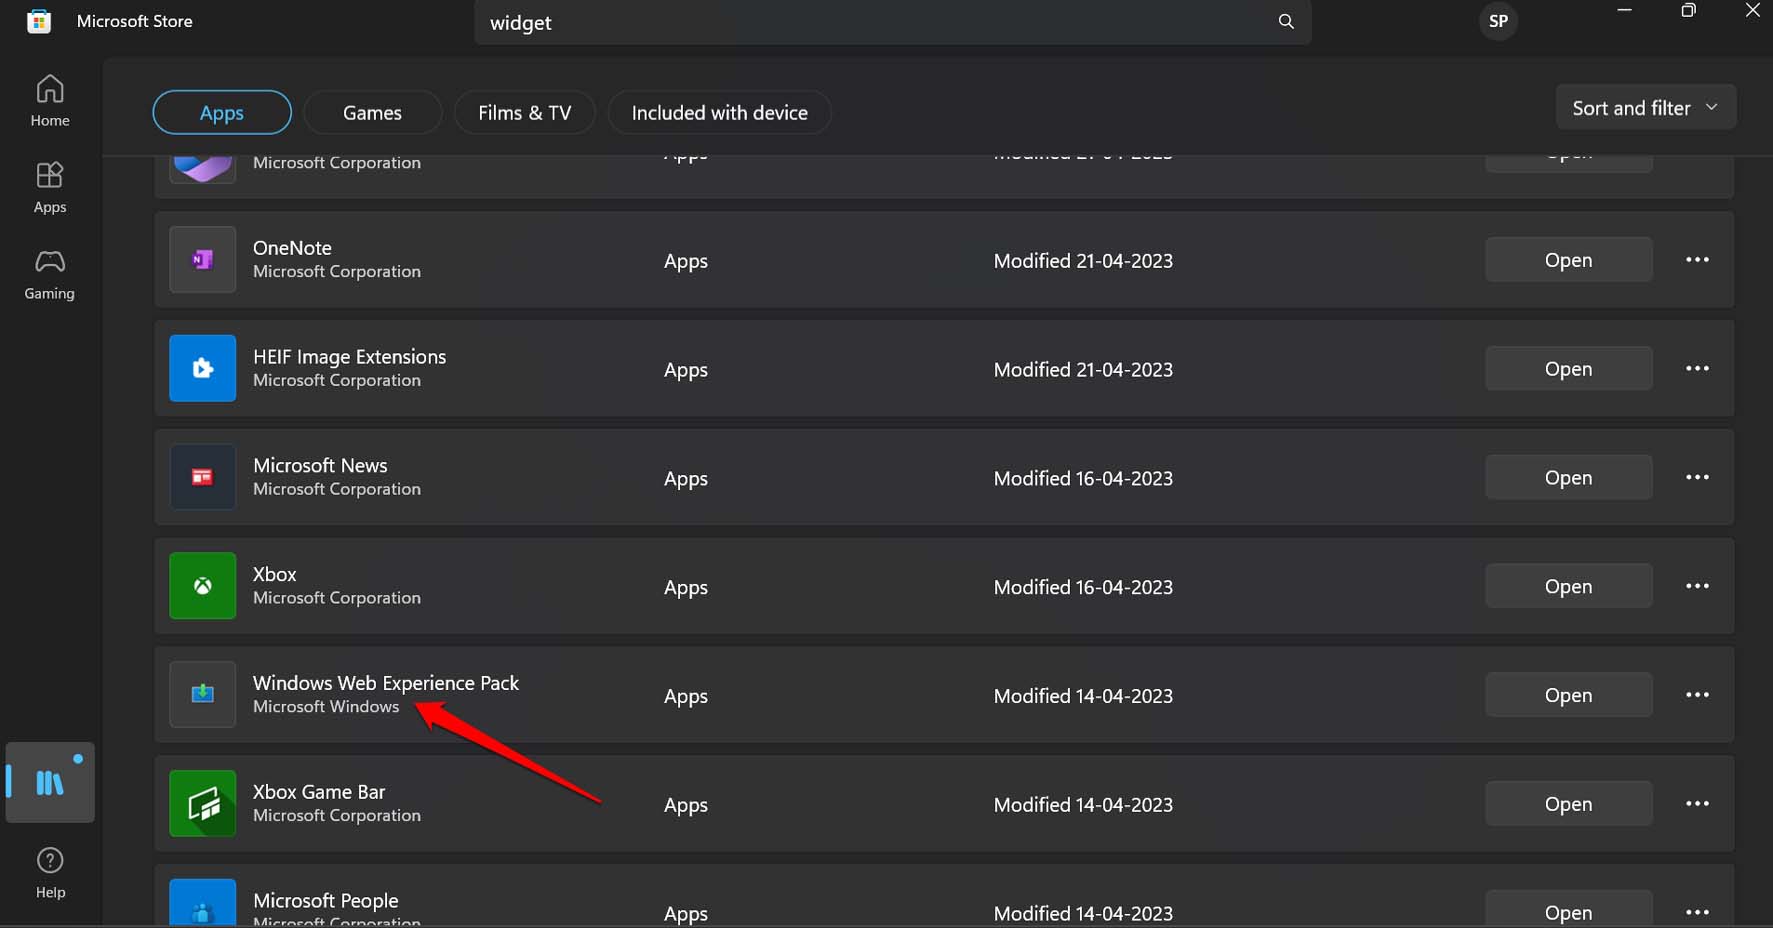
- Then under Updates & Downloads, check if Windows Web Experience Pack has any pending updates.
- If an update is available, click on Update to step the system app to a newer version.
If it is already updated automatically, you can find the app by scrolling down the list of apps that have recently been updated.
3. Update Windows OS to the Latest Version
If you think it is a bug on the Windows OS messing up the functioning of the widget, try updating the Windows OS to the latest version. To search for the system update,
- Go to Settings by pressing the hotkeys Windows + I.
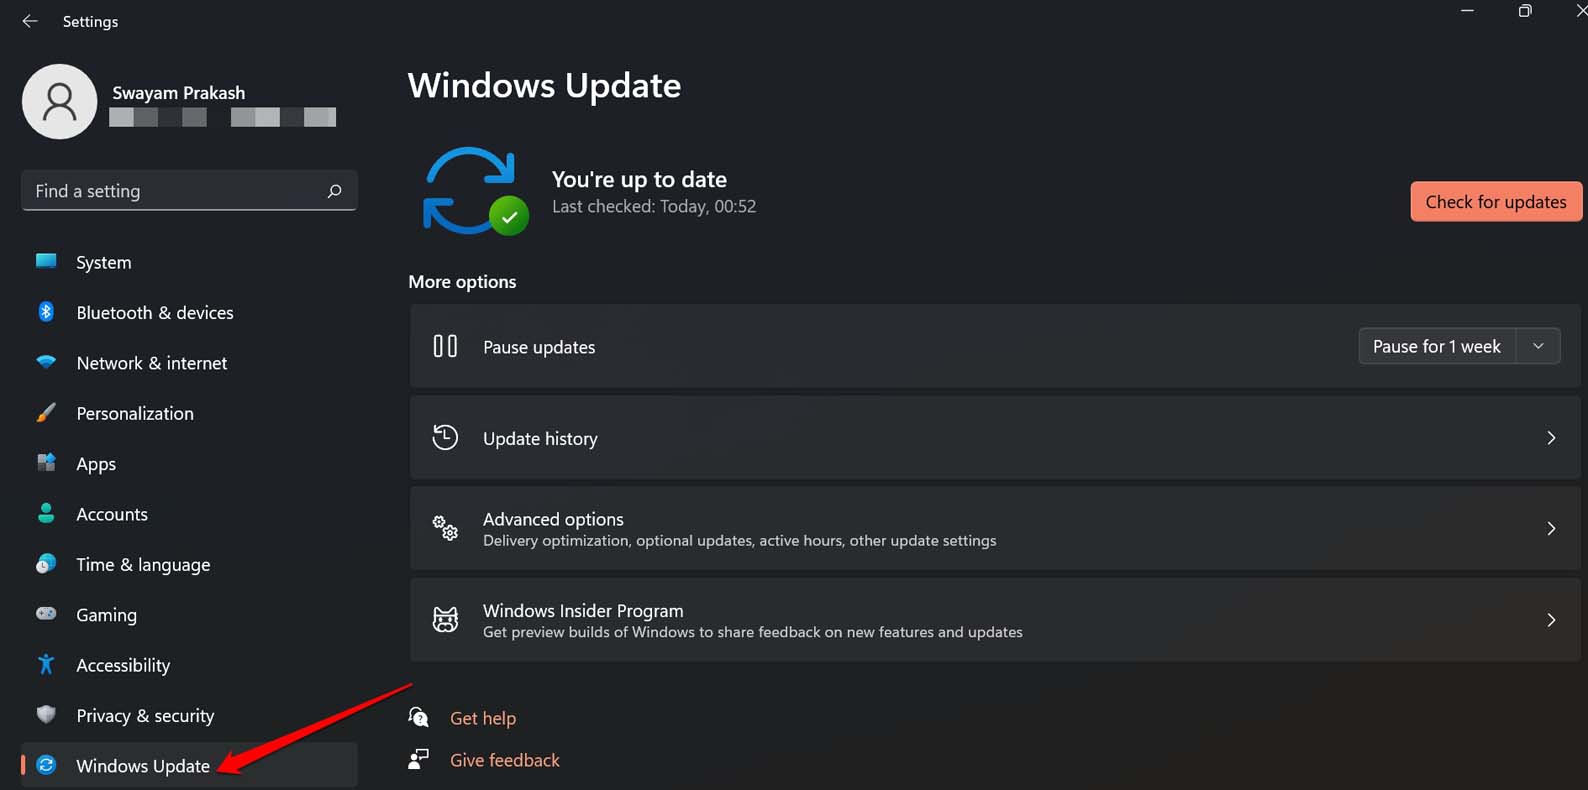
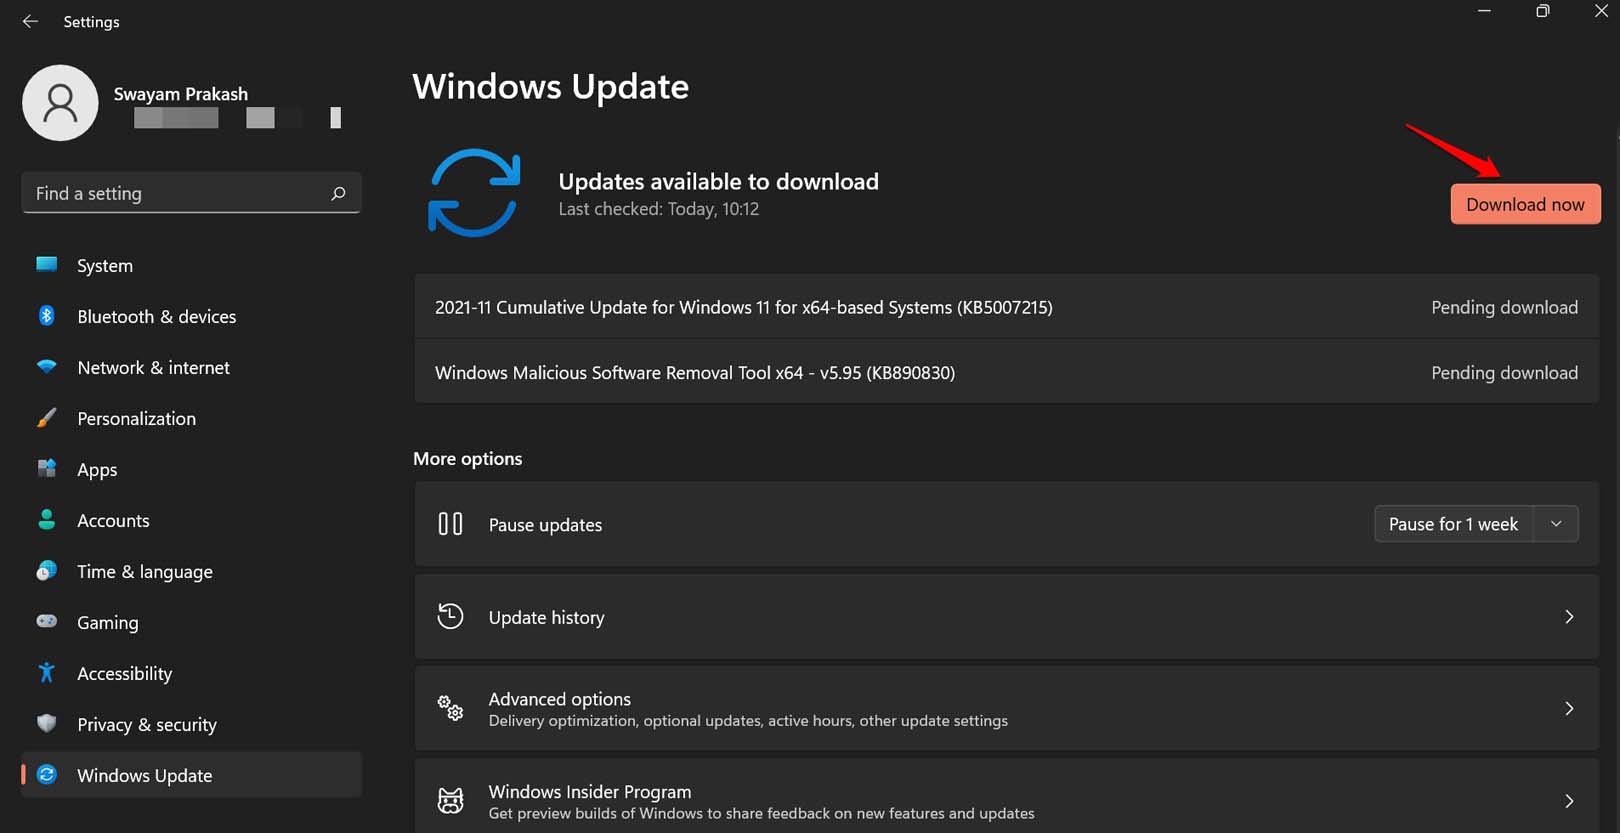
- On the left-hand panel click on Windows Update.

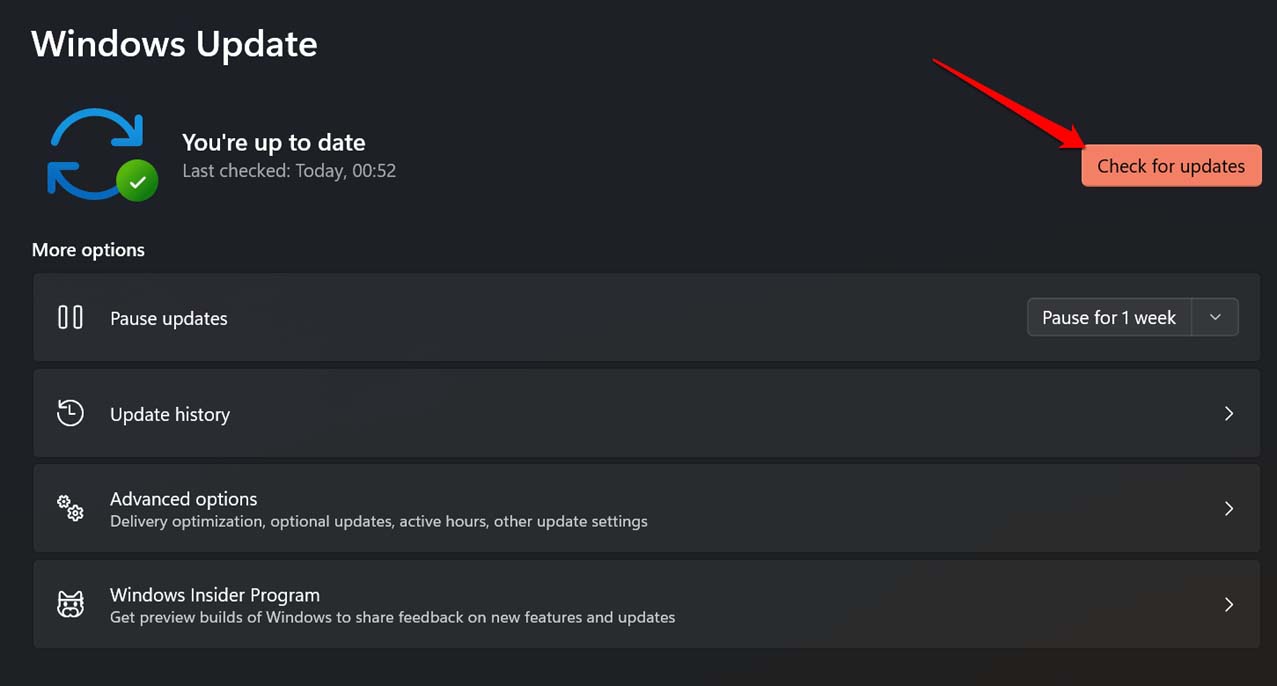
- Then click on Check for Updates.

- Let the system look for available updates.
- If a new version update is found, click on Download Now to start the installation process.

- Follow the instructions on the screen to promptly finish the update.
Restart the PC and check if the weather widget is not showing up on the taskbar and working. If not try the other workarounds.
4. Use a Third-Party Weather Widget
When we speak of third-party apps or widgets, trust issues may arise regarding what is the source of the app. Fortunately, the Widget Launcher app available on the Microsoft Store solves your need for a useful weather widget for Windows 11.
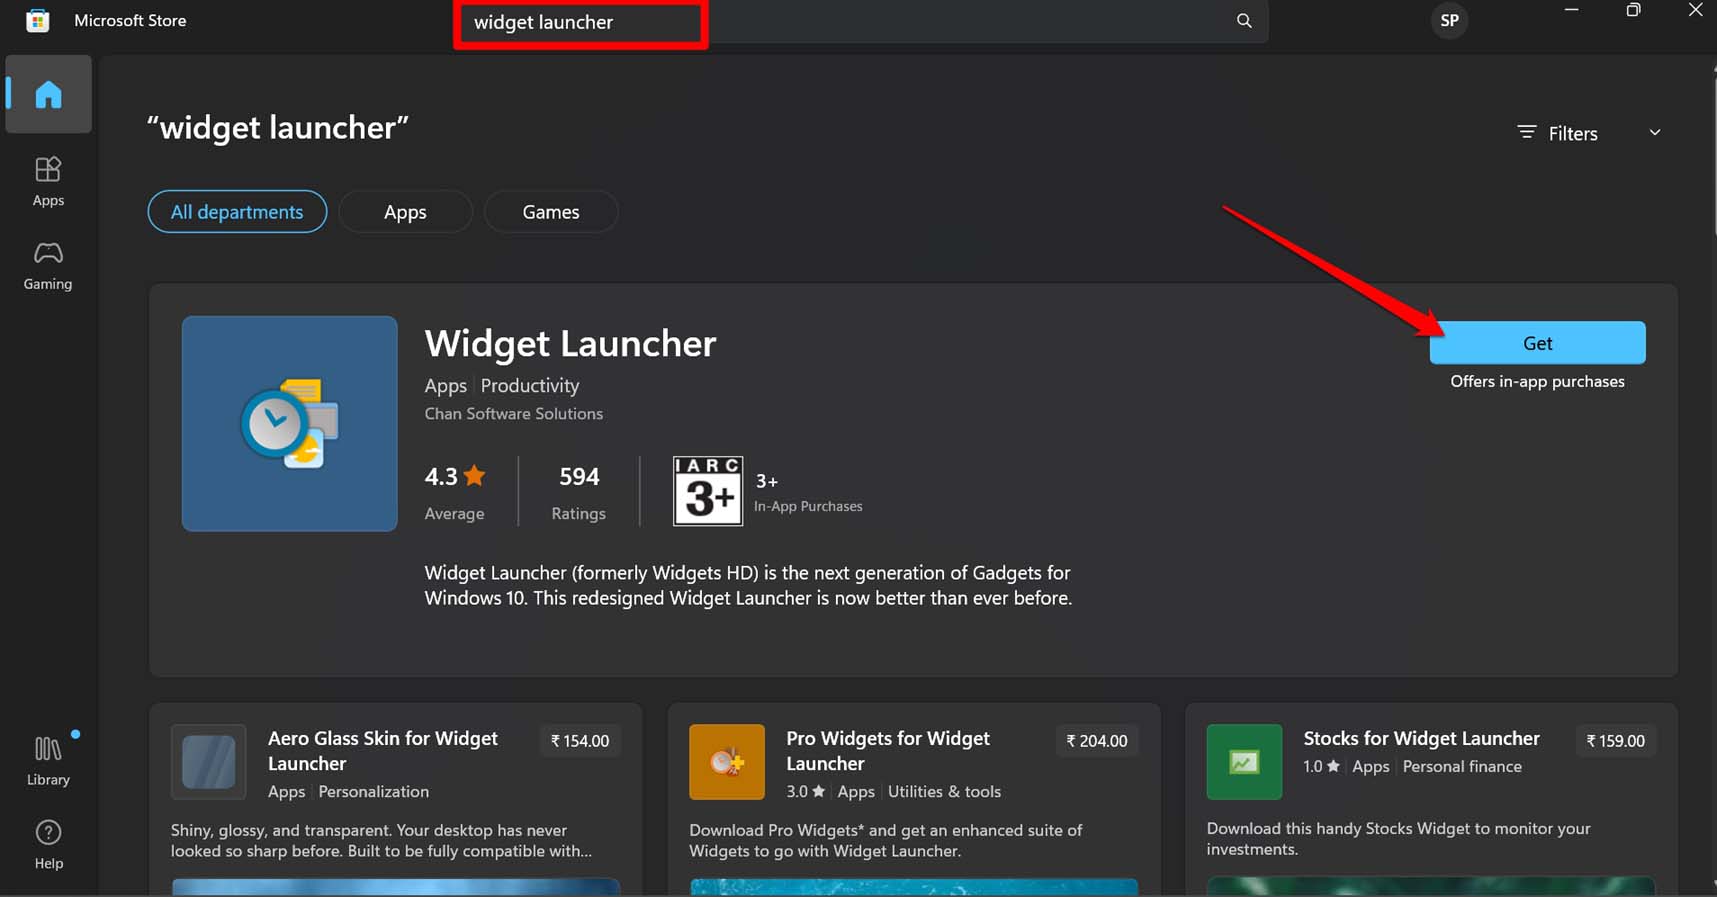
- Open the Microsoft Store app.
- In the search bar, type Widget Launcher.
- When it shows up in the search results, click on the button Get to download it.

It allows a plethora of customizations that you can implement and get the latest weather information of your current location swiftly.
5. Google Up the Weather Condition
If, after following the other tips and tricks, you are unable to use the weather widget on Windows 11, then simply Google the weather condition of your location or any region of the world. Of course, you need to be connected to the web on your PC to find the weather report using Google search. It takes only a single click and barely two seconds to fetch the weather info.
- On your PC, launch the browser and go to the Google home page.
- On the Google search bar, type “Current temperature in “name of the place”.


Replace the “name of the place” with the actual place name. Follow the screenshot above to understand it better.
Conclusion
That’s a wrap on how to add the weather widget on the taskbar in Windows 11. If you like to have the latest weather information right before you, follow these tips and integrate the native weather widget on your PC.
If you’ve any thoughts on How to Add Weather Widget to Windows 11 Taskbar?, then feel free to drop in below comment box. Also, please subscribe to our DigitBin YouTube channel for videos tutorials. Cheers!