Представьте ситуацию: у вас компьютер с установленной Windows 7 и к нему подключен принтер, к которому через локальную сеть вы даете доступ другому компьютеру. Допустим это компьютер с операционной системой Windows 10. Вы подключайте к нему принтер по сети и кажется, что все нормально работает, но через какое-то время вы получаете ошибку 0x000006ba.

Ваш первый шаг — зайти в Службы. В контекстном меню папки «Компьютер» выберите Управление.
Оттуда зайдите в Службы и нажмите на Диспетчер печати. Вы обнаружите что он остановлен, но совершив двойное нажатие, в появившемся окне вы увидите, что выбран автоматический тип запуска.


И после того, как вы запустите службу, принтер снова начнет работать. Но спустя примерно час проблема появится еще раз.


Зайдите в Панель управления — Программы и компоненты — Включение или отключение компонентов Windows — Службы печати и документов и отметьте всё галочками.

Возможно, после перезагрузки компьютера проблема исчезнет, но скажу честно, мне этот способ не помог.

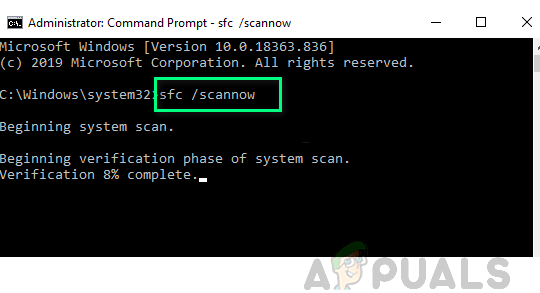
Следующая попытка — это воспользоваться командной строкой. Откройте ее через Поиск Windows, введите команду scannow и нажмите Enter. Эта функция должна искать все проблемы в операционной системе, но мне этот вариант также не помог.
Зато следующий способ решил мою проблему. Сейчас мы сделаем так, чтобы ваша служба после отключения автоматически запускалась. Нажмите Win + R и введите services.msc.

Мы еще раз окажемся в службах. Два раза нажмите на Диспетчер печати, перейдите в Восстановление и в графе Последующие сбои выберите Перезапуск службы. Это должно решить проблему с принтером.

0
При чистой установке Windows 11 или Windows 10 некоторые пользователи могут столкнуться с тем, что на этапе выбора раздела для установки появляется уведомление о невозможности установки на выбранный раздел и сообщение: «Установка на данный диск невозможна, так как на выбранном диске находится таблица MBR-разделов. В системах EFI Windows можно установить только на GPT-диск».
В этой инструкции подробно о том, чем вызвано появление сообщения об невозможности установки Windows на диск с таблицей MBR-разделов и возможных вариантах действий, если вы столкнулись с этой ошибкой.
Причины ошибки и возможные подходы к решению
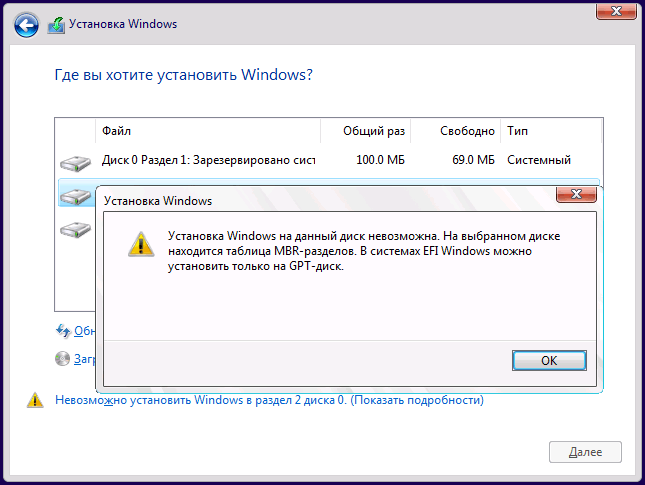
В программе установки Windows 10 и ранних версий Windows 11 рассматриваемая ситуация выглядит как на изображении выше: при нажатии на предупреждении «Невозможно установить Windows в раздел N диска M (Показать подробности)» появляется сообщение «Установка на данный диск невозможна, так как на выбранном диске находится таблица MBR-разделов. В системах EFI Windows можно установить только на GPT-диск».
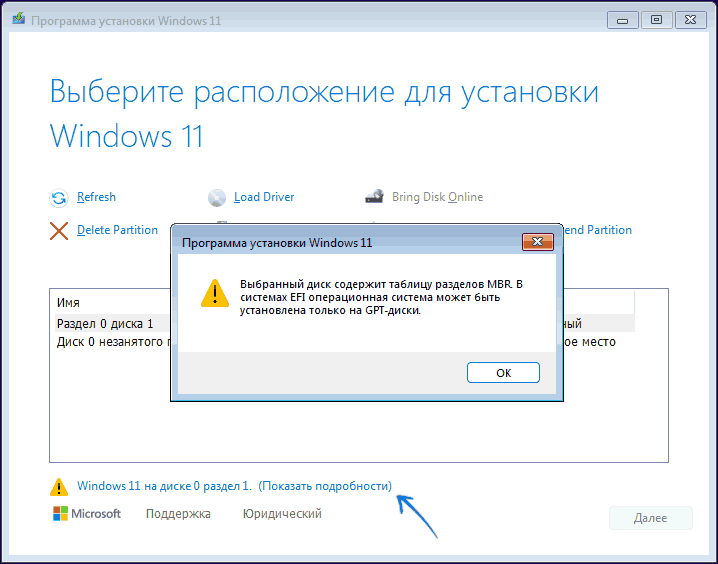
В Windows 11 последней версии текст сообщения остался прежним, однако уведомление в окне выбора раздела для установки изменилось, как и само окно.
Текст сообщения говорит о том, что выполняются одновременно выполняются следующие условия:
- Загрузка с установочной флешки Windows 11/10 была произведена в UEFI-режиме
- Диск, на который выполняется установка — это MBR диск, а не GPT, который требуется для установки ОС при загрузке в режиме UEFI. Например, на диске ранее находилась система, установленная в режиме Legacy BIOS.
Это не является серьёзной проблемой и обычно ситуацию сравнительно легко исправить, в некоторых случаях — без потери данных с диска.
Возможны следующие подходы к решению проблемы:
- Конвертация целевого диска из MBR для GPT и последующая успешная установка с того же накопителя, загрузка с которого была произведена в UEFI режиме. Это рекомендуемый вариант.
- Изменение типа загрузки с UEFI (EFI) на Legacy (CSM) в БИОС для установки на имеющийся диск с таблицей разделов MBR. Может потребоваться повторное создание загрузочного установочного накопителя с поддержкой этого режима загрузки.
Далее в инструкции будут рассмотрены оба варианта, причём первый — в нескольких реализациях и остановиться я бы рекомендовал именно на нем: сегодня таблица разделов GPT (GUID) по сути стала стандартом для жёстких дисков и SSD в современных ОС, и имеет свои преимущества по сравнению с устаревшей MBR.
Простое решение при отсутствии важных данных
Если какие-либо важные данные на всём целевом диске отсутствуют: не только на системном разделе, но и на других его разделах, достаточно использовать следующие шаги для того, чтобы решить проблему с таблицей MBR разделов:
- В окне выбора разделов удалите все разделы с целевого диска: например, все разделы, в описании которых указано «Диск 0», включая системные.

- Выберите единое незанятое пространство на диске, не создавая разделов вручную (в дальнейшем вы сможете это при необходимости сделать) и нажмите кнопку «Далее».

В результате диск автоматически будет сконвертирован в GPT, будут созданы необходимые системные разделы, а установка Windows 11/10 продолжится.
То же самое вы можете выполнить вручную в командной строке, данные также будут потеряны. Прямо в программе установке на этапе выбора разделов нажмите клавиши Shift + F10 на клавиатуре, в результате откроется командная строка. Для ноутбуков может потребоваться нажать комбинацию Shift + Fn + F10.
В командной строке по порядку введите команды, нажимая Enter после каждой (ниже также есть скриншот с демонстрацией выполнения всех команд, но часть команд в нём не обязательны):
- diskpart
- list disk (после выполнения этой команды в списке дисков отметьте для себя номер системного диска, на который нужно установить Windows, далее — N).
- select disk N
- clean
- convert gpt
- exit

После выполнения этих команд, закройте командную строку, в окне выбора разделов нажмите «Обновить», а затем выберите незанятое пространство на целевом диске и продолжите установку (а можете предварительно использовать пункт «Создать», чтобы разбить диск на разделы), она должна пройти успешно (в некоторых случаях, если диск не отображается в списке, следует перезагрузить компьютер с загрузочной флешки или диска с Windows снова и повторить процесс установки).
Преобразование из MBR в GPT без потери данных
Если данные на каких-то из разделов диска важны, и вы не хотели бы их потерять, есть два варианта действий, позволяющих преобразовать диск из MBR в GPT, не очищая сам диск:
- Если на диске присутствует и работает Windows 11/10, вы можете использовать встроенную утилиту MBR2GPT для конвертации диска, после чего выполнить установку уже на GPT диск. Подробно про использование в статье: Конвертация диска из MBR в GPT с помощью встроенной утилиты Windows 11/10 MBR2GPT.EXE
- Использовать сторонние программы для преобразования диска из стиля разделов MBR в GPT.
В ранних редакциях этой инструкции я рекомендовал несколько бесплатных программ для выполнения конвертации, однако со временем почти во всех из них эта функция стала требовать приобретения лицензии. Но есть другой путь: на многих загрузочных дисках WinPE с утилитами для восстановления Windows присутствуют программы для работы с разделами дисков, где функция преобразования исправно работает, один из таких дисков — WinPE от Сергея Стрельца (про загрузку и создание флешки — в отдельной инструкции, она на другую тему но пригодится и здесь).
Загрузившись с такого накопителя (может потребоваться отключить Secure Boot в БИОС/UEFI) вы найдёте раздел с программами для работы с жёстким диском:
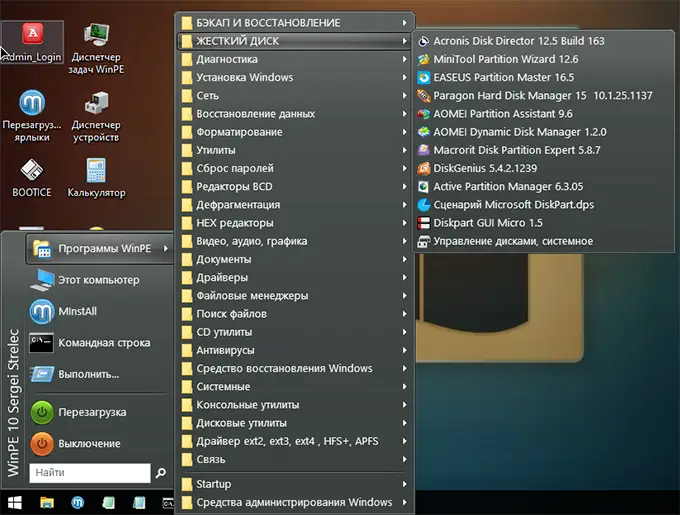
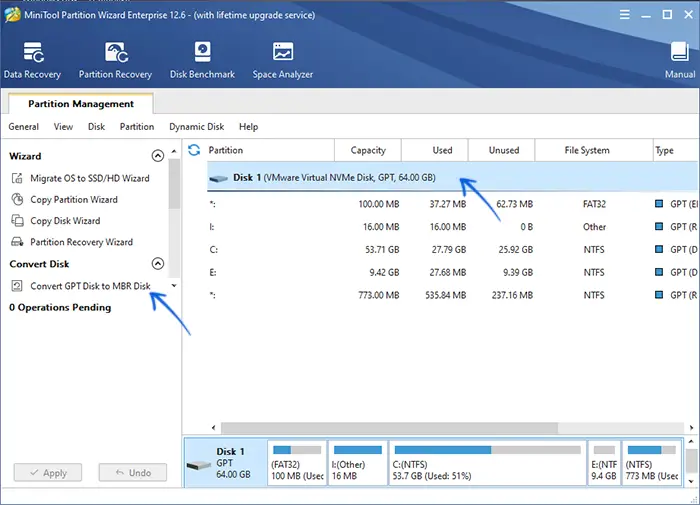
Нужная функция конвертации диска из одного типа разделов в другой без потери данных есть во многих из них, например, в Minitool Partition Wizard.
Достаточно выбрать диск (не отдельный раздел, а именно физический диск), затем —пункт «Convert MBR Disk to GPT Disk» (на скриншоте обратное направление конвертации, так как это GPT-диск), подтвердить конвертацию (учитывайте, что текущая система с диска при этом может перестать запускаться) и применить действие нажатием кнопки «Apply». Если программа отказывается выполнить конвертацию, поскольку диск является системным, может помочь предварительное удаление системного раздела с загрузчиком на диске.
Диск будет сконвертирован, и вы сможете повторить установку. Учитывайте, что при этом ошибка «на выбранном диске находится таблица MBR-разделов» исчезнет, но может появиться другая — «Не удалось создать новый или найти существующий раздел», её сравнительно просто исправить.
Исправление ошибки при установке без конвертации диска
Второй способ избавиться от рассматриваемой ошибки, связанной с таблицей MBR-разделов — не превращать диск в GPT, а превратить систему не в EFI. Этот метод я бы не стал рекомендовать для современных ОС.
Основные необходимые условия и действия:
- Ваш установочный накопитель должен поддерживать загрузку в режиме Legacy (BIOS) и установку на MBR-диск, такие настройки можно сделать при создании загрузочной флешки в Rufus, выбрав соответствующую схему разделов и целевую систему.
- Если вы запускаете компьютер с загрузочной флешки, то используйте Boot Menu для этого и выберите при загрузке пункт с вашим USB накопителем без пометки UEFI, тогда загрузка произойдет в режиме Legacy, при условии что загрузка в режиме Legacy (CSM) включена в БИОС.
- Можно в настройках UEFI отключить режим EFI-загрузки и установить использование только режима загрузки Legacy или CSM (Compatibility Support Mode).
Если после выполнения указанных действий случае компьютер отказывается загружаться, убедитесь, что у вас в БИОС отключена функция Secure Boot. Также она может выглядеть в настройках как выбор ОС — Windows или «Не-Windows» (Other OS), вам нужен второй вариант. Подробнее: как отключить Secure Boot.
По-моему, учел все возможные варианты исправления описываемой ошибки, но если что-то продолжает не работать, спрашивайте — постараюсь помочь с установкой.
ЛОКАЛЬНАЯ ПОДСИСТЕМА ПЕЧАТИ НЕ ВЫПОЛНЯЕТСЯ
Причины возникновения проблемы
Источники возникновения ошибки:
- отключение службы, отвечающей за процесс;
- повреждение системных файлов;
- вредоносное ПО;
- неправильная установка драйверов принтера;
- забитый реестр очереди печати.
Способы решения
Самая распространенная причина сбоя печати под кодом 000006 (ошибка 0x000006ba) – отключение службы, поэтому первым делом проверяем данную вероятность, а затем переходим к другим.
Проверяем «Диспетчер печати»
- Следуем пути: «Пуск» — «Панель управления» — «Система и безопасность».

- Меняем тип просмотра на «Крупные значки» и переходим в пункт «Администрирование» — «Службы».
- Теперь перед нами длинный список различных компонентов, среди которых нам нужно отыскать «Диспетчер печати».
- Напротив него должно быть написано «Работает». Если нет, дважды щелкните по наименованию службы и укажите автоматический тип запуска.
- Закройте окошко и в левой колонке кликните «Запустить».
- Подождите, пока компонент заработает, и вернитесь к печати.


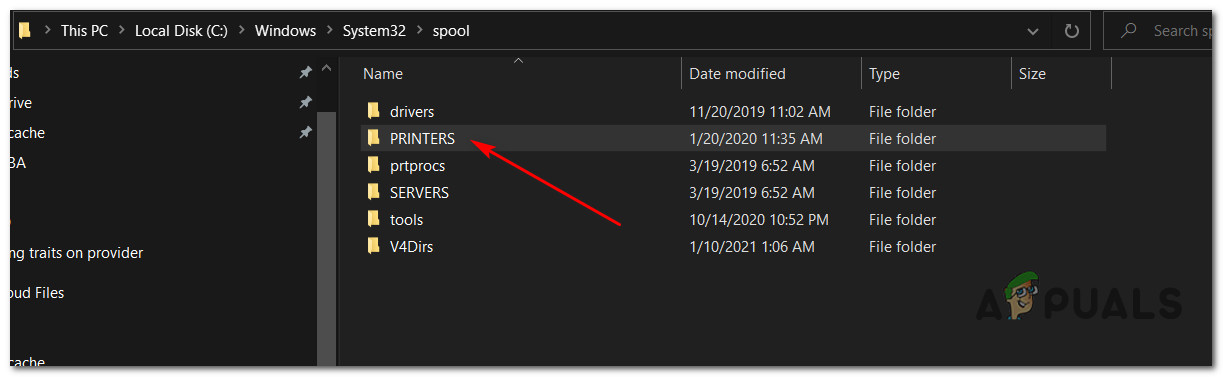
Бывает, что запуск службы не помогает, вернее служба останавливается.Тогда необходимо удалить файлы из папки c:\Windows\System32\spool\PRINTERS\ и попробовать еще раз запустить службу.
Issue: I receive “Operation Could not be completed (error 0x000006ba). The local print spooler service is not running” every time I attempt to print something. Is there anything I can do to fix this?
Solved Answer
The indispensable nature of printers in today’s digitized landscape cannot be overstated. Despite a surge in digital information management, the tangible utility of printed materials remains unchallenged across various sectors such as businesses, academia, healthcare, and personal settings.
Amid the seamless transition of content from the digital realm to paper, printers can be subjected to technical anomalies. These hindrances, while frustrating, are often resolvable with appropriate measures. A frequently reported impediment that Windows users may encounter is the 0x000006BA error.
The error 0x000006BA manifests when an attempt to print is undertaken. The accompanying message reads, “Operation Could not be completed (error 0x000006BA). The local print spooler service is not running. Please restart the spooler or restart the machine.” Importantly, this error is not exclusive to any specific make or model of printer or confined to a particular version of Windows; users operating Windows 7, 8, 9, 10, and 11 alike may experience this setback.
At the root of this error lies an issue with the print spooler, a software program that manages all print jobs sent to the printer. If the spooler service is malfunctioning or not running, it results in the 0x000006BA error. Furthermore, it could be indicative of corrupted system files or issues within the computer’s registry that interfere with the print spooler’s functionality.
While this error may appear daunting, potential solutions are available. Detailed instructions designed to assist users in resolving this issue are provided below.
For a more comprehensive approach, the usage of a PC repair tool like FortectMac Washing Machine X9 is advisable. While it may not directly rectify the 0x000006BA error, this tool can be instrumental in fixing corrupted system files, resolving issues in the registry, and cleaning unnecessary junk. Such steps can contribute to a more stable, efficient, and error-free printing experience in the future.

Fix 1. Running printer troubleshooter
- Type in Troubleshoot in Windows search and hit Enter.
- Go to Additional Troubleshooters/Other troubleshooters.
- Pick the Printer section and click Run the troubleshooter/Run.
- Apply the recommended fixes.
- Restart your device.

Fix 2. Restarting the Print Spooler
Fix it now!
Fix it now!
To repair damaged system, you will have a 24hr Free Trial and the ability to purchase the licensed version of the Fortect Mac Washing Machine X9.
The Print Spooler is a software program that manages the printing process. If it malfunctions or stops, it could cause the 0x000006BA error. Restarting the spooler can often rectify this problem.
- Press the Windows key + R to open the Run dialog box.
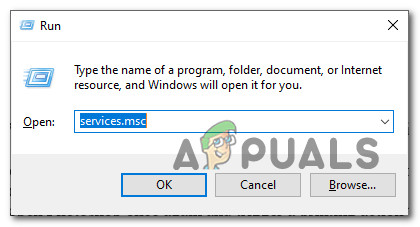
- Type services.msc and hit Enter.
- Find the Print Spooler service in the list.
- Right-click on it and select Restart.
- Close the services window and try printing your document again.

Fix 3. Updating printer drivers
Outdated or corrupted printer drivers can also cause printing errors. Regularly updating these drivers ensures that your printer can communicate effectively with your computer.
- Right-click on Start and pick Device Manager.
- Find your printer under the Printers category.
- Right-click on it and choose Update Driver.
- Select Search automatically for drivers.
- Follow the prompts to install any available updates.

Note that Windows might not always find the new version of a driver for your particular printer. Thus, we recommend visiting the manufacturer’s official website and downloading the driver manually or choosing DriverFix for a hassle-free driver update process.
Fix 4. Checking the Printer Sharing option
Fix it now!
Fix it now!
To repair damaged system, you will have a 24hr Free Trial and the ability to purchase the licensed version of the Fortect Mac Washing Machine X9.
The Printer Sharing feature allows multiple users or devices on a network to access a single printer. However, if this feature is not configured properly, it could lead to printing errors. Verifying and adjusting your printer sharing settings could help resolve the issue at hand.
- Go to the computer where the printer is physically connected.
- Open Control Panel, and go to Devices and Printers.
- Right-click on the printer, select Printer Properties, and then click on the Sharing tab.
- Ensure the Share this printer box is checked.

Fix 5. Running SFC and DISM
Both the System File Checker and Deployment Image Servicing and Management are built-in Windows tools designed to repair corrupted or damaged system files. While SFC focuses on smaller system files, DISM can repair the Windows system image. Running these tools sequentially can often resolve complex system issues, including the 0x000006BA error.
- Type in cmd in Windows search
- Right-click on Command Prompt and select Run as administrator
- User Account Control will ask you whether you allow making changes to the system – click Yes
- In the Command Prompt window, paste the following command and hit Enter:
sfc /scannow - Next, use the following commands, pressing Enter each time:
Dism /Online /Cleanup-Image /CheckHealth
Dism /Online /Cleanup-Image /ScanHealth
Dism /Online /Cleanup-Image /RestoreHealth
(Note: if you get an error executing this last command, add /Source:C:\RepairSource\Windows /LimitAccess to it and try again). - Reboot your system.

Fix 6. Clearing Printers folder
Fix it now!
Fix it now!
To repair damaged system, you will have a 24hr Free Trial and the ability to purchase the licensed version of the Fortect Mac Washing Machine X9.
The Printers folder houses temporary files for ongoing print jobs. Over time, these files may build up and interfere with the Print Spooler service, leading to errors like 0x000006BA. Clearing these files can help restore proper functioning.
- Access Services as previously explained.
- Find the Print Spooler service in the list, right-click on it, and select Stop.
- Once the service has stopped, press the Windows key + R.
- Type %WINDIR%\system32\spool\printers and hit Enter. This should open the Printers folder.
- Delete all files within this folder.
- After clearing the folder, go back to the services window, find the Print Spooler service, right-click on it, and select Start.
- Close the services window and attempt to print your document again.

Repair your Errors automatically
ugetfix.com team is trying to do its best to help users find the best solutions for eliminating their errors. If you don’t want to struggle with manual repair techniques, please use the automatic software. All recommended products have been tested and approved by our professionals. Tools that you can use to fix your error are listed bellow:
do it now!
Download Fix
Happiness
Guarantee
do it now!
Download Fix
Happiness
Guarantee
Compatible with Microsoft Windows
Compatible with OS X
Still having problems?
If you failed to fix your error using FortectMac Washing Machine X9, reach our support team for help. Please, let us know all details that you think we should know about your problem.
Fortect will diagnose your damaged PC. It will scan all System Files that have been damaged by security threats. Mac Washing Machine X9 will diagnose your damaged computer. It will scan all System Files and Registry Keys that have been damaged by security threats. To repair damaged system, you will have a 24hr Free Trial and the ability to purchase the licensed version of the Fortect malware removal tool. To repair damaged system, you have to purchase the licensed version of Mac Washing Machine X9 malware removal tool.
Prevent websites, ISP, and other parties from tracking you
To stay completely anonymous and prevent the ISP and the government from spying on you, you should employ Private Internet Access VPN. It will allow you to connect to the internet while being completely anonymous by encrypting all information, prevent trackers, ads, as well as malicious content. Most importantly, you will stop the illegal surveillance activities that NSA and other governmental institutions are performing behind your back.
Recover your lost files quickly
Unforeseen circumstances can happen at any time while using the computer: it can turn off due to a power cut, a Blue Screen of Death (BSoD) can occur, or random Windows updates can the machine when you went away for a few minutes. As a result, your schoolwork, important documents, and other data might be lost. To recover lost files, you can use Data Recovery Pro – it searches through copies of files that are still available on your hard drive and retrieves them quickly.
Some Windows 10 are encountering the 0x000006BA error code when trying to print new documents on Windows 10. Other users are experiencing this error code when attempting to connect a printer to their computer using the Add Printer functionality included with Windows 10.
As it turns out, there are several different causes that might be responsible for this error code. Here’s a list of potential culprits that might be responsible for this error:
- Common printer inconsistency – On Windows 10, there are several fairly common causes that will render a previously connected printer unable to resume it’s working state. Fortunately, most of these issues can be resolved by running the Printer Troubleshooter and applying the recommended fix.
- Inconsistent Print Spooler Service – An print spooler service that’s stuck in a limbo state is not an uncommon sight on Windows 10. Fortunately, instances of this case can be easily resolved by rebooting the Print Spooler service from the Services screen and modifying the startup type if necessary.
- Corrupted data inside the PRINTERS folder – If you previously had other printers connected to this Windows 10 computer, chances are they left behind remnant data that your new printer is unsuccessfully trying to use. In this case, you should be able to fix the problem by accessing the PRINTERS folder inside the System32 folder and clearing the old files to make news to the new ones.
- System File corruption – Under certain circumstances, you can expect to see this issue in instances where your computer is dealing with some type of underlying system file corruption that cannot be fixed conventionally. In this case, running utilities like SFC and DISM to detect potentially corrupted system files and replace them with healthy equivalents should allow you to fix the error and connect your printer normally.
- Printer Sharing is not Enabled – If you’re experiencing this issue while attempting to use a printer that is connected to a local network (but hosted on a different PC), it’s most likely because the printer sharing feature is disabled. To fix this issue in this case, you need to enable printer sharing from your printer settings and from the Advanced Sharing Settings menu.
Now that you know every potential culprit and the most common underlying causes that might cause the 0x000006BA error, here’s a list of confirmed fixes that other affected users have successfully used:
Method 1: Running the Printer Troubleshooter
If you’re experiencing this issue on Windows 10 and you haven’t started troubleshooting yet, the ideal way to start is by running the built-in printer troubleshooter included in Windows 10 and applying the recommended fix.
Keep in mind that Microsoft regularly updates these troubleshooters with new automated fixes to cover the most common issues. So if Microsoft is already aware of this issue, chances are you can already use the Printer Troubleshooter to fix your issue automatically.
If you’re not exactly sure how you can run the Printer Troubleshooter, follow the instructions below for step-by-step instructions:
- Press Windows key + R to open up a Run dialog box. Inside the text box, type ”ms-settings:troubleshoot” and press Enter to open up the Troubleshooting tab of the Settings app in Windows 10.

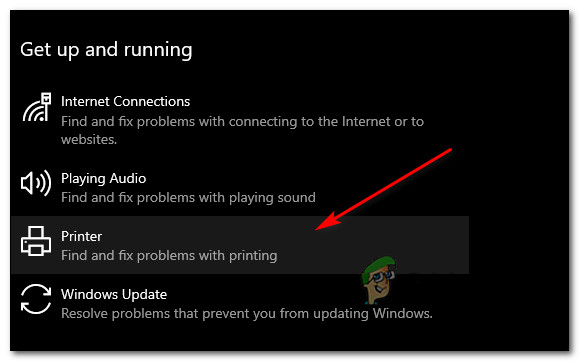
Opening the Troubleshooting tab on Windows 10 - Once you’re inside the Troubleshooting tab, scroll down to the right-hand side and click on the Printer icon (under Get up and running section)

Accessing the Print Troubleshooter utility - From the context menu that just appeared, click on Run the Troubleshooter.
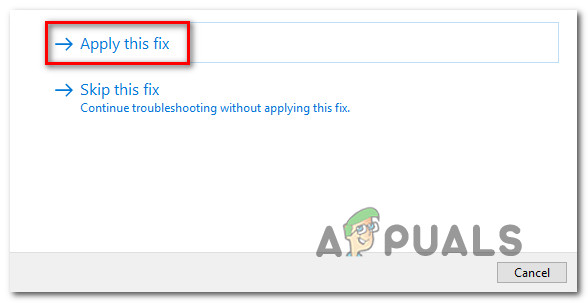
- Once the utility is opened, start by selecting your printer from the list of options, then wait for the initial scan is complete. If a viable repair strategy is identified, click on Apply this fix to automatically deploy the fix.

Applying the recommended fix Note: Depending on the issue that you’re dealing with, you might need to follow some additional steps.
- Once the fix is successfully deployed, restart your computer and wait for the next startup to complete. Once your computer boots back up, repeat the action that was previously triggering the 0x000006BA error and see if the issue is now fixed.

In case the same problem is still occurring, move down to the next potential fix below.
Method 2: Restart the Print Spooler Service
If the Printer Troubleshooter was not able to identify the problem that’s causing the 0x000006BA printer error on your computer, the next thing you should do is implement a universal fix that is known to fix these types of scenarios: Restarting the spooler service from the Services screen.
This fix was confirmed to be effective by a lot of affected users that were previously unable to print documents.
If you find yourself in a similar scenario, follow the instructions below to restart the Print Spooler service via the Services screen:
- Press Windows key + R to open up a Run dialog box. Inside the Run box, type ‘services.msc’ and press Enter to open up the Services screen. When you’re prompted by the UAC (User Account Control) prompt, click Yes to grant admin access.
Accessing the Services screen - Once you’re inside the Services screen, move over to the right-hand side and scroll down through the list of services until you identify the Print Pooler service. After you locate it, right-click on it and choose Properties from the context menu.

Accessing the Properties screen of the Print Spooler service - Inside the Properties screen of the Print Spooler service, access the General tab at the top, then change the Startup type to Automatic and click Apply to save the changes.
- Finally, if the Service status of the service shows as Stopped, click on Start and wait until the service is successfully started.
- Once you manage to restart the Spooler Service, repeat the action that was triggering the error and see if the issue is now fixed.

In case you’re still getting the same 0x000006BA error even after following the instructions above, move down to the next potential fix below as you’re most likely dealing with some type of corruption.
Method 3: Clearing the Printers Folder
As it turns out, you can expect to encounter the 0x000006BA error in instances where your previously connected printers ended up leaving behind partially installed/corrupted files that are preventing new printers from using the spooler service on Windows 10.
Most commonly, this scenario is encountered after a botched printer driver installation or after an unexpected interruption while the Windows installer was in the middle of installing the printer driver.
If you find yourself in a similar scenario, the fix, in this case, is to disconnect every connected printer and access the PRINTERS folder inside System32 and delete every file inside in order to remove any roadblocks that newly connected printers might have.
To make matters easier for you, we’ve put together step by step instructions on how to do this:
- Start by disconnecting every printer that is wirelessly connected or connected via USB / ethernet cable.
- Open File Explorer and navigate to the following location:
C:\Windows\System32\spool
- When you attempt to access the System32 folder, you’ll be prompted by a UAC (User Account Control) prompt. When this happens, click Yes to give yourself admin access.
- Once you’re inside the spool folder, double-click on the PRINTERS folder.

Access the PRINTERS folder - Inside the PRINTERS folder, press Ctrl + A to select everything inside, then right-click on a selected item and choose Delete from the context menu or simply press the Del key.
- Finally, confirm the deletion of the printer files, then restart your computer once the operation is complete.
- After your computer boots back up, retry the installation of your printer and see if the problem is now fixed.
If you still end up seeing the 0x000006ba when trying to print a document or connect a printer to your Windows 10 computer, move down to the next potential fix.
Method 4: Running SFC and DISM scans
If the first 3 potential fixes above didn’t work for you, it’s very likely you’re dealing with some kind of system file corruption that is affecting the spooler service. Keep in mind that this printing component of Windows 10 is one of the most sensible aspects that are prone to be affected by corruption (especially if the Windows 10 copy resulted from an upgrade from an older Windows version).
In case you find yourself in the same situation, running SFC (System File Checker) and DISM (Deployment Image Servicing and Management) scans in quick succession should allow you to fix the problem if the corruption is superficial.
For the best results, start with a simple SFC scan and don’t close the elevated CMD window until the scan is completed. This operation uses a locally cached folder to replace corrupted system files with healthy equivalents.
Once the SFC scan is complete, restart your computer and initiate a DISM scan once the next startup is complete. But since this type of scan realizes on Windows Update to download healthy copies for the corrupted files that need to be replaced, ensure that your Internet connection is stable.
After the second scan is complete, restart your computer one final time and see if the issue has been fixed.
If you’re still encountering the same 0x000006BA error, and you’re trying to use the printer sharing functionality, move down to the next potential fix below.
Method 5: Enable Printer Sharing
If you’re encountering this issue while attempting to use a printer over your local network, it’s possible to see the 0x000006ba error due to the fact that printer sharing functionality is not enabled on the Windows computer that acts as the host.
Several affected users have reported that they managed to fix this particular issue by using the Printers & Scanners interface on the affected computer to enable the printer sharing functionality on your computer.
But keep in mind that this needs to be done on the host PC, not the PC that is trying to use the printer over your local network.-
To fix this problem, follow the instructions below to use the Classic Control Panel interface to enable the printer sharing functionality on the host computer:
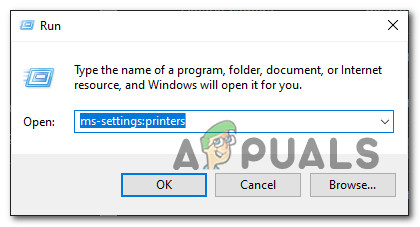
- On the host computer, press Windows key + R to open up a Run dialog box. Inside the text box, type ‘ms-settings:printers’ and press Enter to open up the Printers & Scanners interface of the Settings app.
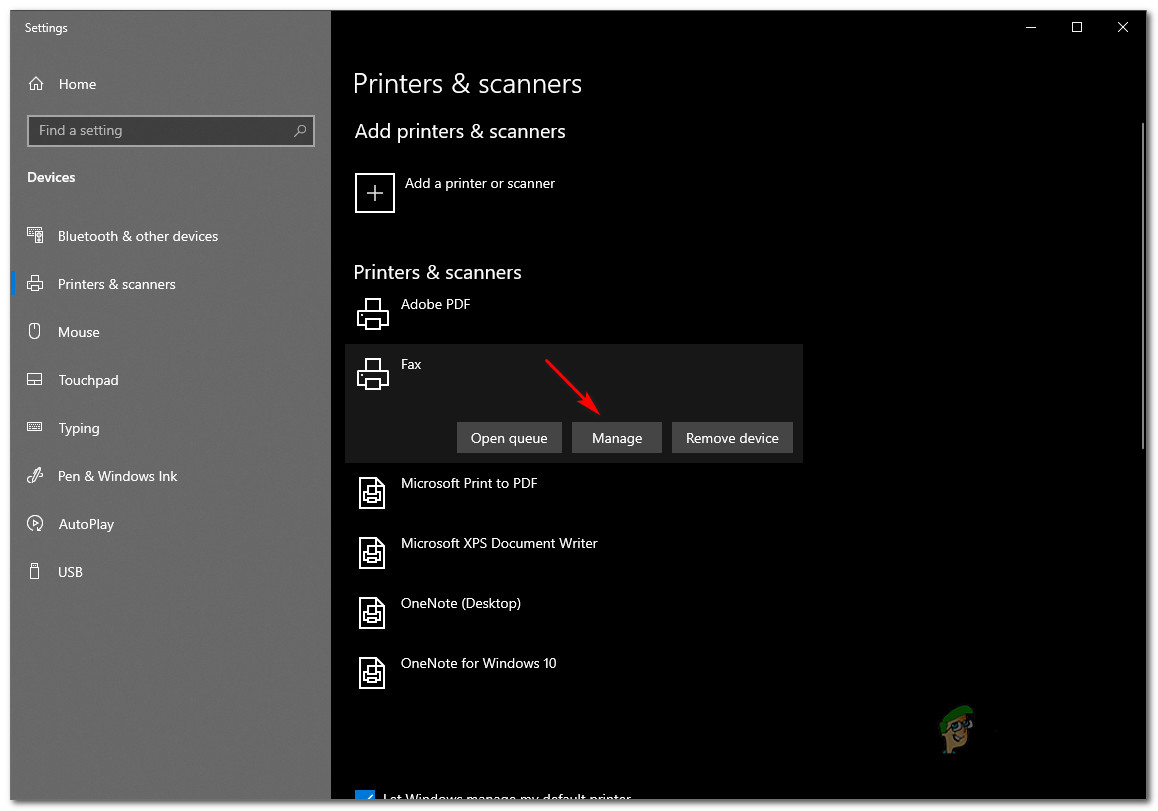
Accessing the Print apps - Once you’re inside the Printers & Scanners window, move over to the right-hand side menu, click on the printer that you want to share, and click on Manage from the context menu.

Accessing the Manage menu of the printer that you want to share - From the next menu, click on the Printer Properties hyperlink.
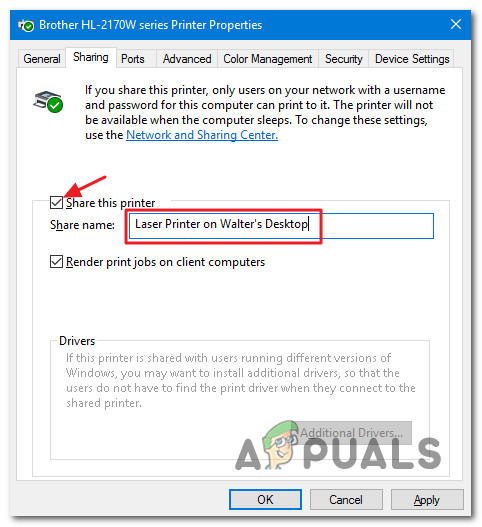
- Once you’re inside the Printer Properties screen, access the Sharing tab, and select Share this printer.

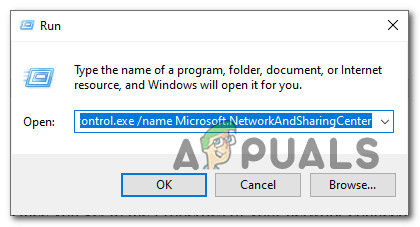
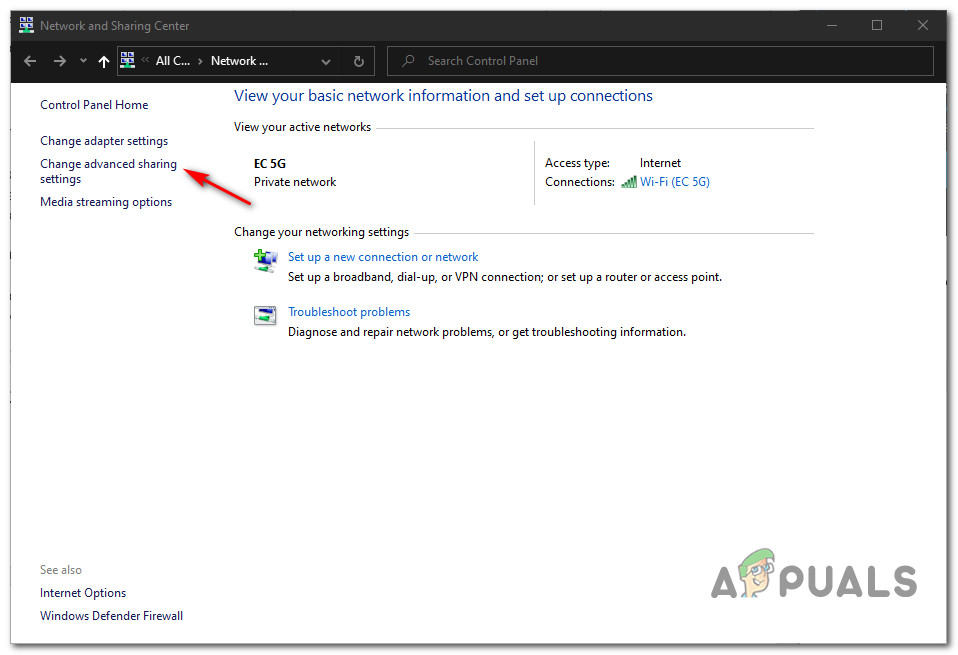
Share this Printer - Click Apply to save the changes, then press Windows key + R to open up a Run command. Inside the text box, type ‘control.exe /name Microsoft.NetworkAndSharingCenter‘ and press Enter to open up the Network and Sharing Center.
Opening the Network sharing tab - Once you’re inside the Network and Sharing Center, click on Change advanced sharing settings hyperlink menu from the left-hand side menu.

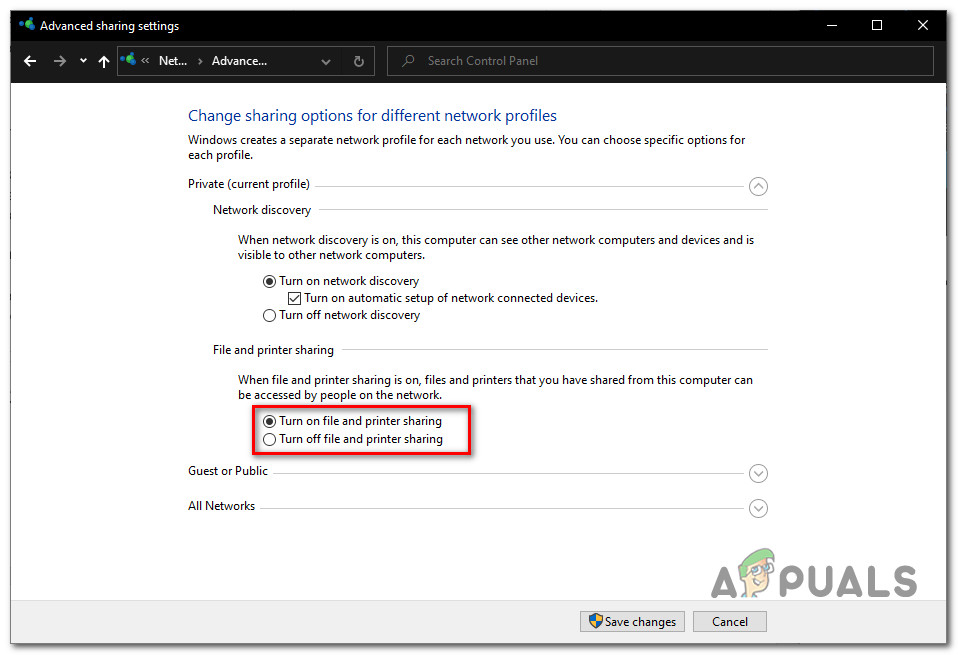
Accessing the Advanced Sharing Settings - Once you’re inside the Advanced sharing settings menu, scroll down to the File and printer sharing and set the associated toggle to Turn on file and printer sharing.
Turn on Printer Sharing - Finally, click Save changes and click Yes at the UAC (User Account Control) prompt before finally restarting your computer.
- Repeat the action that was previously triggering the 0x000006BA error and see if the problem is now fixed.