
Пользователи Windows 11 и Windows 10 могут столкнуться с тем, что Служба узла SysMain, наблюдаемая в диспетчере задач активно нагружает процессор, вплоть до 100%, в некоторых случаях также можно заметить повышенную нагрузку на диск. Сценарий может отличаться: это может быть повышенная нагрузка каждый раз при входе в систему в течение некоторого времени, случайные всплески активности или другие варианты.
В этой инструкции подробно о том, за что отвечает служба SysMain, что делать, если она вызывает повышенную нагрузку на ресурсы компьютера, о возможных причинах такого поведения и дополнительная информация, которая может оказаться полезной в контексте рассматриваемой темы.
Назначение службы SysMain

Служба SysMain в Windows присутствует уже давно, но ранее называлась SuperFetch. Назначение службы — увеличивать скорость загрузки системы, запуска приложений и общую отзывчивость системы по мере использования.
Это достигается следующими методами:
- Для ускорения загрузки ОС SysMain вычисляет оптимальный шаблон загрузки системных процессов в память: эти вычисления проводятся в фоновом режиме во время простоя компьютера и повышенная нагрузка со стороны SysMain в эти моменты — нормальное явление. Данные записываются службой в папку C:\Windows\Prefetch
- Служба анализирует то, какие программы чаще всего запускает пользователь (и система в фоновом режиме) и использует механизмы предварительной загрузки (префетчинг), кэширования кода и функций программ в оперативной памяти, а также объединения странниц памяти для более быстрого доступа к ним в дальнейшем и повышения производительности.
- Работа функции сжатия памяти также обеспечивается службой SysMain — эта функция сжимает неиспользуемые данные в оперативной памяти для снижения обращений к файлу подкачки.
Обычно служба узла SysMain не вызывает повышенной нагрузки ни в отношении процессора, ни для других ресурсов компьютера, за исключением кратковременных скачков при штатном выполнении тех или иных операций.
Как исправить высокую нагрузку SysMain
В некоторых случаях, особенно на старых и ограниченных в ресурсах компьютерах, эффект от работающей службы может быть обратный заявленному: вместо повышения производительности — постоянная или очень продолжительная нагрузка, обычно — на процессор, со стороны SysMain, не позволяющая нормально работать за компьютером.
Возможные причины высокой нагрузки на CPU, RAM и диск
Это может быть вызвано следующими факторами:
- Малым объемом оперативной памяти — обычно о проблемах с узлом службы SysMain сообщают пользователи компьютеров с 4 Гб RAM или менее. Пользователи с объемом ОЗУ 16 Гб и более редко сталкиваются с проблемой при условии исправной системы.
- Медленным жестким диском (особенно на ноутбуке), ошибками файловой системы, аппаратными проблемами с диском, малым количеством свободного места на системном разделе диска.
- В некоторых случаях изменить поведение службы SysMain в худшую сторону может отключение файла подкачки Windows. Если вы это делали, попробуйте снова включить файл подкачки. Инструкция по настройке файла подкачки в Windows.
- Сторонние программы очистки оперативной памяти, или «ускорения в играх» также могут вызывать постоянную высокую нагрузку со стороны службы SysMain (поскольку иногда мешают её исправной работе). При наличии таких программ проверьте, проявляется ли проблема, если отключить их автозагрузку и работу в фоновом режиме.
- Работа сторонних антивирусов и системных служб потенциально также может повлиять на работу службы. Можно проверить, наблюдается ли проблема в режиме чистой загрузки Windows.
Отключение службы SysMain
Самый простой и быстрый способ снизить нагрузку службы SysMain, а точнее — полностью устранить её — отключить эту службу. Служба не является обязательной и её отключение не приведёт к неполадкам, однако, в зависимости от конкретной системы может привести как к ухудшению общей производительности, так, иногда — и к её улучшению.
Примечание: в общем случае, при отсутствии проблем с работой службы SysMain её отключение не рекомендуется, в том числе и для современных ПК и ноутбуков с SSD.
Для отключения службы SysMain вы можете использовать один из следующих способов:
- Нажать клавиши Win+R на клавиатуре, ввести services.msc в окно «Выполнить» и нажать Enter. В списке служб найти SysMain, дважды нажать по службе, остановить службу, установить тип запуска в «Отключена» и нажать «Ок».

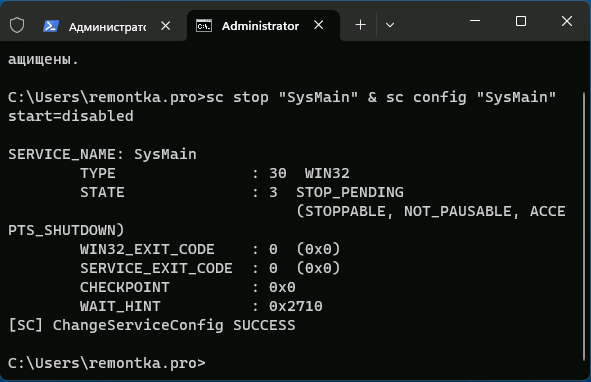
- Запустите командную строку от имени администратора и введите команду
sc stop "SysMain" & sc config "SysMain" start=disabled

- Откройте редактор реестра, перейдите в раздел
HKEY_LOCAL_MACHINE\SYSTEM\CurrentControlSet\Services\SysMain
измените значение параметра Start на 4, примените настройки и перезагрузите компьютер.


Отключение компонентов SysMain
Вторая возможность — отключение отдельных компонентов SysMain, сделать это можно с помощью Windows PowerShell:
- Запустите Терминал Windows или Windows PowerShell от имени администратора — сделать это можно в меню по правому клику на кнопке «Пуск».
- Введите команду Get-MMagent чтобы получить сведения о состоянии компонентов SysMain, по умолчанию для всех из них (кроме третьего и последнего) будет указано True

- Для включения или отключения компонентов (кроме ApplicationLaunchPrefetching) вы можете использовать команды
Enable-MMagent -имя_компонента
и
Disable-MMagent -имя_компонента
соответственно
- Для отключения ApplicationLaunchPrefetching зайдите в редактор реестра в раздел
HKEY_LOCAL_MACHINE\System\CurrentControlSet\Control\Session Manager\Memory Management\PrefetchParameters
и установите значение 0 для параметра EnablePrefetcher (значение по умолчанию — 3).

Назначение компонентов SysMain:
- ApplicationLaunchPrefetching — префетчинг запуска приложений
- ApplicationPreLaunch — предварительный запуск приложений
- MemoryCompression — сжатие памяти
- OperationAPI — API для доступа к службе SysMain из других приложений
- PageCombining — объединение одинаковых страниц оперативной памяти
В случае, если высокая нагрузка на процессор вызвана работой конкретного компонента, его отключение должно решить проблему без необходимости полного отключения службы SysMain.
Все способы:
- Что за это за служба
- Вариант 1: Отключение SysMain
- Способ 1: «Командная строка»
- Способ 2: «Службы»
- Способ 3: «Редактор реестра»
- Вариант 2: Обновление системы
- Вариант 3: Установка актуальных драйверов для компонентов
- Вариант 4: Переустановка/откат системы
- Вопросы и ответы: 1
Что за это за служба
SysMain преимущественно взаимодействует с физической и оперативной памятью и является интеллектуальной функцией, которая мониторит действия пользователя на ПК, оптимизируя и ускоряя работу системы. Такое отслеживание позволяет быстрее запускать чаще всего используемые приложения.
В некоторых случаях со службой возникают проблемы, и она начинает грузить диск в Виндовс 10. В результате компьютер подвисает и тормозит, а пользователь «вылетает» на рабочий стол из приложений. Это происходит из-за высокой нагрузки на жесткий диск или центральный процессор. Чтобы исправить ситуацию, можно временно отключить службу, но есть и другие способы избавиться от неполадки.
Вариант 1: Отключение SysMain
Если SysMain сильно нагружает компоненты системы, что можно проверить в «Диспетчере задач», то есть возможность ее отключить, используя штатные средства Windows. При этом функция не сможет дальше отслеживать деятельность и оптимизировать скорость работы при нормальных обстоятельствах.
Способ 1: «Командная строка»
Самый простой способ отключить процесс — это воспользоваться штатным средством «Командная строка»:
- Запустите «Командную строку» от имени администратора. Существует несколько способов сделать это.
Подробнее: Запуск «Командной строки» от имени администратора в Windows 10
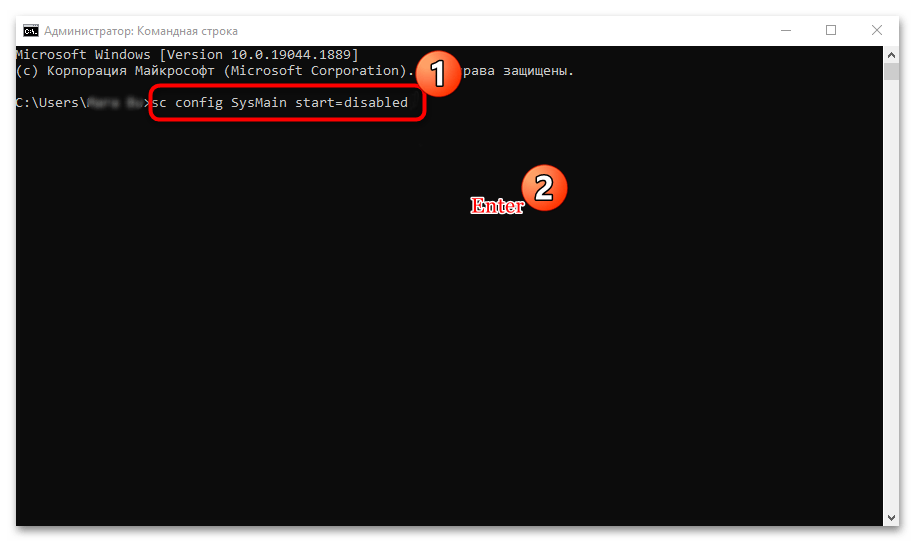
- Скопируйте и вставьте команду
sc config SysMain start=disabledи нажмите на клавишу «Enter».
После этого служба SysMain отключится и перестанет грузить диск. Вновь запустить ее через «Командную строку» можно с помощью команды sc config «SysMain» start=auto && sc start «SysMain».
Способ 2: «Службы»
Один из вариантов отключения работы службы — это использование приложения «Службы», которое, по сравнению с предыдущим способом, позволяет более тонко настроить работу SysMain:
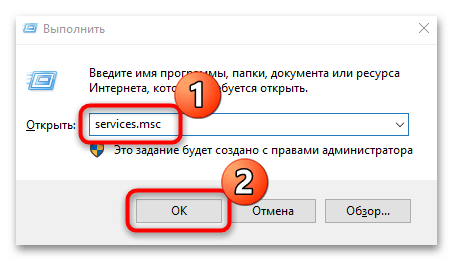
- Одновременно зажмите клавиши «Win + R», чтобы вызвать диалоговое окно «Выполнить». Впишите команду
services.mscв специальной строке и кликните по кнопке «ОК», чтобы быстро запустить приложение. - В разделе «Локальные» найдите службу «SysMain». Пункты можно упорядочить по алфавиту, нажав на вкладку «Имя». Щелкните правой кнопкой мыши по названию и вызовите «Свойства».
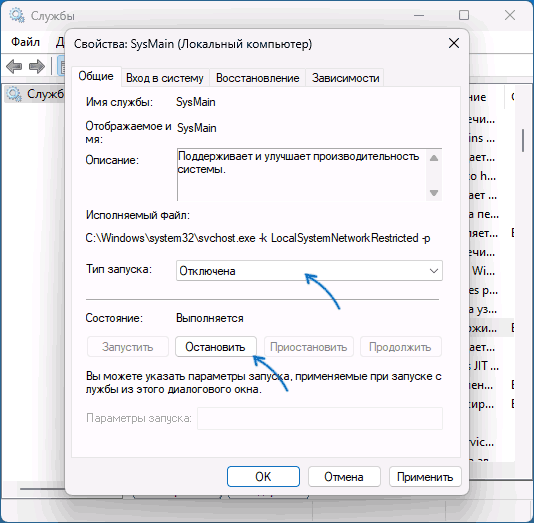
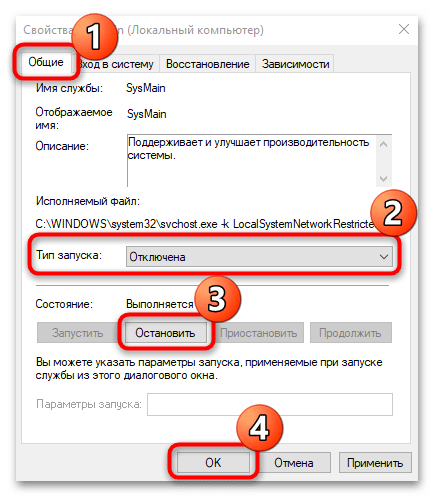
- На вкладке «Общие» в меню «Тип запуска» выберите из раскрывающегося перечня пункт «Отключена», а в разделе «Состояние» кликните по кнопке «Остановить». Нажмите на «ОК», чтобы применить настройки.

Через приложение «Службы» аналогичным образом можно вновь запустить SysMain, выбрав опцию автоматического или ручного запуска и нажав на соответствующую кнопку.
Способ 3: «Редактор реестра»
Чтобы остановить работу SysMain, можете изменить один из параметров реестра Windows 10:
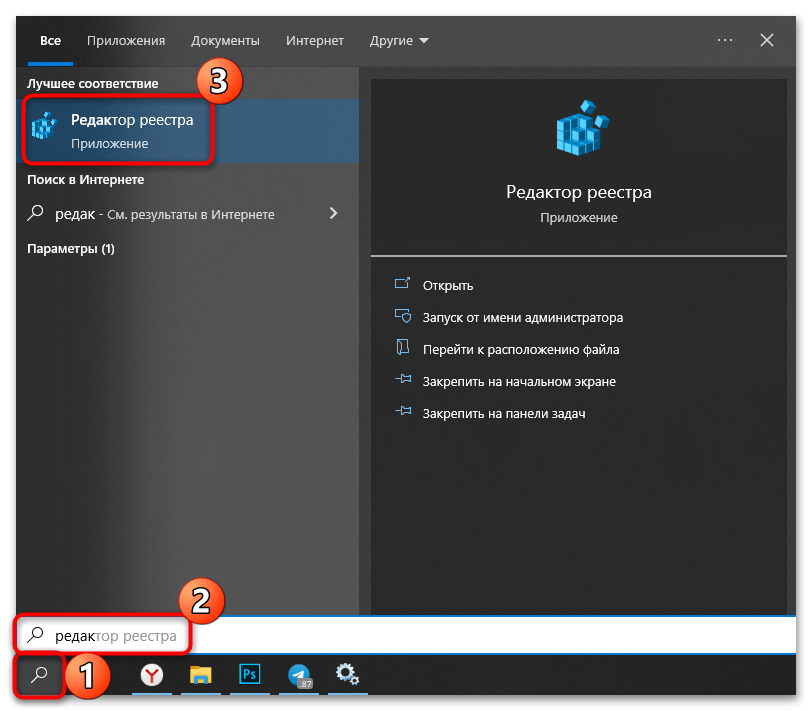
- Найдите и запустите приложение «Редактор реестра», используя поиск в «Пуске».
- На панели слева в каталоге «HKEY_LOCAL_MACHINE» разверните папку «SYSTEM». Затем откройте «CurrentControlSet» и папку со службами «Services».
- Нажмите на «SysMain» в списке, в результате чего справа отобразятся параметры службы. Найдите «Start» и кликните по ней правой кнопкой мыши. Из контекстного меню выберите пункт «Изменить».
- В строке «Значение» вместо «2» введите «4» и нажмите на кнопку «ОК».


После изменения параметров через «Редактор реестра» потребуется перезагрузить ОС, чтобы новые настройки вступили в силу.
Вариант 2: Обновление системы
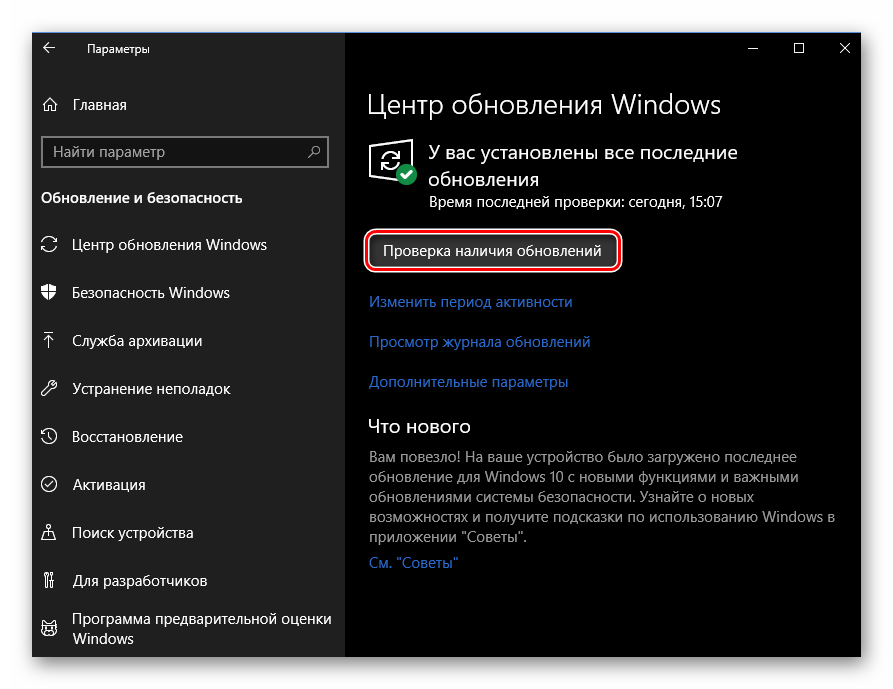
Некорректная работа штатных служб, включая SysMain, может происходить из-за неудачно обновленной или устаревшей версии операционной системы. Microsoft регулярно выпускает апдейты, оптимизирующие ОС, избавляющие от ошибок и улучшающие безопасность пользовательских данных. Проверьте наличие актуальных компонентов вручную, если отключена автоматическая функция. Для этого предусмотрены фирменные утилиты, встроенное средство «Центр обновлений», а также сторонний софт. В нашем отдельном материале более детально описаны все способы с пошаговыми инструкциями.
Подробнее: Обновление Windows 10 до последней версии

Вариант 3: Установка актуальных драйверов для компонентов
Обновления для программных и аппаратных компонентов также желательно устанавливать по мере их выхода — это обеспечивает стабильную работу Windows 10. Если драйверы устройства устарели или в их работе произошел сбой, то это может привести к различным последствиям, в том числе и к упадку производительности компьютера.
Существует множество способов обновить драйверы, например, в самой среде ОС есть встроенные средства для проверки и загрузки актуальных версий. Также для этого используют специализированный софт или официальные сайты производителей оборудования, например для графических адаптеров. Наш автор подробно разбирал все эффективные методы по обновлению драйверов в Windows 10.
Подробнее: Обновляем драйверы в Windows 10
Вариант 4: Переустановка/откат системы
Постоянно отключать одну из важных служб, оптимизирующих систему, нецелесообразно, поэтому попробуйте лучше устранить неполадку. Если ни один из вышеописанных вариантов не помог избавиться от проблемы, при которой SysMain грузит диск, то нужно задуматься о переустановке или откате ОС.
Переустановить «десятку» можно несколькими способами. Встроенные средства предлагают откат к предыдущему состоянию системы или же полный сброс настроек и параметров до заводского состояния. Также можно инсталлировать «чистую» ОС с носителя, например с установочной флешки или оптического диска. В нашей статье на сайте автор разбирал все способы переустановки ОС. Следует отметить, что после процедуры все настройки и приложения будут удалены, а данные, если они хранились на основном локальном диске, где стояла операционка, также могут пропасть, если не создать резервную копию.
Подробнее: Способы переустановки Windows 10

При наличии возможности можно установить твердотельный накопитель SSD под ОС, поскольку он работает гораздо быстрее, чем классический HDD. Из наших руководств вы узнаете, как выбрать его, правильно подключить накопитель и настроить его под операционную систему.
Подробнее:
Настройка SSD под Windows 10

Наша группа в TelegramПолезные советы и помощь
Windows 10 and Windows 11 are excellent operating systems. But if you see a consistently sluggish performance, it could be because of something called SysMain (earlier known as Superfetch).
In this article, we help you understand SysMain and why you might face a high disk usage problem with this service.

What Is SysMain (Superfetch)?
Superfetch, called SysMain after the Windows 10 1809 update, was introduced with Windows Vista and is a successor to Prefetch (a similar feature in Windows XP). The OS uses this feature to improve system performance over time.
Why over time? First, it studies your RAM usage patterns. Then the feature identifies programs you run most often on your PC. Once Superfetch has this information, it preloads these programs into your RAM. When you launch these programs, you’ll see them load much faster.
So, Superfetch needs resources. You might find Superfetch working in the background when you look at the list of system processes in the Task Manager as “Service Host: SysMain”:

Critically, Superfetch doesn’t deprive other programs of RAM. It only uses unused RAM. Any newly launched program will still have priority over Superfetch regarding RAM space. If required, Superfetch will free up RAM for another app.
If you believe Superfetch is causing performance issues on your computer, you can safely disable it. Below, we discuss a few ways to disable Superfetch and fix Service Host: SysMain high CPU usage problem.
Disable SysMain from Services
Since SysMain is a Windows service, the simplest way to disable SysMain is from the Services console:
- Press Win + R, type services.msc, and press Enter to launch the Services console.
- Scroll through the list in the Services console for a service named SysMain.

- Double-click on the SysMain service to open service properties. Alternatively, you can right-click on the service and select Properties.
- Select the Stop button to stop the service. Then, expand the Startup Type drop-down menu and select Disabled.
- Select OK to save and exit.

Disable SysMain Using Command Prompt
Using the Command Prompt to disable SysMain is quicker. If you’re comfortable using commands, here is how you can disable SysMain:
- Press Win + R, type cmd, and press Ctrl + Shift + Enter to launch an elevated Command Prompt.
- Copy and paste the following command into the Command Prompt window and press Enter:
sc stop “SysMain” & sc config “SysMain” start=disabled

Disable SysMain from the Registry
If the previous methods don’t work for some reason, you can modify the registry settings to disable SysMain:
- Press Win + R, type regedit, and press Enter to launch the Registry Editor.
- Navigate to the following path using the left sidebar or copy and paste the following text into the navigation bar at the top and press Enter:
HKEY_LOCAL_MACHINESYSTEMCurrentControlSetServicesSysMain
- Search for a value named Start in the right pane and double-click on it.
- Change Value Data to 4 and select OK to save and exit.

Run SFC Scan
If you want to try resolving the SysMain high disk usage issue without disabling SysMain, you can try using the System File Checker (SFC).
SFC is a built-in utility on Windows that checks system file integrity. It automatically replaces the corrupt system files it finds during the scan, so if system file corruption is at the root of the issue, SFC might fix it.
- Press Win + R, type cmd, and press Ctrl + Shift + Enter.
- Copy and paste the following command into the Command Prompt and hit Enter:
sfc /scannow
The scan will scan your hard disk for corrupt system files and replace ones that have become corrupt. Once the scan completes, restart your PC and check if the Service Host SysMain high disk usage issue persists.

Update Windows
It’s always essential to check Windows Update and see if an update is available for download. Microsoft is constantly looking for issues with Windows and releases updates to fix them.
If the previous fixes weren’t helpful, an update might be worth a shot:
- Press Win + I to launch the Settings app and select Windows Update from the left sidebar.
- Select the Check for updates button.
- If updates are available, select the Download & install button to install them.

Restart your PC and see if that fixes the problem.
Replace Hard Drive with SSD
If you’ve been using your old mechanical HDD for a while, replacing it with a Solid State Drive (SSD) can optimize your computer’s performance and solve the high disk usage issue.
This might be especially warranted if you’ve tried troubleshooting and exhausted all methods to fix the issue.
Most modern computers have a slot to accommodate SSDs. However, if you’ve never purchased SSDs, use our SSD buying guide to make an informed decision.
SysMain Disk Usage, Normalized
Hopefully, you were able to fix SysMain disk usage with one of these fixes. SysMain isn’t necessarily a resource-hog. Windows introduced this intelligent feature to optimize RAM usage and deliver faster performance when using the most frequently used apps.
You can permanently disable it without severe consequences if it’s using a lot of memory. Alternatively, fixing system file corruption or a Windows update might help resolve the issue without disabling the SysMain service.
Related Posts
- How to Fix a “This file does not have an app associated with it” Error on Windows
- How to Fix an Update Error 0x800705b4 on Windows
- How to Resolve “A JavaScript error occured in the main process” Error on Windows
- How to Fix the Network Discovery Is Turned Off Error on Windows
- How to Change Folder Icons in Windows
Service Host SysMain Causing 100% Disk Usage? Find Out How to Fix It
Previously, many Windows 10 users had issues with the Superfetch service causing high disk usage. But this service was replaced with SysMain, which is the same service but with a new name. Many people have noticed that SysMain uses way more disk resources than it should. This article will help you fix SysMain high disk usage.
In the Windows 10 update 1809, Microsoft replaced the Superfetch service with SysMain. So, after Windows 10 version 1809, when the system needed more memory than was available, instead of sending data to the paging file on the hard disk, it compressed the data.
While SysMain is much better than Superfetch in terms of performance, it still has the same issue as Superfetch, which is high disk usage. Under certain conditions, SysMain may start using 100% of your disk, which significantly degrades your computer’s overall performance.
Furthermore, high disk usage may not be your only problem. As a result of high disk usage, SysMain ends up using all of your remaining CPU power. Therefore, when you open Task Manager, you may notice your disk or CPU usage at 100%.
So if you’re experiencing the problems mentioned above, then you ought to disable SysMain altogether. The good news is that disabling it won’t noticeably impact your computer’s speed and overall performance.
Video Guide on Fix Service Host SysMain High Disk Usage
Table of Contents:
- Introduction
- Option 1. Disable SysMain Using Windows Services Manager
- Option 2. Disable SysMain Using Command Prompt
- Option 3. Disable SysMain Using Registry Editor
- Option 4. Run Windows Update
- Video Guide on Fix Service Host SysMain High Disk Usage
Download Computer Malware Repair Tool
It is recommended to run a free scan with Combo Cleaner — a tool to detect viruses and malware on your device. You will need to purchase the full version to remove infections. Free trial available. Combo Cleaner is owned and operated by Rcs Lt, the parent company of PCRisk.com read more.
Option 1. Disable SysMain Using Windows Services Manager
1. Hold down Windows+R keys to open the Run dialog box.
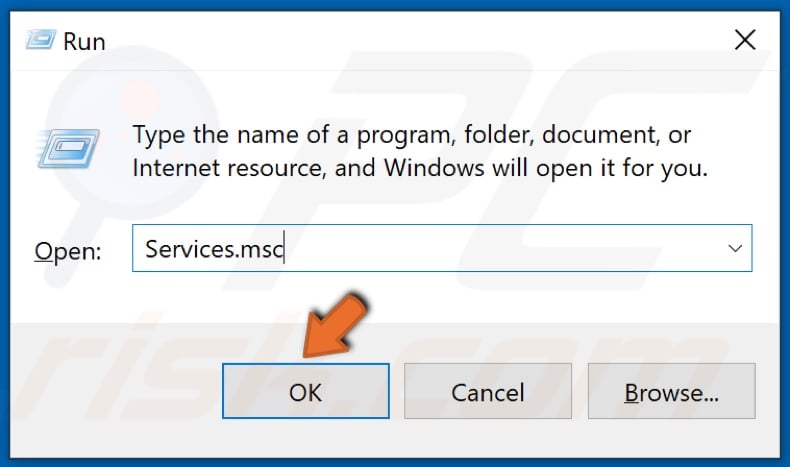
2. In the Run text box, type in Services.msc and click OK.
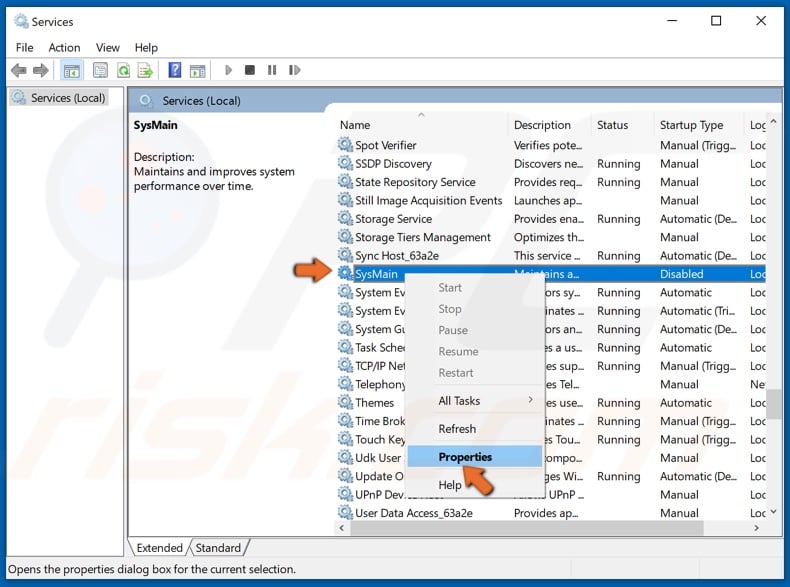
3. Scroll through the services list and locate SysMain.
4. Right-click SysMain and click Properties.
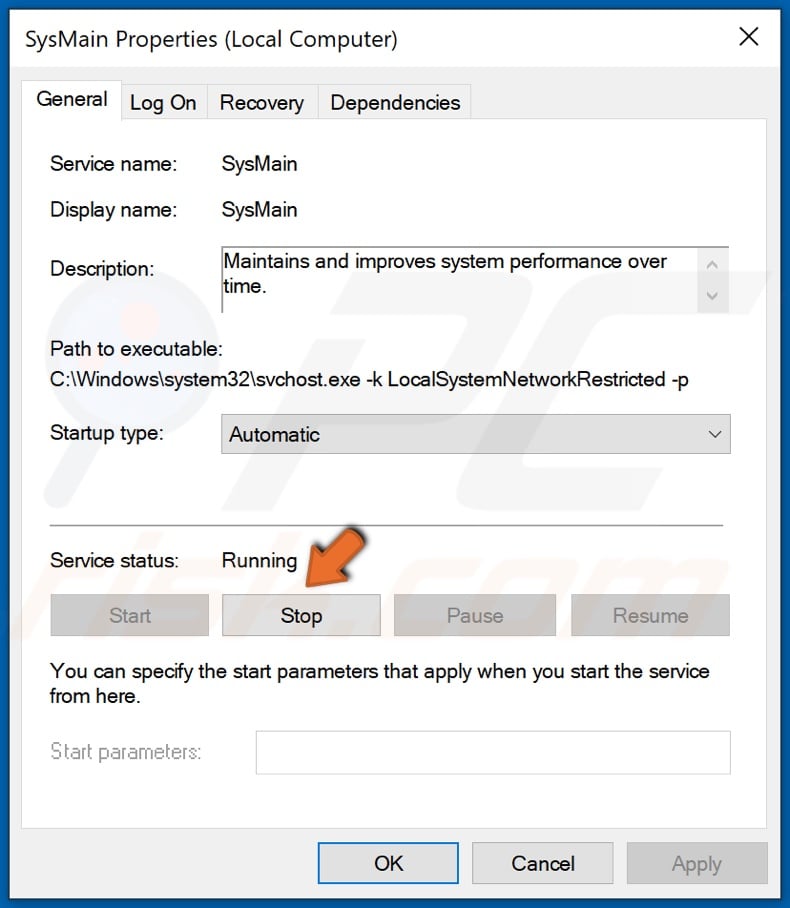
5. Once in SysMain Properties, click the Stop button under the Service status section.
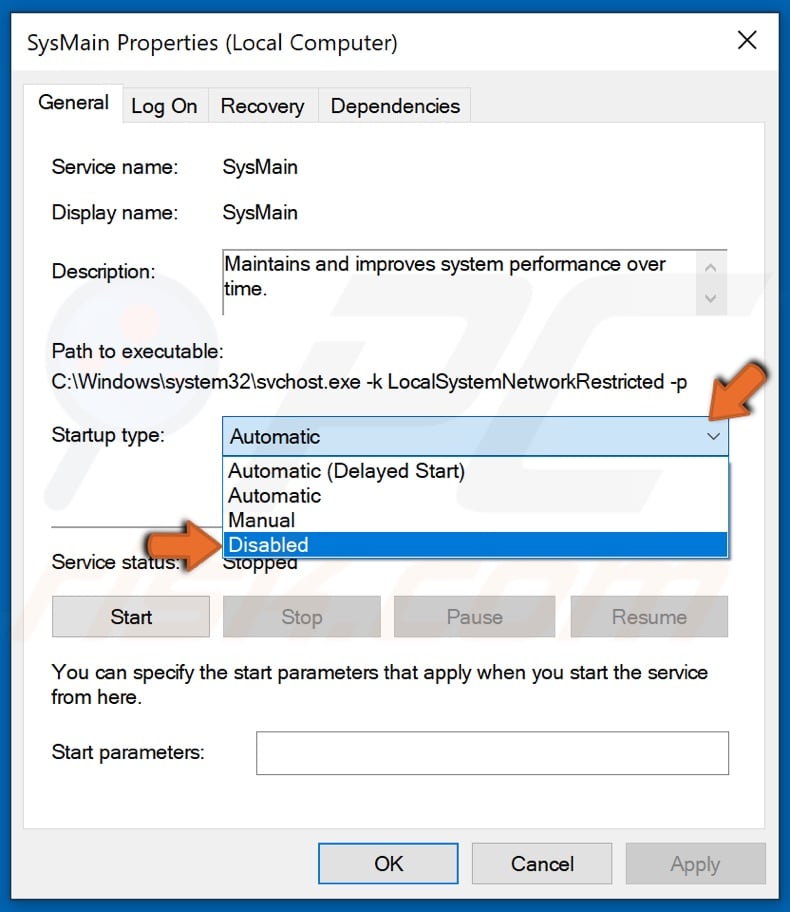
6. Then, Under the Startup type setting, open the drop-down menu and select Disabled.
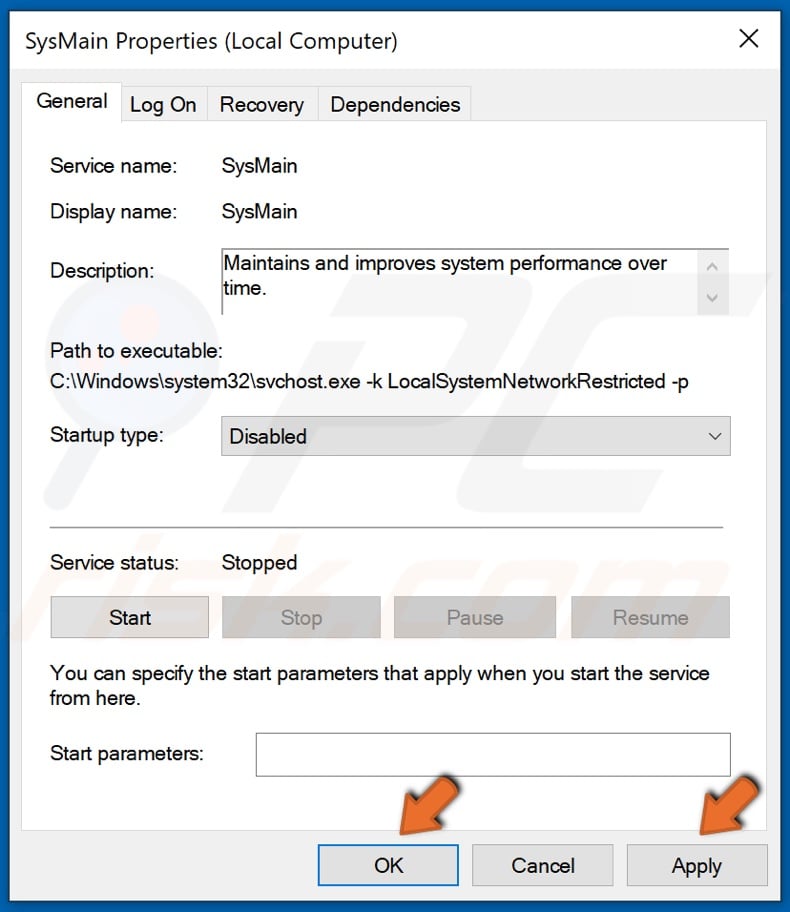
7. Click Apply and click OK.
SysMain is now stopped and will no longer launch on system startup.
[Back to Table of Contents]
Option 2. Disable SysMain Using Command Prompt
1. Hold down Windows+R keys to open Run.
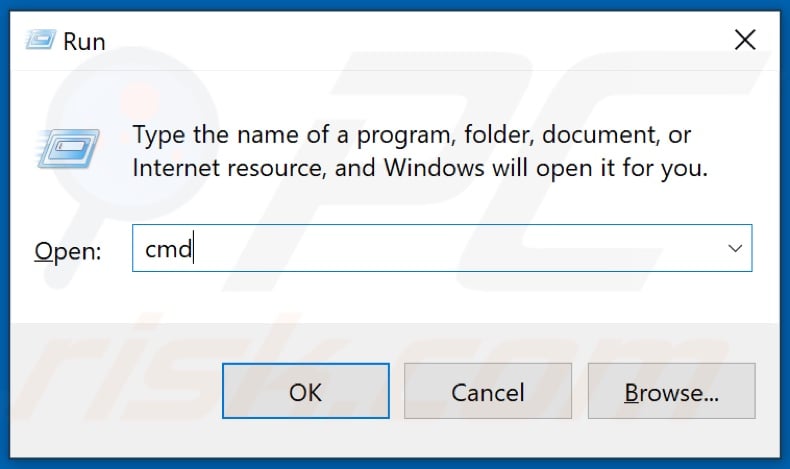
2. Type in CMD in the Run text box and hold down Shift+Ctrl+Enter keys to open the elevated Command Prompt.
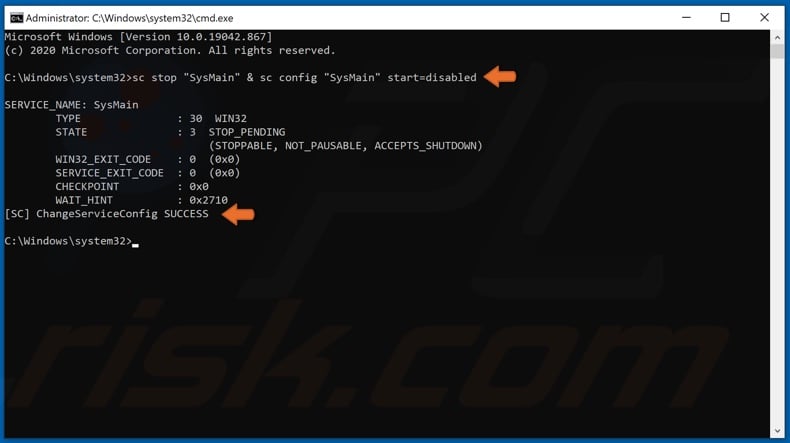
3. In the Command Prompt window, type in sc stop «SysMain» & sc config «SysMain» start=disabled and hit the Enter key. You should get a ChangeServiceConfig SUCCESS message.
Close the Command Prompt and open Task Manager to check if disk/CPU usage has gone down.
[Back to Table of Contents]
Option 3. Disable SysMain Using Registry Editor
1. Hold down Windows+R keys to open Run.
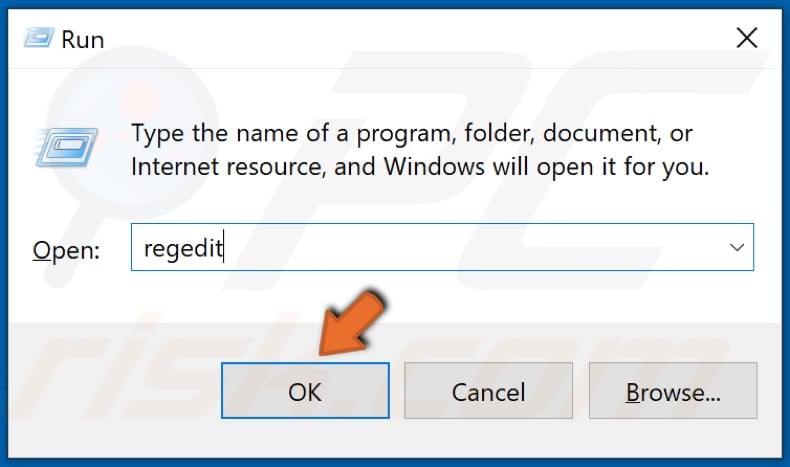
2. In the Run text box, type in Regedit and click OK.
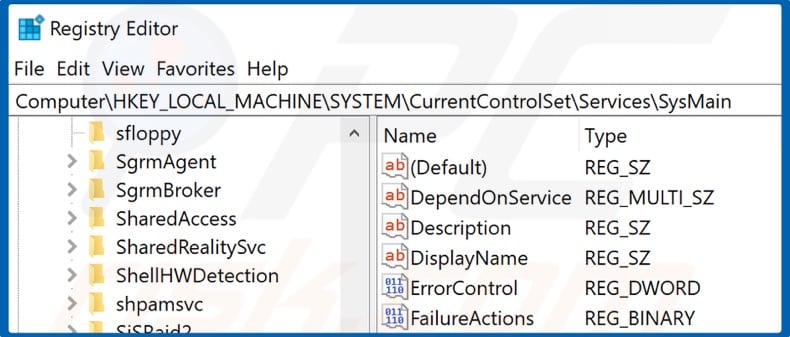
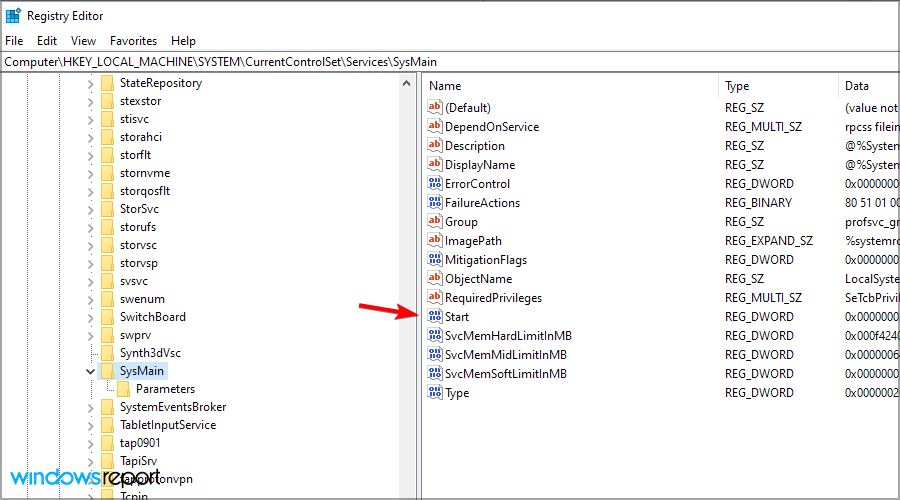
3. Once in the Registry Editor, navigate to KEY_LOCAL_MACHINE\SYSTEM\CurrentControlSet\Services\SysMain

4. In the right pane, right-click Start and click Modify.
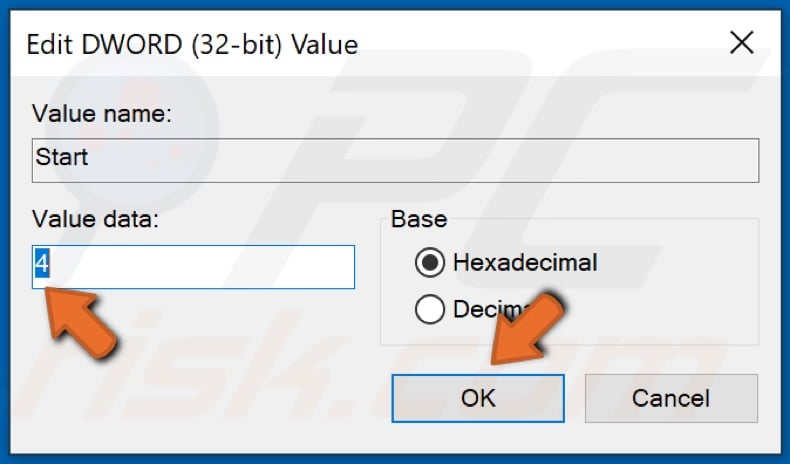
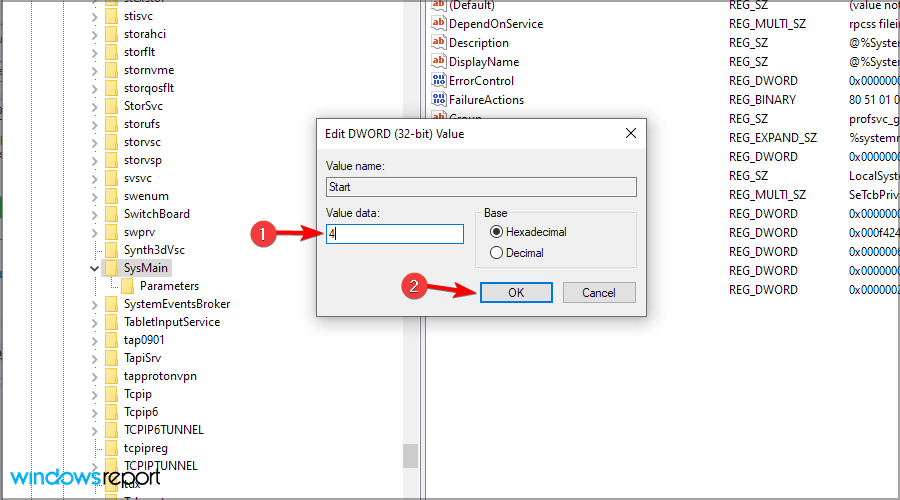
5. In the Value data text box, type in 4.
6. Click OK to save the changes.
Close the Registry Editor and open Task Manager to check if disk/CPU usage has gone down.
[Back to Table of Contents]
Option 4. Run Windows Update
Updating Windows may help in fixing SysMain’s high disk usage. Microsoft periodically releases updates that fix bugs, improve system stability, and optimize system performance, so updating Windows is one of the easiest things to do if you want to resolve your high disk usage issue.
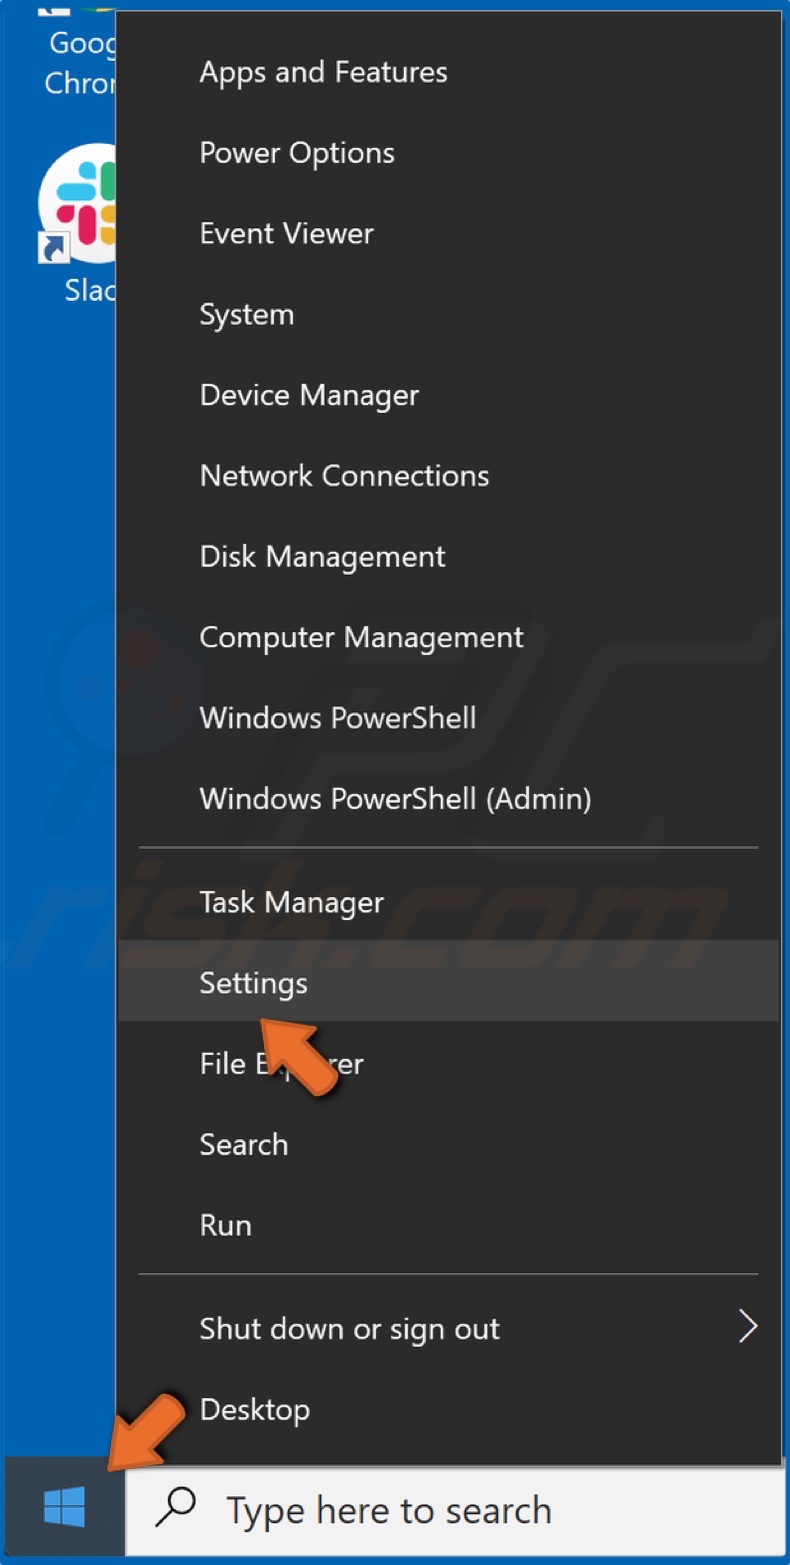
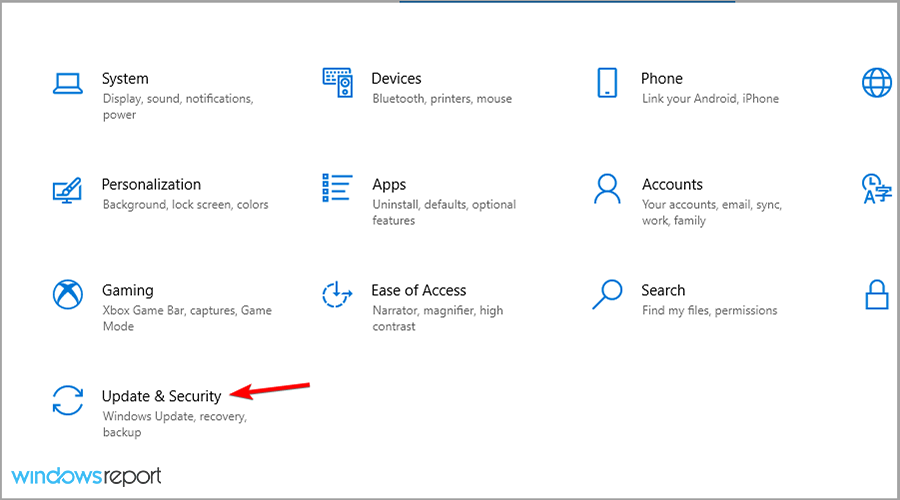
1. Right-click the Start Menu button and select Settings.

2. Then, select Update & Security.
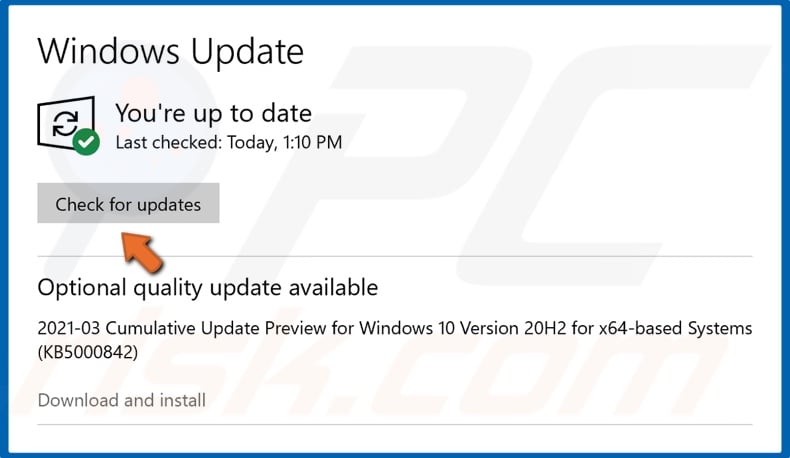
3. Click the Check for updates button.
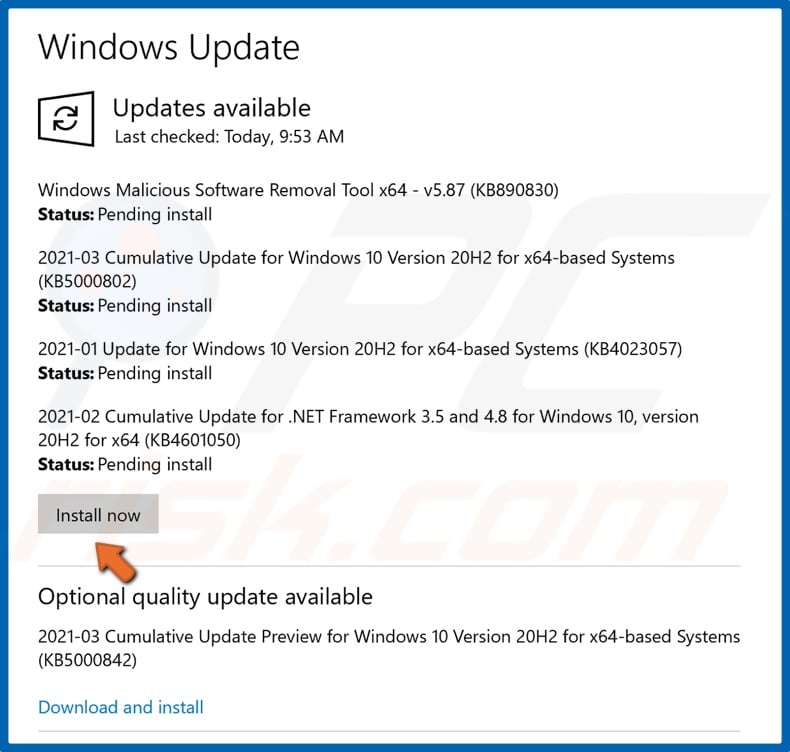
4. If Windows has already checked for updates, click the Install now button.
5. Wait for Windows to download and install the latest updates. Note that the update may take some time, and you will have to restart your computer to finish installing the updates.
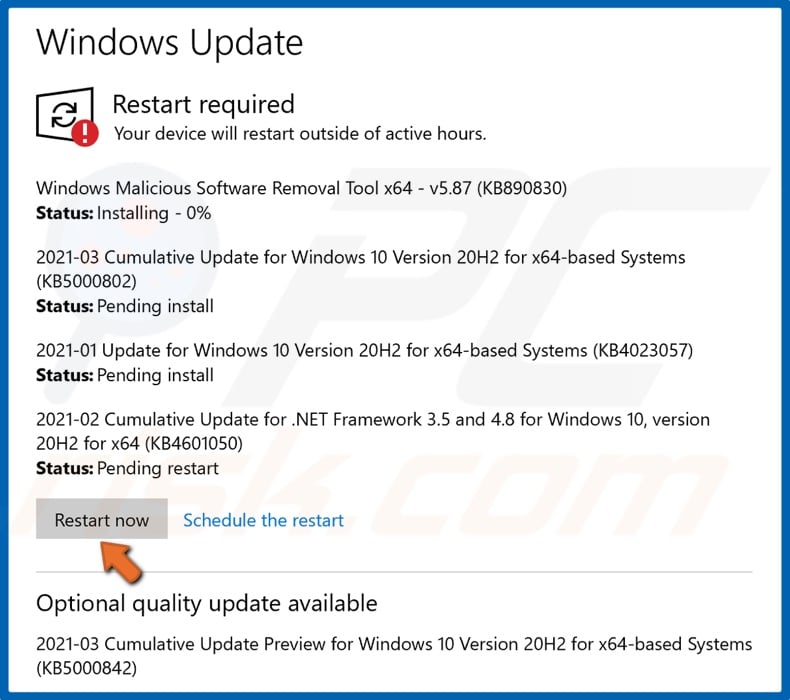
6. Then, click Restart now when prompted, and allow your PC to reboot.
[Back to Top]
Readers help support Windows Report. We may get a commission if you buy through our links.
Read our disclosure page to find out how can you help Windows Report sustain the editorial team. Read more
Several users have reported Service Host SysMain causing high disk usage and memory issues in Windows 10, which can be a problem since it will negatively impact your performance.
In this article, we’ll explore a few troubleshooting steps to help you resolve the issues you might have with this service, so let’s get started.
How do I fix Service Host Sysmain high disk usage on Windows 10?
If you want to skip these solutions’ rigors, you should consider upgrading from HHD to a reliable SSD. An upgrade in hardware mitigates many performance issues.
1. Stop SysMain service
1.1 Using the Services app
- Press the Windows key + R.
- Type services.msc and press Enter.

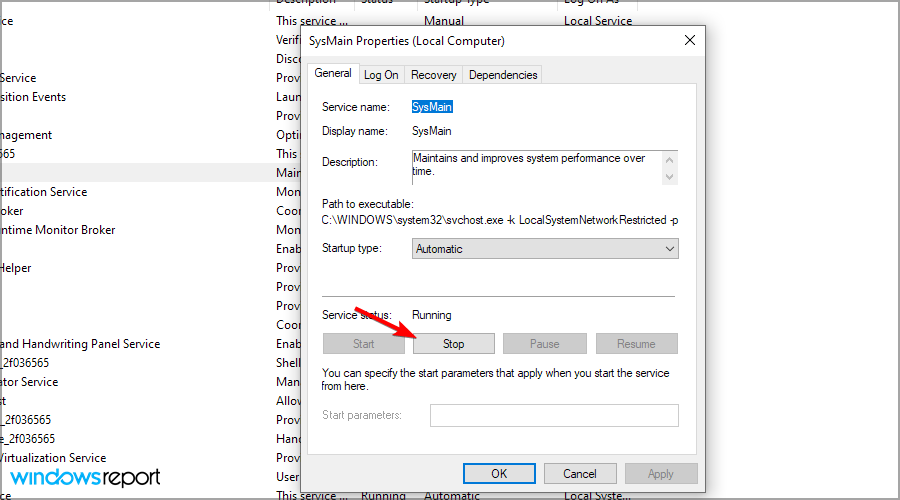
- In the Services window, locate SysMain and double-click it.
- Click the Stop button.
- Click OK to save the changes.


1.2 Service Host SysMain disable using the Command Prompt
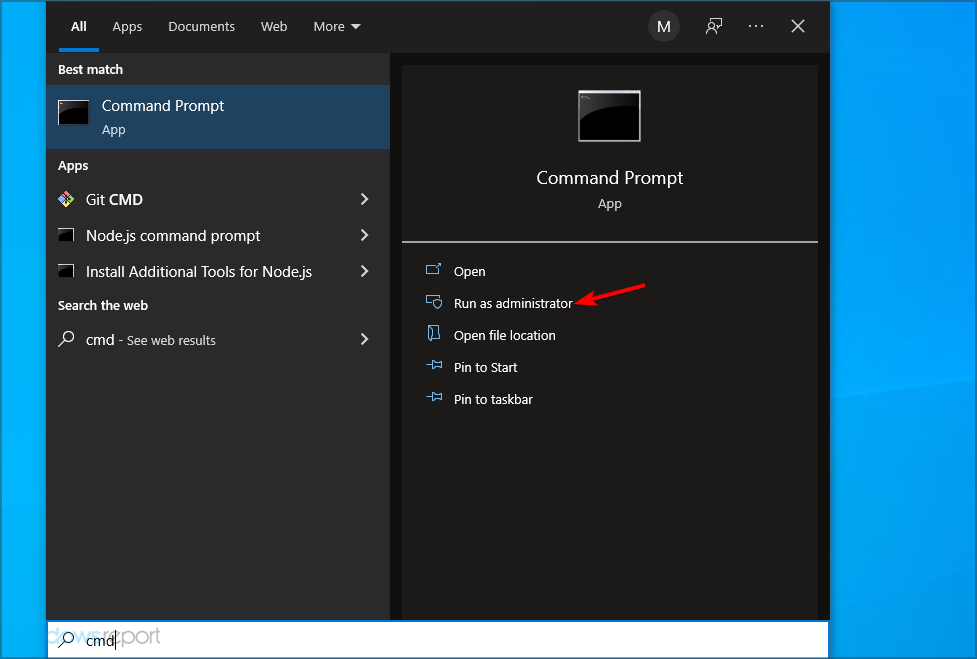
- Press the Windows key + S.
- Type cmd. Click on Run as administrator to open the Command Prompt.

- In the Command Prompt window, type the following command and hit Enter:
sc stop "SysMain" & sc config "SysMain" start=disabled
- You should see Change Service Config Success. This is how you can disable Service Host SysMain.

2. Run SFC and DISM scans
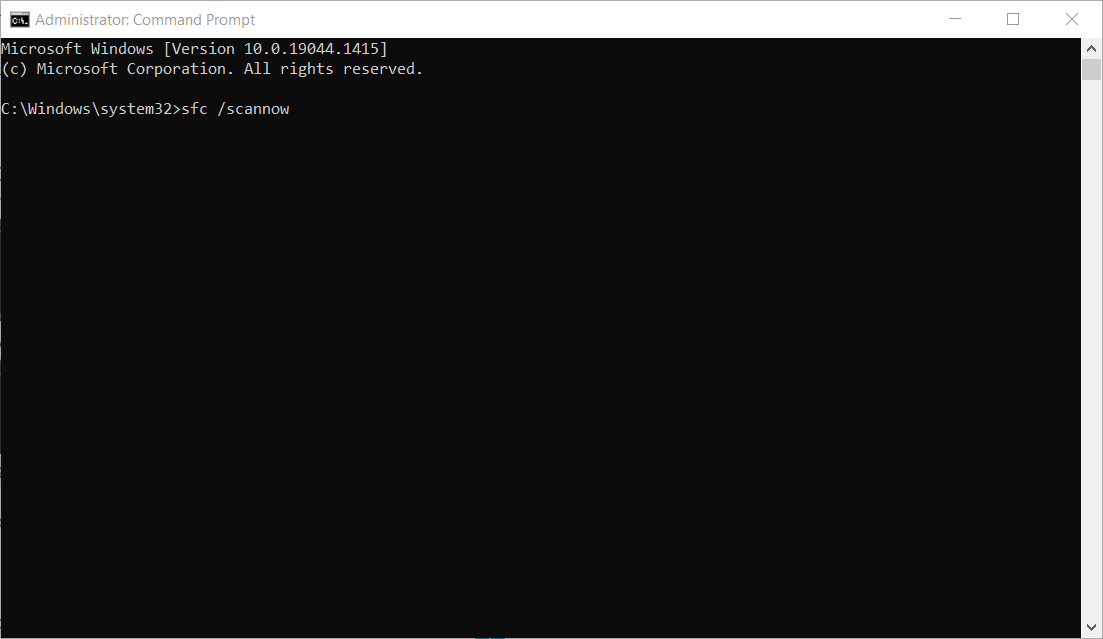
- Click the Start button, type sfc, and click on Run as administrator from the results.
- Type the following command and press Enter to run it:
sfc /scannow
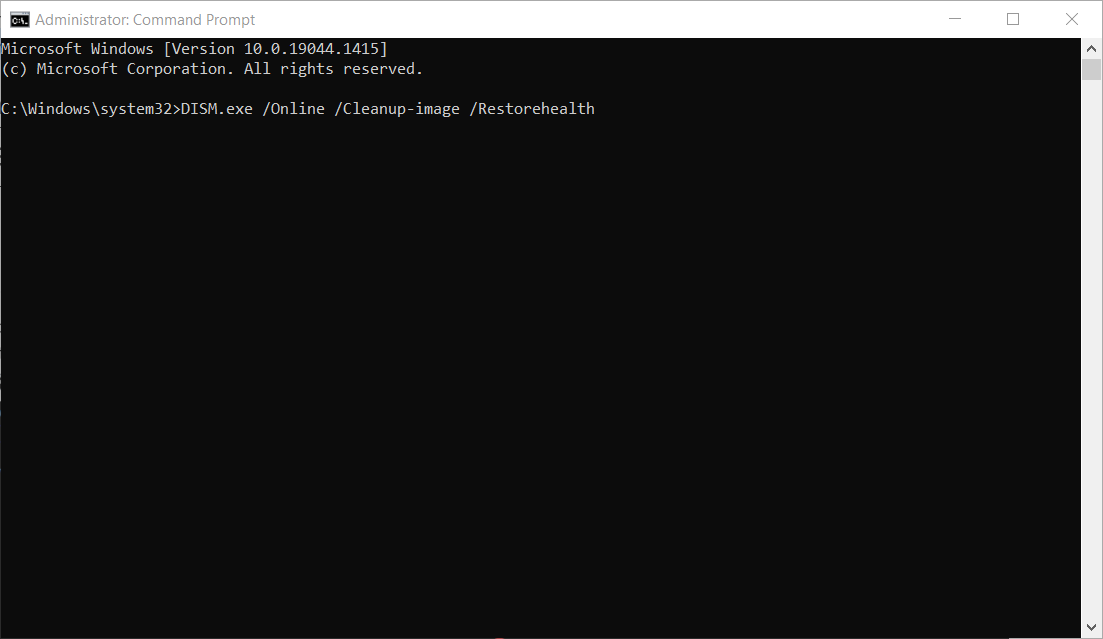
- Wait for the scan to complete, then type the following command and press Enter to run it:
Dism /Online /Cleanup-Image /RestoreHealth
- Wait for DISM to complete the scan and restart your PC afterward to see if the problem has been fixed.
For some of our readers, this issue was caused by one or more corrupted system files, and the System File Checker and DISM tools fixed this problem so you should try it. You can also try specialized software to ease this process significantly.
3. Edit the DWORD value on your Registry Editor
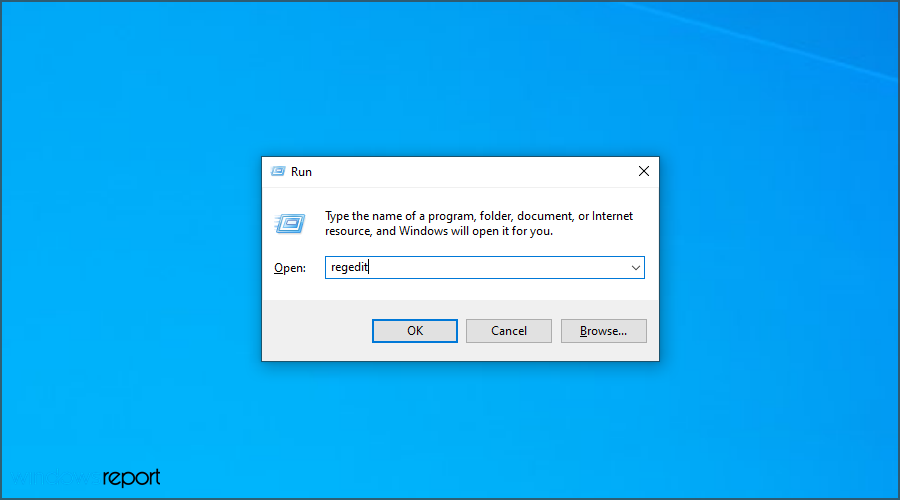
- Press the Windows key + R. Type regedit and click OK.
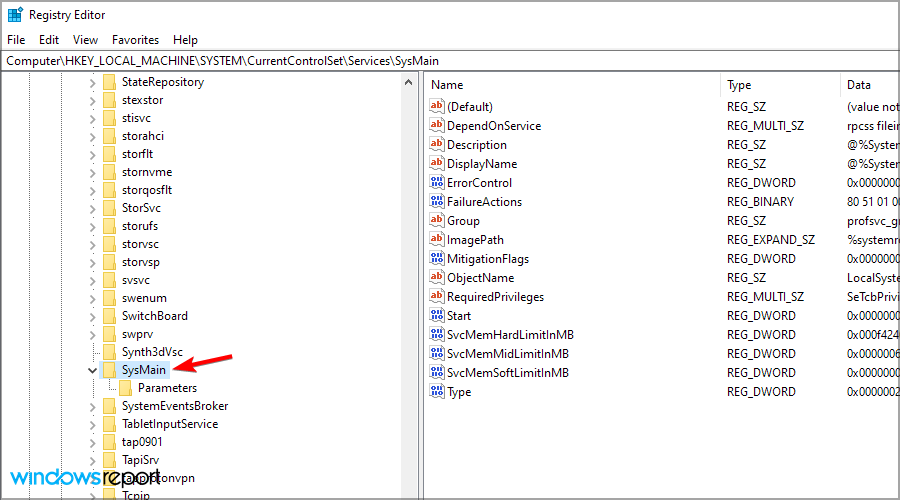
- In Registry Editor, navigate to the following location:
HKEY_LOCAL_MACHINE\SYSTEM\CurrentControlSet\Services\SysMain
- Then, in the right pane, double-click on Start.
- Enter 4 in the Value Data field. Then, click OK to save the changes.
- What is atkexComSvc.exe & How to Fix its High CPU Error
- How to Fix MFReadWrite.dll is Missing on Windows N
- DWMAPI.DLL Missing/Loading Errors – Fix-it Guide
- MUI_NO_VALID_SYSTEM_LANGUAGE BSOD Error [Fixed]
- AGP_ILLEGALLY_REPROGRAMMED – Step-by-Step Fixes
4. Update Windows
- Press the Windows key + I to open the Settings app.
- Go to Update & Security.
- Check for pending Windows updates and install them.
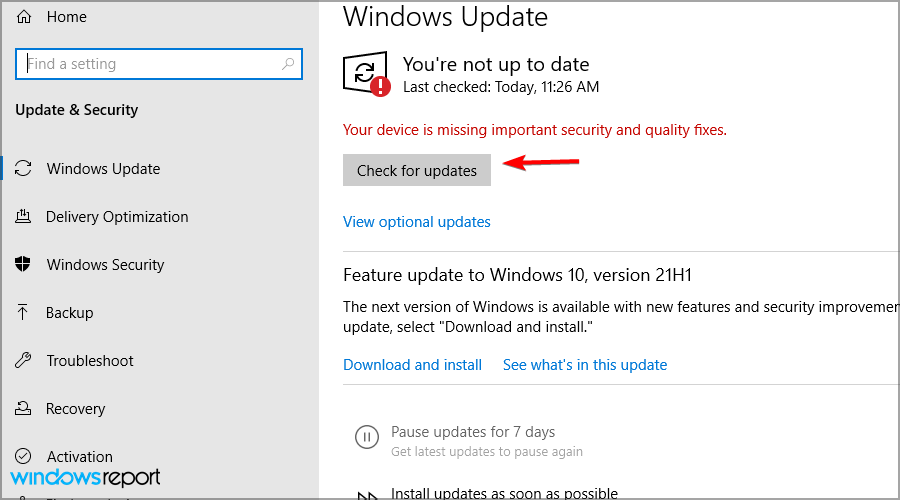
Installing Windows updates can fix the high disk usage issue caused by a glitch in the operating system.
What is Service Host Sysmain?
Service Host SysMain (earlier known as Superfetch) is a bundle of system processes. You are most likely wondering how it works.
This processes package is supposed to optimize the apps launching and speed up their starting, but sometimes it can do quite the opposite, causing high disk and CPU usage.
What causes SysMain’s high disk usage?
Have you ever wondered why is Service Host Sysmain causing high disk usage? Missing updates are the most common cause of this problem, so it’s advised to keep your PC up to date to avoid such issues.
In addition, if this service is causing problems, you might want to try disabling it. Other Sysmain issues include:
- 100% disk usage – This occurs when your system works at 100% capacity to handle the tasks.
- High disk activity – High disk activity means that your system’s disk is running too many apps, and reaches high levels, even though not at 100% yet.
- High CPU usage – This is caused by your Central Processing Unit, or CPU working excessively to deal with the tasks at hand.
What is the use of service host SysMain?
SysMain is a legitimate Windows service that optimizes the computer’s performance by reducing the app loading time. It does so by continuously collecting data about the app usage pattern.
Once it has a sufficient amount and has identified a pattern, for instance, a user opening the Mail app at 10 AM, it will automatically load the required files so that the app launches quickly when a user manually does that.
If the SysMain is causing high disk usage in Windows 10, this can make your computer slow, affecting the performance of other programs and slowing down the PC.
Once you have fixed the problem, do check some quick tips to boost performance in Windows 10.
Did you find a solution to this problem on your own? Feel free to share your answer with us in the comments section below.
Tashreef Shareef
Tashreef Shareef is a software developer turned tech writer. He discovered his interest in technology after reading a tech magazine accidentally. Now he writes about everything tech from Windows to iOS and streaming services to IoT at WindowsReport.