
Все способы:
- Способ 1: Переустановка или обновление видеодрайвера
- Способ 2: Настройка панели управления видеокарты
- Вариант 1: NVIDIA Control Panel
- Вариант 2: AMD Настройки Radeon
- Способ 3: Изменение через свойства видеоадаптера
- Вопросы и ответы: 0
Способ 1: Переустановка или обновление видеодрайвера
Самая распространенная причина возникновения проблемы с изменением разрешения экрана в Windows 11 — отсутствие или неполадка видеодрайвера. Вам понадобится выполнить несколько простых действий, чтобы не только проверить эту теорию, но и автоматически исправить ситуацию, если дело действительно будет в драйвере. Для начала мы рекомендуем осуществить чистую установку, удалив текущую версию драйвера. Об этом более детально читайте в статье по следующей ссылке.
Подробнее: Удаляем драйвер видеокарты

Если хотите, можете обойтись без переустановки, а просто попробовать проверить наличие свежей версии драйвера и установить его поверх текущей. Все подходящие методы обновления и установки с нуля описаны в другом материале на нашем сайте по следующей ссылке.
Подробнее: Обновление драйвера видеокарты на Windows 11
Способ 2: Настройка панели управления видеокарты
Существует вероятность того, что в вашей панели управления видеокартой, которая устанавливается на компьютер вместе с драйвером, установлено другое разрешение или необходимое отсутствует в списке, из-за чего системные настройки, вносимые вручную, работают не совсем корректно. Давайте разберемся с тем, как проверить параметры через панель управления NVIDIA и AMD.
Вариант 1: NVIDIA Control Panel
Для начала обратимся к панели управления NVIDIA, которая установлена на компьютерах у обладателей видеокарт от данной компании. В ней есть нужные настройки для установки нового разрешения или его самостоятельного создания, если подходящих вариантов в списке нет.
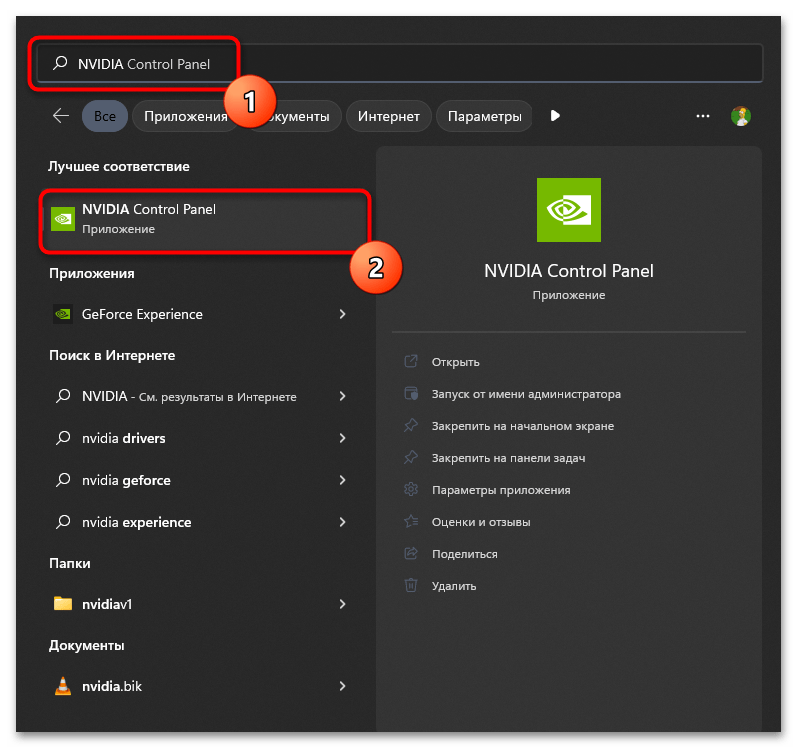
- Запустите «NVIDIA Contol Panel» через значок на панели задач или отыщите приложение в «Пуске».
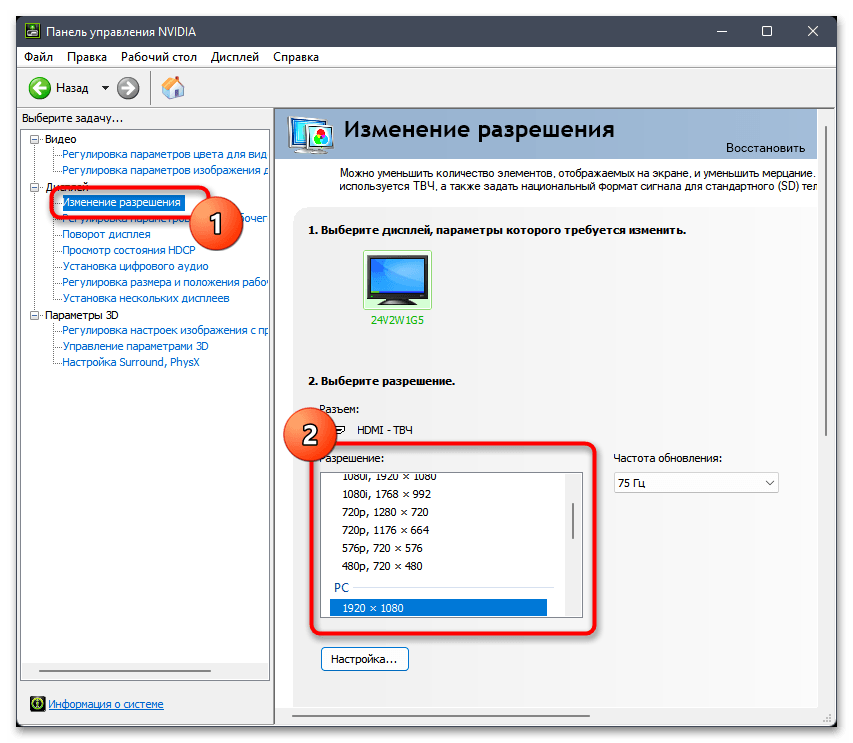
- Перейдите на вкладку «Изменение разрешения», находящуюся в разделе «Дисплей», и ознакомьтесь с доступными разрешениями. Выберите среди них подходящее и сохраните изменения.
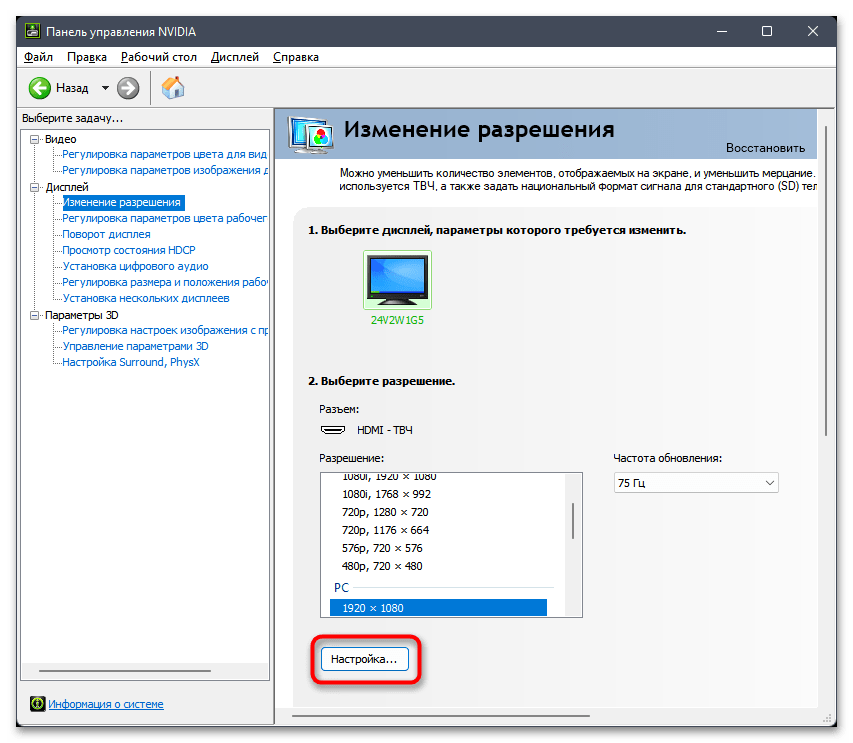
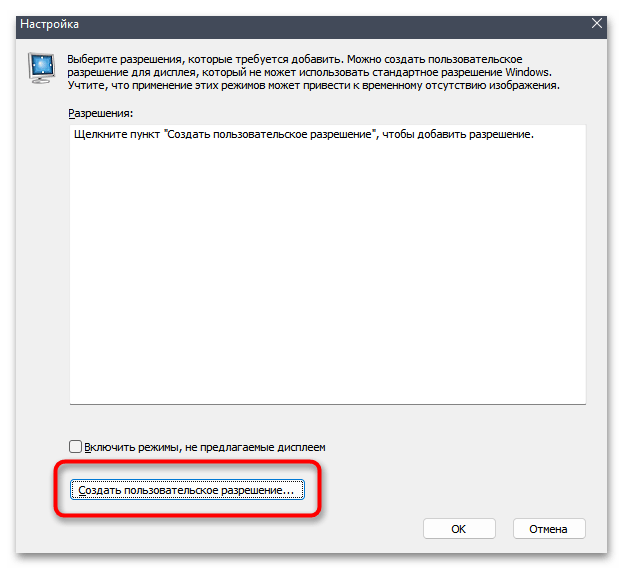
- Если требуемого разрешения нет, щелкните по кнопке «Настройка».
- В новом окне перейдите к «Создать пользовательское разрешение».
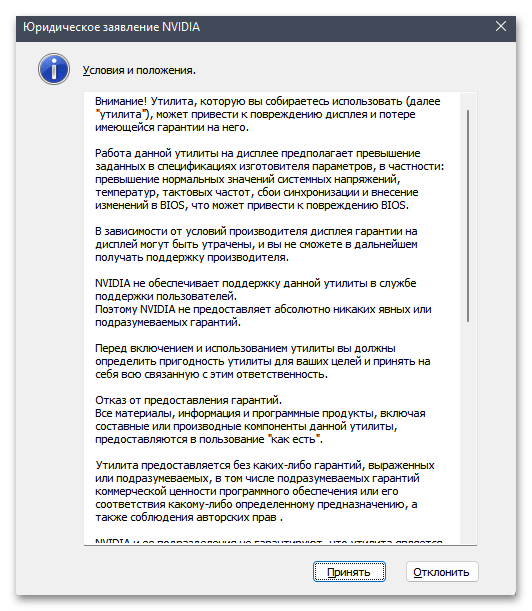
- Внимательно прочитайте предупреждение от разработчиков и в следующем шаге будьте внимательны, чтобы случайно не активировать параметры, которые могут привести к искажениям изображения на экране.
- Задайте необходимое разрешение в пикселях по вертикали и горизонтали и укажите герцовку, если по умолчанию она указана не максимальной для вашего монитора. Другие параметры лучше не трогать, чтобы избежать проблем с выводом изображения.
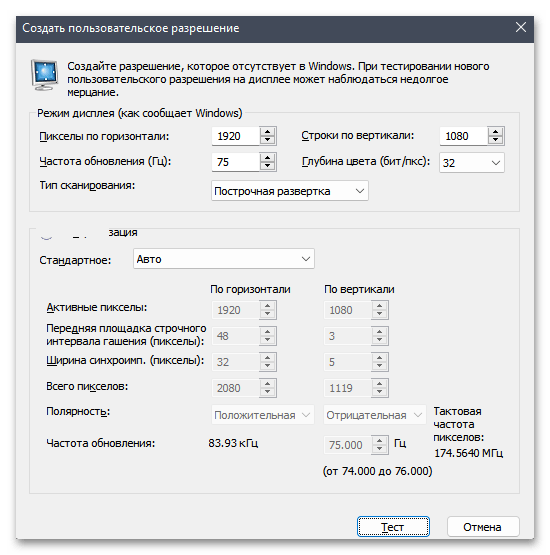
Пользовательское разрешение будет добавлено в список ко всем остальным и доступно для активации в любой момент. Выберите его и проверьте, удалось ли решить вашу проблему с изменением настроек дисплея.
Вариант 2: AMD Настройки Radeon
Далее обратимся к приложению от AMD, в котором предстоит выполнить примерно те же самые действия для выбора разрешения, что и в приложении NVIDIA. Отличается только интерфейс самой панели управления и наличие некоторых дополнительных функций, которые тоже могут влиять на разрешение дисплея.
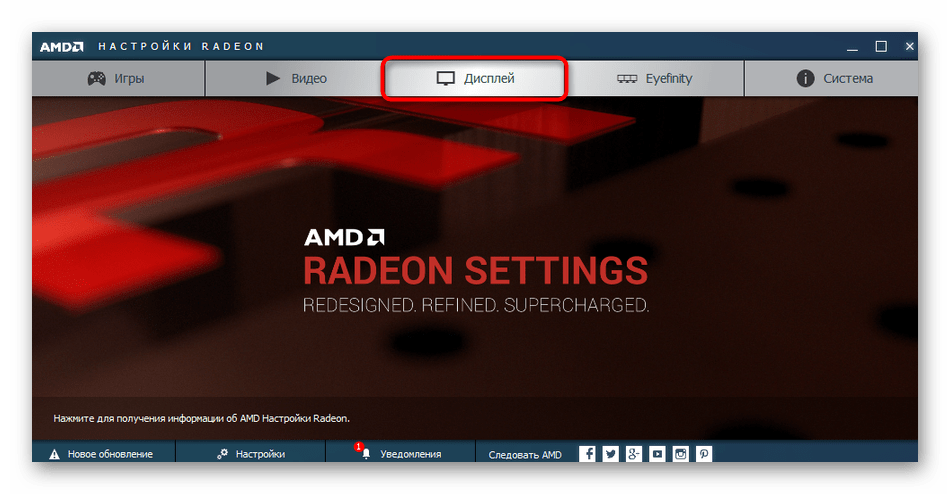
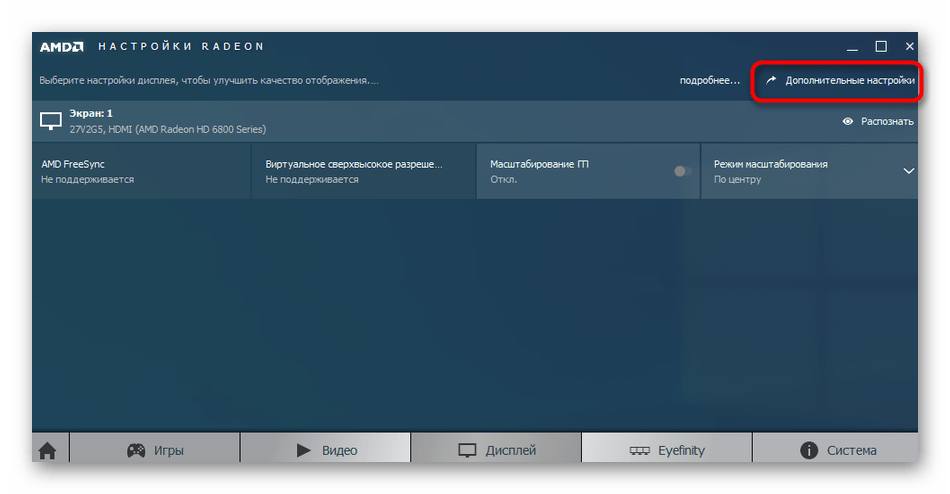
- Запустите окно с настройками AMD и перейдите на вкладку «Дисплей».
- Справа найдите ссылку «Дополнительные параметры» и щелкните по ней, чтобы развернуть новое окно.
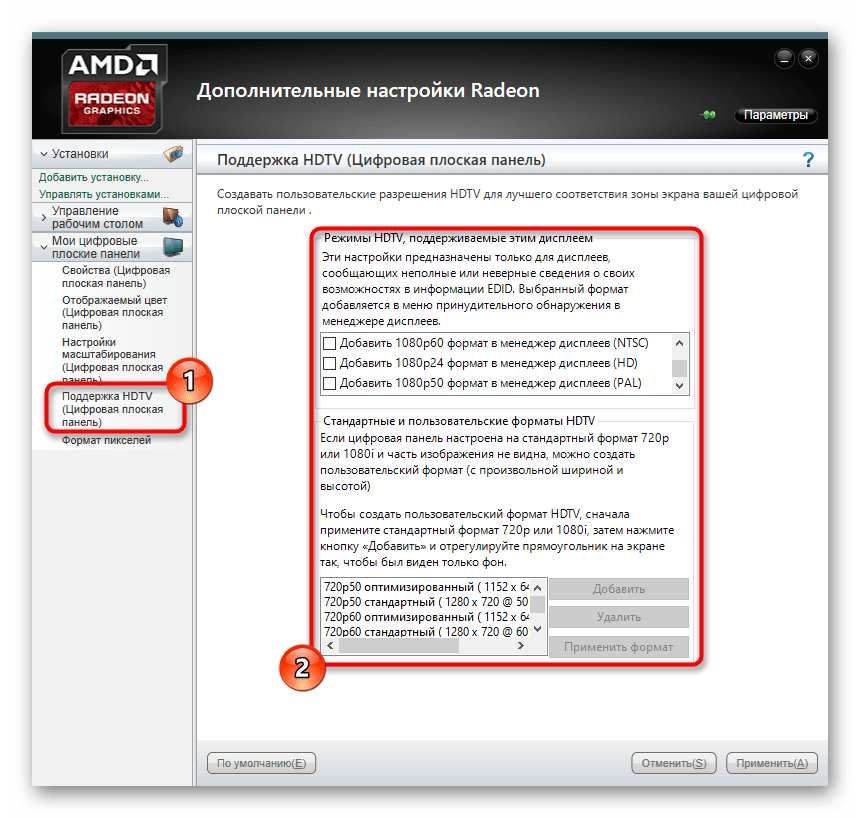
- В нем выберите «Поддержка HDTV (Цифровая плоская панель)» и определитесь с тем, Какое разрешение хотите использовать. Если предпочитаемое является нестандартным, добавьте его из списка менеджера, выделив пункт галочкой.
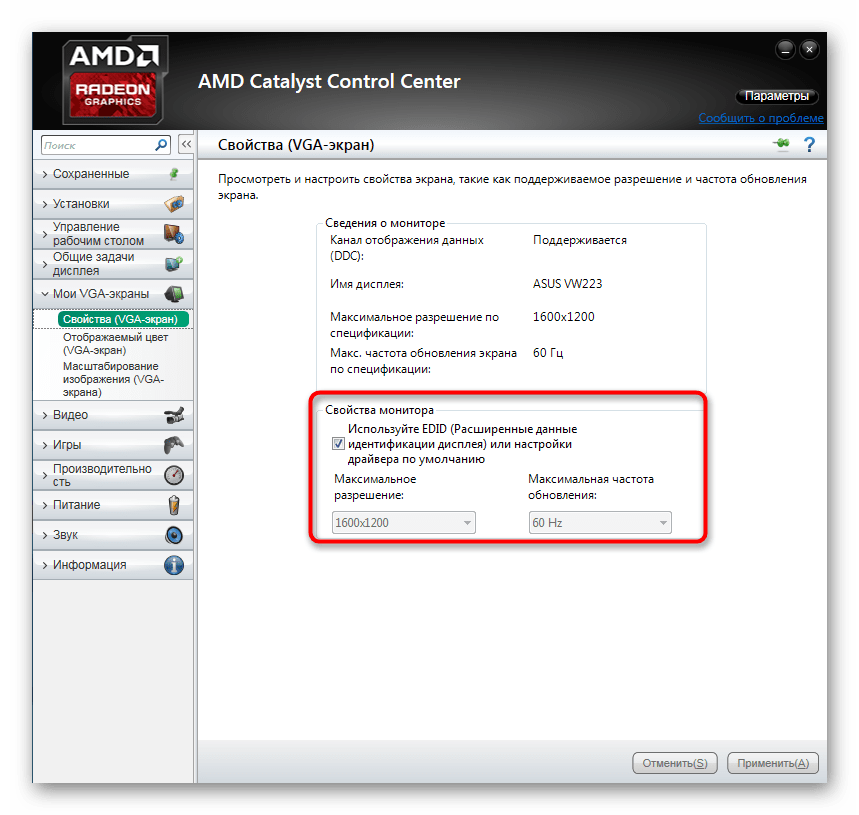
- Дополнительно в разделе «Мои VGA-экраны», если такой у вас присутствует, активируйте поддержку EDID, затем примените изменения.
Способ 3: Изменение через свойства видеоадаптера
В Windows 11 есть еще одна продвинутая настройка, предназначенная для более точной настройки разрешения экрана. Предлагаем воспользоваться ею в тех случаях, если два предыдущих метода не справились с возложенной на них задачей.
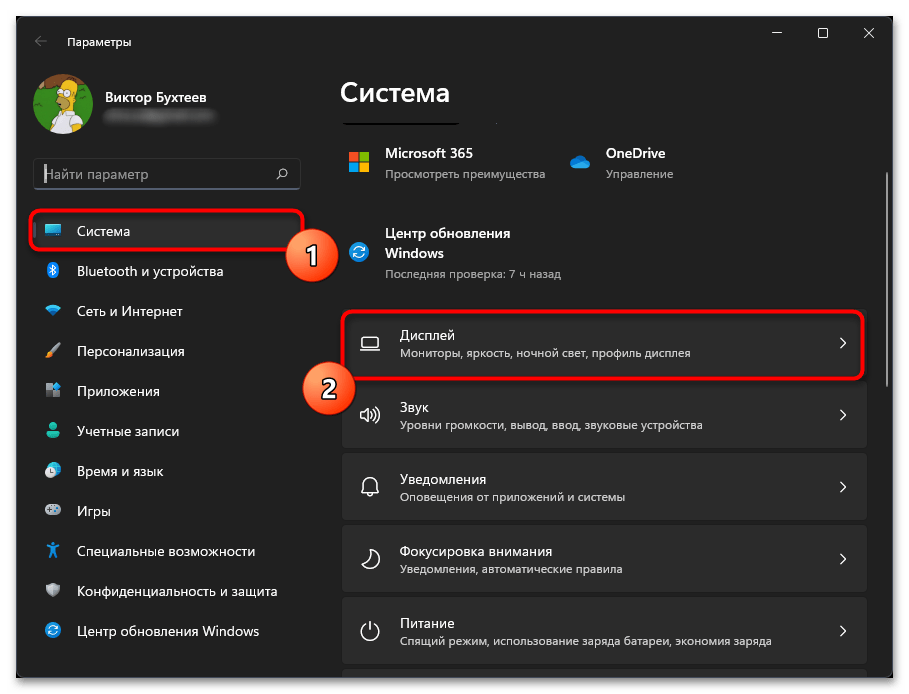
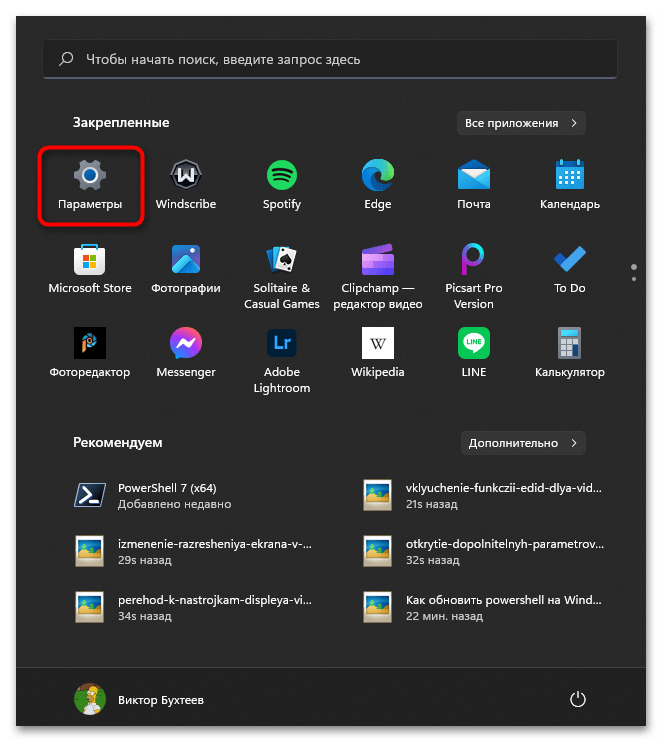
- Откройте меню «Пуск» и перейдите в «Параметры».
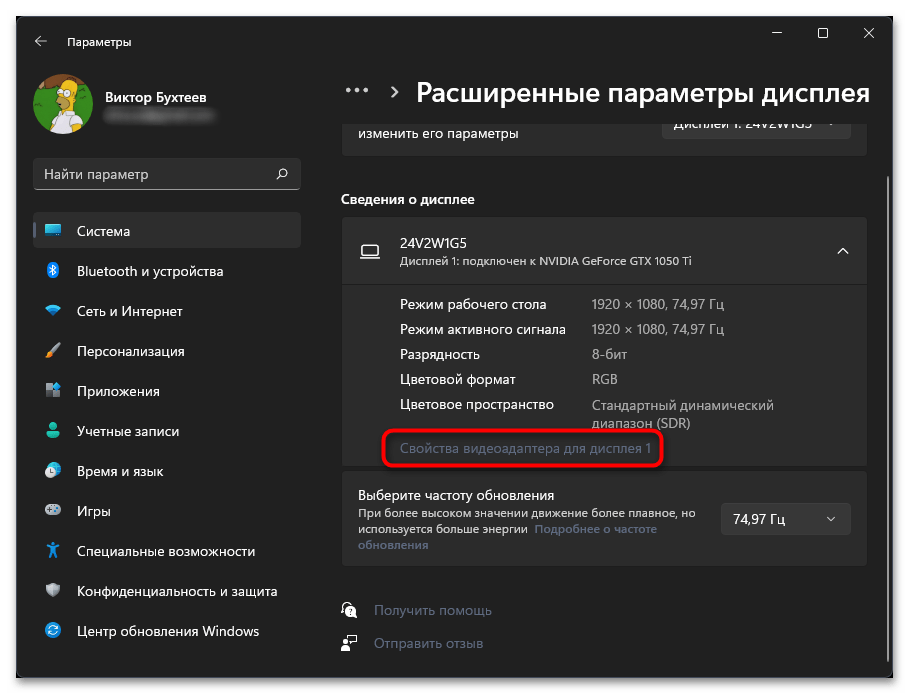
- На панели слева выберите раздел «Система» и перейдите к категории «Дисплей».
- В блоке «Сопутствующие параметры» нажмите по строчке «Расширенные параметры дисплея».
- Теперь щелкните по ссылке «Свойства видеоадаптера для дисплея 1».
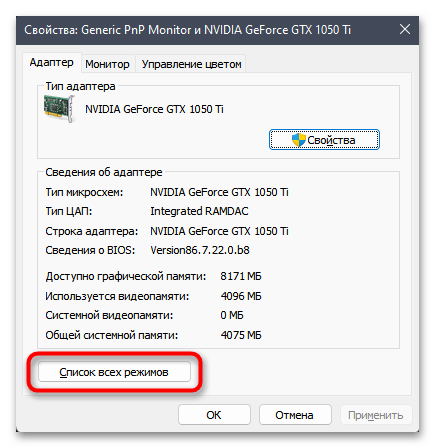
- В новом окне нажмите «Список всех режимов», чтобы как раз и перейти к ознакомлению с доступными разрешениями экрана.
- Найдите подходящее для вас разрешение и активируйте его. Вместе с этим следите за тем, чтобы сохранить герцовку монитора, а не понижать ее.

В завершение отметим, что в редких случаях неполадки с разрешением экрана связаны с неудачной установкой системного обновления или ошибками в нем, которые пока что Microsoft не устранили. Если ничего из перечисленного выше не помогло вам решить проблему, советуем откатить последнее обновление, если это еще возможно. Подходит такое решение в том случае, если вы заметили проблемы с разрешением не сразу после установки Windows 11, а через какое-то время пользования операционной системой.
Подробнее: Как удалить обновление в Windows 11
Наша группа в TelegramПолезные советы и помощь
Key Takeaways
- Outdated or corrupt graphics drivers can prevent you from changing display resolution on Windows 11.
- Running system maintenance tools and SFC scans can help resolve underlying system problems that affect display resolution.
Basic Fixes:
- Restart the computer: Rebooting is effective because minor bugs may trigger the problem, and a reboot often kills the problematic services or processes.
- Reinstall monitor drivers: Outdated monitor drivers may trigger the problem, and reinstalling them may fix it.
- Change resolution via graphics control panel: As a workaround, you should try changing display resolution via the NVIDIA Control Panel or Intel Graphics Command Center.
Fix 1: Update or Reinstall the Graphics Driver
On Windows computers, the graphics driver aids communication between the graphics card and the operating system. When it is outdated, you may notice certain flaws with graphical components, which may be why you cannot change the display resolution. Follow the steps below to update the driver.
Step 1: Right-click the Start menu and click Device Manager.

Step 2: Expand the Display adapters category, right-click your driver, and click Update driver.

Step 3: Click Search automatically for updates.

Alternatively, you may reinstall the driver if it is corrupted.
Step 1: Right-click the Start menu and click Device Manager.
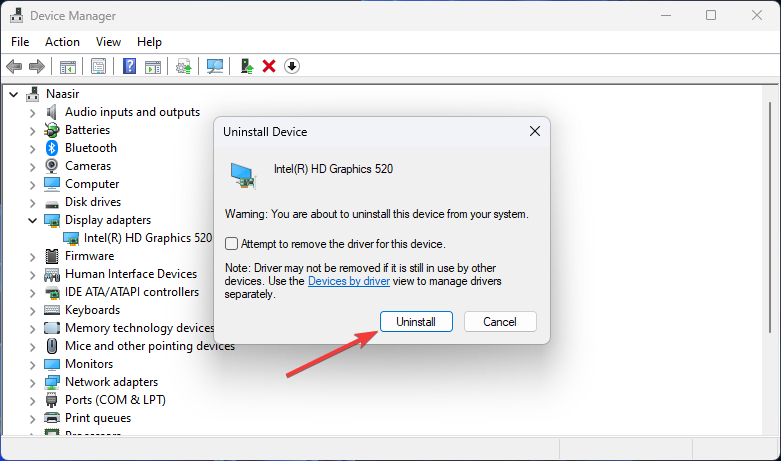
Step 2: Expand the Display adapters category, right-click your driver, and click Uninstall device.

Step 3: Confirm your choice.
Step 4: Restart the computer, reopen the Device Manager, and click the icon for Scan for hardware changes. Once done, the system should automatically prompt you to install the required drivers.

Fix 2: Adjust the Display Scale
If you have selected a mismatch scale for your Windows 11 display resolution, you may encounter a few problems. In this case, your only option will be to set the scale to the recommended settings from Display Settings before changing the resolution.
Step 1: Click the magnifying lens on your Taskbar, type display settings, and click the Display Settings application.

Step 2: In the Scale & layout section, click the Scale dropdown menu and select any option that has Recommended.

Step 3: Try changing the display resolution again.
Fix 3: Change Display Refresh Rate
When you change the refresh rate, you may fix compatibility issues that trigger the problem or bypass conflicts. Follow these steps.
Step 1: Press Windows + I to open Settings.
Step 2: Select System on the left pane and click Display on the right.

Step 3: Click on Advanced Display.
Step 4: Select a new refresh rate from the Choose a refresh rate dropdown.

Fix 4: Run the System Maintenance Troubleshooter
The system maintenance troubleshooter can scan your computer for various problems and fix or recommend solutions. When an underlying system issue impacts the display drivers or settings, this troubleshooter resolves it.
Step 1: Press Windows + R to open the Run dialog, type cmd, and hit Ctrl + Shift + Enter to open an elevated Command Prompt.
Step 2: Type the command below and hit Enter to launch the System Maintenance troubleshooter.
msdt.exe -id MaintenanceDiagnostic

Step 3: Click Next and follow the wizard to complete the process.

Fix 5: Run the SFC Scan
On Windows 11, the System File Checker (SFC) utility scans for damaged or corrupted system files. This tool is powerful enough to fix damage or repair the files when needed. If system file corruption makes changing the display resolution on Windows 11 impossible, an SFC scan will fix it.
Step 1: Press Windows + R to open the Run dialog, type cmd, and hit Ctrl + Shift + Enter to open an elevated Command Prompt.
Step 2: Type the command below and hit Enter to start the SFC scan.
sfc /scannow
Step 3: Follow any instructions on the Command Prompt and restart your computer when the scan is complete.
Was this helpful?
Thanks for your feedback!
The article above may contain affiliate links which help support Guiding Tech. The content remains unbiased and authentic and will never affect our editorial integrity.
Readers help support Windows Report. We may get a commission if you buy through our links.
Read our disclosure page to find out how can you help Windows Report sustain the editorial team. Read more
You are not alone if Windows 11 resolution keeps changing automatically on your computer. Windows 11 resolution pixelating and changing by itself after a Windows update is a common problem.
What causes Windows 11 screen resolution to keep changing and how can you fix it? All the answers you need are in this guide.
Why does Windows 11 resolution keep changing on my computer?
Several possible reasons can cause abrupt screen resolution changes in Windows 11. The most common ones are:
- Faulty or outdated graphics driver – The leading cause of resolution problems on Windows 11 is a malfunctioning or out-of-date graphics driver.
- Recent Windows update – Since Windows 11 multiple bugs issue is yet to be resolved, a recent update could mess up your screen resolution.
- Second monitor issue – If Windows 11 fails to detects a second monitor correctly, you will likely have this issue.
- Malware and virus attacks – Both can be responsible for any Windows 11 error that could ever affect your computer. They can be the reason for this too.
Whether you can pinpoint the root of the problem or you can’t, below are some solutions you can employ to fix the problem.
What can I do if Windows 11 resolution keeps changing on my computer?
Before you proceed to the major fixes in this guide, try out these basic solutions to see if they could solve your problem:
- Go to display settings on your computer and change your display resolution to the default settings.
- If you use a custom or downloaded screensaver, try to turn it off to see if it fixes the problem.
- Updating to the latest version of Windows can solve the problem if bugs cause it.
- Performing system restore is also another potential solution. Just make sure you back up your data before starting the process.
- Scan your computer for malware and viruses attacks to detect and fix the problem.
If these fixes don’t rectify the issue, you can employ the advanced screen resolution troubleshooting methods below.
1. Reinstall the graphics driver
- Press Windows + X on your keyboard and click on Device Manager.

- Locate Display adapters from the list and double-click to expand it. Right-click on your driver and select Uninstall device.

- Select Uninstall from the dialogue to remove the driver from your computer.

- To reinstall the graphics driver, go back to your Device Manager, switch to the Action tab and select Scan for hardware changes from the drop-down menu.

- Wait for Windows to automatically reinstall the graphics driver and restart your PC once the installation is complete.
- Now, go back to the Device Manager and expand Display adapters to confirm that the driver has been reinstalled.


If you can’t find your graphics driver in there, it means Windows ran into some issues. Follow our guide on Windows encountered a problem installing the driver to fix it.
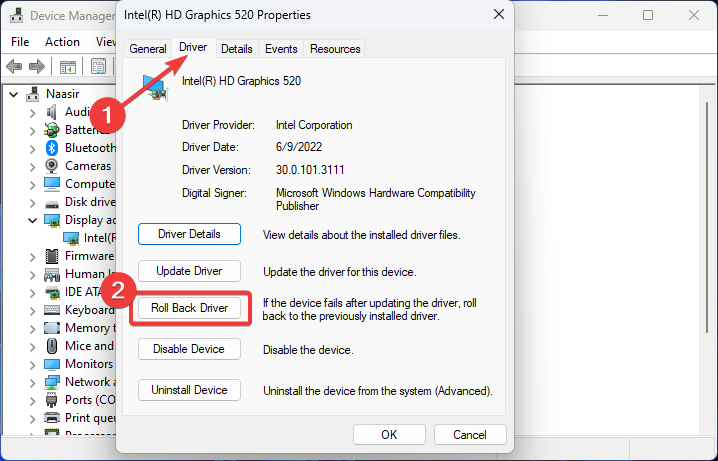
2. Rollback the graphics driver
- Press Windows + X on your keyboard and click on Device Manager.
- Double-click to expand Display adapters, right-click on your graphics driver, and select Properties from the options.
- Switch to the Driver tab and click on the Roll Back Driver button.
- Select any of the answers under Why are you rolling back? and click Yes to continue.

- Wait for Windows to roll back the driver and restart your PC.


If the roll back option is greyed out, it means you don’t have a previous version of the driver to roll back to. Move to the next solution.
After rolling back your graphics driver and the problem is fixed, you might want to prevent Windows from updating the driver again. Our comprehensive post on how to disable automatic driver update on Windows 11 can guide you.
- Recent Windows 11 update lets you disable profanity filter in voice typing
- Meta under fire after AI chatbot caught having sexual talks with minors
- OpenAI decides to reverse recent GPT-4o update after user find bot being overly appeasing
- Microsoft’s hotpatching for Windows Server 2025 to be subscription-based starting July
3. Disable the base video option
- Right-click on the Windows button on your taskbar and select Run from the shortcut menu.

- Enter the following command in the box and click the OK button:
msconfig
- Switch to the Boot tab on the System Configuration page, uncheck the box next to Base video and click the Apply button.

- Next, select OK to confirm your changes.
- Restart your computer and check if the problem has been solved.


4. Disable the Display Control Panel
- Press Windows + R keys on your keyboard, input the following command into the Run command box and click OK:
gpedit.msc
- Under User Configuration on the left pane, click on Administrative Template and double-click to expand Control Panel under it.

- Next, go to Display and double-click on Disable the Display Control Panel from the right.
- Choose Disabled, click the Apply button and select OK to complete the changes.

- Restart Windows.


5. Run the system maintenance troubleshooter
- Press Windows + R keys on your keyboard, enter the following command into the Run command dialog box, and click OK:
msdt.exe -id MaintenanceDiagnostic
- Click on Advanced on the bottom left corner.

- Next, check the Apply repairs automatically box and click on the Next button.

- Wait for Windows to detect the problem and follow the on-screen instructions to complete the process.


You can also use a troubleshooting tool to perform this operation. Here are the best Windows PC troubleshooting tools to pick from.
6. Uninstall the latest Windows update
- Click on the Windows icon on your taskbar and select Settings from the Start menu.

- Select Windows Update on the left pane and scroll down to Update history on the right.

- Next, click on Uninstall updates under Related settings.
- Click on the latest update under Microsoft Windows and click on Uninstall.

- Click Yes on the confirmation box that pops up and wait for Windows to complete the removal.
- Restart your PC.


7. Clean boot Windows 11
- Press Windows + R keys on your keyboard, input the following command into the Run command box and click OK:
msconfig
- Under Selective startup, uncheck the Load startup items box, check the box next to Load system services and Use original boot configuration. Click OK to save the changes.

- Next, switch to the Services tab, check the box next to Hide all Microsoft services at the bottom of the page, and click the Disable all button.

- Next, switch to the Startup tab and click Open Task Manager.

- Right-click each item under the Startup apps and Disable them one after the other.

- Close the Task Manager and go back to the System Configuration window. Click on the Apply button then press the OK button to save all changes.

- Restart your PC.


Those are the solutions that have helped many users put an end to screen resolution changing automatically on Windows 11.
You may have to try more than one of the solutions. If one doesn’t work for you, feel free to move to the next until you are able to fix the problem.
Another typical resolution problem you will likely encounter is having a larger display than screen size. To fix it, check out how to make Windows 11 display fit to screen.
You might also be interested in reading our guide on how to correct low resolution on Windows 11. The guide is for Windows 10, but the solutions are the same for Windows 11.
If you have other methods that work, share them with us in the comments section below.
Loredana Harsana
Windows Software Expert
Loredana is a passionate writer with a keen interest in PC software and technology. She started off writing about mobile phones back when Samsung Galaxy S II was on top of the world and she fell in love with tech of all sorts.
Whenever she’s not at her work desk, you’ll find her enjoying refreshing tea flavors, spilling stories on paper, and listening to the radio.
-
Home
-
News
- How to Fix Display Resolution Greyed out on Windows 11/10?
By Daisy | Follow |
Last Updated
Some users report that they are unable to change the screen resolution because the display resolution is greyed out. This post from MiniTool introduces some solutions for you. Now, keep on your reading.
When you want to change the screen resolution of your primary or secondary display in Windows 11, you may find that the Display Resolution drop-down menu is grayed out and cannot be clicked. Here are some solutions to the “display resolution greyed out” issue.
Fix 1: Update the Graphics Driver
You have to ensure that you are using the latest version of the graphics driver. You will meet the “display resolution greyed out” issue if you have incompatible, corrupt, missing, or outdated drivers. To solve the issue, you need to update the driver.
Step 1: Open the Run box by pressing the Windows + R keys and type devmgmt.msc to open Device Manager.
Step 2: Double-click Display adapters to expand it. Then right-click your graphics card driver and choose Update driver.
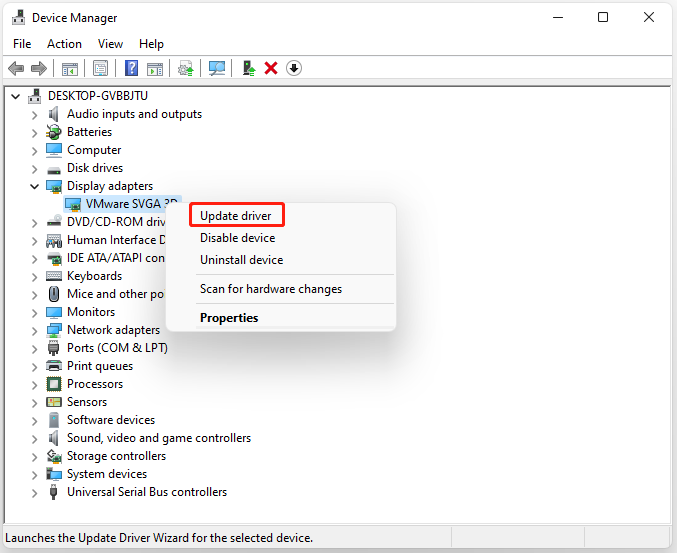
Step 3: You will be asked how you want to search for drivers in the pop-up window. You should choose Search automatically for updated driver software and then follow the instructions to complete the process.
Fix 2: Reinstall Graphics Driver
You can also try to reinstall the graphics driver to get rid of the “display resolution greyed out” issue. Here are the steps.
Step 1: Open Device Manager again and go to Display adapters.
Step 2: Right-click your display adapter driver, and select Uninstall.
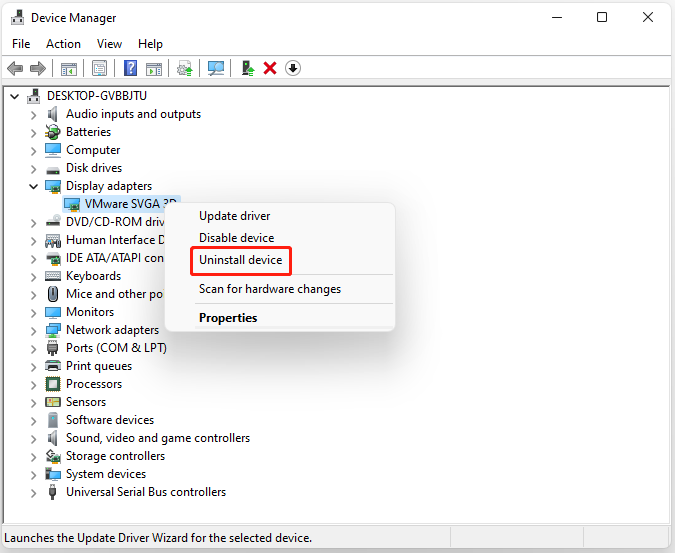
Step 3: Wait for the process to complete.
Step 4: Click the Action tab, and select Scan for hardware changes.
Step 5: Then you can download the latest drivers directly from your manufacturer’s website.
Fix 3: Uninstall the Most Recent Windows Update
Uninstalling the most recent Windows update is also helpful to remove the “display resolution greyed out” error on Windows 11.
Step 1: Press the Windows + I keys to open the Settings application.
Step 2: Go to Windows Update > Update history.
Step 3: Under the Related settings part, click the Uninstall updates option.
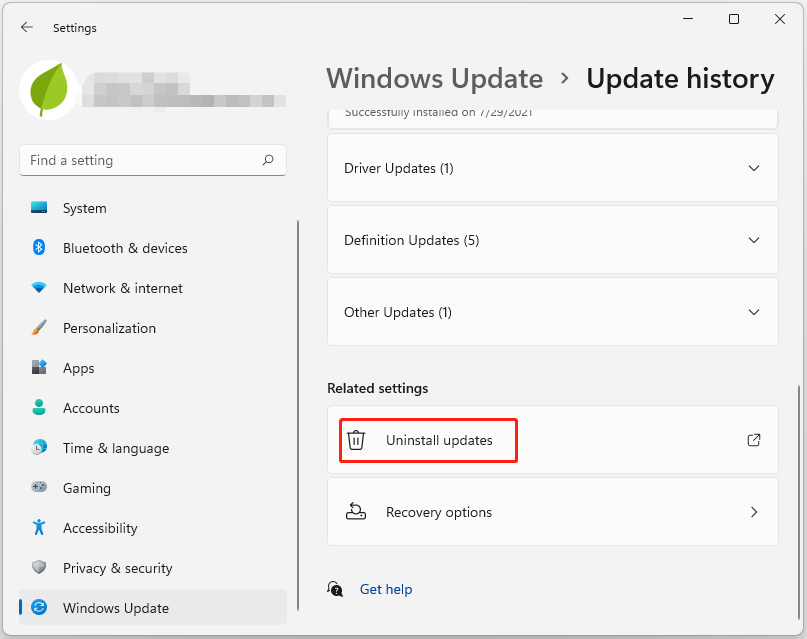
Step 4: Then, you will bring to uninstall the updates. Locate the patch you have recently installed and click Uninstall.
Fix 4: Run SFC and DISM
Now, you can try to run SFC and DISM to fix the “display resolution greyed out” issue. Here is how to do that:
Step 1: Launch Command Prompt as an administrator.
Step 2: Type sfc /scannow and press Enter after the message appears. This process might take some time. The message “Verification 100% complete” will be shown after it’s done.
Step 3: Type dism.exe /Online /Cleanup-image /Restorehealth and press Enter. Then there will be a message: “The operation completed successfully”.
Step 4: At last, type Exit to close the Command Prompt window.
Fix 5: Reset Your PC
If all of the methods are not working, resetting your PC will solve all the problems you are facing. Thus, if you want to reset Windows 11, you can refer to this post – How to Reset Windows 11? [Step-by-Step Guide].
As is well known, factory resetting a computer will delete information on Windows 11 or delete everything on the system partition of Windows. Thus, you need to back up all important files to an external hard drive to keep data safe before factory resetting Windows 11.
To back up files, the professional backup software – MiniTool ShadowMaker is strongly recommended.
MiniTool ShadowMaker TrialClick to Download100%Clean & Safe
Final Words
To sum up, this post has shown 5 ways to fix the “display resolution greyed out” error. If you come across the same error, try these solutions. I hope that this post will be useful to you.
About The Author
Position: Columnist
Having been an editor at MiniTool since graduating college as an English major, Daisy specializes in writing about data backups, disk cloning, and file syncing as well as general computer knowledge and issues. In her free time, Daisy enjoys running and going with friends to the amusement park.
When you want to change the screen resolution for your primary or secondary monitor or TV on Windows 11, if the screen resolution drop-down menu is greyed out and cannot be clicked, this guide will show you why this problem occurs and how to fix it.
Also see: Windows 10/11 Screen Resolution Stuck at 1024×768 Only
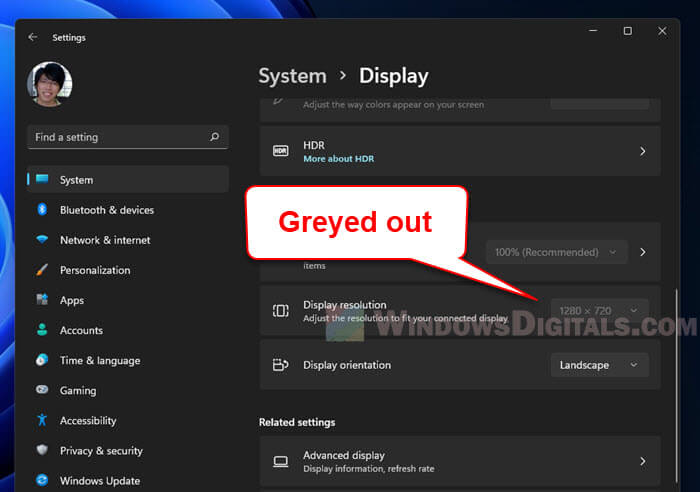
Display resolution greyed out in Windows 11
In most cases, when the screen resolution settings is greyed out and cannot be changed, it is usually because Windows couldn’t recognize your display adapter (your graphics card). When that happens, Windows will automatically assigns a default “Microsoft Basic Display Adapter” as your video driver.
When that happens, many settings, including the screen resolution, will be restricted, since Windows has no idea what display resolutions your graphics adapter can support.
Manually install the graphics driver
If the monitor whose screen resolution you want to change is connected to an integrated graphics such as Intel HD graphics or other OEM (Original Equipment Manufacturer) graphics card, though rare, there is a chance Windows 11 may fail to recognize the card and restrict you from changing the screen resolution.
In that case, you can try to manually update the graphics driver for your OEM graphics card. To do so, follow the steps below.
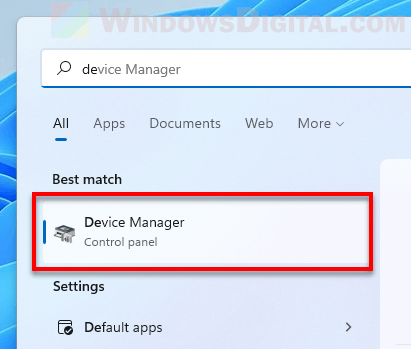
- Search for and open “Device Manager” via Start.

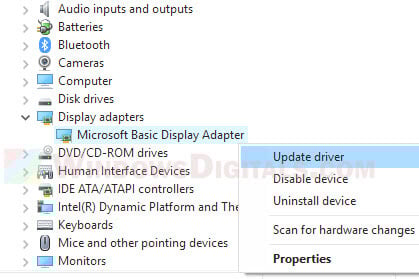
- In Device Manager, click the Display adapters category to expand it.
- If you see any display adapter listed as “Microsoft Basic Display Adapter” or an unknown device with an exclamation point, this is what is causing the screen resolution setting to gray out in Windows 11. To solve the issue, right-click the problem display adapter and select “Update driver“.

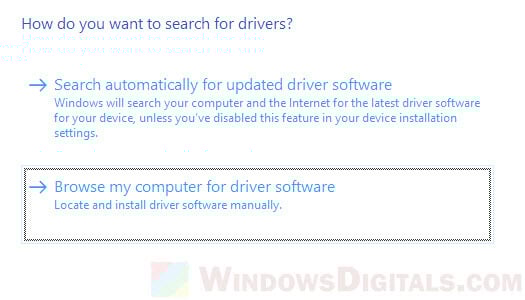
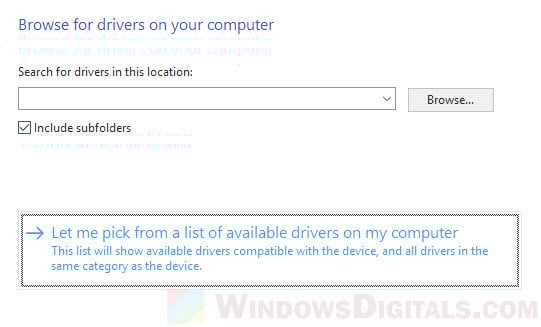
- On the next screen, when you are asked how you want to search for the driver, you should first try selecting the first option to have Windows search automatically for updated driver software. If that doesn’t work, repeat the same steps and select “Browse my computer for driver software” and proceed to the next step.

- Next, select “Let me pick from a list of available drivers on my computer“.

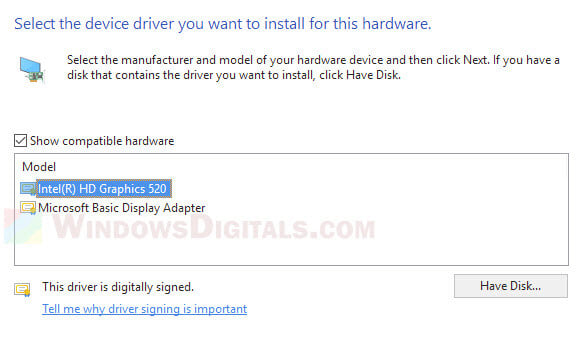
- Select the “Show compatible hardware“. You should then see your OEM graphics driver. Select it and click Next to install the driver.

- If the driver can be successfully installed, the wizard will show you “Windows has successfully updated your graphics driver”.
- Restart your computer and retry changing the screen resolution again.

Update your dedicated graphics card’s driver
If the monitor is connected to a dedicated graphics card such as Nvidia or AMD video card, and if Windows couldn’t recognize the display adapter, it will cause the screen resolution to gray out in Windows 11.
This usually happens when you have just freshly installed Windows or done a complete reset of your PC and the latest display drivers may not be installed yet. If that’s the case, the first thing you should try is to simply run Window Update and let Windows automatically search for and install the latest driver for your display adapter.
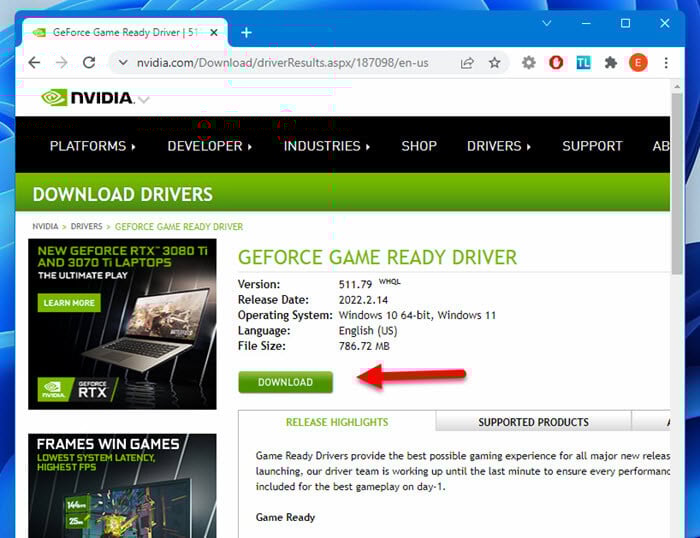
Alternatively, you can manually download the latest driver from the manufacturer website (amd.com or nvidia.com) and install it.
Change screen resolution via your GC control panel
If the display resolution setting is still greyed out even after installing the latest driver for your display adapter, try changing the display resolution via your graphics card control panel. When you install a display driver, it will usually come with a control panel software that lets you tweak the settings of your graphics adapter.
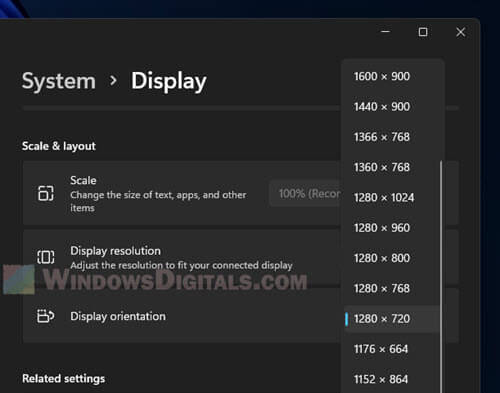
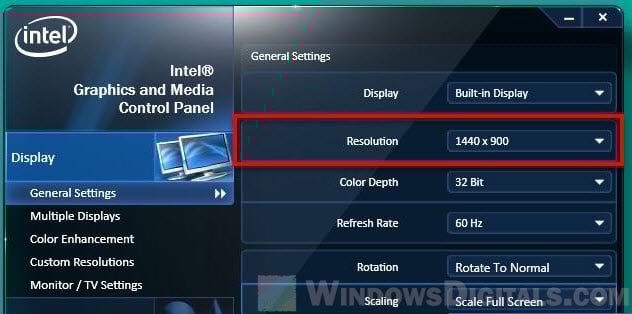
For example, if you are using integrated graphics adapter such as Intel HD Graphics, try to search for “Intel graphics and media control panel” via the Start menu. Open it and navigate to Display > General Settings > Resolution to change the screen resolution without having to rely on Windows 11 settings.
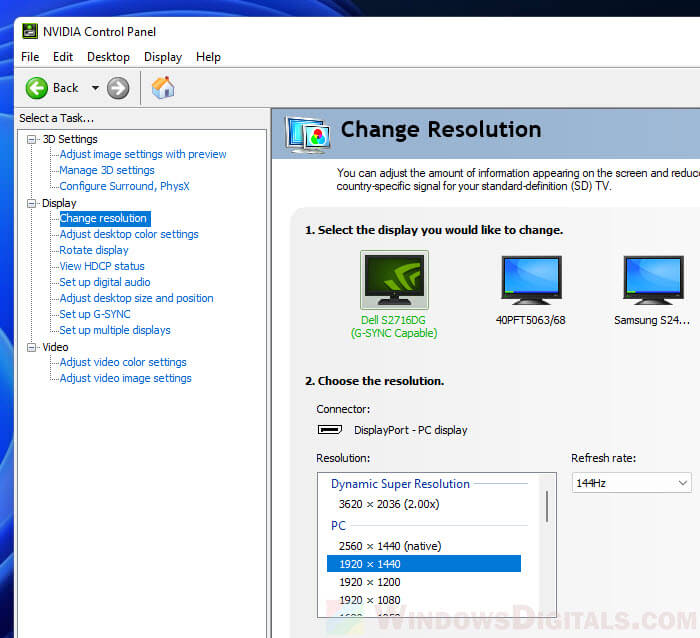
If you are using dedicated graphics card such as Nvidia video card, open Nvidia Control Panel and navigate to Display > Change resolution to change the display resolution.
Other reasons that could cause the display resolution to grey out in Windows 11
If updating the display drivers and trying to change the screen resolution through a different control panel does not fix the problem, it may be caused by something else that may be more serious. Listed below are a few ideas that may help you troubleshoot the problem.
- Your graphics adapter may be faulty or starting to fail. Consult a technician and have your computer checked to see if it is a hardware problem.
- A recent Windows update may have caused the driver to fail. If this is the case, try to roll back the update or perform a system restore to a previous date.
- Try running a series of repair commands on startup to see if it’s a system error. Read more: How to startup repair Windows 11/10 using command prompt.
- If there is no way to fix this problem, as a last resort you can try to reset your PC to factory defaults.
Why is the display resolution grayed out in Windows 11?
The screen resolution setting will be greyed out when Windows doesn’t know what resolution your display adapter and monitor can support due to drivers not being installed or recognized. You need to make sure you have the latest drivers installed for your display adapter so that Windows knows what display adapter you are using and unlocks the screen resolution settings.