
Все способы:
- Способ 1: Перезапуск приложения
- Способ 2: Проверка целостности системных файлов
- Способ 3: Откат к предыдущему состоянию
- Способ 4: «Конфигурация системы»
- Вопросы и ответы: 2
Способ 1: Перезапуск приложения
Самая распространенная причина, почему не работают «Ножницы» в Windows 10, – сбой в работе этого приложения. Если оно не запускается, зависло или не реагирует на комбинации клавиш, которые делают снимок или открывают панель инструментов (например, сочетание «Win + Shift + S»), то в первую очередь попробуйте перезапустить процесс:
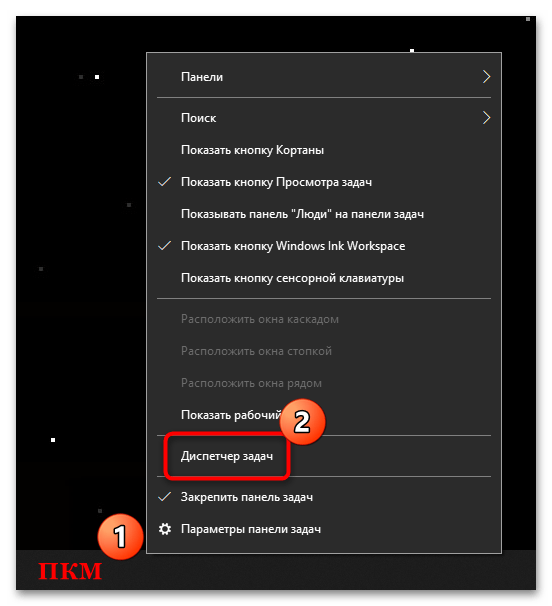
- Откройте «Диспетчер задач» Windows 10. Для этого достаточно щелкнуть правой кнопкой по нижней рабочей панели и выбрать соответствующий пункт.
- На вкладке «Процессы» отыщите строку «Snipping Tool» или «Ножницы», выделите средство и кликните по кнопке «Снять задачу». Если в разделе «Приложения» его нет, ищите в блоке «Фоновые процессы».
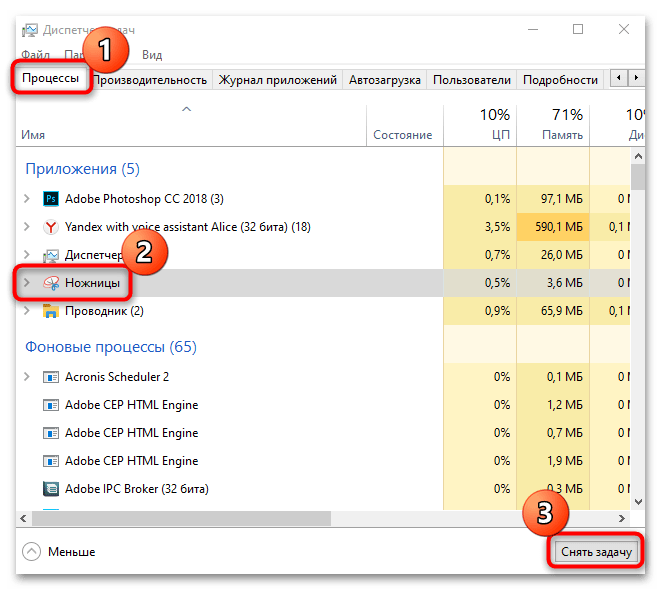
Все работающие приложения можно упорядочить по алфавиту, если кликнуть по заголовку столбца «Имя». Это упростит поиск процесса.
Если «Диспетчер задач» изначально запустился в свернутом виде, нажмите на кнопку «Подробнее», чтобы открыть полный перечень процессов.
После того как «Ножницы» были закрыты, попытайтесь открыть приложение снова.
Читайте также: Как сделать скриншот выделенной области в Windows 10
Способ 2: Проверка целостности системных файлов
Приложение «Ножницы» предустановлено в системе и является штатным. Иногда вирусы вредят важным файлам Windows 10, что вызывает серьезные ошибки и проблемы с запуском встроенных инструментов. Такое случается и из-за критических сбоев в ОС, проблем при обновлении или вмешательстве сторонних программ в реестр и систему.
В этом случае может понадобиться проверка системных файлов с помощью встроенных возможностей «десятки» — утилит SFC и DISM. Их надо применить по очереди — если первая не справилась с задачей, второй следует попытаться восстановить ее работоспособность. В нашем отдельном материале есть инструкция по использованию встроенных средств для проверки целостности данных и их восстановления. В некоторых случаях это помогает решить проблему с работой «Ножниц».
Подробнее: Использование и восстановление проверки целостности системных файлов в Windows 10
Способ 3: Откат к предыдущему состоянию
Если активна функция создания контрольных точек, восстановите предыдущее состояние приложения. Более подробная информация доступна в разделе со свойствами исполняемого файла инструмента:
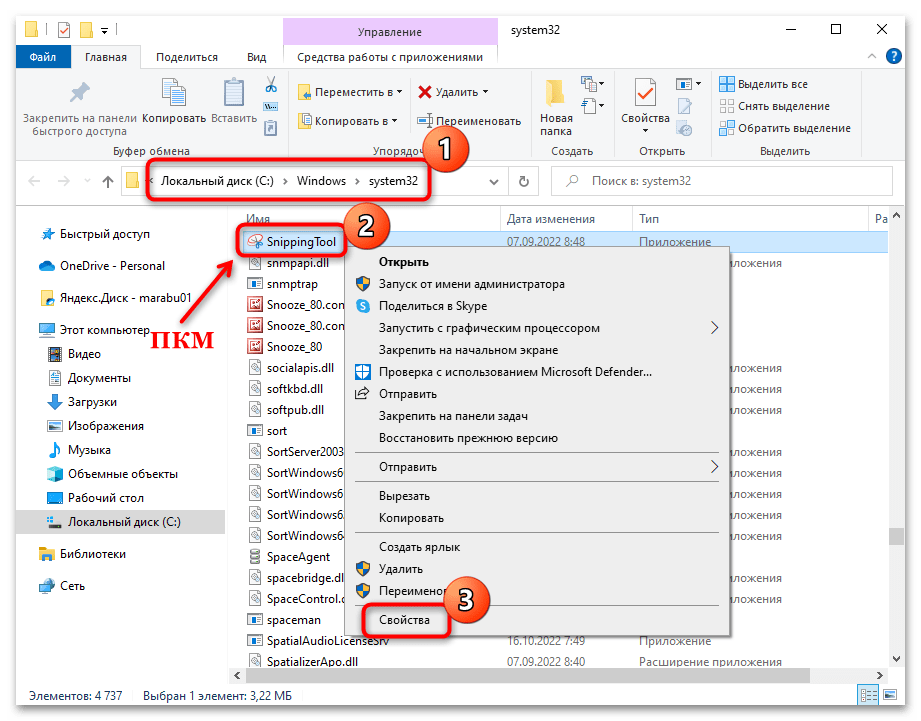
- Через «Проводник» перейдите по пути
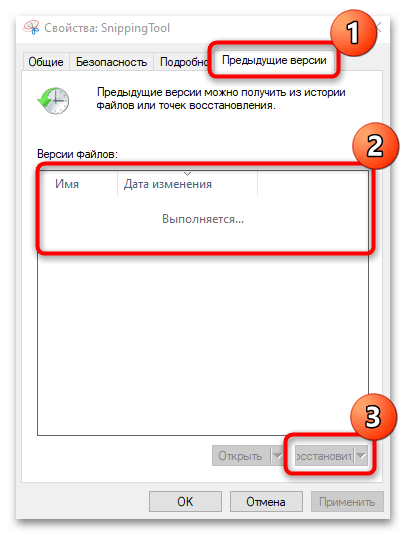
C:\Windows\system32. В списке отыщите приложение «SnippingTool» и кликните по нему правой кнопкой мыши. Из контекстного меню выберите «Свойства». - Перейдите на вкладку «Предыдущие версии». Если они есть, то данные о них отобразятся в поле «Версии файлов». Выделите нужную и кликните по кнопке «Восстановить».
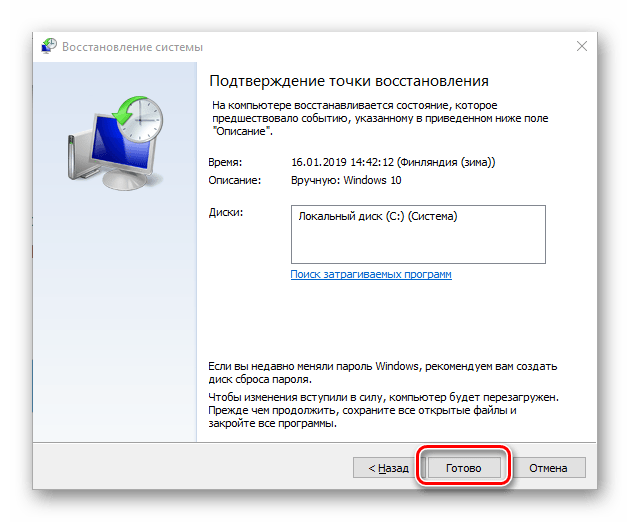
Также можно попытаться восстановить общее состояние операционной системы. Нередко это помогает устранить недавно возникшие проблемы со встроенными или сторонними приложениями. Но следует учитывать, что в этом случае все настройки и программы, которые были установлены после создания контрольной точки, будут сброшены и безвозвратно удалены соответственно.
Подробнее: Откат к точке восстановления в Windows 10
Способ 4: «Конфигурация системы»
Когда ни один способ не помог, следует поискать программное обеспечение, которое может конфликтовать с приложением «Ножницы»:
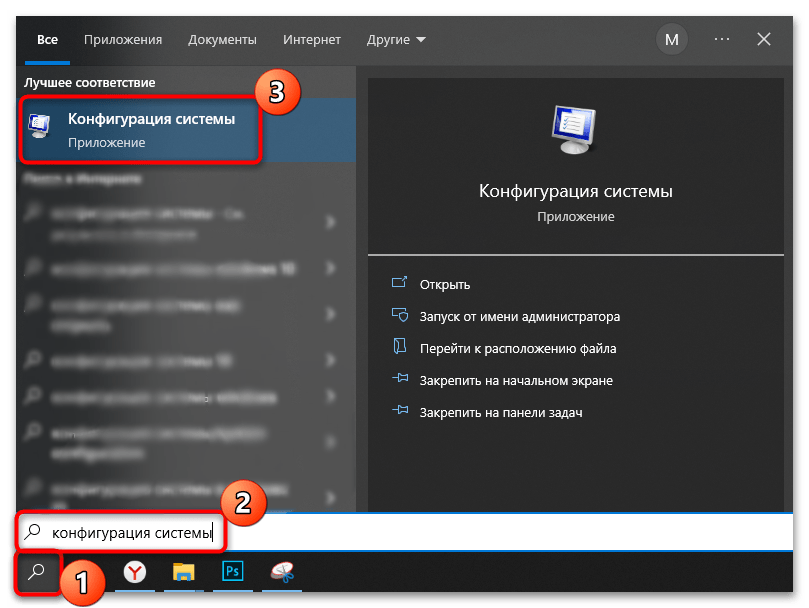
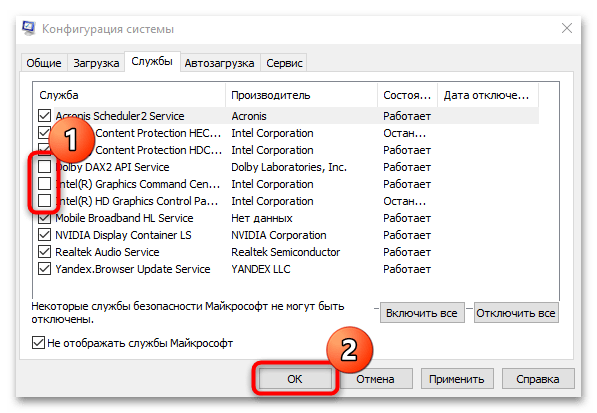
- Через поиск «Пуска» отыщите штатное средство «Конфигурация системы».
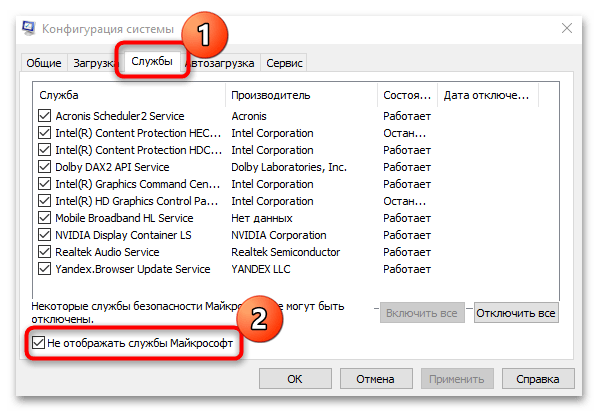
- Перейдите на вкладку «Службы», поставьте галочку у опции внизу «Не отображать службы Майкрософт» для удобства.
- Внимательно посмотрите на список оставшихся служб. Если есть те, которые вы подозреваете в сбое «Ножниц», то снимите у них отметку и нажмите на кнопку «ОК», чтобы применить настройки.
После этого попробуйте вновь запустить приложение для создания снимков экрана. Если проблема не ушла, то пробуйте отключать другие службы.
Читайте также: Способы запуска оснастки «Конфигурация системы» (msconfig) в Windows 10
Наша группа в TelegramПолезные советы и помощь
Snipping Tool is a handy screenshot-taking & editing tool for many Windows users. As one of the native Windows apps, it’s lightweight and useful in producing screenshots, but sometimes it also fails to work properly.
Users may encounter issues such as a pop-out error message, blank or black screen, images failing to be saved or the app not working after the system is upgraded. If you’re stuck in one of these Snipping Tool problems, you’ve found the right place! In this article, we will guide you through several methods that may help you out. Now, let’s move on to show you how:
Try these methods:
You might not need to try them all, just walk your way down the list until you find the one that fixes the snipping tool not working issue.
- Relaunch Snipping Tool in Task Manager
- Allow the Snipping Tool to run in the background
- Update your graphics driver
- Update your Operating System
- Repair or reset apps in Apps & features
- Run DISM tool
- Run System File Checker
Method 1: Relaunch Snipping Tool
Simply quitting the Snipping Tool and restarting it may help with the problem. You can use the built-in program Task Manager that allows you to close any non-responding or freezing application to end the Snipping Tool completely, and then have a relaunch to see if your problem can be solved.
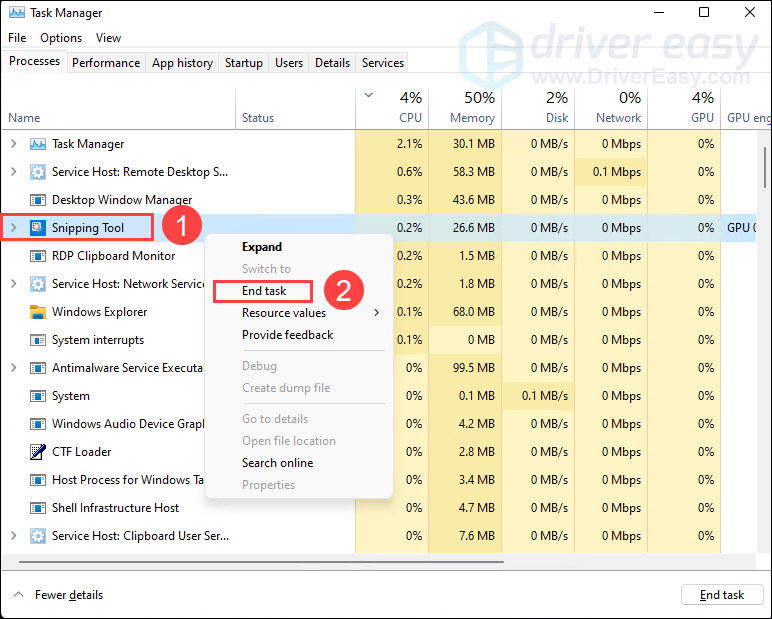
- Press Ctrl + Shift + Esc keys to open the Task Manager.
- Under the Processes tab, right-click the Snipping Tool listed on the left and select End task from the pop-up menu.

- Restart your Snipping Tool and check if it can function properly.
If this fix doesn’t work, try the next below.
Method 2: Allow the Snipping Tool to run in the background
For most of the time, Snipping Tool is an app that “stays behind the screen” and waits for being woken. If Snipping Tool lacks permission from your PC to run in the background, it won’t be able to work at any time when you are not active in the app’s window.
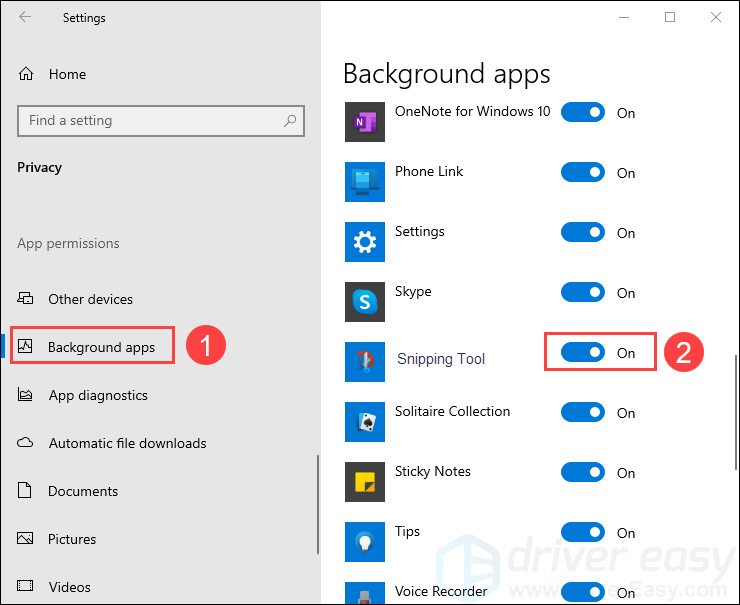
On Windows 10
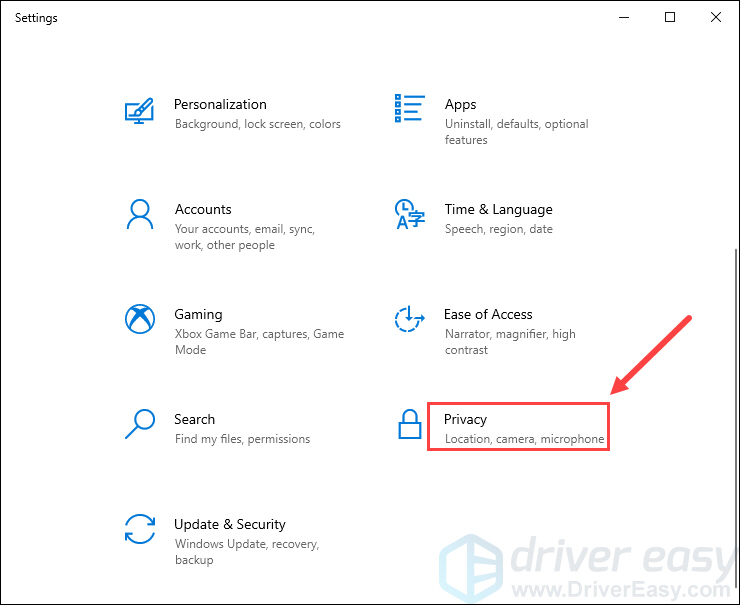
- Right-click the Windows icon on the taskbar to open the quick access menu and then select Settings.
- In Settings, click Privacy.

- On the left panel, scroll down to the Background apps, check if the Snipping Tool is turned on. If not, toggle the switch to On
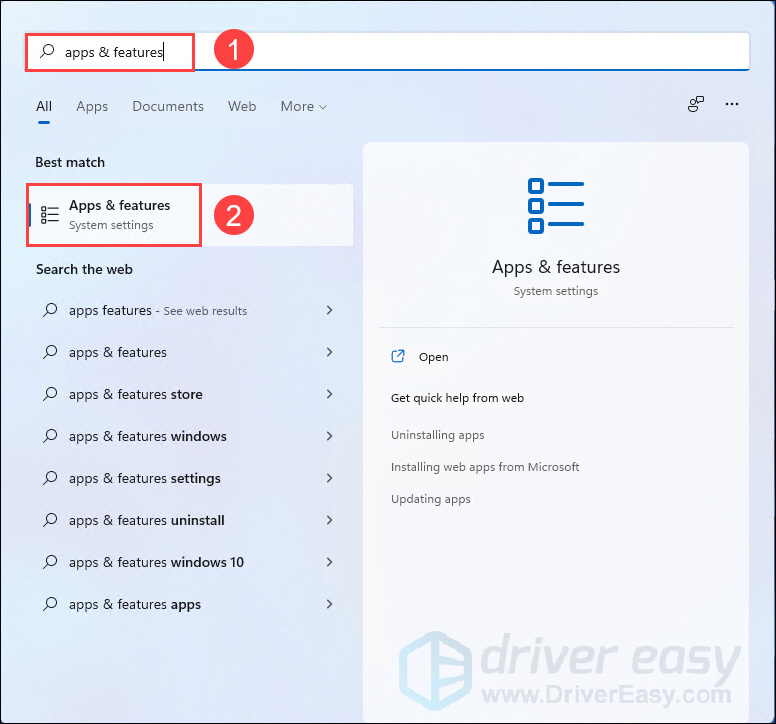
On Windows 11
- Press the Windows key to open the Start menu, type apps & features in the search box and select it from the result.

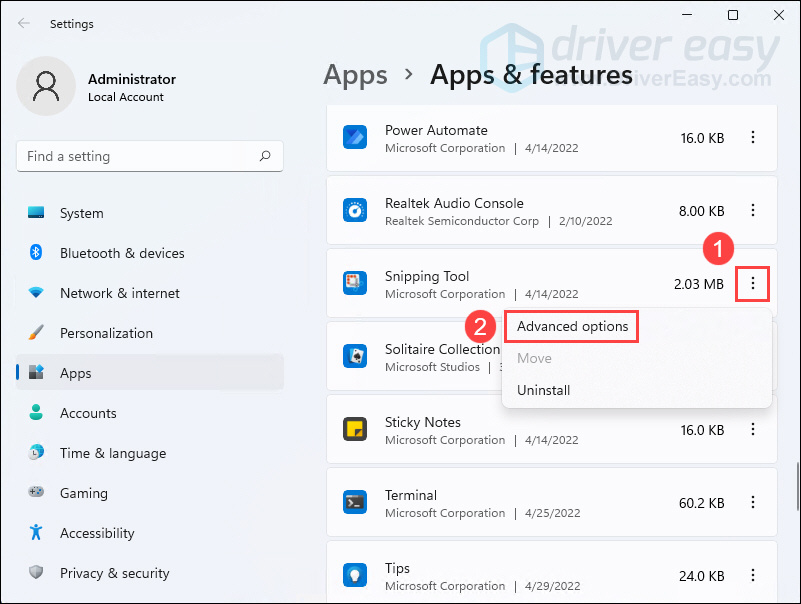
- Scroll down to the Snipping Tool in the right list and click the 3-dots icon next to it, then select Advanced options.

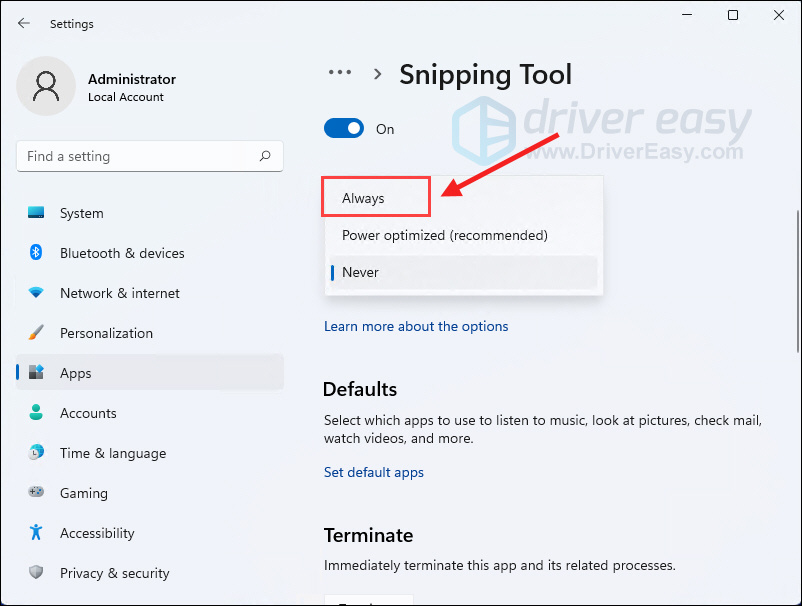
- In the Background apps permissions section, click on the box under Let this app run in the background.

- Select Always from the drop-down list.


If this fix doesn’t work, try the next below.
Method 3: Update your graphics driver
If you have an outdated graphics driver, your graphics would not be able to process images appropriately in your computer and as a result, the Snipping Tool cannot be used properly. So you should update your graphics driver to see if it fixes your problem.
You can update your graphics driver manually by visiting the manufacturer’s website (NVIDIA/AMD), finding the latest correct installer and installing step by step. But if you don’t have the time, patience or skills to update the driver manually, you can do it automatically with Driver Easy.
Driver Easy will automatically recognize your system and find the correct drivers for it. You don’t need to know exactly what system your computer is running, you don’t need to be troubled by the wrong driver you would be downloading, and you don’t need to worry about making a mistake when installing.
- Download and install Driver Easy.
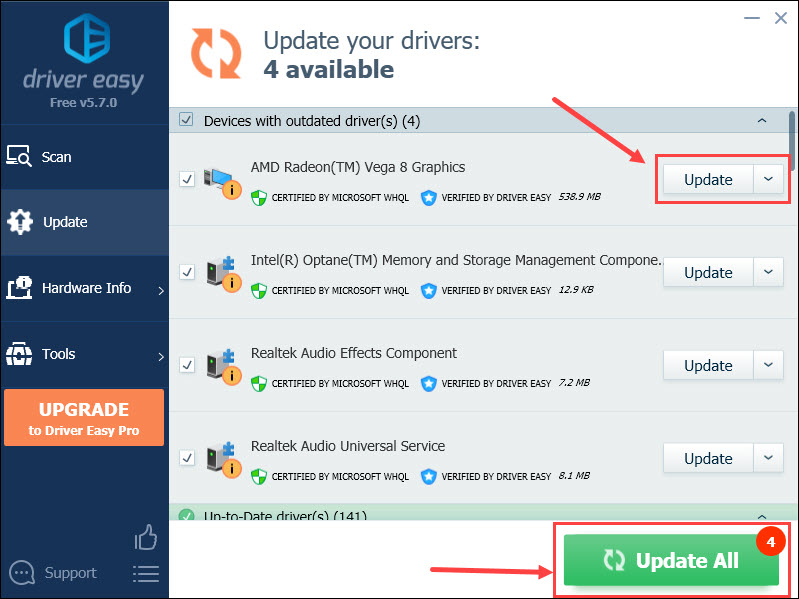
- Run Driver Easy and click the Scan Now button. Driver Easy will then scan your computer and detect any problem drivers.

- Click Update All to automatically download and install the correct version of all the drivers that are missing or out of date on your system (this requires the Pro version with full support and a 30-day money-back guarantee – you’ll be prompted to upgrade when you click Update All).
You can do it for free if you like, but it’s partly manual.

Method 4: Update your Operating System
Apart from updating the graphics driver, updating your Windows should also be a trick that is worth trying since Microsoft keeps releasing OS updates with bug fixes for its apps including Snipping Tool. Here’s how you can check for updates:
On Windows 10
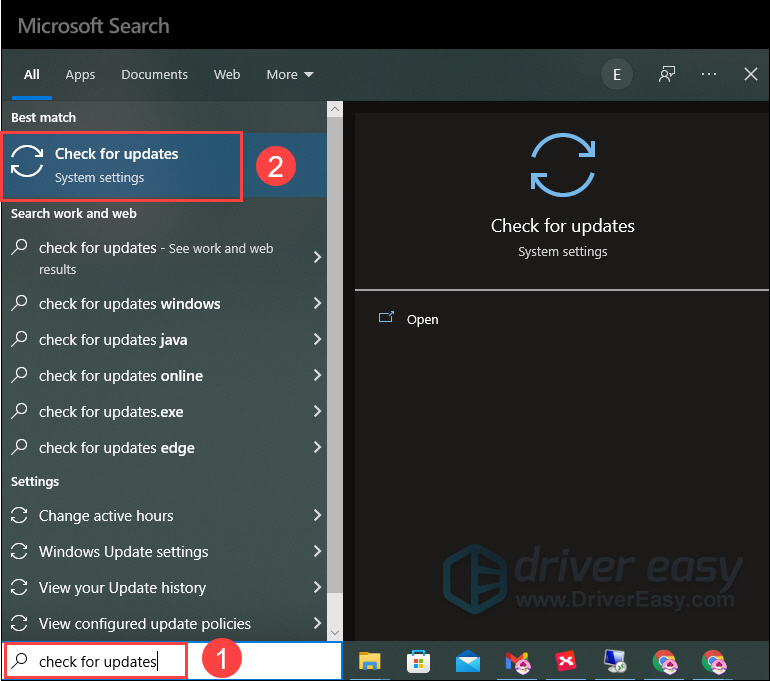
- In the search box, type check for updates and select it from the result that appears.

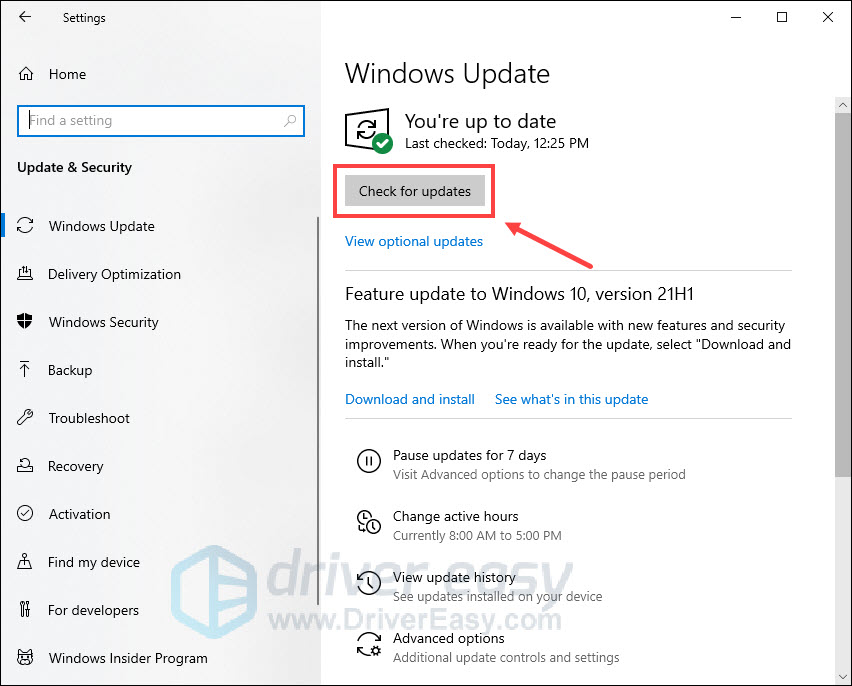
- Click Check for updates on the right section and wait for the checking.

- The checking result could be You’re up to date, which means you don’t need to do anything about it next.
If not, there will be a Download and install button. Click on it to have a Windows update.
On Windows 11
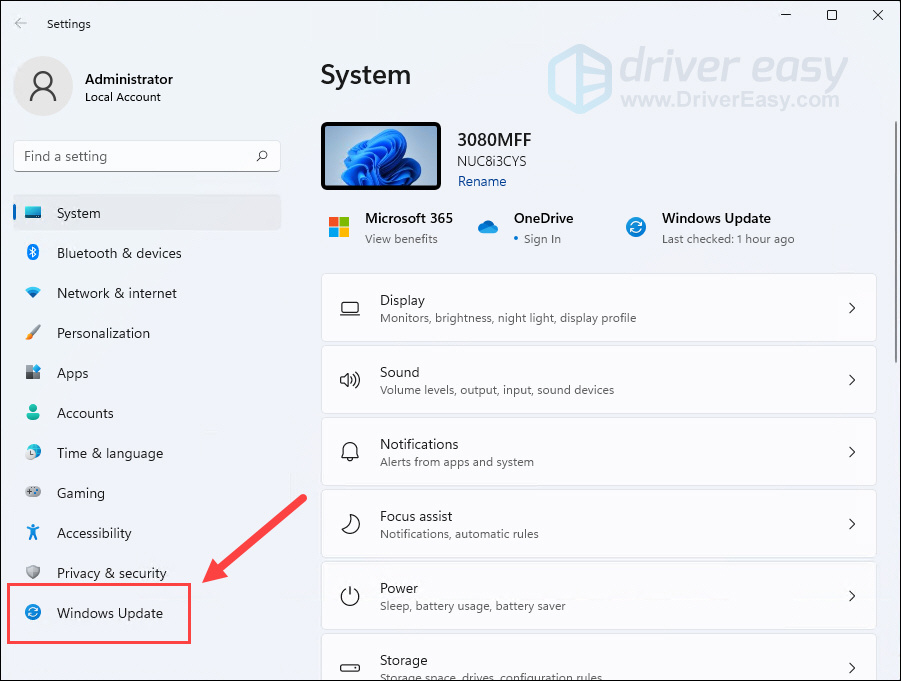
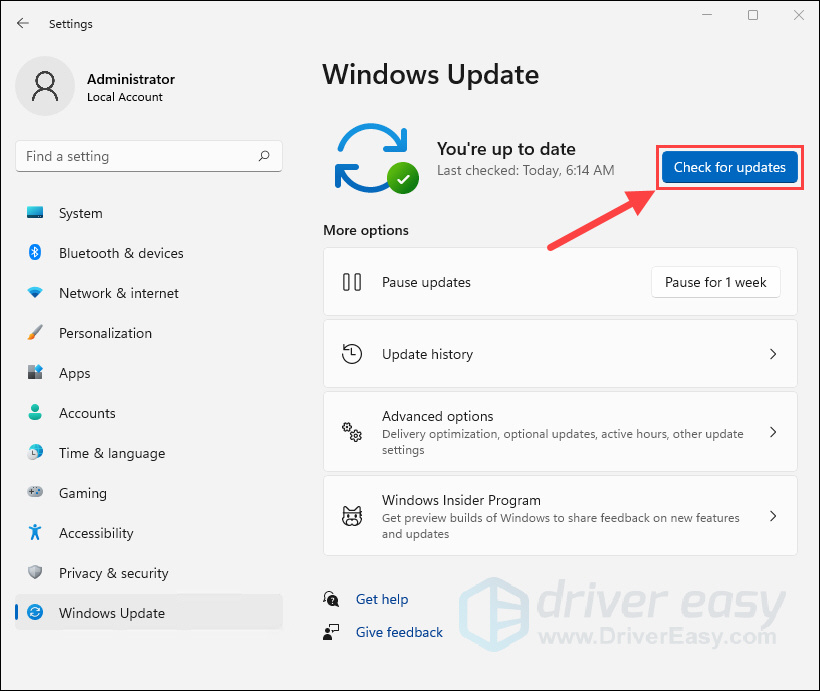
- Press the Windows + I keys to open Settings.
- Click Windows Update on the left section.

- Click Check for updates. Then Windows will start downloading the updates if they are available.

- Click Restart now when the process is finished.
Method 5: Repair or reset the Snipping Tool
When an app is not running correctly or the app’s certain features fail to work properly, you can give it a try to repair and reset it with the built-in process Apps & features. Below is how to do it when your Snipping Tool is somehow not working.
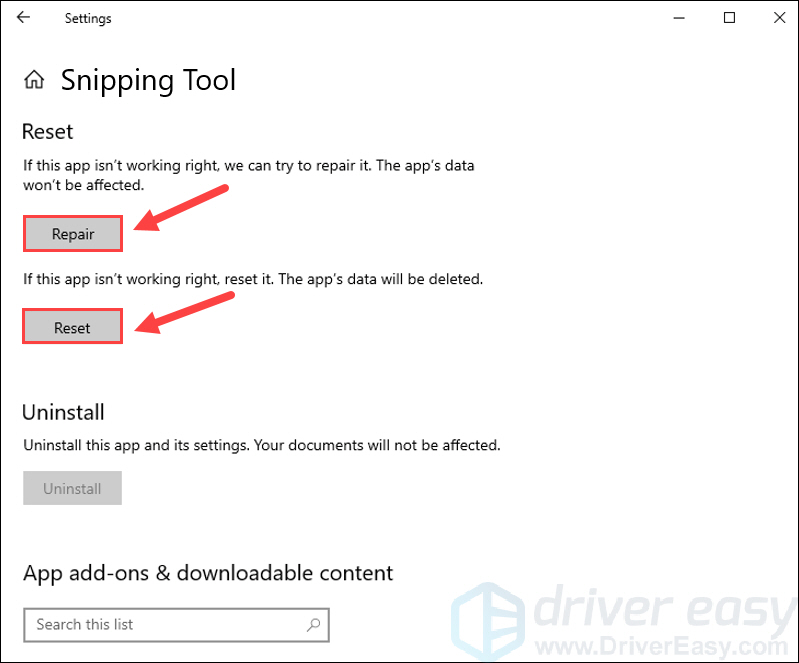
On Windows 10
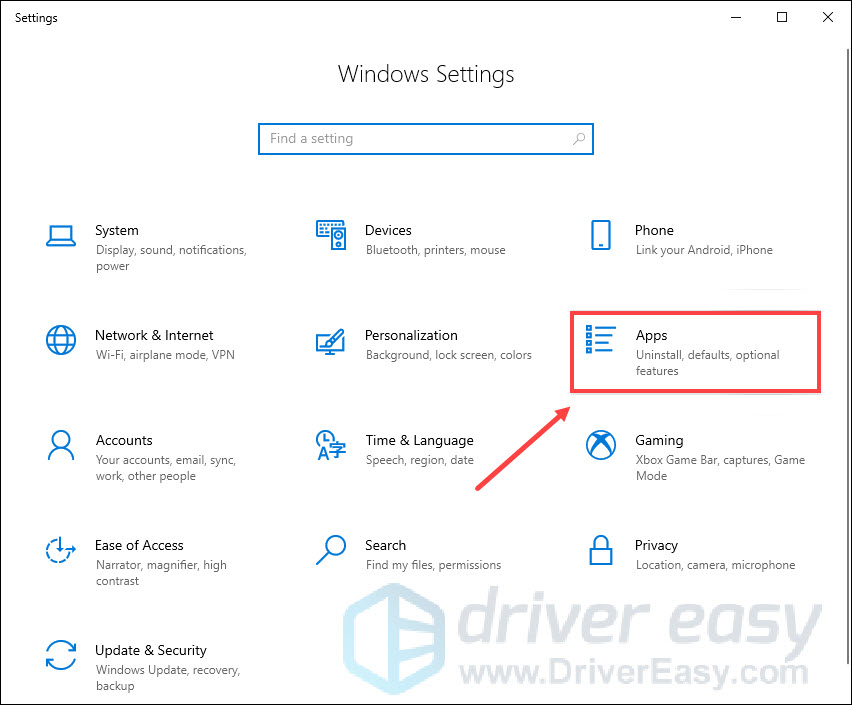
- Press Windows + I keys to open Windows Settings and then click Apps.

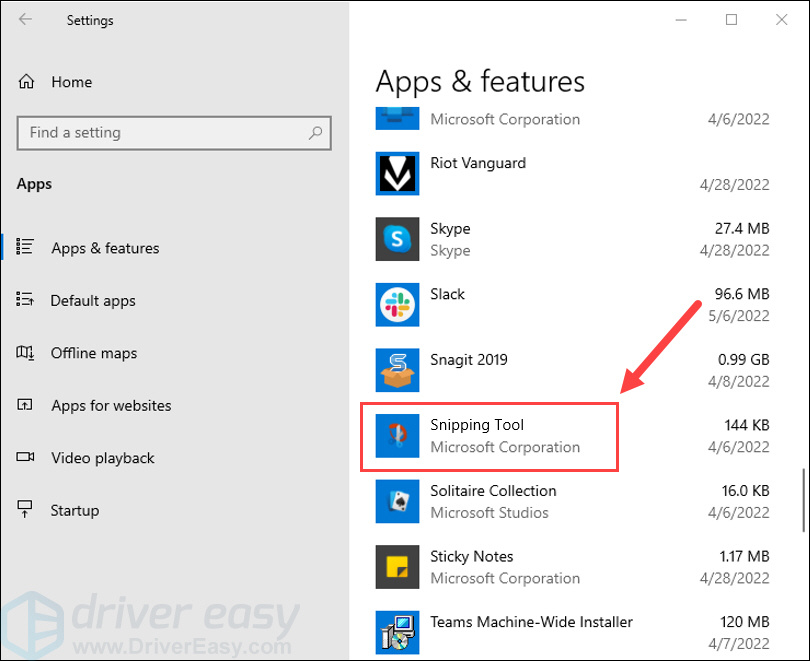
- Scroll down to the Snipping Tool in the right list and click to expand it.

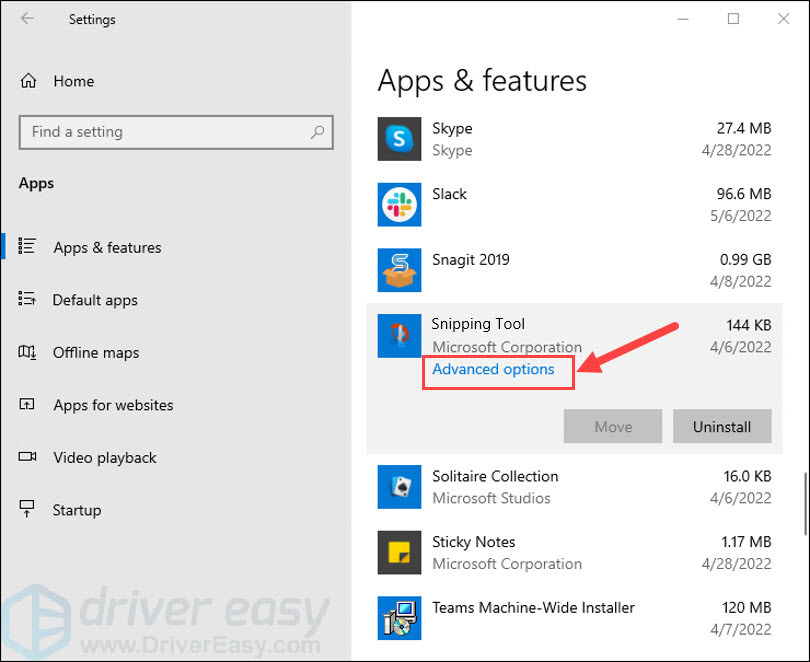
- Click Advanced options.

- If Repair is available, click on it.
If it isn’t available or doesn’t fix the problem, select Reset.
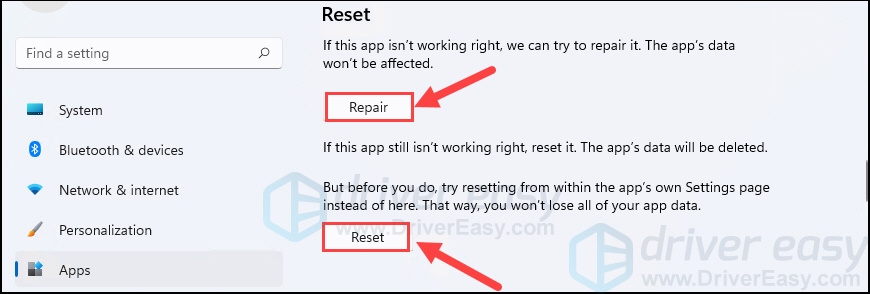
On Windows 11
- Press the Windows key to open the Start menu, type apps & features in the search box and select it from the result.
- Scroll down to the Snipping Tool in the right list and click the 3-dots icon next to it, then select Advanced options.
- Click Repair if it’s available.
If it isn’t available or doesn’t fix the problem, then select Reset.
Move on to the next fix below if this method doesn’t work for you.
Method 6: Run the DISM tool
The Deployment Image Servicing and Management (DISM) is a command-line tool for Windows image service. One of its many uses is to repair system images when image-related problems occur. So if your Snipping Tool is not working correctly, you can run the DISM command with the RestoreHealth option to see whether problems come from the system image.
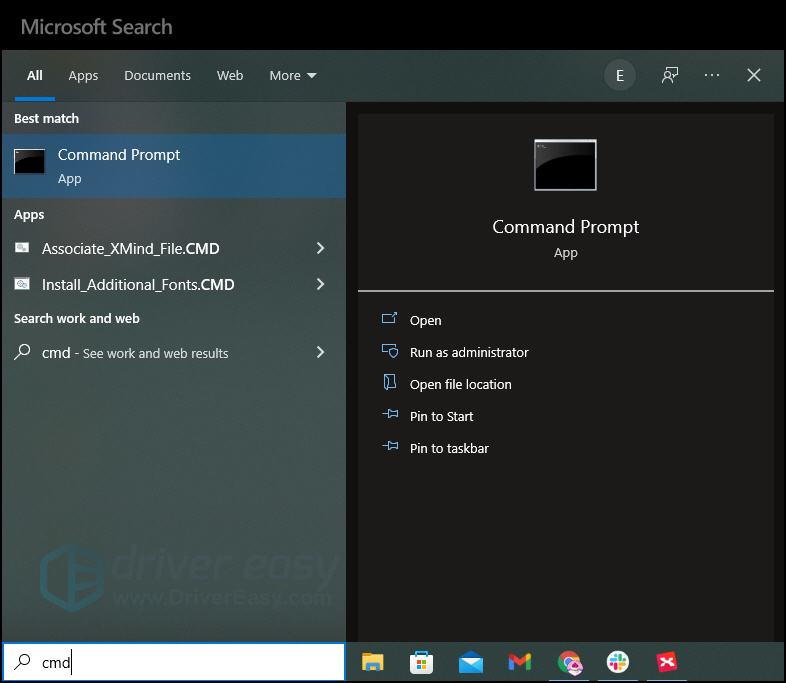
- Type cmd in the search box and select Run as administrator to open the Command Prompt.

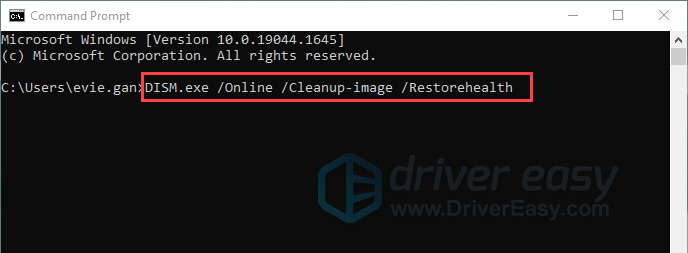
- Copy the following command to the Command Prompt and press Enter.
DISM /Online /Cleanup-Image /RestoreHealth
- Wait for the restore operation to complete.
- Restart your PC to see if the Snipping Tool is working now.
If this fix doesn’t work, try the last method below.
Method 7: Run System File Checker
When corrupted or damaged system files exist in your system, they could also cause the Snipping Tool to go wrong. In this case, maybe you should run a system scan to detect broken system files in your PC.
To do this, follow these steps:
- Press the Windows logo key and R on your keyboard to invoke the Run box.
- On your keyboard, type cmd and press Ctrl, Shift and Enter at the same time to run Command Prompt as administrator.
- You’ll be prompted for permission. Click Yes to open Command Prompt.
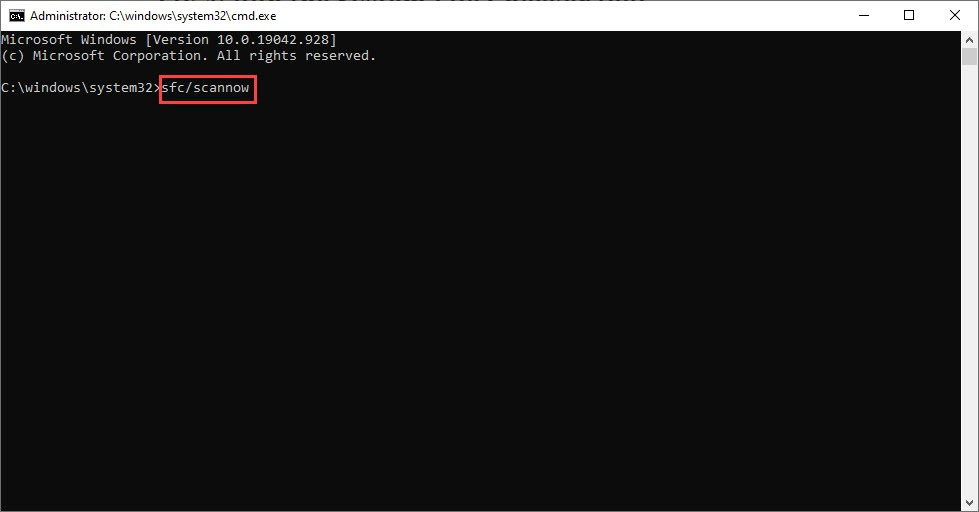
- Type sfc/scannow, then press Enter.

- The System Files Checker tool will automatically scan for corrupt or missing files and fix them, if there’s any.

Restart your PC to see if the issue persists.
That’s it – hopefully, this guide could help you solve the Snipping Tool not working problem. If you have any ideas or other fixes for this issue, please feel free to leave comments below. We would appreciate your thoughts!
10
10 people found this helpful
Что делать, если не работает сочетание Win + Shift + S в Windows
Восемь возможных проблем и способы их решения.
Данная комбинация вызывает инструмент для захвата экрана «Ножницы» или «Фрагмент и набросок» либо «Набросок на фрагменте» в более ранних версиях Windows. Опция гораздо удобнее стандартных скриншотов по PrintScreen, поскольку умеет снимать не только весь экран, но и отдельные области и окна, а также позволяет записывать видео.
Иногда сочетание Win + Shift + S не срабатывает, и на то есть несколько причин. Разбираемся, как это исправить.
Перезагрузите компьютер

Проблема может быть вызвана пустяковой ошибкой или программным сбоем. Чтобы исключить эту причину, просто перезагрузите компьютер. Кликните правой кнопкой мыши по кнопке «Пуск» и выберите «Завершение работы или выход из системы» → «Перезагрузка». После этого проверьте, будут ли работать «Ножницы».
Установите обновления
Апдейты системы могут исправлять возможные ошибки, в том числе и с работой сочетания Win + Shift + S, которые периодически случаются.

Для этого откройте «Параметры», нажав Win + I на клавиатуре, переключитесь в раздел «Центр обновления Windows» и кликните «Проверить наличие обновлений». Если есть доступные, нажмите «Загрузить и установить» либо просто «Перезагрузить», если они были уже скачаны ранее автоматически.
На некоторых игровых клавиатурах, а также на всех ноутбуках есть функциональная клавиша Fn, которая позволяет использовать дополнительные комбинации. Если случайно нажать на неё в сочетании с кнопкой Win, то последняя отключится, чтобы не мешать, например, в играх.

Попробуйте вызвать сочетание Fn + Win для активации кнопки. Если на клавиатуре есть индикатор Win Lock (Win🔒), он должен погаснуть. Также можно просто использовать для вызова «Ножниц» комбинацию Fn + Win + Shift + S.
Включите уведомления

Возможно, сочетание Win + Shift + S всё-таки работает, но вы просто не получаете уведомления о том, что скриншот сделан. Для проверки нажмите Win + I для вызова настроек, а затем перейдите в раздел «Система» → «Уведомления», найдите «Ножницы» и убедитесь, что оповещения работают. Если тумблер уже активен, попробуйте отключить и включить его заново.
Исправьте ошибки приложения
Неполадки могут возникать в самом приложении «Ножницы», из‑за чего вызов сочетанием Win + Shift + S не работает корректно. Исправить это можно штатными средствами Windows.

Для этого перейдите в «Параметры», нажав сочетание Win + I, откройте раздел «Приложения» → «Установленные приложения». Найдите поиском «Ножницы», кликните по троеточию и выберите «Дополнительные параметры».

Поочерёдно нажмите «Завершить», «Исправить», «Сброс», дожидаясь окончания каждой операции.
Перезапустите службу

В некоторых случаях сброс стандартными средствами не срабатывает, и необходимо перезапустить зависший процесс через «Диспетчер задач» Windows. Нажмите Ctrl + Shift + Esc для вызова диспетчера, а затем найдите процесс ScreenClippingHost.exe или «Создание фрагмента экрана» и выберите в контекстном меню «Снять задачу».
Назначьте создание скриншотов на клавишу PrintScreen
Если по какой‑то причине сочетание Win + Shift + S всё равно не хочет работать, можно переназначить инструмент на клавишу PrintScreen. Тогда по нажатию на неё сразу же будет активироваться захват экрана в приложении «Ножницы».

Нажмите Win + I для вызова настроек, перейдите в раздел «Система» → «Специальные возможности» → «Клавиатура» и включите тумблер «Используйте клавишу Print Screen для открытия захвата экрана».
Переустановите «Ножницы»
Если исправить ошибки не получилось ни одним из описанных способов, попробуйте удалить и заново установить инструмент «Ножницы» («Фрагмент и набросок») с официального сайта Microsoft.

Для этого сначала нажмите Win + I, откройте «Приложения» → «Установленные приложения», найдите там с помощью поиска «Ножницы» («Фрагмент и набросок»). Кликните по троеточию и выберите «Удалить».

После чего перейдите по этой ссылке и нажмите «Установить».
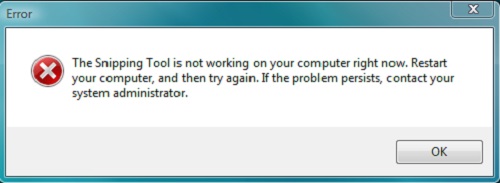
«When attempting to run the Snipping Tool in Windows 10, I got the following error:’The Snipping Tool is not working on your computer right now. Restart your computer, and then try again.'»
The Snipping Tool is a Windows built-in screenshot software, lightweight and useful. Recently, we have heard from those who found Snipping tool not working on Windows 7/8/10, etc. Some reported that the Snipping Tool just shows a black screen or blank screen, instead of the actual screenshot; some complained that when they click on «save as», nothing pops up; some got a message stating that «The Snipping Tool is not working on your computer right now.» No matter in which cases, one thing is for sure: rebooting didn’t solve the problem.
So, what happened to the Snipping Tool and how to fix The Snipping Tool not working issue?
[Jan. 14, 2022 Updated!] You may also face trouble after you updated your Windows to the latest Windows 11. As we test, the methods below also work for Windows 11, so you are free to have a try.
Why the Snipping Tool is Not Working
With Snipping Tool, you can snip any area/object on your screen by drawing a circle or a triangle around the object you want to capture. When it fails to work, it brings inconvenience. So, what’s the reason?
There are mostly three reasons:
- Your default save path has been changed so the Snipping Tool can’t save the screenshot properly.
- If you get a message stating that «Snipping tool is not working properly», there may be another software having conflicts with the Snipping Tool.
- The Snipping tool may not work properly when some related system files are damaged.
How to Fix «the Snipping Tool is not working» Issue
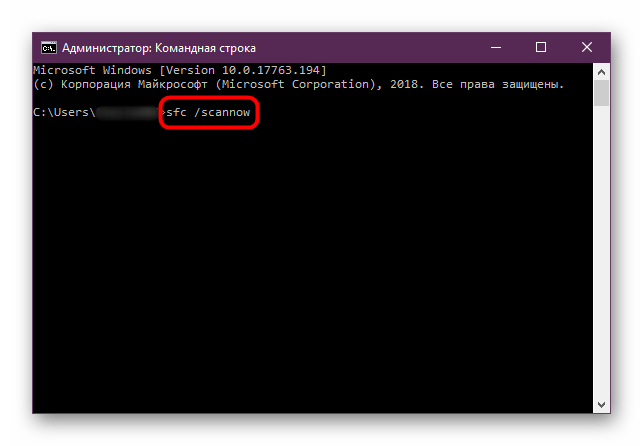
Run «sfc /scannow» Command
The first thing you can try is to fix Snipping Tool with «sfc /scannow» command. This way is to use System File Checker, a Windows built-in utility to detect whether there is a system error and fix it.
- Press Windows logo+»R» on the keyboard together, type «cmd», then tap «Enter»;
- Type «sfc /scannow» in the command line, press «Enter»;
- Type «snippingtool.exe» to check whether the tool is fixed, press «Enter». If the tool launched successfully, make a shortcut to verify it.

Warning:
- Some websites may advice you to change the data in the Registry Editor, but it has to be emphasized that it can be dangerous to change the data of Registry. If you are not familiar with it, think twice and ask an expert for help.
Relaunch the Snipping Tool
If the Snipping Tool doesn’t work properly, for example, Snipping Tool shortcut, eraser, or pen not working, you may quit the Snipping Tool and restart it.
- Press «Ctrl + Shift + Esc» on the keyboard together to show the Task Manager.
- Find and quit the SnippingTool.exe, then relaunch it for a try.
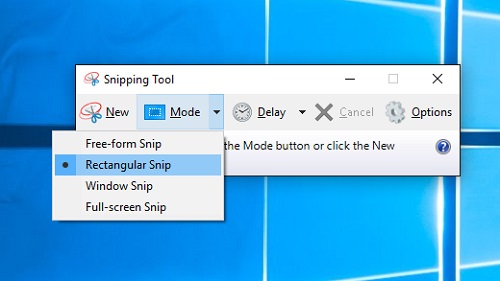
Use Shortcuts to Open the Snipping Tool
If your problem is that your Snipping Tool cannot open properly, or your shortcut do not work, you can try to set or reset a shortcut to launch the program.
- Search “Snipping Tool” at the search bar on the Start menu, and right-click it and choose “Open File Location”.
- As you see the program location, right-click again and select “Properties”.
- In “Properties > Shortcut > Shortcut Key”, you can set up the shortcuts to open the Snipping Tool. Press the keys you want to use as a shortcut, for example, Ctrl + Alt + A, and you will see the shortcut automatically set.
- Tap “OK” to remember the change. There may be a pop-up windows which asks your Administrative Permission, just Press “OK’ and “Continue” to finish the progress.
- Press the shortcut you set up just now to see if the Snipping Tool works.
Note:
- If your Windows 10 launches a relatively new update, you may find there’s an alternative tool named Snip & Sketch besides the Snipping Tool. To use this tool, you can press Windows + Shift + S at the same time. Also have a try and see if it works for you.
Find out the Conflicting Software
As mentioned above, there may be other software on your computer conflicting with Snipping Tool and makes it not work. To settle the problem, here’s the way to find the software out:
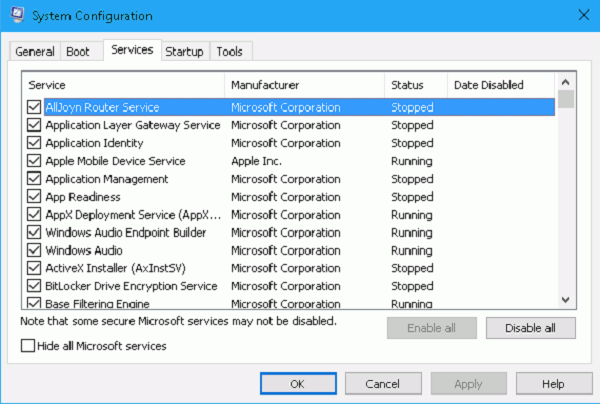
- Press Windows logo and «R» on the keyboard together, type «msconfig», then press «Enter»;
- In the System configuration window, click on «service», mark «Hide all Microsoft services» below the window, then stop the suspected services, especially relates to the newly-installed software.
Replace Windows Snipping Tool with Third-party Snapshot Program
If you have tried all the methods we mentioned, or you want to find a way that you have no need to cost much time on troubleshooting, a good way is to use an alternative program to replace the Snipping Tool. Besides, thought the Snipping Tool is lightweight and simple, sometimes the features may be too limited to meet your need, and a third-party screenshot tool can usually do more.
FonePaw Screen Recorder is a great alternative as it can be a more powerful snapshot tool for Windows however as easy to use as Snipping Tool. You can use hotkeys to capture your screen easily, annotate the picture as you like and export the screenshot files to multiple formats, including PNG, JPG, GIF, etc.
Free Download Buy with 20% off
Step 1. Open FonePaw Screen Recorder, and click the “Snapshot” button with a camera icon on the panel to use the feature.
Step 2. Drag your mouse to select the area to take a screenshot; otherwise, it will capture full screen.
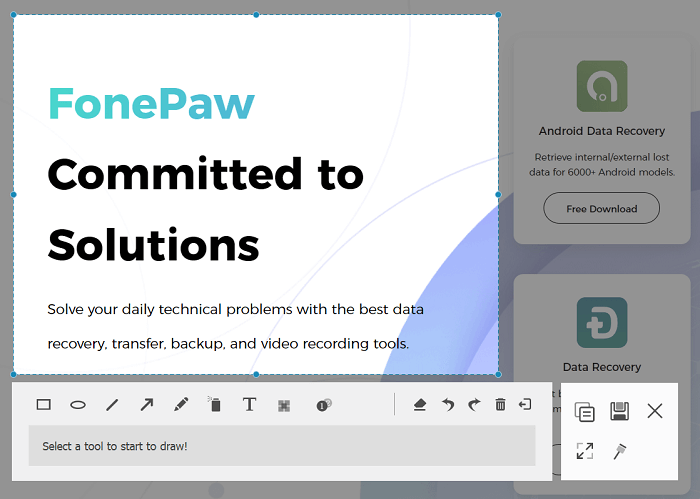
Step 3. In the snapshot window, you’ll find the annotation tools to add line, circle, texts, etc. to the screenshot. And you can choose to save the screenshot or pin the screenshot on computer.

You can easily find all the screenshot files by clicking the Recording History, button at the bottom-left corner. Then you can share the pictures to your friends or to social media like YouTube or Facebook.
You can also go to Preferences and set up hotkeys to take screenshots with FonePaw Screen Recorder.
FonePaw Screen Recorder is also a powerful screen recorder. It can easily record screen activities and webcam video with high quality. For more information, you can see: The Top Desktop Recorder.
Video Guide: How to Screen Record on Windows 10 with Audio
All the above is the four ways to fix «the Snipping Tool is not working» issue. Hope our methods can help you out of the problem.
Screen Recorder
Capture every loving moment of your screen on Windows and Mac!
Чтобы улучшить наш веб-сайт и сделать его удобнее для вас, мы используем рекомендательные технологии и файлы cookie. Продолжая просмотр сайта, я соглашаюсь с использованием файлов cookie владельцем сайта в соответствии с «Политикой в отношении файлов cookie», в том числе на передачу данных, указанных в Политике, третьим лицам (статистическим службам сети Интернет)
Подробнее
Инструмент Ножницы в Windows 10 зависает
Поддерживаемые продукты:
PC
- Если иногда инструмент Ножницы не работает, перезагрузите приложение и повторите попытку.
- При частых сбоях инструмента Ножницы переустановите приложение или используйте другой инструмент для создания скриншотов.
- Используйте горячие клавиши для создания скриншотов: нажмите клавишу Prtsc для создания скриншота всего экрана или нажмите сочетание клавиш Alt+Prtsc для создания скриншота текущего окна, затем вставьте скриншот в нужный документ.
- Сторонние приложения, например, QQ и WeChat, также предоставляют инструменты для создания скриншотов. Откройте окно QQ и нажмите на значок с изображением ножниц для создания скриншота, затем вставьте скриншот в нужный документ.
Спасибо за Ваш комментарий.