
Все способы:
- Способ 1: Изменение конфигурации программы
- Способ 2: Включение улучшения звука
- Способ 3: Отключение аппаратного ускорения звука
- Способ 4: Добавление в список исключений антивируса/брандмауэра
- Способ 5: Обновление звуковых драйверов
- Способ 6: Переустановка аудиоустройств
- Способ 7: Сброс настроек Equalizer APO
- Способ 8: Редактирование системного реестра
- Способ 9: Переустановка программы
- Вопросы и ответы: 0
Способ 1: Изменение конфигурации программы
Наиболее распространенная проблема, из-за которой не работает Equalizer APO на компьютере с Windows 10, заключается в том, что настройки системы не совместимы с конфигурацией программы. Кроме того, во многих случаях исправить неполадку удается за счет выбора типа SFX/EFX, предусмотренного в самом софте. Этот параметр обработки звука используется для подачи сигнала аудиооборудованию, и, если он выбран неверно, устройство не определит настройки изменения звучания.
Изменить конфигурацию можно с помощью специальной утилиты (на этапе установки вы наверняка сталкивались с данным окном), которая запускается отдельно:
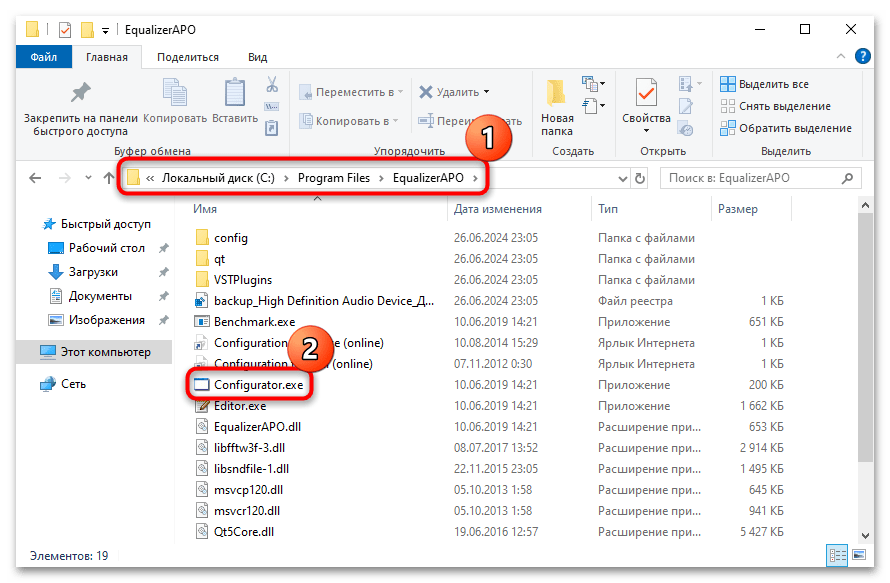
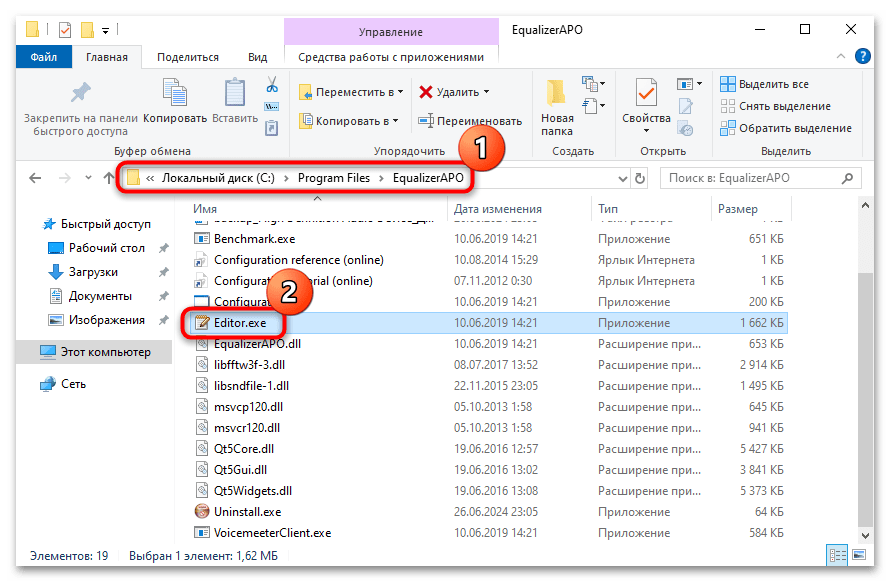
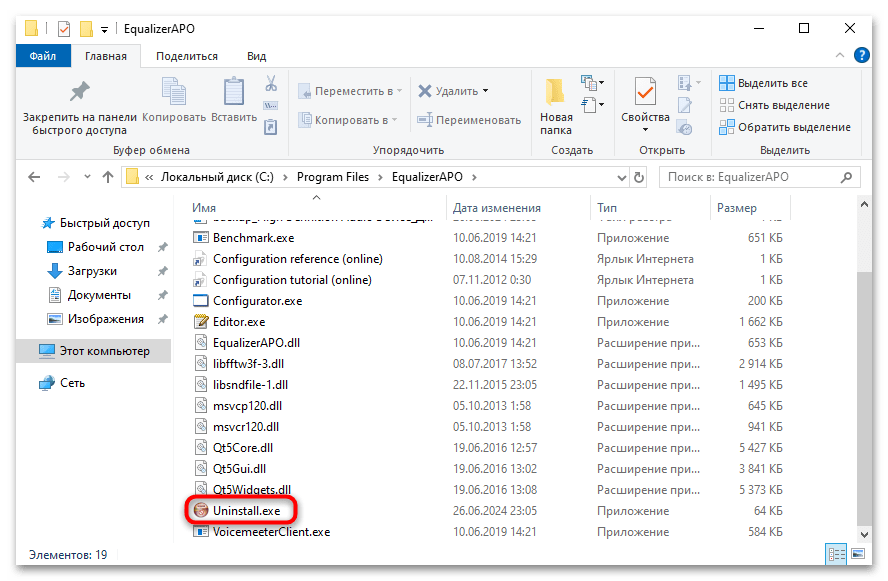
- Перейдите к расположению исполняемого файла Equalizer APO. Если во время установки программы никаких изменений в пути для хранения не вносилось, то по умолчанию он находится по такому адресу:
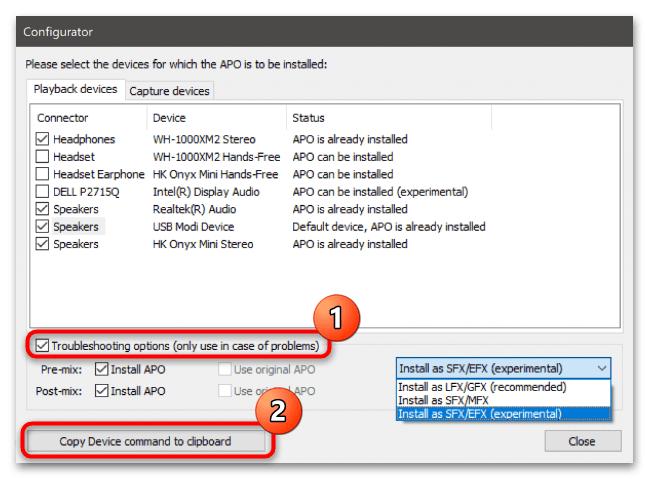
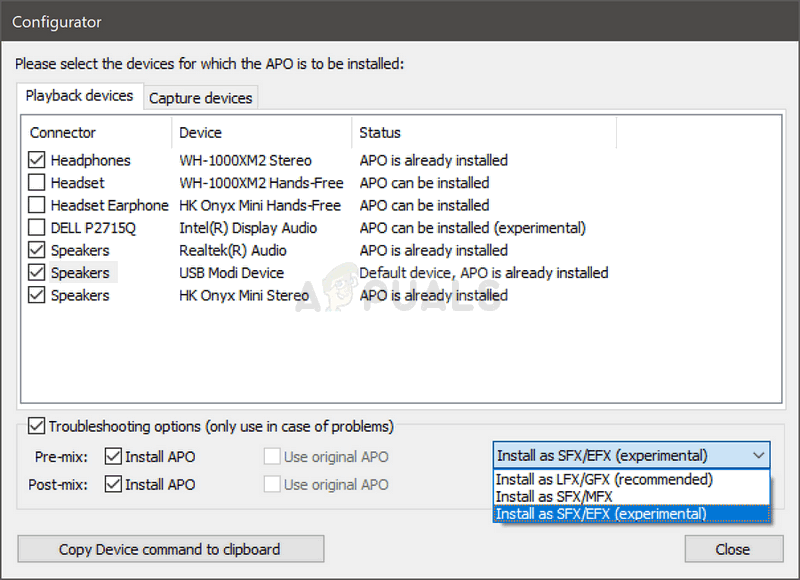
C:\Program Files\EqualizerAPO. Среди файлов найдите приложение «Configurator» и запустите его двойным кликом левой кнопкой мыши. - В открывшемся окне на вкладке «Playback devices» отметьте нужные аудиоустройства, через которые будет выводиться звук, затем поставьте галочку у пункта внизу – «Troubleshooting options (only use in case of problems)». Должно появиться дополнительное поле с выбором параметра. Из выпадающего меню выберите «Install as SFX/EFX (experimental)» и сохраните новые параметры.

Чтобы новые настройки вступили в силу, нужно обязательно перезагрузить компьютер, после чего можно проверять, решена ли проблема.
Также можно попробовать и другие варианты конфигурации. Например, некоторые пользователи Windows 11 сообщали, что в их случае проблему удалось решить, выбрав параметр «Install as LFX/GFX».
Способ 2: Включение улучшения звука
Если изменение конфигурации программы не исправила ситуацию, стоит проверить настройки самой системы, которые связаны с выводом звука и аудиоустройствами. В первую очередь убедитесь, что различные улучшения звука, которые предусматриваются в ОС, активны. Если они выключены, тогда Equalizer APO не сможет применять эффекты на компьютере, а все изменения будут незаметны.
- Щелкните по значку звука в трее правой кнопкой мыши и выберите «Звуки» из появившегося меню.
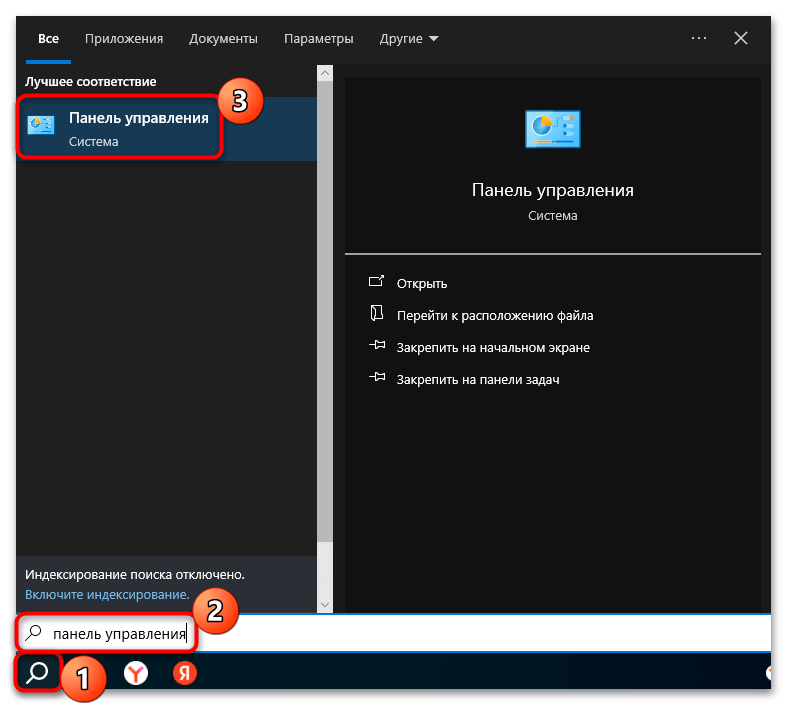
- Попасть в окно с настройками аудиоустройств можно также и через «Панель управления» (актуально, если значка в трее нет). Запустите встроенное средство, отыскав его через главное меню или строку системного поиска.
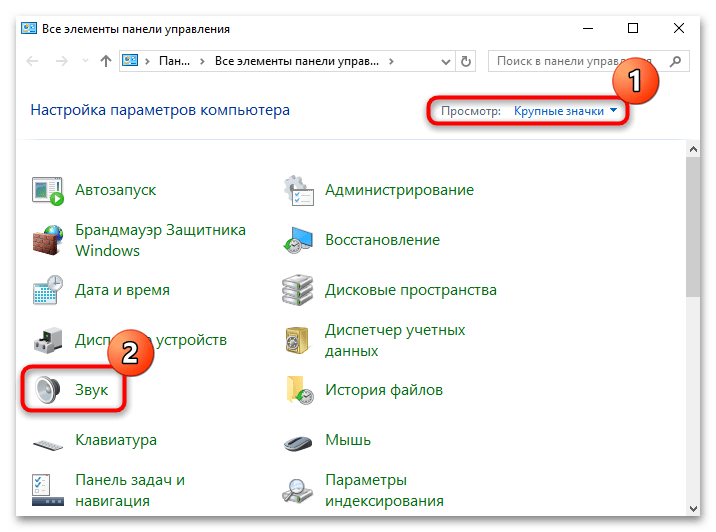
- Для отображения разделов смените тип просмотра на мелкие или крупные значки через меню «Просмотр» и щелкните по пункту «Звук».
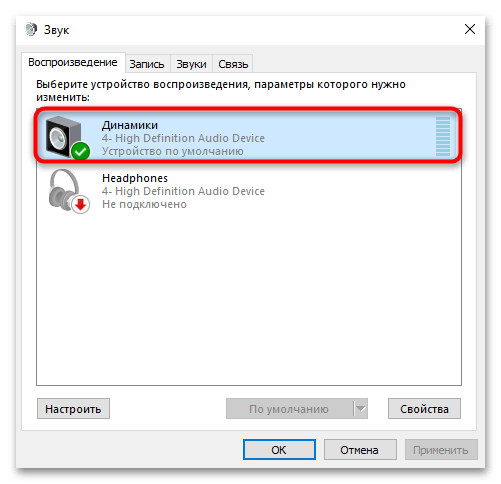
- Далее выберите устройство, через которое будет воспроизводиться звук, дважды кликнув по нему левой кнопкой мыши.
- Переключитесь на вкладку «Дополнительные эффекты» и убедитесь, что параметр «Отключить все дополнительные эффекты» не включен. В противном случае снимите галочку и сохраните настройки, нажав на «ОК».
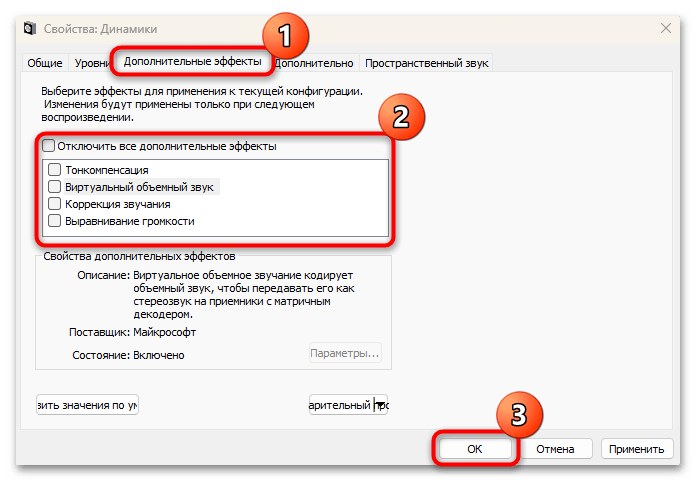
После перезагрузки компьютера снова проверьте, как работает программа. Кроме того, в окне со свойствами аудиоустройства можно также активировать параметры монопольного режима. Для этого перейдите на вкладку «Дополнительно», затем в соответствующем блоке отметьте доступные пункты и сохраните изменения.

Следует отметить, что иногда пользователи Windows 10 сталкиваются с тем, что улучшения звука попросту отсутствуют в свойствах аудио. Это может быть связано с тем, что звуковая карта не поддерживает рассматриваемую возможность, но также причиной оказывается и некорректная работа драйвера. В этом случае переходите к Способу 5, чтобы исправить ситуацию. А иногда может потребоваться и перезапуск/запуск службы Windows Audio. Кстати, если вам пришлось прибегнуть к данному варианту решения проблемы, убедитесь, что служба запускается автоматически (тип запуска выставлен как «Автоматически»).
Читайте также: Перезапуск службы аудио в Windows 10
Способ 3: Отключение аппаратного ускорения звука
В операционной системе предусматривается возможность для разгрузки центрального процессора – аппаратное ускорение звука. Оно предназначено для выполнения звуковых задач аудиокартой, а не ЦП, но иногда активная функция становится причиной проблем работы Equalizer APO. Решением в этой ситуации может стать отключение аппаратного ускорения звука, поскольку из-за него, возможно, аудиокарта не может распознать изменения.
Проделайте то же самое, что в инструкции из Способа 2 (Шаги 1-4). Включение/отключение аппаратного ускорения звука производится на вкладке «Дополнительно». Если такой пункт присутствует, отключите его, сохраните настройки и перезагрузите компьютер.
Не все звуковые карты поддерживают аппаратное ускорение, поэтому данного пункта в системных настройках может не оказаться. Если вы наверняка уверены, что эта возможность в компоненте реализована, тогда следует обновить драйвер, о чем мы писали в Способе 5 данной статьи.
Способ 4: Добавление в список исключений антивируса/брандмауэра
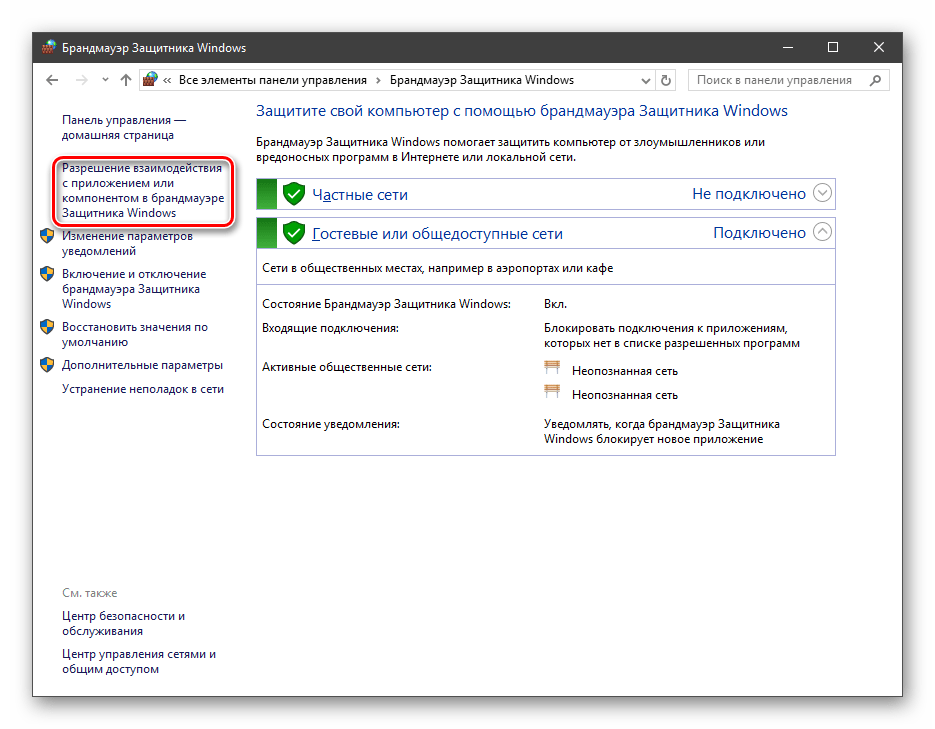
Как ни странно, но работа встроенной защиты или стороннего антивируса может препятствовать корректному функционированию эквалайзера. Если это так, попробуйте добавить исполняемый файл программы в список исключений – после этого антивирусное ПО не будет контролировать софт и проверять его действия на наличие потенциальной угрозы. О том, как добавить программу в список исключений брандмауэра операционной системы и стороннего антивируса, мы писали подробнее в отдельных материалах.
Подробнее: Добавляем программу в исключения в брандмауэре Windows 10 / антивируса
Способ 5: Обновление звуковых драйверов
Еще одна распространенная причина проблем с Equalizer APO – это устаревший драйвер звуковой карты. Проверьте наличие актуальной версии ПО – возможно, производитель выпустил апдейт с исправлениями ошибок либо проблем с работой адаптера. В любом случае, если дело в драйвере, то его можно самостоятельно обновить с помощью встроенных возможностей операционной системы, вспомогательной утилиты от разработчика или сторонних решений. Обо всех возможных методах наш автор писал в отдельной статье на сайте.
Подробнее: Поиск и инсталляция аудиодрайверов для Windows 10
Способ 6: Переустановка аудиоустройств
Переустановка аудиоустройств в Windows 10 также иногда помогает решить рассматриваемую неисправность. В этом случае может оказаться достаточно удаления оборудования из списка в «Диспетчере устройств», а после перезагрузки система автоматически установит драйвер.
Такой метод позволяет исправить ситуации, когда файлы программного обеспечения повреждаются вследствие какого-либо системного сбоя или другой неполадки.
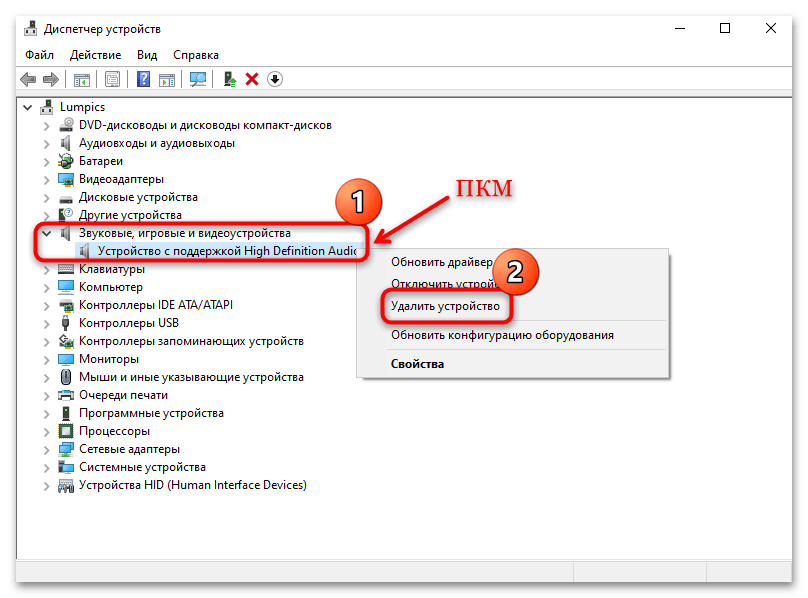
- Запустите «Диспетчер устройств». Для этого можете кликнуть правой кнопкой мыши по «Пуску» и выбрать соответствующий пункт из меню.
- В списке разверните раздел «Звуковые, игровые и видеоустройства», затем найдите название звуковой карты и кликните по ней правой кнопкой мыши, из контекстного меню выберите «Удалить».
- Подтвердите действие в новом окошке.
Как уже говорилось, останется перезагрузить компьютер. После запуска системы необходимое, но базовое ПО будет инсталлировано.
Способ 7: Сброс настроек Equalizer APO
Мешать работе Equalizer APO также могут мешать некорректные настройки самой программы и неправильно выбранный модуль. С помощью дополнительной утилиты, которая инсталлируется вместе с программой, есть возможность сбросить все настройки к тем, что были по умолчанию:
- В корневой директории с эквалайзером или с помощью строки системного поиска найдите утилиту «Editor».
- В открывшемся окне нажмите на вкладку «Settings», а из дополнительного меню выберите «Reset all global preferences».
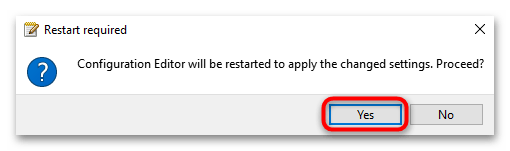
- Подтвердите действие в новом окне.
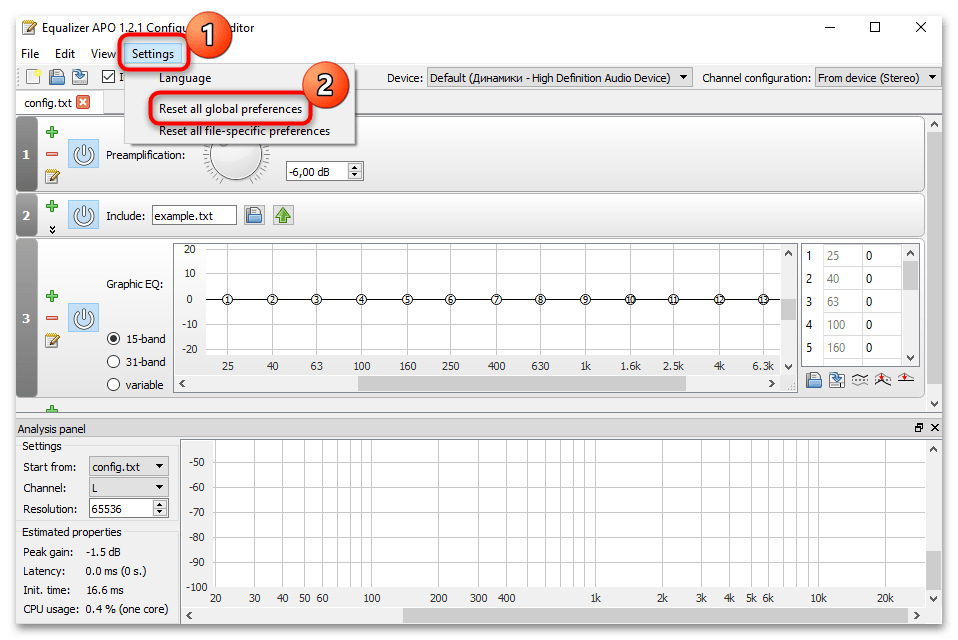
После того как все настройки оказались сброшены к исходному состоянию, закройте утилиту и проверьте, как работает Equalizer APO в Windows 10.
Способ 8: Редактирование системного реестра
Если раздел реестра Equalizer APO поврежден или неисправен, работе программы могут препятствовать различные неполадки. Тогда стоит попытаться удалить этот раздел, но предварительно потребуется стать его владельцем. Метод покажется довольно трудоемким, но иногда является единственным решением, поскольку после удаления раздела в системном реестре новый создастся вновь, а все поврежденные записи, соответственно, восстановятся:
- Запустите утилиту «Configurator», которая устанавливается вместе с программой (Способ 1). На вкладке «Playback devices» поставьте отметку у устройства, которое нужно настроить, затем поставьте галочку у пункта «Troubleshooting options (only use in case of problems)». Внизу появится кнопка «Copy Device command to clipboard» — кликните по ней. Так вы поместите в буфер обмена путь к разделу реестра оборудования.
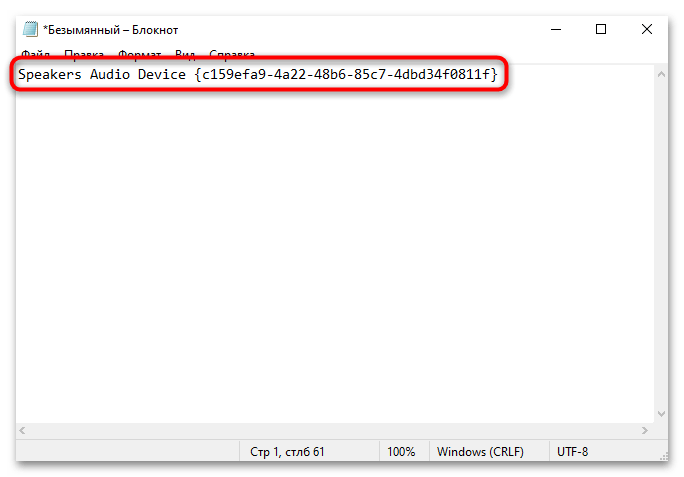
- Сохраните скопированные данные в любое место. Например, можно открыть штатный «Блокнот», затем посредством функции вставки добавить новое содержимое, которое обычно выглядит примерно так:
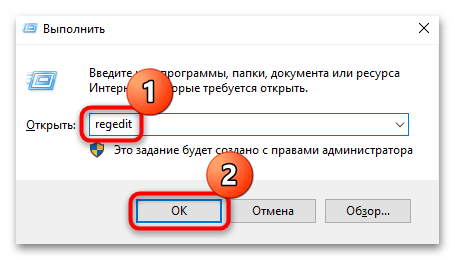
Speakers High Definition Audio Device {c159efa9-4a22-48b6-85c7-4dbd34f0811f} - Теперь запустите «Редактор реестра». Для этого можно одновременно нажать на клавиши «Win + R», ввести команду
regeditи нажать на кнопку «ОК» или клавишу «Enter». - Разверните ветку
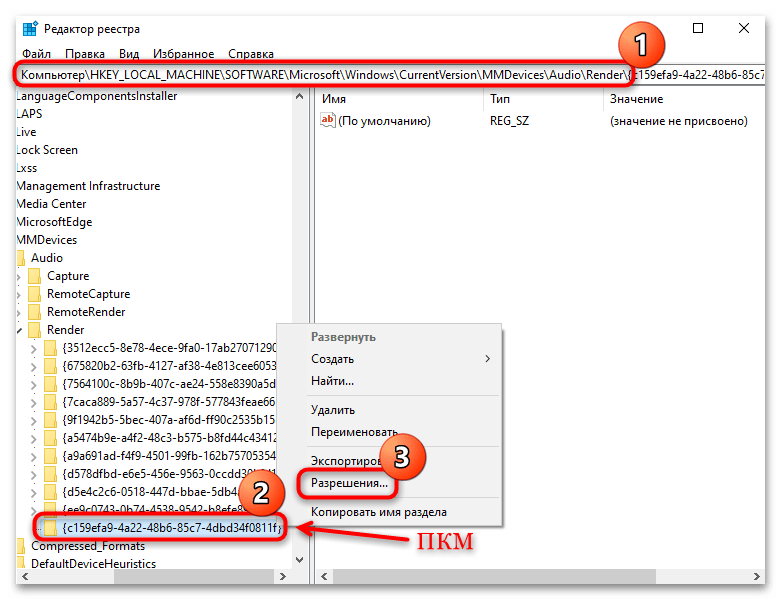
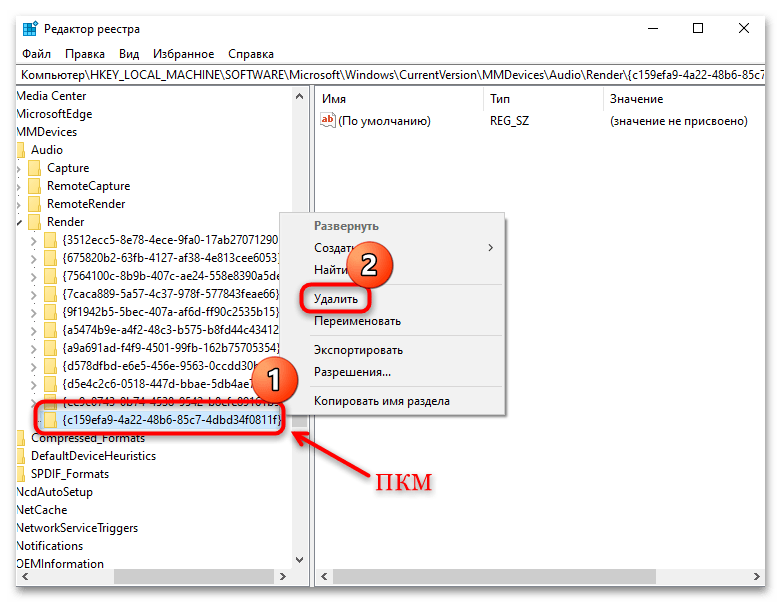
HKEY_LOCAL_MACHINE\SOFTWARE\Microsoft\Windows\CurrentVersion\MMDevices\Audio\Render(путь можно скопировать и вставить в адресную строку «Редактора реестра»). В папке «Render» должен быть раздел с таким же названием, что и скопированное ранее содержимое из утилиты «Configurator» (например, в нашем случае это{c159efa9-4a22-48b6-85c7-4dbd34f0811f}). Найдите соответствующий каталог на панели слева и кликните по нему правой кнопкой мыши, затем из контекстного меню выберите «Разрешения». - Отобразится окно с настройками безопасности, где нужно нажать на кнопку «Дополнительно».
- В строке «Владелец» кликните по строке «Изменить».
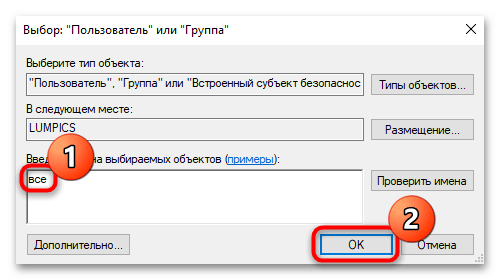
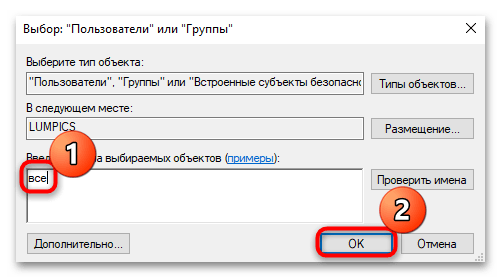
- В текстовом поле открывшегося окна введите «все» и нажмите на кнопку «ОК» или клавишу «Enter».
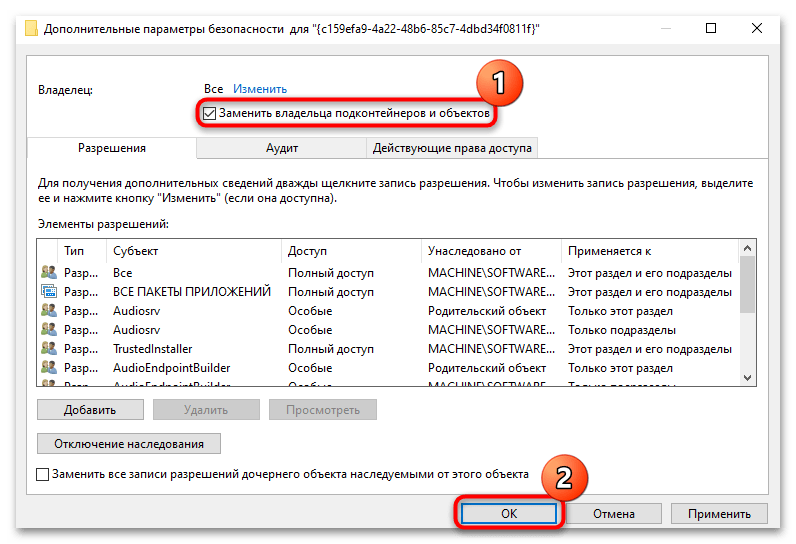
- Отметьте пункт «Заменить владельца подконтейнеров и объектов», затем сохраните новые настройки. Таким образом предоставляется доступ к редактированию каталога.
- Теперь нужно позволить полностью контролировать записи в реестре. В окне «Разрешения» нажмите на «Добавить».
- Потребуется ввести учетную запись, для которой будет открываться полный доступ, или же, как мы уже писали, «все». После ввода нажмите на клавишу «Enter».
- В предыдущем окне, если понадобится, отметьте галочкой пункты «Полный контроль» и «Чтение» в блоке с разрешениями для группы. Сохраните новые параметры.
- После предоставления полного контроля остается удалить проблемный раздел из системного реестра. Кликните по нему правой кнопкой мыши и выберите «Удалить».
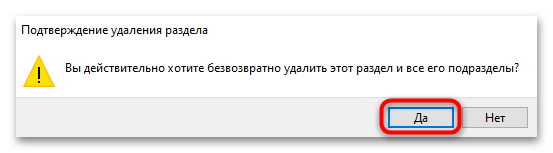
- Подтвердите действие.

После перезагрузки системы запустите Equalizer APO. Если возникла аналогичная или другая проблема после редактирования реестра, сразу переходите к следующему способу – переустановке программы.
Способ 9: Переустановка программы
Если ничего не помогло, выполните переустановку Equalizer APO. Вероятно, после удаления также придется почистить системный реестр от записей, которые могла оставить программа. Благодаря этому удастся избежать конфликтов между версиями софта и полностью очистить систему от остаточных файлов.
Вместе с эквалайзером устанавливается файл-деинсталлятор, который и удаляет программу из Windows 10. Найти его можно в корневой директории софта, и называется он «Uninstall». Достаточно открыть его, после чего запустится пошаговый мастер удаления.
Кроме того, можно воспользоваться и системными средствами для удаления Equalizer APO, например штатными «Параметрами»:
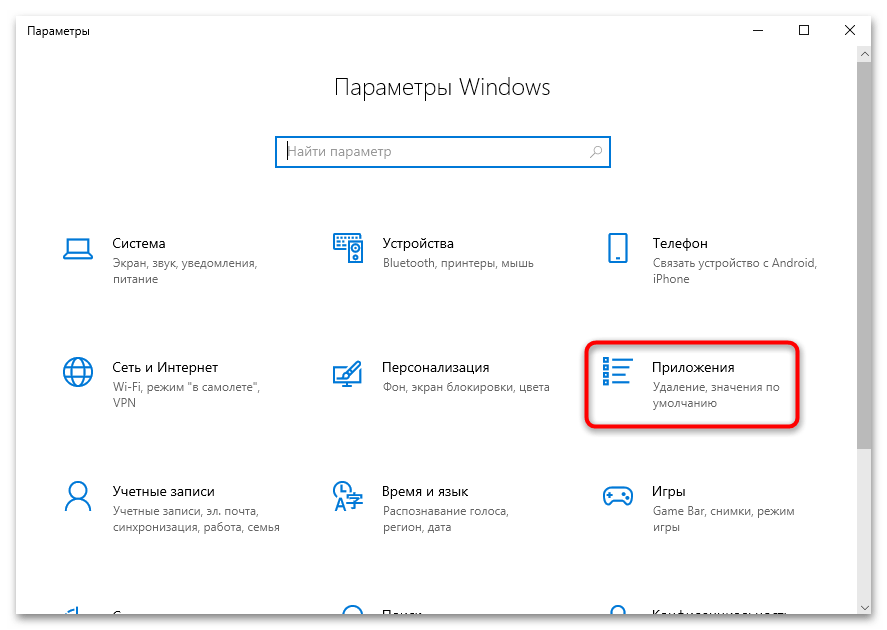
- Нажмите на «Пуск» и выберите запуск «Параметров».
- Перейдите в раздел «Приложения».
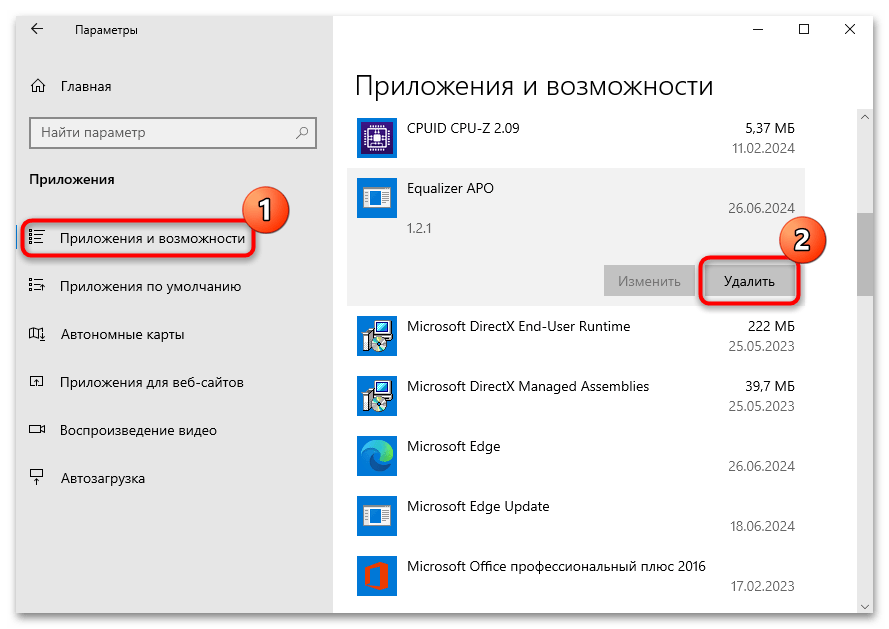
- На вкладке «Приложения и возможности» найдите название программы, кликните по ней, затем по «Удалить».
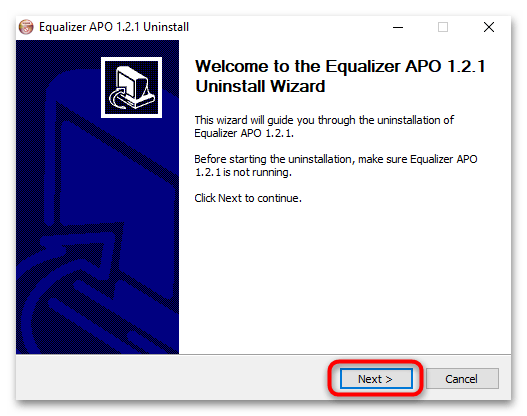
- Далее останется следовать шагам мастера деинсталляции.
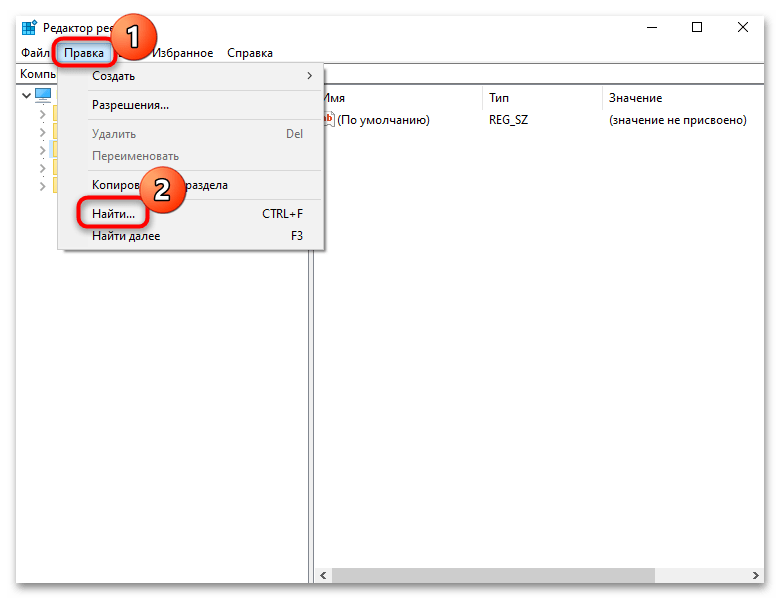
Также стоит очистить системный реестр от остаточных записей, прежде чем устанавливать софт заново. Для этого запустите «Редактор реестра» и нажмите на вкладку «Правка», из появившегося меню выберите действие «Найти».
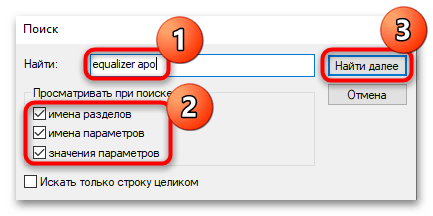
В текстовом поле введите «Equalizer APO», убедитесь, что пункты «имена разделов», «имена параметров» и «значения параметров» отмечены, и нажмите по «Найти далее».
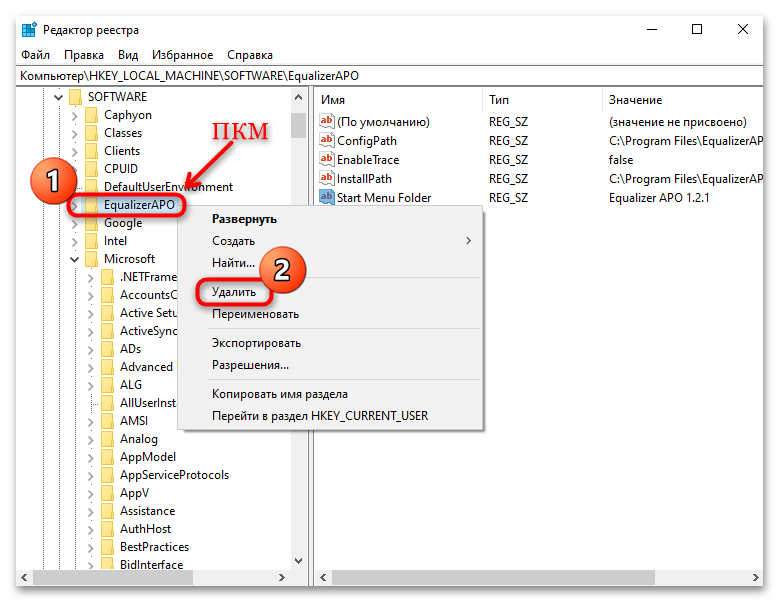
Выделенные объекты потребуется удалить (нажатие правой кнопкой мыши и выбор соответствующего пункта).
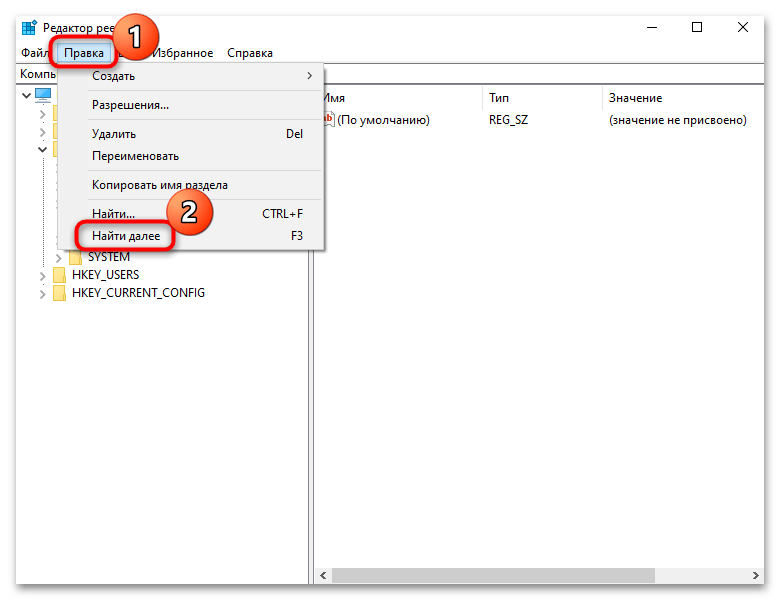
Нажмите на вкладку «Правка» и выберите «Найти далее», чтобы продолжить поиск по введенному ранее запросу. Или просто жмите «F3» на клавиатуре.
Как только все разделы и ключи, связанные с Equalizer APO, будут удалены, перезагрузите компьютер, перейдите на официальный сайт разработчика и скачайте актуальную версию софта, после чего произведите повторную инсталляцию.
Скачать Equalizer APO с официального сайта
Наша группа в TelegramПолезные советы и помощь
-
Home
-
News
- Realtek Equalizer Windows 10 for Realtek HD Sound
By Alisa |
Last Updated
The Realtek equalizer Windows 10 controls the Realtek HD sound. This post from MiniTool Software teaches you how to how to open Realtek equalizer in Windows 10 and adjust Realtek audio equalizer settings, how to fix Realtek equalizer missing or not working issues, etc.
What is Realtek equalizer in Windows 10 and how to open and adjust its settings or troubleshoot its issues? Check the answers in this post.
Realtek Equalizer Windows 10
What is Realtek equalizer?
Realtek sound card features a graphic equalizer to let users freely adjust the computer sound. You can go to Realtek equalizer settings window to make proper adjustments for Windows 10 audio.
Realtek equalizer comes along with Realtek sound card in your Windows 10 computer and should work only if the Realtek High Definition Audio driver has been installed.
How to Open Windows 10 Realtek Equalizer
You can open Realtek equalizer in Windows 10 and adjust its settings if you like. Generally, you can access the default Realtek equalizer from Sound settings.
- Right-click Sound icon at the bottom-right corner of Windows taskbar and select Sounds.
- Under Playback tab, right-click Speakers and select Properties.
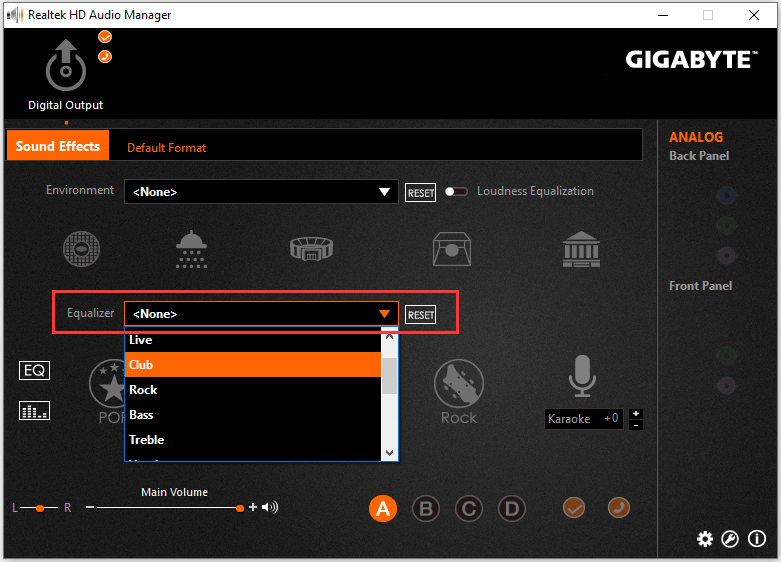
- Click Enhancements tab and click Equalizer. Click the drop-down icon next to Setting to choose an audio equalizer option.
- You can also click the three-dot icon next to Setting to open Graphic EQ to adjust its settings.
Fix Realtek Equalizer Windows 10 Missing or Not Working
Fix 1. Open Realtek Audio Manager to access Realtek equalizer. You can press Windows + R, type C:\Program Files\Realtek\Audio\HDA\ in Run box, and press Enter. Then double-click RtkNGUI64 file to open Realtek HD Audio Manager. Then you can click Equalizer to choose a preferred equalizer setting for Realtek audio. Here you can also click Change to Graphic EQ icon under EQ to activate Realtek sound card equalizer in Windows 10.
Tip: If your computer doesn’t have Realtek HD Audio Manager, you can check how to get Realtek HD Audio Manager download for Windows 10.
Fix 2. If the Realtek equalizer is disappeared from your Windows 10 computer, you can go to Realtek official website to download and install the latest Realtek High Definition Audio driver to make Realtek equalizer work.
Fix 3. Update Realtek High Definition Audio driver. Press Windows + X and select Device Manager to open Device Manager in Windows 10. Expand Sound, video and game controllers. Right-click Realtek High Definition Audio and click Update driver.
Fix Realtek No Enhancements Tab
Some users may find that there is no Enhancements tab in the Speakers Properties window. You can follow the steps to fix Enhancements tab missing issue.
- Press Windows + X and select Device Manager.
- Expand “Sound, video and game controllers” category.
- Right-click Realtek High Definition Audio and select Disable device
- Right-click Realtek High Definition Audio again and select Update driver.
- Click Browse my computer for driver software and select High definition audio device to install the High Definition Audio Device driver.
This should replace the Realtek Audio driver and install the default High Definition Audio Device driver in Windows 10, and get back the Enhancements tab in the Speakers Properties window.
8 Best Free Equalizer for Windows 10 for Better Sound
If you are looking for a top third-party sound equalizer for Windows 10, here we list the top 8 free Windows 10 audio equalizers for you. They are Equalizer APO, Realtime Equalizer, Viper4Windows, FXSound, Boom3D, Graphic Equalizer Studio, Breakaway Audio Enhancer, and EqualizerPro.
About The Author
Position: Columnist
Alisa is a professional English editor with 4-year experience. She loves writing and focuses on sharing detailed solutions and thoughts for computer problems, data recovery & backup, digital gadgets, tech news, etc. Through her articles, users can always easily get related problems solved and find what they want. In spare time, she likes basketball, badminton, tennis, cycling, running, and singing. She is very funny and energetic in life, and always brings friends lots of laughs.
If you have noticed that in the Realtek Audio Console, there is no Equalizer in Windows 11/10, you are not alone. Many users are in the same boat, and this can be due to various reasons. It can be outdated drivers, incorrect settings, or even software conflicts. Fortunately, there are several ways to resolve the issue which we are going to explore in this article.

If Realtek Audio Console has no Equalizer in Windows 11/10, execute the solutions mentioned below.
- Disable DTSAPO3Service
- Update or reinstall the audio driver
- Install Custom Realtek audio drivers
- Roll back to the previous version of the driver
- Enable or disable Audio Enhancement
- Reinstall Realtek software
- Use Realtek alternatives
Let’s get started with the troubleshooting guide.
1] Disable DTSAPO3Service
DTSAPO3Service can often override or interfere with Realtek’s built-in features and, therefore, cause conflicts between DTS audio processing and the Realtek Audio Console. In this solution, we will disable the service to regain control over audio settings.
- Click Win + R to open the Run dialog box, type services.msc, and hit the OK button.
- Find DTSAPO3Services, double-click on it, and navigate to the Startup Type drop-down menu.
- Set it to Disabled mode, click on the Stop button, and hit the Apply and OK buttons to save the changes.
Once done, check whether the Equalizer is visible. If it is still missing, slide to the next solution.
2] Update or reinstall the audio driver
Next up, you need to check if there is an update available for your audio drivers and install it. You can download the latest version of the Audio driver and see if that helps. In case that is to no avail, let us remove the current installation of the audio driver and install a fresh one. To do so, follow the steps mentioned below.
- Open the Device Manager.
- Expand Sound, video, and game controller.
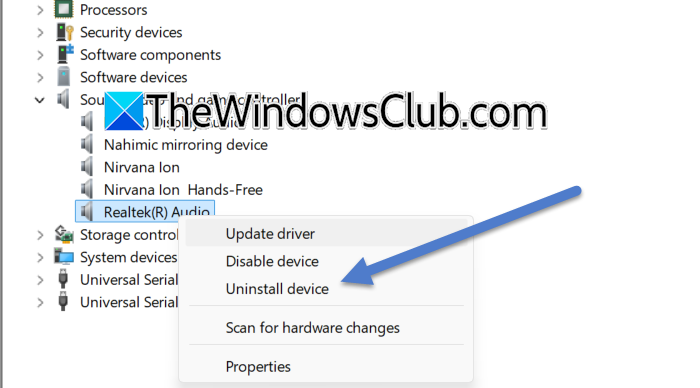
- Right-click on the Realtek audio driver and select Uninstall device.
- Click Yes when the prompt appears.
- Finally, run the Audio driver we asked you to download earlier to install it.
Hopefully, this will do the job for you.
3] Install Custom Realtek audio drivers
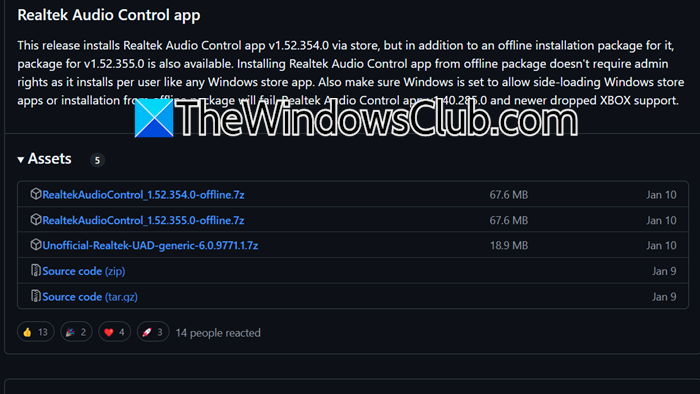
When standard drivers fail to provide full functionality or compatibility, installing custom Realtek audio drivers is necessary. To proceed, first uninstall any existing Realtek drivers and remove premium audio software, if any, as such apps may interfere with Realtek features. Once done, visit github.com to view Realtek UAD Github page to download the required files and refer to the instructions provided for the proper installation. Navigate to the next solution if the issue persists after installing the custom Realtek audio drivers.
4] Roll back to the previous version of the driver

If the issue started right after updating the driver, it could be due to compatibility issues or bugs introduced by recent updates. To rule out this possibility, follow the steps mentioned below, as we will roll back to the previous version of the driver.
- Click Win + X to open the Quick Link Menu, and select Device Manager.
- Next, expand the Sound, video, and game controllers category and right-click on the audio device.
- Once the Properties window appears on the screen, navigate to the Driver tab, and click on the Roll Back Driver option.
See if the Equalizer is available; proceed to the next step if the issue persists.
5] Enable or disable Audio Enhancement
Audio Enhancement is a feature that improves sound quality by applying processing effects. These enhancements can sometimes cause conflicts. In our situation, we recommend disabling the feature to revert to basic sound processing to resolve conflicts or compatibility issues that may cause the equalizer to disappear. However, if it is disabled, enable it to potentially restore the equalizer.
- Open the Control Panel, go to Sound, and go to the Playback tab.
- Right-click on the default device and then navigate to the Advanced tab.
- In the Signal Enhancement section, uncheck the Enable audio enhancement option to disable it, and if it was already disabled, tick the box to enable it.
- Lastly, click the Apply and OK buttons to save the changes.
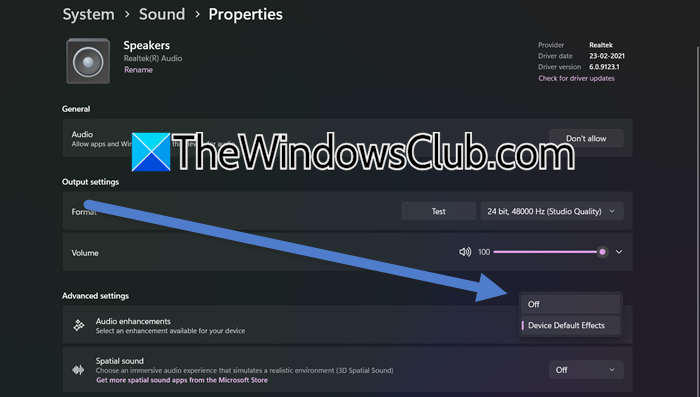
- Alternatively, users can navigate to Settings > System > Sound. Under the Output section, select the audio device, navigate to the Audio Enhancement option, and set it to Off.
After completing the process, see if the Equalizer is now accessible. If it’s still missing, continue with the next solution.
6] Reinstall Realtek software
A corrupted installation or stubborn residual files can prevent the equalizer from appearing in the Realtek Audio Console. However, this can be easily fixed through a fresh installation, which removes corrupted configurations and reinstalls necessary drivers. Here’s how to do the same.
- Click Win + I to open Settings, go to Apps, and then click on Installed apps.
- Find the Realtek Software, and click on the three dots option.
- Select Uninstall and follow the on-screen procedure to do the same.
- Now, go to the Microsoft Store, download Realtek Audio Console, and follow the steps to complete the process.
The problem should be resolved.
7] Use Realtek Alternatives
Last but not least, don’t fret if the equalizer continues to be invisible in the Realtek Console; there are several options available in the market that users can explore. Dolby Atmos stands out as one of the top-notch contenders, which is known for its premium sound quality and advanced customization features, and therefore provides immersive audio experiences. Next, we have EqualizerAPO, which is favored by users for its lightweight nature and extensive audio customization capabilities.
There are more options, such as FxSound, previously known as DFX Sound, which offers user-friendly presets and customizable settings, whereas Boom 3D excels in delivering 3D surround sound and comes equipped with an auto-calibration feature. Lastly, we have EasyEffects, an open-source tool that offers flexibility and advanced features like a parametric equalizer and dynamic range compression.
Read: Realtek Audio Console not detecting Headphones
How to fix Realtek audio No sound in Windows 11?
To fix the No audio issue in Realtek audio, proceed by checking connections and volume settings. If there are no issues with the settings, run the Audio Troubleshooter, ensure that Realtek is set as the default, and update the drivers. If needed, restart the Windows Audio services, and hopefully, there won’t be any problems regarding the sound.
Read: Realtek Audio Console doesn’t support for this machine
What equalizer setting is best for music?
The best equalizer settings vary from person to person since they depend on personal preference and genre. However, a flat ‘EQ’ where all frequency bands remain at their default levels is often recommended for the most accurate and natural sound reproduction.
Also Read: Realtek Audio Console Connector Retasking greyed out.
Equalizer APO might not work on Windows if audio enhancements aren’t applied, leaving users with unchanged sound even though the software is running. This typically occurs because the software’s APO is not correctly installed or linked to the chosen audio device.
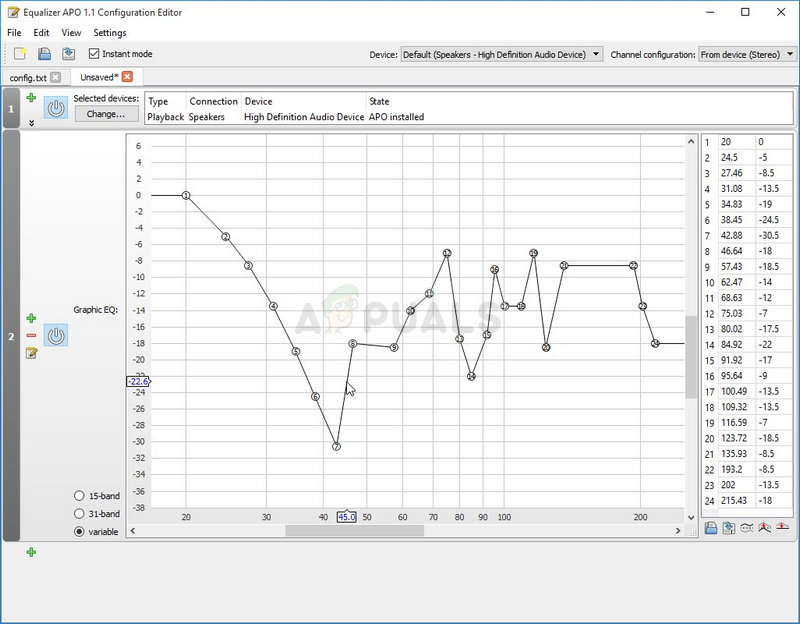
The most common reason is that Equalizer APO was installed without sufficient permissions, particularly when administrative rights weren’t given. Other issues like antivirus blocking, incorrect audio driver settings, or conflicts with Bluetooth or USB devices can also stop it from working.
In this article, we will discuss different ways to solve this error.
1. Install as SFX/EFX
Switching to “Install as SFX/EFX” helps Equalizer APO work with devices by directly managing audio streams and bypassing conflicts, especially with older drivers or certain USB and Bluetooth devices.
- Open Configurator for Equalizer APO by searching for it in the Start menu and selecting the first result.
- In the Playback devices tab, check the boxes next to all devices you want to use with the equalizer.

- Make sure the “Use Original APO” boxes are unchecked.
- Check Troubleshooting options (only use in case of problems), click the arrow, and select Install as SFX/EFX (experimental) from the dropdown menu.
- Apply changes, close the Configurator, and reopen Equalizer APO to see if it works now.
2. Make Sure Enhancements are Enabled
To address issues with Equalizer APO, check if audio enhancements are turned on. These settings enable the software to change the sound. If they’re off, Equalizer APO can’t function, so turning them on restores its operation.
- Right-click the Volume icon in the bottom right of your screen and select Sounds. Alternatively, open Control Panel, set View by to Large icons, and click Sounds.
- Go to the Playback tab in the Sounds window.

Playback devices - Select your device, click Properties, then go to the Enhancements tab. Uncheck Disable all enhancements and click OK. Check if Equalizer APO works now.

3: Disable Hardware Acceleration of Audio
Turning off hardware acceleration can fix Equalizer APO issues by making Windows process audio without advanced sound card features, avoiding compatibility problems. This ensures stable software-based audio processing, allowing Equalizer APO to work properly.
- Right-click the Volume icon in the bottom right of your screen and select Sounds. Alternatively, open Control Panel, set View by to Large icons, and click Sounds.
- Go to the Playback tab in the Sounds window.
Playback devices - Select your headset, click Properties, and go to the Advanced tab. Look for the Hardware acceleration section.

Disabling audio hardware acceleration - Uncheck Allow hardware acceleration of audio with this device. Check if Equalizer APO now works properly.

4: Make an Exception for it in Your Antivirus
Antivirus software might wrongly see Equalizer APO as a threat and block it. Adding an exception for Equalizer APO in your antivirus settings lets the software run without issues. This step stops the antivirus from blocking important tasks, like changing audio settings, and allows Equalizer APO to work well with your system’s security.
However, ensure you add the Equalizer APO executable in the box that appears, prompting you to navigate to the installation folder. It should be in the same folder where you decided to install Equalizer APO. By default, it’s:
C:\Program Files (x86)\Equalizer APO
Check to see if you can now use Equalizer APO properly. If it still doesn’t work, try restarting your computer and try again. The last step would be to uninstall the antivirus and try a different one if the same issue persists.
5: Delete a Registry Key
Deleting a specific registry key might help Equalizer APO by removing data that could block the software. This data might have been incorrectly set up during installation or updates, preventing it from connecting with audio devices. Removing the key allows Equalizer APO to create a new entry, which could improve its connection to the audio system.
Please back up your registry keys before proceeding with this method using these (steps).
6: Perform a Clean Install
If other solutions don’t work, doing a clean install might help. This step removes all parts of Equalizer APO, including bad settings or broken files causing problems. Starting fresh ensures everything is set up right and previous issues are gone.
- Open the Settings app from the Start menu or use the search bar to find Control Panel.

Opening Settings from the Start menu - In Settings, go to Apps to see a list of all installed programs. In Control Panel, select Uninstall a Program under Programs.

Uninstall a program in Control Panel - Find Equalizer APO and click Uninstall. Follow the prompts to completely remove it.
- Before editing the registry, consider backing it up using this guide.
- Press Windows Key + R, type “regedit”, and press Enter to open Registry Editor. In the menu, click Edit and then Find.
Finding all Equalizer APO related entries in the registry - Type Equalizer APO in the search box and click Find Next. Right-click any result, select Delete. Repeat using the F3 key to ensure all entries are removed. Consider using CCleaner for automated cleanup.

Find Next in the registry - Visit this link to download the latest Equalizer APO version. Install it following the on-screen instructions, and check if the issue persists.


Kevin Arrows
Kevin Arrows is a highly experienced and knowledgeable technology specialist with over a decade of industry experience. He holds a Microsoft Certified Technology Specialist (MCTS) certification and has a deep passion for staying up-to-date on the latest tech developments. Kevin has written extensively on a wide range of tech-related topics, showcasing his expertise and knowledge in areas such as software development, cybersecurity, and cloud computing. His contributions to the tech field have been widely recognized and respected by his peers, and he is highly regarded for his ability to explain complex technical concepts in a clear and concise manner.