
,
If you try to install Windows 11 and you can’t because Secure Boot is Unsupported or Not Available, continue reading below. Microsoft, starting with Windows 8, supports a new security feature called Secure Boot. Secure boot is available on almost all modern computers and is built into the UEFI (Unified Extensible Firmware Interface), to prevent malware from taking over the computer during the boot process.
Windows 7, Vista and XP used to operate in Legacy boot mode (also known as «CSM» Mode), which uses the Master Boot Record (MBR) Partition table.
Windows 8, 8.1 & 10 are designed to operate also in UEFI boot mode, which uses the GUID Partition Table (GPT), in order to take advantage of the advanced features offered by the UEFI, such as the «Secure Boot» security feature.
Microsoft has made secure boot a prerequisite for users who want to upgrade to Windows 11. So, if you get the error «Secure boot is not supported» or «Secure boot is not available», then one of the following is probably happening:
-
- Your computer is set to UEFI boot mode but Secure Boot is OFF (Disabled).
- Your computer is set to Legacy boot mode, which does not support either Secure Boot or GPT partition style.
- Your computer is not UEFI & Secure Boot capable.
In this tutorial you’ll find step-by-step instructions to fix the following problems when you try to install Windows 11:
- Secure Boot is unsupported
- Secure Boot is not available
- Secure Boot is Off
- Related article: How to Install Windows 11 without TPM on Unsupported CPUs.
How to FIX: Secure Boot Unsupported or Off (Disabled) & Cannot Install Windows 11.
Step 1. Check the state of Secure Boot & BIOS Mode.
To know if Secure Boot is On, OFF or Unsupported on your device, follow the instructions below:
1. Press Windows + R keys to open the run command box.
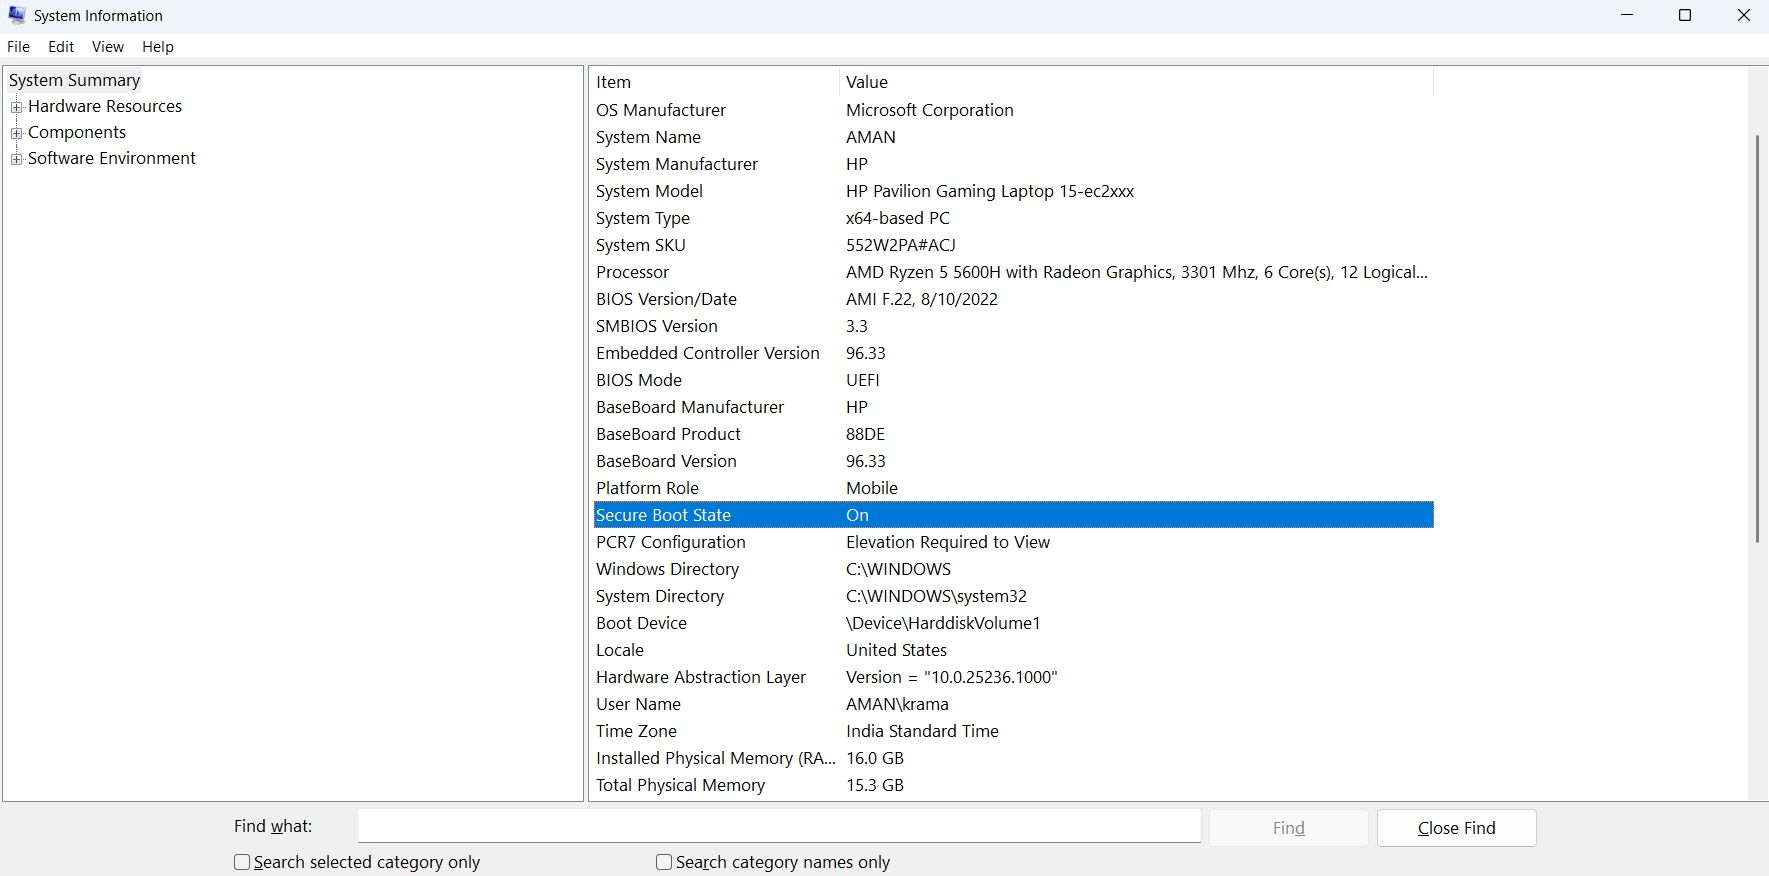
2. Type msinfo32 and click OK to open System Information.

3. On the System Information page, check the BIOS Mode and the Secure Boot Status.
4. Now according your case, proceed as follows:
- CASE A: If the BIOS Mode is UEFI & the Security Boot State is Off, means that your PC boot mode is set to UEFI, but the Secure Boot feature is disabled on your system. At this case skip to Part-1, to enable Secure Boot in BIOS/UEFI firmware settings.

- CASE B: If the BIOS mode is Legacy and the Secure Boot State is Unsupported or Unavailable, go to step-2 below because it means one of the following: *
-
- Your computer supports UEFI boot mode, but it is disabled because it is running in Legacy Boot mode, which does not support Secure Boot and GPT, or…
- …your computer does not support UEFI boot mode, and therefore does not support secure boot (and TPM 2.0, which is required for Windows 11 installation).

Step 2. Find Out if your Computer Supports UEFI.
At this point and before continuing further, you must ensure that your device supports UEFI & Secure Boot by doing one the following:
-
Navigate to the support website of your computer or motherboard manufacturer and check the specifications to see if it supports UEFI boot mode. If yes, proceed to Part-2.
-
Check if the UEFI boot mode is available in BIOS/UEFI settings. To do that:
-
-
Shutdown your PC.
-
Power On your PC and immediately press the DEL or F2, F10, F12 keys to get into the BIOS/UEFI Firmware Settings. (For more specific details on how to get into BIOS settings, visit your computer’s/motherboard’s manufacturer support website).
-
In the BIOS settings, check in Boot Options if you can enable the UEFI boot mode or if you can disable the Legacy support. If you can, then your computer supports UEFI. At this case exit from BIOS settings without saving and proceed to Part-2. If you cannot, then your computer/motherboard does not support UEFI and needs to be replaced. *
-
* Note: The safest way to check if your device supports UEFI is from the manufacturer’s website. Especially for users who want to upgrade their system to Windows 11 the computer must support also TPM version 2.0.
Part 1. Enable Secure Boot in BIOS/UEFI.
If your computer is running in UEFI boot mode but Secure boot is disabled/OFF (Case A), proceed and activate Secure Boot in BIOS/UEFI settings, by using one of following methods:
Method 1: Change Secure Boot State in UEFI/BIOS Settings.
1. As soon as you turn ON the PC, press the DEL or F2, F10, F12 keys to get into the BIOS/UEFI Firmware Settings. (For more specific details on how to get into BIOS settings, visit your computer’s manufacturer support website).
2. Go to Security Options or to Boot Options & Change the Secure Boot to Enabled. *
* Note: If you want to install/upgrade to Windows 11, you must enable also the TPM in BIOS Settings. The TPM can be called (depending on the manufacturer) as: Intel Platform Trusted Module, Intel TPM, Intel Platform Trust Technology, Intel PTT, Security Device, Security Device Support, TPM State, AMD fTPM switch, AMD PSP fTPM.
3. Save and Exit from BIOS settings.
Method 2. Activate Secure Boot in UEFI Firmware settings from Windows RE.
To second way to get into the BIOS/UEFI settings, is by using the Windows Recovery Environment (WinRE) options:
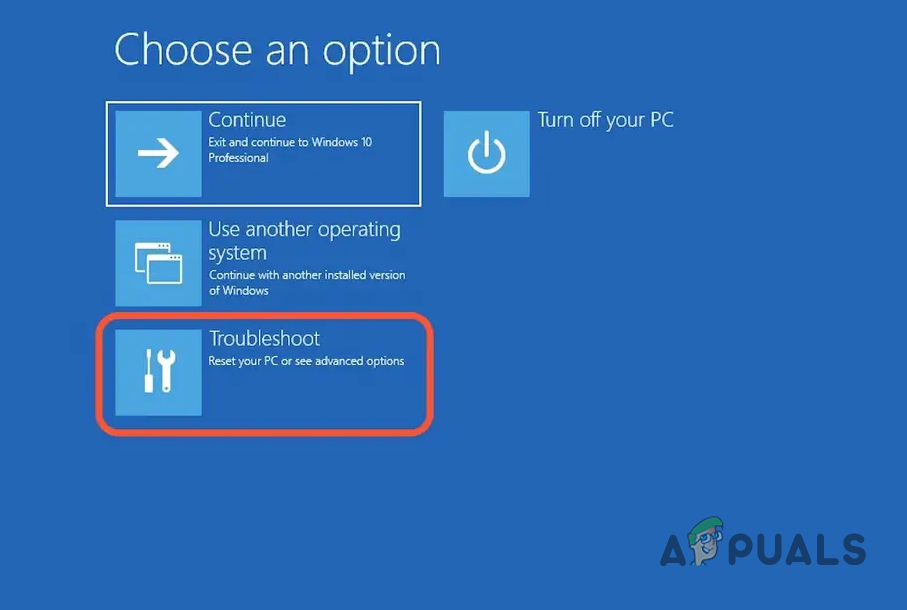
1. Hold down the Shift key and from the Power icon select Restart to boot your system in Windows Recovery Environment (WinRE).

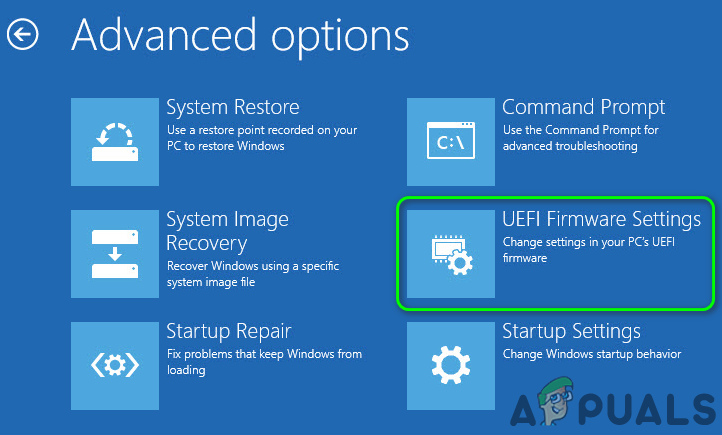
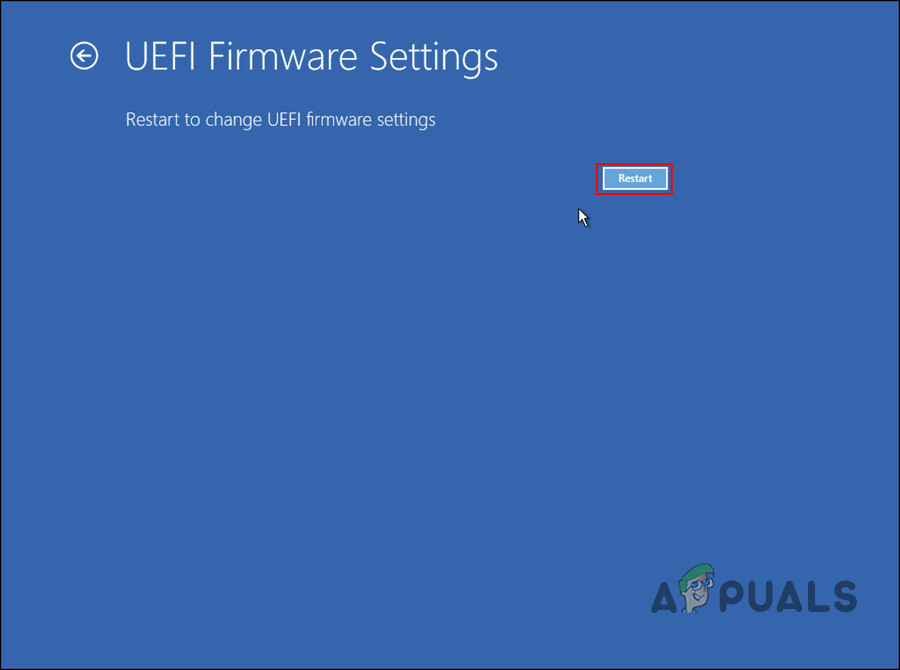
2. Then select Troubleshoot -> Advanced options -> UEFI Firmware Settings and select Restart.

3. Navigate to the System Configuration tab, select Boot Options.

4. In Boot options, Change Secure Boot and select Enabled. *
* Note: If you can’t find the Secure Boot option here, go to the manufacturer’s support website for guidance. (The BIOS/UEFI firmware settings varies among difference computer manufacturers)

5. Save and Exit from BIOS Settings.
6. Restart the PC and open System Information (msinfo.exe), to verify that Secure Boot is On now.
Part 2. Convert DISK to GPT & Enable UEFI and Secure Boot.
As mentioned at the beginning of this article, secure boot is only supported on modern computers where the boot mode of the computer is set to UEFI and the partition table is GPT.
So, if your computer’s boot mode is set to Legacy and the partition table is MBR (Case B), then to enable secure boot, you must first convert the partition schema from MBR to GPT, and then switch from Legacy boot mode to UEFI boot mode.*
* Warning: Before you continue to the steps below, backup your data, to avoid data loss if something goes wrong, and ensure that your device supports UEFI (see step-2 above).
Step 1. Ensure that the current Partition Style is MBR.
Before you convert the partition scheme, first ensure that the partition style on your main disk is MBR and NOT GPT.
1. Press the Windows + R keys to load the Run dialog box.
2. Type diskmgmt.msc and press Enter.

3. Right-click the drive with Windows OS and select Properties.

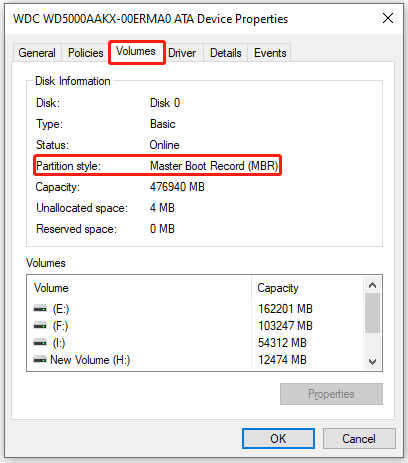
4. Select the Volumes tab.
5. Now look at the «Partition style» and make sure it is Master Boot Record (MBR). *
* Note: If the Partition style states GUID Partition Table (GPT), you don’t need to proceed to further. Just follow the instructions on Part-1 above to enable the Secure Boot in BIOS.

6. Once you confirm that the partition style is «MBR», proceed to step-2 below to convert the partition style to GPT.
Step 2. Convert MBR partition style to GPT.
Windows Creator Update (1703) or later allows you to convert the partition scheme without losing data. Microsoft designed the MBR2GPT.exe tool for easy conversion and data retention. However, it is safer to convert the partition scheme when Windows is Offline (not running). To do that:
1. Hold down the Shift key and from the Power icon select Restart to boot your system in Windows Recovery Environment (WinRE).

2. Then go to Troubleshoot -> Advanced options -> Command Prompt. (If asked choose an administrator account and type its password to proceed).

3. Type the command below to convert the disk from MBR to GPT and hit Enter:
- mbr2gpt /convert

4. When the process completes, close command prompt and shut down the PC.
5. Proceed to step-3 below.
Step 3. Enable UEFI and Secure Boot in BIOS/UEFI firmware settings.
After converting the partition style from MBR to GPT, the computer will not be able to boot normally until the PC boot mode is changed from Legacy to UEFI. So, proceed as follows before booting to Windows.
1. As soon as you turn ON the PC, press the DEL or F2, F10, F12 keys to get into the BIOS/UEFI Firmware Settings. (For more specific details on how to get into BIOS settings, visit your computer’s manufacturer support website).
2. Navigate to the System Configuration tab and select Boot Options.

3. In Boot options, apply the follow actions:
a. Set the Legacy Support to UEFI or Disabled (This will automatically enable UEFI)
b. Change the Secure Boot to Enabled. *
* Note: If you can’t find the Secure Boot option here, go to the manufacturer’s support website for guidance. (The BIOS/UEFI firmware settings varies among difference computer manufacturers)

4. Save and Exit from BIOS Settings.
5. Boot to Windows and check in System Information to be sure that secure boot is ON. You will also notice that BIOS Mode is UEFI.

6. At this point you can proceed to upgrade your device to Windows 11, if that was the goal you wanted to achieve with these changes.
That’s it! Let me know if this guide has helped you by leaving your comment about your experience. Please like and share this guide to help others.
If this article was useful for you, please consider supporting us by making a donation. Even $1 can a make a huge difference for us in our effort to continue to help others while keeping this site free:
- Author
- Recent Posts
Konstantinos is the founder and administrator of Wintips.org. Since 1995 he works and provides IT support as a computer and network expert to individuals and large companies. He is specialized in solving problems related to Windows or other Microsoft products (Windows Server, Office, Microsoft 365, etc.).
Secure Boot State Unsupported problem is generally seen while looking into the system information panel on the Windows 11 system. The problem appears due to the problem with the Secure boot, and as a result, users cannot enable device encryption on their system. The error is commonly seen on Windows 11 computers.
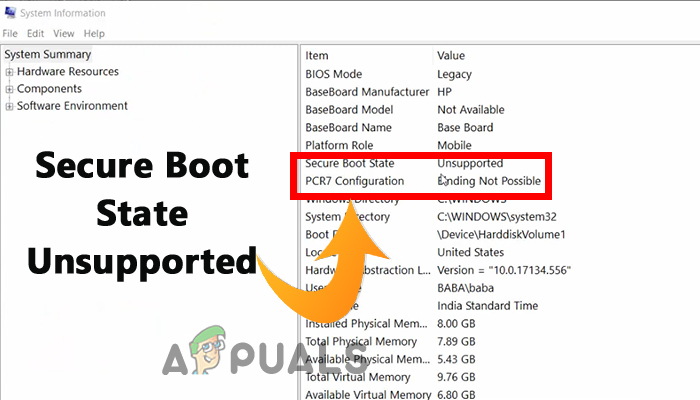
You can see this message on your Windows screen for several reasons. Here learn some of the most common ones:
- Hardware incompatibility: If your Windows system won’t meet the hardware requirements for enabling Device Encryption.
- Some required features are disabled: In your system, some of the features like Secure boot, TPM Module 2.0, etc. are disabled you are more likely to see this error message. In this case, enabling the secure boot, TPM Module 2.0, and others may help you to solve the problem.
As we know the potential reasons behind the Secure Boot State Unsupported problem, let’s try the troubleshooting methods to fix this problem.
1. Check if your Device Meets the Hardware Requirements for Device Encryption
Before applying any fixes, check if your device supports PCR7 binding or not.
- TPM Module 2.0 (Trusted Platform Module) Enabled.
- Modern Standby support.
- UEFI firmware (legacy BIOS is not supported)
You can also check if your device supports PCR7 binding by just following the steps mentioned below:
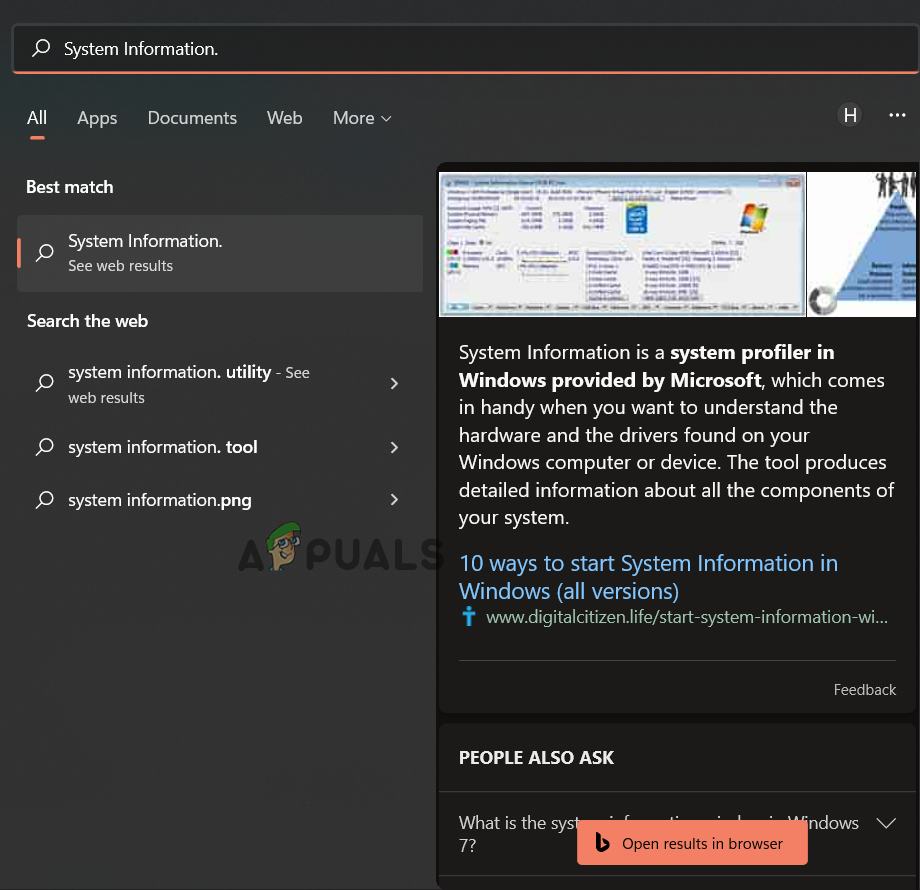
- Click on the Start button, and in the search box, type System Information.

Type System Information in the search box. - Now, click on the System Information app and the Run as administrator option from the list right.
- Then in the UAC pop-up, click on Yes.
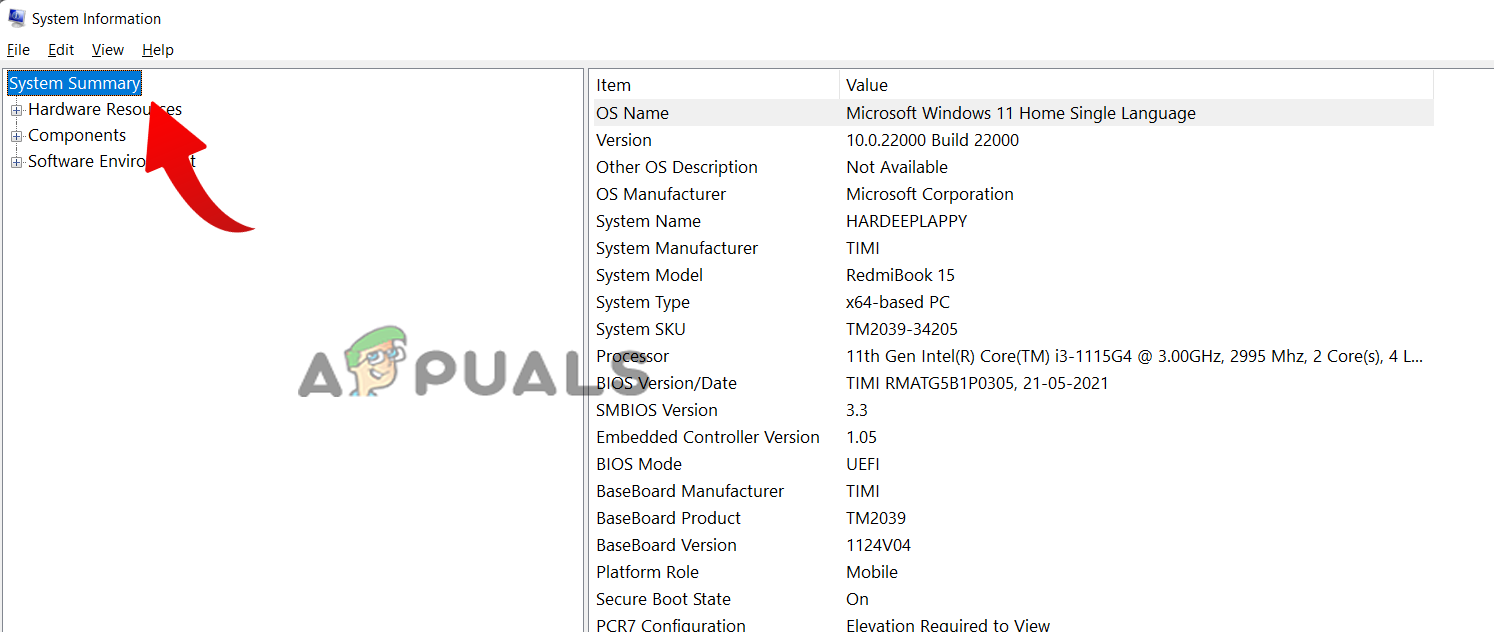
- Then click on the System Summary option available on the left side.

Click on the System Summary option. - Now, if you see Binding is possible besides the PCR7 configuration option, then your device is supported.
But if you see a message “Reasons for failed automatic device encryption: Hardware Security Test Interface failed, and the device is not Modern Standby” besides device encryption support, you need to try the below-given workaround to solve the problem.
2. Check Secure Boot
Secure boot is necessary for device encryption on Windows devices, and if this feature is disabled, you are more likely to see the error message. In this case, you need to enable the secure boot state in the BIOS settings.
Note: Entering into the PC BIOS might differ per your PC brand. Different brands’ PCs have different function keys to enter into the BIOS. It is best to refer to your user manual to learn how to get into the BIOS.
Here follow the steps to do so:
- Click on the Start icon and type System information in the search bar.
- From the results list, right-click on it and click on the Run as administrator option.
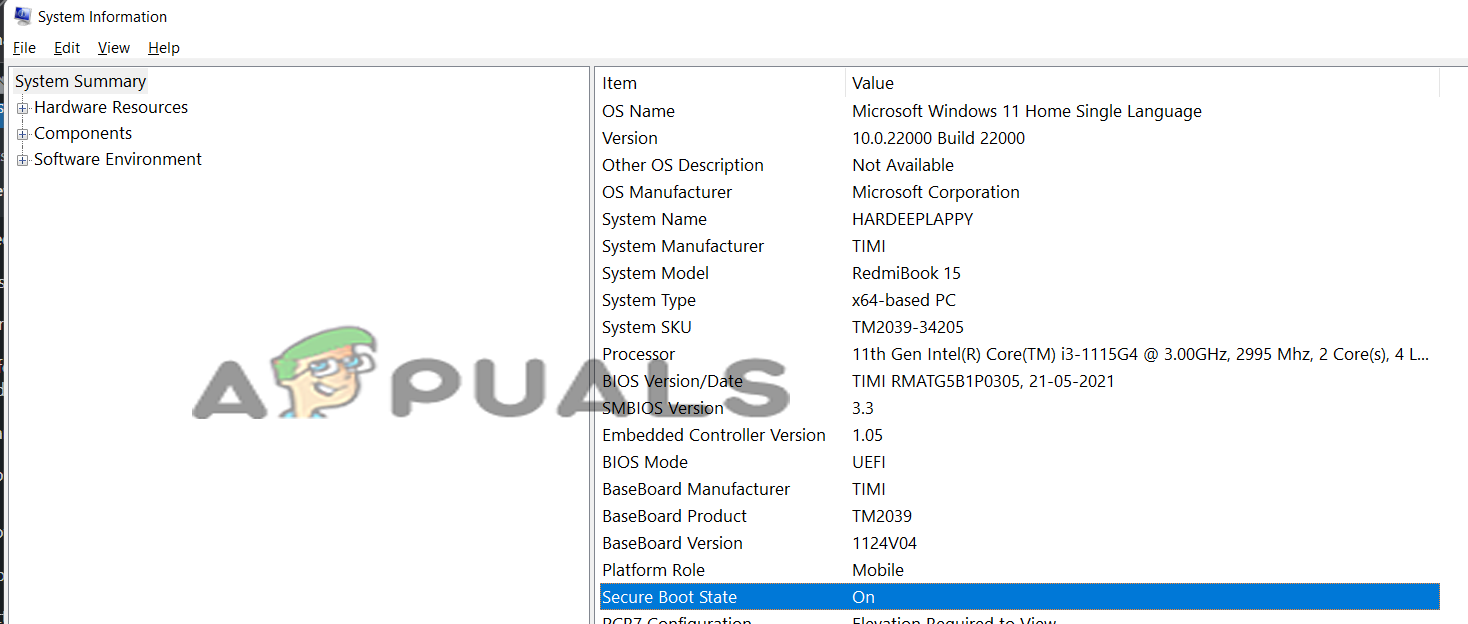
- Then click on the System Summary option available on the left side.
Click on the System Summary option. - Now check if the secure boot state is on or not. If not, follow the steps mentioned below to turn it on:

Check if the secure boot state is on. - Restart your device and enter the BIOS menu by pressing F9 or F12.
- Now go to the System Configuration tab and enable the secure boot option.
Boot up your device and check if the issue is resolved or not.
3. Check TPM (Trusted Platform Module)
Like the Secure boot feature, a TPM chip is also required for device encryption, solving the Secure Boot State Unsupported problem. Check if your Windows system has a TPM chip installed or not.
Follow the steps mentioned:
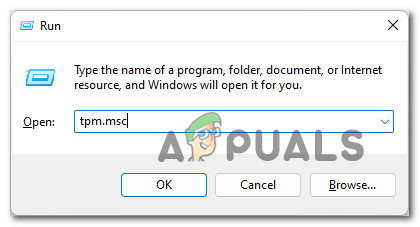
- Press Windows + R on your keyboard to open the run dialog box.
- Now in the run box, type tpm.msc and press ok.

Open up the Trusted Platform Module menu. - If it shows that Compatible TPM cannot be found on this computer, then there is no TPM available on your computer, and if it is showing TPM is ready to use, then your computer has TPM installed. You can also read our guide to fixing TPM device is not detected issue.
4. Change Your BIOS Mode from Legacy to UEFI
Another requirement to run the PCR7 binding properly is that your BIOS should be UEFI, not legacy. So, do check if your BIOS mode is UEFI or Legacy or UEFI by following the instructions given:
- Click on the Start button and type system information in the search bar.
- Now right-click on it and click on the Run as administrator option.
- Then click on the System Summary option available on the left side.
- Now check if your BIOS mode is UEFI or Legacy.

Check your BIOS mode.
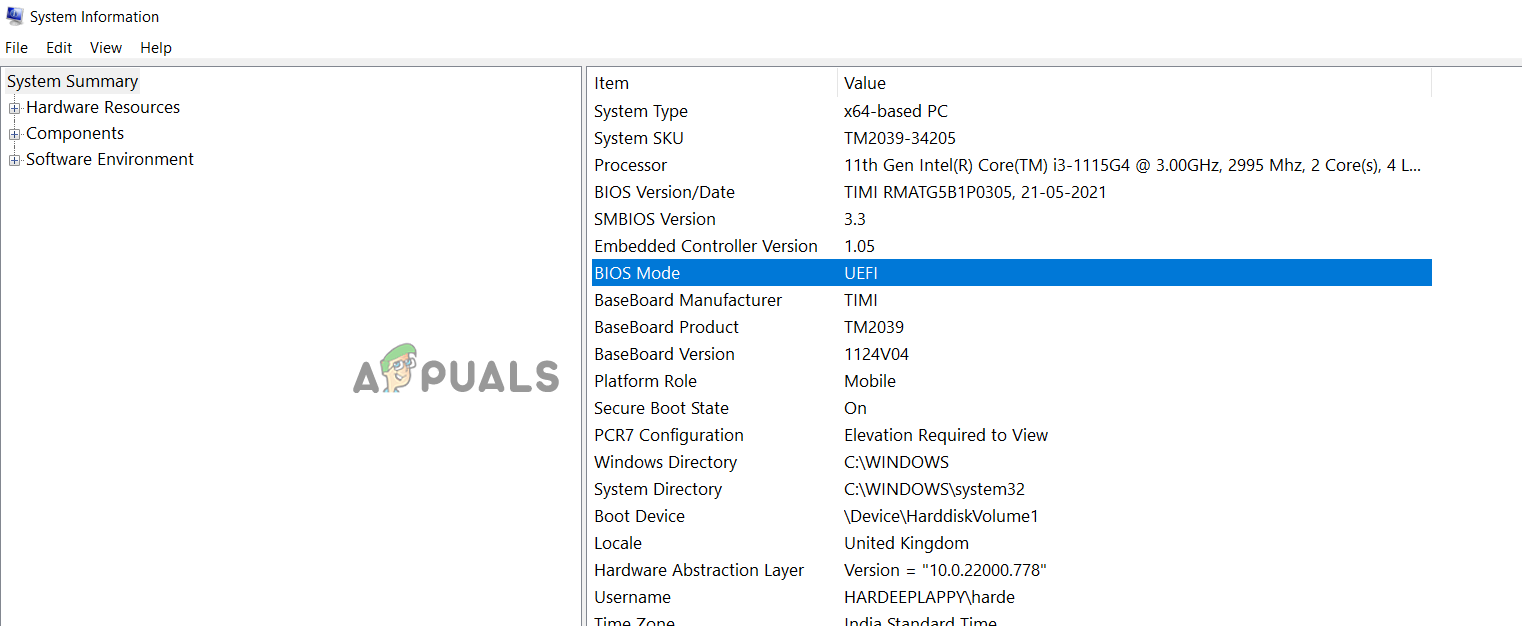
If it is Legacy, follow the instructions given to change it to UEFI
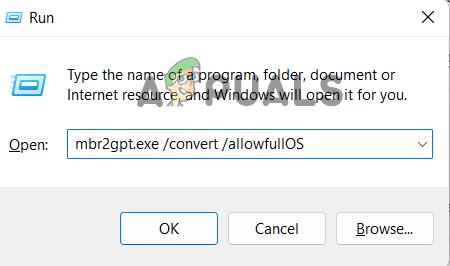
- Press Windows + R key altogether to open the Run dialog box.
- Now in the run box, type mbr2gpt.exe /convert /allowfullOS and press OK.

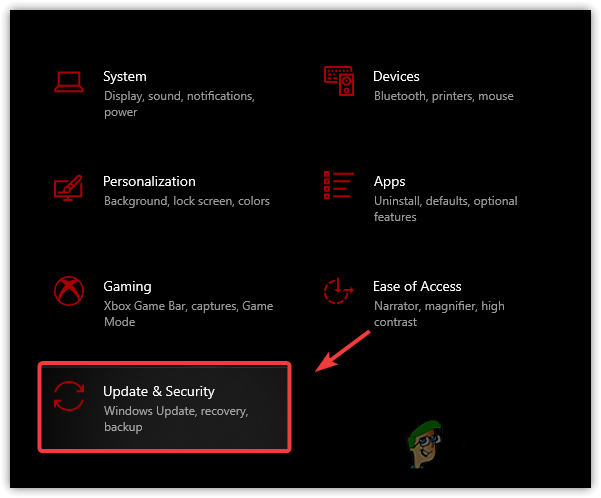
Type the command in the Run box - Then click the Windows Settings, the Update & Security option, and the Advanced Startup options.

Go to Update & Security - Click on the Restart now option.
- Then in the Advanced Options, choose the Troubleshoot option.

Open the Troubleshoot tab. - Now click on the UEFI firmware settings option, which will take you to the BOOT settings.

Open UEFI Firmware Settings in Advanced Options - Click on the Boot tab, then click the Boot configuration option and set it to UEFI.

Restart to Set it UEFI - Save the changes, restart your PC, and check if the issue is resolved.
5. Check Modern Standby Support
If you can still not use PCR7 Binding, then the Modern Standby Support is the last feature to check if it is enabled. Check that your device supports Modern Standby Support, which should be enabled too. To check if it is supported and enabled, follow the instructions given:
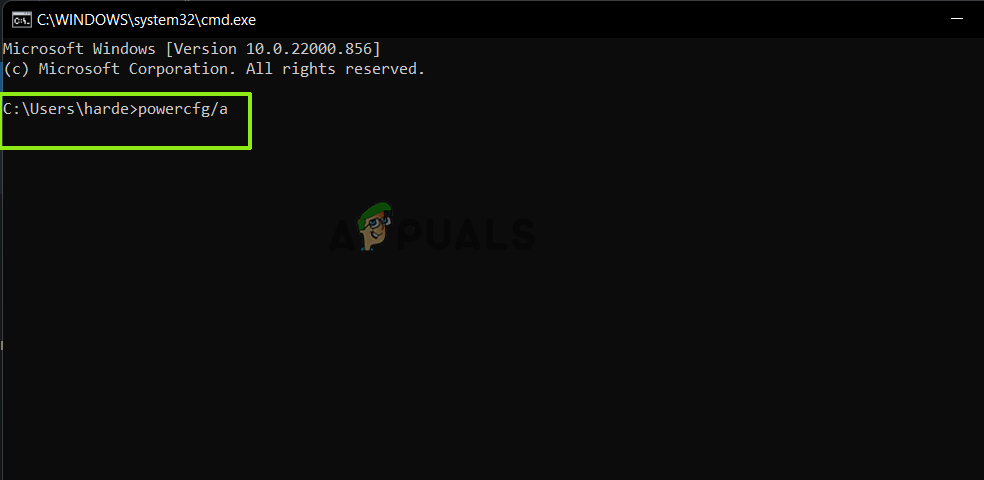
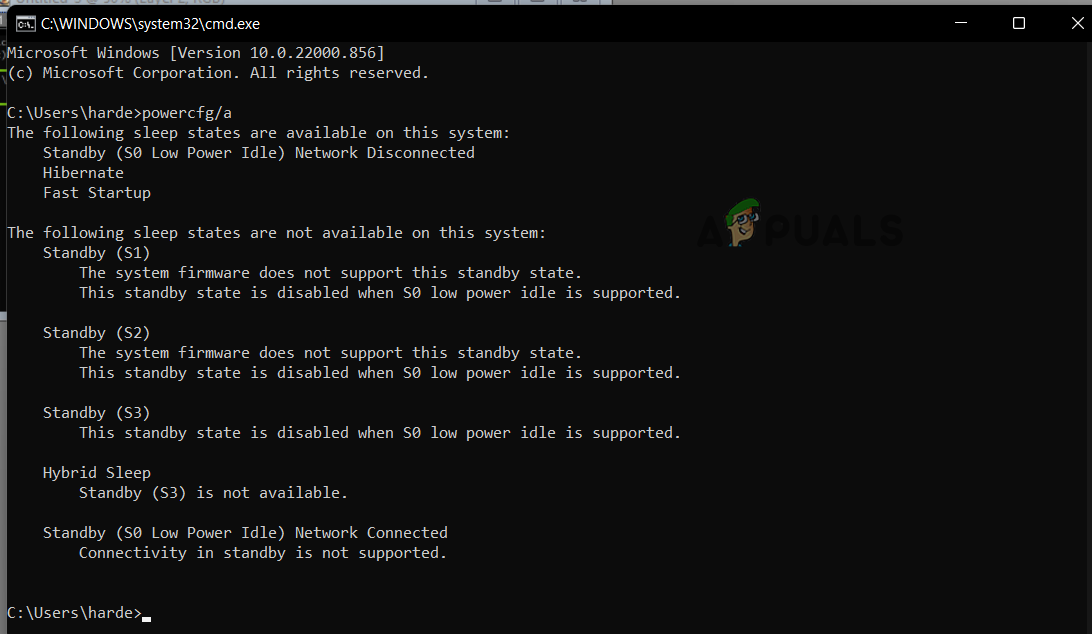
- Press Windows + R key together to open the Run box, and here type cmd and click ok
- Now in the command prompt, type powercfg/a and hit Enter

Type powercfg/a command in CMD - If it shows S0 Low Power Idle Mode, your computer supports the Modern Standby Support feature and is enabled.

Check the Modern Standby Support feature is enabled
These solutions may work for you to fix the Secure Boot State Unsupported problem in Windows 10/11. If you are still facing the problem, ensure your device is compatible with encryption technology.
Also, if your device is not meeting the device encryption hardware requirements, you can switch to a third-party application to encrypt your device.
If none of these methods work for you, you can try to repair install Windows first; if that doesn’t work, clean installing Windows is your best option.
Hardeep Kaur
Hardeep is a passionate technical writer with more than 7 years of experience. She has a keen interest in PC games, Windows OS and everything surrounding it. She is a technology enthusiast and fascinated with technology since her childhood days.
Secure Boot is a security feature that helps to ensure that only trusted applications are installed on the computer. Although this feature is enabled by default on most computers, you will still likely see the «Secure Boot state unsupported» error while installing Windows 11.
The error mainly appears when TPM is disabled on your computer. As such, if you’re also facing the same problem, follow the fixes below to troubleshoot the problem for good.
What Causes the «Secure Boot State Unsupported» Error?
Secure Boot is a feature of modern computers that uses a digital signature to verify the authenticity of the system’s software, especially the operating system’s files. It is one of the minimum requirements to install Windows 11.
Although you can easily bypass Windows 11’s minimum requirements, doing so would adversely affect your computer. You could expect your device to slow down or even crash on a frequent basis.
Some of the common reasons behind the «Secure Boot state unsupported» error are:
- You’ll likely see the error message if TPM is disabled or not installed on your computer.
- The error message will appear if Secure Boot is disabled in the BIOS.
- You’ll also encounter the error if BIOS mode is set to Legacy instead of UEFI.
Now, let’s dive into fixes that will help you eliminate the problem.
1. Enable Secure Boot in BIOS
You must enable Secure Boot in BIOS if you want to install Windows 11 on your computer. But before doing that, view Secure Boot’s current state. Here’s how to do it:
- Press the Win + R hotkey to open the Run dialog box. Then, type msinfo32, and press Enter. It’ll open the System information window.
- Click System Summary in the left panel.
-
Check the Secure Boot State in the right pane.

If the Secure Boot status is Off, you’ll have to enable it through your BIOS. To do that, follow the instructions:
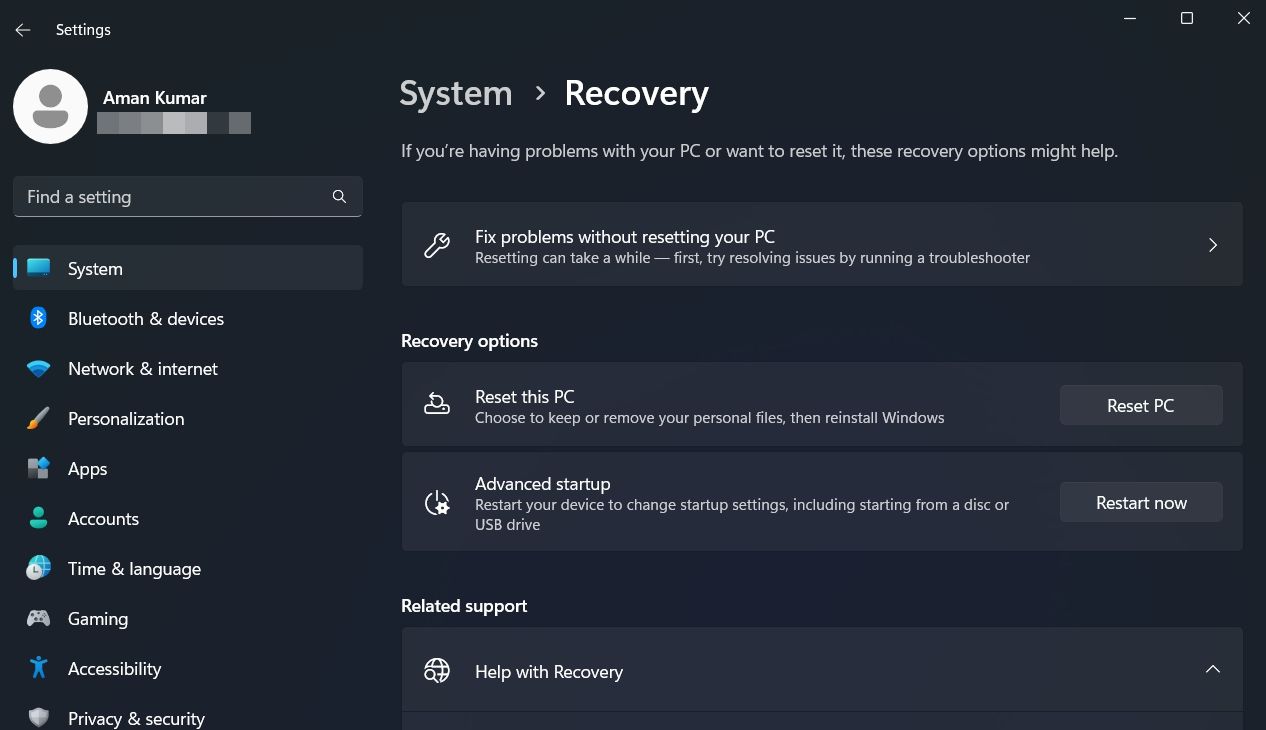
- Open the Settings menu by pressing the Win + I hotkey, and navigate to System > Recovery.
-
Click Restart now next to Advanced startup. It’ll restart your computer.

- In the Advanced startup mode, choose Troubleshoot and then Advanced options.
- Choose UEFI Firmware Settings and click Restart. I’ll boot you straight into Windows UEFI BIOS.
- Choose BIOS Setup.
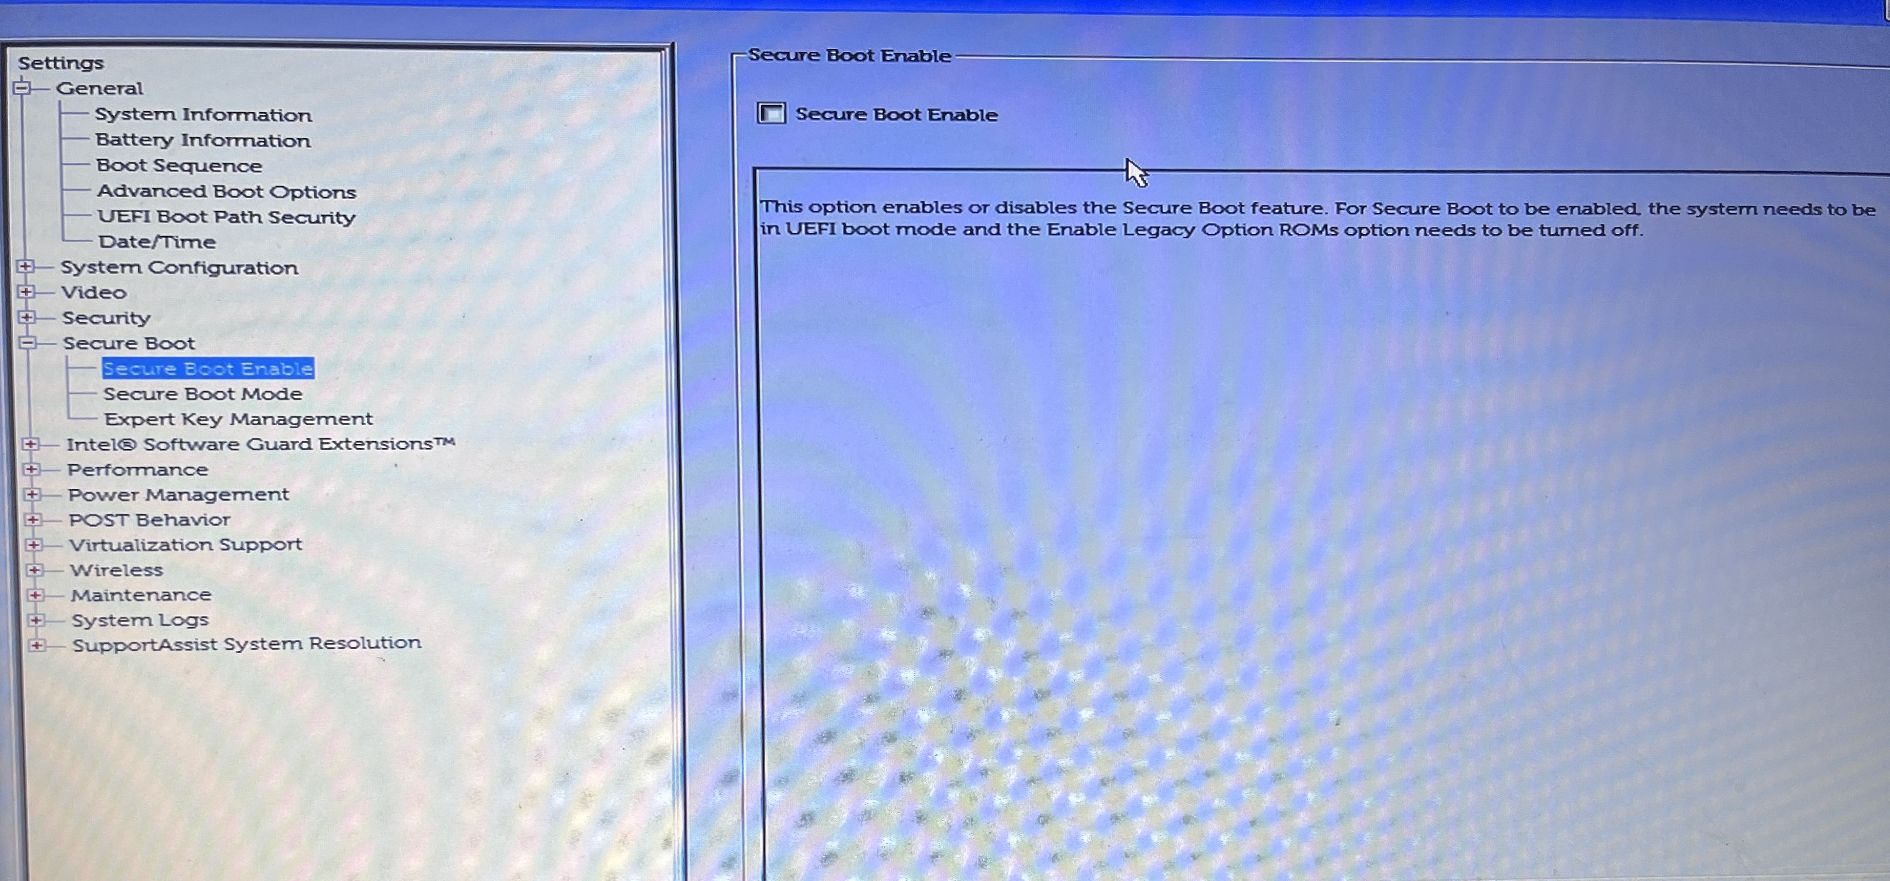
- Switch to Secure Boot.
-
Check the box before Secure Boot Enable.

Note that the steps to enable Secure Boot will be different for different manufacturers. You can check out your manufacturer’s BIOS page to know how to do it on your computer.
Once you’ve enabled Secure Boot, try to install Windows and check if the problem continues. If yes, then try the next solution on the list.
2. Check and Enable TPM Support
You must have the TPM chip installed on your computer to download Windows 11. If the TPM chip is missing, you can still install Windows 11 by bypassing the minimum requirement, but then the «Secure Boot state unsupported» error will continue to bother you now and then.
The problem in the discussion can also appear if TPM is disabled on your computer. To enable TPM, follow the below instructions:
- Open the Run dialog box.
- In the search bar, type tpm.msc and press Enter.
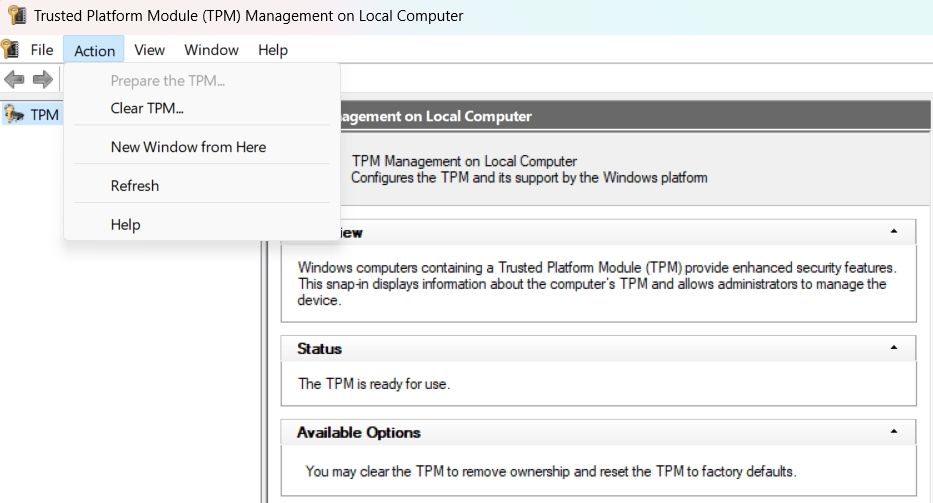
- In the TPM management window, click Actions in the top bar.
-
Choose Prepare the TPM from the context menu.

Restart your computer and check for the problem.
3. Choose UEFI as the BIOS’ Mode
Windows supports two BIOS modes–UEFI and Legacy. The difference between these two modes is in the process that the firmware uses to locate the boot target.
You must install Windows using the new UEFI mode as it offers more security features than the Legacy BIOS mode.
To choose UEFI as the BIOS mode, follow the below steps:
- Open the BIOS page on your computer.
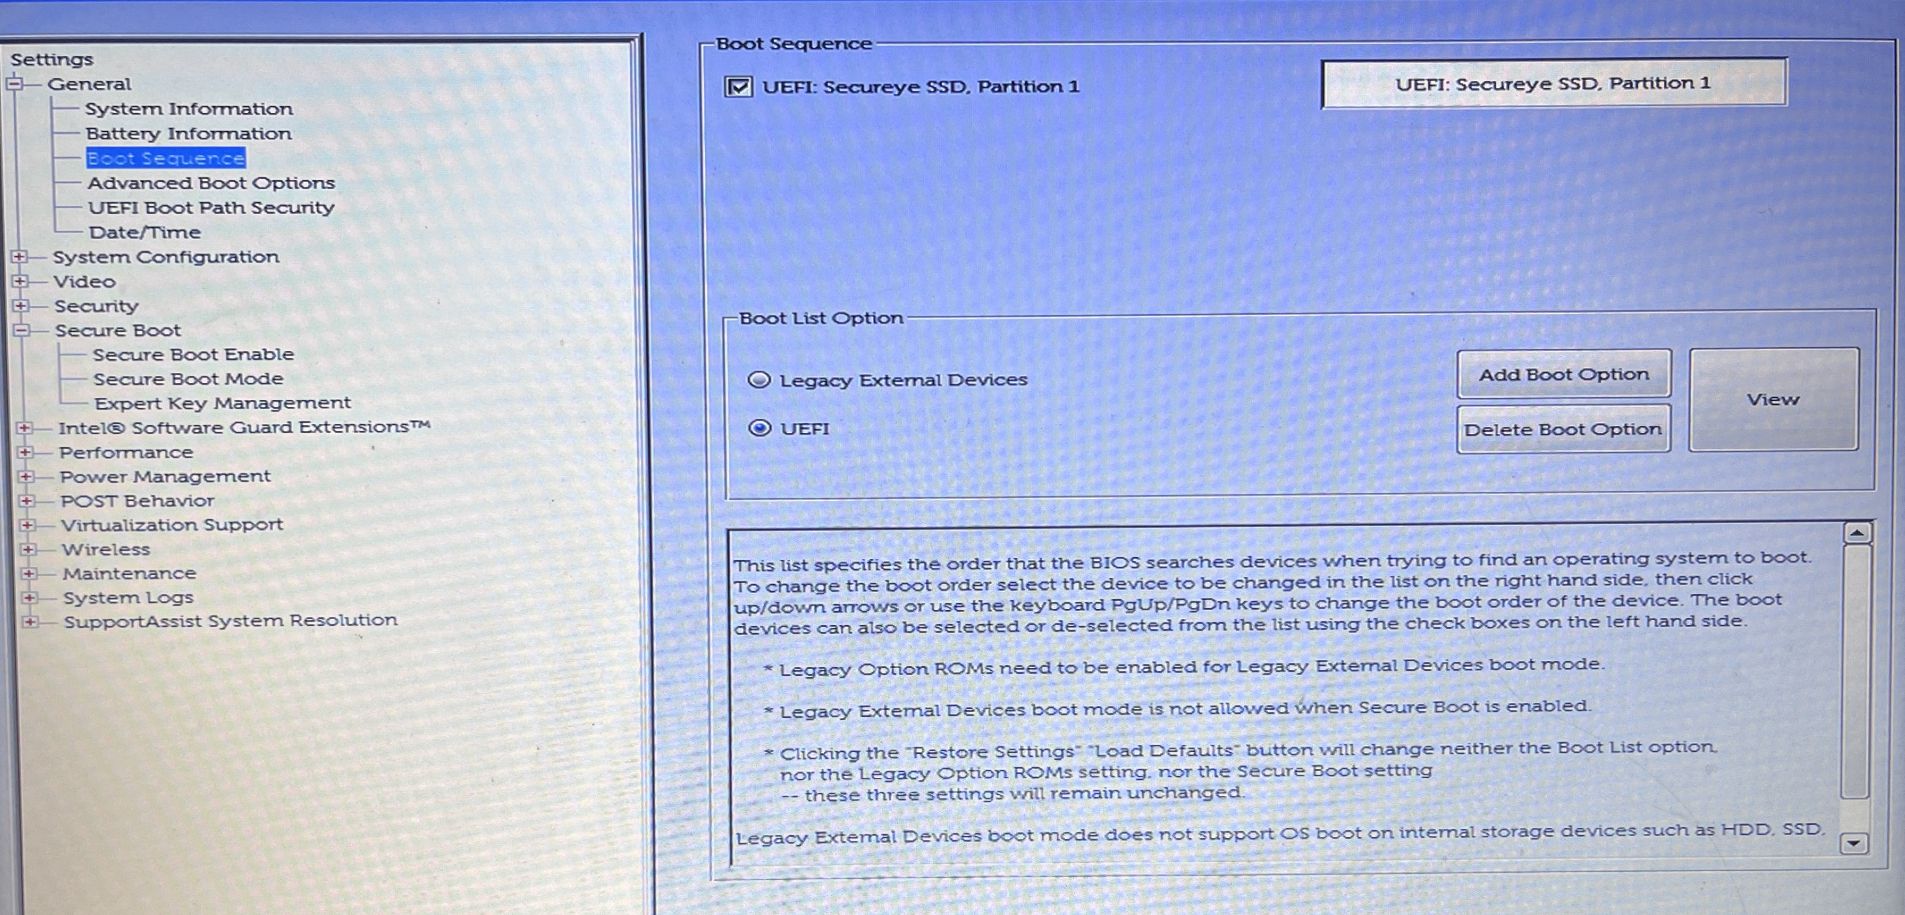
- Choose Boot Sequence from the left panel.
-
Check the UEFI option under Boot List Options.

- Save the changes and restart your computer.
Again, the process will differ for different manufacturers; therefore, you must check your manufacturer’s BIOS page to know how to do it on your computer.
4. Convert the Partition Style From MBR to GPT
In modern computers, the boot mode is set to UEFI and has GPT (GUID Partition Style) partition style. However, if your computer is using Legacy Boot mode and MBR (Master Boot Record) partition style, then you will face the problem at hand.
The solution, in this case, is to convert the partition style from MBR to GPT. But before doing that, you must check your computer partition style. Here’s how:
- Press Win + X to open the Power menu.
- Choose Disk Management.
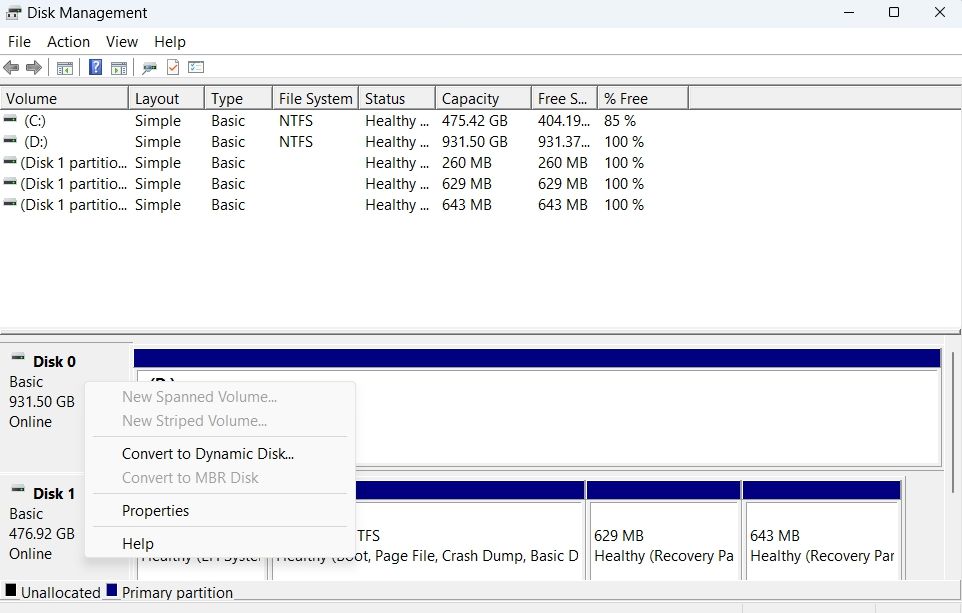
-
In the Disk Management window, right-click on the hard disk drive and choose Properties from the context menu.

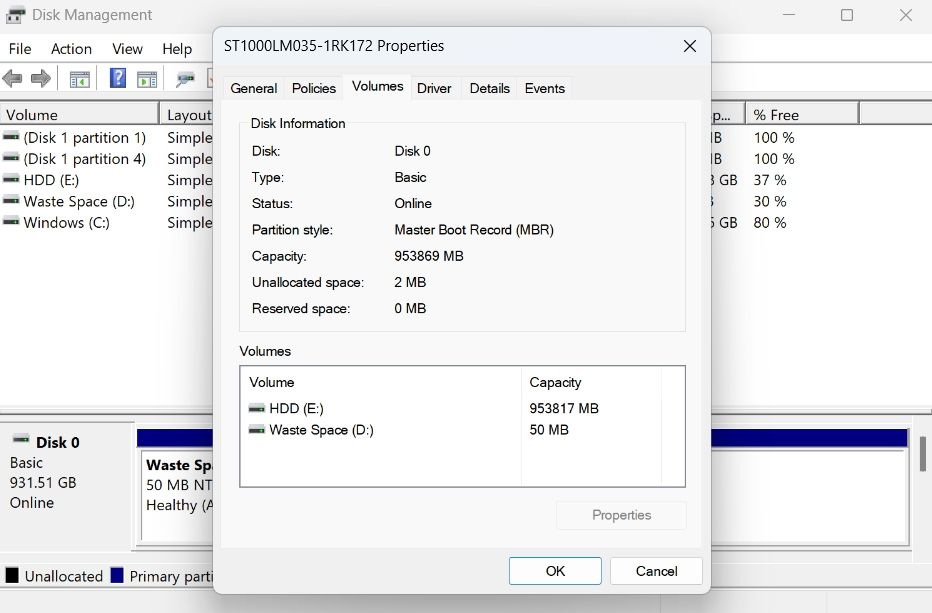
- Switch to the Volumes tab.
-
Check the Partition style. If it shows Master Boot Record (MBR), then you will have to convert it to GPT.

To convert the MBR partition style to GPT, follow the below steps:
- Open the Start Menu by pressing the Windows key.
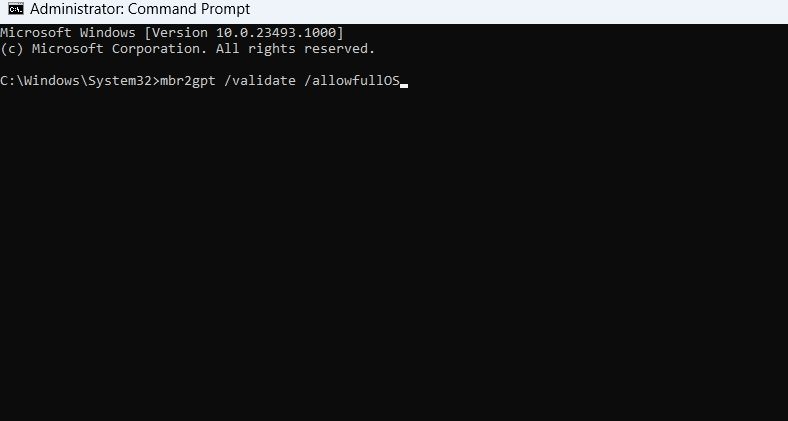
- Type Command Prompt in the search bar and click the Run as administrator option in right pane.
-
Type mbr2gpt /validate /allowfullOS and press Enter. This command will validate the partition.

- Once the validation is complete, type mbr2gpt /convert /allowfullOS and press Enter.
That’s it. Windows will start converting the partition style. The process may take some time, depending on the size of your drive.
5. Perform a Clean Boot
Are you still facing the «Secure Boot state unsupported» error? If yes, then you will have to perform a clean boot to troubleshoot the issue. Check out our guide on how to perform a clean boot on Windows for more information.
In the clean boot state, check if you’re facing the error message again or not.
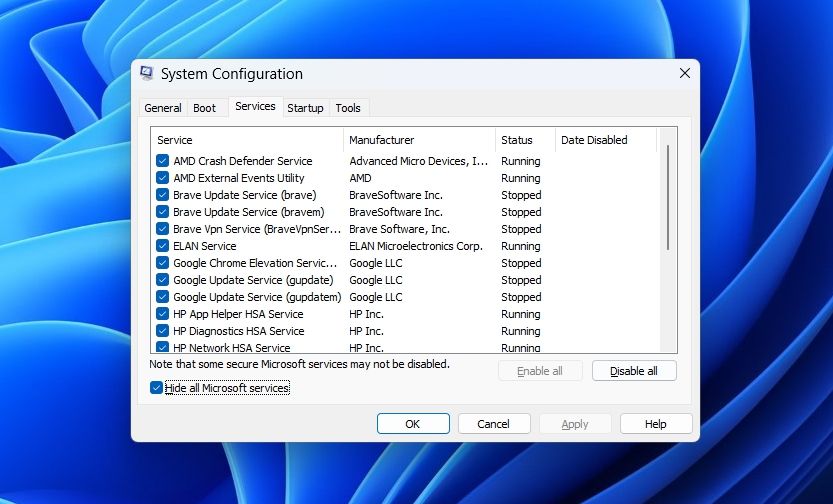
If not, then it indicates that one of the services you disabled was causing the problem. To narrow it down, repeat the above process while slowly re-enabling the services until you see the error again.
Once you find out which service is the culprit, consider downloading its driver update or running an SFC scan if it’s a Windows-based service.
The «Secure Boot State Unsupported» Error, Fixed
The «Secure Boot state unsupported» error is a very common issue that appears when you try to install Windows 11. Fortunately, you can quickly troubleshoot this error by following the above fixes.
But in the worst-case scenario, if none of the above fixes were helpful, then you will have to clean install Windows.
Are you encountered the “Windows 10 won’t boot with Secure Boot enabled” issue? How to fix it? What causes the issue? This post of MiniTool Partition Wizard will show you the reasons and provide several effective ways for the boot failure after enabling Secure Boot error.
Windows Computer Won’t Boot After Enabling Secure Boot
Secure Boot is part of the Microsoft Windows operating system from Microsoft Windows 8 and above. As we all know, the traditional BIOS can be booted from anywhere, and the Secure Boot running on top of UEFI is used to ensure that the Windows operating system is free from malware.
However, some users are complaining that the Windows computer won’t boot after enabling Secure Boot. Whenever they encounter this issue, they see the computer return to the UEFI or BIOS screen with no error messages or logs. On the other hand, if Secure Boot remains disabled, they’ll get an error message stating “This PC can’t run Windows.”
Causes for Windows Computer Won’t Boot After Enabling Secure Boot
In this section, we list several causes of this problem. As follows:
- Outdated BIOS version: The main cause of the “boot failure after enabling Secure Boot” issue is an outdated BIOS version.
- GPU failure: This issue could also be that the dedicated GPU is starting to fail.
- Outdated SSD drivers: If you are able to boot without Secure Boot enabled, your SSD driver may be the cause.
- Incompatible partition style: Windows can use the GPT partition style with Secure Boot. Windows will not boot if the drive is still in the unbootable MBR partition table when Secure Boot is enabled.
- Inconsistent startup data: Inconsistent startup data may also cause Windows 10 won’t boot with Secure Boot enabled.
- Corrupted system files: This problem can also be caused by corrupted system files.
All of these above can be the reason why Windows 10 won’t boot with Secure Boot enabled. Well, how to fix this problem? Keep reading.
Ways to Windows Computer Won’t Boot After Enabling Secure Boot
Here we summarize 9 feasible ways to help you fix the “Windows 10 won’t boot with Secure Boot enabled” error. You can try them in order until the error gets fixed.
Way 1. Remove the CMOS Battery
It turns out that, one of the most common reasons why Windows does not start after enabling Secure Boot is that the motherboard battery (CMOS) is holding the computer in a state where it thinks Secure Boot isn’t available.
In this case, you can remove the motherboard battery, put it outside for about 10 minutes, and clean the power capacitor to solve the problem.
If you’re dealing with a replaceable CMOS battery, you should be able to fix the problem by clearing the CMOS battery or replacing the battery entirely in case the problem recurs.
Way 2. Disconnect External Storage Devices
It turns out that you may experience this issue if you have an external hard drive or any other storage device connected to your computer. In this case, disconnecting them temporarily can resolve the issue, then start your computer and see if that helps. If the problem still persists, go on to the next solution.
Way 3. Update the BIOS Version
In some cases, outdated BIOS can also cause this “Windows 10 won’t boot with Secure Boot enabled” error. Some affected users claim that the issue is fully resolved after updating their BIOS firmware to the latest version.
You can check and update your BIOS version by reading this post: How to Update BIOS Windows 10 | How to Check BIOS Version.
Way 4. Update the SSD Driver
If you only experience this issue with Secure Boot enabled, but the boots work fine, your SSD drivers may be the source of the problem. So, you need to update the SSD driver using Device Manager in Safe Mode. Here’s a tutorial for booting into safe mode:
Step 1: Boot into WinRE.
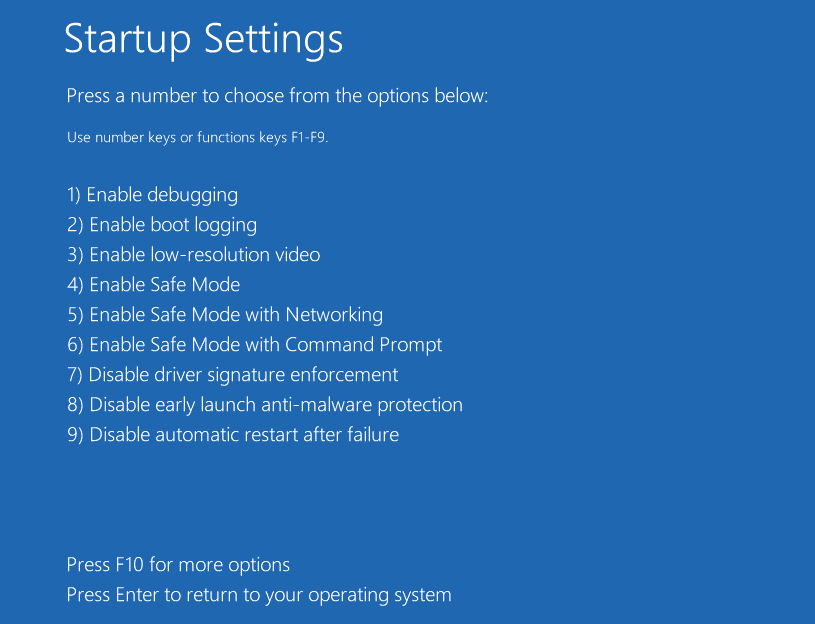
Step 2: Boot into Safe Mode.
- Navigate to Troubleshoot > Advanced options after you enter WinRE.
- Click Startup Settings and wait for a while.
- Press the F5 key to choose Enable Safe Mode with Networking option, thus booting into safe mode.
After the computer boot into Windows or safe mode, you can update your SSD driver.
Step 1: Press the Win + X keys and select Device Manager from the pop-up context menu.
Step 2: Expand the Disk drives category, and then right-click the SSD driver and select Update driver.
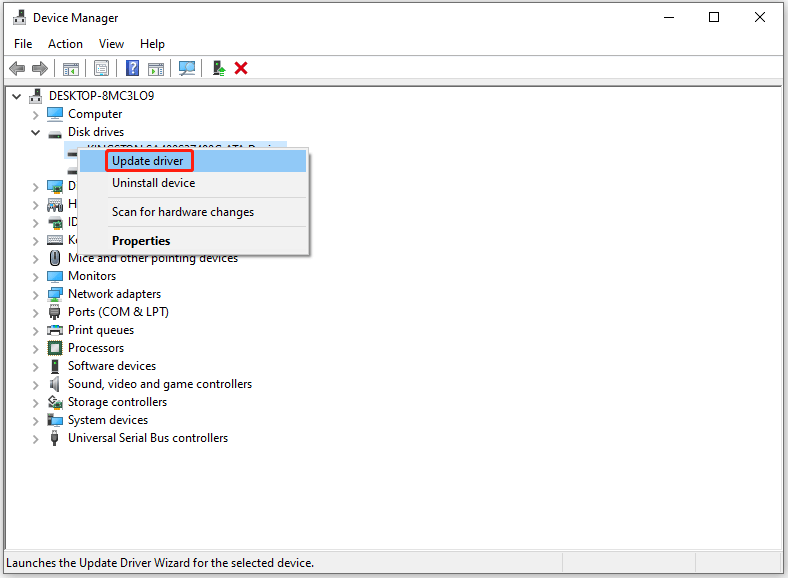
Step 3: In the pop-up window, you can select Search automatically for drivers and follow the on-screen prompts to complete the process. Once done, restart your PC and check if the “Windows 10 won’t boot with Secure Boot enabled” error gets fixed.
Way 5. Install Pending Windows Updates
Microsoft recently fixed startup issues caused by outdated Windows updates. You need to install every pending Windows update before you can apply the patch that fixes this “Windows does not start after enabling Secure Boot” issue. This way also requires you to enter Safe Mode. Here is a tutorial to install pending Windows updates.
Step 1: Press the Win + R keys to open the Run dialog box. Then type ms-settings:windowsupdate in the text field and press Enter.
Step 2: After opening the Windows Update window, select Check for Updates.
Step 3: After the update has finished downloading, select Install Now to begin a local installation.
Restart your computer to see if the issue has been resolved. If Secure Boot is still preventing you from starting your computer, continue with the method after that.
Way 6. Convert Disk from MBR to GPT
As mentioned above, Secure Boot is a feature of UEFI. If your disk is MBR, you need to convert the disk from MBR to GPT in order to support Secure Boot and make your computer bootable with the feature activated.
Before doing that, check which format your drive is partitioned with GPT or MBR. You can check this in the Disk Management application. The following steps will help you:
- Right-click the Start menu and select Disk Management.
- Now, right-click on your hard drive and select Properties.
- In the Properties window, click the Volumes tab. There you will see the partition style of your hard drive.
If your hard disk partition type is MBR, it should be converted to GPT. How to convert MBR to GPT without data loss? Here we highly recommend you use MiniTool Partition Wizard.
Its Bootable Edition can help you complete various partition operations when Windows fails to start, including convert MBR to GPT, recovering lost/deleted partitions, rebuilding MBR, cloning disk/partition, etc.
For the problem that the system cannot boot, you should prepare a working computer and a USB or CD/DVD in advance, and then click the provided button to download MiniTool Partition Wizard.
MiniTool Partition Wizard DemoClick to Download100%Clean & Safe
Step 1: Plug the prepared USB into the working computer or insert the prepared CD/DVD into its CD/DVD burner.
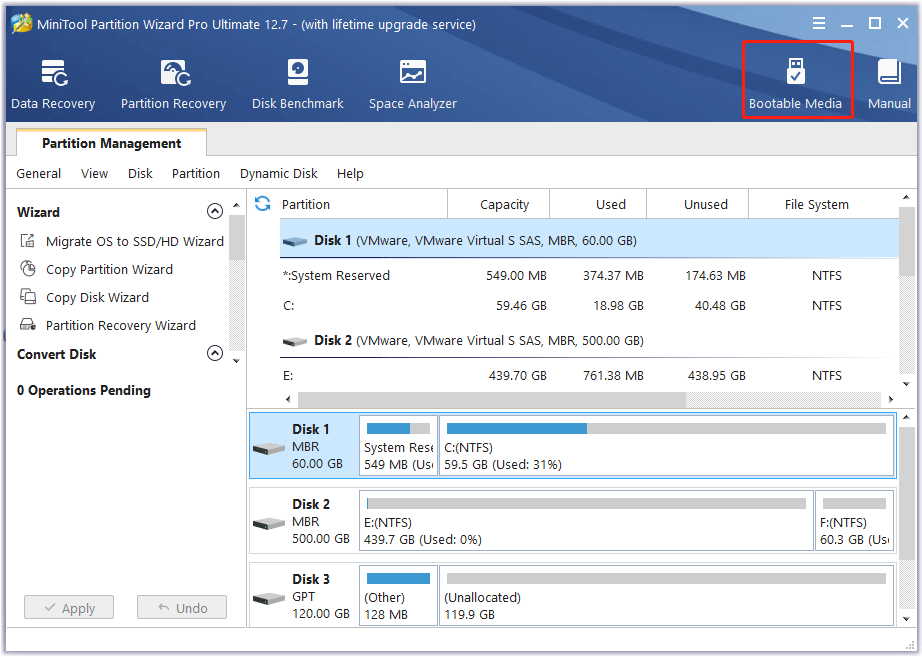
Step 2: Download the software and then launch it to access its main interface. Click Bootable Media in the upper right corner and follow the on-screen instructions to create a bootable USB, CD, or DVD.
Step 3: Plug the bootable USB into the original computer which the operating system cannot boot or put the bootable CD or DVD into it.
Step 4: Restart the computer and press F2 or another key to enter BIOS menu. Change boot settings to make your computer boot from the USB or CD/DVD flash drive.
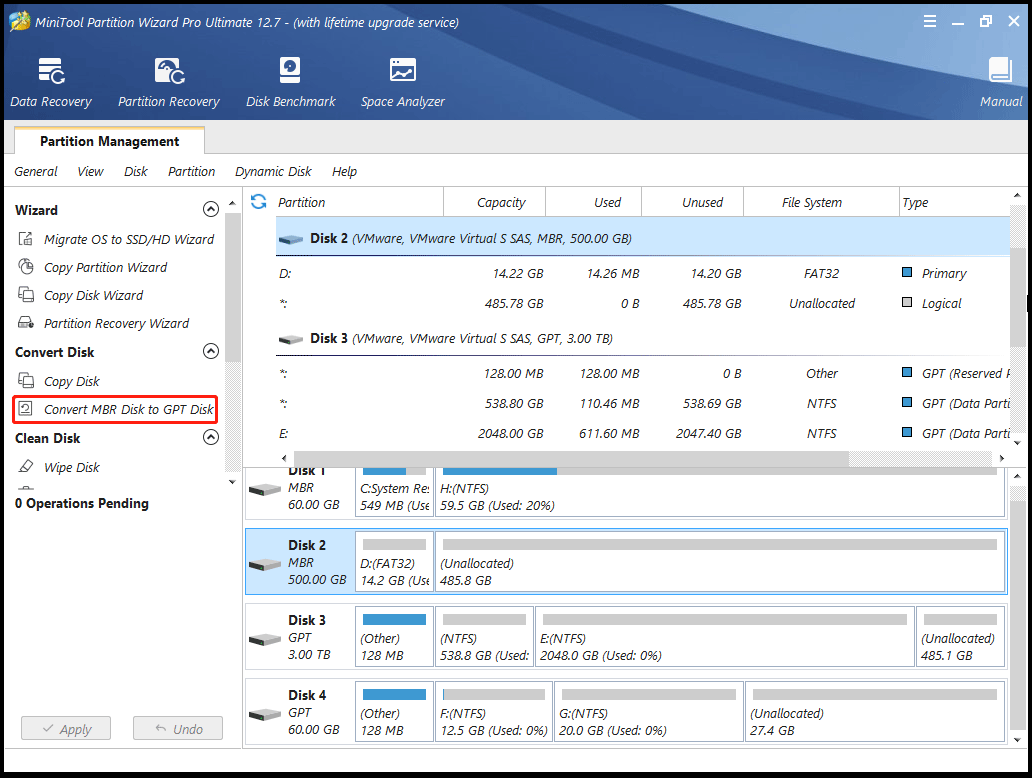
Step 5: In the main interface of MiniTool Partition Wizard, select the target disk and choose Convert MBR Disk to GPT Disk from the left side panel.
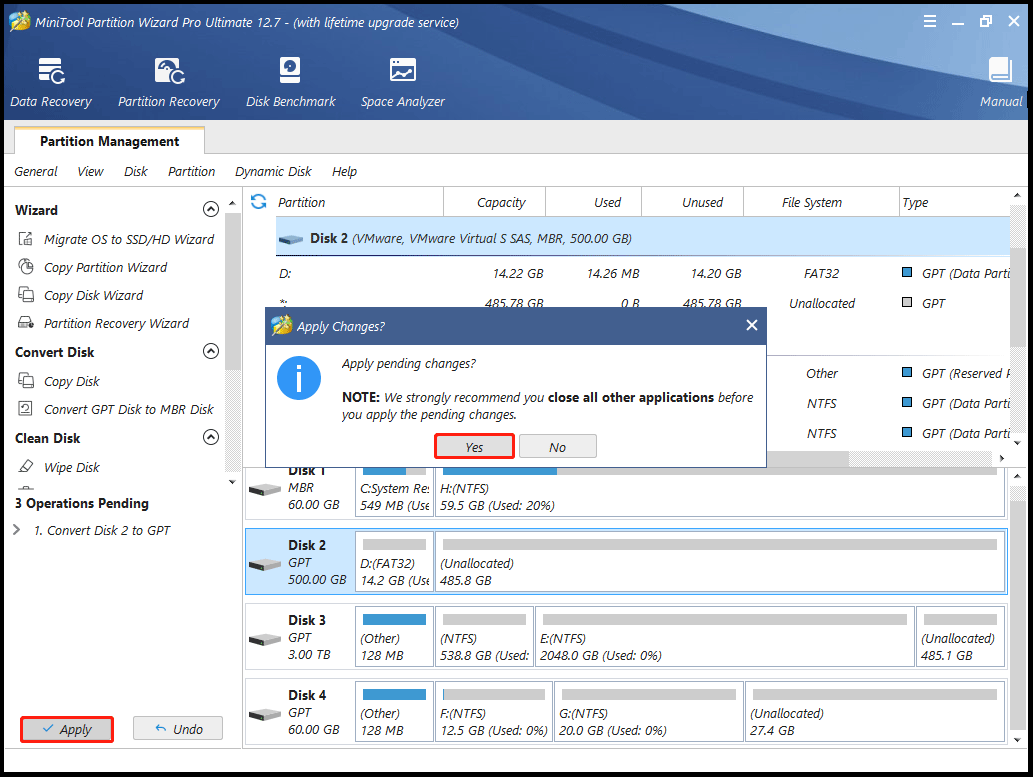
Step 6: This interface is the preview of the conversion result. Click on Apply to execute the change. Then tap the Yes button to confirm the conversion. Wait for the completion of disk conversion. Then click on the OK button finally.
After converting MBR to GPT, start your PC with Secure Boot enabled. It should work.
Way 7. Boot from bootx64.efi or bootia32.efi File
Some users reported that manually booting the PC from the bootx64.efi file resolved the issue. Files with the EFI extension are bootloaders. In most cases, these files are located on a specific system partition. This system partition does not have any drive letter and is usually hidden.
If you have a UEFI-based system, you may find the EFI file under Windows Boot Manager in the following location:
- \EFI\boot\bootx64.efi
- \EFI\boot\bootia32.efi
Note:
If your operating system is a 64-bit version of Windows, the bootx64.efi file will be present in your firmware. On the other hand, users of 32-bit Windows operating systems will find the bootia32.efi file on their firmware.
To manually boot your computer from an EFI file, you should enter the boot options in the BIOS. There you will find all the boot options available on your computer depending on the manufactures of the computers. See if a bootx64.efi or bootia32.efi file is available. If yes, start your computer from this file.
Way 8. Run DISM and SFC Tools
The “Windows computer won’t boot after enabling Secure Boot” error may be caused by corrupted system files. You can repair them by running DISM and SFC tools. Here shows how to use DISM and SFC in Command Prompt.
Step 1: Type cmd in the Windows search bar. Then right-click on Command Prompt and select Run as administrator.
Step 2: In the Command Prompt window, type sfc /scannow and press Enter.
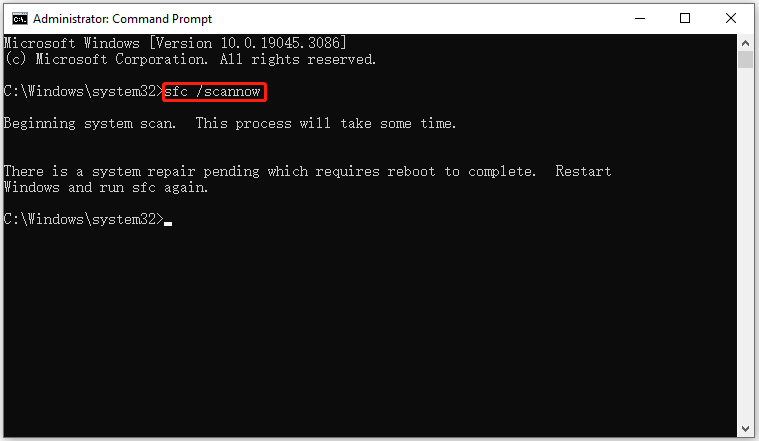
Step 3: When the SFC tool completes its task, type DISM.exe /Online /Cleanup-image /Restorehealth and press Enter.
Step 4: Wait patiently until the process is 100% complete.
Way 9. Clean Install
If the above methods can’t solve the “boot failure after enabling Secure Boot” error, you can try to clean install your PC to solve it. But all data on the hard drive will be erased after you clean install, so pay attention that you need to back up them before you do.
Facing the situation that Windows cannot boot normally, you should take advantage of the third-party software called MiniTool Partition Wizard, which can help you back up data before installing Windows.
MiniTool Partition Wizard DemoClick to Download100%Clean & Safe
Here is a tutorial on how to back up data with the help of MiniTool Partition Wizard.
Step 1: Boot the PC from created bootable CD/DVD disc or USB flash drive as the steps mentioned above.
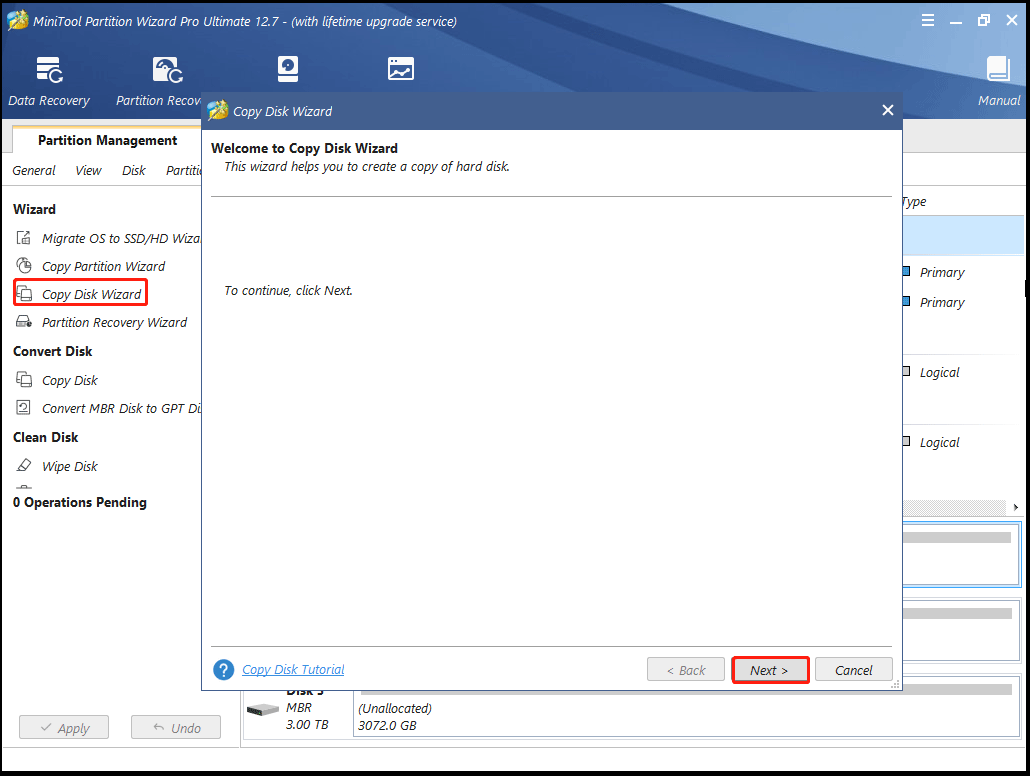
Step 2: In the main interface of MiniTool Partition Wizard, click on Copy Disk Wizard in the action panel. Then click on Next.
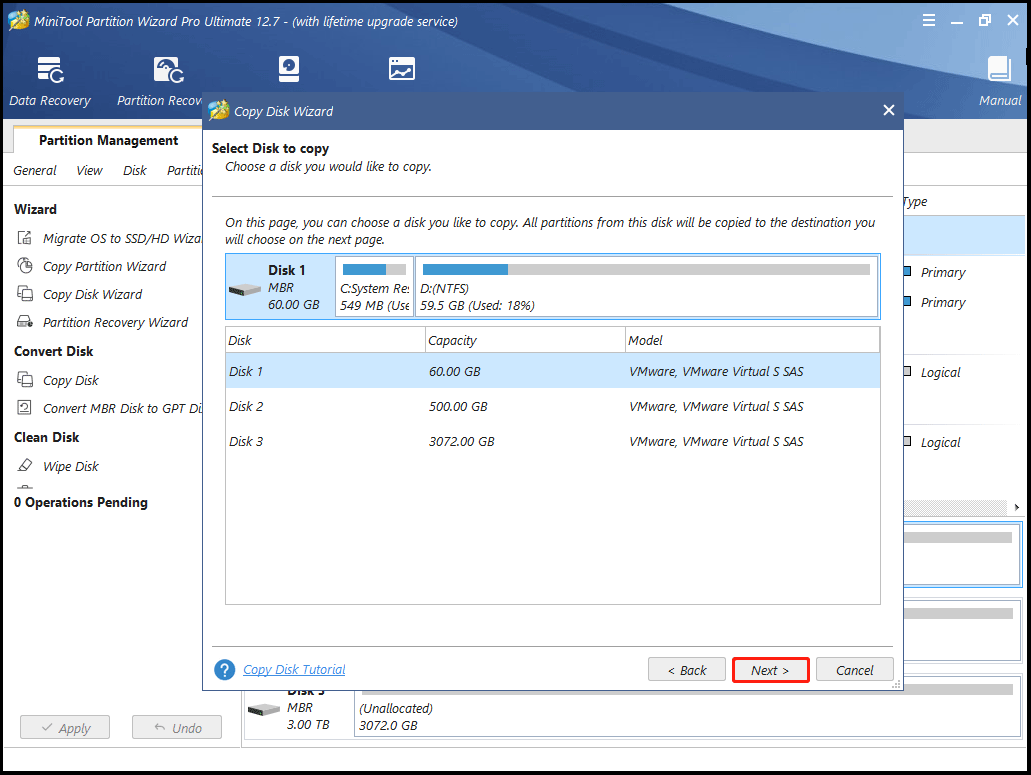
Step 3: In the pop-up window, select the disk to copy and click on Next.
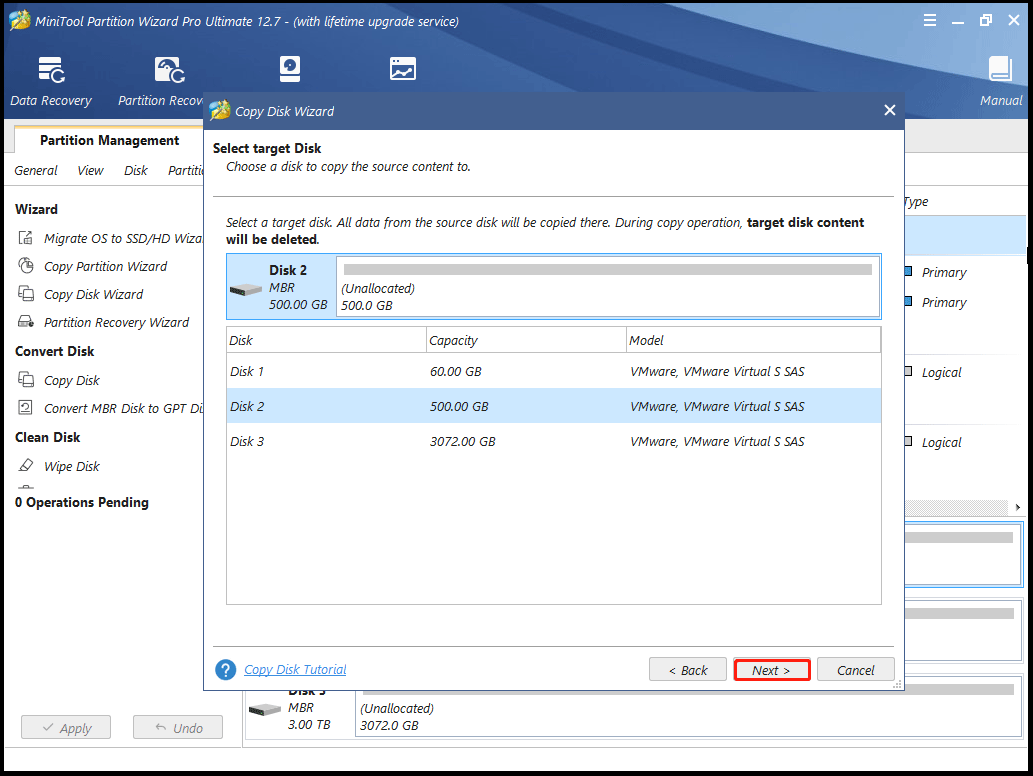
Step 4: Select the destination disk in the next window and click on the Next button.
Step 5: Pick Copy Options based on your needs or situation.
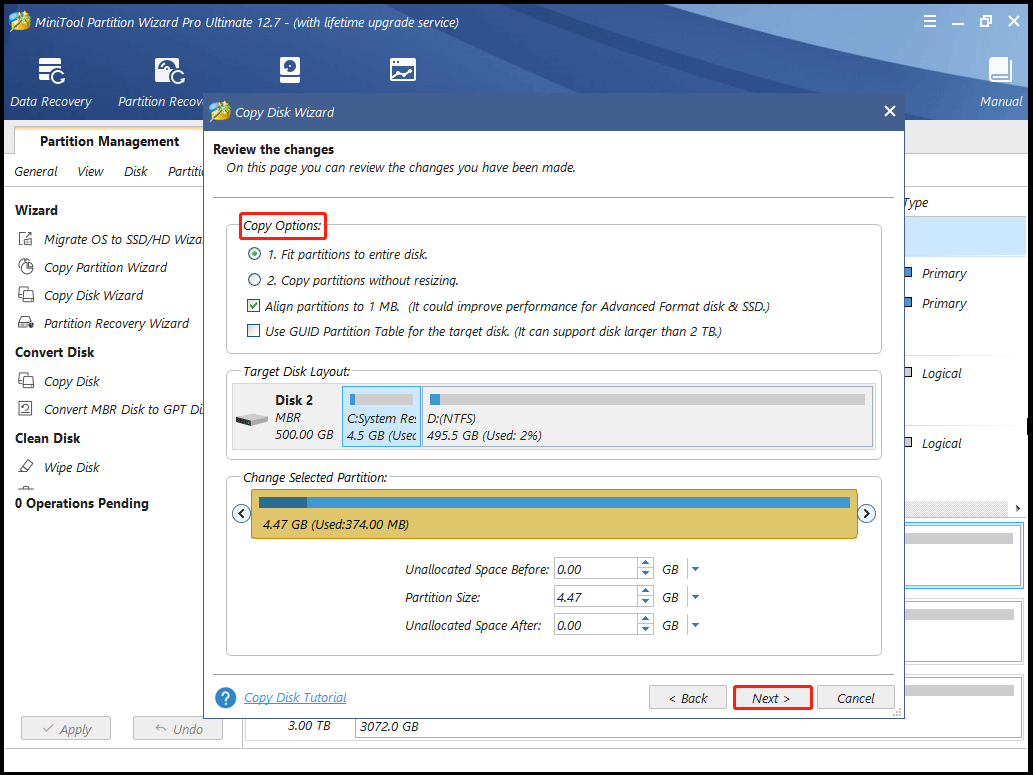
Step 6: Click Finish > Apply > Yes to carry out the pending operation.
After backing up data, you can refer to this article to clean install your PC.
Are you bothered by the “Windows 10 won’t boot with Secure Boot enabled” error? This post provides several feasible solutions to this issue. Just have a try!Click to Tweet
Bottom Line
How to fix the “Windows 10 won’t boot with Secure Boot enabled” issue? This post focuses on the causes of error and provides several feasible ways. If you are one of those who encounter this problem, you can pay attention to this post.
For any other opinions about this error, you can leave a message in our comment area below. If you meet certain issues while using MiniTool Partition Wizard, you can send us an email via [email protected] to get a quick reply.