
Why isn’t Skype starting on my desktop?
There are several possible reasons why Skype on desktop might not be starting.
The most common cause is that your system does not meet the minimum requirements of the latest version of
Skype
. For more information, check the
Skype system requirements
.
For Mac, you should also make sure that your version of Skype is up to date by using
Software Update
and installing the latest version of
QuickTime
.
Another common issue is with the default text-to-speech setting on Mac OS X. To change the default text-to-speech setting:
-
In the menu bar, select the
Apple
menu, then select
System Preferences
. -
In the
System Preferences
window, select
Accessibility
. -
Select
Spoken Content
. -
In the
System Voice
drop-down, select anything other than the current selection. -
Try to start Skype again.
Need more help?
Want more options?
Explore subscription benefits, browse training courses, learn how to secure your device, and more.
Все способы:
- Решение проблем с запуском Скайпа
- Причина 1: Устаревшая версия программы
- Причина 2: Проблемы с интернет-соединением
- Причина 3: Работа антивируса и/или брандмауэра
- Причина 4: Вирусное заражение
- Причина 5: Технические работы
- Дополнительно: Сброс настроек и переустановка программы
- Заключение
- Вопросы и ответы: 3
Несмотря на то что Skype давно потерпел поражение в битве с мессенджерами, он все еще востребован среди пользователей. К сожалению, далеко не всегда эта программа работает стабильно, особенно в последнее время. Связано это не в последнюю очередь с частыми переработками и обновлениями, а на Windows 10 эта проблема усиливается не менее редкими апдейтами операционной системы, но обо всем по порядку.
Решение проблем с запуском Скайпа
Причин, по которым Skype может не запускаться на Windows 10, не так много, и чаще всего они сводятся к ошибкам системы или действиям пользователя – неумелым или заведомо неправильным, в данном случае уже не столь важно. Наша с вами сегодняшняя задача – заставить программу запускаться и нормально работать, а потому приступим.
Причина 1: Устаревшая версия программы
Microsoft активно навязывают пользователям обновление Skype, и если ранее их можно было буквально в несколько кликов отключить, то сейчас все делается значительно сложнее. Кроме того, версии 7+, которые так полюбились многим пользователям этой программы, более не поддерживаются. Проблемы с запуском как на Windows 10, так и на предшествующих ей, а значит, уже не актуальных версиях операционной системы, в первую очередь возникают как раз из-за морального устаревания – Скайп открывается, но все что можно сделать в приветственном окне, это установить обновление или закрыть его. То есть, выбора нет, почти…

Если вы готовы обновиться, обязательно сделайте это. Если же такого желания нет, установите старую, но пока что работающую версию Skype, а затем запретите ей обновляться. О том, как делается первое и второе, мы ранее писали в отдельных статьях.
Подробнее:
Как отключить автоматическое обновление Скайпа
Установка старой версии Skype на компьютер
Дополнительно: Скайп может не запускаться еще и по той причине, что в этот момент он устанавливает обновление. В таком случае остается только подождать, пока данная процедура будет завершена.
Причина 2: Проблемы с интернет-соединением
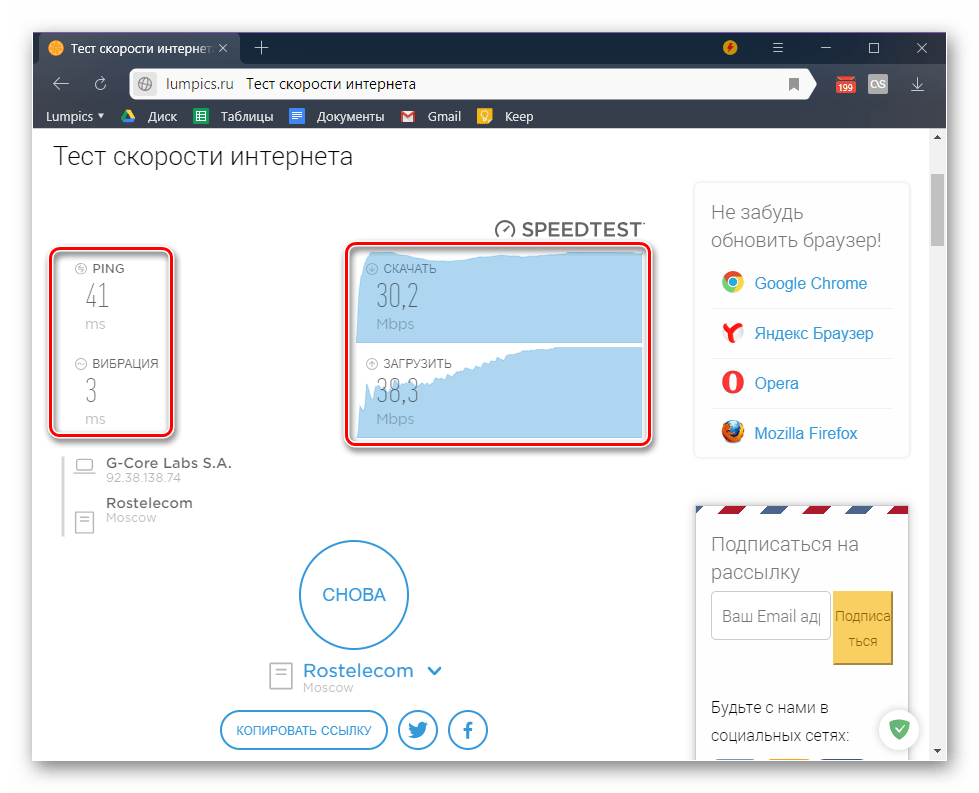
Ни для кого не секрет, что Skype и ему подобные программы работают только при наличии активного подключения к сети. Если на компьютере отсутствует интернет или его скорость слишком низкая, Скайп может не только не выполнять свою основную функцию, но и вовсе отказываться запускаться. Поэтому проверить как настройки подключения, так и непосредственно скорость передачи данных, точно не будет лишним, особенно, если вы не уверены в том, что с ними все в полном порядке.
Подробнее:
Как подключить компьютер к интернету
Просмотр скорости интернета в Виндовс 10
Программы для проверки скорости интернет-соединения
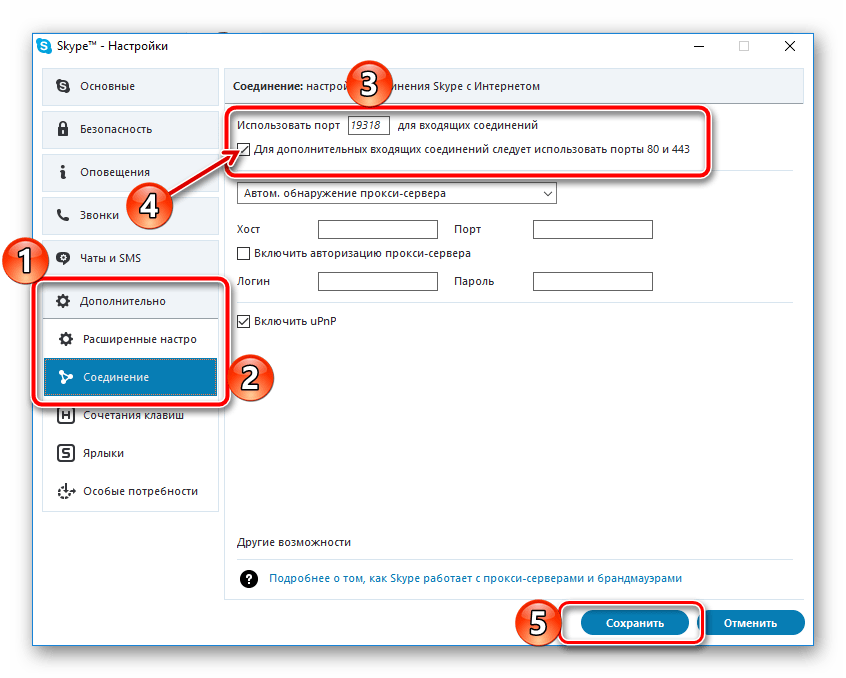
В старых версиях Скайп можно столкнуться и с еще одной проблемой, напрямую связанной с интернет-соединением – он запускается, но не работает, выдавая ошибку «Не удалось установить подключение». Причина в данном случае заключается в том, что зарезервированный программой порт занят другим приложением. Поэтому если вы все еще пользуетесь Skype 7+, но рассмотренная выше причина вас не коснулась, стоит попробовать изменить используемый порт. Делается это следующим образом:

- На верхней панели откройте вкладку «Инструменты» и выберите пункт «Настройки».
- Разверните в боковом меню раздел «Дополнительно» и откройте вкладку «Соединение».
- Напротив пункта «Использовать порт» введите номер заведомо свободного порта, установите галочку в расположенный ниже чекбокс «Для дополнительных входящих соединений…» и нажмите по кнопке «Сохранить».
Перезапустите программу и проверьте ее работоспособность. Если проблема по-прежнему не будет устранена, повторно выполните описанные выше действия, но в этот раз укажите в настройках Скайпа изначально заданный порт, после чего переходите далее.
Причина 3: Работа антивируса и/или брандмауэра
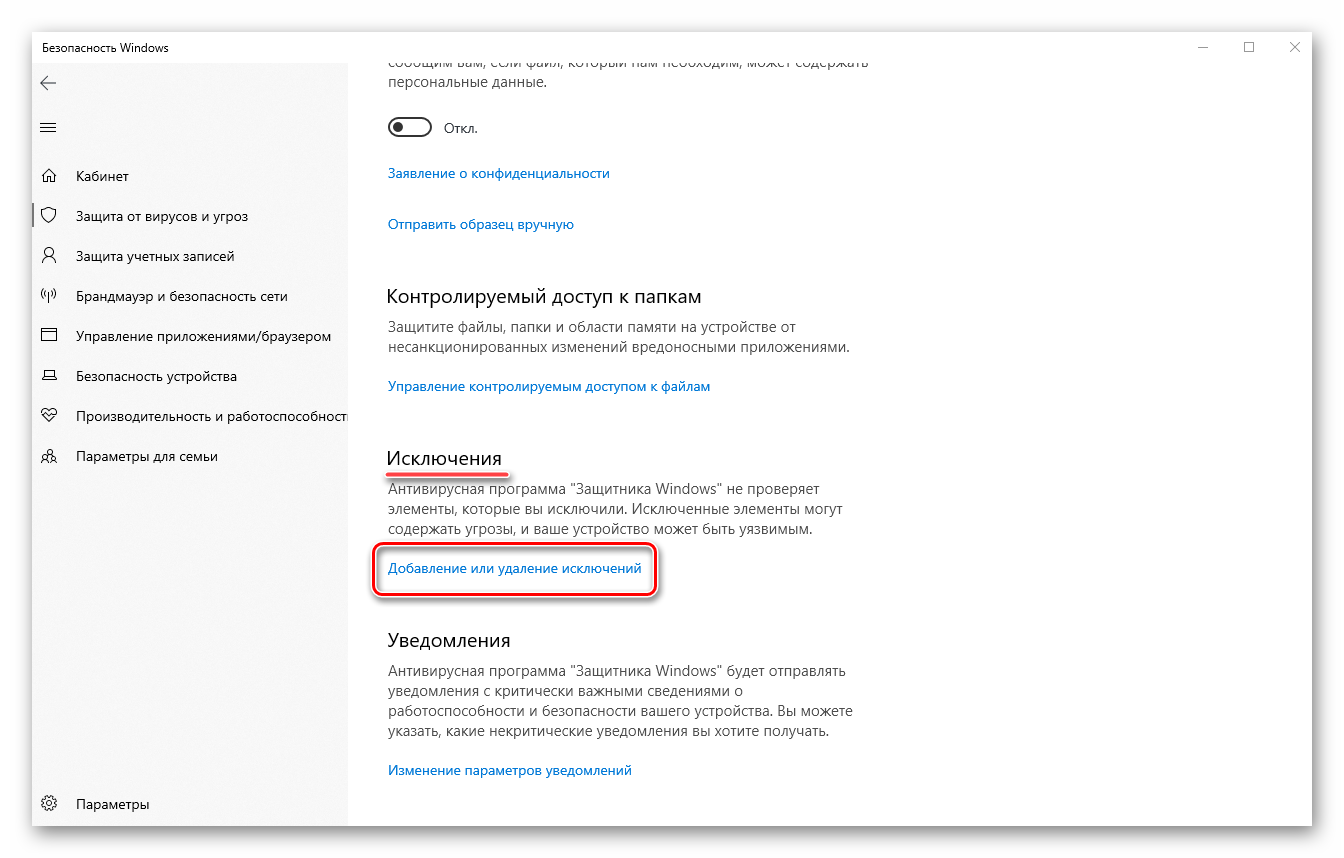
Брандмауэр, встроенный в большинство современных антивирусов, время от времени ошибается, принимая за вирусное ПО абсолютно безопасные приложения и обмен данными по сети, которые они инициируют. Это же характерно и для встроенного в Windows 10 Защитника. Поэтому вполне возможно, не запускается Skype как раз из-за того, что стандартный или сторонний антивирус принял его за угрозу, тем самым заблокировав программе доступ к интернету, а это, в свою очередь, мешает ей запуститься.
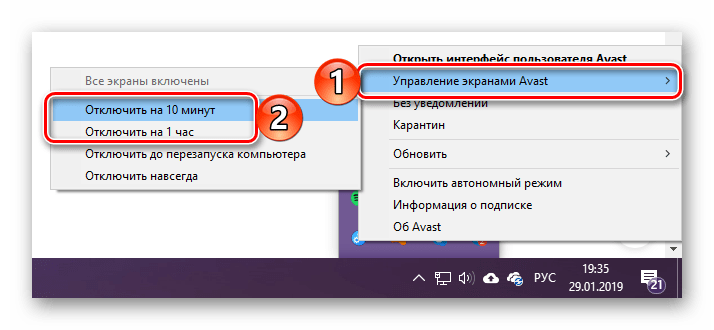
Решение здесь простое – для начала временно отключите защитное ПО и проверьте, запустится ли Скайп и будет ли он нормально работать. Если да – наша теория подтверждена, осталось только добавить программу в исключения. О том, как это делается, рассказывается в отдельных статьях на нашем сайте.
Подробнее:
Временное отключение антивируса
Добавление файлов и приложений в исключения антивирусного ПО
Причина 4: Вирусное заражение
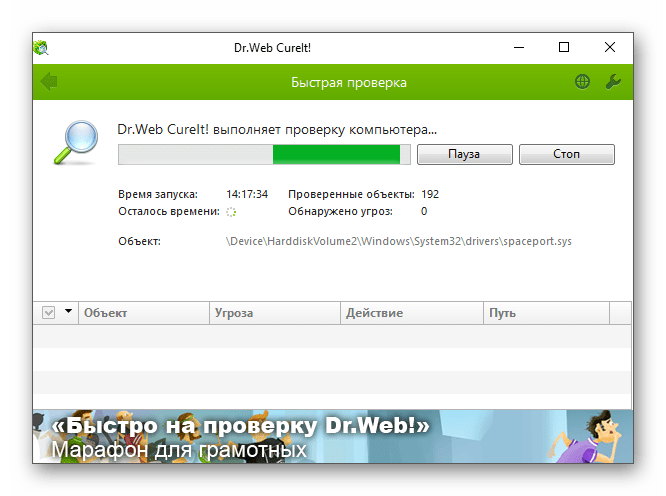
Вполне возможно, что рассматриваемую нами проблему вызвала ситуация, противоположная вышеописанной – антивирус не перестарался, а наоборот, недоработал, упустил вирус. К сожалению, вредоносное ПО иногда проникает даже в самые защищенные системы. Узнать, по этой ли причине не запускается Скайп, можно только после проверки Windows на вирусы и их устранения в случае обнаружения. Сделать это вам помогут наши подробные руководства, ссылки на которые представлены ниже.
Подробнее:
Проверка операционной системы на вирусы
Борьба с компьютерными вирусами
Причина 5: Технические работы
Если ни один из рассмотренных нами выше вариантов устранения проблемы с запуском Skype не помог, можно смело предположить, что это временный сбой, связанный с проведением технических работ на серверах разработчика. Правда, так это лишь в том случае, если отсутствие работоспособности программы наблюдается не дольше нескольких часов. Все что можно предпринять в таком случае – просто подождать. При желании вы также можете самостоятельно обратиться в службу технической поддержки и попытаться узнать, на чьей стороне проблема, но для этого придется подробно описать ее суть.

Страница техподдержки Скайп
Дополнительно: Сброс настроек и переустановка программы
Крайне редко, но все же бывает так, что Skype не запускается даже после того, как были устранены все причины проблемы и точно известно, что дело не в технических работах. В таком случае остается еще два решения — сброс настроек программы и, если даже это не поможет, ее переустановка начисто. Как о первом, так и о втором, мы ранее рассказывали в отдельных материалах, с которыми и рекомендуем ознакомиться. Но забегая вперед отметим, что Скайп восьмой версии, на которую данная статья ориентирована в большей степени, лучше сразу переустанавливать — сброс вряд ли поможет восстановить его работоспособность.
Подробнее:
Как сбросить параметры Skype
Процедура деинсталляции Скайпа с компьютера
Заключение
Причин, по которым Skype может не запускаться на Windows 10, довольно много, но все они имеют временный характер и устраняются довольно просто. Если же вы продолжаете пользоваться старой версией этой программы – обязательно обновитесь.
Наша группа в TelegramПолезные советы и помощь
Sign in to your MUO account
Skype is Windows 10’s default messaging app many users utilize to keep in touch with contacts. Yet, sometimes the Skype app doesn’t open for Windows users. Some users may see an error message when Skype doesn’t open. However, in other instances, it doesn’t start without throwing up a message.
Fixing Skype not opening is important for all those users who rely upon that app for sending instant messages or making video calls. Has your Skype app been facing issues in Windows 10 or 11? If so, you can follow these troubleshooting steps to fix Skype not launching on your PC.
1. Check the Microphone and Webcam Settings for Skype
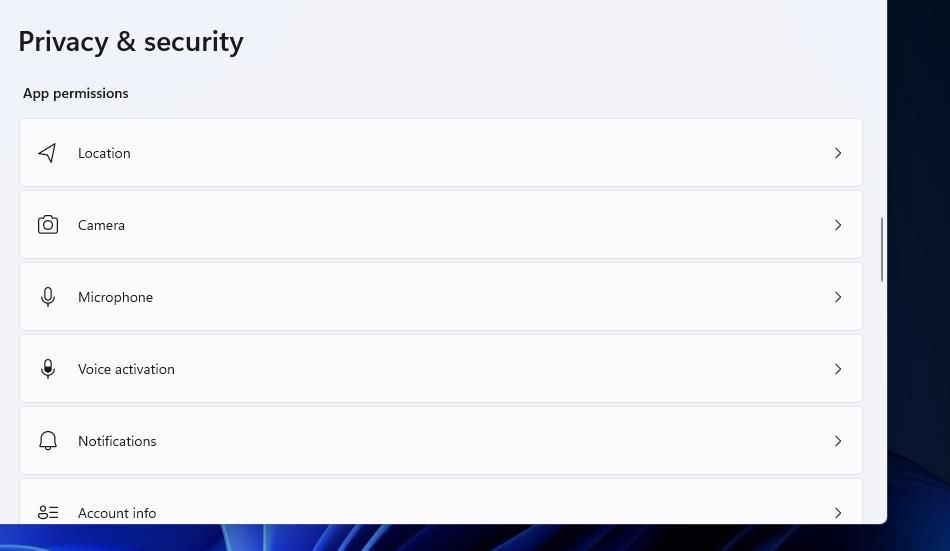
First, check if the required microphone and webcam settings are enabled for Skype. Remember that the app needs access to your PC’s webcam and microphone. You can check those settings in Windows 11/10 by following these steps:
- Launch Settings by pressing the Windows button + I keys.
- Then select Settings’ Privacy tab or category.
-
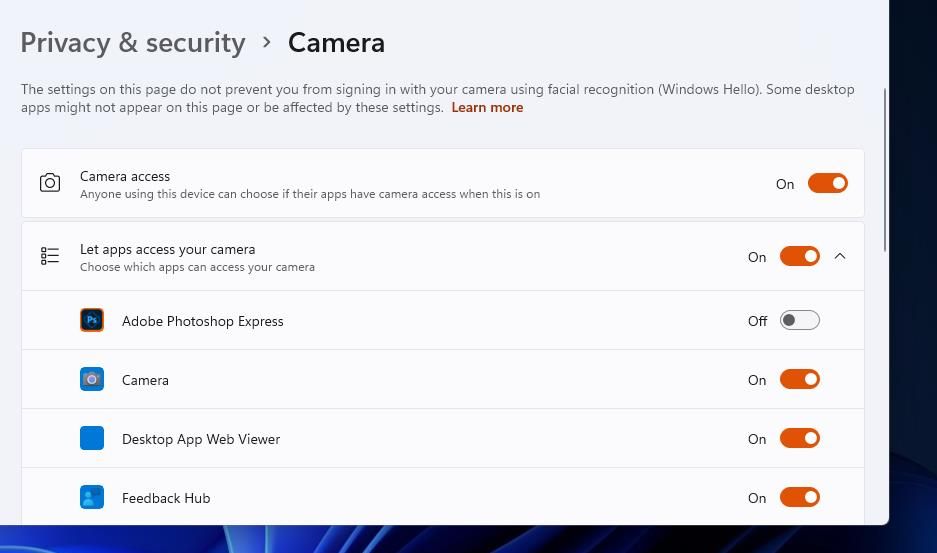
Select Camera to access the webcam settings.

-
Toggle on the Camera access option.

- Scroll through the listed apps, and turn on access for the Skype app.
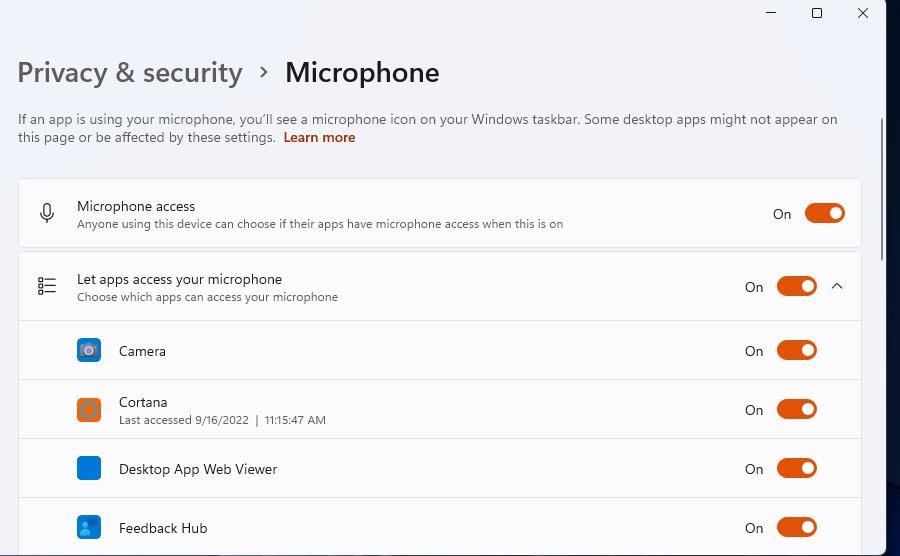
- Then, go back to the previous menu and select Microphone app permissions.
-
Make sure the general Microphone access option is turned on.

- Click Skype’s toggle switch under the Let apps access your microphone section to turn on mic access for that app.
2. Run Skype in Compatibility Mode
Skype compatibility issues can sometimes arise with new Windows versions. So, opting to run Skype in compatibility mode might help some users kick-start the app. Try setting that app to run in a Windows 8 compatibility mode as follows:
- Open the Windows 11/10 file manager by pressing the File Explorer button along the taskbar.
-
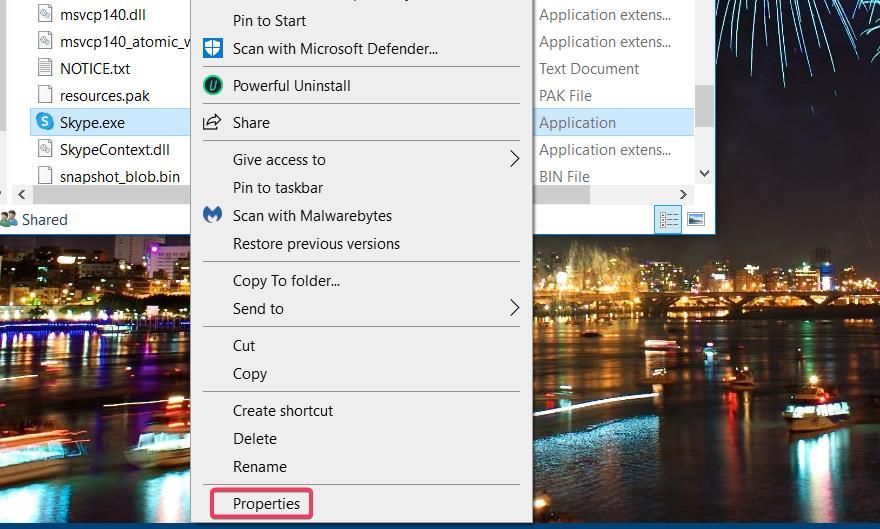
Open whatever folder that houses your Skype app. The following is the default directory for the UWP Skype app in Windows 10:
C:\Program Files\WindowsApps\Microsoft.SkypeApp_15.92.3204.0_x86__kzf8qxf38zg5c\Skype -
Right-click the Skype app and select Properties.

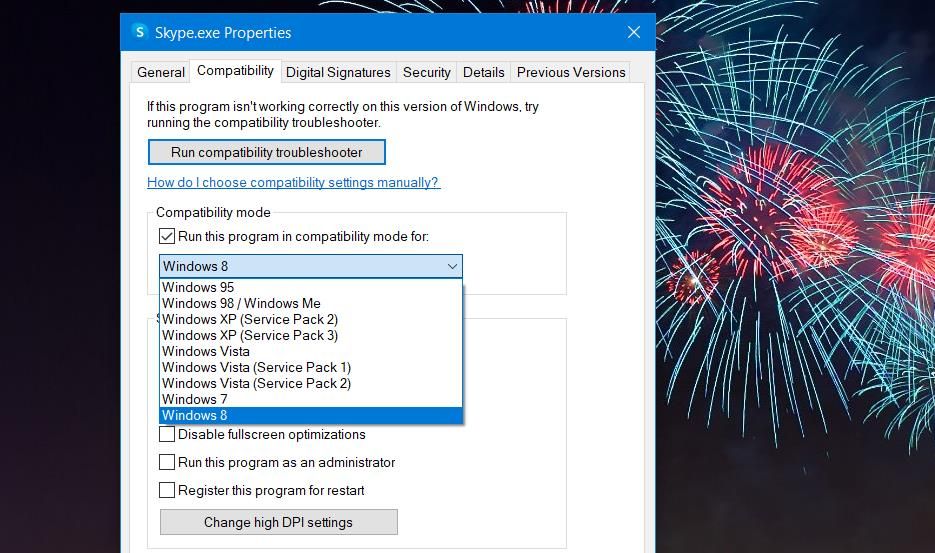
- Select Compatibility to view that tab’s settings.
-
Then select the Run this program in compatibility mode checkbox, and click Windows 8 on the dropdown menu.

- Select Apply to save compatibility settings.
The WindowsApps directory that includes the Skype UWP app is a restricted folder in Windows 10. You’ll need to take ownership of that folder to access it. Check out our guide about taking ownership of folders in Windows 10 and 11 for detailed instructions.
3. Select the Repair and Reset Skype Options
The Repair and Reset troubleshooting options in Windows help users fix apps that aren’t working right. So, it’s worth trying those options for fixing a Skype app that doesn’t launch. This is how you can select Skype’s Reset and Repair options:
- Open Apps & features to view a list of installed Windows apps.
- Scroll down to Skype, and click that app’s three-dot menu button. In Windows 10, select that app to view its options.
-
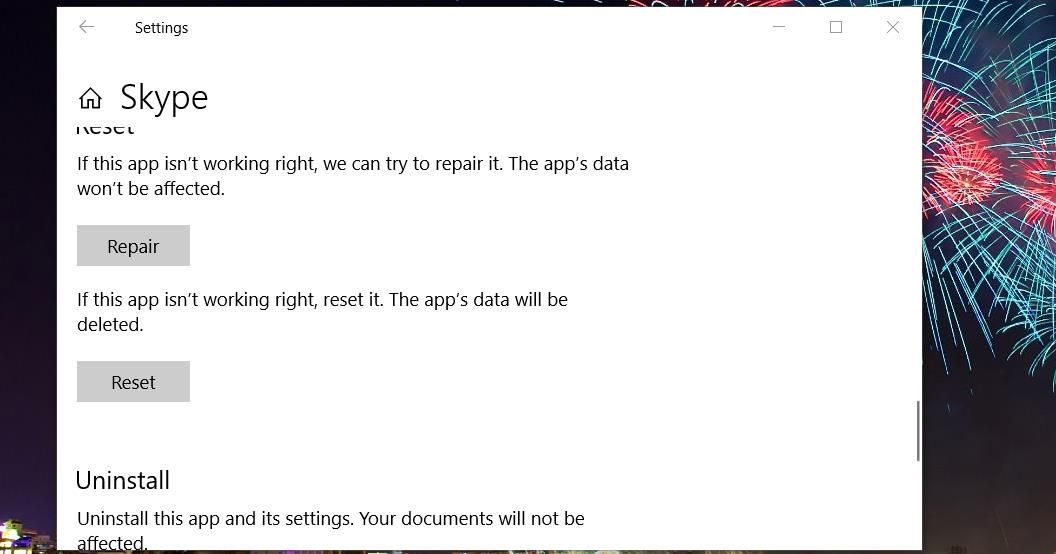
Click Advanced options to bring up the troubleshooting buttons.

-
Select Repair to apply a potential fix that won’t affect Skype’s data.

- If the Repair button doesn’t work, click on Reset to clear Skype’s data.

4. Scan System Files
App startup issues can also arise because of corrupted system files. So, it’s likely a system file Skype needs may be corrupted on your PC.
You can check for and repair corrupted system files with a command-line SFC tool by following the steps below:
- Press the Windows + S keys and input cmd inside the search bar.
- Select Run as administrator for Command Prompt inside the search utility.
-
Run the Deployment Image Servicing tool before an SFC scan by executing this command:
DISM.exe /Online /Cleanup-image /Restorehealth -
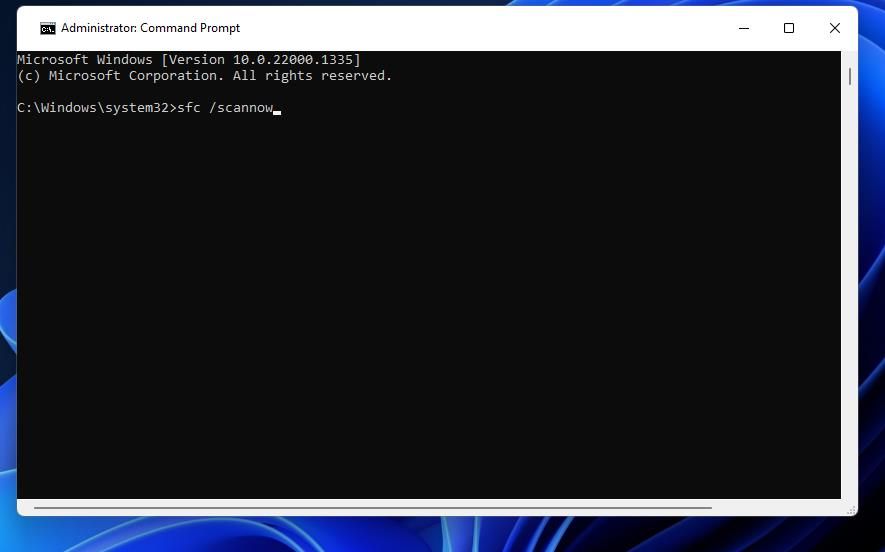
To initiate the SFC scanning, type in this command and press Enter:
sfc /scannow
- Now, wait for the System File Checker to do its stuff and show an outcome inside the Command Prompt window.
5. Rename the Skype Data Folder
Renaming a Skype data folder is a resolution that has worked for some users who needed to fix Skype not opening. Doing so will generate a fresh new Skype data folder the next time you launch the app. This is how you can rename that data folder in File Explorer:
- First, start Windows in safe mode (select Safe Mode with Networking).
- Press Windows + R keys to bring up the Run dialog box.
- Type %appdata% inside the Open field.
- Click OK to view a Roaming folder.
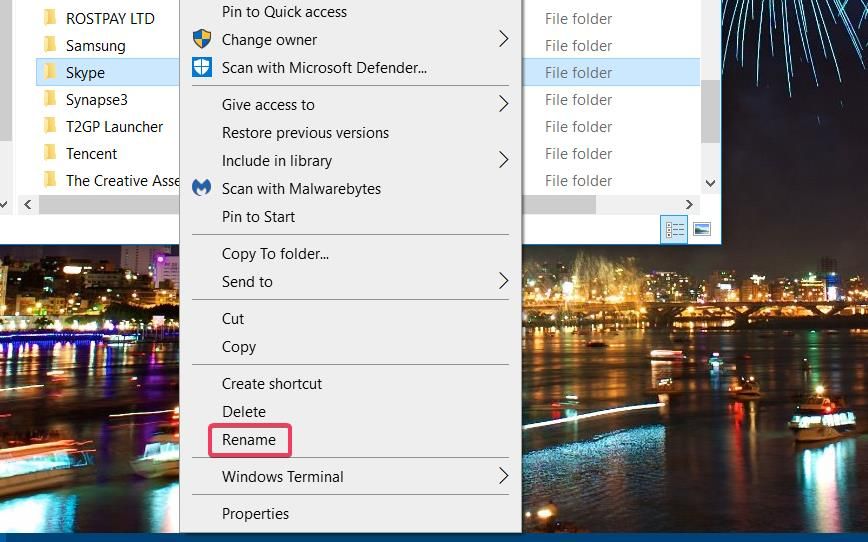
-
Right-click the Skype data folder and select Rename from the context menu.

- Input Skype_2 inside the text box for the folder.
- Then exit Explorer, and try starting Skype again.
6. Temporarily Turn Off Windows Defender Firewall
Skype is an app for which internet connectivity is essential. So, make sure Windows Defender Firewall isn’t blocking that app. Try temporarily disabling that firewall using the following steps to see if that makes a difference:
- Launch Windows Search (Windows + S) and enter the keyword Windows Defender Firewall inside the text box.
- Select the search result for the Windows Defender Firewall Control Panel applet.
-
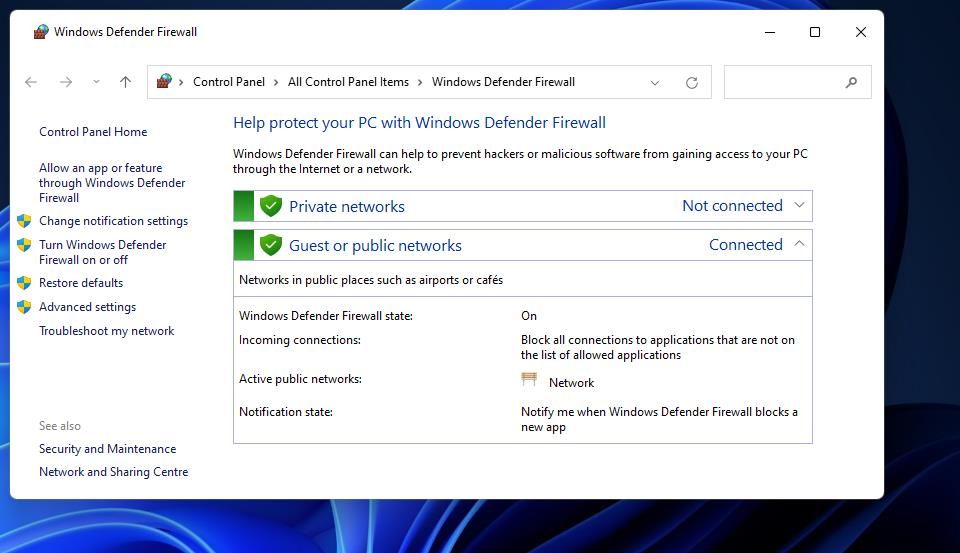
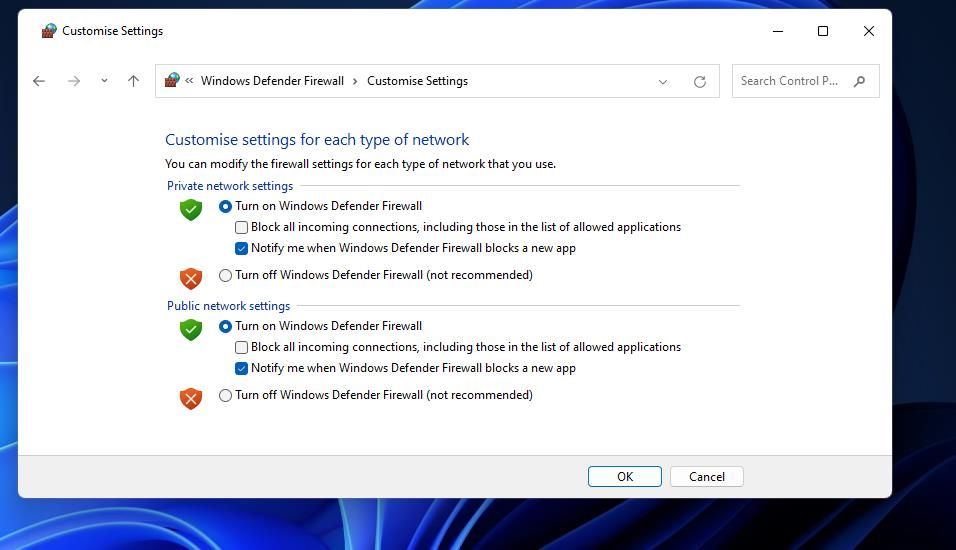
Click on the Turn Windows Defender Firewall on or off option on the left to access options for disabling WDF.

-
Check the Turn off Windows Defender Firewall option for Private and Public network settings in the Customize Settings menu.

- Click OK to save and close the firewall settings.
- Now, try launching Skype after disabling the firewall.
If your Skype app starts, chances are the firewall was blocking it. Turn the firewall back on, and then check its app permissions for Skype. Consider checking out our guide on allowing apps through Windows Defender Firewall for details about enabling Skype through WDF.
7. Reinstall Skype
Reinstalling Skype will replace all the app’s files. That solution will likely address issues caused by corrupted or missing app files. These are the steps for reinstalling Skype in Windows:
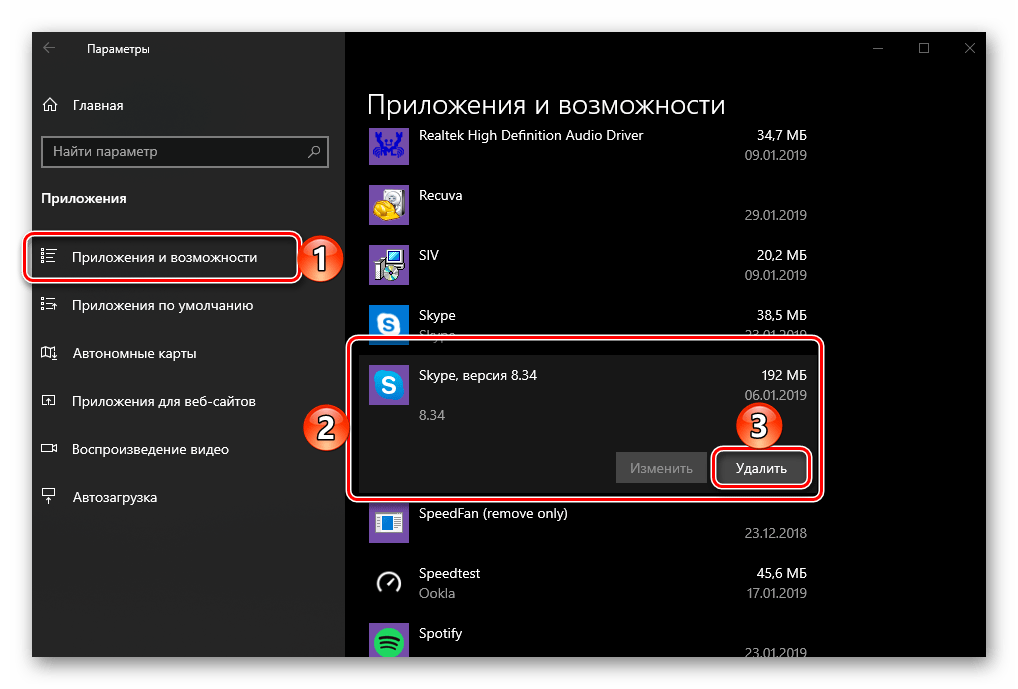
- Go to Apps & features in Settings. If you’re on Windows 11, go to Apps instead from the left pane.
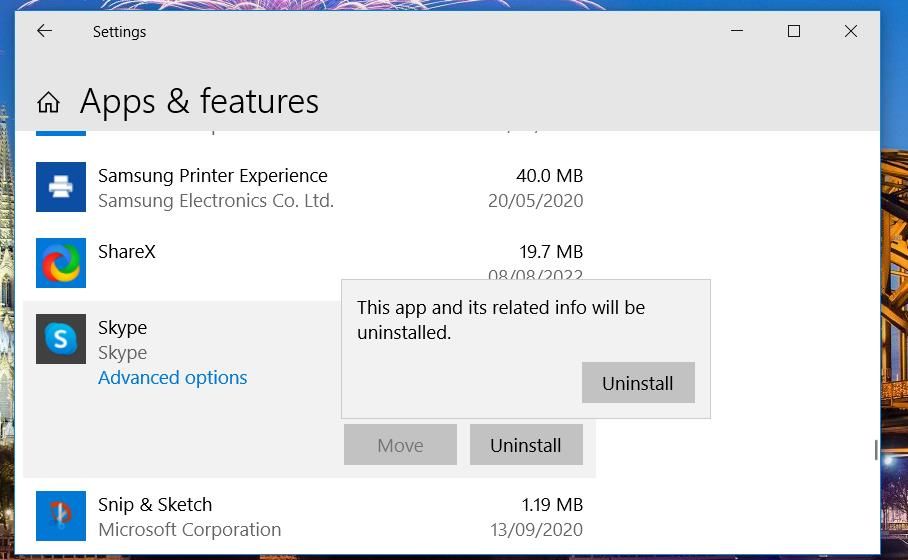
- Click Skype’s menu button or select that app in Apps & Features.
-
Select Skype’s Uninstall option. Click Uninstall again to confirm the selected option.

- Then head over to the Skype download page.
-
Click on the Get Skype for Windows 10 & 11 option to reinstall the UWP app.

- Click Open Microsoft Store to bring up Skype’s MS Store page.
- Press Skype’s Get button to reinstall.

Alternatively, you can reinstall a Skype desktop version, which can be more reliable. To do so, access the dropdown and click Get Skype for Windows option on the download page. Then, open the downloaded setup wizard for Skype to install the desktop software.
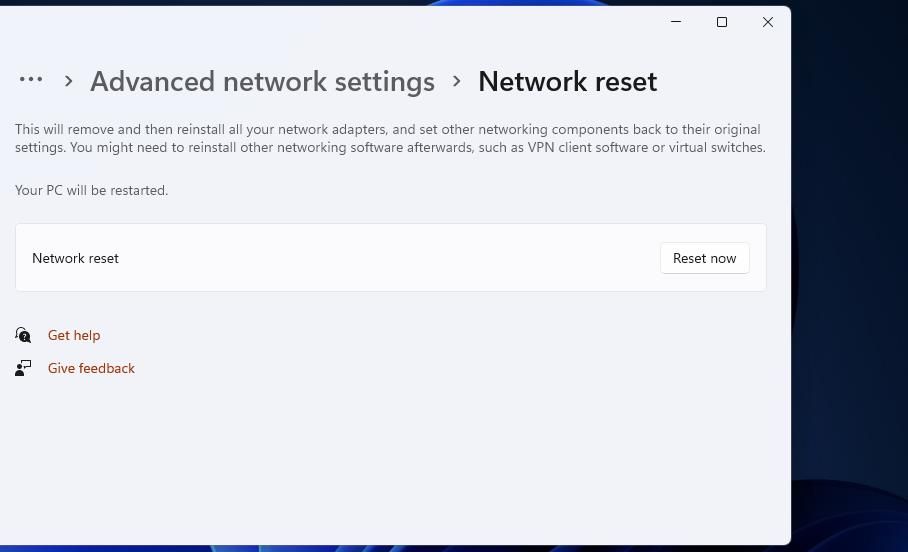
8. Reset Your Network
Skype also fails to launch because of network-related issues. Resetting your PC’s network configuration in Windows can resolve such issues. If you’re unsure where to start, we’ve covered a dedicated guide on resetting network settings in Windows 11.
Use Skype on Your Windows PC Without Issues
At least one of the troubleshooting steps we discussed here will do the job and fix the launch issues you were facing with Skype on your Windows 11/10 PC.
Note that these are fixes that have kick-started Skype for many users. However, you can utilize the Skype browser app as an alternative if they’re not enough.
The problem of Skype not opening or responding on a Windows computer is usually reported after an Update. However, this problem can also occur at any other time, while you are trying to make an Audio or Video call using Skype.
If this problem is not related to an update, it could be occurring due to the Skype App being blocked, lacking the permission to access the camera and microphone on your computer and other reasons.
Depending on the reason, you should be able to fix the problem of Skype not opening or responding on your computer using the following troubleshooting steps.
1. Allow Apps to Access Microphone & Camera
First make sure that Apps on your computer are allowed to access Microphone and Camera.
Advertisement
1. Go to Settings > Privacy > Camera > enable Allow Apps to access your Camera option in the right-pane.

2. Next, select Microphone in the left-pane and enable Allow Apps to access Camera hardware option.
2. Allow Skype to Access Webcam & Microphone
Next, make sure that Skype has the permission to access both Camera and Microphone on your computer.
1. Go to Settings > Privacy > select Camera in the left-pane. In the right-pane, scroll down to “Choose which apps can access your camera” section and move the Slider next to Camera to ON position.
2. On the same screen, scroll down further and move the slider next to Skype to ON position.

3. Next, select Microphone in the left-pane. In the right-pane, scroll down to “Allow Apps to Access your Microphone” section and move the toggle next to Skype to ON position.
Restart your computer and see if Skype is now working.
3. Repair Skype App
Sometimes, the Skype App can become corrupted and this can be fixed by using the Repair App option as available in Windows.
1. Go to Settings > Apps > click on Apps & Features in the left pane. In the right-pane, scroll down and click on Skype > Advanced options.

Advertisement
2. On the next screen, scroll down and click on the Repair button.

Restart your computer and see if Skype is now working on your computer.
4. Reset Skype
If the repair option did not work, you can Reset Skype App. This will basically remove and reinstall the Skype on your computer.
1. Go to Settings > Apps > click on Apps & Features in the left pane. In the right-pane, scroll down and click on Skype > Advanced options.
2. On the next screen, click on the Reset button.

3. On the confirmation pop-up, click on Reset to confirm.
Restart your computer and see if Skype is now working on your computer.
5. Check Firewall Blocking
It is possible that Windows Defender Firewall or Firewall of the Antivirus software program installed on your computer might be blocking Skype.
You can unblock Skype in Windows Defender Firewall using steps provided in this guide: How to Allow Apps Through Firewall in Windows 10/11.
If you are using Norton or any other Antivirus program, you will have to go into Firewall Settings of the Antivirus Program to unblock Skype.

Не так давно вышла новая версия Skype 8.2.5 , которая перестала работать на windows 10. Удаление/установка, чистка папок результата не дали. Судя по программе, она пыталась подключиться к серверу и зависала на этом месте. Не открывалось даже меню. Как временное решение, был установлен Skype 8.2.3. Который работал, но каждый день просил обновиться.
Новый скайп пытается подключиться к магазину приложений windows 10.
А по скольку я заблокировал телеметрию windows 10 и подключение к сомнительным серверам, то магазин windows 10 не открывался и скайп не мог найти нужные сервера для подключения.
Как решение: проверяем чтобы в hosts файле по адресу c:\Windows\System32\drivers\etc\ не было указано никаких серверов windows и Microsoft.
Если вы пользовались программами для отключения телеметрии и слежения, то сервера Microsoft в этом списке присутствовать будут.
Если записи есть, удаляем их, сохраняем файл, пробуем запустить скайп. Он должен соединиться и заработать.
После этого в файл hosts можно снова вернуть удалённые записи с серверами.
Просмотров: 27 286