
Windows располагает базовым набором драйверов, обеспечивающих функционирование аудиосистемы ПК или ноутбука. Но порой хочется более точной настройки динамиков или микрофона. И в этом вам помогут программы из нашего топа.
Realtek HD Audio
Программа позволяет регулировать громкость записи, а также устанавливать, на какую сторону будет приниматься лучший сигнал, что полезно для устройств с возможностью позиционирования. К дополнительным опциям относится подавление шума и помех, удаление эха. Можно создать шаблон, который будет действовать для всех следующих записей.
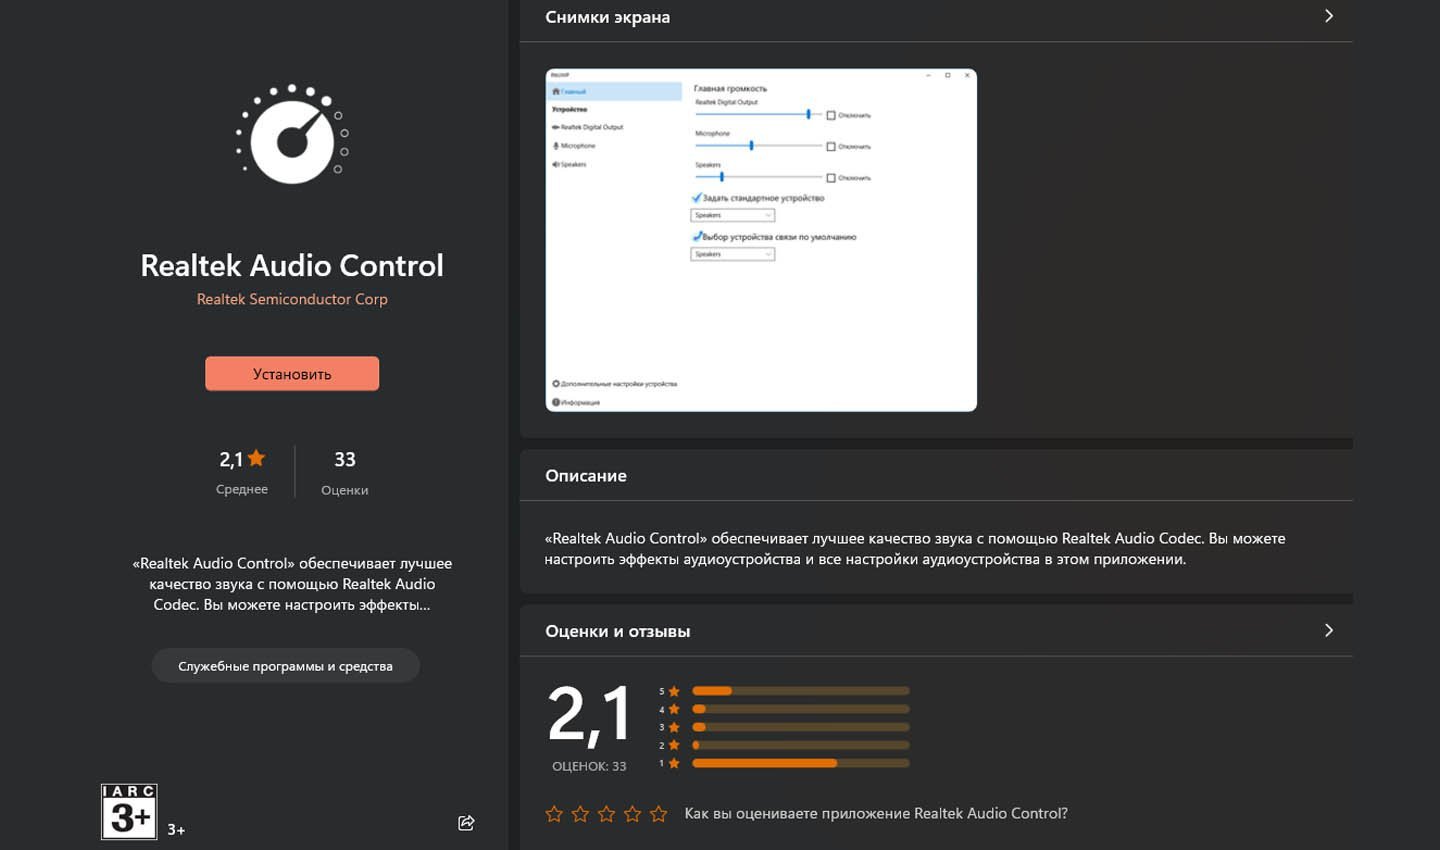
Источник: CQ \ Скриншот Realtek HD Audio
Voicemeeter
Программа позволяет микшировать входящие и исходящие звуковые сигналы в операционной системе. Пользователям доступно управление всеми приложениями, использующими функцию записи. В наличии достаточно простой эквалайзер, позволяющий подстроить громкость и распределить частоты. Voicemeeter подходит для большинства звуковых карт и моделей микрофонов.
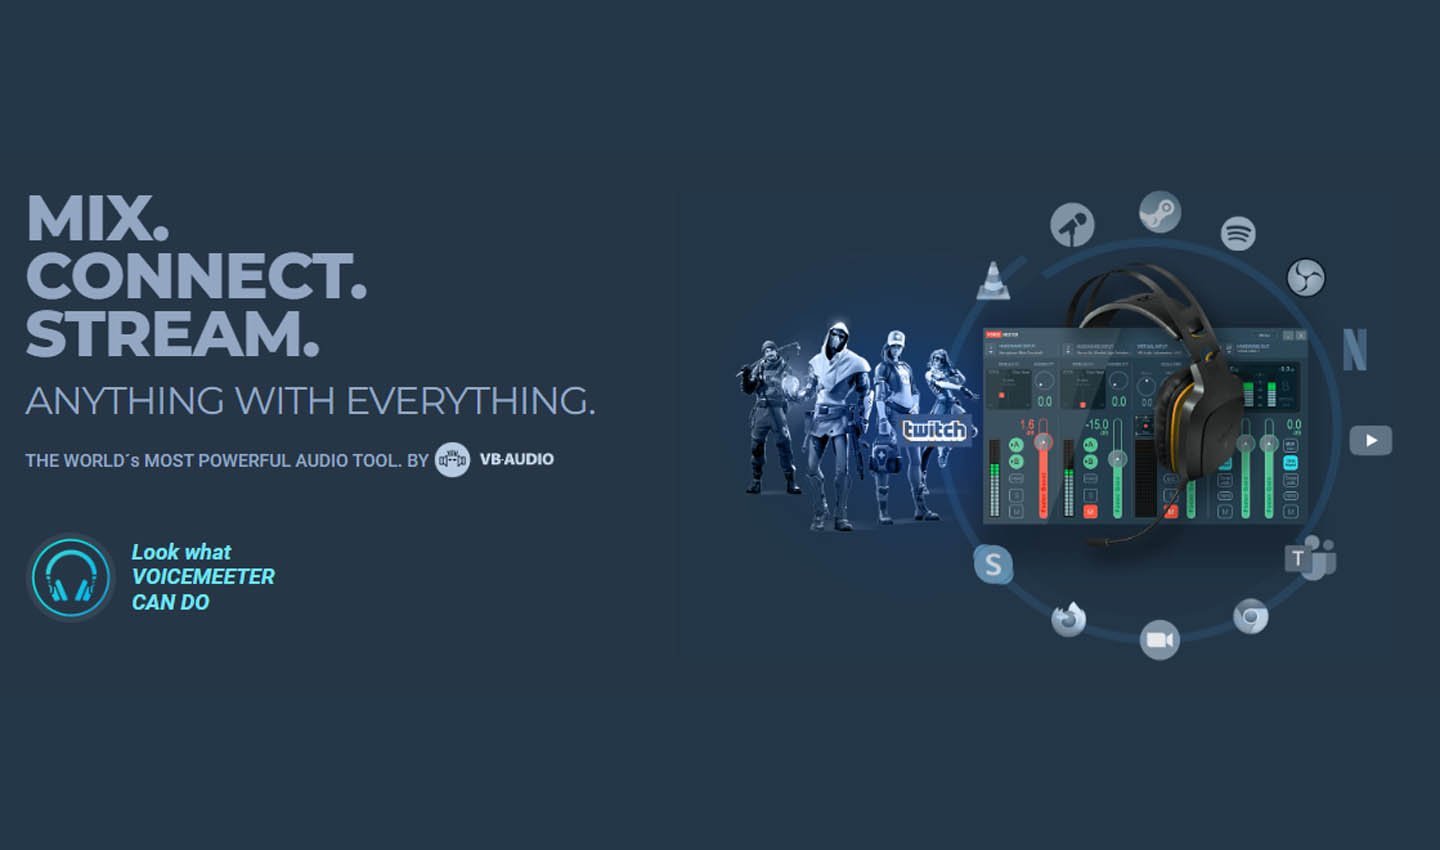
Источник: CQ \ Скриншот Voicemeeter
MXL Studio Control
Решение для всех устройств, но с определенными ограничениями. Например, при отсутствии функции шумоподавления в самом микрофоне не удастся это сделать при помощи программы. Если к ПК или ноутбуку подключено два и более звукозаписывающих устройства, сервис позволит переключаться между ними и выставлять отдельные настройки.
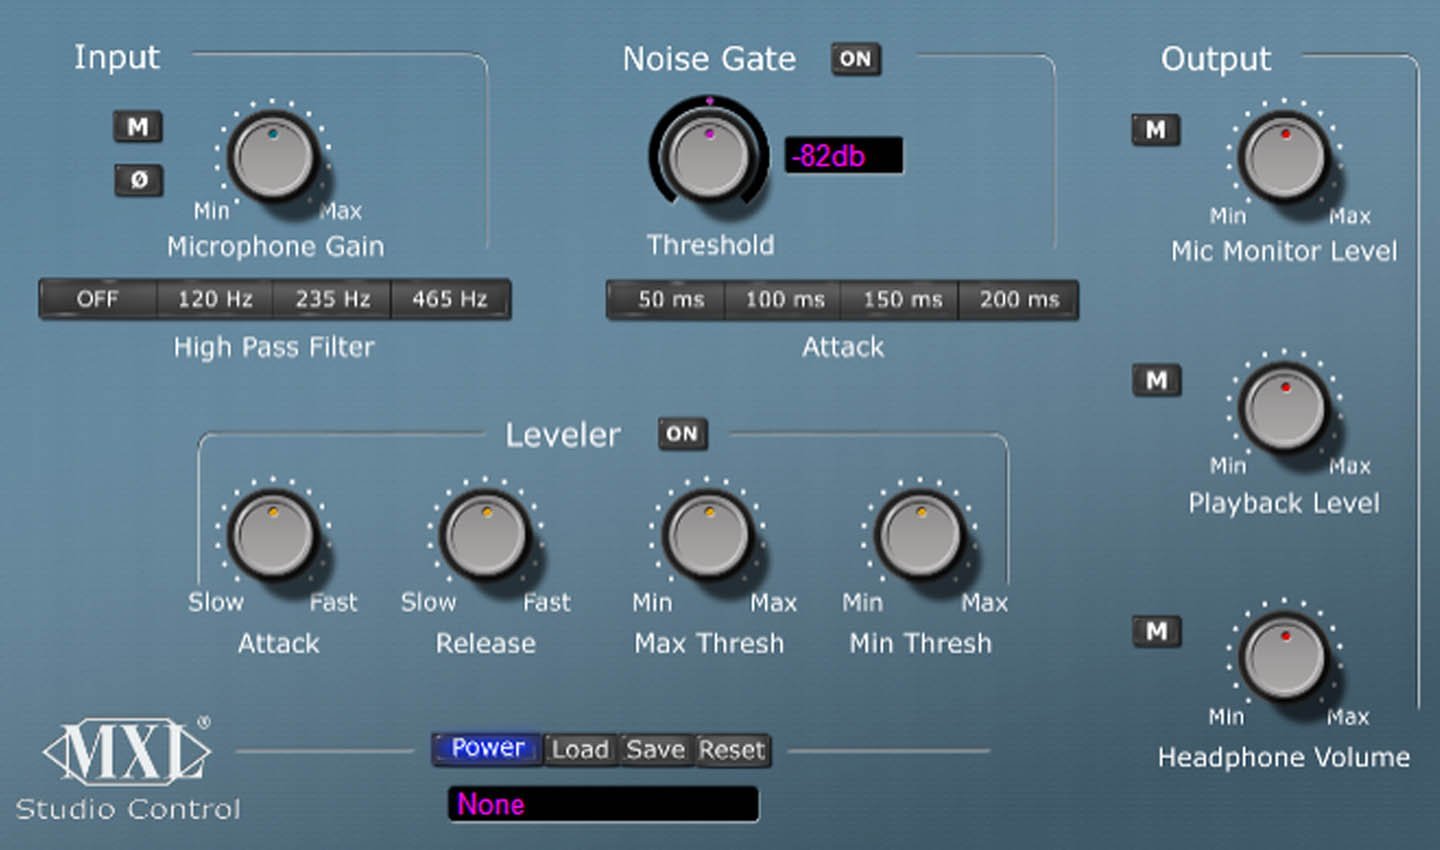
Источник: CQ \ Скриншот MXL Studio Control
Рекомендуется использовать программу только с одним микрофоном из-за отсутствия шаблонов. Переключение на другое звукозаписывающее устройство сбросит настройки и придется заново их выставлять.
Audacity
Приложение для редактирования звука и ведения записи через микрофон. Перед трекингом можно произвести регулировку, но настройки распространяются только на одну используемую программу — в иных сервисах звук не изменится.
Источник: Audacity \ Фото Audacity
По завершении записи доступны разные функции обработки: микширование дорожек, изменение громкости через эквалайзер, уменьшение эха и т.д. Готовый файл сохраняется в наиболее распространенных форматах, включая MP3.
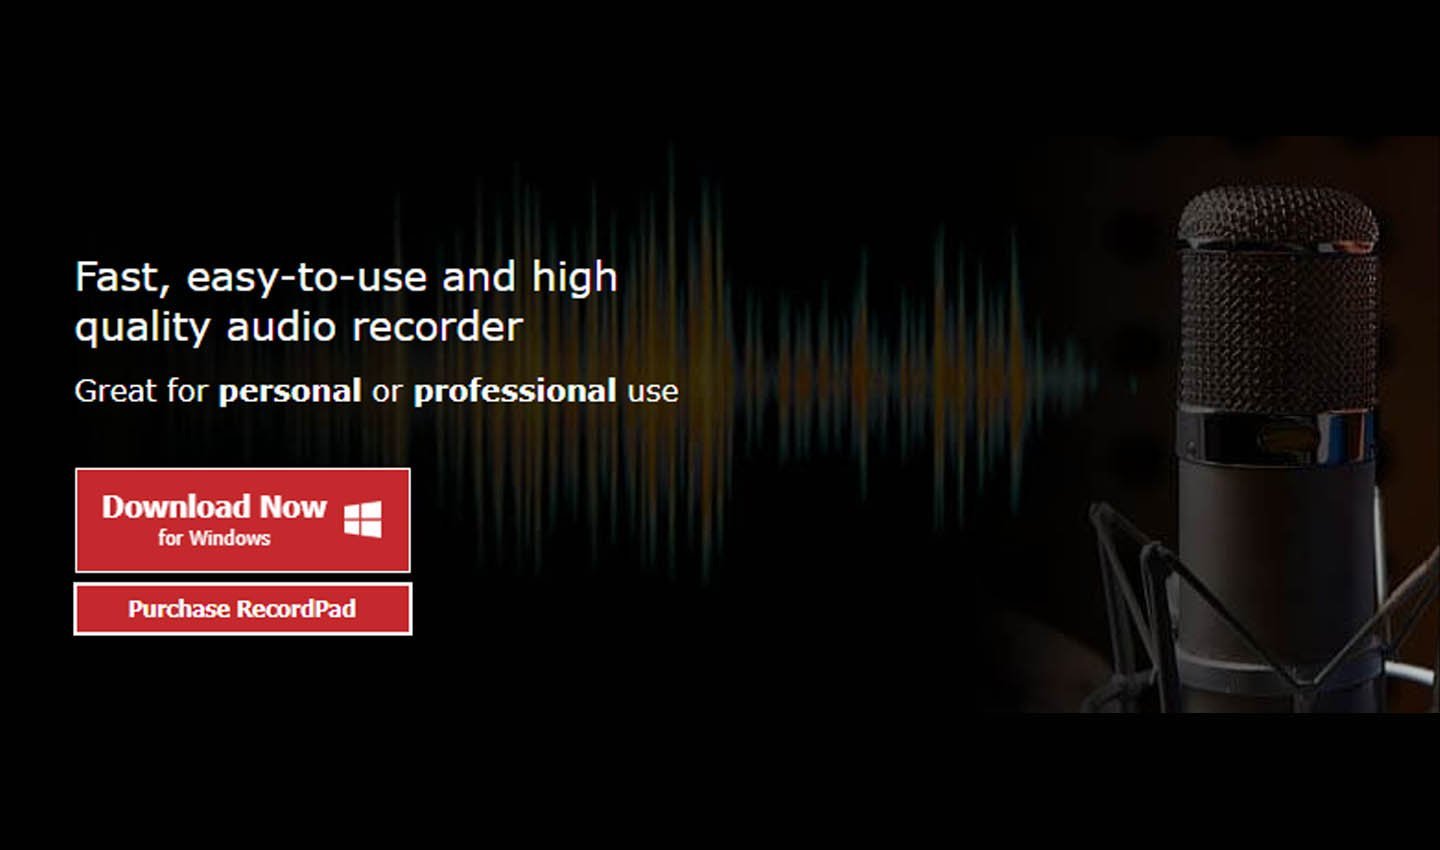
RecordPad
Программа для тонкой подстройки микрофона: можно уменьшать или увеличивать его чувствительность, выставить срабатывание на конкретный уровень мощности и т.д. Такой функционал предназначен для тех, кому требуется записать звук с определенной мощностью или же выделить его из нескольких аудиорядов.
Источник: CQ \ Скриншот RecordPad
Готовые дорожки сохраняются в разных форматах, включая MP3, FLAC и пр. Ими можно делиться с помощью электронной почты или загружать на FTP-сервер с помощью приложения.
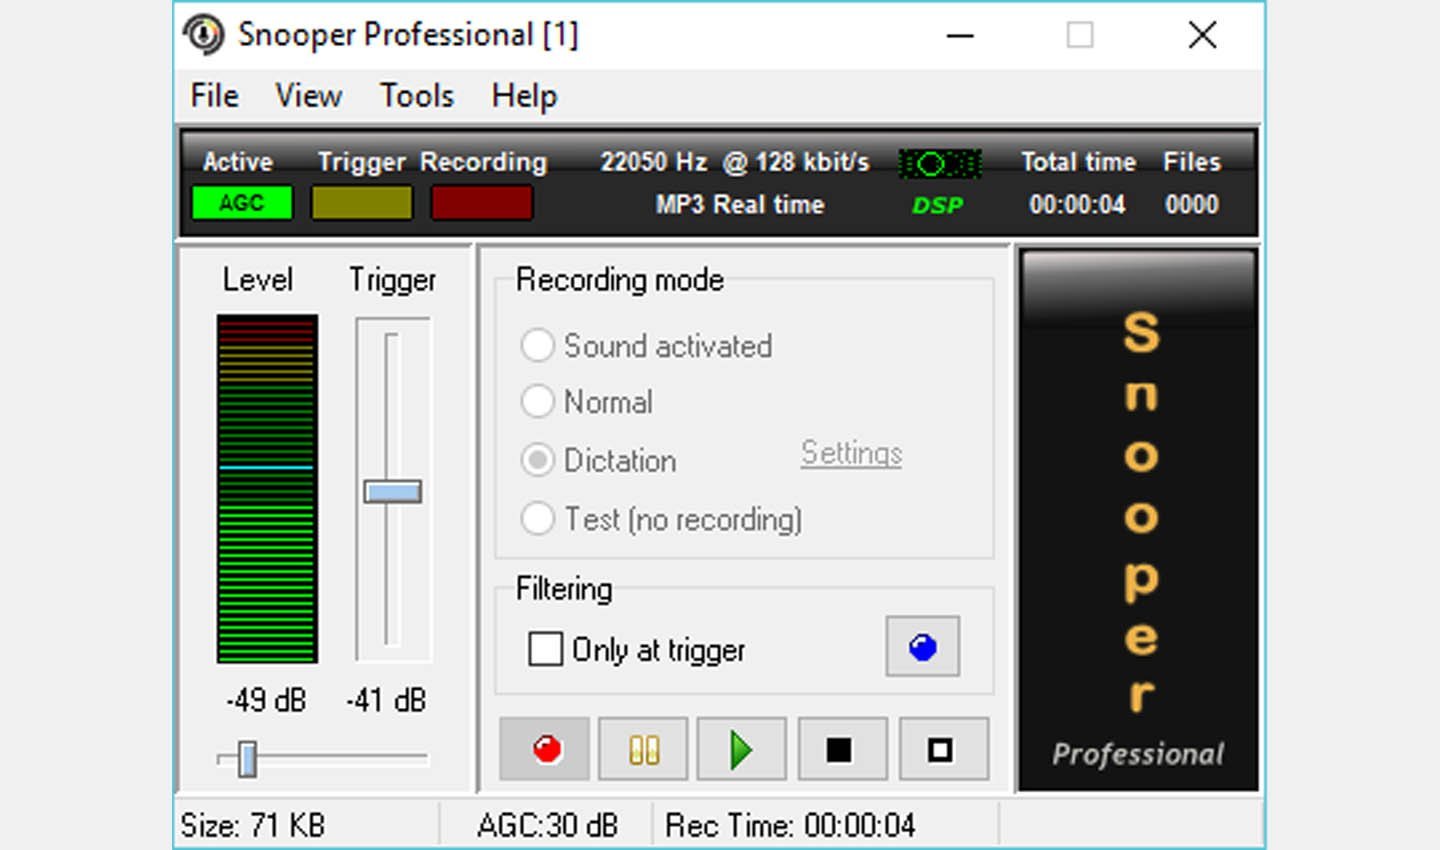
Snooper
Основная функция — автоматическое включение записи, когда звучание в микрофоне достигает определенной громкости. Также есть опция «диктофона», позволяющая вести трекинг без перерыва.
Источник: CQ \ Скриншот Snooper
Из дополнительных функций стоит отметить подавление шума, что удобно для случаев записи голоса или звука в шумном помещении. Опытные пользователи могут выставить тонкие настройки в эквалайзере, фильтре частот, а также анализаторе сигнала.
Clownfish
Программа работает с несколькими звукозаписывающими устройствами одновременно. Есть шаблоны для каждого микрофона, можно сохранить конфигурацию и использовать ее по необходимости.
Источник: CQ \ Скриншот Clownfish
Перед началом в приложении выбирается требуемое устройство записи звука. Программа автоматически отследит аудиоканал и перехватит сигнал, идущий в него. Также можно отрегулировать высокие и низкие частоты, изменить фильтрацию шума и т.д.
Adobe Audition
Это приложение обрабатывает звук, ранее записанный с микрофона. Опции позволяют повысить или удалить определенные частоты, тем самым делая звучание голоса более четким. Имеется функция работы с шумами — если не удастся их полностью удалить, то можно сделать практически незаметными. Также присутствуют дополнительные плагины для настройки тональности или накладывания эффектов.

Источник: CQ \ Скриншот Adobe Audition
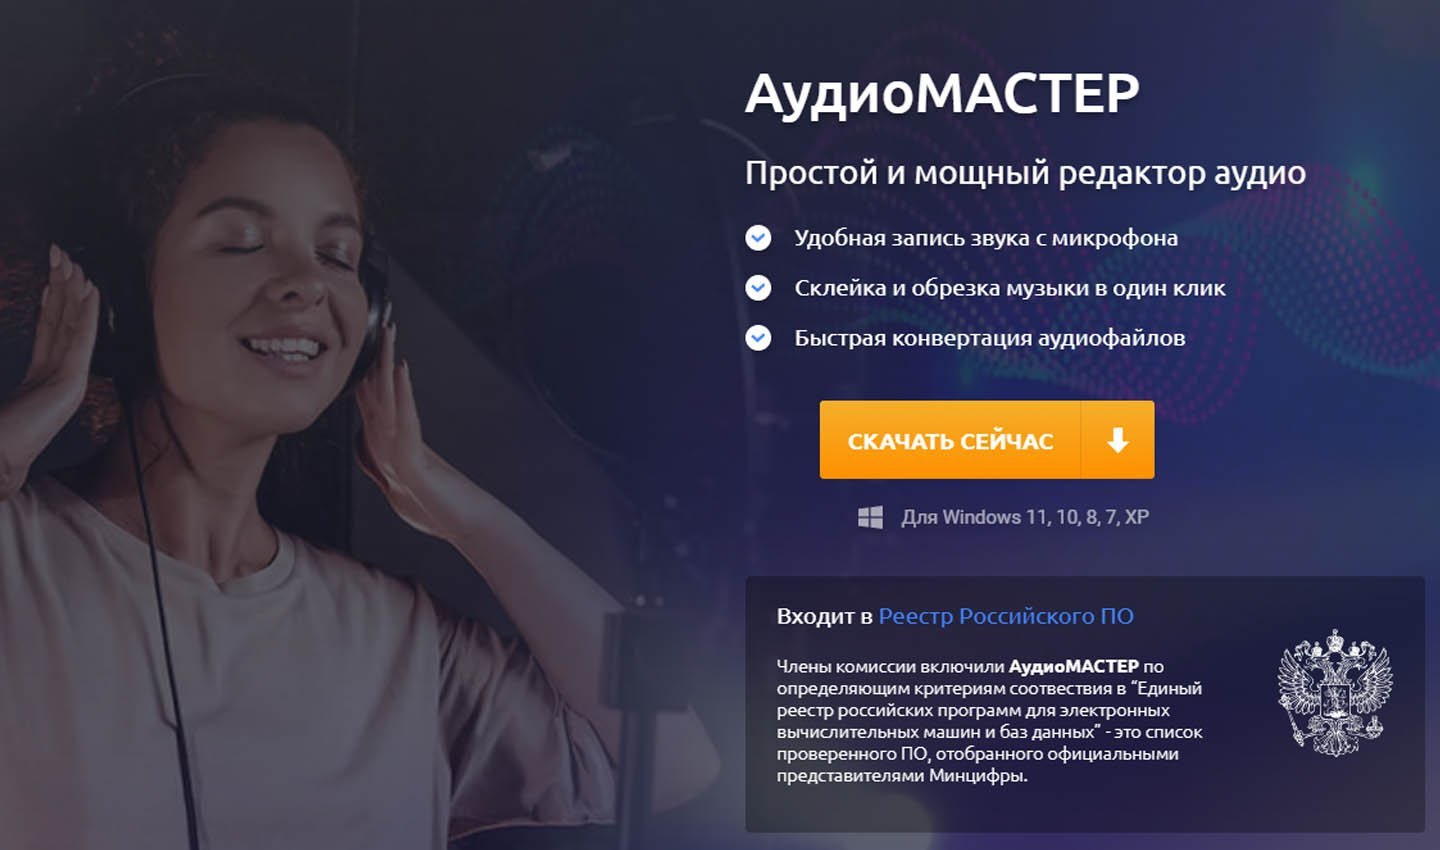
АудиоМАСТЕР
Полноценный редактор звука, позволяющий наложить разные фильтры, убрать или уменьшить шум, а также подавить эхо. Опытным пользователям предлагается развернутая панель управления, включая эквалайзер для подстройки частот.
Источник: CQ \ Скриншот АудиоМАСТЕР
Также программа позволяет записывать звук с микрофона. Для этого можно предварительно составить разные конфигурации и использовать каждую из них по необходимости, работая с конкретным приложением или звукозаписывающим устройством.
Заглавное фото: unsplash.com
Mastering the art of livestreaming isn’t just about visuals—it’s also about delivering crisp, clear, and engaging audio. In this guide, we’ll explore how you can enhance your livestream’s audio quality using free microphone plugins, ensuring your audience enjoys the best listening experience. We’ll delve into Noise Gates, EQ, Compressors, and De-Essers – essentially everything you need to extract the best sound from your microphone.
Even better, all of these recommended plugins are not only highly customizable to your unique voice but are also entirely free of charge. The plugins we’ll be discussing are VST (Virtual Studio Technology) plugins. These are software plugins designed to replicate the functionality of real studio hardware.

Before we dive in, here are three crucial points to keep in mind:
- You can find download links for every plugin mentioned in this article.
- We’ll be incorporating these plugins into our microphone chain using the Elgato Wave Link software. It’s also possible to add VST plugins directly into OBS Studio, though currently, OBS does not support VST3 plugins.
- Following the installation of a VST plugin, Wave Link has to locate it before it can be added to a channel. To accomplish this, simply open the preferences window, navigate to the
Audio Effectstab, and click onScan Plugin Folders. By default, VST3 plugins will install toC:\Program Files\Common Files\VST3\on PC orlibrary/audio/plug-ins/VST3on Mac. Wave Link is already configured to use these folders.

With these points in mind, let’s dive into the world of microphone plugins and explore how they can enhance your livestreaming experience.
Enhancing Your Audio with Noise Gate VST Plugins
The first step in our journey to superior audio quality is the addition of a Noise Gate VST plugin. This plugin effectively mutes your microphone when you’re not speaking, thus eliminating any background noise from infiltrating your audio stream. As soon as you start speaking again, the noise gate ‘opens’, and your microphone is unmuted.

One of the best free noise gate plugins available is Renegate, which offers a visually intuitive interface to help you understand the exact settings being applied. Download Renegate from their website, install it on your PC, and ensure Wave Link scans the folder where it’s installed. Once done, you can locate the effect by clicking on the Effects button on your microphone channel and selecting Renegate from the list.

The first step in setting up Renegate is establishing your noise floor, a task unique to each user as it depends on the environment where your streaming PC is located. To do this, remain silent and observe the levels your microphone picks up without your voice input. If, for instance, your noise level hovers around -60 decibels, set your threshold roughly 5 decibels above that level (around -55 decibels). This means that when your volume is above this threshold (i.e. when you’re speaking), the noise gate will be open. Conversely, when the volume falls below this threshold (when you’re silent), the gate will close, preventing any room noise from entering your audio stream.

Renegate also allows you to adjust the attack and release times, essentially controlling how quickly the gate opens, how long it stays open, and how slowly it closes again. The default settings may seem a bit quick, so consider setting your attack to around 10 milliseconds and your release to approximately 125 milliseconds for better results.

The final tweakable setting in Renegate is the mix percentage, which controls how closed the gate is when it’s not in use. Dragging this setting to the bottom (100%) ensures the gate is fully closed, allowing no noise when you’re silent. However, for a more natural sound, consider setting this to around 80 to 85%, which allows a small amount of room noise but maintains a more natural audio flow.

Fine-Tuning Your Audio with EQ Plugins
The next step in our audio enhancement journey involves adding some EQ (Equalization) to our microphone chain. EQ settings are inherently subjective, as they depend on factors such as your unique voice, the microphone you’re using, and the environment from which you’re streaming or recording. Even if two people were using the same microphone in the same setting, their EQ profiles would differ due to the unique qualities of their voices.
While it’s challenging to recommend a one-size-fits-all EQ setting, there are some subtle changes you can use as a starting point. However, it’s crucial to listen to how these changes affect your voice and make necessary adjustments based on your personal preferences.

TDR Nova is an excellent free EQ plugin that can help you in this process. After downloading, installing, and scanning it within Wave Link, you can add it to your microphone chain. Once opened, you’ll need to switch the setting from Off to In to see the frequency response of your voice.

We’ll apply a basic three-band EQ to our voice. You can disable the fourth band as we won’t be using it. Adjustments can be made either on the graph by dragging the nodes around or by modifying the Q, frequency, and gain values using the knobs at the bottom.

Here are some suggestions for your EQ settings:
- First Node (Warmth): Add a slight
boostin the100to150 Hertzrange to add some warmth to the low end. For instance, you might choose a 1-decibel boost of around 140 Hertz and adjust the Q to around 0.9 for a wider bandwidth. - Second Node (Reducing Boxiness): Make a slight
cutin the400to900 Hertzrange, typically responsible for a ‘boxy’ sound in most voices. A cut around 1.5 decibels at 500 Hertz, with a narrower Q width, could work well. - Third Node (Clarity): Add a
shelfstarting in the3,000to5,000 Hertzrange to enhance clarity. You might choose to start around 4,000 Hertz and add a slight gain of around 0.8 decibels, adjusting the Q value to around one.

Remember, these EQ settings are intentionally subtle to avoid drastic changes, given the wide variety of voices out there. Always listen to your voice and tweak the settings based on how you want it to sound. Your voice is unique, and your EQ settings should reflect that.
Achieving Consistent Volume Levels with Compressor Plugins
The next step in our audio enhancement journey involves adding a compressor plugin to our microphone chain. A compressor helps maintain a consistent volume level, ensuring that whether you’re speaking in a normal voice or shouting in excitement, your viewers enjoy a pleasant listening experience. It achieves this by compressing volumes above a certain threshold to create a more consistent sound.

There are numerous free compressor VST plugins available online, but one that stands out is RoughRider 3. To set up any compressor, there are three key settings you need to understand: ratio, threshold, and makeup gain.
- Ratio: This setting determines the extent of compression applied when your volume exceeds the threshold. Common ratios are
2:1,4:1,8:1, or even10:1. The higher the ratio, the more compression is applied. A ratio of4:1is typically recommended for a natural-sounding compression, but feel free to adjust this according to your preference. - Threshold (or Sensitivity in RoughRider 3): This setting is the decibel level at which the compressor starts working. Any sounds above this level will have the chosen ratio of compression applied. A recommended setting is around
-18or-20 decibels, but this may vary depending on how loud you usually are and the gain level of your microphone. - Makeup Gain: After applying a compressor, you’ll likely need to adjust your makeup gain. This is because compression reduces the overall volume when it exceeds the threshold. You can adjust this by observing your OBS meters and ensuring that when you’re speaking, you’re sitting in the
yellow zone, which is roughly around-12 decibels. Add makeup gain as needed to maintain this level.

By incorporating a compressor into your audio setup, you can ensure a more consistent and enjoyable audio experience for your viewers, regardless of the fluctuations in your speaking volume.
Reducing Harshness with De-Esser Plugins
Another optional but beneficial addition to your audio setup is a de-esser. This is particularly useful for those using condenser microphones like Wave: 1 and Wave: 3. A de-esser works to reduce the harshness of the ‘S’ sound, which can be pretty fatiguing for your audience during long broadcasts. An excellent plugin for this purpose is the T-De-Esser.

Once you’ve installed T-De-Esser and added it to your microphone chain, you’ll find two main controls within the plugin interface that you’ll need to adjust: processing and intensity.
- Intensity: This control adjusts the level of de-essing. Depending on your preference, you might want to increase the intensity. A setting around
7.0is a good starting point. - Processing: This control adjusts the actual amount of de-essing happening. A practical way to change this is by holding the ‘S’ sound and adjusting the processing until you see its effect on the level in real time. The level of processing you end up using largely depends on your personal preference. A good starting point is to ensure a few decibels of harshness are removed whenever you use words that have sibilance.

Remember, the changes you’re making here are subtle, but they can significantly improve the sound of your microphone. Every improvement you make, no matter how small, contributes to a more enjoyable listening experience for your audience.
Optional: Noise Suppression Plugins
The fifth plugin we’ll discuss is optional and depends on the noise level in your streaming environment. If you find that noise is still coming through when you speak, even with a noise gate, you might want to consider a noise suppression filter.
There are two recommended paths for noise suppression. If you have an NVIDIA Card and want results similar to NVIDIA Broadcast, you can use a VST plugin developed by Xaymar. Alternatively, you can use a VST plugin based on the RNNoise suppression filter, which is also found within OBS Studio. This filter is excellent at removing constant background noise, but it doesn’t learn or adapt to the noise environment.
If you decide to add a noise suppression filter to your microphone chain, it’s critical to ensure it’s applied at the beginning of your chain, before the EQ, compression, or de-essing. This allows the filter to process the raw audio input, providing a cleaner signal for the subsequent plugins in the chain.

Remember, while noise suppression can be beneficial in noisy environments, it’s not necessary for everyone. Always consider your specific needs and circumstances when deciding on the best plugins for your setup.
READ MORE: The Ultimate Guide to Separate Audio Sources in OBS Studio
Bonus Tips: Maximizing Your Microphone Chain
Now that you’ve set up your microphone chain, here are some additional tips to help you make the most of your new setup:
Using Elgato’s Wave Link Microphone Effects
Elgato has added a new audio device to your system that allows you to use your new microphone chain across different programs. This device, called Wave Link MicrophoneFX, can be used as your microphone input in programs like Discord, your favorite games, or even Zoom. This means you can enjoy the benefits of your full audio chain, complete with all the VST plugins you’ve added, across different platforms.

Toggling Audio Effects
You can choose whether these audio effects apply to just your stream mix or also your monitor mix. If you prefer not to hear the plugin effects in your own headphones, you can easily toggle this within the software.

Using the Elgato Stream Deck
If you own the Elgato Stream Deck, you can add the Sound Deck plugin. The sampler action allows you to sample your microphone in real-time and playback that sample. This is a handy tool for quick testing when changing your EQ or any of the plugins we’ve discussed.

Order of Audio Effects
The audio effects we’ve applied are processed in order from top to bottom. You can rearrange them by dragging and dropping them. While some people prefer to compress before they EQ rather than EQ before they compress, it’s generally recommended to place your noise gate and noise suppression at the start of the chain.

Applying Effects to Other Channels
You aren’t limited to applying effects to your microphone chain. You can add VST filters to any of the different channels within Wave Link. For example, you could add a compressor to your Voice Chat channel to maintain consistent volume levels among teammates with different audio setups. Alternatively, you could add a limiter to your music channel to ensure no songs exceed a certain volume level.

By utilizing these tips, you can ensure that your audio setup is not only optimized for your needs but also flexible enough to provide a quality audio experience across various platforms and situations.
Summary
In conclusion, optimizing your livestreaming audio doesn’t have to be a daunting task. With the right tools and a bit of knowledge, you can significantly enhance your audio quality using free VST plugins. From noise gates and compressors to EQ and de-essers, these plugins offer a range of options to improve your sound. Remember, it’s all about experimentation and finding what works best for your unique voice and setup. With these tips and plugins in your audio toolkit, you’re well on your way to delivering a superior audio experience for your audience.
Video Guide
As with all of our guides, below we have included a full video tutorial if that is your preferred method of learning.

The best mic booster software helps amplify the sound of external and internal microphones. Such programs support various options that help increase the volume. They increase microphone sensitivity, use preamplification, fader gain, and more.
Some instruments enhance the volume at the system level, so you can record an amplified sound using dedicated software.
Why you can trust FixThePhoto ☑. Our team carefully tests every software, product and service to give you honest recommendations for your requirements and purpose. Learn more about how we test.
Top 5 Mic Booster Software
-
Voicemeeter —
Routes a multitude of sources
-
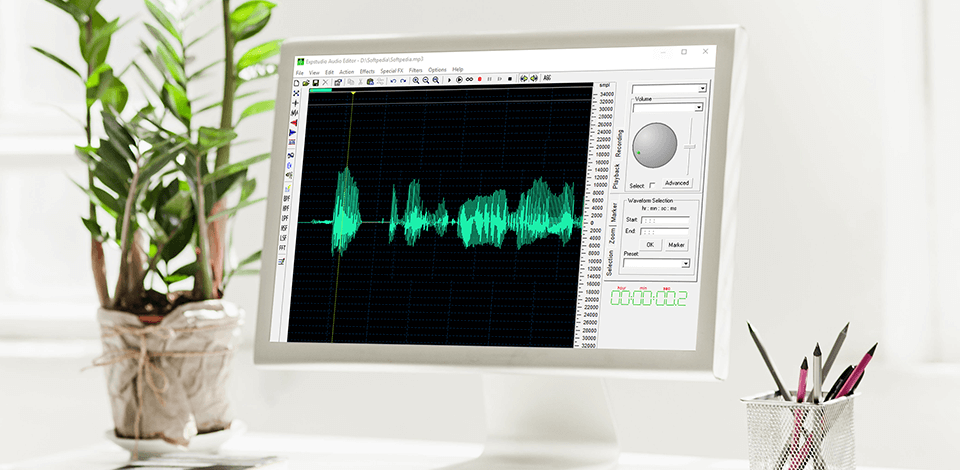
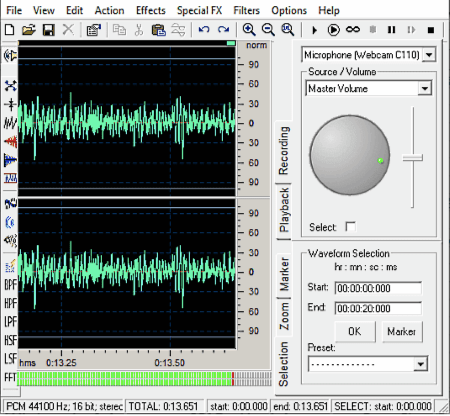
Expstudio Audio Editor —
Supports WAV, MP3, WMA, OGG
-
Equalizer APO —
Analyzes peak gain
-
Kazi Sound Recorder —
With sampling settings
-
Audacity —
Supports multitrack audio
When testing the best mic booster software, we checked whether these programs are easy to use. These programs allow you to save recorded audio in MP3, MP2, WAV, AAC formats.
Some of the programs support different sound effects, such as fading, distortion, bass, treble, echo. What’s more, some tools allow users to visualize recorded sound waves.
1. Voicemeeter — Our Choice
Routes a multitude of sources
- Free supplemental software available
- Convenient interface
- Mix and adjust the output sound
- Mono or stereo sound from the microphone
- None
Verdict Voicemeeter has a few unique features that make it stand out among its competitors. This mic booster software does not require any plug-ins, there are no hardware components to configure, there is a free virtual sound and instrument library, and many more. It also has several great virtual music samples for you to use.
You can use this software with supplemental tools. Except this, it has tools to mix and adjust the output sound. The program can record mono or stereo sound from the microphone.

2. Expstudio Audio Editor
Supports WAV, MP3, WMA, OGG
- Cut, copy, silence, mix tools
- Bandpass and low pass filters
- Converts female voice to male
- Effects audio like vibrato, pitch shift
- Includes only basic documentation
Verdict: Expstudio Audio Editor comes in handy when you want to edit your audio recordings quickly and easily. One of the best features of this software is the mic booster. This tool can help you to make your audio recordings sound better than they originally sound.
Using this mic booster software, you are able to turn an inconsistent mic signal into a consistent one. This will help you to have a clean sound. With this audio editor, you are able to add effects to your voice. The mic booster tool will also allow you to maximize the effects of any microphones for podcasting or wireless microphones.
3. Equalizer APO
- Open-source
- Works on the system level
- Latency and response time of sound
- Low pass, high pass, bandpass filters
- Time-consuming and unresponsive
Verdict: Equalizer APO comes with so many great features, like a true analog sound, variable limiting on both the mic gain and input level, and the built-in equalizer. It also comes with digital options for limiting, panning and faking a drum roll.
This mic booster software uses true analog filters and circuitry which are what helps to make the mix sound so real. It also offers manual equalization of any input through the usage of a high-gain USB. This virtual surround sound software allows you to mix your songs and sounds as you see fit. Along with the mic plug-in adaptor, there is a mixer with knobs that allow you to change between either a cardioid with the push of a button.
4. Kazi Sound Recorder
- Grabs any sound
- Supports VCR, Telephone, TV, Radio
- Saved in WAV, MP3, OGG, Vox
- Support for RealPlayer, Winamp, WMP
- Lack of technical support
Verdict: This mic booster software will allow you to monitor the volume levels of each microphone when you are recording and playback. The mic amplifier feature will boost the volume level of your microphone even further. This feature allows you to use a much higher quality microphone when you are recording.
There are also several different types of recording media that you can use with Kazi Sound Recorder including MP3, WAV, and CD audio files. This recorder has an audio monitor that will allow you to listen to what you are doing and fix it when necessary. The built-in recording studio feature allows you to easily create multiple recordings and store them onto your hard drive.
5. Audacity
Supports multitrack audio
- For Windows, Linux, and Mac
- Records internal or external microphones
- Microphone sensitivity control
- View sound waves of captured audio
- Destructive editing only
Verdict: You can use Audacity for recording and monitoring noises. It has a mic booster feature that will enhance your digital recording sounds. This software records internal or external microphones.
You must always carry out a test run on your microphone before using the software. This free audio editing software will also help you in editing your recordings easily. You will also find that this software has a good price tag as well.
Eva Williams
Writer & Gear Reviewer
Eva Williams is a talented family photographer and software expert who is in charge of mobile software and apps testing and overviewing in the FixThePhoto team. Eva earned her Bachelor’s degree in Visual Arts from NYU and work 5+ years assisting some of the city’s popular wedding photographers. She doesn’t trust Google search results and always tests everything herself, especially, much-hyped programs and apps.
Read Eva’s full bio
Tetiana Kostylieva
Photo & Video Insights Blogger
Tetiana Kostylieva is the content creator, who takes photos and videos for almost all FixThePhoto blog articles. Her career started in 2013 as a caricature artist at events. Now, she leads our editorial team, testing new ideas and ensuring the content is helpful and engaging. She likes vintage cameras and, in all articles, she always compares them with modern ones showing that it isn’t obligatory to invest in brand-new equipment to produce amazing results.
Read Tetiana’s full bio
Are you tired of struggling with low microphone volume during your important online meetings, podcasts, or voice recordings? Look no further, as we have compiled a list of the best microphone booster software to help you amplify your voice and ensure crystal-clear audio.
Whether you’re a content creator, gamer, or professional in need of crystal-clear audio, these powerful tools have got you covered. Say goodbye to low microphone volume and hello to a world of enhanced sound quality.
In this guide, we’ll explore the top microphone booster software options that will revolutionize your audio experience.
7+ Best Free Mic Booster For Windows 11, 10, 8, 7 PC
All the below-mentioned options are quite handy and have free versions to use. So, without wasting much time, let’s continue reading!
1. Voicemeeter
- Latest Version: 1.0.8.2
- Compatibility: Support Windows 11/10/8/7 (32 / 64 bits)
- Pricing: Na

Voicemeeter is basically a free virtual audio mixer program, but it is also considered a good option for boosting microphone volume. The application holds the ability to enhance the sound quality of both physical mics and virtual sound sources.
One of the best parts of using this mic booster software is it works on the system level. Hence, you can utilize any sound recorder tool to record the boosted mic volume.
Highlights: Voicemeeter
- The microphone amplification software supports both audio & stereo input.
- Supports adjusting the Sample Rate, Bit Rate & Quality of both input/output streams.
- No additional plugins are needed to configure the app.
- A slew of tools is available for editing your voice recording.
Get It Now
2. Expstudio Audio Editor
- Latest Version: 4.31
- Compatibility: Support Windows 8/7 (32 / 64 bits)
- Pricing: Freeware
Here comes another microphone boost software which is available in two different editions: Free and Professional version. As the name entails, the program’s main aim is to edit audio, but it does support recording sound and boosting microphone volume without any hiccups.
Using Expstudio Audio Editor, one can easily cut, copy, silence, and mix audio in a couple of clicks. Additionally, the microphone booster software for Windows offers the following features:
Highlights: Expstudio Audio Editor
- Variety of filters like low pass, FFT, notch, and bandpass) to manage frequency range.
- Provides the ability to convert the female voice to the male voice & vice-versa.
- Supports voice changing to Zeus and Chipmunk voices as well.
- Easily save recorded sounds in formats like WMA, RAW, VOX, MP3, MP2 & more.
Get It Now
3. Audacity
- Latest Version: 3.1.3
- Compatibility: Support Windows 11/10/8/7 (32 / 64 bits)
- Pricing: Open-source software

Our following inclusion in the list of Best Mic Booster Software for Windows is Audacity. It’s a free and open-source software for microphones that allows users to record, monitor, and enhance audio files easily. It features a fantastic dashboard that makes the entire task effortless for both novice and advanced users.
Using this microphone enhancer software, you can also take advantage of a variety of editing options to boost mic volume and more.
Highlights: Audacity
- Effortlessly increase or decrease the microphone sensitivity.
- Tons of audio effects and audio analyzing tools to manage contrast, plot spectrum, etc.
- Comes with the ability to record audio in formats like MP3, FLAC, M4A, OGG etc.
- Highly-compatible open-source audio editing tool for Windows, Mac & Linux.
Get It Now
4. Equalizer APO
- Latest Version: Na
- Compatibility: Support Windows 7 / 8 / 8.1 / 10 (32 / 64 bits)
- Pricing: Open-source software

If you are looking for lightweight Microphone Booster Software for Windows PC, then choose none other than Equalizer APO. The application doesn’t consume a lot of memory or CPU resources, as it works with elementary frameworks.
As compared to other Microphone Amplification Software listed here, it offers an audio filter tool that holds the ability to convert audio inputs into low or high-pitch sound easily. To know more about what all Equalizer APO has to offer, keep reading:
Highlights: Equalizer APO
- Holds the potential to boost weak sound signals as well.
- Offers a user-friendly dashboard with impeccable audio-boosting features.
- Less CPU consumption and memory usage.
- Free & open-source mic booster software for Windows 10, 8.1, 8, 7 PC.
Get It Now
5. Mic Note
- Latest Version: Na
- Compatibility: Support Windows 7 / 8 / 8.1 / 10 (32 / 64 bits)
- Pricing: Open-source software
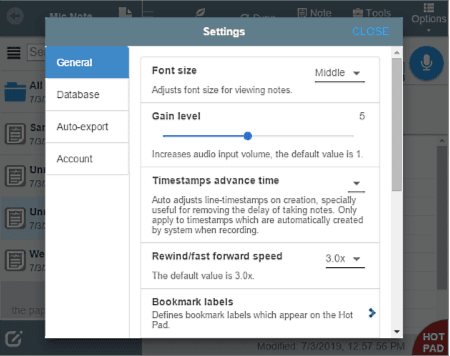
Listing out the best software for a microphone and not mentioning Mic Note is certainly not possible. The application dedicatedly works to create voice and text notes, but it also holds the ability to boost microphone volume.
Using the microphone boost software, you can also record sound with greater mic sensitivity. It even helps users to convert text to speech, which is certainly a standout feature in mic booster software.
Highlights: Mic Note
- Allows you to create a single audio note for up to 10 minutes in length.
- Automatically insert timestamps for your notes.
- Supports editing, inserting, trimming, and extracting audio.
- Comes with a set of tools to transcribe recordings using shortcut keys.
Get It Now
6. Kazi Sound Recorder
- Latest Version: 3.50
- Compatibility: Support Windows 7 / 8 / 8.1 / 10 (32 / 64 bits)
- Pricing: Freeware

Here comes another microphone enhancer software cum sound recorder, designed and developed for Windows PC. The application works flawlessly to amplify the sound inputs and bridges the gap if any. It even features a plethora of audio filters like bandpass, low pass, etc to manage frequency range.
So, in a nutshell, if you wish to enhance your mic sound and quickly add audio effects to create professional output, choose without a doubt Kazi Sound Recorder.
Highlights: Kazi Sound Recorder
- Includes a built-in mini player, so you can listen to your recordings immediately.
- Converts audio formats MP3, WAV, OGG, and WMA from one to another.
- Offers direct support for RealPlayer, Windows Media Player, Power DVD, Flash & more.
- To get a higher quality recording, set the Sample rate, Mono, or Stereo accordingly.
Get It Now
7. DeskFX
- Latest Version: NA
- Compatibility: Support Windows XP/Vista/7/8/8.1/10/11
- Pricing: Freeware
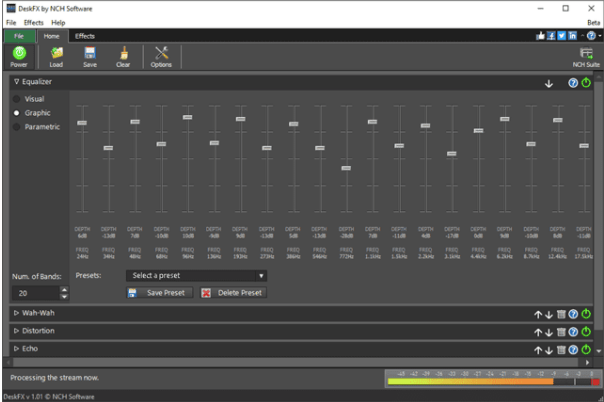
Last but not least in consideration, try using DeskFX, microphone booster software for Windows PC. The application supports tracking all the record and playback audio, without putting in much effort. Besides this, it offers the capability to edit your sound files and save file formats in MP3, VOX, CD, OGG, and WAV.
All these essential utilities are equipped with a smart and straightforward interface, making it a suitable choice for both novice and pro users.
Highlights: DeskFX
- Features an excellent dashboard, making it easy to use for novice users.
- Enhance the quality of the music in a couple of clicks.
- Adjust the controls of audio enhancement for sounds coming from the system & headphones.
- Comes with effects such as equalize, amplify, reverb, and many more for free.
Get It Now
8. ViPER4Windows
- Latest Version: 1.0.5
- Compatibility: Support Windows 10/8/7/XP, Vista (32 / 64 bits)
- Pricing: Freeware
You cannot miss installing Viper4Windows if you are an audiophile. This tool is complete freeware and comes bundled with the original installation. It offers support for both 32 and 64-bit operating systems and is a feature-rich program.
Highlights: Viper4Windows
- It offers three modes for tweaking – Music, Movie, and Freestyle.
- Supports a post-volume slider for boosting the volume on Windows.
- Comes with default audio preset and custom audio configurations.
- Enabled with features like the IRS Power Controller, ViPER XBass parameter, and ViPER XClarity.
Comparison Table of Top 8 Mic Booster Software
| Product Name | Best For | Platform | Free Trial | File Size | Price | Latest
Version |
| Voicemeeter | Audio Mixing | Windows 10/8/7, Vista, XP | Freeware | 11.2 MB | Freeware | 1.0.8.2 |
| Expstudio Audio Editor | Editing audio | Windows 8/7 | Freeware | 5.7 MB | Freeware | 4.31 |
| Audacity | Multi-track audio recording and editing | Windows, Mac OS X, Linux | Freeware | 88.2 MB | Free | 3.1.3 |
| Equalizer APO | Enhancing sound quality | Windows 11/10/8/7 | Freeware | 8.33 MB | Freeware | 1.3 |
| Mic Note | Transcribing recordings | Windows, Mac OS, Linux | Freeware | 23.5 MB | Free | 1.1.1 |
| Kazi Sound Recorder | Converting audio versions from one form to another | Windows All Versions | Yes | 4.21 MB | $24.95 | 3.50 MB |
| DeskFX | Creating podcasts and audiobooks | Windows 11/10/8.1/8/7/Vista Mac OS X 10.9 or above | Freeware | 1.1 MB | Free | 4.04 |
| ViPER4Windows | Customizing audio configurations | Windows 10/8/7/XP/Vista | Freeware | 11.9 MB | Free | 1.0.5 |
Which Microphone Booster Software Will You Choose For Windows PC
Well, to be honest, all of the aforementioned programs work brilliantly. But if you ask for our recommendation, we would suggest using Voicemeeter. The application can enhance the sound quality of both physical mics and virtual sound sources.
One of the best parts of using this mic booster software is it works on the system level. Hence, you can utilize any sound recorder tool to record the boosted mic volume. Cool, right?
Do let us know which one’s your favorite tool among the glut. You can mention your choices in the comments section below! And, in case we’ve missed any important mic-boosting tool that deserves a place in the listicle, then you can also drop the same in the section below!
Frequently Asked Questions:
Q1. How can I boost my mic?
Follow the instructions stated below to enhance microphone volume:
- Right-click on the sound icon, located on the Taskbar.
- Choose the Sound option.
- Navigate to the Recording tab and simply right-click on the microphone.
- Now select Properties and head toward the Levels tab.
- At this point, you need to set the Microphone boost to at least +40 dB.
- Hit the OK button to implement the changes!
Q2. How can I make my microphone louder with software?
For demonstration purposes, we are using Audacity to boost the mic volume.
- Launch the Audacity software on your PC.
- Now hit the Recording button to initiate the sound recording process.
- At this point, you need to slide the Recording Volume toward the right.
- This way, you can instantly increase the microphone volume.
Q3. Which software is best for a microphone?
Audacity is undoubtedly the best software for microphones. It’s a free and open-source application for enhancing mic volume and improving quality. It even allows users to record, monitor, and enhance audio files easily.
Audacity features a fantastic dashboard that makes the entire task effortless for both novice and advanced users.
Q4. What is the best free microphone software?
Expstudio is one of the best free tools that do support recording sound and boosting microphone volume without any hiccups. Using Expstudio Audio Editor, one can easily cut, copy, silence, and mix audios in a couple of clicks as well.
Also Read
- Best Bass Booster for Windows
- Volume Boosters For Windows
- Best Soundboard Software for Windows
- Best Sound Equalizer for Windows
- Volume Booster Apps for Android
- Volume Booster Apps for iPhone
- Best Free Karaoke Software