
OpenCV Bootcamp
Before you begin your journey into the exciting world of Computer Vision, Deep Learning, and AI, you need to become an expert at using the world’s largest resource of Computer Vision, the OpenCV library. This free OpenCV course will teach you how to manipulate images and videos, and detect objects and faces, among other exciting topics in just about 3 hours.
Enroll for Free
Get Started With OpenCV in Just 3 Hours!
Join 100K+ learners who trust OpenCV.
Dive into the world of Computer Vision, Deep Learning, and AI with OpenCV – the most powerful library for image and video processing. In just 3 hours, this free course will teach you how to transform images, detect faces and objects, and unlock new possibilities in tech.
Get Instant Access.
No spam. Unsubscribe anytime.
Installation
Select your preferences and run the install command.
Language:
Python
C++
Java
Android
iOS
JavaScript
Run this Command:
Default Result: pip3 install opencv-python
Verification
To ensure that OpenCV is installed correctly, we can run the following example to show how to read and display image
Python
Change path/to/image to a real path of an image, then run this demo
					import cv2 as cv
img = cv.imread("path/to/image")

cv.imshow("Display window", img)
k = cv.waitKey(0) # Wait for a keystroke in the window
C++
Change path/to/image to a real path of an image, then build this demo with OpenCV package and run it
					#include
#include
using namespace cv;
int main()
{
    std::string image_path = "path/to/image";
    Mat img = imread(image_path, IMREAD_COLOR);

    imshow("Display window", img);
    int k = waitKey(0); // Wait for a keystroke in the window
    return 0;
}
JavaScript
Copy this code into an html file and open it in your web browser
  Hello OpenCV.js


  Hello OpenCV.js
  OpenCV.js is loading...


      imageSrc


      canvasOutput


    let imgElement = document.getElementById('imageSrc');
    let inputElement = document.getElementById('fileInput');
    inputElement.addEventListener('change', (e) => {
      imgElement.src = URL.createObjectURL(e.target.files[0]);
    }, false);
    imgElement.onload = function () {
      let mat = cv.imread(imgElement);
      cv.imshow('canvasOutput', mat);
      mat.delete();
    };
    var Module = {
      // https://emscripten.org/docs/api_reference/module.html#Module.onRuntimeInitialized
      onRuntimeInitialized() {
        document.getElementById('status').innerHTML = 'OpenCV.js is ready.';
      }
    };
Keep OpenCV Free
OpenCV is raising funds to keep the library free for everyone, and we need the support of the entire community to do it. Donate to OpenCV on Github to show your support.
- OpenCV on Wheels
- Installation and Usage
- Frequently Asked Questions
- Documentation for opencv-python
- CI build process
- Manual builds
- Manual debug builds
- Source distributions
- Licensing
- Versioning
- Releases
- Development builds
- Manylinux wheels
- Supported Python versions
- Backward compatibility
OpenCV on Wheels
Pre-built CPU-only OpenCV packages for Python.
Check the manual build section if you wish to compile the bindings from source to enable additional modules such as CUDA.
Installation and Usage
-
If you have previous/other manually installed (= not installed via
pip) version of OpenCV installed (e.g. cv2 module in the root of Python’s site-packages), remove it before installation to avoid conflicts. -
Make sure that your
pipversion is up-to-date (19.3 is the minimum supported version):pip install --upgrade pip. Check version withpip -V. For example Linux distributions ship usually with very oldpipversions which cause a lot of unexpected problems especially with themanylinuxformat. -
Select the correct package for your environment:
There are four different packages (see options 1, 2, 3 and 4 below) and you should SELECT ONLY ONE OF THEM. Do not install multiple different packages in the same environment. There is no plugin architecture: all the packages use the same namespace (
cv2). If you installed multiple different packages in the same environment, uninstall them all withpip uninstalland reinstall only one package.a. Packages for standard desktop environments (Windows, macOS, almost any GNU/Linux distribution)
- Option 1 — Main modules package:
pip install opencv-python - Option 2 — Full package (contains both main modules and contrib/extra modules):
pip install opencv-contrib-python(check contrib/extra modules listing from OpenCV documentation)
b. Packages for server (headless) environments (such as Docker, cloud environments etc.), no GUI library dependencies
These packages are smaller than the two other packages above because they do not contain any GUI functionality (not compiled with Qt / other GUI components). This means that the packages avoid a heavy dependency chain to X11 libraries and you will have for example smaller Docker images as a result. You should always use these packages if you do not use
cv2.imshowet al. or you are using some other package (such as PyQt) than OpenCV to create your GUI.- Option 3 — Headless main modules package:
pip install opencv-python-headless - Option 4 — Headless full package (contains both main modules and contrib/extra modules):
pip install opencv-contrib-python-headless(check contrib/extra modules listing from OpenCV documentation)
- Option 1 — Main modules package:
-
Import the package:
import cv2All packages contain Haar cascade files.
cv2.data.haarcascadescan be used as a shortcut to the data folder. For example:cv2.CascadeClassifier(cv2.data.haarcascades + "haarcascade_frontalface_default.xml") -
Read OpenCV documentation
-
Before opening a new issue, read the FAQ below and have a look at the other issues which are already open.
Frequently Asked Questions
Q: Do I need to install also OpenCV separately?
A: No, the packages are special wheel binary packages and they already contain statically built OpenCV binaries.
Q: Pip install fails with ModuleNotFoundError: No module named 'skbuild'?
Since opencv-python version 4.3.0.*, manylinux1 wheels were replaced by manylinux2014 wheels. If your pip is too old, it will try to use the new source distribution introduced in 4.3.0.38 to manually build OpenCV because it does not know how to install manylinux2014 wheels. However, source build will also fail because of too old pip because it does not understand build dependencies in pyproject.toml. To use the new manylinux2014 pre-built wheels (or to build from source), your pip version must be >= 19.3. Please upgrade pip with pip install --upgrade pip.
Q: Import fails on Windows: ImportError: DLL load failed: The specified module could not be found.?
A: If the import fails on Windows, make sure you have Visual C++ redistributable 2015 installed. If you are using older Windows version than Windows 10 and latest system updates are not installed, Universal C Runtime might be also required.
Windows N and KN editions do not include Media Feature Pack which is required by OpenCV. If you are using Windows N or KN edition, please install also Windows Media Feature Pack.
If you have Windows Server 2012+, media DLLs are probably missing too; please install the Feature called «Media Foundation» in the Server Manager. Beware, some posts advise to install «Windows Server Essentials Media Pack», but this one requires the «Windows Server Essentials Experience» role, and this role will deeply affect your Windows Server configuration (by enforcing active directory integration etc.); so just installing the «Media Foundation» should be a safer choice.
If the above does not help, check if you are using Anaconda. Old Anaconda versions have a bug which causes the error, see this issue for a manual fix.
If you still encounter the error after you have checked all the previous solutions, download Dependencies and open the cv2.pyd (located usually at C:\Users\username\AppData\Local\Programs\Python\PythonXX\Lib\site-packages\cv2) file with it to debug missing DLL issues.
Q: I have some other import errors?
A: Make sure you have removed old manual installations of OpenCV Python bindings (cv2.so or cv2.pyd in site-packages).
Q: Function foo() or method bar() returns wrong result, throws exception or crashes interpreter. What should I do?
A: The repository contains only OpenCV-Python package build scripts, but not OpenCV itself. Python bindings for OpenCV are developed in official OpenCV repository and it’s the best place to report issues. Also please check OpenCV wiki and the official OpenCV forum before file new bugs.
Q: Why the packages do not include non-free algorithms?
A: Non-free algorithms such as SURF are not included in these packages because they are patented / non-free and therefore cannot be distributed as built binaries. Note that SIFT is included in the builds due to patent expiration since OpenCV versions 4.3.0 and 3.4.10. See this issue for more info: https://github.com/skvark/opencv-python/issues/126
Q: Why the package and import are different (opencv-python vs. cv2)?
A: It’s easier for users to understand opencv-python than cv2 and it makes it easier to find the package with search engines. cv2 (old interface in old OpenCV versions was named as cv) is the name that OpenCV developers chose when they created the binding generators. This is kept as the import name to be consistent with different kind of tutorials around the internet. Changing the import name or behaviour would be also confusing to experienced users who are accustomed to the import cv2.
Documentation for opencv-python
The aim of this repository is to provide means to package each new OpenCV release for the most used Python versions and platforms.
CI build process
The project is structured like a normal Python package with a standard setup.py file.
The build process for a single entry in the build matrices is as follows (see for example .github/workflows/build_wheels_linux.yml file):
-
In Linux and MacOS build: get OpenCV’s optional C dependencies that we compile against
-
Checkout repository and submodules
- OpenCV is included as submodule and the version is updated
manually by maintainers when a new OpenCV release has been made - Contrib modules are also included as a submodule
- OpenCV is included as submodule and the version is updated
-
Find OpenCV version from the sources
-
Build OpenCV
- tests are disabled, otherwise build time increases too much
- there are 4 build matrix entries for each build combination: with and without contrib modules, with and without GUI (headless)
- Linux builds run in manylinux Docker containers (CentOS 5)
- source distributions are separate entries in the build matrix
-
Rearrange OpenCV’s build result, add our custom files and generate wheel
-
Linux and macOS wheels are transformed with auditwheel and delocate, correspondingly
-
Install the generated wheel
-
Test that Python can import the library and run some sanity checks
-
Use twine to upload the generated wheel to PyPI (only in release builds)
Steps 1—4 are handled by pip wheel.
The build can be customized with environment variables. In addition to any variables that OpenCV’s build accepts, we recognize:
CI_BUILD. Set to1to emulate the CI environment build behaviour. Used only in CI builds to force certain build flags on insetup.py. Do not use this unless you know what you are doing.ENABLE_CONTRIBandENABLE_HEADLESS. Set to1to build the contrib and/or headless versionENABLE_JAVA, Set to1to enable the Java client build. This is disabled by default.CMAKE_ARGS. Additional arguments for OpenCV’s CMake invocation. You can use this to make a custom build.
See the next section for more info about manual builds outside the CI environment.
Manual builds
If some dependency is not enabled in the pre-built wheels, you can also run the build locally to create a custom wheel.
- Clone this repository:
git clone --recursive https://github.com/opencv/opencv-python.git cd opencv-python- you can use
gitto checkout some other version of OpenCV in theopencvandopencv_contribsubmodules if needed
- you can use
- Add custom Cmake flags if needed, for example:
export CMAKE_ARGS="-DSOME_FLAG=ON -DSOME_OTHER_FLAG=OFF"(in Windows you need to set environment variables differently depending on Command Line or PowerShell) - Select the package flavor which you wish to build with
ENABLE_CONTRIBandENABLE_HEADLESS: i.e.export ENABLE_CONTRIB=1if you wish to buildopencv-contrib-python - Run
pip wheel . --verbose. NOTE: make sure you have the latestpipversion, thepip wheelcommand replaces the oldpython setup.py bdist_wheelcommand which does not supportpyproject.toml.- this might take anything from 5 minutes to over 2 hours depending on your hardware
- Pip will print fresh wheel location at the end of build procedure. If you use old approach with
setup.pyfile wheel package will be placed indistfolder. Package is ready and you can do with that whatever you wish.- Optional: on Linux use some of the
manylinuximages as a build hosts if maximum portability is needed and runauditwheelfor the wheel after build - Optional: on macOS use
delocate(same asauditwheelbut for macOS) for better portability
- Optional: on Linux use some of the
Manual debug builds
In order to build opencv-python in an unoptimized debug build, you need to side-step the normal process a bit.
- Install the packages
scikit-buildandnumpyvia pip. - Run the command
python setup.py bdist_wheel --build-type=Debug. - Install the generated wheel file in the
dist/folder withpip install dist/wheelname.whl.
If you would like the build produce all compiler commands, then the following combination of flags and environment variables has been tested to work on Linux:
export CMAKE_ARGS='-DCMAKE_VERBOSE_MAKEFILE=ON'
export VERBOSE=1

python3 setup.py bdist_wheel --build-type=Debug
See this issue for more discussion: https://github.com/opencv/opencv-python/issues/424
Source distributions
Since OpenCV version 4.3.0, also source distributions are provided in PyPI. This means that if your system is not compatible with any of the wheels in PyPI, pip will attempt to build OpenCV from sources. If you need a OpenCV version which is not available in PyPI as a source distribution, please follow the manual build guidance above instead of this one.
You can also force pip to build the wheels from the source distribution. Some examples:
pip install --no-binary opencv-python opencv-pythonpip install --no-binary :all: opencv-python
If you need contrib modules or headless version, just change the package name (step 4 in the previous section is not needed). However, any additional CMake flags can be provided via environment variables as described in step 3 of the manual build section. If none are provided, OpenCV’s CMake scripts will attempt to find and enable any suitable dependencies. Headless distributions have hard coded CMake flags which disable all possible GUI dependencies.
On slow systems such as Raspberry Pi the full build may take several hours. On a 8-core Ryzen 7 3700X the build takes about 6 minutes.
Licensing
Opencv-python package (scripts in this repository) is available under MIT license.
OpenCV itself is available under Apache 2 license.
Third party package licenses are at LICENSE-3RD-PARTY.txt.
All wheels ship with FFmpeg licensed under the LGPLv2.1.
Non-headless Linux wheels ship with Qt 5 licensed under the LGPLv3.
The packages include also other binaries. Full list of licenses can be found from LICENSE-3RD-PARTY.txt.
Versioning
find_version.py script searches for the version information from OpenCV sources and appends also a revision number specific to this repository to the version string. It saves the version information to version.py file under cv2 in addition to some other flags.
Releases
A release is made and uploaded to PyPI when a new tag is pushed to master branch. These tags differentiate packages (this repo might have modifications but OpenCV version stays same) and should be incremented sequentially. In practice, release version numbers look like this:
cv_major.cv_minor.cv_revision.package_revision e.g. 3.1.0.0
The master branch follows OpenCV master branch releases. 3.4 branch follows OpenCV 3.4 bugfix releases.
Development builds
Every commit to the master branch of this repo will be built. Possible build artifacts use local version identifiers:
cv_major.cv_minor.cv_revision+git_hash_of_this_repo e.g. 3.1.0+14a8d39
These artifacts can’t be and will not be uploaded to PyPI.
Manylinux wheels
Linux wheels are built using manylinux2014. These wheels should work out of the box for most of the distros (which use GNU C standard library) out there since they are built against an old version of glibc.
The default manylinux2014 images have been extended with some OpenCV dependencies. See Docker folder for more info.
Supported Python versions
Python 3.x compatible pre-built wheels are provided for the officially supported Python versions (not in EOL):
- 3.7
- 3.8
- 3.9
- 3.10
- 3.11
- 3.12
Backward compatibility
Starting from 4.2.0 and 3.4.9 builds the macOS Travis build environment was updated to XCode 9.4. The change effectively dropped support for older than 10.13 macOS versions.
Starting from 4.3.0 and 3.4.10 builds the Linux build environment was updated from manylinux1 to manylinux2014. This dropped support for old Linux distributions.
Starting from version 4.7.0 the Mac OS GitHub Actions build environment was update to version 11. Mac OS 10.x support deprecated. See https://github.com/actions/runner-images/issues/5583
Starting from version 4.9.0 the Mac OS GitHub Actions build environment was update to version 12. Mac OS 10.x support deprecated by Brew and most of used packages.
Last Updated :
07 Aug, 2024
Prerequisite: Python Language Introduction OpenCV is the huge open-source library for computer vision, machine learning, and image processing and now it plays a major role in real-time operation which is very important in today’s systems. By using it, one can process images and videos to identify objects, faces, or even the handwriting of a human. When it integrated with various libraries, such as Numpy, python is capable of processing the OpenCV array structure for analysis. To Identify image patterns and its various features we use vector space and perform mathematical operations on these features. To install OpenCV, one must have Python and PIP, preinstalled on their system. To check if your system already contains Python, go through the following instructions: Open the Command line(search for cmd in the Run dialog( + R). Now run the following command:
python --version
If Python is already installed, it will generate a message with the Python version available.

If Python is not present, go through How to install Python on Windows? and follow the instructions provided. PIP is a package management system used to install and manage software packages/libraries written in Python. These files are stored in a large “on-line repository” termed as Python Package Index (PyPI). To check if PIP is already installed on your system, just go to the command line and execute the following command:
pip -V

If PIP is not present, go through How to install PIP on Windows? and follow the instructions provided.
Downloading and Installing OpenCV:
OpenCV can be directly downloaded and installed with the use of pip (package manager). To install OpenCV, just go to the command-line and type the following command:
pip install opencv-python
Beginning with the installation:
To check if OpenCV is correctly installed, just run the following commands to perform a version check:
python
>>>import cv2
>>>print(cv2.__version__)

Table of Contents
- Installing OpenCV on Windows
- Installing OpenCV Using Pip
- Having Problems Configuring Your Development Environment?
- Summary
- References
- Citation Information
In this tutorial, you will learn how to install OpenCV on Windows. This includes a complete guide to installation using prebuilt binaries.
After completing this blog post, you will be able to install OpenCV on your Windows machine on your own. You will also be able to choose the method that will suit you the best.
To learn how to Install OpenCV on Windows, just keep reading.
Hello and welcome to today’s tutorial. If you are here, I assume you must have a Windows computer or need to use one for Computer Vision. First, let me assure you of a doubt you might have nurtured.
Yes, it is possible to practice Deep Learning and Computer Vision on a Windows machine. We at PyImageSearch are firm believers in democratizing learning.
You do not need an expensive laptop to get started with OpenCV.
In this tutorial, we will guide you through the various ways you can follow to get OpenCV installed on your Windows computer.
Installing OpenCV Using Pip
Installing OpenCV Python using pip is fairly easy. However, there are a few things to keep in mind before we get started.
- This is a prebuilt CPU-only OpenCV package for Python. You cannot follow these steps if you are on a GPU-powered computer.
- These are unofficial prebuilt packages for installing OpenCV. They are not official OpenCV packages released by the OpenCV.org team.
- It is essential to have Python and pip installed on your Windows machine before you get started. If you do not have Python installed, please download and install the latest version from here.
With all the disclaimers and prerequisites done, let’s get started with some installation. Here are four OpenCV packages that are pip-installable on the PyPI repository:
- opencv-python: This repository contains just the main modules of the OpenCV library. If you’re a PyImageSearch reader, you do not want to install this package.
- opencv-contrib-python: The opencv-contrib-python repository contains both the main modules along with the contrib modules. This is the library we recommend you install, as it includes all OpenCV functionality.
- opencv-python-headless: Same as opencv-python but no GUI functionality. Useful for headless systems.
- opencv-contrib-python-headless: Same as opencv-contrib-python but no GUI functionality. Useful for headless systems.
You DO NOT want to install both opencv-python and opencv-contrib-python. Pick ONE of them.
Step 1: Make sure you have python and pip installed. Pip version 19.3 is the minimum supported version. This means a pip with a version higher than 19.3 is required.
To check the pip version, open your command prompt and type:
$ pip -V
This will let you know the version of pip you are using. To upgrade pip to the latest version type:
$ pip install --upgrade pip
Step 2 (optional): Create a virtual environment and install OpenCV there. Creating a virtual environment in Python is a very good practice, and we highly recommend it.
You can develop multiple projects without worrying if your libraries are going to crash with each other. This can be achieved through virtualenv and virtualenvwrapper as well as Anaconda. In this tutorial, we will use virtualenv and virtualenvwrapper.
$ pip install virtualenv virtualenvwrapper
$ pip install virtualenvwrapper-win
You’ll see some terminal output that sets up virtualenvwrapper. You now have access to new terminal commands:
- Create an environment with
mkvirtualenv. - Activate an environment (or switch to a different one) with
workon. - Deactivate an environment with
deactivate. - Remove an environment with
rmvirtualenv.
Read the documentation to get familiar with the commands.
Next, create a virtual environment called cv (you can name it anything you want) to install OpenCV.
$ mkvirtualenv cv -p python3
Switch to this environment using:
$ workon cv
Step 3: With everything taken care of, we finally start installing OpenCV on your Windows system.
$ pip install opencv-contrib-python
To check if OpenCV is installed properly, open a new command prompt and enter a Python shell using the following command:
$ python

>> import cv2
>> print(cv2.__version__)
And that’s it. OpenCV is successfully installed on your windows machine. You are ready to embark on your Computer Vision journey.
We recommend you go through some of our tutorials on OpenCV fundamentals to get yourself acquainted with the topic.
Having Problems Configuring Your Development Environment?
All that said, are you:
- Short on time?
- Learning on your employer’s administratively locked system?
- Wanting to skip the hassle of fighting with the command line, package managers, and virtual environments?
- Ready to run the code right now on your Windows, macOS, or Linux system?
Then join PyImageSearch University today!
Gain access to Jupyter Notebooks for this tutorial and other PyImageSearch guides that are pre-configured to run on Google Colab’s ecosystem right in your web browser! No installation required.
And best of all, these Jupyter Notebooks will run on Windows, macOS, and Linux!
What’s next? We recommend PyImageSearch University.
Course information:
86+ total classes • 115+ hours hours of on-demand code walkthrough videos • Last updated: May 2025
★★★★★ 4.84 (128 Ratings) • 16,000+ Students Enrolled
I strongly believe that if you had the right teacher you could master computer vision and deep learning.
Do you think learning computer vision and deep learning has to be time-consuming, overwhelming, and complicated? Or has to involve complex mathematics and equations? Or requires a degree in computer science?
That’s not the case.
All you need to master computer vision and deep learning is for someone to explain things to you in simple, intuitive terms. And that’s exactly what I do. My mission is to change education and how complex Artificial Intelligence topics are taught.
If you’re serious about learning computer vision, your next stop should be PyImageSearch University, the most comprehensive computer vision, deep learning, and OpenCV course online today. Here you’ll learn how to successfully and confidently apply computer vision to your work, research, and projects. Join me in computer vision mastery.
Inside PyImageSearch University you’ll find:
- ✓ 86+ courses on essential computer vision, deep learning, and OpenCV topics
- ✓ 86 Certificates of Completion
- ✓ 115+ hours hours of on-demand video
- ✓ Brand new courses released regularly, ensuring you can keep up with state-of-the-art techniques
- ✓ Pre-configured Jupyter Notebooks in Google Colab
- ✓ Run all code examples in your web browser — works on Windows, macOS, and Linux (no dev environment configuration required!)
- ✓ Access to centralized code repos for all 540+ tutorials on PyImageSearch
- ✓ Easy one-click downloads for code, datasets, pre-trained models, etc.
- ✓ Access on mobile, laptop, desktop, etc.
Click here to join PyImageSearch University
Summary
In this tutorial, we learned how to install OpenCV from prebuilt binaries. We also learned which package to install and how to create a virtual environment for working on the package. For all purposes of learning computer vision using Python, we highly recommend installing opencv-contrib-python using prebuilt binaries.
If you are looking to start your development journey in computer vision, check out some of our tutorials on OpenCV.
Happy learning 🙂
References
- PyImageSearch: Pip Install OpenCV guide
- Adam Hacks: Installing OpenCV on Windows
- PyPi: Pip install OpenCV
Citation Information
Raha, R. “Installing OpenCV on Windows,” PyImageSearch, D. Chakraborty, P. Chugh, A. R. Gosthipaty, S. Huot, K. Kidriavsteva, and A. Thanki, 2022, https://pyimg.co/b3q05
@incollection{Raha_2022_Installing-OpenCV-Windows,
  author = {Ritwik Raha},
  title = {Installing {OpenCV} on {W}indows},
  Booktitle = {PyImageSearch},
  editor = {Devjyoti Chakraborty and Puneet Chugh and Aritra Roy Gosthipaty and Susan Huot and Kseniia Kidriavsteva and and Abhishek Thanki},
  year = {2022},
  note = {https://pyimg.co/b3q05},
}

Unleash the potential of computer vision with Roboflow — Free!
- Step into the realm of the future by signing up or logging into your Roboflow account. Unlock a wealth of innovative dataset libraries and revolutionize your computer vision operations.
- Jumpstart your journey by choosing from our broad array of datasets, or benefit from PyimageSearch’s comprehensive library, crafted to cater to a wide range of requirements.
- Transfer your data to Roboflow in any of the 40+ compatible formats. Leverage cutting-edge model architectures for training, and deploy seamlessly across diverse platforms, including API, NVIDIA, browser, iOS, and beyond. Integrate our platform effortlessly with your applications or your favorite third-party tools.
- Equip yourself with the ability to train a potent computer vision model in a mere afternoon. With a few images, you can import data from any source via API, annotate images using our superior cloud-hosted tool, kickstart model training with a single click, and deploy the model via a hosted API endpoint. Tailor your process by opting for a code-centric approach, leveraging our intuitive, cloud-based UI, or combining both to fit your unique needs.
- Embark on your journey today with absolutely no credit card required. Step into the future with Roboflow.
Join Roboflow Now

Join the PyImageSearch Newsletter and Grab My FREE 17-page Resource Guide PDF
Enter your email address below to join the PyImageSearch Newsletter and download my FREE 17-page Resource Guide PDF on Computer Vision, OpenCV, and Deep Learning.
В статье разберем, как установить библиотеку OpenCV на компьютеры с операционной системой Windows и MacOS.
Установка OpenCV на компьютер с ОС Windows
- Установить Python со встроенными библиотеками.
- После установки Python нажимаем на комбинацию кнопок Win+R. В открывшемся окне нужно прописать:
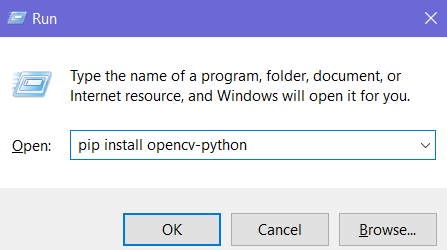
Начнётся скачивание и установка:
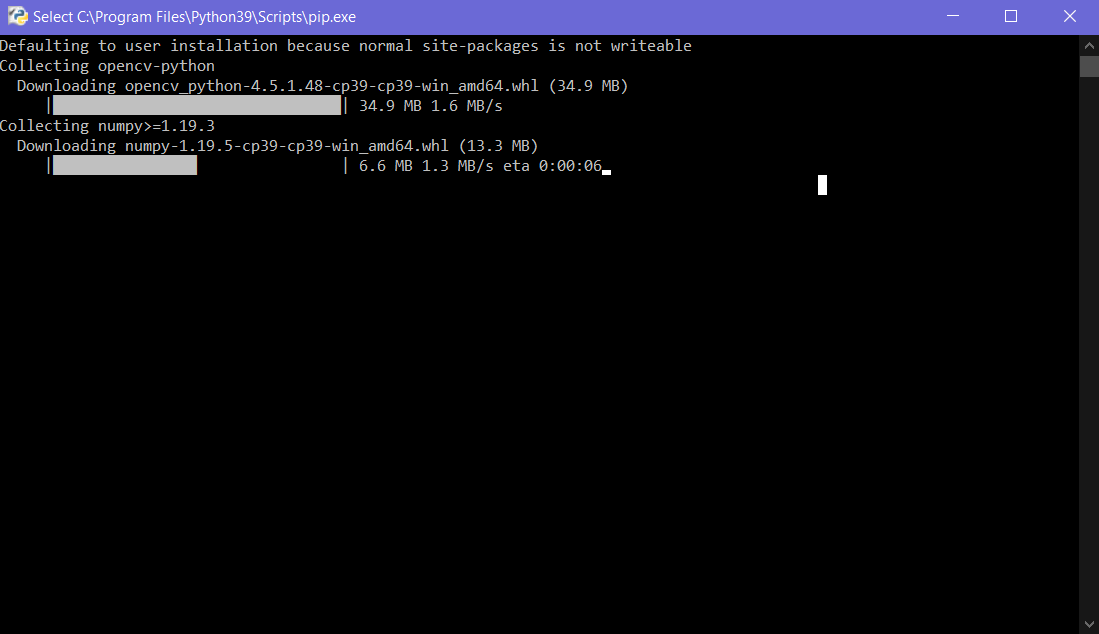
Готово! Библиотека OpenCV установлена на ваш Windows-компьютер.
Для установки OpenCV на компьютер с ОС Linux вводим такую же команду.
Установка OpenCV на MacOS
- Установить Python со встроенными библиотеками для своей операционной системы.
Если у Вас уже установлен Python, рекомендуем переустановить и обязательно поставить галочку у пункта «добавить в PATH».
2. Открываем терминал и пишем туда несколько команд:
pip install --upgrade pip
pip install opencv-python
После ввода произойдёт скачивание и установка.
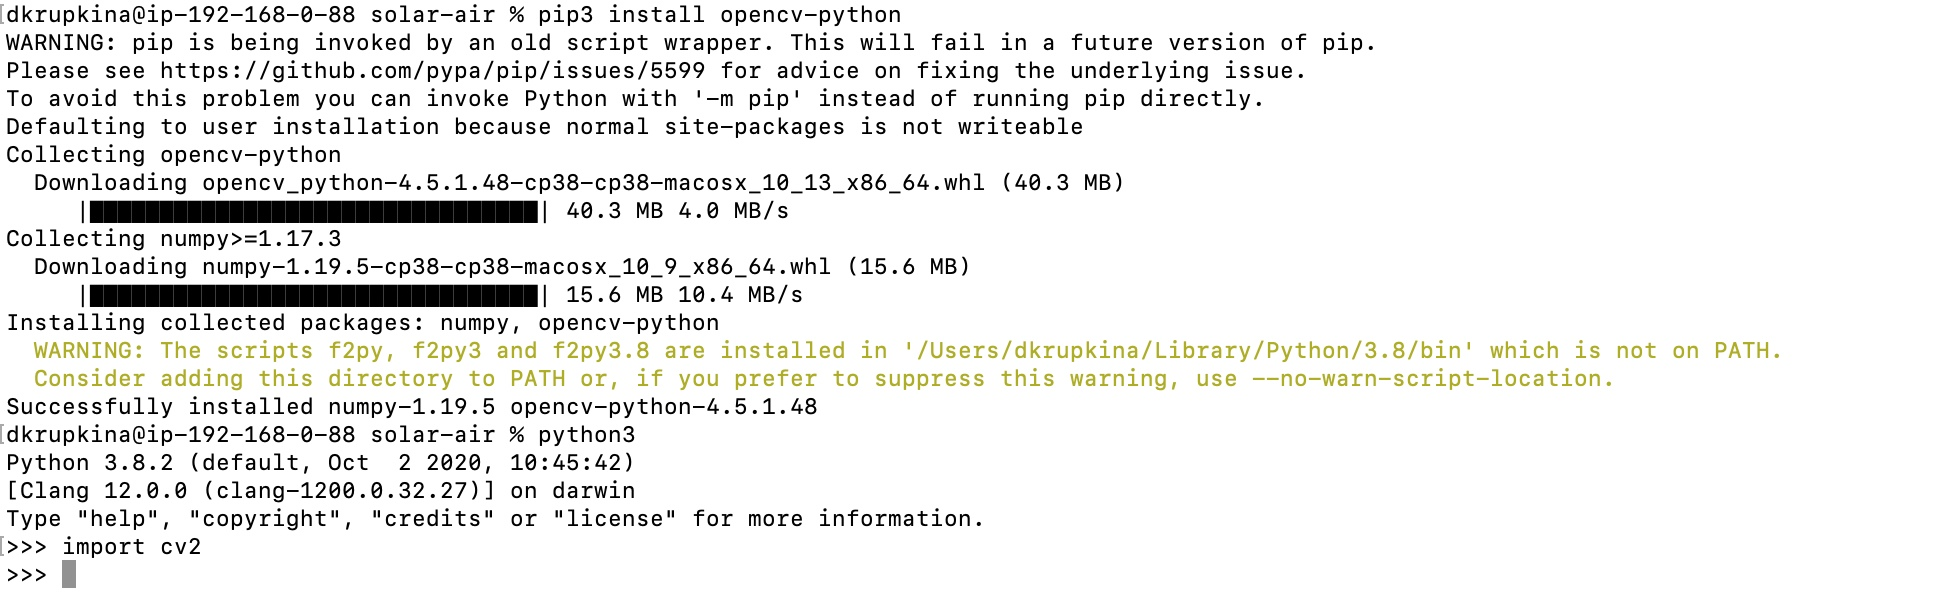
Проверка установки
Для проверки откроем Python и напишем:
Если ошибок нет, значит, OpenCV установился.
Курсы Робикс, в которых изучается этот материал.
- Duckietown: робот с системой Автопилота