
Project Jupyter’s tools are available for installation via the Python Package Index, the leading repository of software created for the Python programming language.
This page uses instructions with pip, the recommended installation tool for Python. If you require environment management as opposed to just installation, look into conda, mamba, pipenv, and Homebrew.
JupyterLab
Install JupyterLab with pip:
Note: If you install JupyterLab with conda or mamba, we recommend using the conda-forge channel.
Once installed, launch JupyterLab with:
Jupyter Notebook
Install the classic Jupyter Notebook with:
To run the notebook:
Voilà
Install Voilà with:
Once installed, launch Voilà with:
Homebrew
Homebrew is a package manager for macOS and Linux.
You can use it to install Jupyter by running:
JupyterLab can be installed as a terminal-launched application accessible via a web browser (default), or as a desktop application which is running in its own window and can be opened by clicking on a desktop shortcut (JupyterLab Desktop). This page describes installation of the default (terminal-launched) JupyterLab application using conda, mamba, pip, pipenv or docker and assumes basic knowledge of the terminal. For JupyterLab Desktop instructions see the Installation section in the JupyterLab Desktop repository.
Warning
New versions of JupyterLab may break backwards compatibility with extensions and other
Jupyter customizations. As noted in Backwards Compatibility, Versions and Breaking Changes, JupyterLab development and
release cycles follow semantic versioning, so we recommend planning your installation and
upgrade procedures to account for possible breaking changes that may disrupt your usage
of JupyterLab and any related tools that are critical to your workflows.
conda#
If you use conda, you can install it with:
conda install -c conda-forge jupyterlab
mamba#
If you use mamba, you can install it with:
mamba install -c conda-forge jupyterlab
pip#
If you use pip, you can install it with:
If installing using pip install --user, you must add the user-level
bin directory to your PATH environment variable in order to launch
jupyter lab. If you are using a Unix derivative (FreeBSD, GNU/Linux,
macOS), you can do this by running export PATH="$HOME/.local/bin:$PATH".
pipenv#
If you use pipenv, you can install it as:
pipenv install jupyterlab
pipenv shell
or from a git checkout:
pipenv install git+git://github.com/jupyterlab/jupyterlab.git#egg=jupyterlab
pipenv shell
When using pipenv, in order to launch jupyter lab, you must activate the project’s virtualenv.
For example, in the directory where pipenv’s Pipfile and Pipfile.lock live (i.e., where you ran the above commands):
Alternatively, you can run jupyter lab inside the virtualenv with
Docker#
If you have Docker installed, you can install and use JupyterLab by selecting one
of the many ready-to-run Docker images
maintained by the Jupyter Team. Follow the instructions in the Quick Start Guide
to deploy the chosen Docker image.
Ensure your docker command includes the -e JUPYTER_ENABLE_LAB=yes flag to ensure
JupyterLab is enabled in your container.
Usage with JupyterHub#
Read the details on our JupyterLab on JupyterHub documentation page.
Usage with Jupyverse#
Jupyverse is a next-generation Jupyter server based on
FastAPI. It can be used instead of
jupyter-server, the Jupyter server installed by default with JupyterLab.
Note that jupyter-server extensions won’t work with jupyverse (for which there might be equivalent plugins).
You can install jupyverse with pip:
pip install "jupyverse[auth,jupyterlab]"
or with conda:
conda install -c conda-forge jupyverse fps-auth fps-jupyterlab
or with mamba:
mamba install -c conda-forge jupyverse fps-auth fps-jupyterlab
And run it with:
Supported browsers#
The latest versions of the following browsers are currently known to work:
-
Firefox
-
Chrome
-
Safari
-
Edge
Earlier browser versions may also work, but come with no guarantees.
Installation problems#
If your computer is behind corporate proxy or firewall,
you may encounter HTTP and SSL errors due to the proxy or firewall blocking connections to widely-used servers. For example, you might see this error if conda cannot connect to its own repositories:
CondaHTTPError: HTTP 000 CONNECTION FAILED for url <https://repo.anaconda.com/pkgs/main/win-64/current_repodata.json>
Here are some widely-used sites that host packages in the Python and JavaScript open-source ecosystems. Your network administrator may be able to allow http and https connections to these domains:
-
pypi.org
-
pythonhosted.org
-
continuum.io
-
anaconda.com
-
conda.io
-
github.com
-
githubusercontent.com
-
npmjs.com
-
yarnpkg.com
Alternatively, you can specify a proxy user (usually a domain user with password),
that is allowed to communicate via network. This can be easily achieved
by setting two common environment variables: HTTP_PROXY and HTTPS_PROXY.
These variables are automatically used by many open-source tools (like conda) if set correctly.
# For Windows
set HTTP_PROXY=http://USER:PWD@proxy.company.com:PORT
set HTTPS_PROXY=https://USER:PWD@proxy.company.com:PORT

# For Linux / MacOS
export HTTP_PROXY=http://USER:PWD@proxy.company.com:PORT
export HTTPS_PROXY=https://USER:PWD@proxy.company.com:PORT
In case you can communicate via HTTP, but installation with conda fails
on connectivity problems to HTTPS servers, you can disable using SSL for conda.
Warning
Disabling SSL in communication is generally not recommended and involves potential security risks.
# Configure npm to not use SSL
conda config --set ssl_verify False
You can do a similar thing for pip.
The approach here is to mark repository servers as trusted hosts,
which means SSL communication will not be required for downloading Python libraries.
# Install pandas (without SSL)
pip install --trusted-host pypi.org --trusted-host files.pythonhosted.org pandas
Using the tips from above, you can handle many network problems
related to installing Python libraries.
Many Jupyter extensions require having working npm and jlpm (alias for yarn) commands,
which is required for downloading useful Jupyter extensions or other JavaScript dependencies. If npm cannot connect to its own repositories, you might see an error like:
ValueError: "@jupyterlab/toc" is not a valid npm package
You can set the proxy or registry used for npm with the following commands.
# Set proxy for NPM
npm config set proxy http://USER:PWD@proxy.company.com:PORT
npm config set proxy https://USER:PWD@proxy.company.com:PORT

# Set default registry for NPM (optional, useful in case if common JavaScript libs cannot be found)
npm config set registry http://registry.npmjs.org/
jlpm config set npmRegistryServer https://registry.yarnpkg.com/
In case you can communicate via HTTP, but installation with npm fails
on connectivity problems to HTTPS servers, you can disable using SSL for npm.
Warning
Disabling SSL in communication is generally not recommended and involves potential security risk.
# Configure npm to not use SSL
npm set strict-ssl False
Installation |
Documentation |
Contributing |
License |
Team |
Getting help |
An extensible environment for interactive and reproducible computing, based on the
Jupyter Notebook and Architecture.
JupyterLab is the next-generation user interface for Project Jupyter offering
all the familiar building blocks of the classic Jupyter Notebook (notebook,
terminal, text editor, file browser, rich outputs, etc.) in a flexible and
powerful user interface.
JupyterLab can be extended using npm packages
that use our public APIs. The prebuilt extensions can be distributed
via PyPI,
conda, and other package managers. The source extensions can be installed
directly from npm (search for jupyterlab-extension) but require an additional build step.
You can also find JupyterLab extensions exploring GitHub topic jupyterlab-extension.
To learn more about extensions, see the user documentation.
Read the current JupyterLab documentation on ReadTheDocs.
[!IMPORTANT]
JupyterLab 3 reached its end of maintenance date on May 15, 2024. Fixes for critical issues will still be backported until December 31, 2024. If you are still running JupyterLab 3, we strongly encourage you to upgrade to JupyterLab 4 as soon as possible. For more information, see JupyterLab 3 end of maintenance on the Jupyter Blog.
Getting started
Installation
If you use conda, mamba, or pip, you can install JupyterLab with one of the following commands.
- If you use conda:
conda install -c conda-forge jupyterlab
- If you use mamba:
mamba install -c conda-forge jupyterlab
- If you use pip:
pip install jupyterlab
If installing using
pip install --user, you must add the user-levelbindirectory to yourPATHenvironment variable in order to launchjupyter lab. If you are using a Unix derivative (e.g., FreeBSD, GNU/Linux, macOS), you can do this by runningexport PATH="$HOME/.local/bin:$PATH".
For more detailed instructions, consult the installation guide. Project installation instructions from the git sources are available in the contributor documentation.
Installing with Previous Versions of Jupyter Notebook
When using a version of Jupyter Notebook earlier than 5.3, the following command must be run after installing JupyterLab to enable the JupyterLab server extension:
jupyter serverextension enable --py jupyterlab --sys-prefix
Running
Start up JupyterLab using:
jupyter lab
JupyterLab will open automatically in the browser. See the documentation for additional details.
If you encounter an error like «Command ‘jupyter’ not found», please make sure PATH environment variable is set correctly. Alternatively, you can start up JupyterLab using ~/.local/bin/jupyter lab without changing the PATH environment variable.
Prerequisites and Supported Browsers
The latest versions of the following browsers are currently known to work:
- Firefox
- Chrome
- Safari
See our documentation for additional details.
Getting help
We encourage you to ask questions on the Discourse forum. A question answered there can become a useful resource for others.
Bug report
To report a bug please read the guidelines and then open a Github issue. To keep resolved issues self-contained, the lock bot will lock closed issues as resolved after a period of inactivity. If a related discussion is still needed after an issue is locked, please open a new issue and reference the old issue.
Feature request
We also welcome suggestions for new features as they help make the project more useful for everyone. To request a feature please use the feature request template.
Development
Extending JupyterLab
To start developing an extension for JupyterLab, see the developer documentation and the API docs.
Contributing
To contribute code or documentation to JupyterLab itself, please read the contributor documentation.
JupyterLab follows the Jupyter Community Guides.
License
JupyterLab uses a shared copyright model that enables all contributors to maintain the
copyright on their contributions. All code is licensed under the terms of the revised BSD license.
Team
JupyterLab is part of Project Jupyter and is developed by an open community. The maintenance team is assisted by a much larger group of contributors to JupyterLab and Project Jupyter as a whole.
JupyterLab’s current maintainers are listed in alphabetical order, with affiliation, and main areas of contribution:
- Mehmet Bektas, Netflix (general development, extensions).
- Alex Bozarth, IBM (general development, extensions).
- Eric Charles, Datalayer, (general development, extensions).
- Frédéric Collonval, WebScIT (general development, extensions).
- Martha Cryan, Mito (general development, extensions).
- Afshin Darian, QuantStack (co-creator, application/high-level architecture,
prolific contributions throughout the code base). - Vidar T. Fauske, JPMorgan Chase (general development, extensions).
- Brian Granger, AWS (co-creator, strategy, vision, management, UI/UX design,
architecture). - Jason Grout, Databricks (co-creator, vision, general development).
- Michał Krassowski, Quansight (general development, extensions).
- Max Klein, JPMorgan Chase (UI Package, build system, general development, extensions).
- Gonzalo Peña-Castellanos, QuanSight (general development, i18n, extensions).
- Fernando Perez, UC Berkeley (co-creator, vision).
- Isabela Presedo-Floyd, QuanSight Labs (design/UX).
- Steven Silvester, MongoDB (co-creator, release management, packaging,
prolific contributions throughout the code base). - Jeremy Tuloup, QuantStack (general development, extensions).
Maintainer emeritus:
- Chris Colbert, Project Jupyter (co-creator, application/low-level architecture,
technical leadership, vision, PhosphorJS) - Jessica Forde, Project Jupyter (demo, documentation)
- Tim George, Cal Poly (UI/UX design, strategy, management, user needs analysis).
- Cameron Oelsen, Cal Poly (UI/UX design).
- Ian Rose, Quansight/City of LA (general core development, extensions).
- Andrew Schlaepfer, Bloomberg (general development, extensions).
- Saul Shanabrook, Quansight (general development, extensions)
This list is provided to give the reader context on who we are and how our team functions.
To be listed, please submit a pull request with your information.
Weekly Dev Meeting
We have videoconference meetings every week where we discuss what we have been working on and get feedback from one another.
Anyone is welcome to attend, if they would like to discuss a topic or just listen in.
- When: Wednesdays 9:00 AM Pacific Time (USA)
- Where:
jovyanZoom - What: Meeting notes
Notes are archived on GitHub Jupyter Frontends team compass.
Note
Installation steps assume that you have administrator rights on your system.
If you don’t have administrator rights, follow the steps without selecting “for all users”
options and install software packages to your user account only.
Install Python
Skip this step if you have Python 3.x already installed on your system.
-
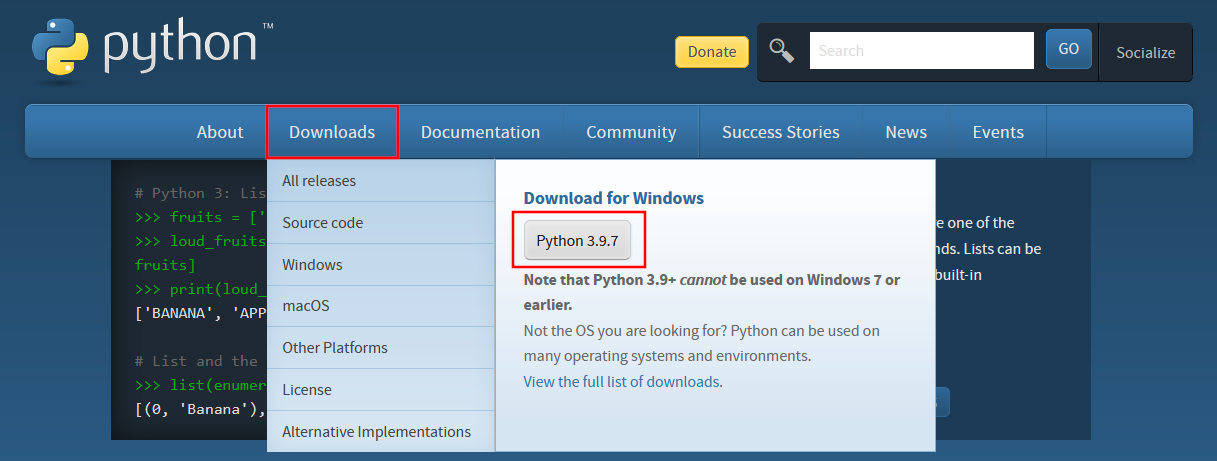
Open your web browser and go to https://www.python.org/
-
Click
Downloadson the top menu and clickPython 3.9.7button.
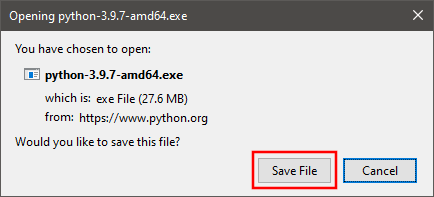
-
Save installation file.
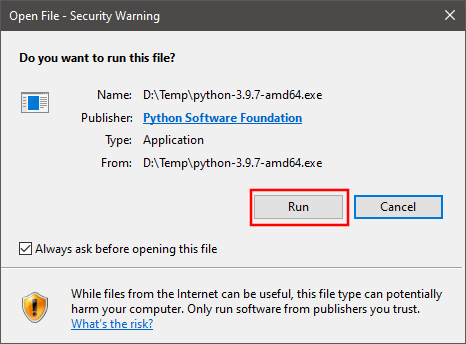
-
Run installation file.
-
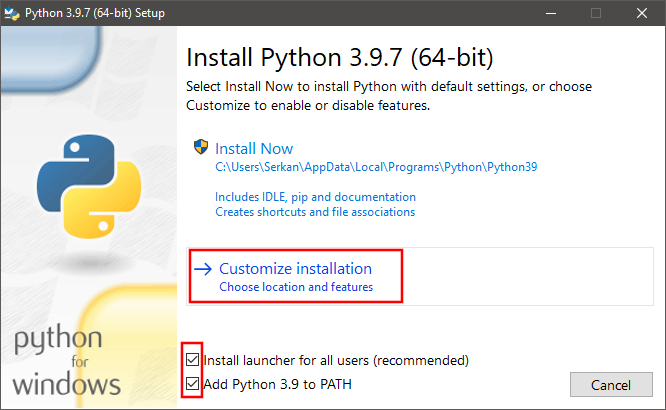
You can choose
Install Nowoption to complete installation with default options. For the suggested custom installation please follow steps 6 – 8. -
Check
Install launcher for all usersandAdd Python 3.9 to PATHboxes. ClickCustomize Installation.
-
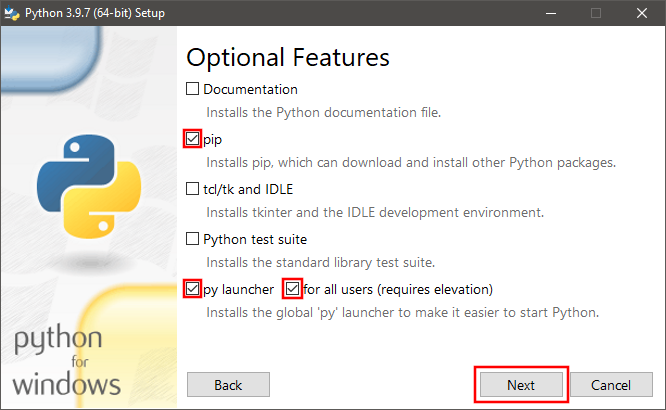
Uncheck
Documentation,tcl/tk and IDLE, andPython test suiteoptions. Checkpip,py launcher, andfor all usersoptions. ClickNext.
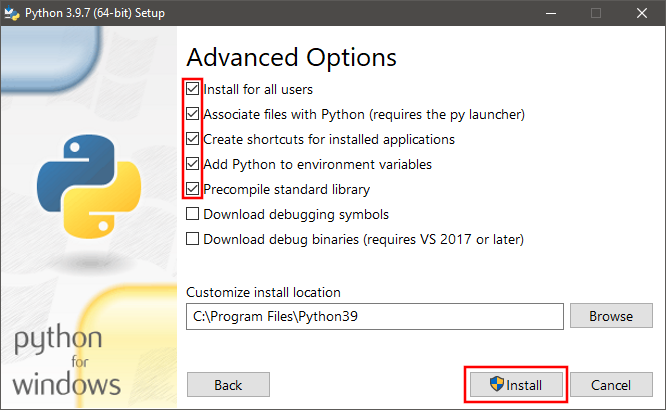
8. Check Install for all users, Associate files with Python, Create shortcuts for installed applications, Add Python to environment variables,
and Precompile standard library options. Uncheck Download debugging symbols and Download debug binaries options. Click Install.
9. Once installation is finished, open a command prompt and test Python by entering python
command. Python command line interface should be available with >>> prompt.

Install node.js
Skip this step if you have node.js 14.x or newer already installed on your system.
Note
Installation steps assume that you have administrator rights on your system.
If you don’t have administrator rights, follow the steps without selecting “for all users”
options and install software packages to your user account only.
-
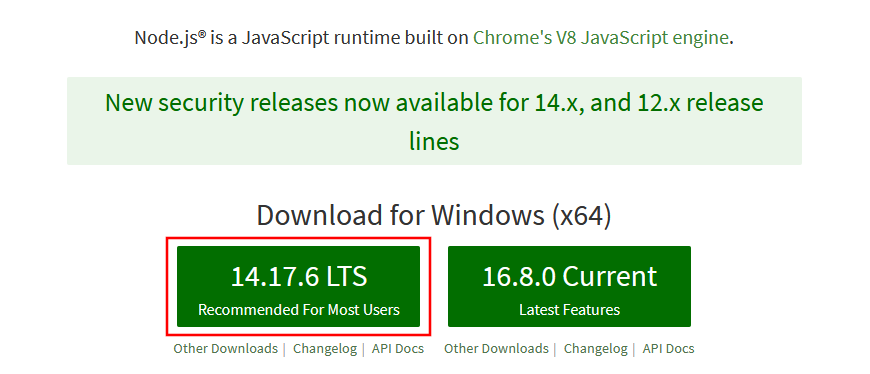
Open your web browser and go to https://nodejs.org/en/
-
Click LTS (Long Term Support) version
downloadbutton.
-
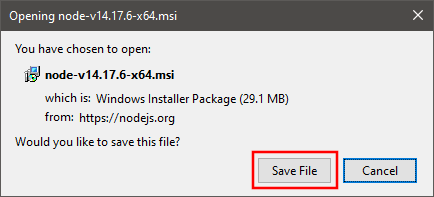
Save installation file.
-
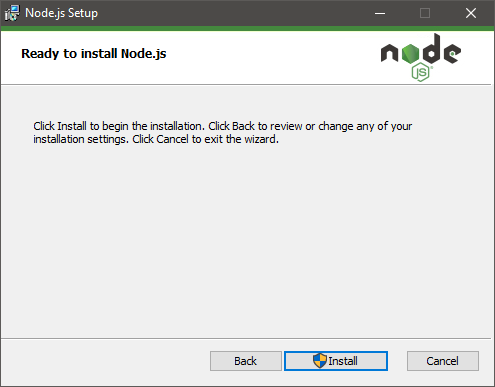
Run installation file.
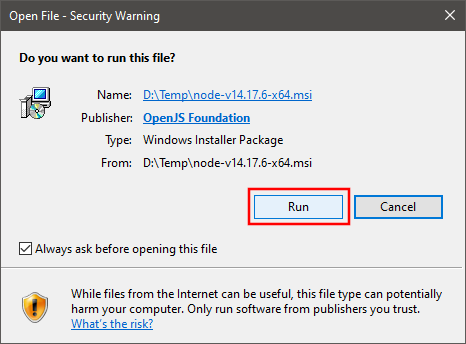
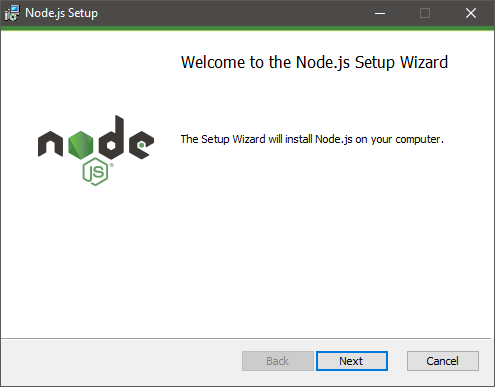
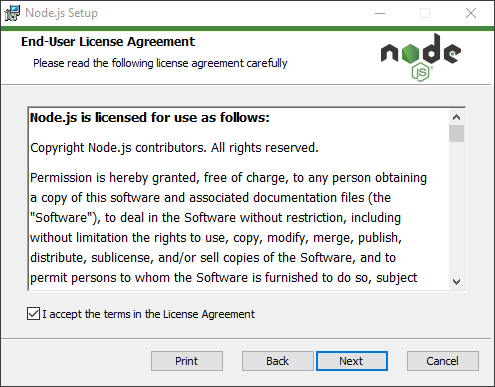
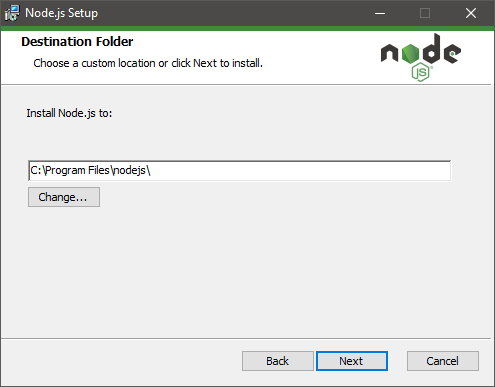
-
Complete installation by following the wizard accepting the terms and the default options.


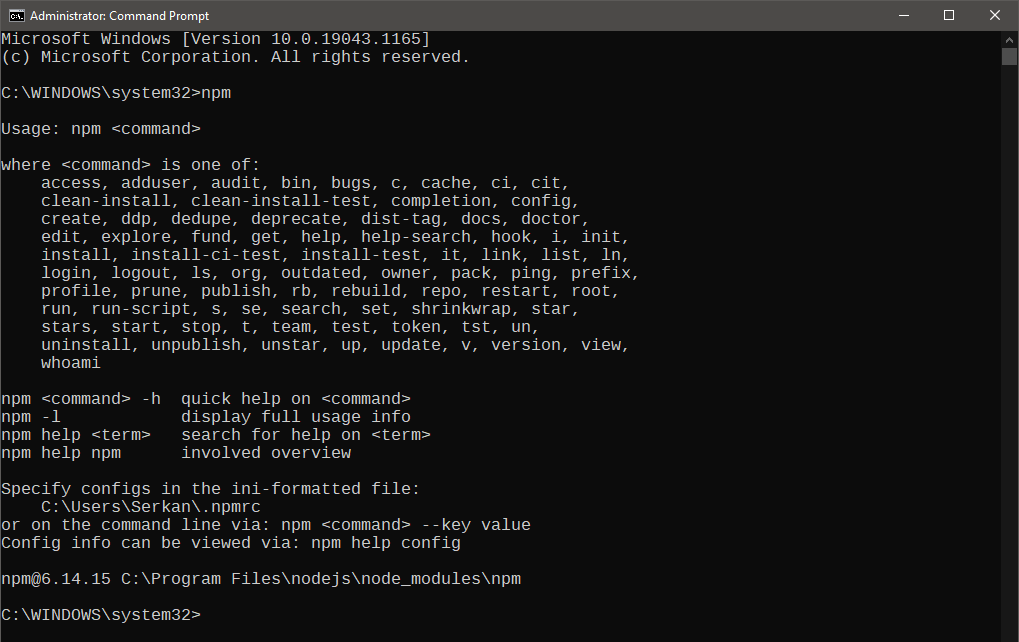
6. Once installation is finished, open a command prompt and test node.js by entering npm
command. Help on its usage should be displayed.
Install JupyterLab
-
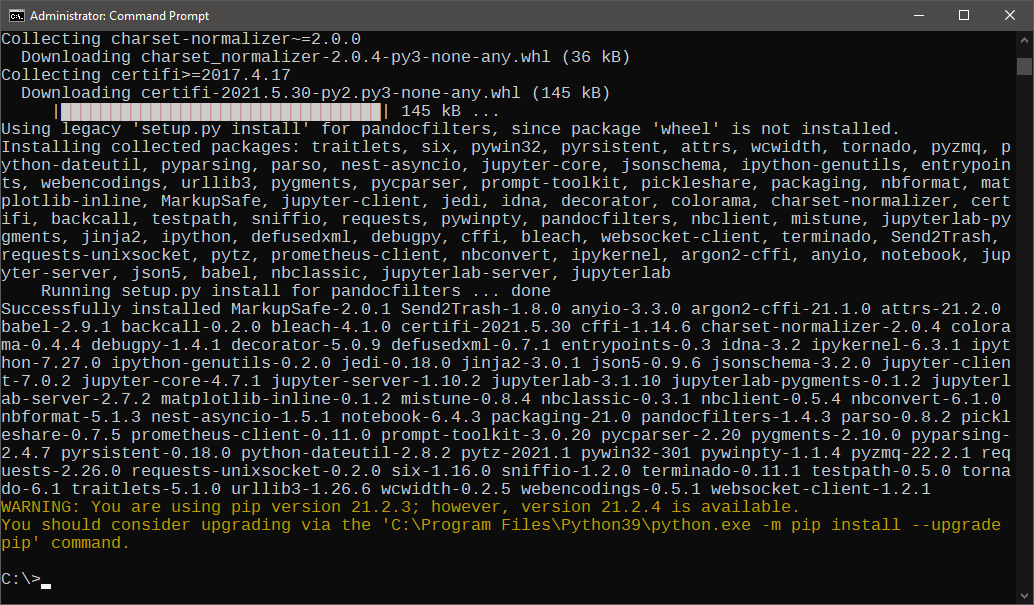
Open a command prompt and enter
pip install jupyterlabcommand.

-
Python package manager (pip) will install JupyterLab and all other required packages.
-
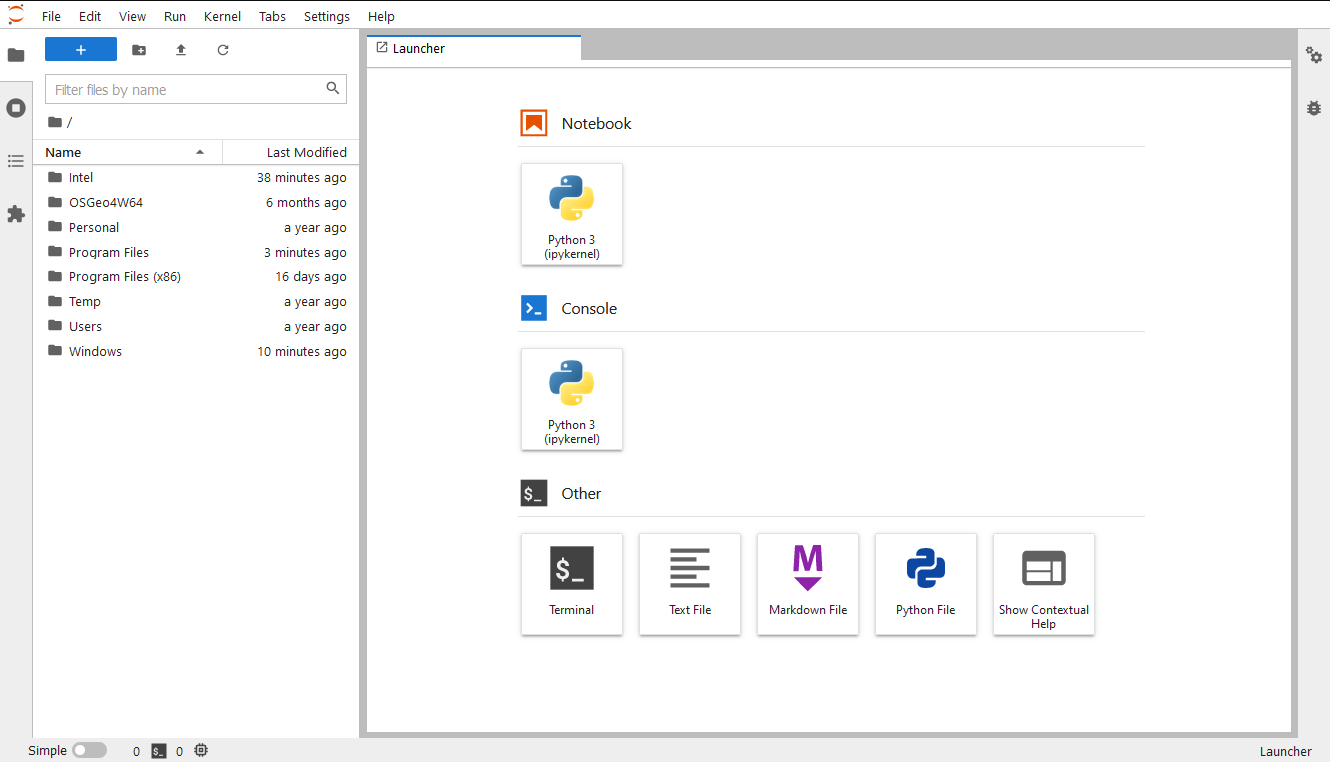
Once installation is finished, enter
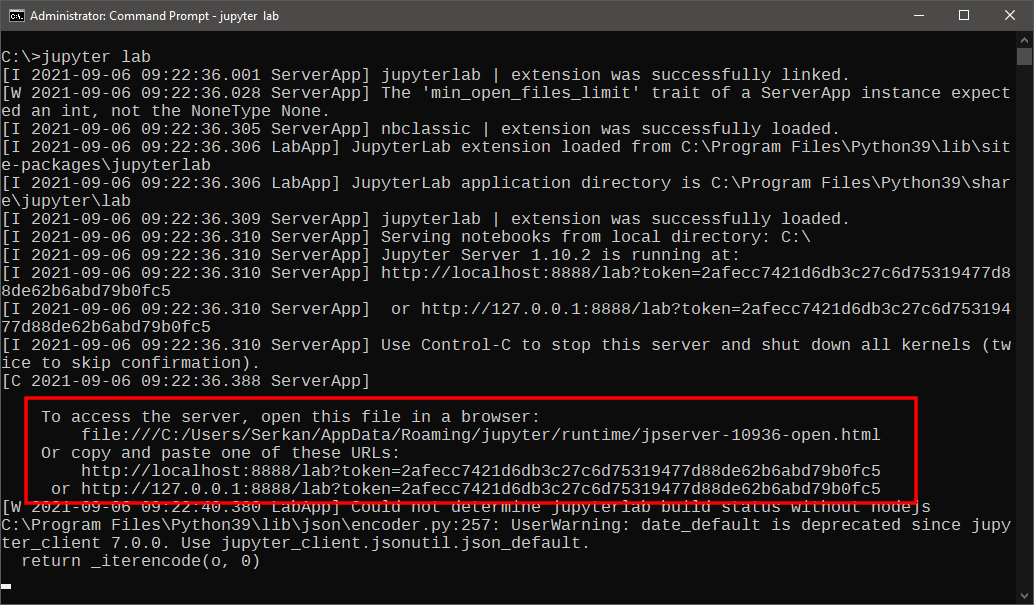
jupyter labcommand to start JupyterLab.

-
By default, JupyterLab automatically opens a web browser tab to display the user interface.
5. JupyterLab will also display some information on the terminal, including the URL address to
access the user interface. You can copy-paste the URL address to your web browser to access
the user interface if it is not displayed automatically.
-
Enjoy your JupyterLab!
1. Install Python and pip:
If you haven’t installed Python and pip, install them first.
-
Windows:
Download the latest version of Python from Python’s official site (opens in a new tab) and install it. Pip will be installed alongside it. -
macOS and Linux:
Many systems come with Python pre-installed. You can verify this by typing:If Python is not installed, you can use a package manager (like
aptfor Ubuntu orbrewfor macOS) to install it. Pip typically comes with Python.
2. Install Jupyter Lab:
Once Python and pip are installed, you can install Jupyter Lab using pip:
3. Launch Jupyter Lab:
After installation, you can launch Jupyter Lab by running:
Your default web browser should open with the Jupyter Lab interface, and you can start creating new notebooks or scripts.
Optional: Virtual Environments
It’s a good practice to create a virtual environment for your projects to avoid potential package conflicts. Here’s a quick guide:
-
Install
virtualenv: -
Create a virtual environment:
-
Activate the environment:
-
Windows:
-
macOS and Linux:
-
-
Now, within the virtual environment, install Jupyter Lab:
-
Launch Jupyter Lab from within the environment:
When you’re done, you can deactivate the virtual environment with the deactivate command.
That’s it! You now have Jupyter Lab installed and can start working on your projects.
FAQ for Jupyter Lab
Q1: How to set up Jupyter Lab with Conda?
Answer: Conda is an excellent package manager, especially for data science tools like Jupyter Lab. Here’s how you can set it up:
-
Install Miniconda or Anaconda:
If you haven’t installed either Miniconda or Anaconda, start by downloading and installing one. Anaconda comes with many data science packages pre-installed, whereas Miniconda offers a minimalistic approach, allowing you to install only what you need.Download Anaconda (opens in a new tab) or Download Miniconda (opens in a new tab)
-
Create a new conda environment:
-
Activate the environment:
-
Install Jupyter Lab:
Within the activated environment, run: -
Launch Jupyter Lab:
Q2: How to upgrade from Jupyter Notebook to Jupyter Lab?
Answer: If you’re already using Jupyter Notebook and want to transition to Jupyter Lab, follow these steps:
-
Using pip:
If you installed Jupyter Notebook using pip, you can upgrade to Jupyter Lab with: -
Using conda:
If you used Anaconda or Miniconda to manage your packages, run:
After the installation, you can launch Jupyter Lab using the jupyter lab command. Your existing Jupyter Notebooks (.ipynb files) will open seamlessly in Jupyter Lab.
Remember, you don’t need to «remove» Jupyter Notebook to use Jupyter Lab; both can coexist on the same system.