
The ping command is a utility command that is used to troubleshoot errors in the network connection. However, while trying to execute the ping command you might have come across the error message “PING: transmit failed. General failure.”
The error message usually occurs when the system can’t send or receive data packets. Or, it could be because of the wrong TCP/IP or DNS settings. As a result, you will have slow or no connection to the internet or the local network group.
In this article, we have compiled a list of causes and fixes to troubleshoot this error.
Probable Causes for the General Failure
There may be various reasons for the “PING: transmit failed. General failure.” error message, but it is generally due to an issue in the network adapter. The issue occurs when the system doesn’t have any communication with the device it’s pinging.
Here are some other common reasons for the error message showing up.
- Corrupted DNS cache
- Misconfigured or conflicting IP address
- Faulty drivers
- Hardware issues
How to Fix “Ping transmit failed general failure” on Windows?
There are several causes for your ping transmit failing and different fixes. Before trying the fixes in this list, try restarting your computer and check if your network adapter driver is enabled first.
If that doesn’t work, here are some ways to fix this issue on Windows.
Restarting Your Entire Network
The first thing you should do is restart your entire network or internet setup. That means restarting the router, restarting your PC, turning Wi-Fi on and off, unplugging the LAN cable, and plugging it back in.
If the ping transmit failed issue only shows in the local network group, also restart the local network group.
Run the Internet Connections Troubleshooter
The Internet Connections troubleshooter checks and fixes any issues within the network. The process is very simple, and it can troubleshoot various network issues.
To run the Windows troubleshooter, follow the steps below.
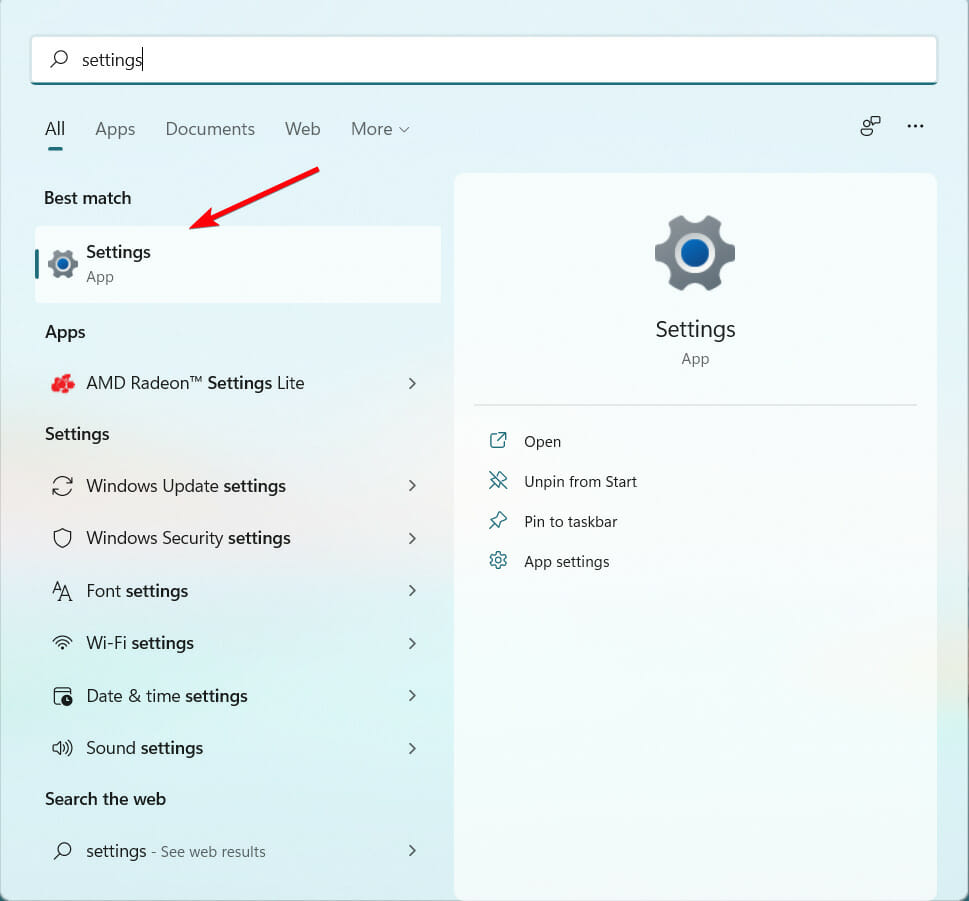
- Open settings from the start menu.
- Click on Update & Security.
- Select the Troubleshoot option from the sidebar and click on Additional troubleshooters.

- Click on Internet Connections and press Run the troubleshooter.


This method is mainly useful if your computer has access to the internet. You can use it to troubleshoot why your computer is not connecting to a local network group.
Remove the DNS Cache
DNS is the phonebook of domain names that link to IP addresses. Whenever you type a domain name (E.g., google.com) in your browser, DNS will go through its records of listed domain names and match it to its IP address.
IP addresses are needed to locate a website, webpage, or just about anything on the internet. Furthermore, the DNS cache saves your device’s common domain name and IP address, so it doesn’t always have to ask the DNS server what this domain’s IP address is.
However, if your DNS cache gets corrupted, you will face issues like the internet not working and the ping command showing this particular error message.
Follow the steps below to flush your DNS cache.
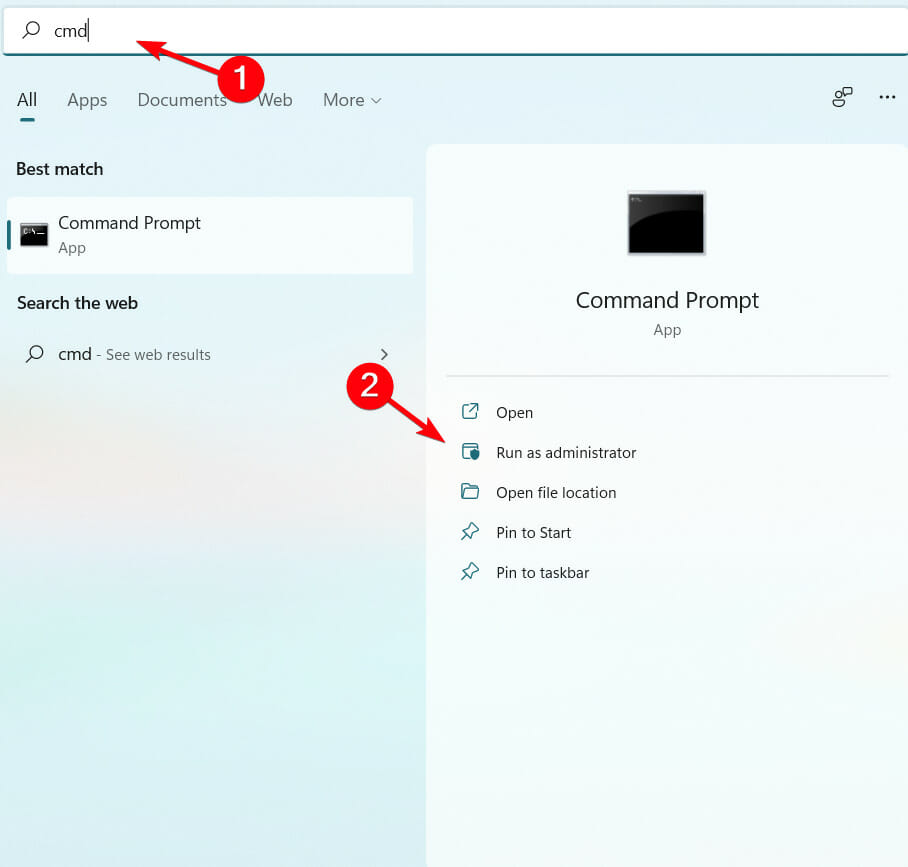
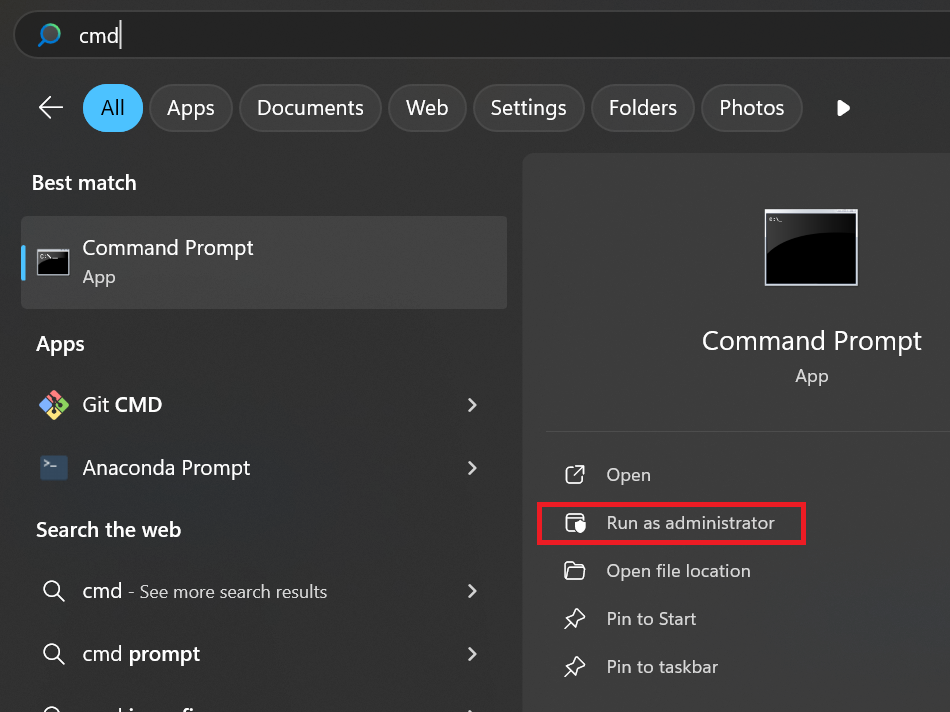
- Search the Command prompt in the search bar.
- Right-click and select Run as administrator.

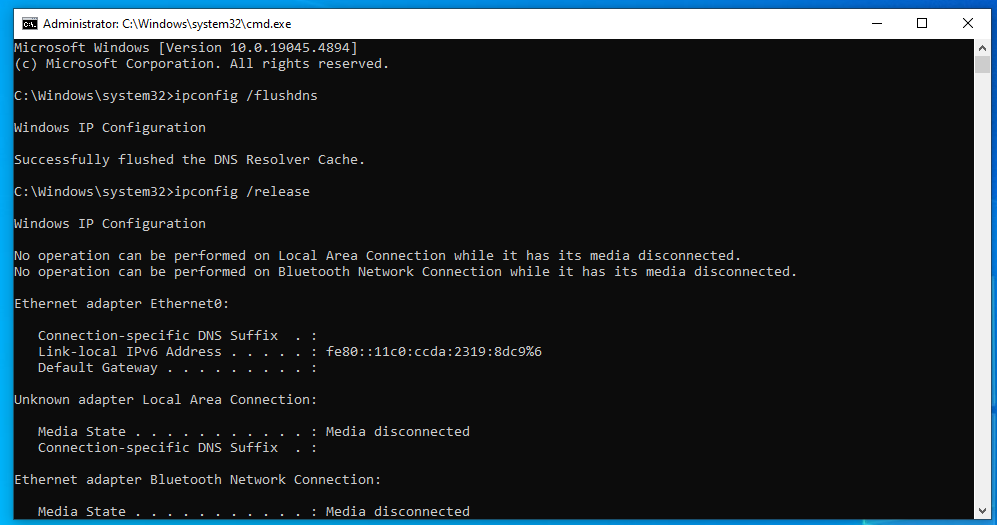
- Type the following command and Press Enter after each command:
ipconfig /flushdnsipconfig/releaseipconfig/renew
- Restart your computer.


Change to a Static IP Address
A static IP address is an IP address that doesn’t change at all. On the other hand, dynamic IP addresses change every time you disconnect and connect with a network. While both have advantages, static IP addresses are better for devices that need to communicate with each other reliably.
Static IP addresses are easily found in the network and are generally recommended for private or local network groups. However, static IP addresses are not very good for using on the internet, as they always remain the same.
If “Ping: transmit failed. General failure.” is showing when pinging the local network group, you may need to set up a static IP.
Similarly, an improperly set static IP address can also cause the error and block your internet access.
To properly set up a static IP address, follow the steps below.
- Search the Control panel in the search bar and open it.
- Go to Network and Internet, and go to Network and Sharing Center.
- Click on Change adapter settings in the left sidebar.
- In the new window, right-click the local network group and select properties. (You can also choose the Wi-Fi option to set a static IP on the internet, but it’s not recommended.)

- Click on the Internet Protocol Version 4 (TCP/IPv4).
- Click on Properties, and select Use the following IP address in the new window.
- Fill in the custom IP address and press Ok. (You must fill in the IP address, Subnet mask, Default Gateway, and Preferred DNS server. )
- Tap the close button in the properties window.

While filling the custom IP address, you must do the following.
- Your Subnet mask should be
255.255.255.0 - Your default gateway should be your router’s IP address.
- Your IP address should be the same as your router IP address, except the last number should be different.
- Your Preferred DNS server could be any DNS server you like. (E.g. Google’s public use DNS server = 8.8.8.8)
- For a local network group static IP, you do not have to fill the Gateway and DNS server. You can also choose any IP address from a private IP address. (The most common private IP addresses are from 192.168.0.0 to 192.168.255.255 )
-
Note : Your router assigns the last number of your IP address, but if you use a static IP address, you can assign it yourself. However, remember that assigning an already assigned IP address to your static IP will cause your device to be unable to access the internet. If there are a lot of users in the network, your self-assigned IP address could already be used by another device.
It is generally recommended to use the dynamic IP address for browsing the internet. That means, instead of selecting Use the following IP address, you should select Obtain an IP address automatically for the WI-Fi.
Update Your drivers
“PING: transmit failed. General failure.” can also be caused due to faulty drivers. Be sure to update your drivers regularly and also check if it’s disabled or not. A disabled network adapter driver will always result in a ping transmit failed error.
Here’s how to update a driver.
- Search Device Manager in the search bar and open it.
- Double click the Network adapters option.
- Right-click the Intel driver and press Update driver.

- Select Search automatically for drivers.
- Click on Done.

Perform a Network Reset
Network reset will remove all your network adapters and reinstall them to resolve any issue with connection settings. It will also revert your settings to their default state.
To perform a Network reset, follow the steps below.
- Open settings from the start menu.
- Go to Network & Internet.
- Scroll down and click on the Network Reset option.

- Click on Reset now and hit Yes.
- Restart your PC.

After your PC boots back up, configure the network settings and try to see if the ping command works.
Perform a Winsock Reset
If none of the above methods work, try doing a Winsock reset. Winsock reset is a command to reset the catalog back to the default setting. It resets the whole Windows Socket API software.
Here’s how to do it.
- Search Command prompt in the search bar.
- Right-click the Command prompt and select Run as administrator.
- Type
netsh Winsock resetand press Enter.
- Restart your PC.

Perform a System Restore
Performing a system restore reverts your computer’s state to a previously determined point. If the “PING: transmit failed. General failure.” error recently cropped up and didn’t show before, try performing a system restore.
Here’s how to do it.
- Search the Control panel in the search bar and open it.
- On the top right, next to View by, select Large icons.
- Select Recovery and click on Open System Restore, and then hit Next.
- Select a restore point where the ping command works properly and click on Next.


If none of the above methods work, the hardware may have problems. You might have to go to a service center and show it to a professional.
Windows OS is a versatile and capable OS that delivers all features that an OS needs to provide for successfully running a computer. The OS is unparalleled and is still one of the best in the industry. Well, the OS has got several good features and one among them is the networking feature. Microsoft designs Windows OS in such a way that the OS offers users the best networking features. Especially, Windows 10/11 are built for modern times and the OSes are much more advanced in terms of networking.

Windows 10/11 OSes offers users great and simple to use networking tools and features, and apart from the good networking features the OS also has some tools that allow users to check, fix and do much more in case of an issue with the networking feature on the OS. Even such facilities on the OS are not foolproof and there can be some minor issues with these tools and features here in this article, we will look into an issue that has been bugging many users when they tried using the Ping Commands on command prompt. So, hop on and learn, the fix for these simple issues on Windows 10/11.
Recommended Post:- Fixed: 0x800f0805 Windows Update Error on Windows 10 and 11
Command Prompt, as we all know is a very powerful tool, that has been tagging along with the OS for a long time, this tool has been in for a long time and it has various functions like resolving issues, checking up things and functions, running applications, performing operations that normally causes issues when running and much more. So, putting such a powerful tool to good use is in the hands of the users and many users do so. Well, when some Windows 10/11 users tried using the command prompt to run some Ping commands, general failure error messages popped out. Well, this issue on a Windows 10/11 computer is pretty common and can be resolved with some simple methods.
Simple Methods to Fix the Ping Transmit Failed General Failure Error on Windows 10/11
Well, the Ping Transmit Failed error on Windows is a common error as mentioned previously, yet the issue can be resolved with some simple methods. Well, here are the methods, that you can use and fix the issue on your computer and then use the command prompt to run the Ping Commands without errors.
Method 1: Run a Network Adapter Troubleshooter
Troubleshooting is one of the best ways of dealing with common issues on Windows OSes. running the network adapter troubleshooter can help you fix the issue related to any network-related problems on the computer.
- To run the network troubleshooter, open the Settings application.
- Here in the Settings, go to the update and security tab.
- Here, select the troubleshoot tab.
- Under the troubleshoot option, select the additional troubleshooter option.
- Now, from the list of troubleshooters, select the internet connection troubleshooter and then run it.
- Once the troubleshooter is done, restart your computer and try running the Ping commands using the command prompt.
Method 2: Flush the DNS
Flushing the DNS will help with resolving command errors with networking.
- To flush the DNS, run the command prompt as an administrator.
- Here in the terminal, type in ipconfig /flushdns and then run it.
- Now, once the command has been run, restart your computer.
Method 3: Use IPv4 Instead of IPv6 on your Computer
- To use IPv4 over IPv6, download the preferred IPv4 over IPv6 in the prefix policy and install Microsoft Easy Fix 21066.
- Once, you have downloaded, install the downloaded file.
- Now, follow the steps on the screen to complete the process.
- Once, done, restart your computer and check whether the Ping Commands works on your computer.
Method 4: Uninstall Applications that Stop HTTP Traffic
An application that stops the HTTP traffic can be the cause for the Ping general failure error on your computer, so uninstalling the applications, responsible can help you fix the error on your computer.
- To uninstall applications, open the Settings application, here go to the Apps tab.
- Now, in the apps and features option, select the application that you want to uninstall, click on it and then select the uninstall option.
- Once you have uninstalled the applications that cause issues on your computer, you are good to go with using the Ping commands on the command prompt.
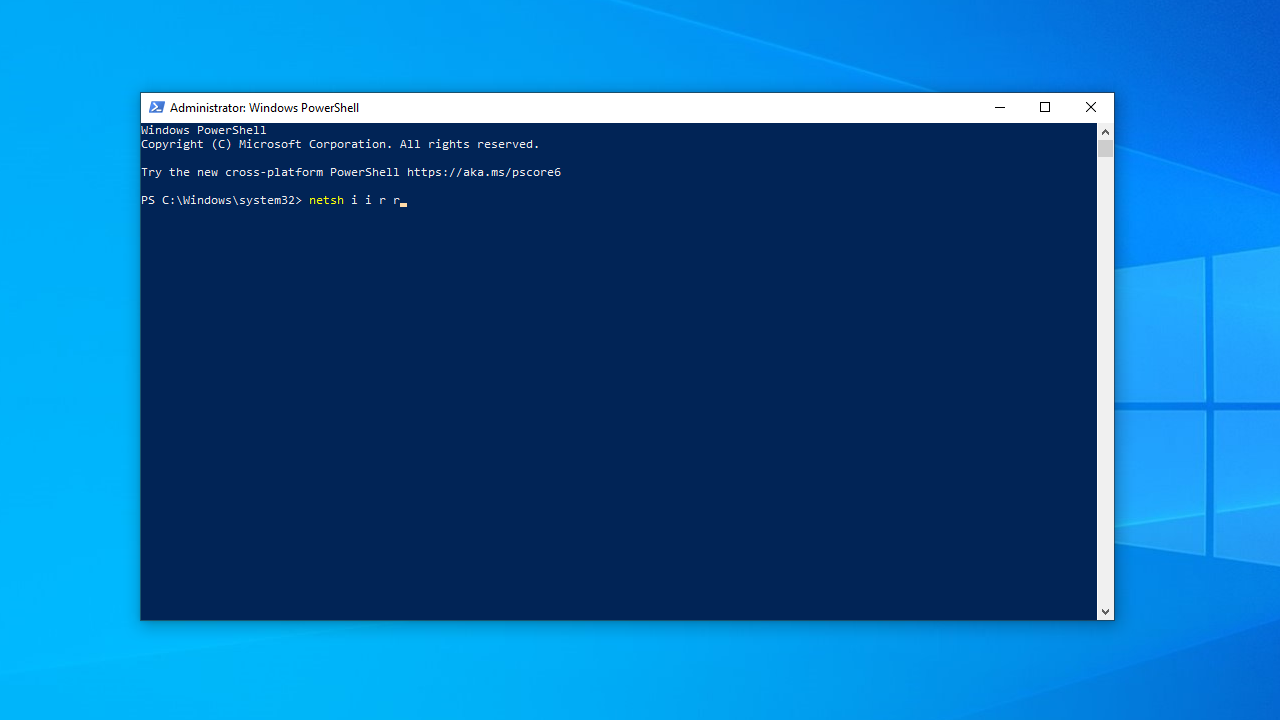
Method 5: Restart TCP/IP
- To restart the TCP and IP on your computer, run the command prompt as an administrator.
- Here, in the terminal, run the command “netsh i i r r”.
- Now, run the command “netsh winsock reset”.
- Now, exit the command prompt and then restart your computer.
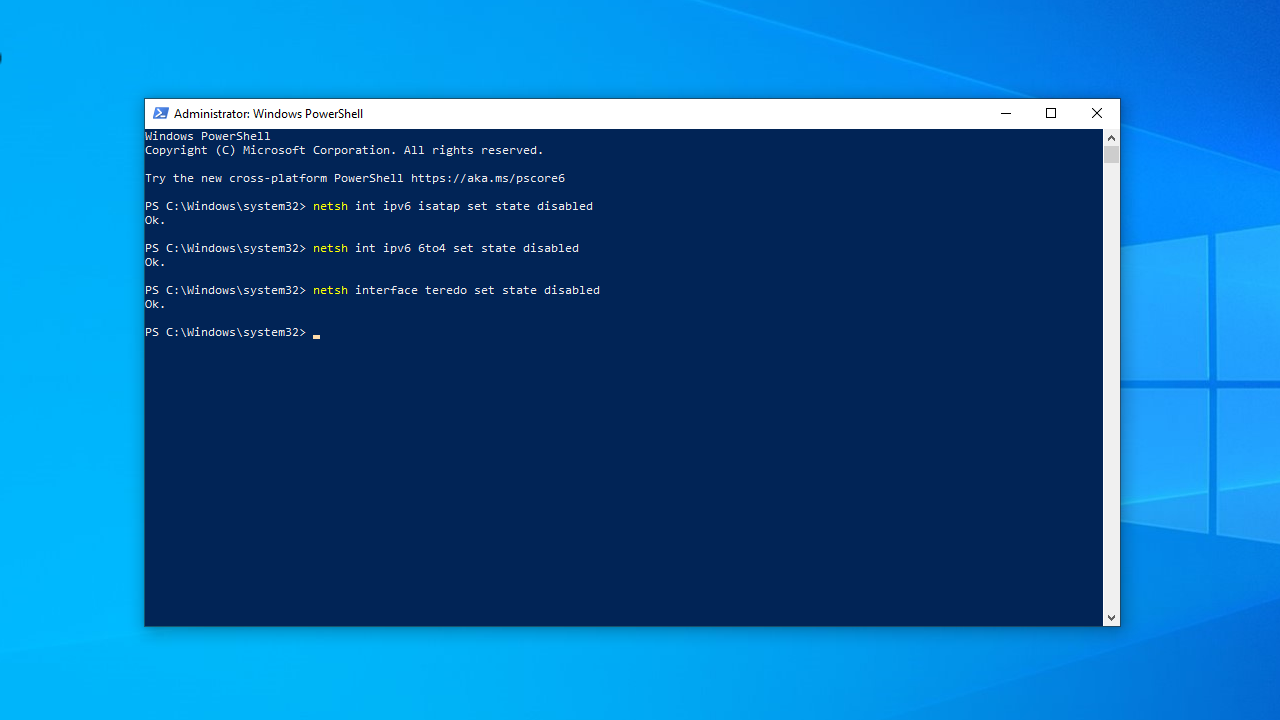
Method 6: Disable IPv4 and IPv6 Transition Tech
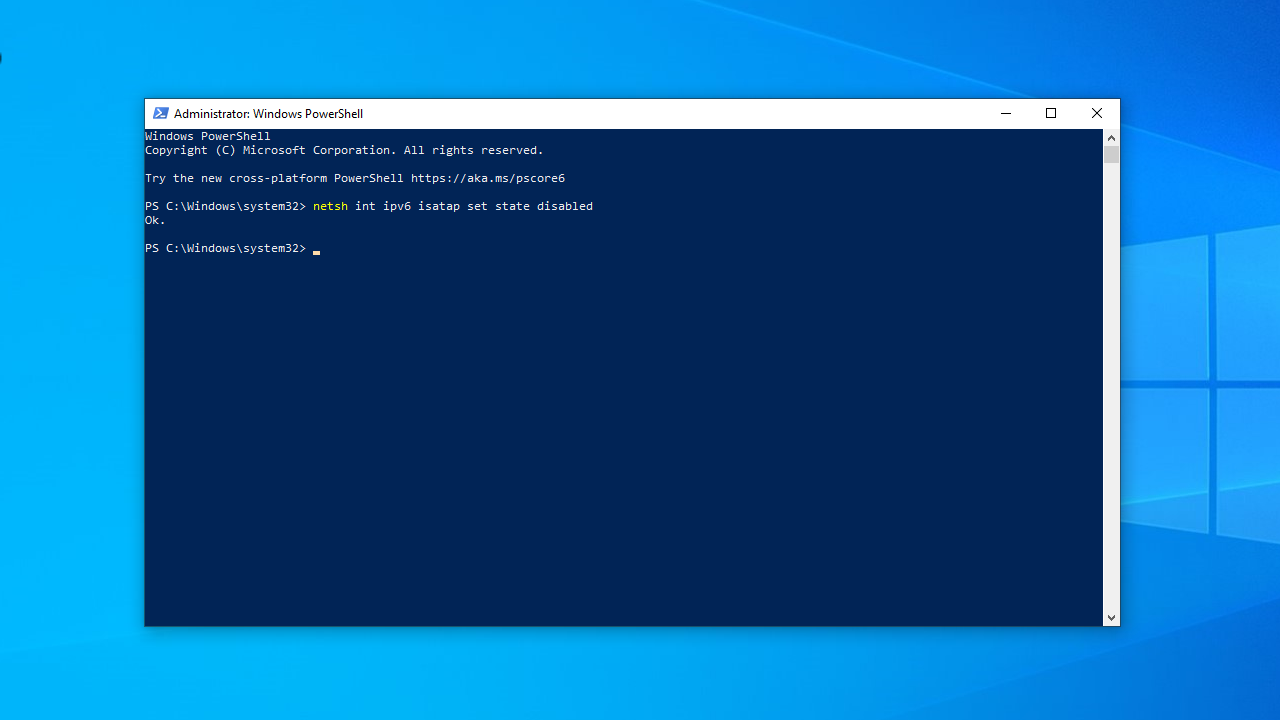
- To disable the IPv4 and IPv6 transition tech, run the command prompt as an administrator.
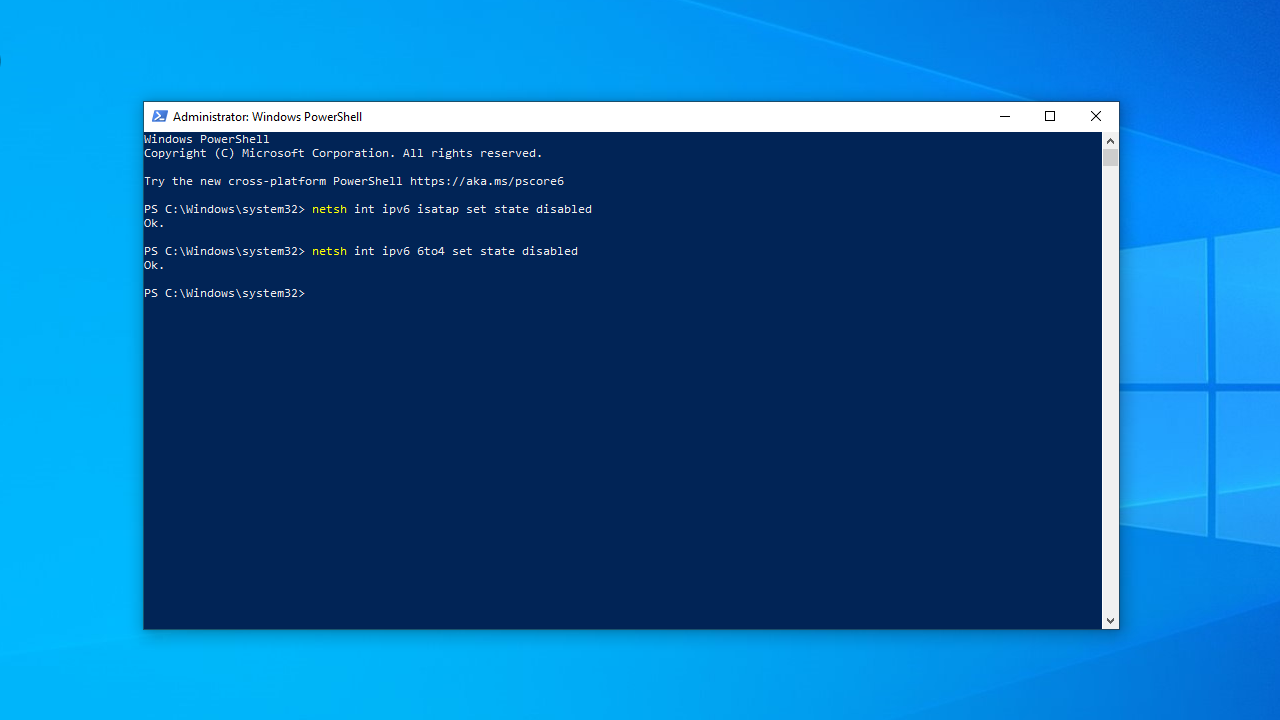
- Now, in the terminal, type in “netsh int ipv6 isatap set state disabled” and hit enter.
- Now, type in “netsh int ipv6 6to4 set state disabled” and hit enter.
- Now, type in “netsh interface teredo set state disable” and hit enter.
- Once done, exit the command prompt and then restart your computer.
Well, these are some simple methods that you can use and fix the Ping Transmit failed issue on your Windows 10/11 computer.
Hope the information provided above was helpful and informative, with these simple methods, you can fix the error with ease and run the Ping commands on the computer with great ease.
Table of contents
- What Causes the “Ping: Transmit Failes. General Failure” Error?
- How to Fix “Ping: Transmit Failed. General Failure”
- Fix 1: Temporarily disable your firewall
- Fix 2: Remove any applications that block HTTP traffic
- Fix 3: Flush your DNS cache
- Fix 4: Remove All Ipv6 and IPv4 Transition Technologies
- Fix 5: Reset your PC’s TCP/IP
- Fix 6: Reset your PC’s hosts file
- “Ping: Transmit Failed General Failure” Error: Fixed
- FAQ
When you run into network problems like the “Ping: Transmit failed. General failure” error, pinging can help troubleshoot the underlying issue.
On a Windows machine, we use the ping command to measure an IP address’s response time and, among other things, analyze the statistics of the reply received.
When you execute the ping command, packets of information are sent to devices on the same network or the Internet to determine whether they are available for connection.
But, what do you do if you send a ping and it returns the error “Ping: Transmit Failed. General Failure”?
It can be quite frustrating, especially if you are working on something. The problem is exacerbated by the fact that the notification doesn’t show additional information describing the error.
But don’t panic. In this post, we show you how to troubleshoot ping failure so that you can get back to your business.
What Causes the “Ping: Transmit Failes. General Failure” Error?
There are various possible reasons that could cause this problem. Some of the potential ones are as follows:
- Outdated network drivers or firmware;
- A misconfigured firewall;
- Hardware and software issues;
- Issues with the Domain Name System (DNS)
As we noted above, the main reason why the error occurs is not known. Having said that, the following are the most effective solutions to the “Ping: General Failure” error. These solutions worked for other users and are worth trying on your PC.
How to Fix “Ping: Transmit Failed. General Failure”
Fix 1: Temporarily disable your firewall
First, you need to check if your firewall is to blame for the ping general failure error. While this is rarely the case, it’s worth checking this out since we can’t exactly pinpoint the source of the problem.
To do that, temporarily disable the firewall and try running the ping command again. If you use Windows Defender as your security solution, here are the steps to follow:
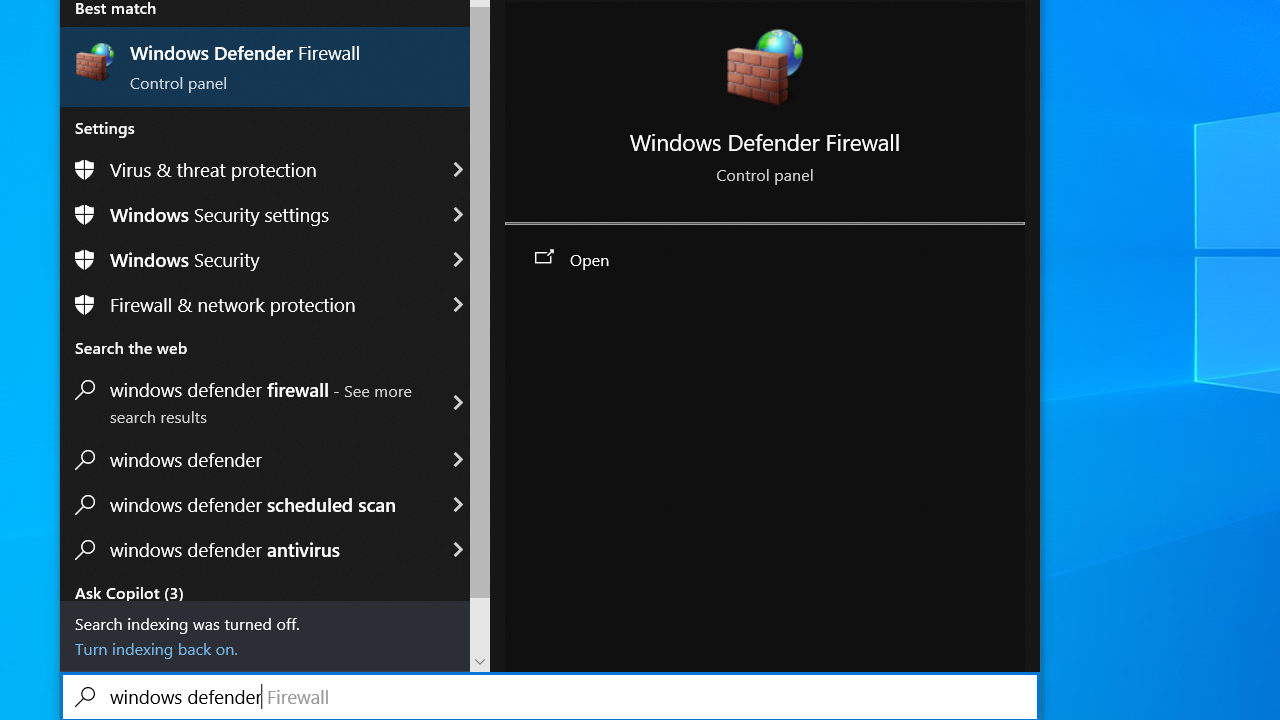
- Press the
Windows logo key + Scombination, type Firewall and select Windows Defender Firewall. This will take you directly to the Windows Defender Firewall page in the Control Panel.
- While in this window, look for the Turn Windows Defender Firewall on or off option in the left pane and select it.
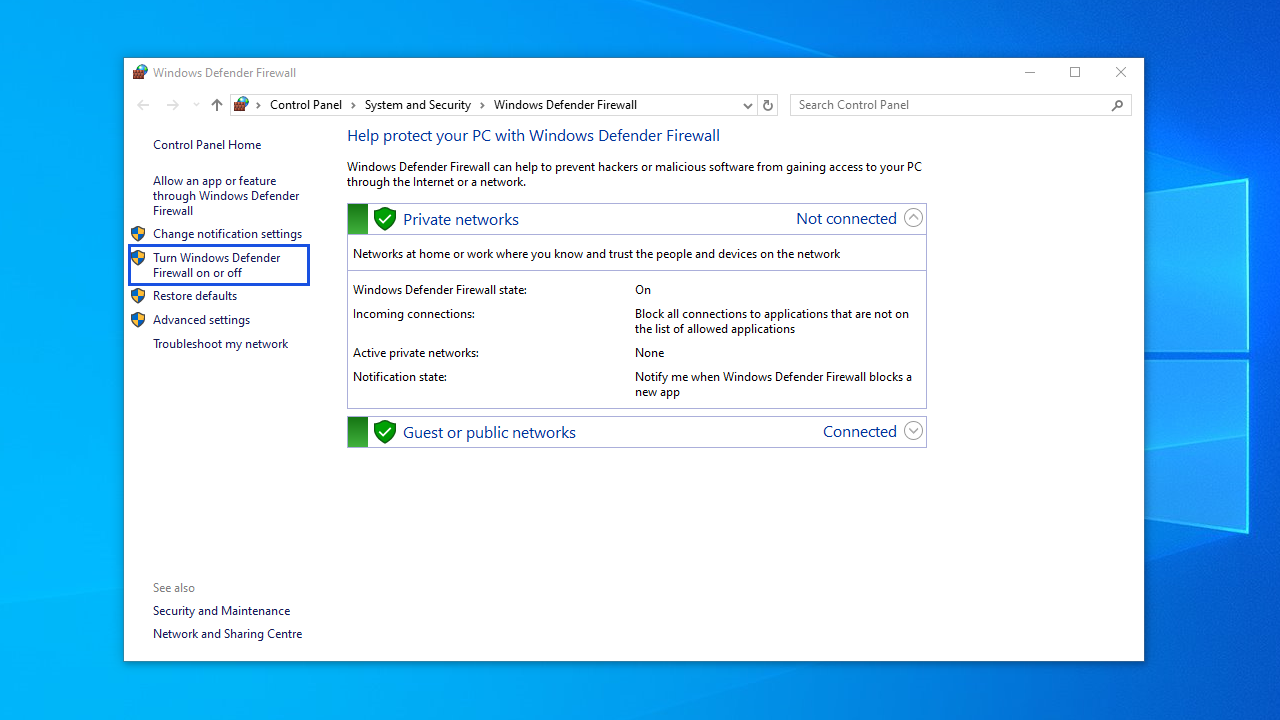
- Click the radio buttons next to Turn off Windows Defender Firewall (not recommended) for each network type.
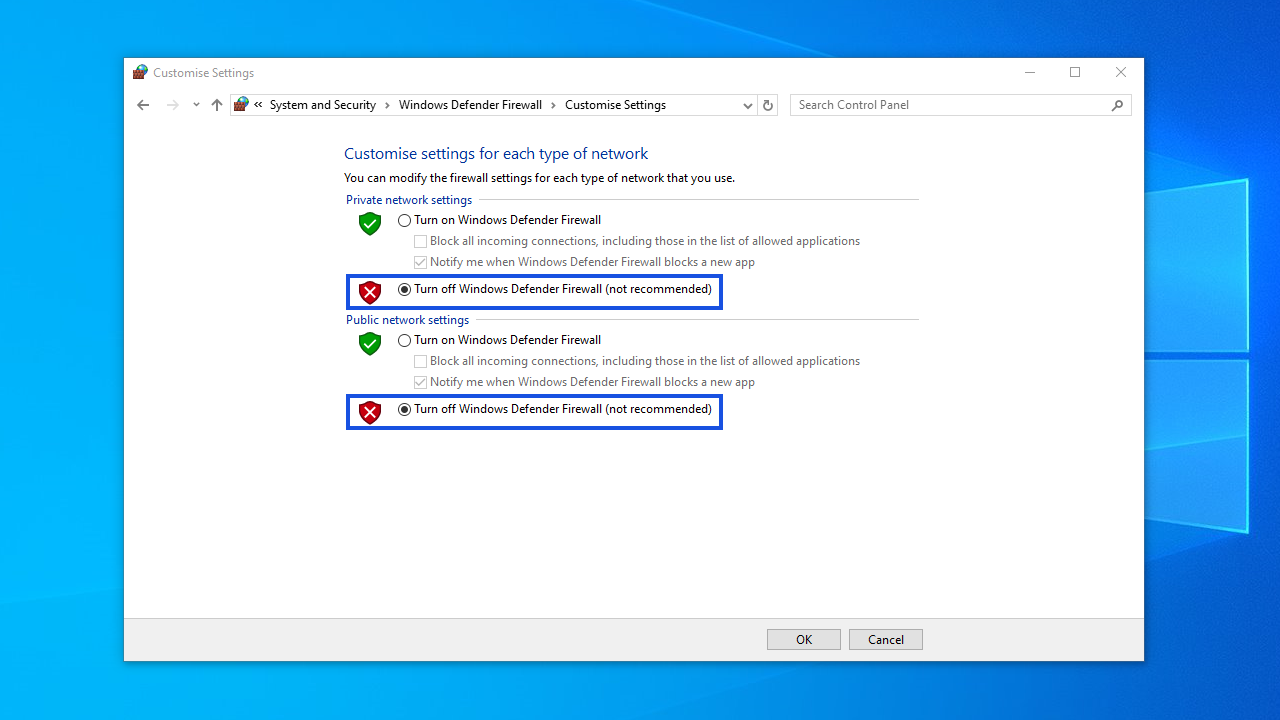
Turn Windows Defender Firewall on or off
- Alternatively, you can simply block all the incoming connections by clicking the checkbox under the option to turn on Windows Firewall.
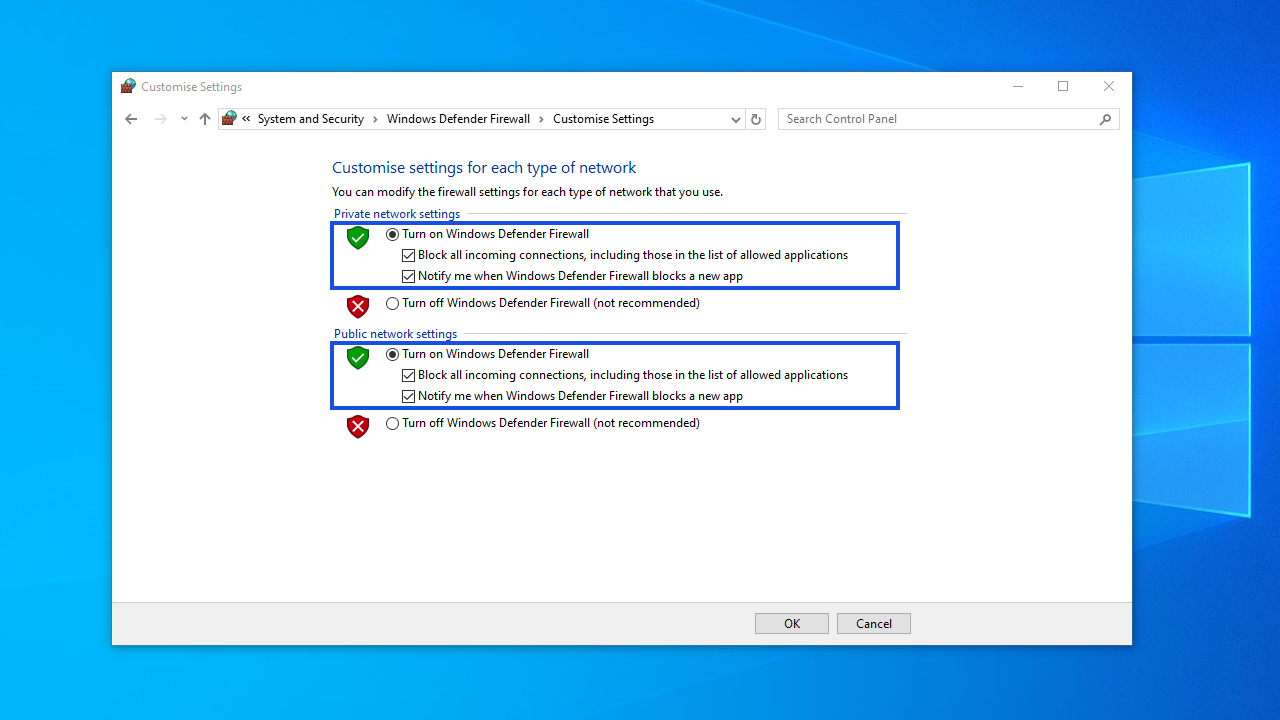
Now check if you’ll run into the ping general failure error. If you do, Windows Defender is not the culprit. Turn it back on to keep your system protected.
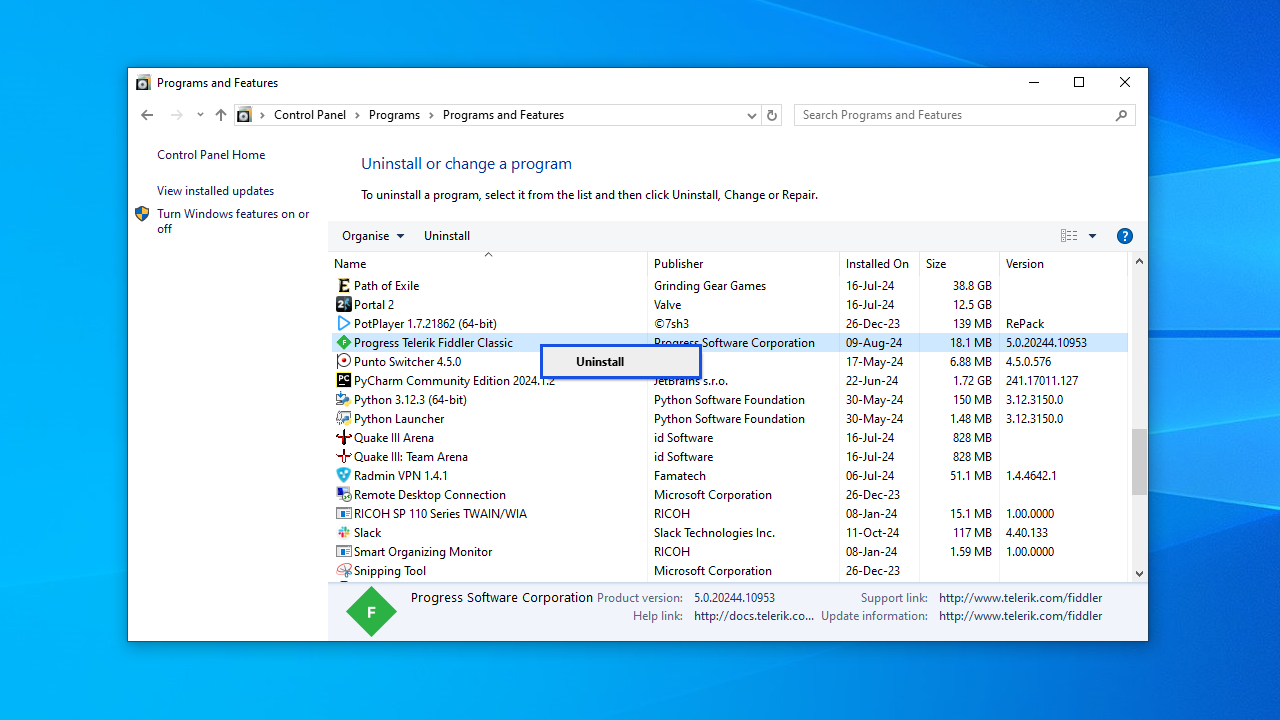
Fix 2: Remove any applications that block HTTP traffic
If you’ve installed any applications on your Windows machine that could, in one way or another, be capable of blocking HTTP traffic coming to or from your PC, you must uninstall them.
These applications can block your system from pinging the IP address or website that you’re trying to reach.
Examples of such programs include Simplewall, Peer Guardian, Wireshark, Peerblock, and AnyConnect.
How to check which applications are blocking HTTP
- Open Resource Monitor (type it into the Start menu) and navigate to the Network tab.
- Under the Network Activity section, you can see which applications are currently using network connections and identify any that are being blocked or restricted.
Here is how to uninstall the applications:
- Open the Control Panel, and go to Programs > Uninstall a program.
- Right-click the suspect program and select Uninstall.
Additionally, if you’re using VPN software, disable it when testing to check if it’s causing the error.
Fix 3: Flush your DNS cache
Flushing your computer’s DNS
is an effective solution to the “Ping: Transmit failed. General failure” error on Windows 10/11.
When you clear the DNS cache, the old IP records are deleted, allowing your system to get fresh ones when you access the server. In fact, flushing your computer’s DNS cache from time to time is considered healthy.
Clearing your DNS cache will also reset your Winsock catalog, and this might help to fix the problem. To flush the DNS cache, follow the instructions below:
- Click the Start button in the lower-left corner of your screen.
- Once in the Start menu, go to the search bar and type
Command Promptorcmd.
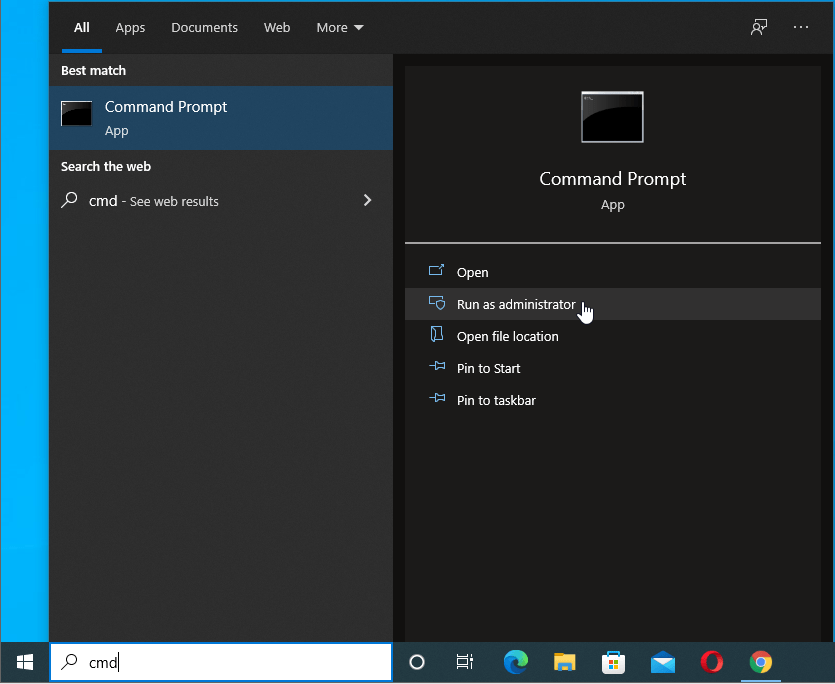
- Right-click on Command Prompt in the search results and click on Run as administrator.
- Once in the Command Prompt (Admin) window, enter the following commands one after the other and press
Enteron your keyboard after each one:
ipconfig /flushdns
ipconfig /all
ipconfig /release
ipconfig /renew
netsh int ip reset c:\tcp.txt
netsh winsock reset
After running all the commands, close the Command Prompt (Admin) window, restart your computer, and check if your ping issue has been resolved.
Related:[FIXED] ‘Your DNS Server Might Be Unavailable’ Error on Windows 10
Fix 4: Remove All Ipv6 and IPv4 Transition Technologies
Transition technologies have been developed to simplify the task of migrating to IPv6 from IPv4. However, they may cause problems when pinging.
If you’re using any kind of protocol transition technology on your computer, try disabling it to check if this has fixed the issue.
Here are the steps:
- You’ll need to run Windows PowerShell as an admin. To do that, press the
Windows logo and Xkeys simultaneously and select Windows PowerShell (Admin).

- You can also run the Command Prompt with admin rights. Simply press the
Win + Rkeyboard shortcut, type cmd into the text box, and hit theCtrl + Shift + Entercombination. - In the elevated PowerShell or Command Prompt window, type or paste the commands below one after the other and press
Enterafter each one:
netsh int ipv6 isatap set state disabled
netsh int ipv6 6to4 set state disabled
netsh interface teredo set state disabled
- Exit the Command Prompt or Windows PowerShell and restart your computer.
- Now check if the ping problem still exists.
Fix 5: Reset your PC’s TCP/IP
If you’re still struggling to resolve the ping general failure error, try resetting your PC’s TCP/IP to check if it works this time.
Here’s how:
- Run the Command Prompt or Windows PowerShell with admin rights.

- Click Yes when prompted by the system to grant administrator access.

- Type or paste the command
netsh i i r rand pressEnter.
- Next, type or paste the command
netsh winsock resetand hitEnter.
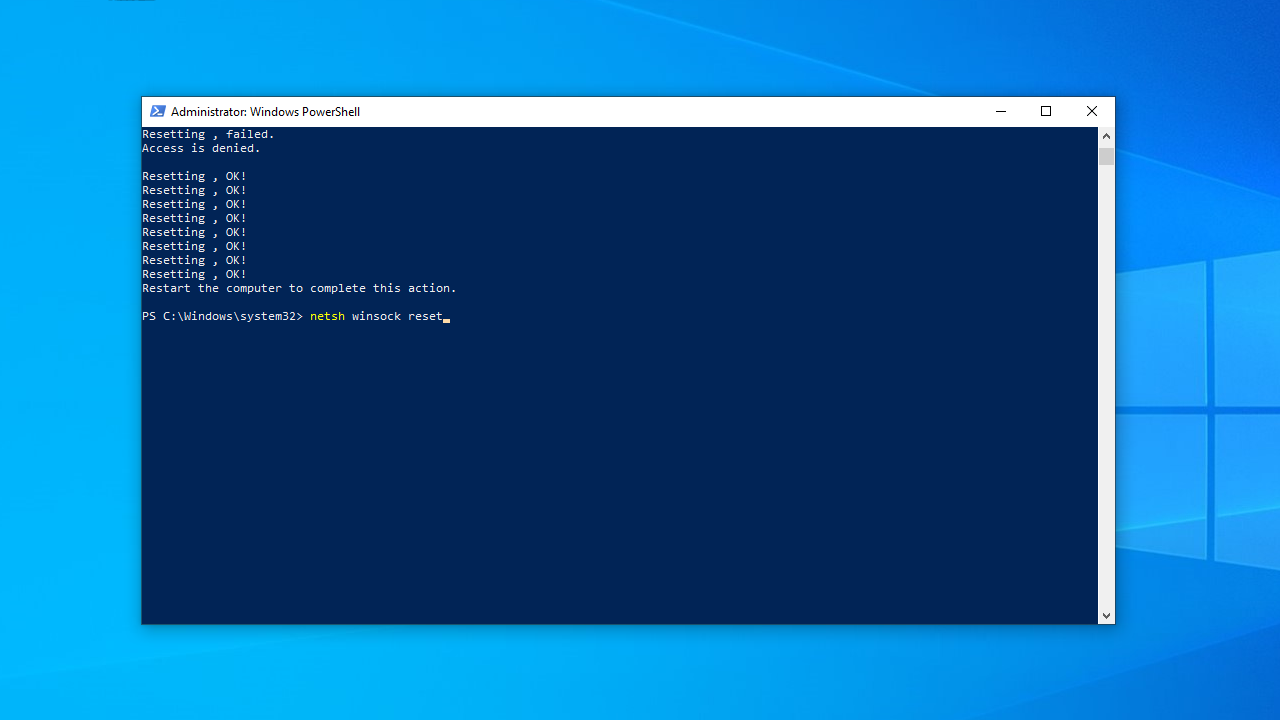
- Exit the Command Prompt or Windows PowerShell and restart your computer.
This solution should fix the ping failure error.
Fix 6: Reset your PC’s hosts file
If nothing seems to work in your case, you may want to try resetting your computer’s host file.
What is a computer’s Hosts file?
A computer’s hosts file is a local text file that maps IP addresses to hostnames. When a user tries to access a website, the operating system first checks this file before querying DNS servers, allowing for custom or overridden mappings for specific domains.
Here is the step-by-step guide to reset your computer’s host file:
- Go to Start and launch Notepad.

- Paste the following script into a new Notepad page:
# Copyright (c) 1993-2006 Microsoft Corp.

# This is a sample HOSTS file used by Microsoft TCP/IP for Windows.

# This file contains the mappings of IP addresses to host names. Each

# entry should be kept on an individual line. The IP address should

# be placed in the first column followed by the corresponding host name.

# The IP address and the host name should be separated by at least one

# space.

# Additionally, comments (such as these) may be inserted on individual

# lines or following the machine name denoted by a ‘#’ symbol.

# For example:

# 102.54.94.97 rhino.acme.com # source server

# 38.25.63.10 x.acme.com # x client host

# localhost name resolution is handled within DNS itself.

# 127.0.0.1 localhost

# ::1 localhost
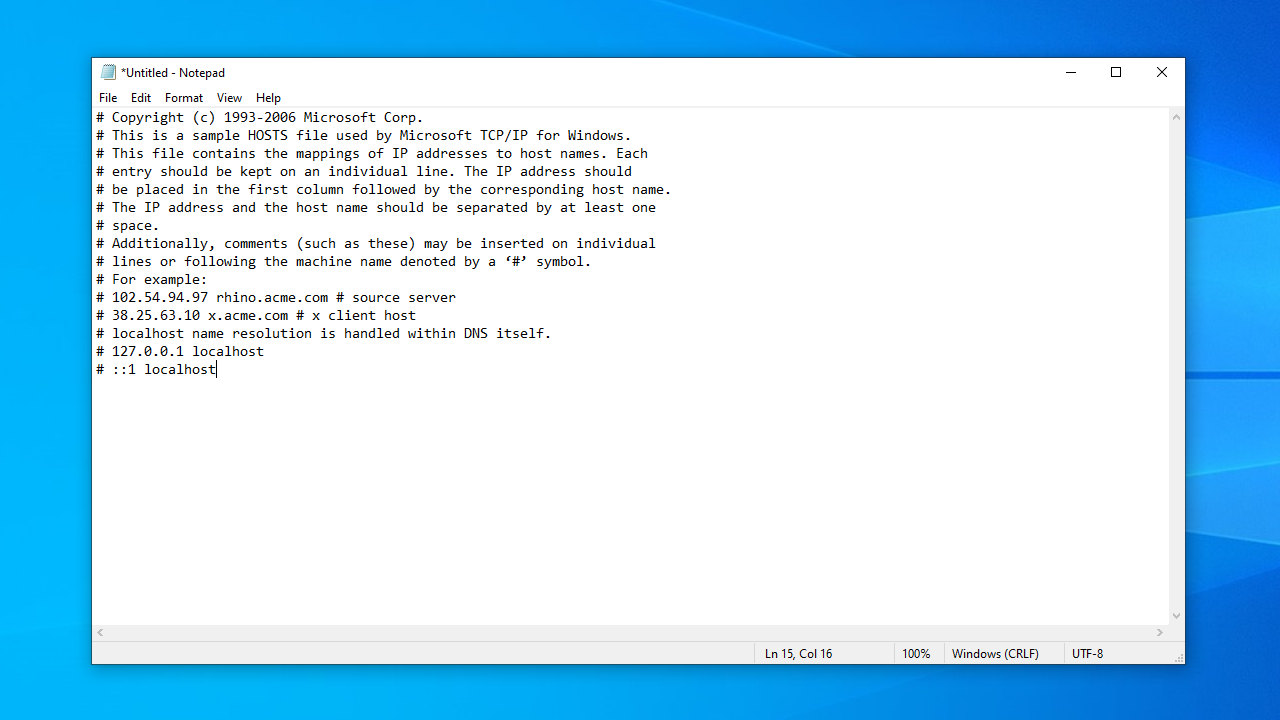
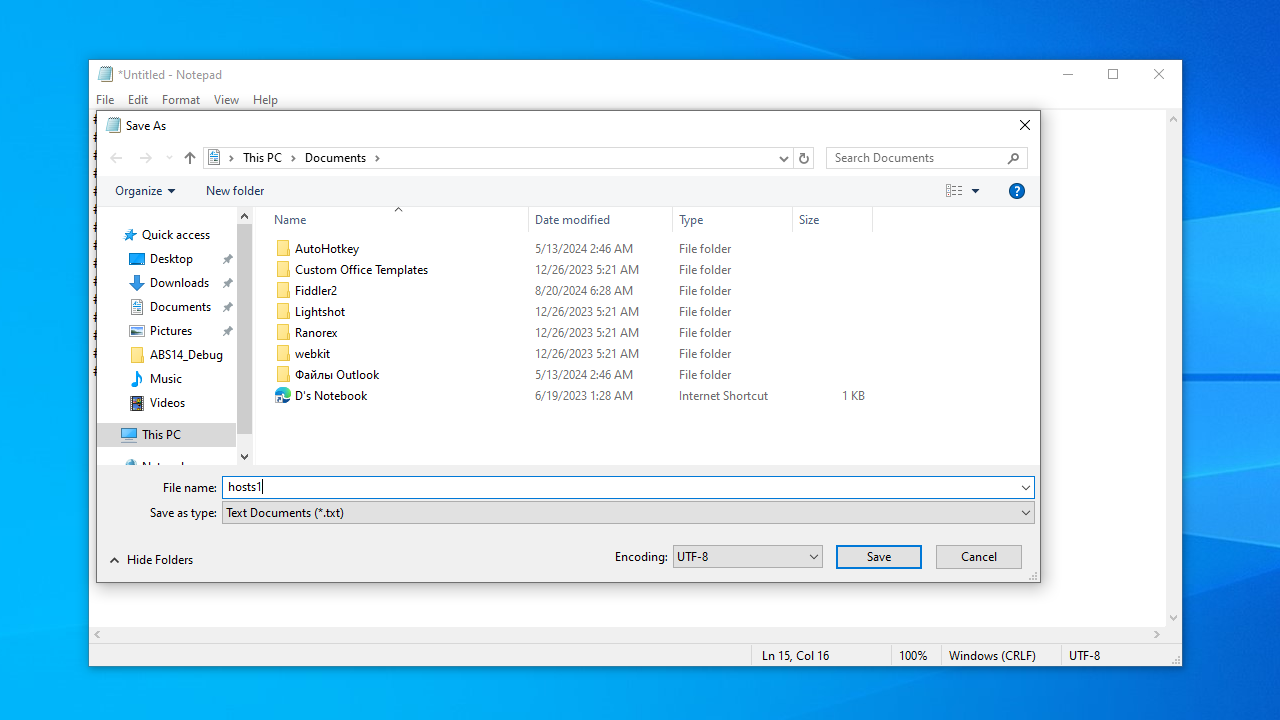
- Go to File > Save As.
- Assign the file an appropriate title (like hosts1), and click on OK to save it to your preferred location.
- Next, open the Run command using the
Win + Rshortcut. - Type
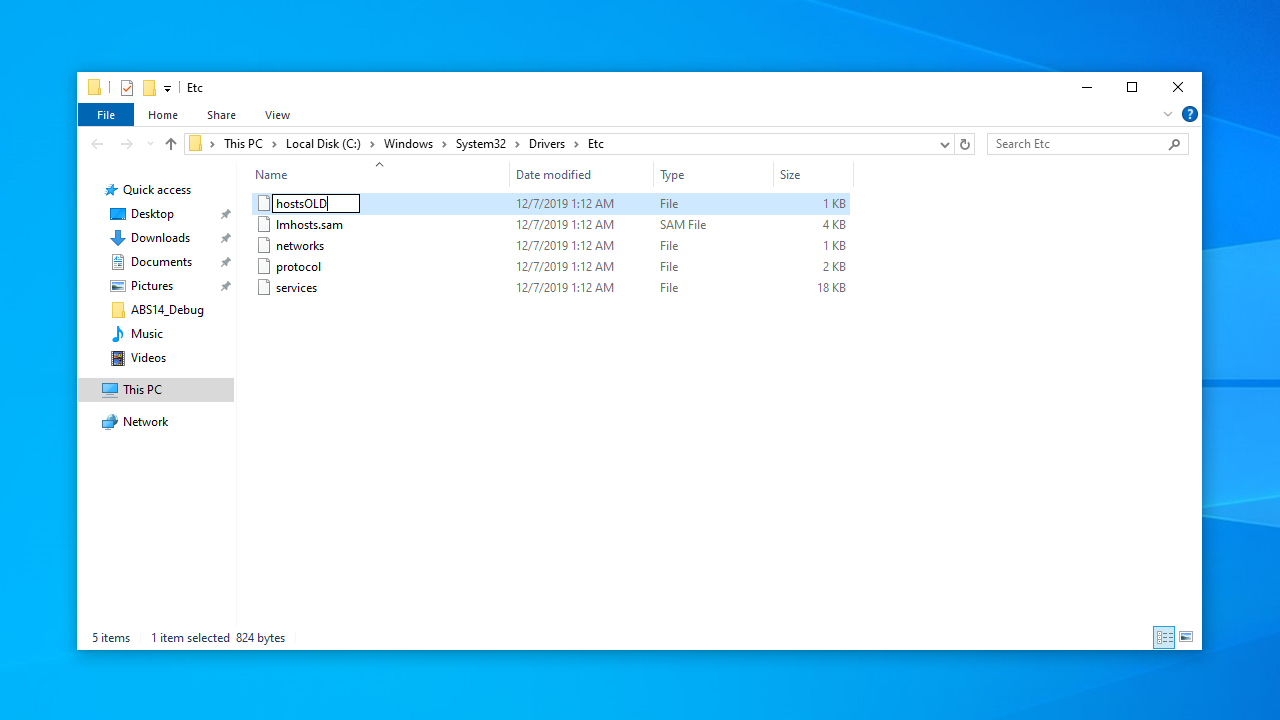
%WinDir%\System32\Drivers\Etcinto the text box and pressEnter.

- Search for the original hosts file here.
- Right-click on it and select Rename.
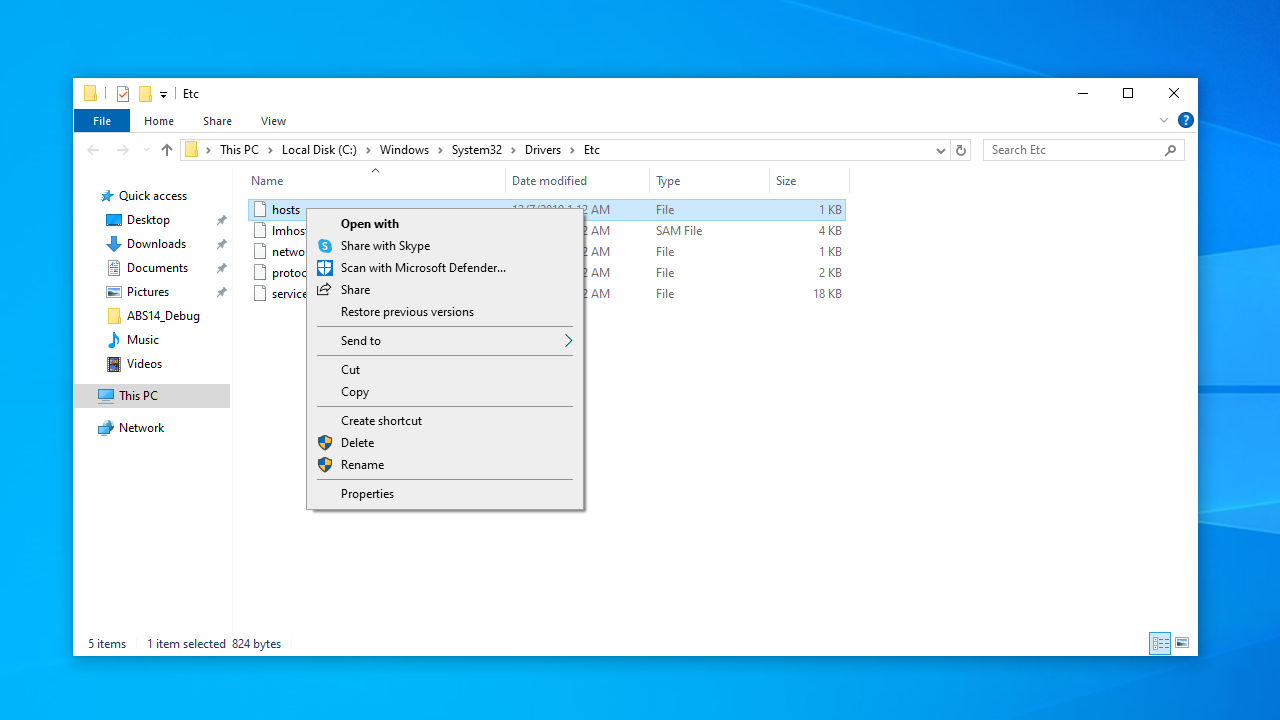
- Rename it to something like hostsOLD and hit
Enter.
- Now, move the newly created hosts1 file from where you previously saved it to the %WinDir%\System32\Drivers\Etc directory.
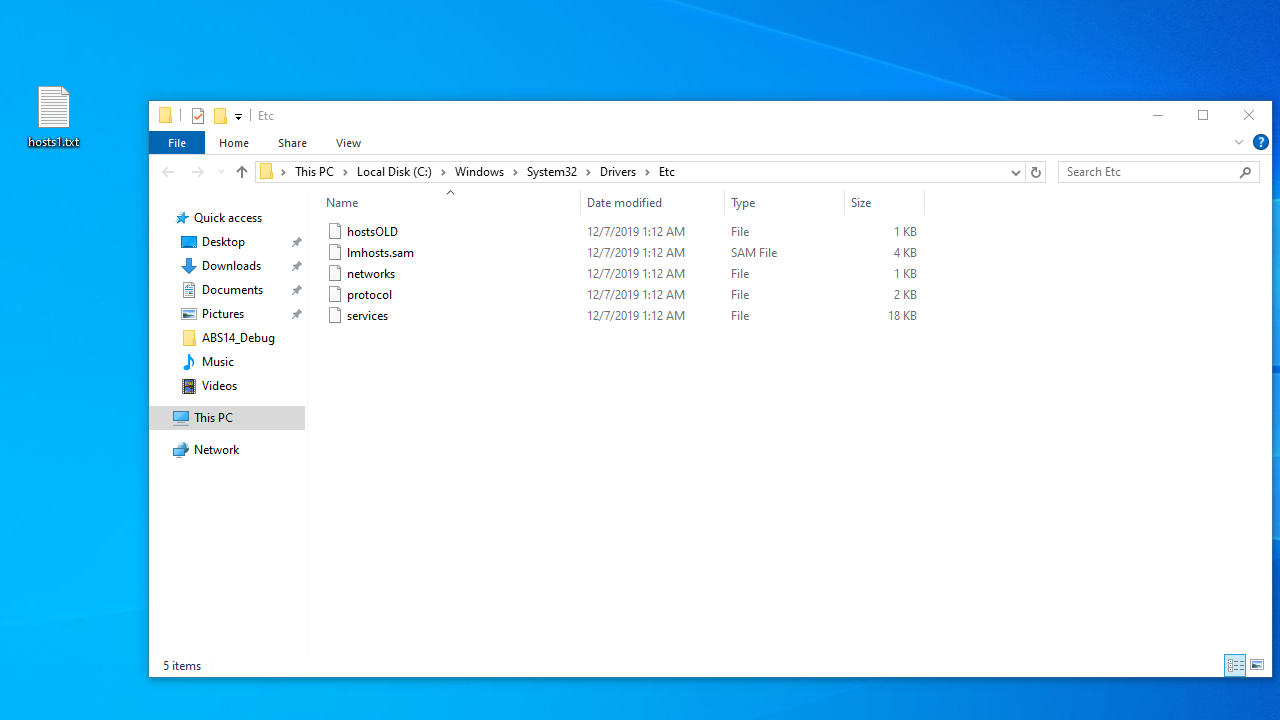
- You’ll need to provide administrator permission to move things around.
- Now restart your PC and try running the ping command again.
“Ping: Transmit Failed General Failure” Error: Fixed
Hopefully, one of these solutions will help you fix the Ping General Failure error. Have you ever run into ping issues?
If yes, how did you resolve them? Share your experience by commenting below.
FAQ
What causes the ping command to not execute?
The ping command may not run properly for several reasons. Software conflicts, improper settings, hardware problems, firewall restrictions, and network congestion are common causes. The ping command may only be able to send data packets if your machine is linked to the network correctly, either over Ethernet or Wi-Fi. Ping failures can also be caused by improper IP address settings, such as an erroneous gateway or subnet mask, which might interfere with communication. As a precautionary measure, firewalls or security software may block ping requests, preventing the command from reaching its intended location. Ping failures can also result from problems with the destination server or website, such as malfunctioning network settings or outages.
What is a general failure?
When a ping test encounters a “Transmit Failed General Failure” error message, “general failure” refers to a wide range of problems that can prevent data packets from being sent. A general failure message means that the ping command encountered an issue, but it is unable to pinpoint the precise cause, compared to specific error codes that identify specific issues. Because of this lack of precision, troubleshooting becomes more difficult because you have to look into a number of potential reasons to find and fix the main problem.
How do I fix ping failure?
To fix ping problems, you should first ensure that your Ethernet or Wi-Fi connection is operational and that all your wires are firmly connected. Next, make sure your IP address is configured correctly. Incorrect configurations can cause problems with connectivity. You can also restart your modem or router to refresh the connection. If the issue continues, try pinging various locations to see whether it is unique to a particular server or webpage. Using network diagnostic tools and updating your network drivers can also help you find and address the underlying issues causing the ping failure.
What does ping transmit failed general failure mean?
Generally speaking, the error message “Ping Transmit Failed General Failure” means a communication issue between your computer and another device or network server. This error shows that the transfer of data packets failed for a general reason, without mentioning a specific cause, when you run the ping command to test connectivity. Numerous network difficulties, including malfunctioning hardware, incorrectly configured settings, or broken connections, maybe the cause.