
Is your Windows Hello PIN not being accepted by Windows? In most cases, it occurs when you enter the wrong PIN. Other factors that could contribute to this issue include corruption of the Ngc folder, a problem with your Microsoft or local accounts, or misconfigured PIN settings in the Group Policy Editor.
Likewise, not updating your operating system for long, being infected with malware, or corrupted system files can also prevent your login PIN from working. If you’re having trouble logging in to your device using your Windows Hello PIN, give the following solutions a shot.
1. Ensure You Aren’t Entering the Incorrect PIN
You could simply be entering the wrong PIN, which is the first possible cause of your PIN not working. To eliminate this possibility, reset your PIN once.
Your computer must be connected to an active internet connection to reset your PIN. Therefore, turn on your computer and ensure that the internet is connected. To reset your PIN, go to the profile’s login page and click on I forgot my PIN.
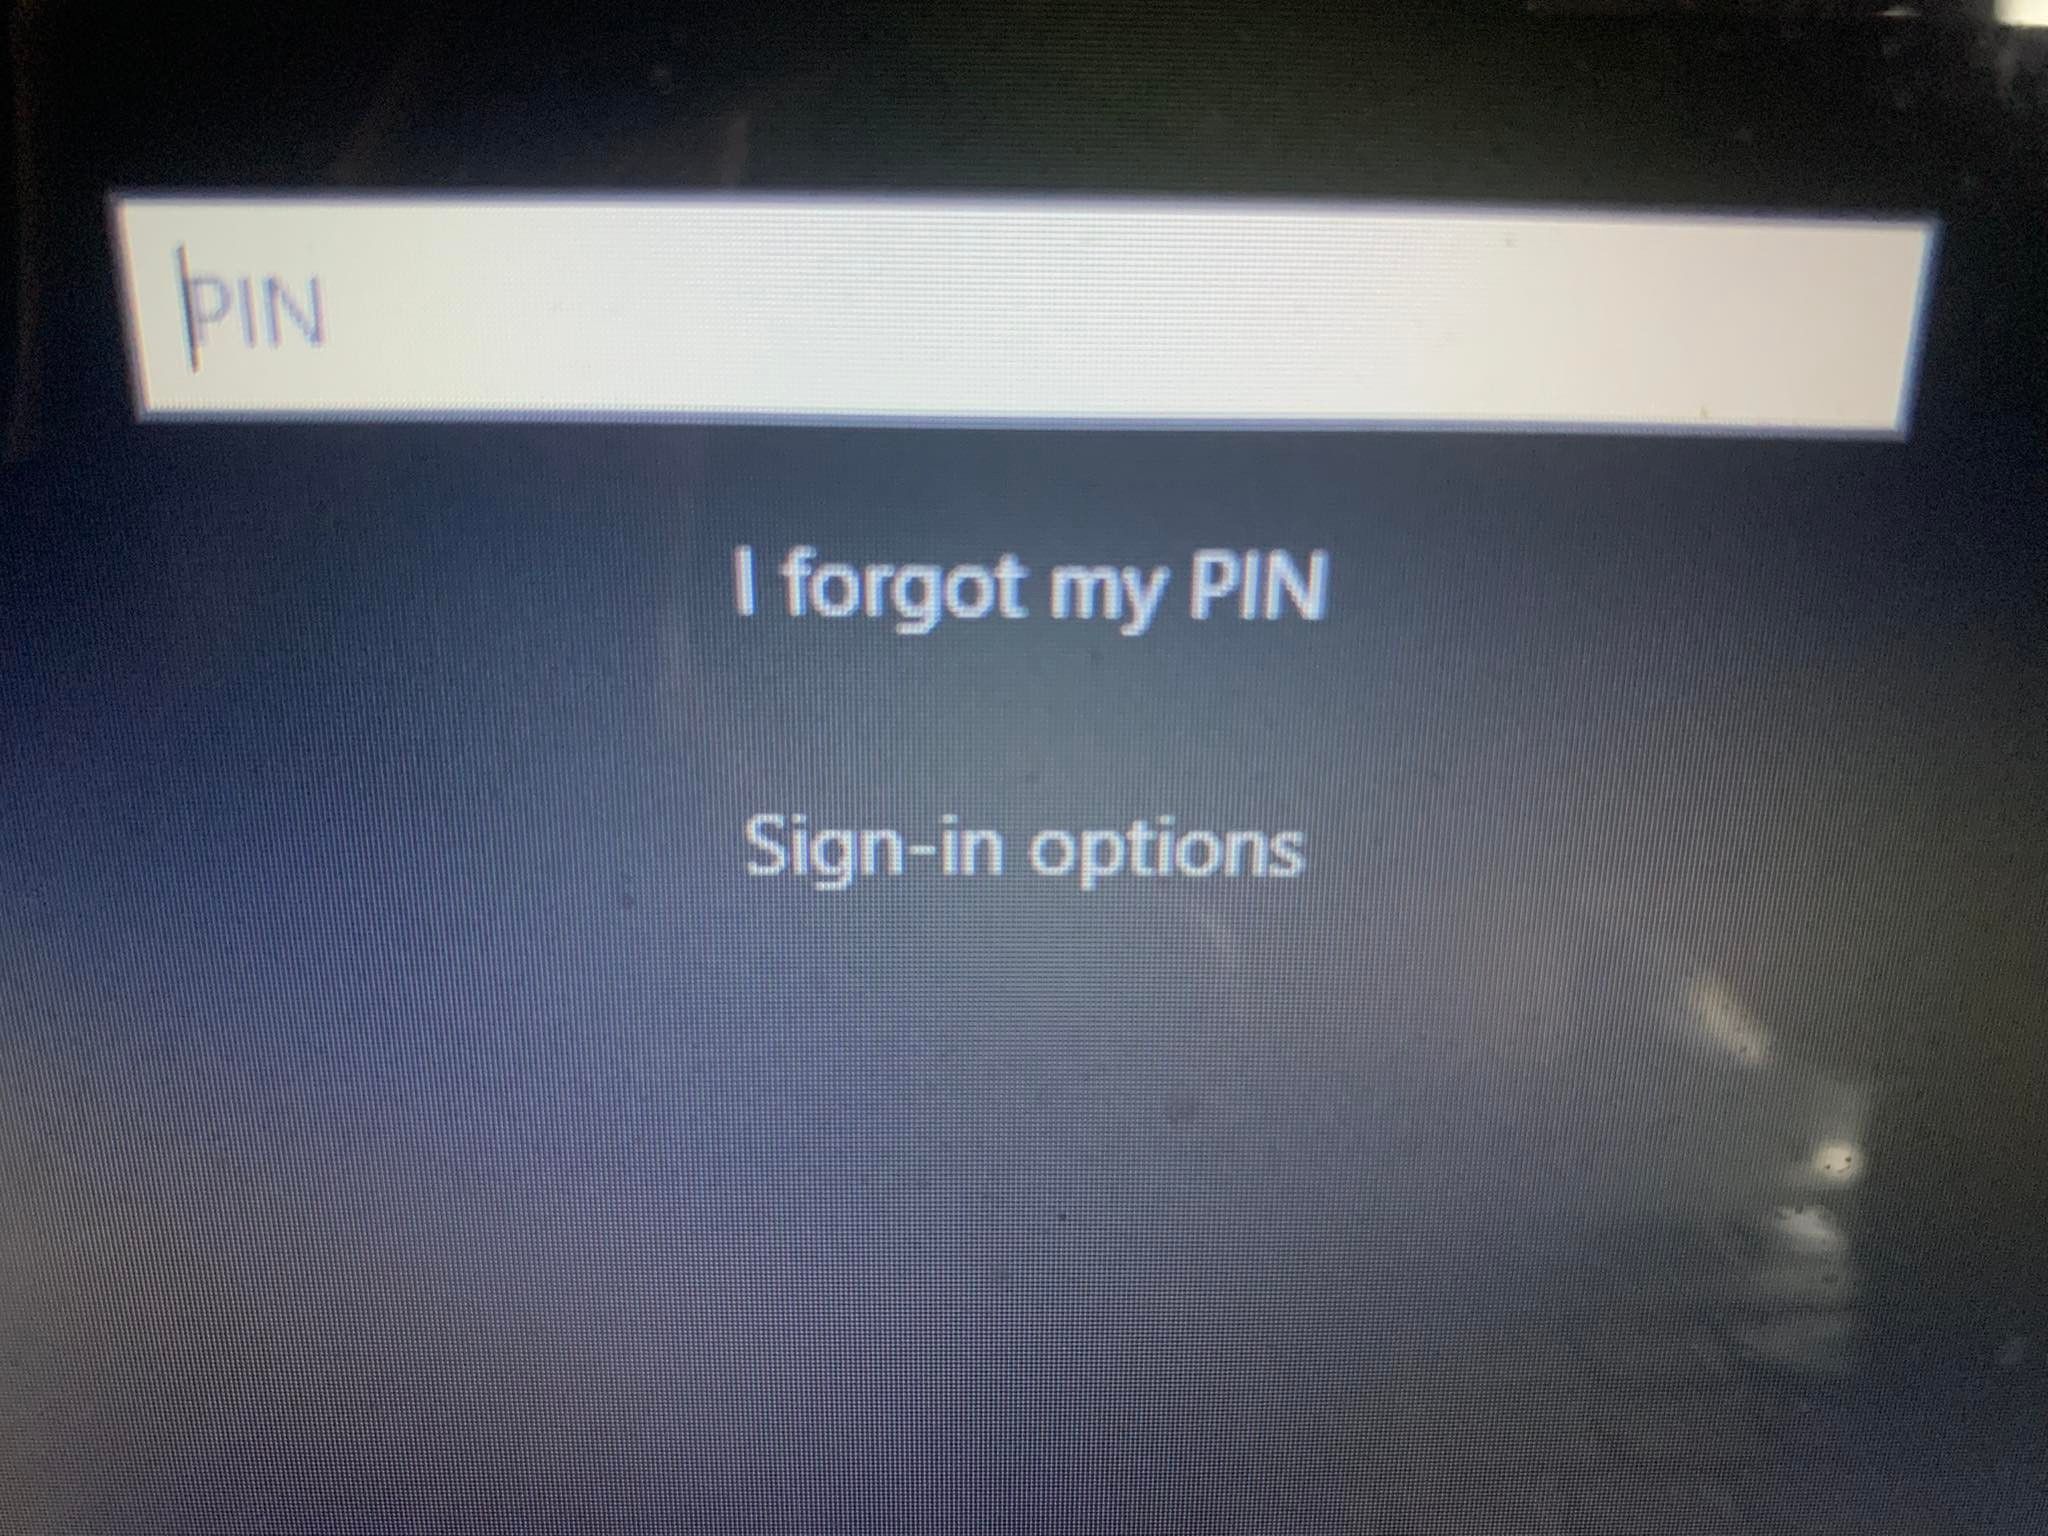
You can either reset the PIN by verifying your identity with your Microsoft account password or choose an alternative sign-in option by clicking Send code, which sends a code to your email address.
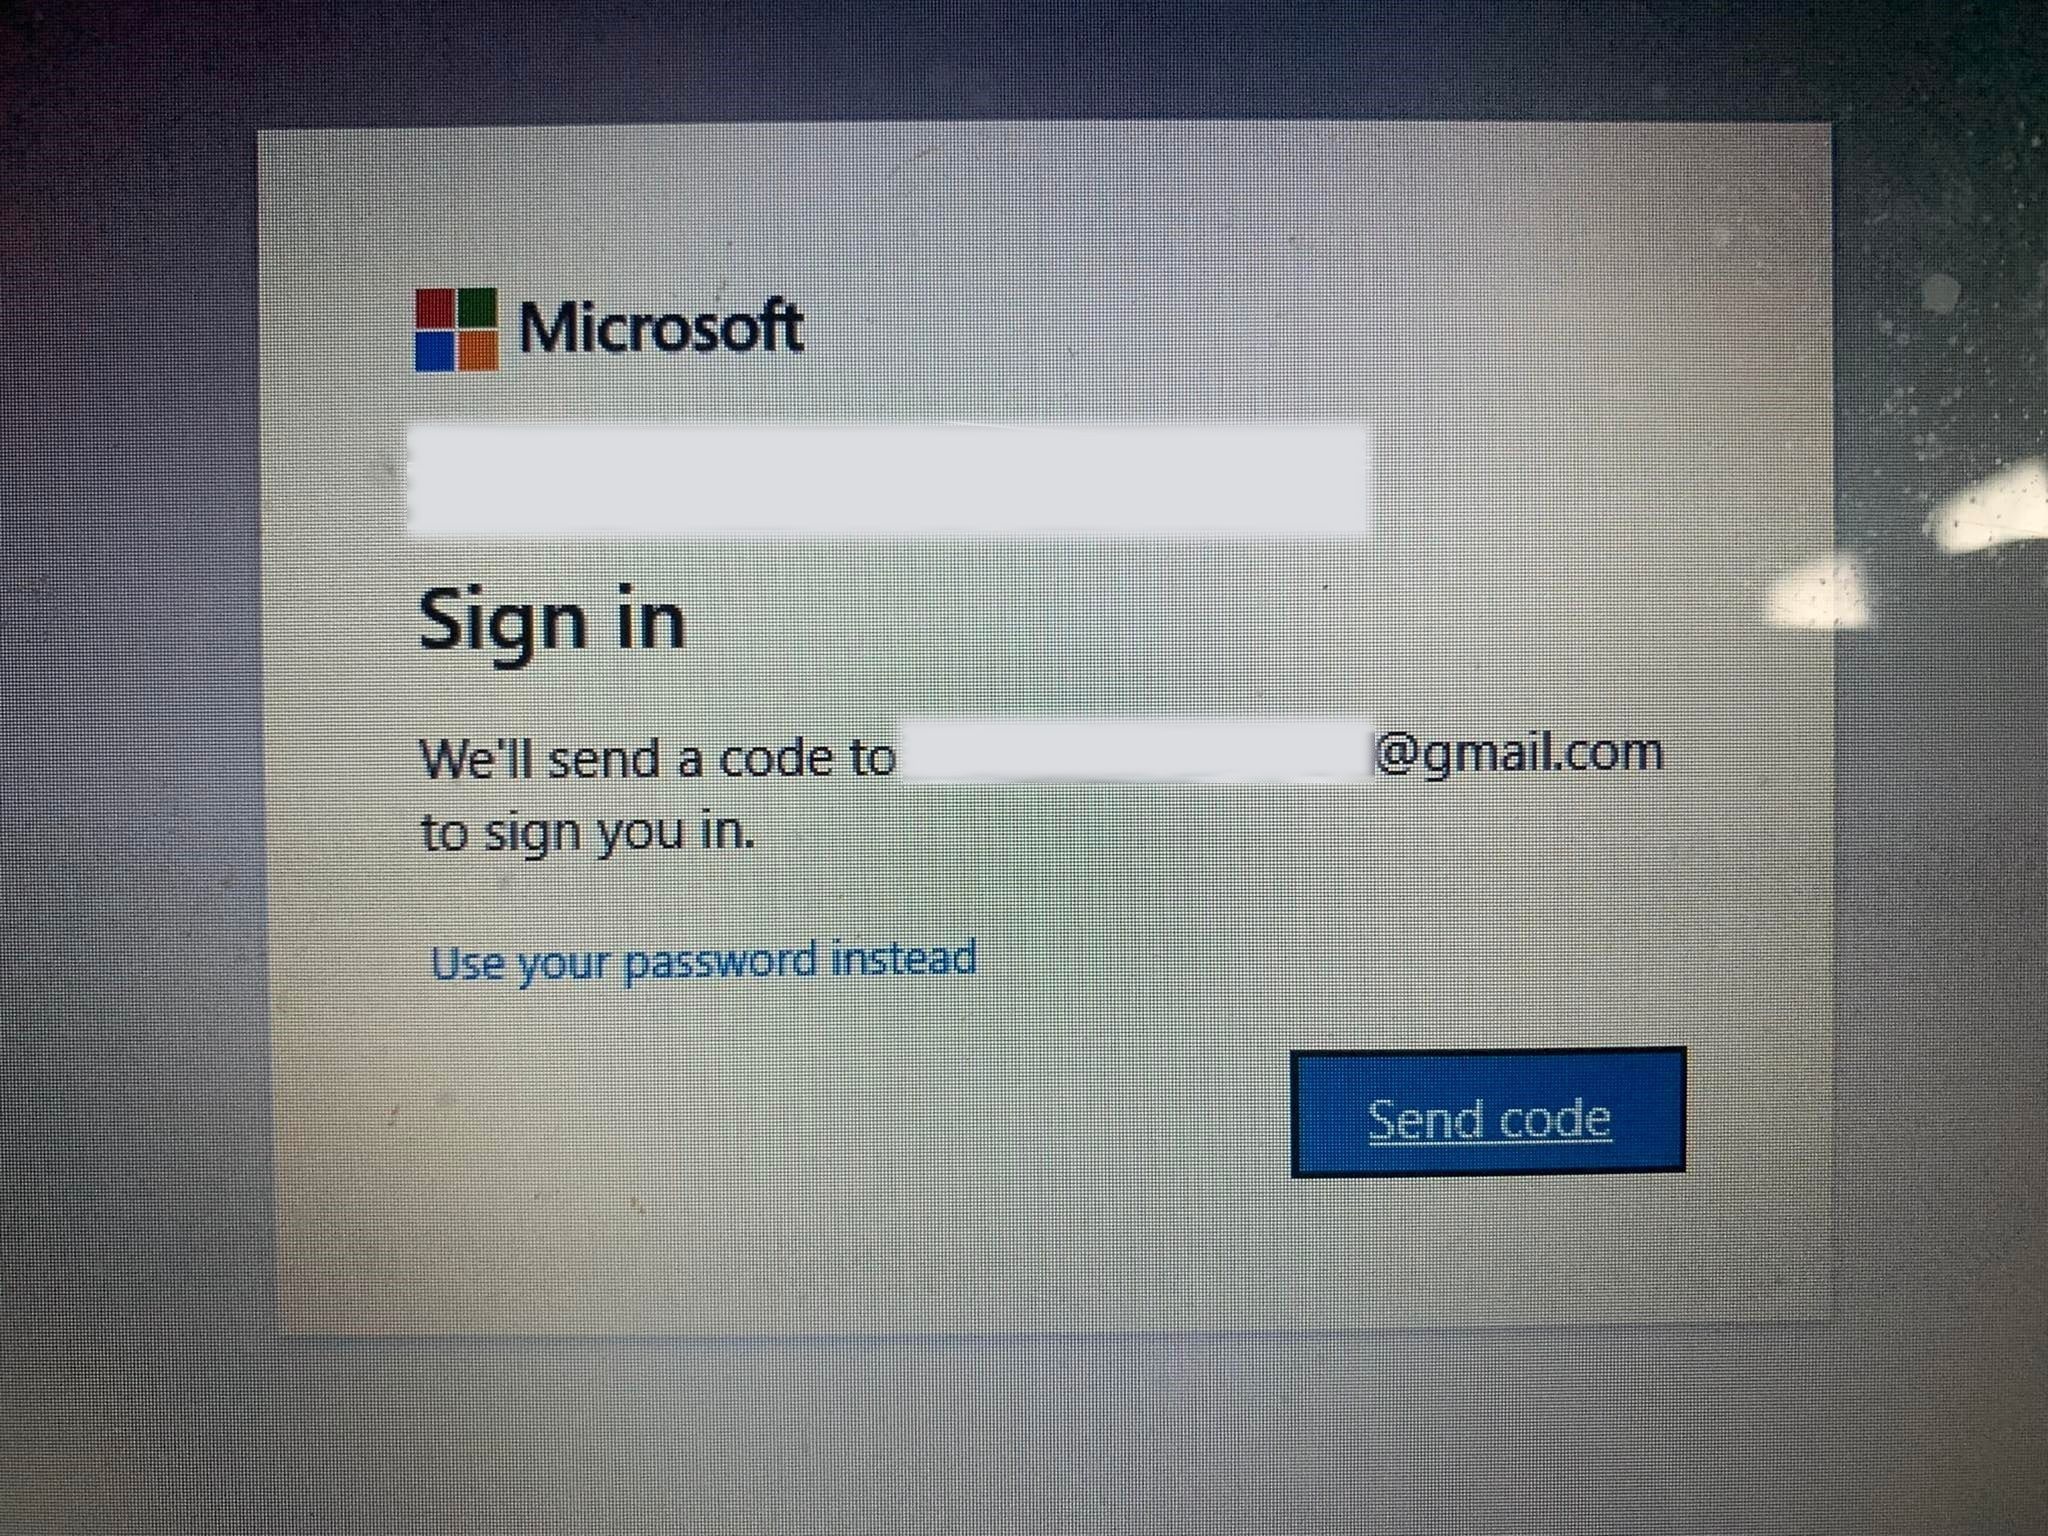
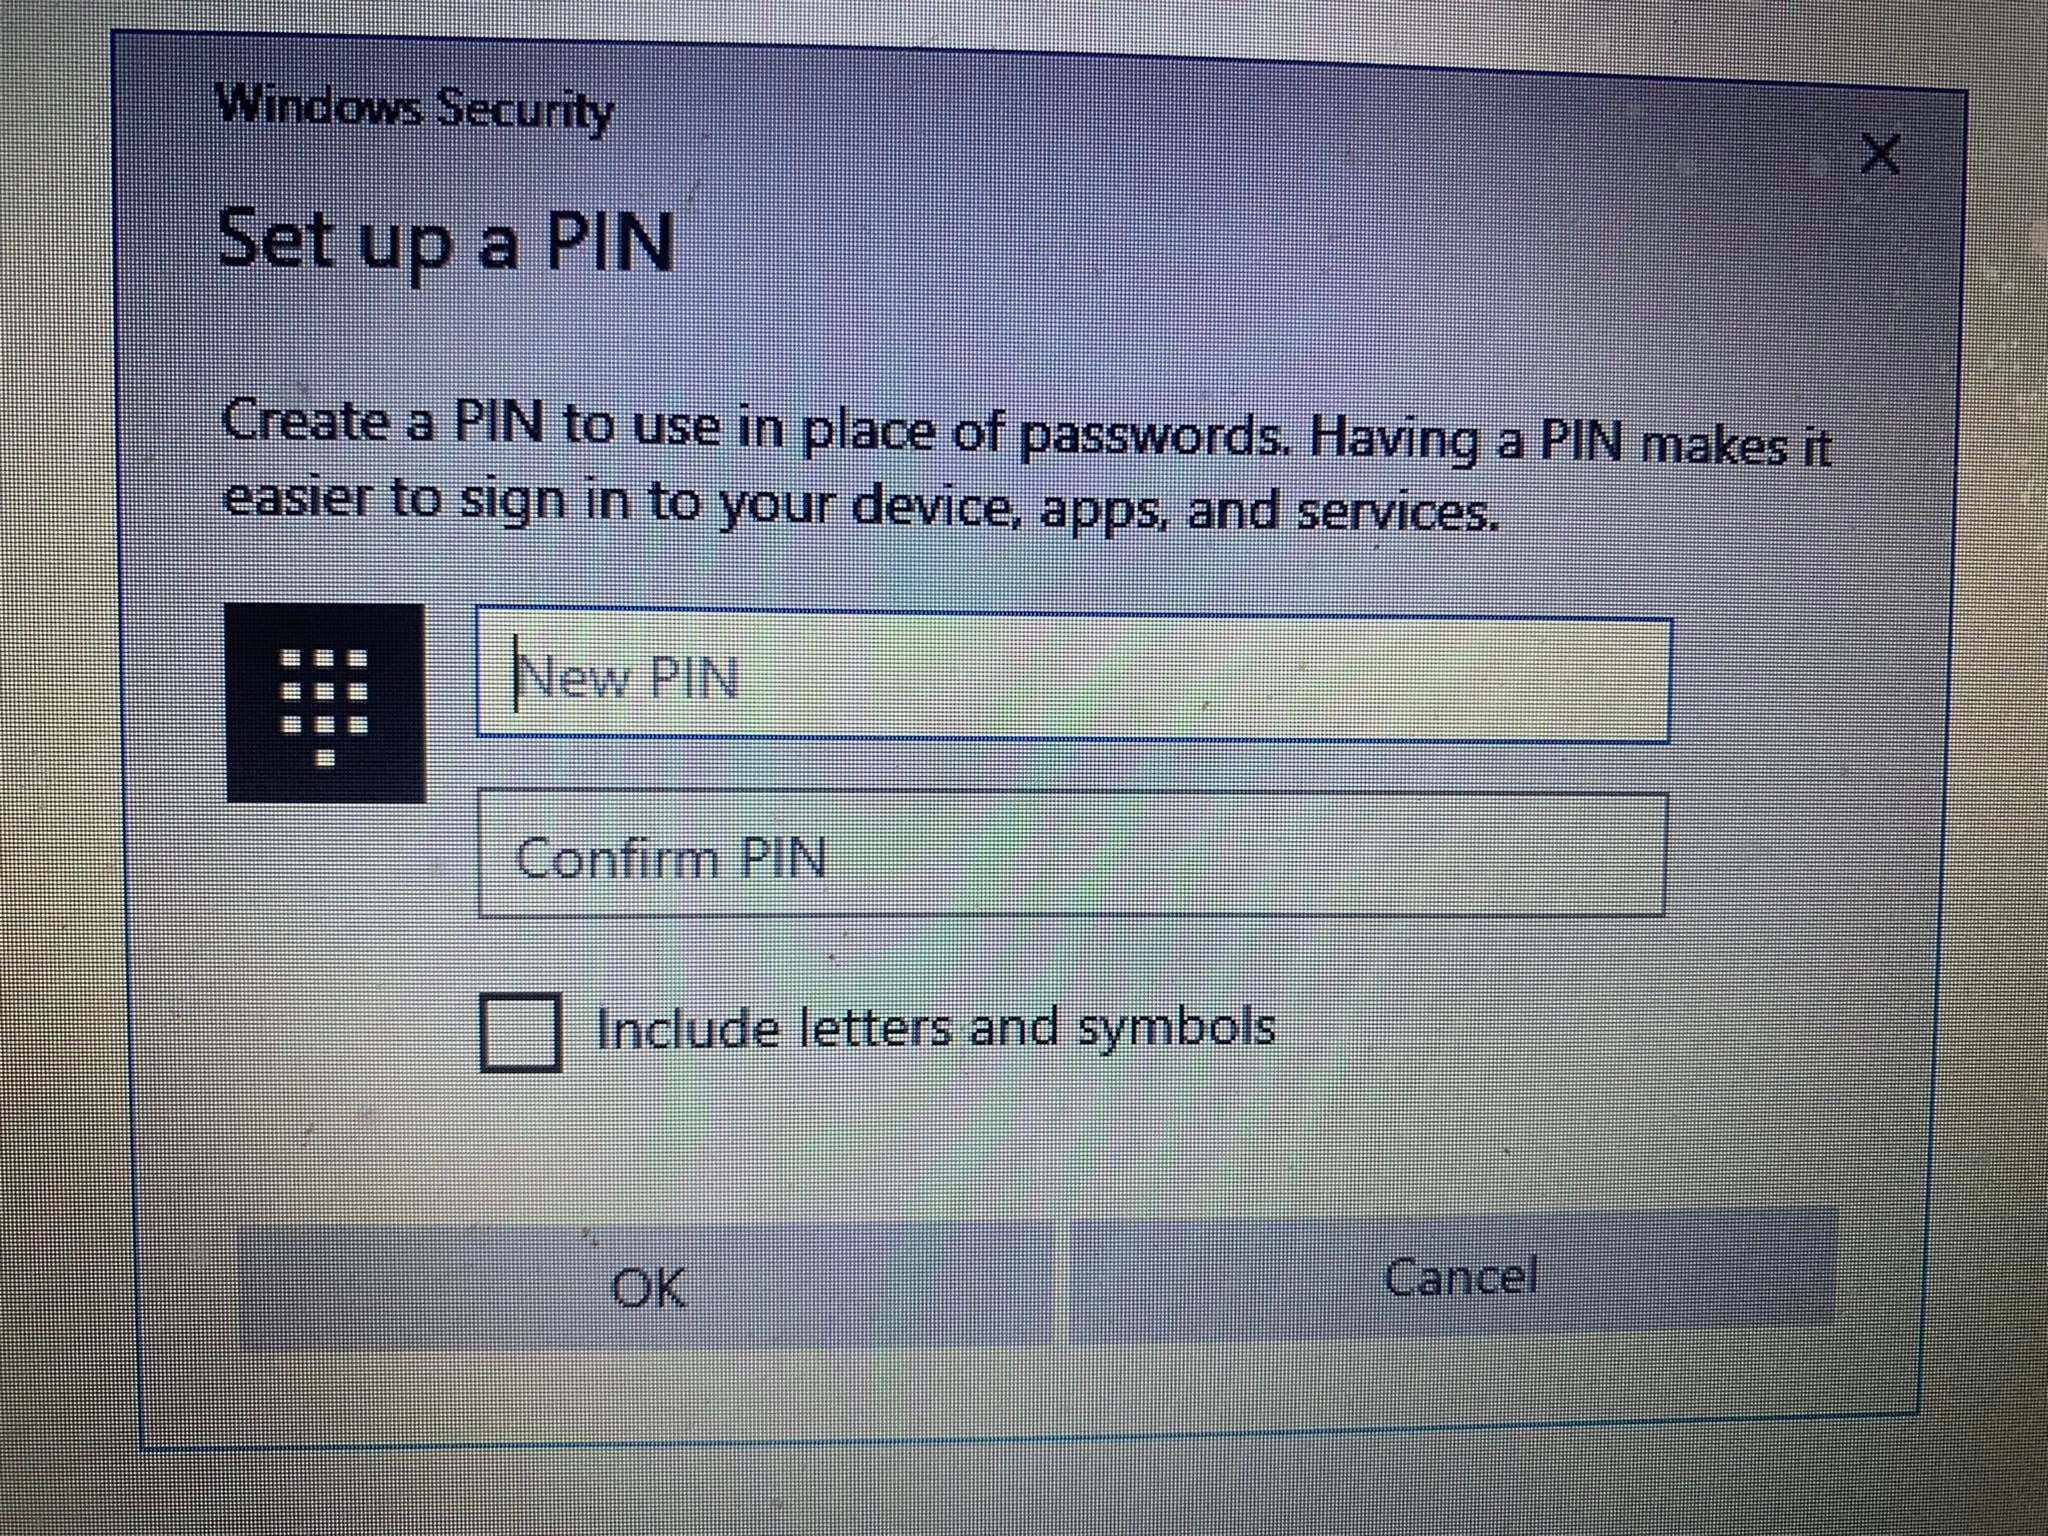
If you select the latter option, enter the code you received by email and click Continue. Windows will direct you to enter a new PIN here, so enter it, confirm it once, and click OK.
Restart your computer once more, add your new PIN on the login screen, and try logging in again to make sure it was the wrong PIN that wasn’t letting you enter the computer previously. You are good to go if you can log in this time — just don’t forget your new PIN.
If the PIN again does not work after resetting and you are sure that the PIN you are entering is correct, the problem may reside elsewhere. Therefore, use an alternate way to log in to your account and then rule out other possibilities.
2. Sign-In Using Alternative Methods
If resetting the PIN from the login screen does not resolve the issue, you can use your account password instead. To do that, follow the below steps:
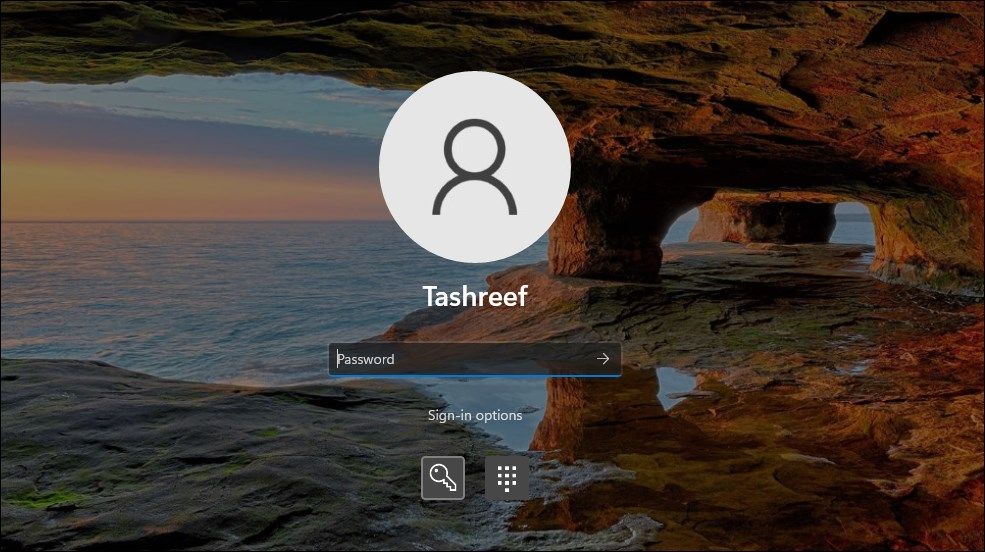
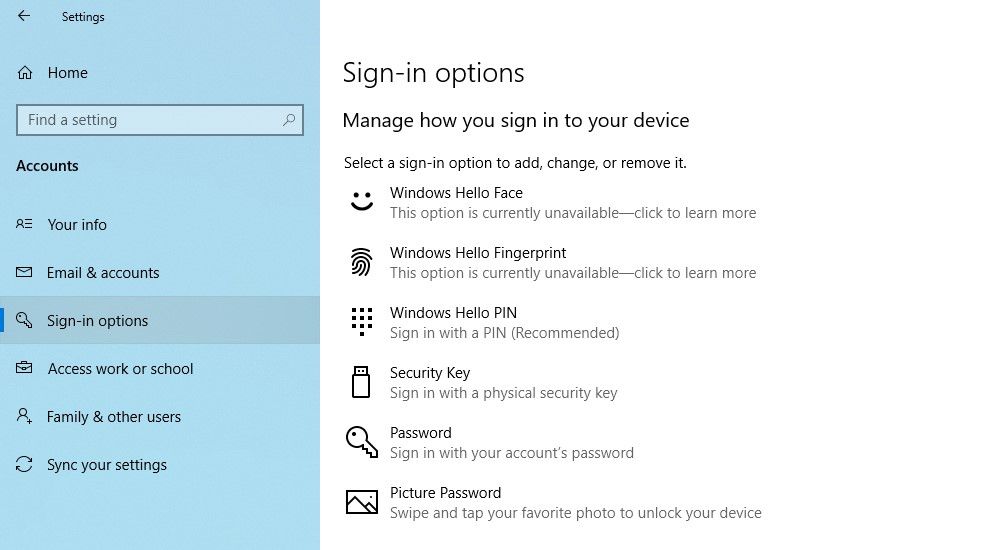
- Click Sign-in options to view other options for logging in.
-
Click the key icon, which is usually located on the left.

- Type the password associated with your account here.
Once logged in, you can start applying the remaining fixes.
If you don’t remember your account password, you can reset it just like you can your PIN. Unlike resetting the PIN, resetting the password mostly goes smoothly and lets you sign in.
3. Delete the Ngc Folder in Windows
Windows stores all your PIN-related settings in this folder, so if the OS isn’t accepting your PIN, which is correct, you should delete this folder. This process will wipe out all PIN-related data from the OS. You can then set up a new PIN, which should work fine.
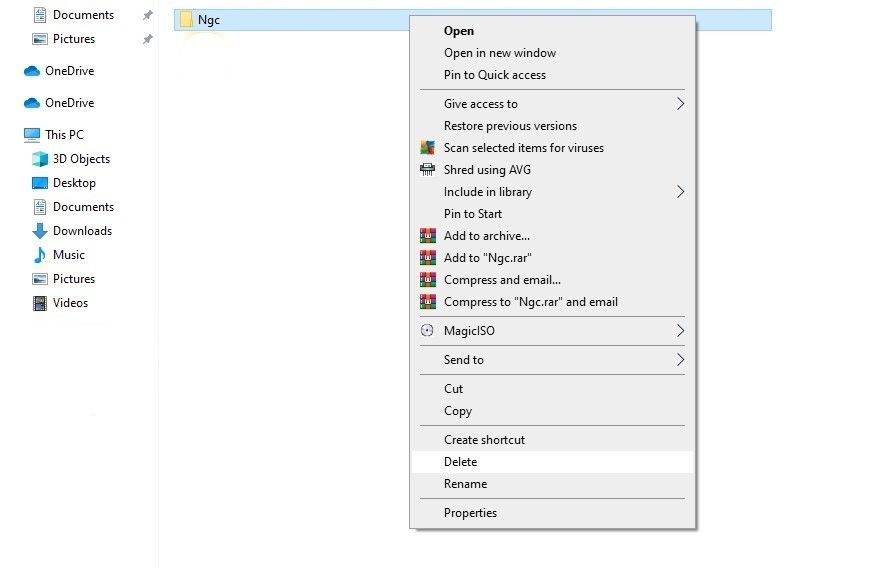
You can delete the Ngc folder by following these steps:
- Log in to your administrator account.
- Navigate to C: drive > Windows> ServiceProfiles > LocalService > AppData > Local> Microsoft.
-
Locate the Ngc folder, right-click on it, and hit Delete.

Navigate to Settings > Accounts > Sign-in options to set up a new PIN after deleting the old one. Afterward, click on Windows Hello PIN, add a new PIN, and hopefully, the PIN will start working on your operating system.
If this fix also doesn’t resolve the issue, it lies somewhere else that needs to be investigated further.
4. Rule Out User Account Specific Issues
When troubleshooting PIN issues, it’s essential to rule out account-specific problems first. To begin with, check that the problem does not persist on a single Microsoft account. The best way to confirm this is to switch to a local account. To do that, follow the below steps:
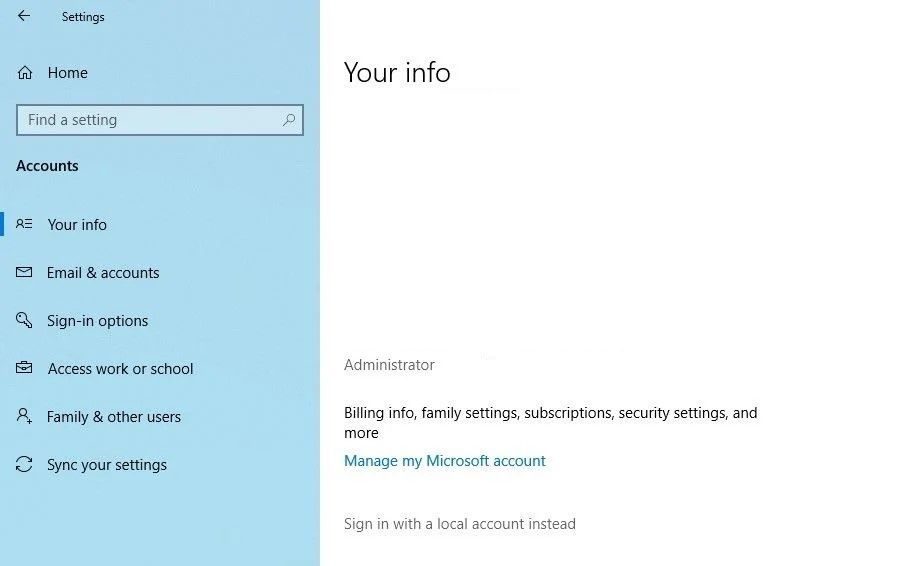
- Open the Windows Settings app.
- Go to Accounts.
- Navigate to Your info in the left-sidebar.
-
Click on Sign in with a local account instead.

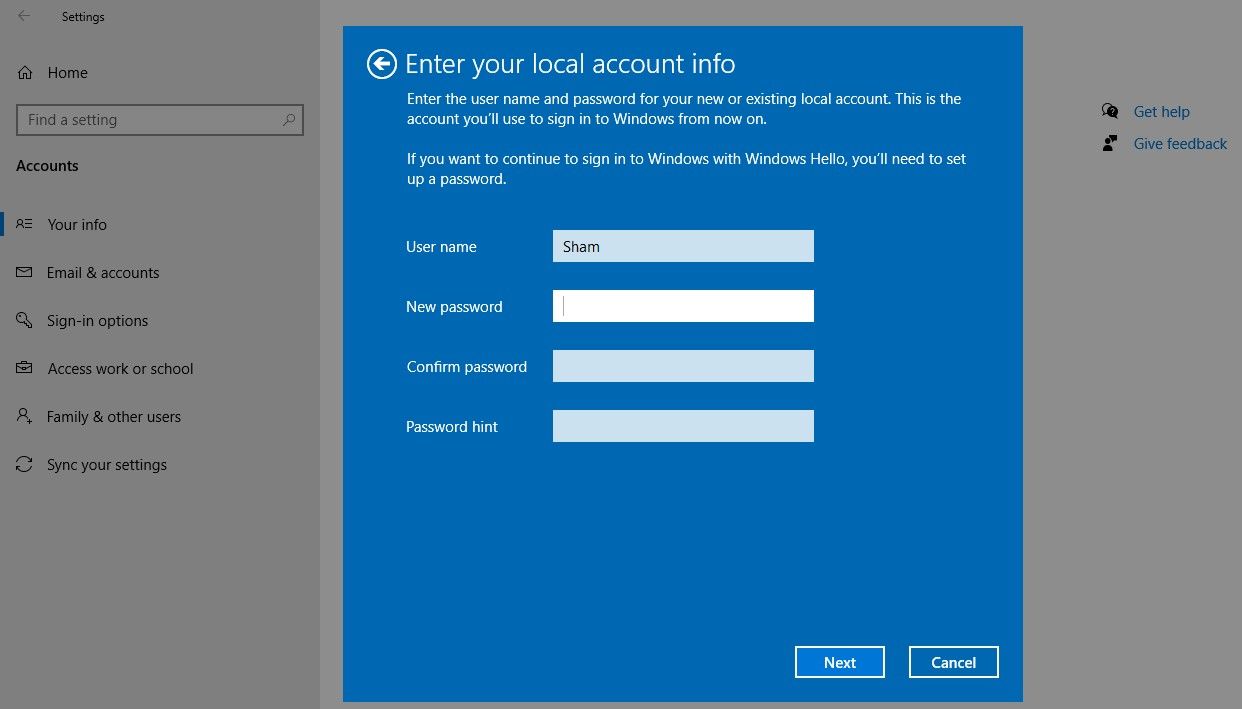
- Click on Next.
- Enter your PIN.
- Set up your local account by adding your username and password.
-
Once done, hit Next.

- Click on Sign out and finish.
By following the above steps, you will return to the login screen. Type in your PIN again to confirm it works. If it does, it’s your Microsoft account that is to blame. Creating another user account and checking if the PIN works there could help confirm that.
Therefore, if the issue originates from your Microsoft user account, you should copy your files to the new account and start using the new account permanently.
If the PIN does not work on any account, move on to the next fix.
5. Tweak PIN Sign-In Settings in Group Policy Editor
When the convenience PIN sign-in setting in the Group Policy Editor is disabled, the PIN will not work. Therefore, it’s essential to ensure it’s not causing the problem during sign-in.
Some Windows versions, however, might not have this feature. If this applies to you as well, skip this step.
Follow the below steps to adjust the settings in the Group Policy Editor:
- Search for the Run app in the Windows search bar.
- Type gpedit.msc and click on OK.
- Navigate to Administrative Templates > System > Logon.
- In the right-hand pane, locate and double-click on Turn on convenience PIN sign-in setting.
- Check the Enabled checkbox, click Apply, and hit OK.
If the setting is already enabled, continue to apply the remaining fixes.
6. Update or Downgrade Your OS
According to Microsoft support helpers, one of the possible causes of PIN not working on Windows may be recent updates. If you remember doing an update recently, you need to roll the update back.
Conversely, if you haven’t updated your computer for quite some time, maybe the problem stems from an outdated Windows OS. In that case, follow the below steps to update your computer:
- Open the Windows Settings app.
- Go to Update & Security.
- Navigate to Windows Update in the left sidebar.
-
Click on Check for updates box.

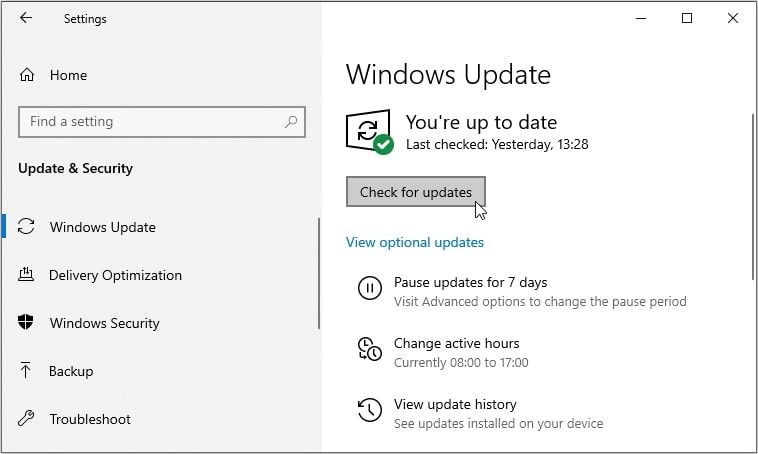
Windows will automatically check for the latest updates and update itself if necessary. After your OS has been updated, try logging in again with your PIN if it works this time.
If you’re experiencing this issue on Windows 11, see our guide on how to install Windows 11 updates to update your system. If you’ve started experiencing this issue after installing an update, follow our guide on how to uninstall updates in Windows 11 and uninstall the most recent updates you installed.
If the issue persists, run a malware scan to rule out the possibility of malware interference.
7. Turn Off Your Antivirus and Run a Malware Scan
Possible interference from antivirus may also result in your PIN being rejected. To prevent this from happening, temporarily turn off any third-party antivirus you’re using. If turning off the third-party security suite fixes the problem, turn it off permanently.
In addition, you can temporarily disable Windows Defender (now known as Microsoft Defender), the built-in security suite, to ensure that it’s not the culprit. Remember to re-enable the security suite, as turning it off for too long can expose your device to malware.
Aside from that, malware infections can also impair many system functions. Thus, it is imperative to rule out this possibility. You can easily do this by running a Microsoft Defender offline scan. By scanning the system, you can ensure that no hidden malware is affecting its performance.
8. Run an SFC Scan
When you remove malware from your computer, make sure it hasn’t corrupted any Windows files that might have caused the issue at hand.
The easiest way to do this is to run an SFC scan. The scan automatically searches for corrupted files and replaces them with a cached copy. You can check out how to use the SFC tool in our guide on how to repair corrupt Windows files with its built-in tools.
If running the SFC scan does not fix the problem, you can revert your system to an earlier restore point where the PIN was working. You can only do this if you’ve already created a restore point. Otherwise, it’s impossible.
PIN Still Isn’t Working on Windows?
After you have tried all fixes listed above and the issue persists, consider restoring your computer to a previous point where the PIN was working fine. If that doesn’t solve the problem either, it’s best to factory reset your computer as a last resort.
FAQ
[Windows 11] Недоступно распознавание PIN-кода, лица или отпечатка пальца (Windows Hello) после обновления до Windows 11
После обновления Вашего ПК до Windows 11 Вы можете столкнуться с уведомлением: «Вы должны добавить пароль, прежде чем использовать этот параметр входа» в отношении функции распознавания PIN-кода, лица или отпечатка пальца (Windows Hello) в разделе вариантов входа. Подробные инструкции можно найти в этой статье.
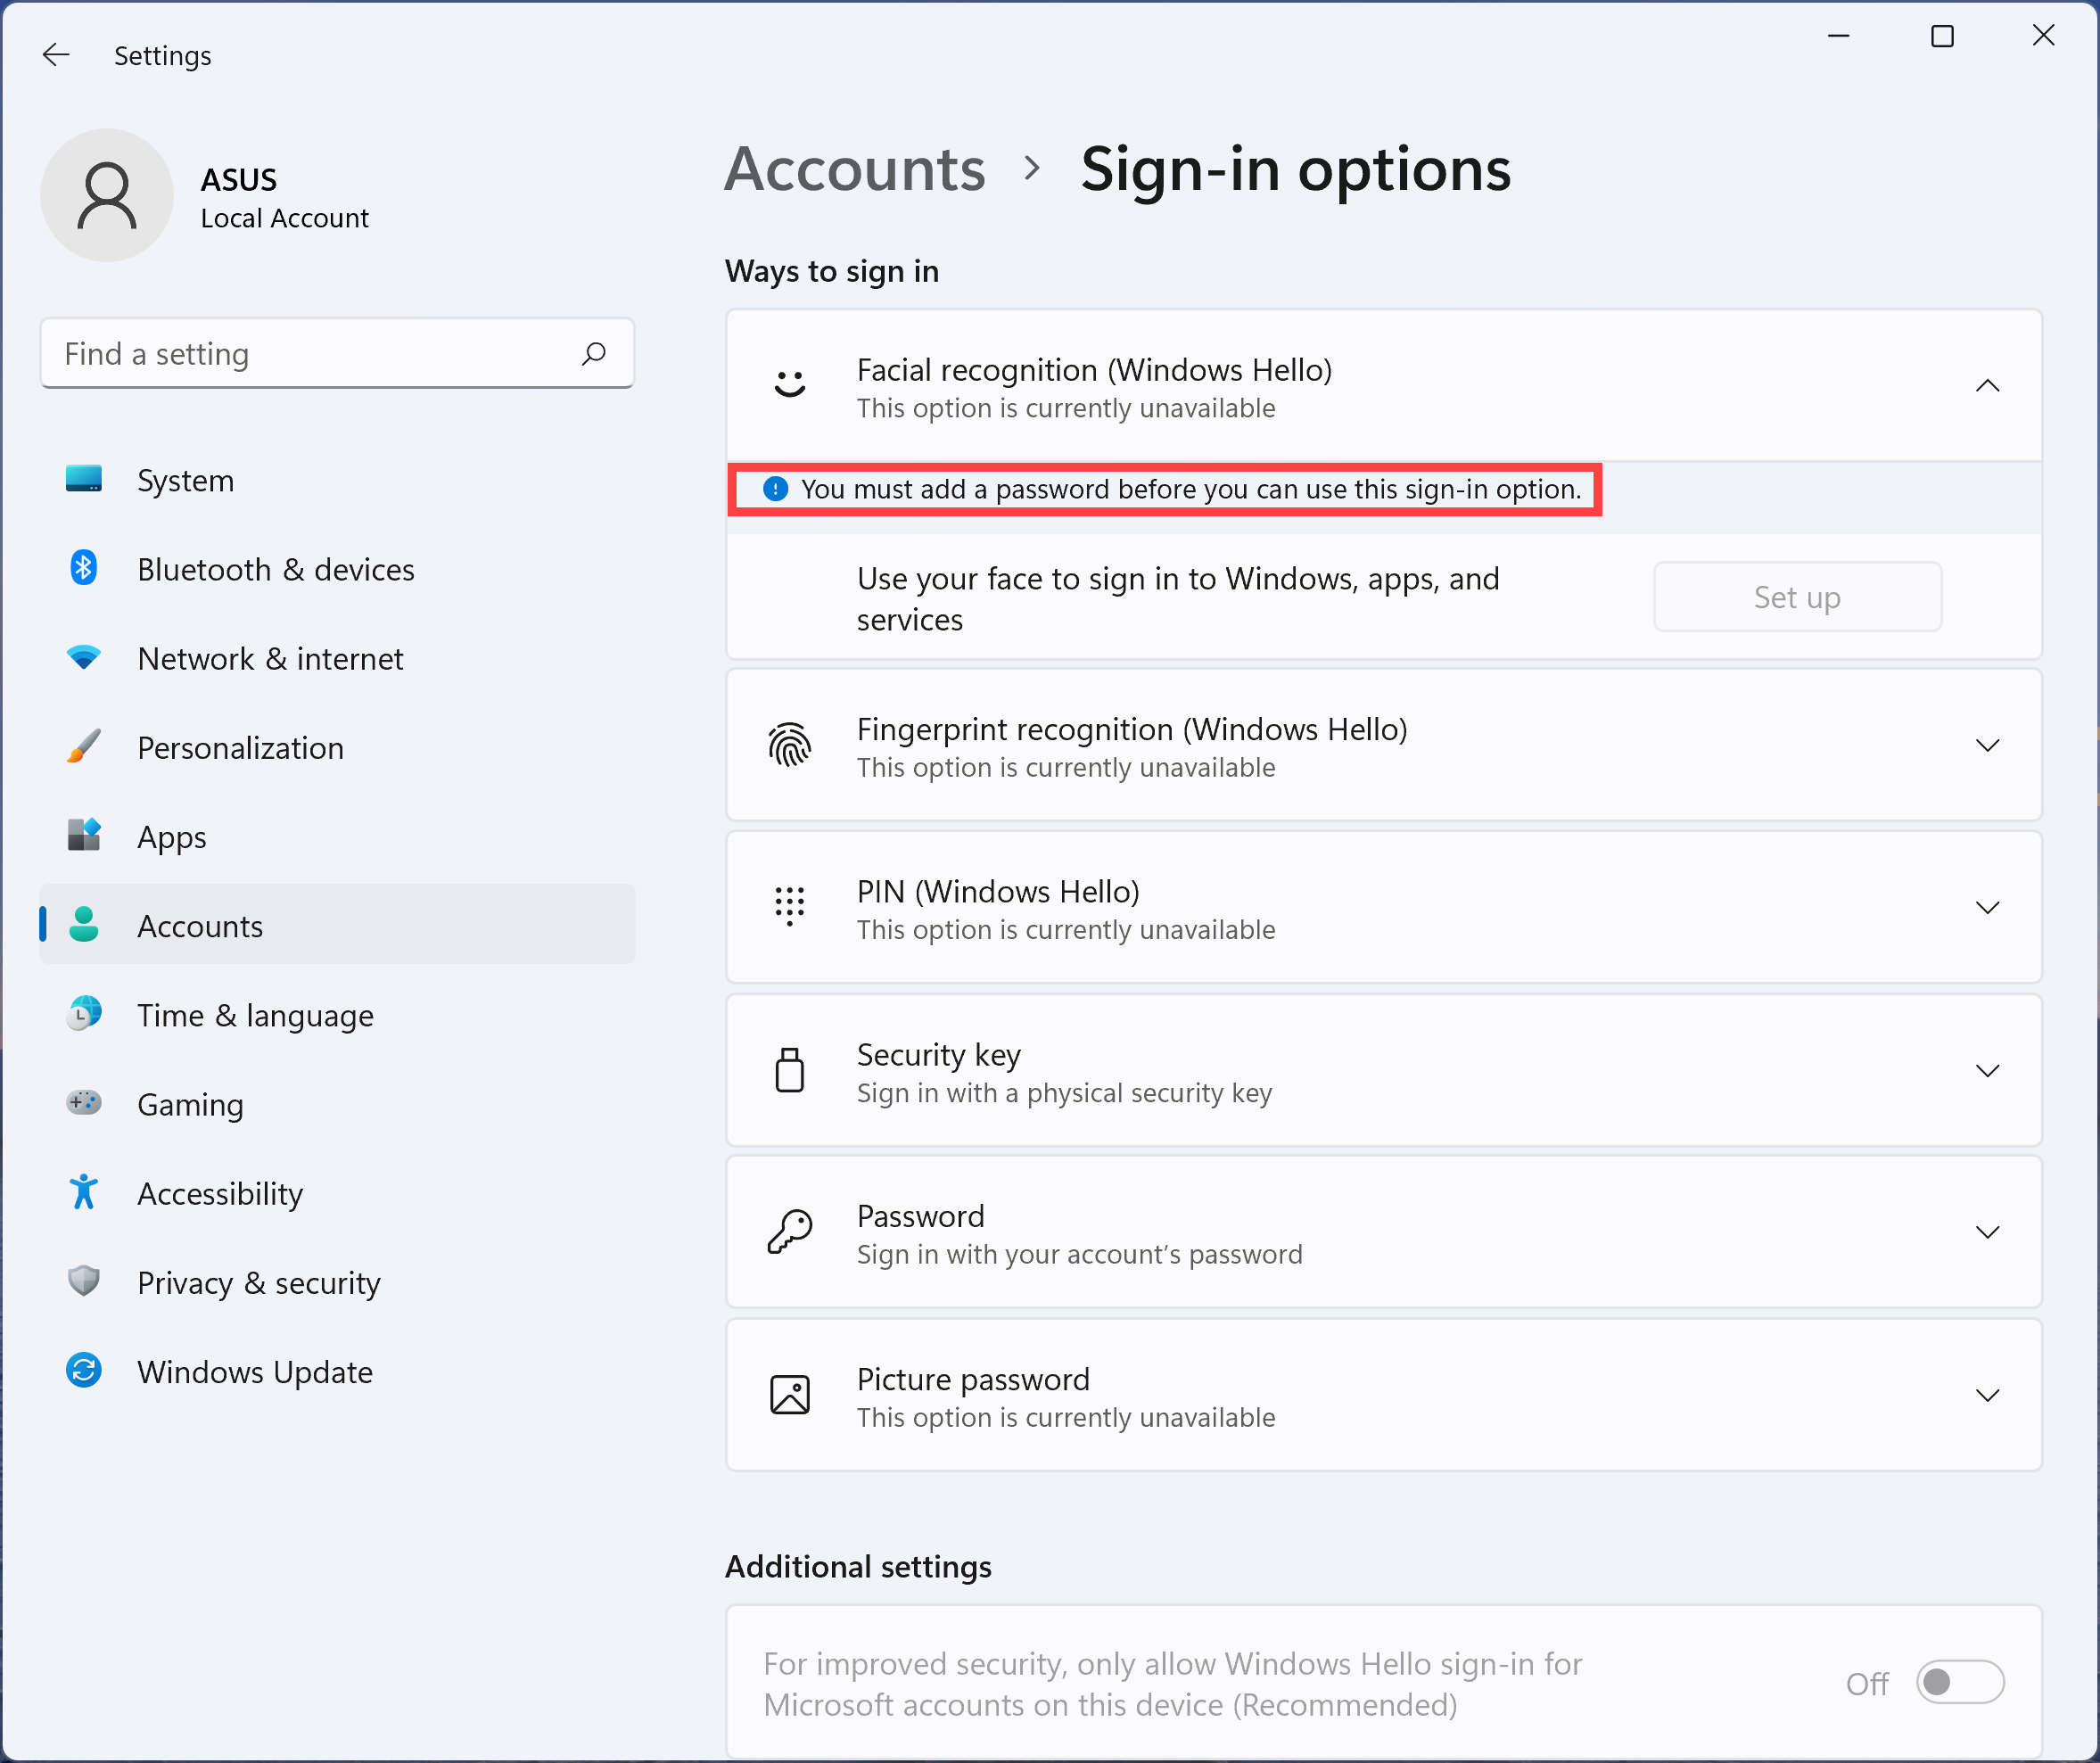
Windows 11 требует от пользователей входить в Windows Hello только с учетной записью Microsoft на устройстве для повышения безопасности. Поэтому Вам нужно переключить локальную учетную запись на свою учетную запись Microsoft, и тогда будет доступно распознавание лиц.
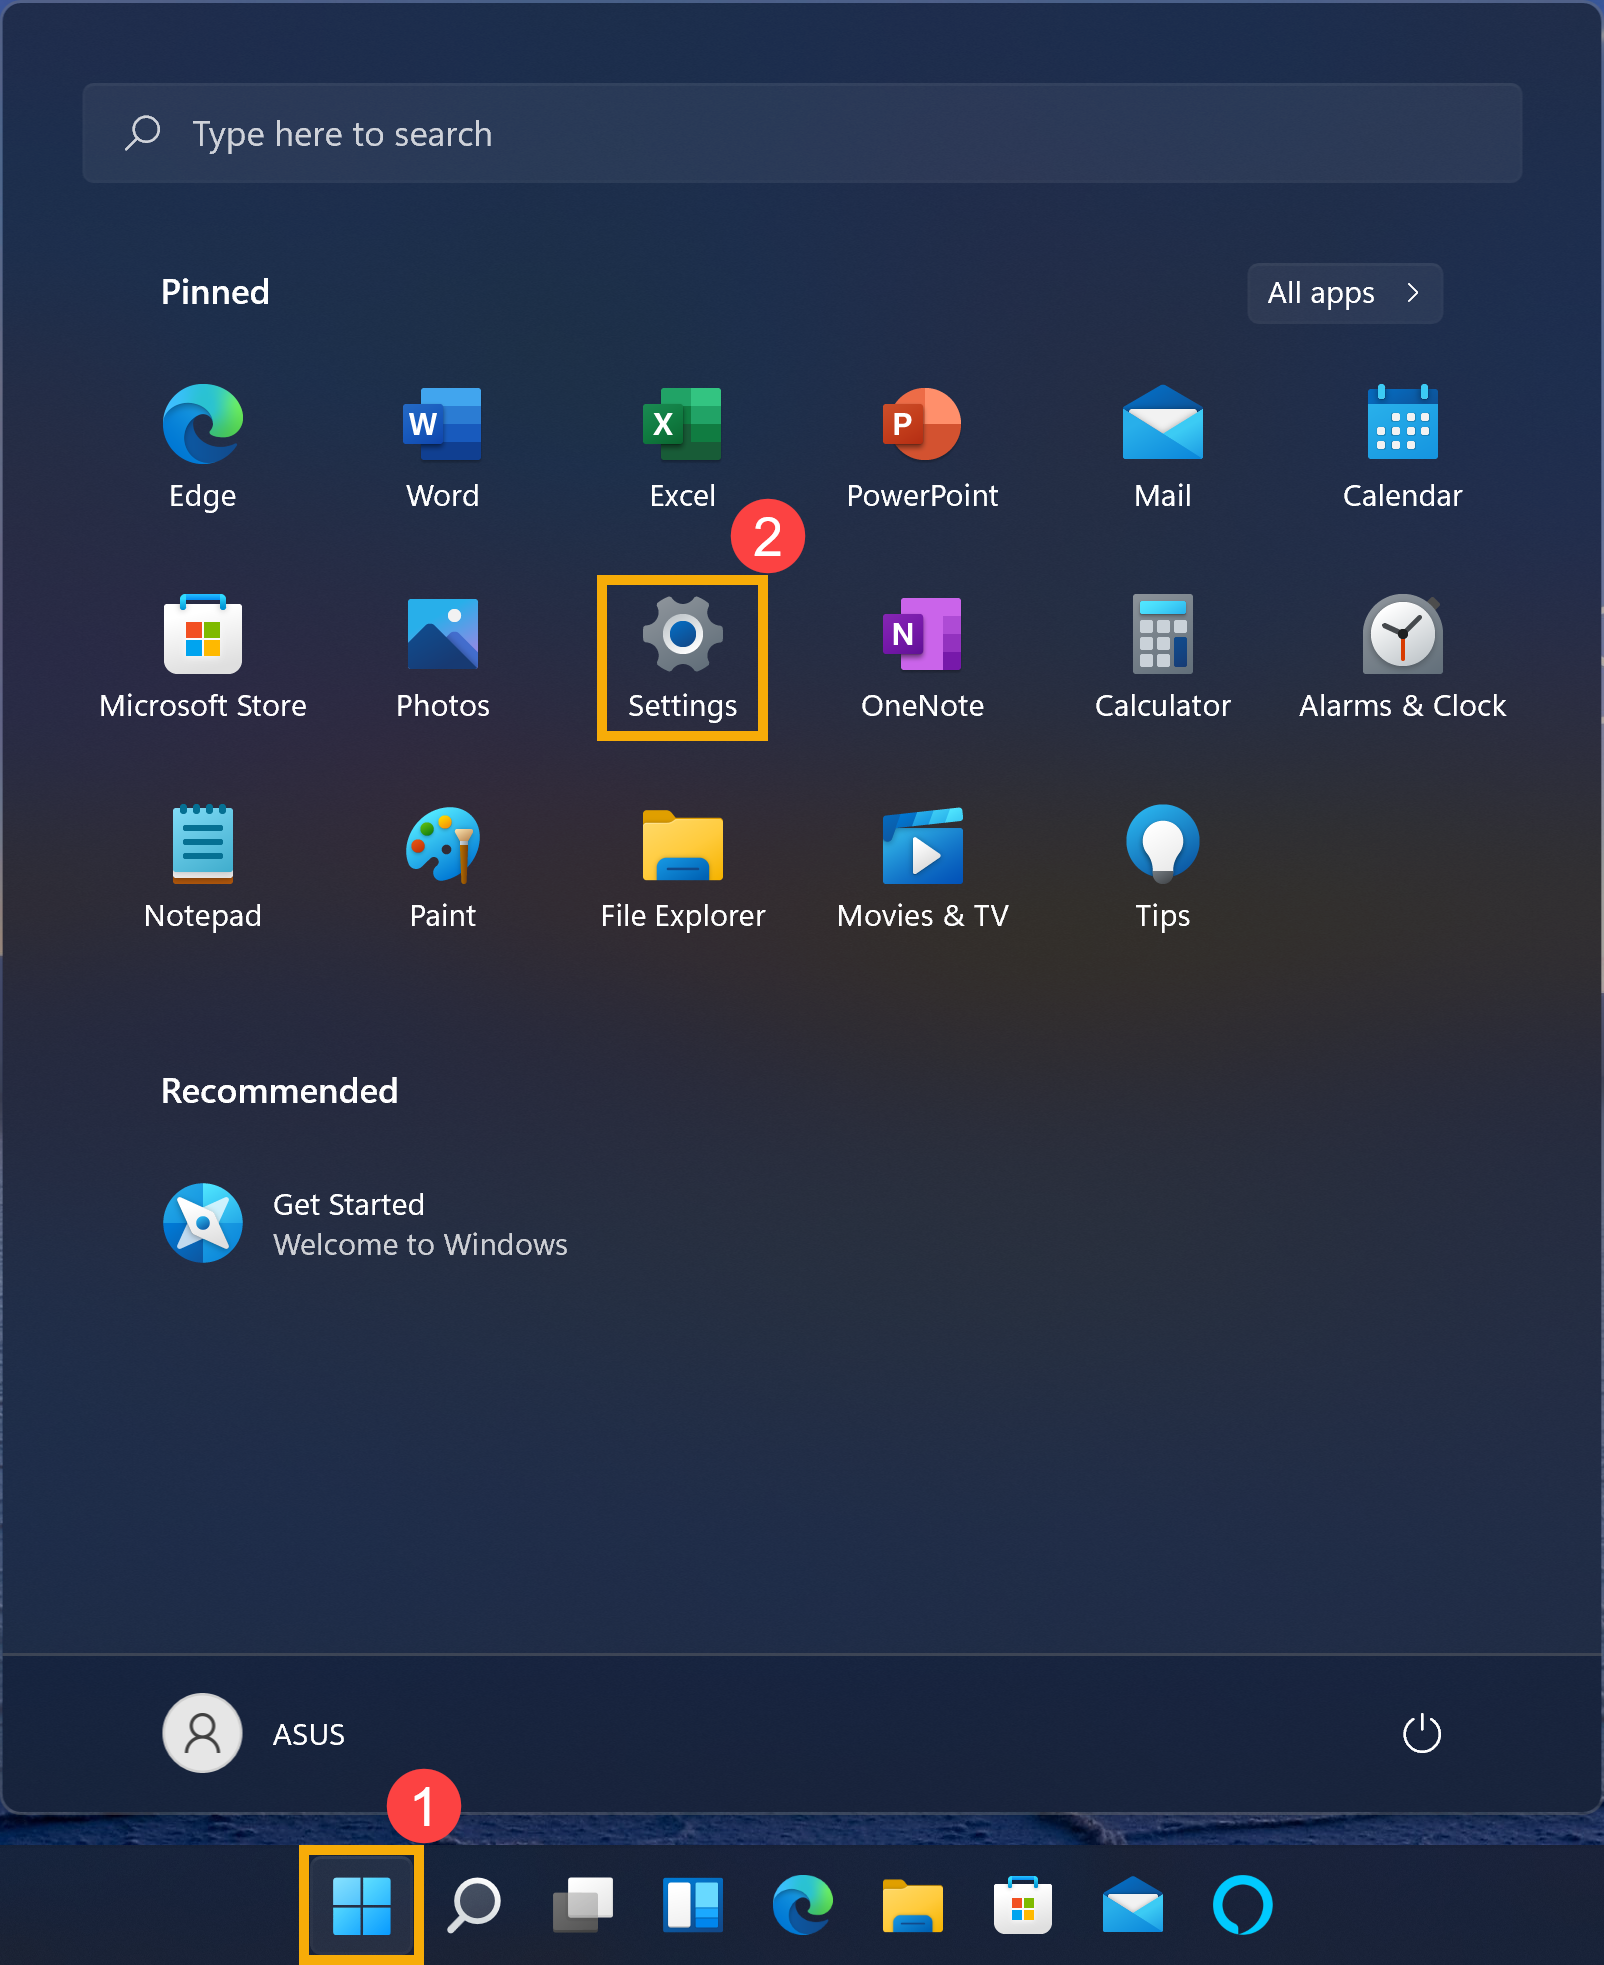
- Нажмите [Пуск] ①, затем выберите [Параметры] ②.

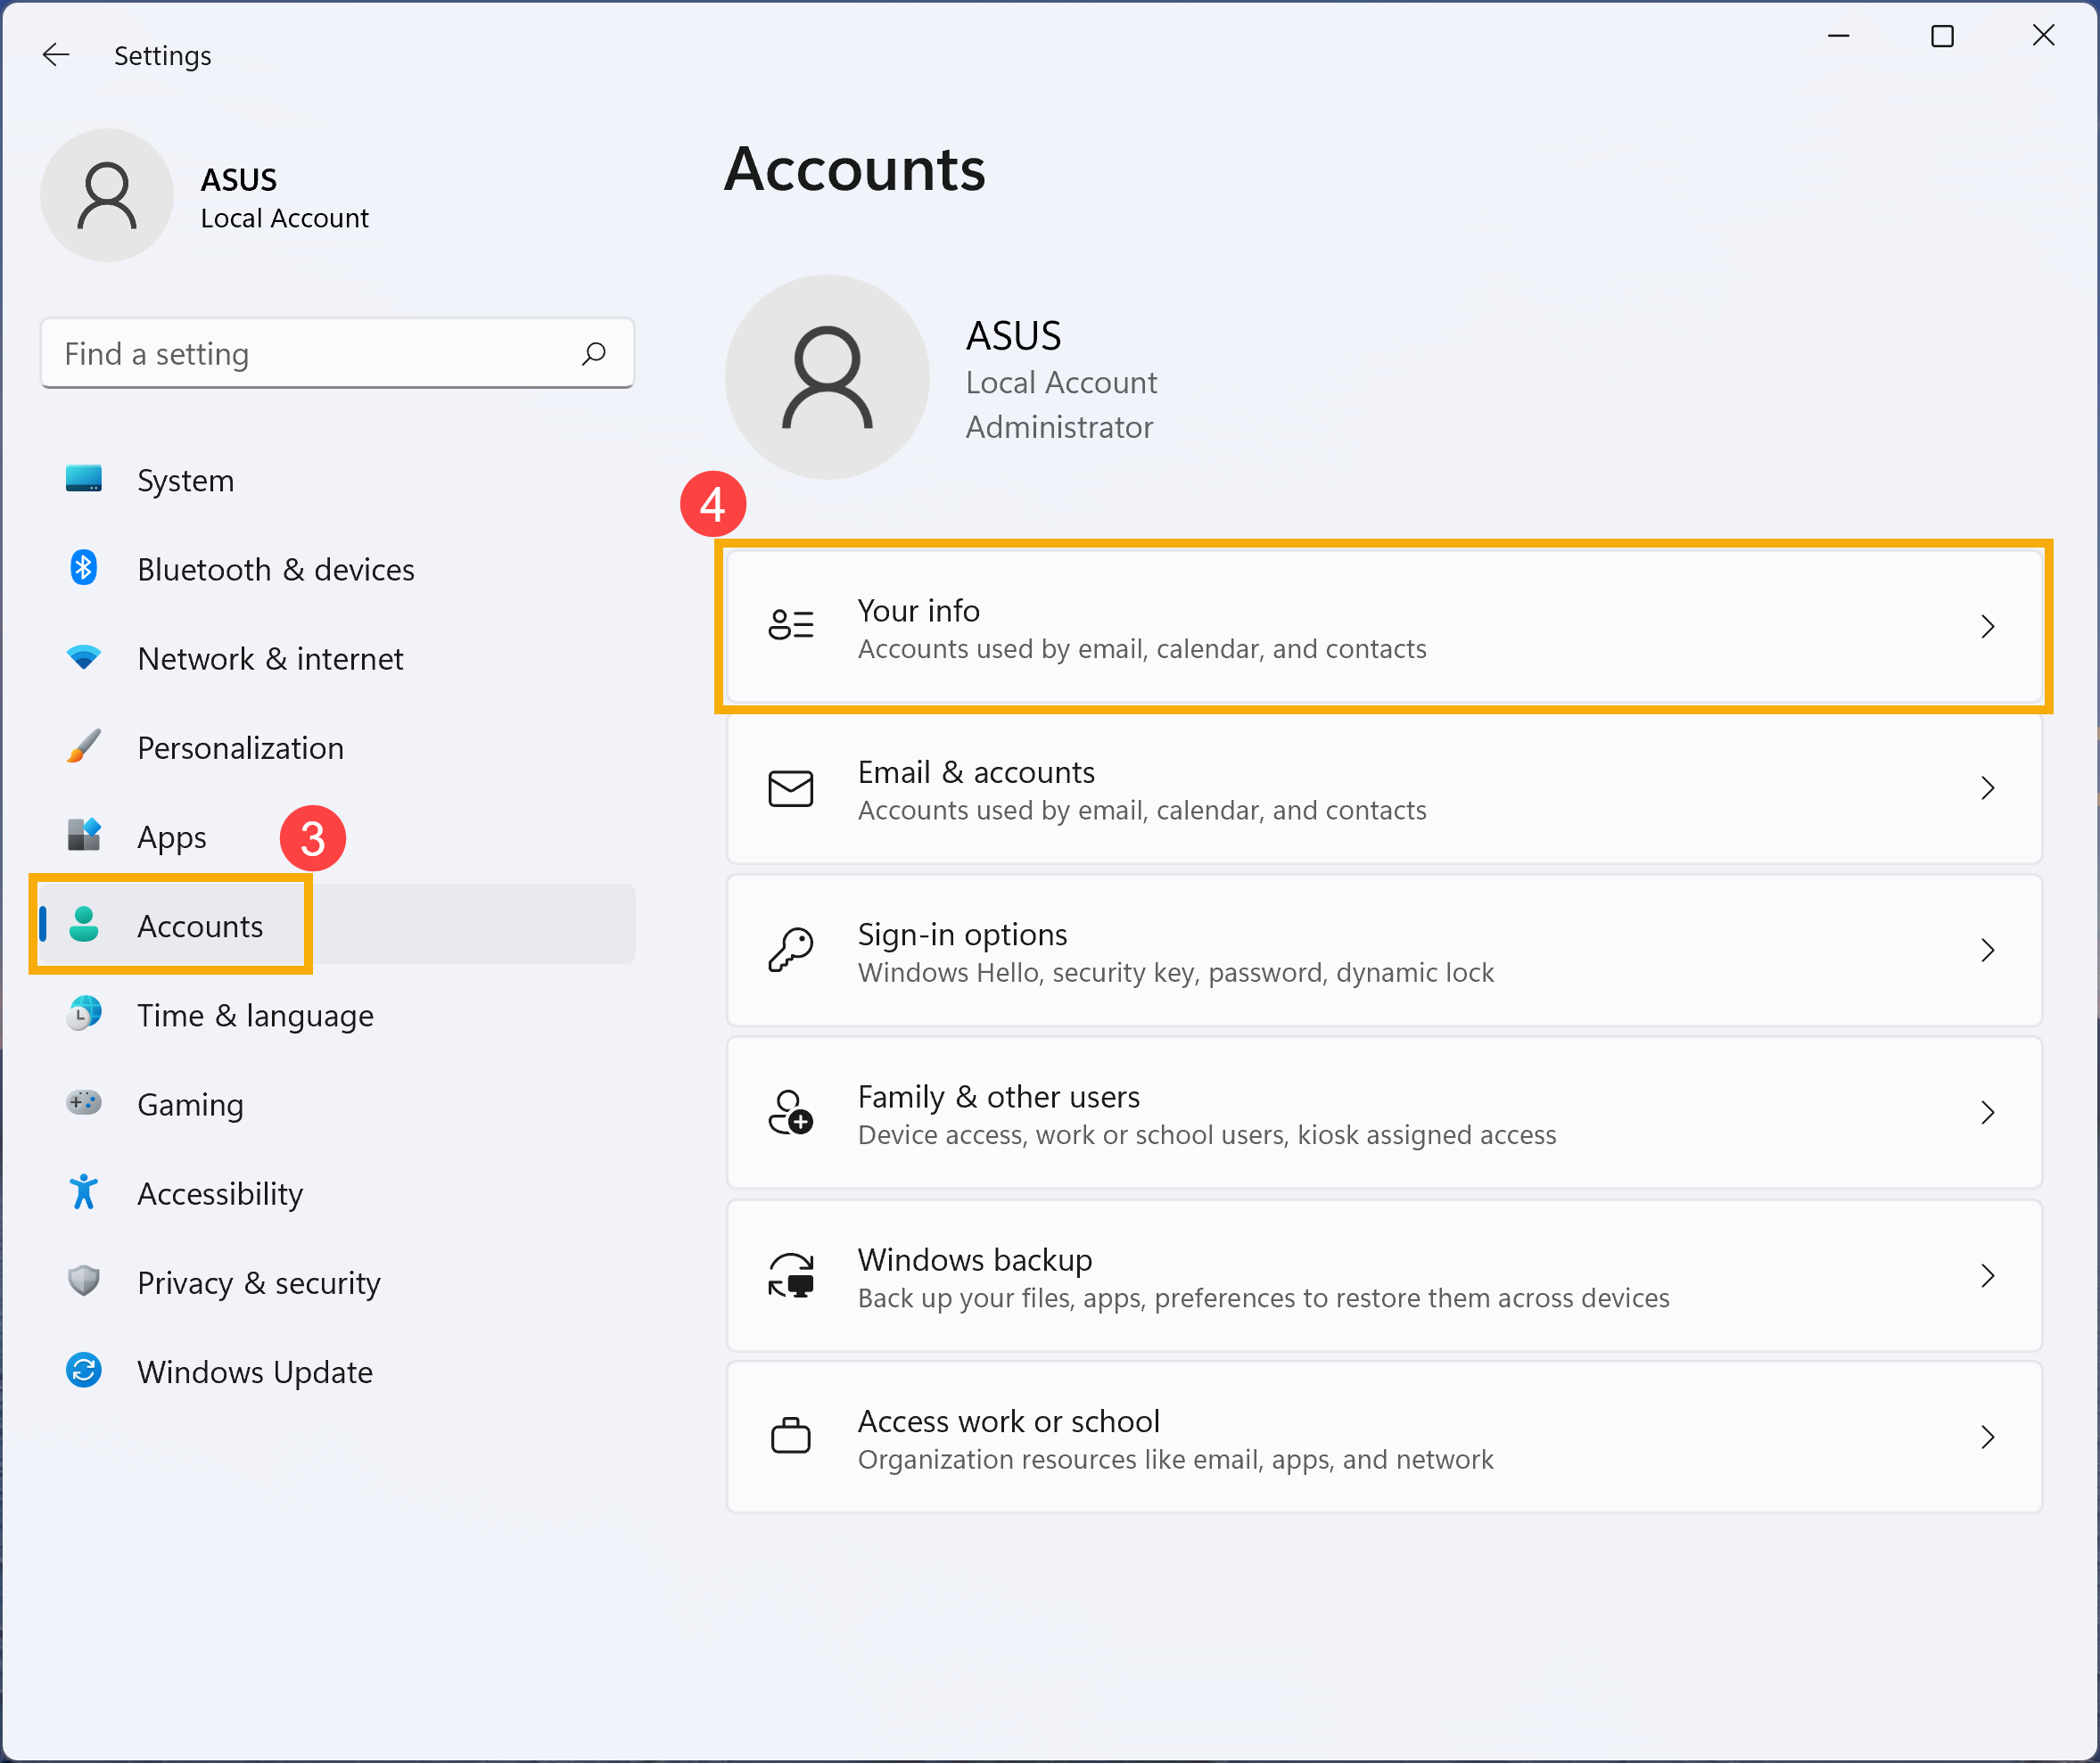
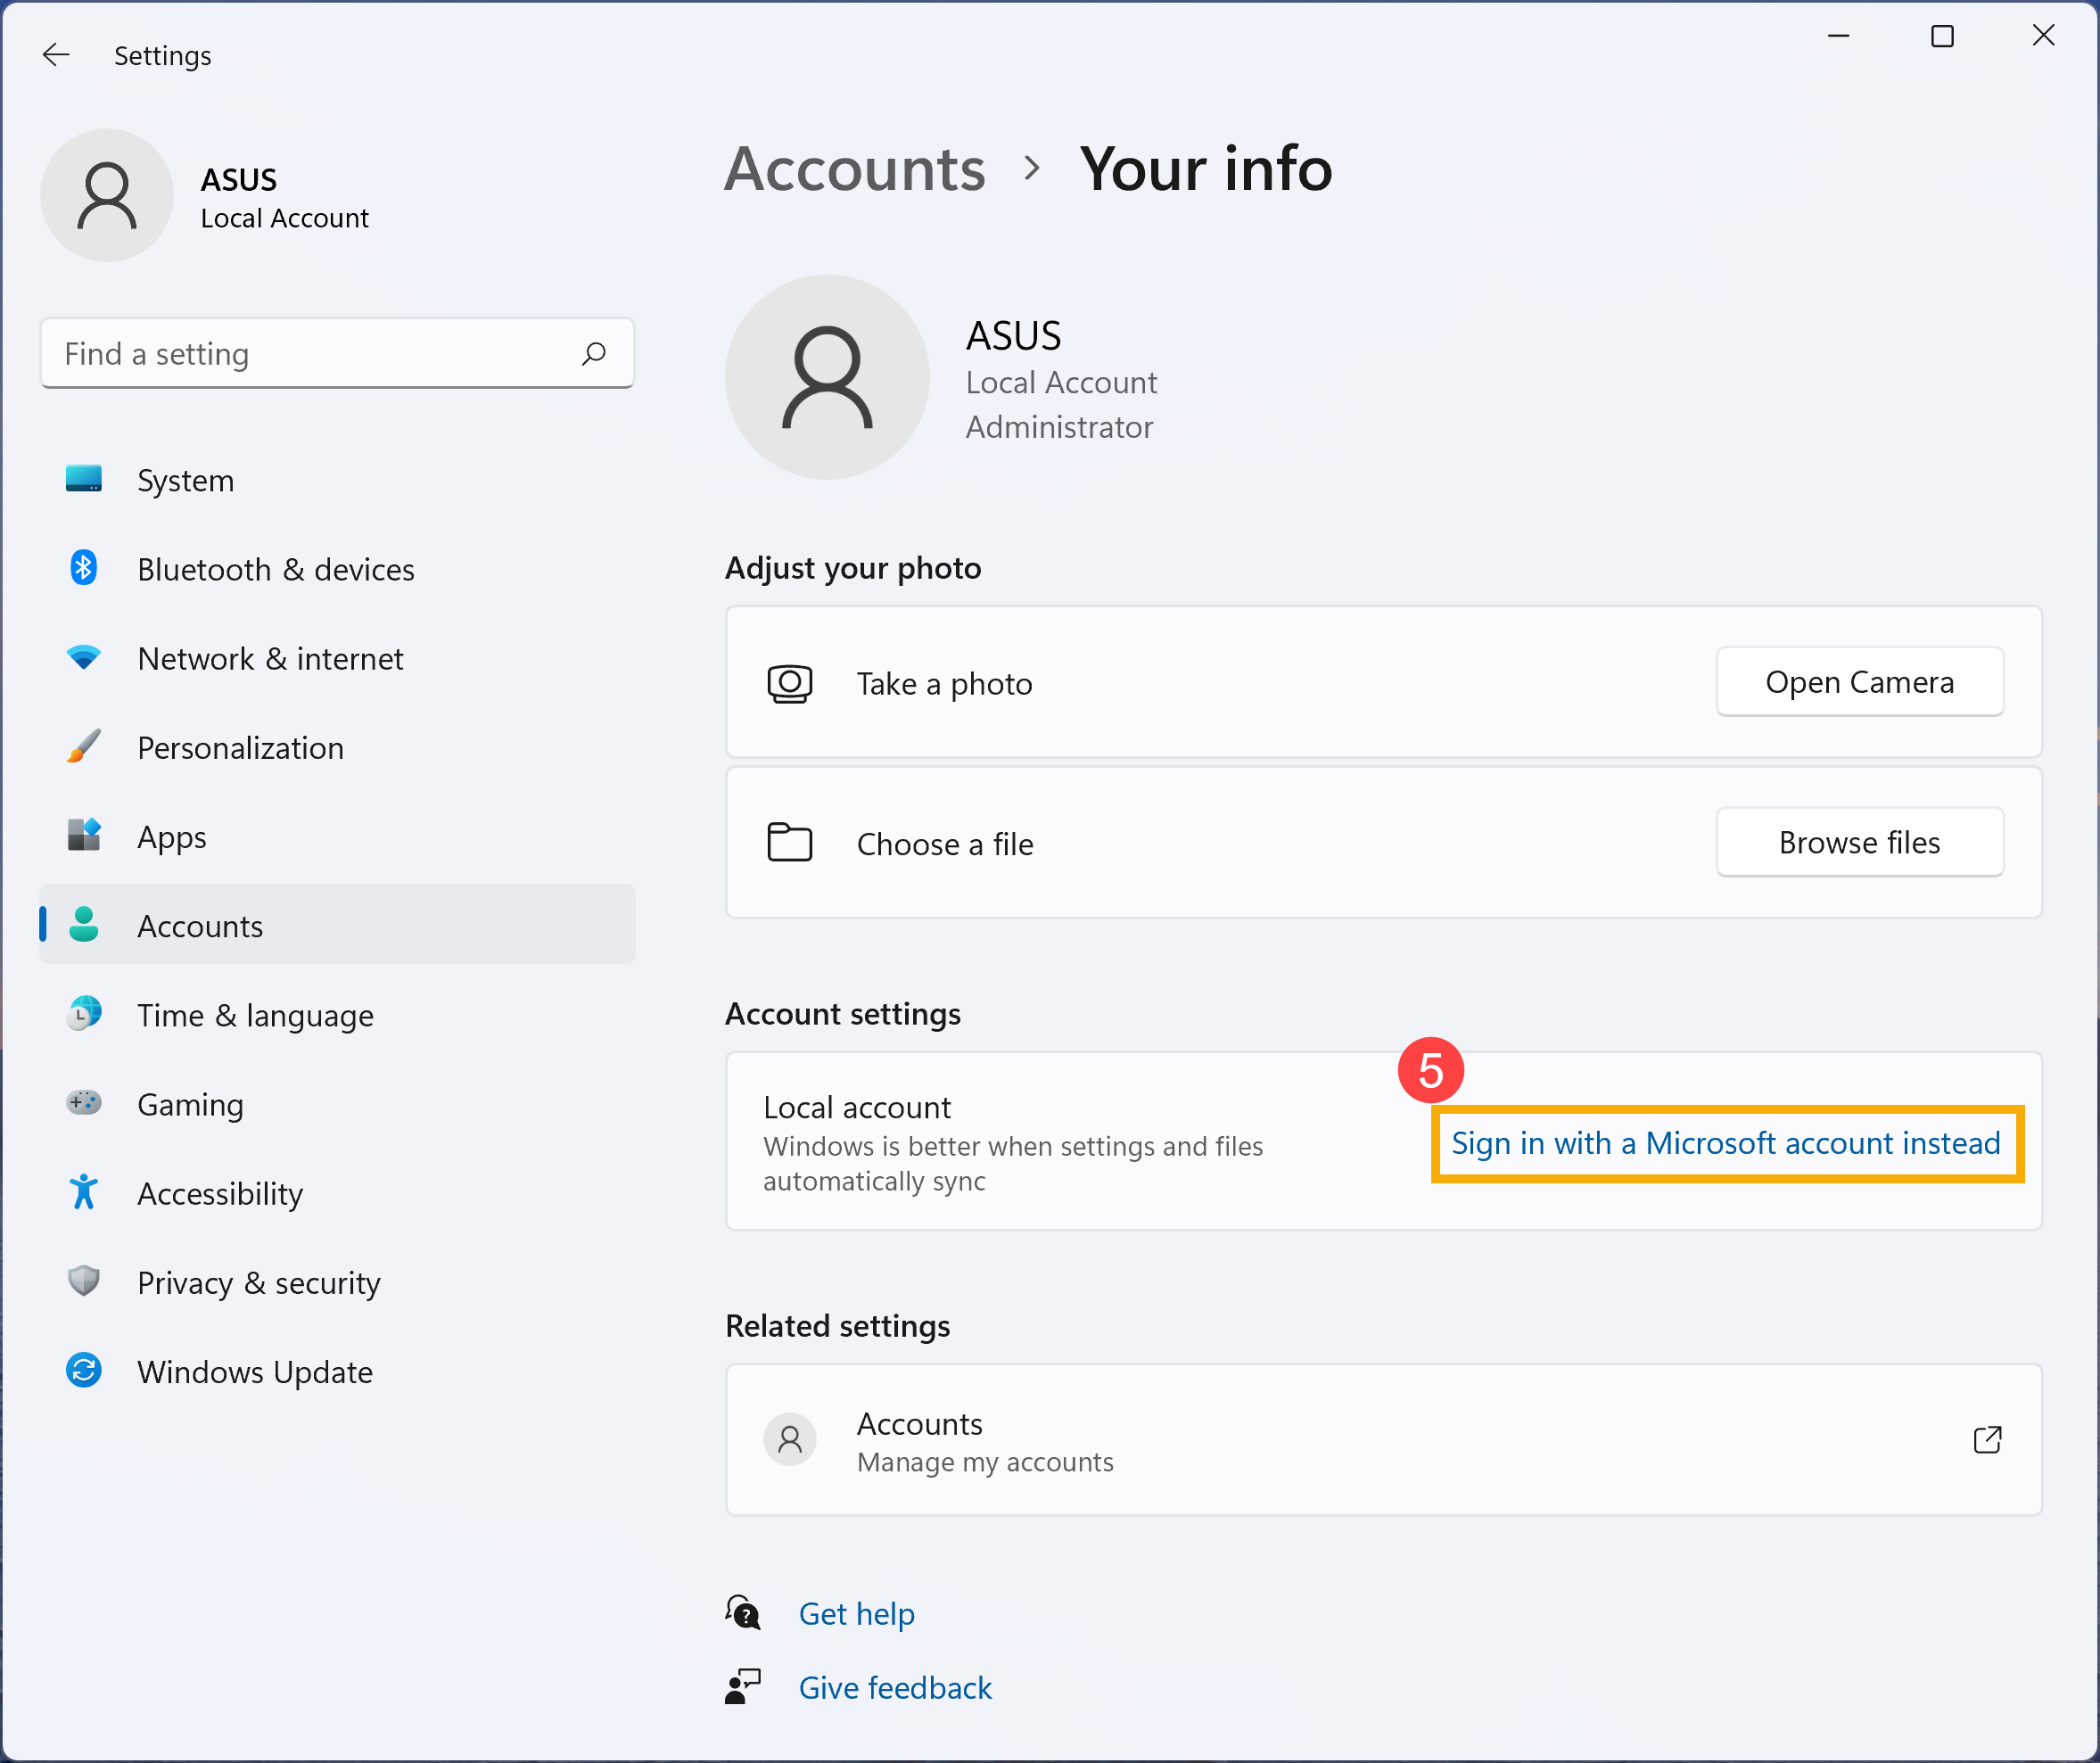
- В параметрах выберите [Учетные Записи] ③, затем выберите [Ваша информация] ④.
- В параметрах учетной записи нажмите [Переключиться на аккаунт Microsoft] ⑤.
- После того, как Вы войдете в свою учетную запись Microsoft, вернитесь к параметрам входа, после чего станет доступна настройка распознавания лиц.
Эта информация была полезной?
Yes
No
- Приведенная выше информация может быть частично или полностью процитирована с внешних веб-сайтов или источников. Пожалуйста, обратитесь к информации на основе источника, который мы отметили. Пожалуйста, свяжитесь напрямую или спросите у источников, если есть какие-либо дополнительные вопросы, и обратите внимание, что ASUS не имеет отношения к данному контенту / услуге и не несет ответственности за него.
- Эта информация может не подходить для всех продуктов из той же категории / серии. Некоторые снимки экрана и операции могут отличаться от версий программного обеспечения.
- ASUS предоставляет вышеуказанную информацию только для справки. Если у вас есть какие-либо вопросы о содержании, пожалуйста, свяжитесь напрямую с поставщиком вышеуказанного продукта. Обратите внимание, что ASUS не несет ответственности за контент или услуги, предоставляемые вышеуказанным поставщиком продукта.
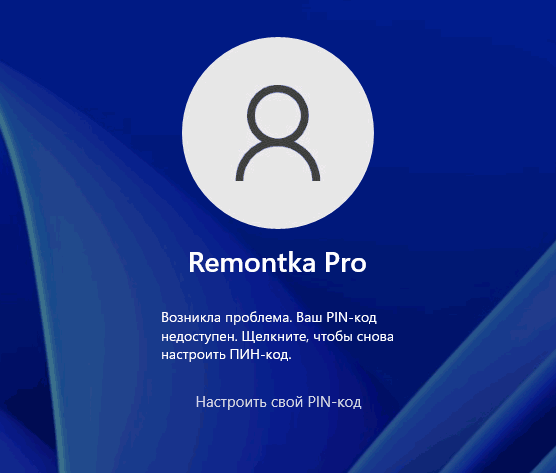
При очередном включении компьютера или ноутбука вас может встретить сообщение: «Возникла проблема. Ваш PIN-код недоступен. Щелкните, чтобы снова настроить ПИН-код». Иногда нажатие «Настроить свой PIN-код» позволяет заново создать его, но чаще вы снова возвращаетесь в это же окно.
В этой пошаговой инструкции подробно о том, что делать, если ПИН-код недоступен, чтобы исправить ситуацию и зайти в Windows 10 или Windows 11.
Решение проблемы, если отображается пункт «Параметры входа»
Если ниже сообщения о том, что ваш PIN-код недоступен есть ссылка «Параметры входа», можно нажать по ней, а затем войти в систему, используя пароль учётной записи Майкрософт, при условии, что вы его помните. Если нет — далее поговорим и о сбросе пароля.
После входа в Windows с паролем, можно начать решать проблемы с ПИН-кодом. Рекомендуемые шаги для рассматриваемого сценария:
- Нажмите правой кнопкой мыши по кнопке «Пуск», выберите пункт «Выполнить», введите services.msc и нажмите Enter.
- Откроется список служб. Найдите в списке «Изоляция ключей CNG» и дважды нажмите по имени службы.
- Если тип запуска службы установлен в «Отключена», измените на «Вручную», примените настройки и перезагрузите компьютер — это должно исправить проблему и описанные далее шаги использовать не требуется.

- Если тип запуска службы установлен правильно (Вручную), попробуйте использовать точки восстановления системы на дату, когда проблемы не было. Об этом в инструкциях Точки восстановления Windows 11, Точки восстановления Windows 10.
- При отсутствии точек восстановления, есть ещё один подход: удалите содержимое системной папки
C:\Windows\ServiceProfiles\LocalService\AppData\Local\Microsoft\NGC
но учитывайте, что это удалит ПИН-коды всех пользователей компьютера. Удалить её в проводнике не получится, вместо этого, запустите командную строку от имени администратора и по порядку введите следующие команды:
takeown /f C:\Windows\ServiceProfiles\LocalService\AppData\Local\Microsoft\NGC /r /d y
icacls C:\Windows\ServiceProfiles\LocalService\AppData\Local\Microsoft\NGC /grant Администраторы:F /t
RD /S /Q C:\Windows\ServiceProfiles\LocalService\AppData\Local\Microsoft\Ngc
MD C:\Windows\ServiceProfiles\LocalService\AppData\Local\Microsoft\Ngc
icacls C:\Windows\ServiceProfiles\LocalService\AppData\Local\Microsoft\Ngc /T /Q /C /RESET
После удаления содержимого папки и перезагрузки компьютера вам могут предложить заново создать ПИН-код, либо его можно будет создать вручную в параметрах учетных записей в пункте «Варианты входа».

Как исправить ошибку «Возникла проблема ПИН-код недоступен», если параметры входа не отображаются
Если выбор варианта входа с паролем вместо ПИН-кода недоступен, можно использовать следующий способ решить проблему (внимание: если проблема возникла после включения опции Диагностический запуск в msconfig, используйте отдельную инструкцию):
- На экране блокировки нажмите по изображенной в правом нижнем углу кнопки «Питания», а затем, удерживая клавишу Shift нажмите «Перезагрузка».
- После перезагрузки вы попадете в среду восстановления Windows 10 или Windows Перейдите в раздел Поиск и устранение неисправностей — Дополнительные параметры.
- Здесь в первую очередь я рекомендую попробовать использовать пункт «Восстановление системы» — при наличии точек восстановления вы быстро сможете вернуть компьютер к состоянию, когда вход с ПИН-кодом работал исправно.

- Если предыдущий вариант не подошел, откройте пункт «Командная строка», а затем введите команду regedit и нажмите Enter.
- Откроется редактор реестра. В нём выберите раздел HKEY_LOCAL_MACHINE, а затем в меню выберите «Файл» — «Загрузить куст» и укажите путь к файлу
C:\Windows\System32\config\SYSTEM
Внимание: буква системного диска в среде восстановления может отличаться, кроме этого, может быть несколько дисков, содержащих такую папку. Убедитесь, что файл открывается с того диска, где у вас по факту установлена Windows (определить можно, например, по размеру этого диска).

- Появится запрос о назначении имени для загруженного куста — задайте любое удобное вам. В результате внутри раздела реестра HKEY_LOCAL_MACHINE появится подраздел с заданным вами именем.
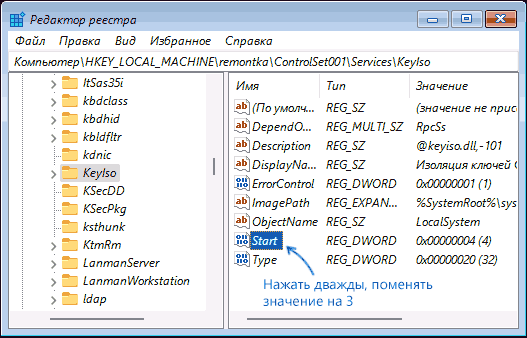
- В этом подразделе перейдите в
ControlSet001\Services\KeyIso
и обратите внимание на значение параметра с именем Start в правой панели. Если его значение отличается от 3, дважды нажмите по параметру, установите значение 3, примените настройки. Если значение уже такое, перейдите к 10-му шагу.

- Выберите подраздел реестра с заданным вами на 6-м шаге именем, а затем в меню редактора реестра выберите в меню «Файл» — «Выгрузить куст» и подтвердите выгрузку сделанных изменений.
- Закройте редактор реестра, командную строку и перезагрузите компьютер — ПИН-код Windows 10 или Windows 11 должен работать.
- Если на 7-м шаге значение параметра уже равно 3, можно закрыть редактор реестра, а затем удалить ПИН-код в командной строке, используя по порядку следующие команды (при необходимости измените букву диска C на актуальную букву системного раздела диска):
takeown /f C:\Windows\ServiceProfiles\LocalService\AppData\Local\Microsoft\NGC /r /d y
icacls C:\Windows\ServiceProfiles\LocalService\AppData\Local\Microsoft\NGC /grant Администраторы:F /t
RD /S /Q C:\Windows\ServiceProfiles\LocalService\AppData\Local\Microsoft\Ngc
MD C:\Windows\ServiceProfiles\LocalService\AppData\Local\Microsoft\Ngc
icacls C:\Windows\ServiceProfiles\LocalService\AppData\Local\Microsoft\Ngc /T /Q /C /RESET


После этого можно закрыть командную строку, перезагрузить компьютер. В результате вам будет предложено либо зайти с паролем, либо создать ПИН-код сразу после ввода пароля учетной записи Майкрософт.
Сброс пароля, удаление ПИН-кода и перевод учетной записи в «Локальную»
Если предыдущие способы не помогают попасть в систему, либо вы не помните пароль учётной записи Майкрософт, вы можете использовать LiveCD для того, чтобы сбросить пароль учетной записи, конвертировать её из учетной записи Майкрософт в локальную, что автоматически отключит использование ПИН-кода для этого аккаунта.
- Используя какой-либо другой компьютер, загрузите образ ISO WinPE Sergei Strelec с сайта sergeistrelec.ru и запишите его на флешку, например, с помощью Rufus.
- Загрузитесь с созданной флешки (может потребоваться отключить Secure Boot в BIOS) на компьютере, где ПИН-код недоступен, в меню «Пуск» перейдите в раздел «Программы WinPE» — «Сброс паролей» и запустите утилиту Windows Login Unlocker.

- В списке учетных записей нажмите правой кнопкой мыши по учетной записи, в которую не получается войти и выберите пункт «Reset password» (для сброса/удаления пароля) или «Change password» (для изменения пароля).

- Появится запрос, с сообщением о том, что это учетная запись Майкрософт и она будет преобразована в локальную учетную запись — нажмите Ок.


После выполнения указанных действий вы получите сообщение о том, что пароль был успешно сброшен, утилиту можно закрыть и загрузиться с обычного жесткого диска или SSD — без пароля или с установленным вами паролем.
Если создание загрузочной флешки в текущей ситуации невозможно, есть ещё один вариант: используйте 2-й способ из статьи Как включить скрытую учетную запись Администратора в Windows 11 (подойдет и для Windows 10), затем зайдите в эту учетную запись и уже из неё выполняйте управление пользователями для исправления проблемы.
While setting up a new Windows 11/10 OS, it’s mandatory to create a Hello PIN as well. You may discontinue using the same after the first login to your computer. Several users have reported experiencing different Windows Hello Error codes while re-creating the pin on their devices. Well, in this guide, we discuss all such known issues that occur from time to time along with doable workarounds.
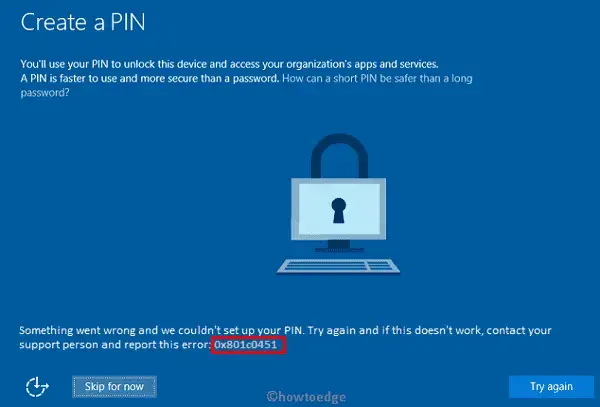
When one encounters a hello pin error, it accompanies a bug check value like – 0x801c004d, 0x90280013, etc. The error message reads – “Something went wrong, and we couldn’t set up your PIN”. Each such issue is unique in nature and requires separate solutions like – Sign-out/Sign-in, Reboot PC, Unjoin/Rejoin Azure AD, etc. Let’s explore these fixes in detail –
Read Also – How to fix Windows Hello error 0x801c004d in Windows 10
To solve the Windows Hello PIN error on your computer, use the below workarounds –
1] Reboot your PC
Many a time, Windows Hello Errors occur due to system glitches, so you can solve them by restarting your device. Here is the list of such Windows PIN errors that you can fix with a simple PC reboot –
- 0x801C000F – The system requires a reboot.
- 0x80090031 – If the system reboot doesn’t solve the issue, see solution #4.
2] Sign Out then Re-login to your Microsoft Account
There are a few Windows hello error codes that get solved by signing out and then re-logging into your Microsoft account. Here is the complete list –
| Error Codes | Reasons |
| 0x801C0010 | The AIK certificate is not valid or trusted. |
| 0x801C0011 | The attestation statement of the transport key is invalid. |
| 0x801C0012 | The Discovery request is not in a valid format. |
| 0x801C03E9 | The server response message is invalid |
| 0x801C03EB | Server response HTTP status is not valid |
| 0x801C03EC | Unhandled exception from server. |
| 0x801C03EE | Attestation failed. |
| 0x801C03EF | The AIK certificate is no longer valid. |
| 0x801C044E | Failed to receive user credentials input. |
3] Unjoin the device from Azure AD then rejoin
If you have connected your device with an Azure AD, you may encounter hello pin errors from time to time. To solve such issues, you should disable/remove the azure account on your computer and restart your PC. After the next login, you may rejoin the azure account (stopped earlier). To unjoin your system from Azure AD, browse to the following location, and select Disconnect from the organization.
Settings > System > About
Doing this indeed fixes several Windows hello errors which are as follows –
| PIN Error Codes | Causes |
| 0x801C044D | The authorization token does not contain a device ID. |
| 0x80090005 | NTE_BAD_DATA |
| 0x8009000F | The container or key already exists. |
| 0x80090011 | The container or key was not found. |
Note: There are a few Windows hello error codes that occur due to multiple reasons. They are as follows –
i] 0x801C03ED:
This error appears due to any one of the following reasons –
- The server receives an invalid request.
- Failed to read one or more objects.
- Missing Token inside the Authorization header.
- “ProvisionKey” requires multi-factor authentication, however, none is performed.
Sol – Sign out of your Microsoft account then re-login. If the error persists even after this, unjoin the device from Azure Active Directory (Azure AD) and rejoin.
ii] 0x801C03EA:
This occurs when the server fails to authenticate either user or the device. To solve this, check whether you own a valid token or the user has permission to register for Windows Hello for Business keys.
iii] 0x801C0015:
You must be having a new computer and haven’t yet joined an active azure AD. Just join the domain directory and you are good to create Windows Hello PIN.
iv] 0x801C000E:
One may encounter this error only when there reaches an upper limit of the registration quota. To fix this, either unjoin a few existing azure accounts or increase the number of devices per user.
4] TPM Issues while creating a PIN
A few windows hello error occurs when the TPM setup is either outdated or not complete. You can solve such hello pin errors simply by clearing the TPM security processor firmware. Here is the list of hello error codes that occur due to TPM issues –
- 0x80090029 – This occurs when the TPM setup is not complete on Windows 10 PC.
- 0x80090031 – This displays an error message that reads – “NTE_AUTHENTICATION_IGNORED”.
- 0x80090035 – If the Business policy of an organization makes TPM mandatory, however, you don’t have this program on your computer.
Note: In most of the above cases, a simple sign-out and sign-back-in will resolve the issue. However, if not, you must reset the TPM or run “clear TPM” using PowerShell.
How to Clear TPM on your device
To clear TPM on your Windows 10 Machine, use the below steps –
- Navigate to the following path –
Settings (Win+I) > Update & Security > Windows Security
- Head over to the right pane, scroll down and click on Device Security.
- When Windows Security launches, select Security processor details under the Security Processor section.
- Next, click Security processor troubleshooting thereafter clear TPM.

That’s it, this will reset your security processor to its default settings. Just make sure to Reboot your PC after successfully completing the above steps.
Note: Alternatively, you can use PowerShell to perform the above task –
- Make right-click on the Windows icon and select Windows PowerShell (Admin).
- On its blue screen, copy/paste the below code and hit Enter.
Clear-Tpm

The above command line will reset the Trusted Platform Module to its default state. Additionally, this will also remove the owner authorization value and any keys stored inside the TPM.
5] Configuration Issues
If the federation provider configuration is set to empty, this may also lead to Windows Hello PIN errors. If that’s the case, all you need is to go to the client configuration webpage and take the below actions –
- 0x801C0016 – The file shouldn’t remain empty.
- 0x801C0018 – The
clientconfigelement must contain a valid URL.
6] Other Hello PIN Errors
There are a few hello PIN errors that we can’t categorize as they appear due to different reasons. Below, we discuss such bugs along with their proper solutions –
1. x801C0003: The user is not authorized to enroll
Since the user is denied access to enroll, check whether the user actually owns the permission or not. If yes, contact the IT admin to complete the set-up process.
2. 0x8009002A: NTE_NO_MEMORY
The bug appears owing to a shortage of memory. To fix this, either close any/all large applications running in the background or increase the overall RAM.
3. 0x80090036: User canceled an interactive dialog
Just try to re-run the setup and the error will fade away.
4. 0x8009002d: There’s some system glitch, skip for now and try again in a few minutes.
7] Contact Microsoft Support Team
There are a few Windows hello error codes to which Microsoft hasn’t yet provided any exact solution. If you ever encounter such issues, it’s better to contact the support team for a fix. Here’s is the complete list of such PIN errors –
| Hello Error Codes | Reasons |
| 0X80072F0C | Unknown |
| 0x80070057 | An invalid parameter or argument is passed. |
| 0x80090020 | NTE_FAIL |
| 0x80090027 | The caller provided the wrong parameter. If third-party code receives this error, they must change their code. |
| 0x8009002D | NTE_INTERNAL_ERROR |
| 0x801C0001 | ADRS server response is not in a valid format. |
| 0x801C0002 | The server failed to authenticate the user. |
| 0x801C0006 | Unhandled exception from server. |
| 0x801C000B | Redirection is needed and redirected location is not a well-known server. |
| 0x801C000C | Discovery failed. |
| 0x801C0013 | The tenant ID is not found in the token. |
| 0x801C0014 | User SID is not found in the token. |
| 0x801C0019 | The federation provider-client configuration is empty. |
| 0x801C001A | The DRS endpoint in the federation provider-client configuration is empty. |
| 0x801C001B | The device certificate is not found. |
| 0x801C03F0 | There is no key registered for the user. |
| 0x801C03F1 | There is no UPN in the token. |
| 0x801C044C | There is no core window for the current thread. |
That’s it, we hope this article helps to troubleshoot different Hello Errors that occur from time to time while setting a PIN to your Windows 11 or 10 device. If you have any queries related to this article, drop a message in the below comment box.