
Last Updated :
30 Nov, 2021
Redis is Remote Dictionary Server. It is an open-source fast performance data structure store. It is used for caching, session management & gaming etc. Redis is basically installed in Linux only. But by using other method we can install it in Windows also. But before that you need to install PHP in your device.
Installing Redis for PHP on Windows:
Follow the below steps to install Redis for PHP on Windows:
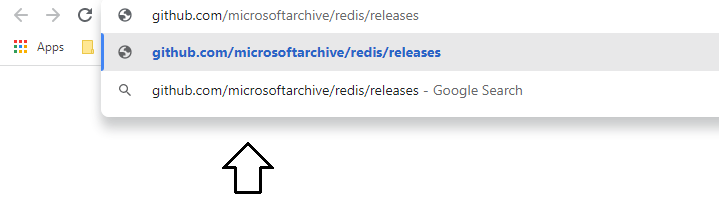
Step 1: At first, browse to this link
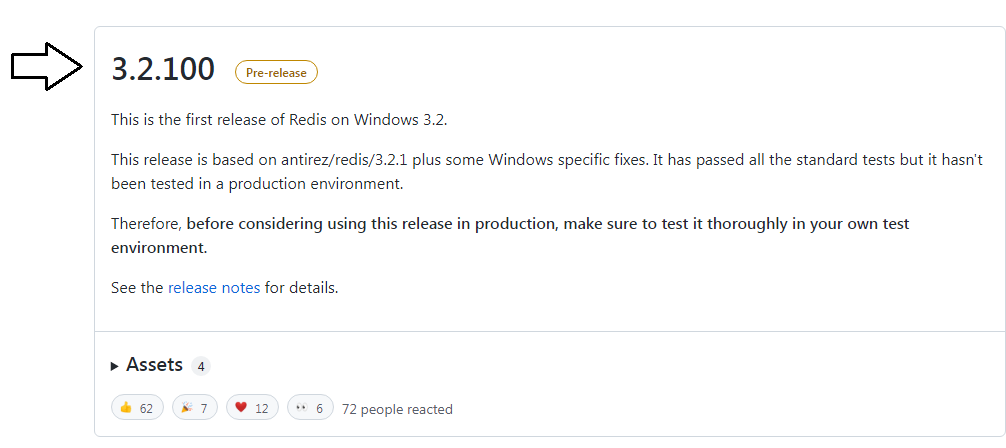
Step 2: Click on 3.2.100.
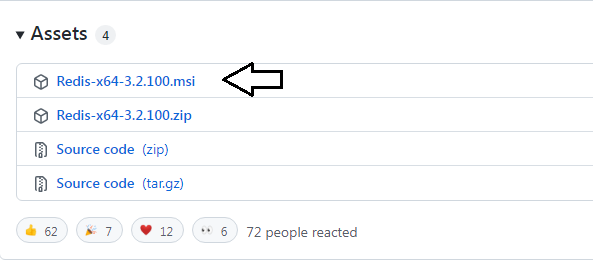
Step 3: Click on the link Redis-x64-3.2.100.msi.
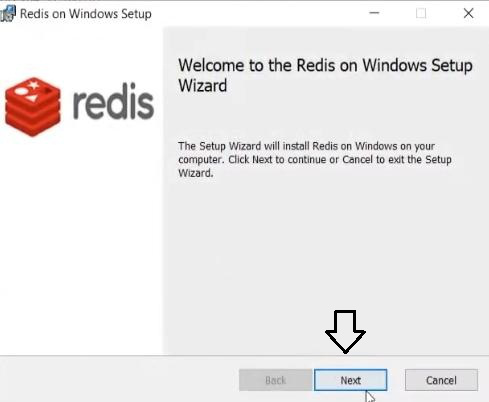
Step 4: Start Installing & Click Next.
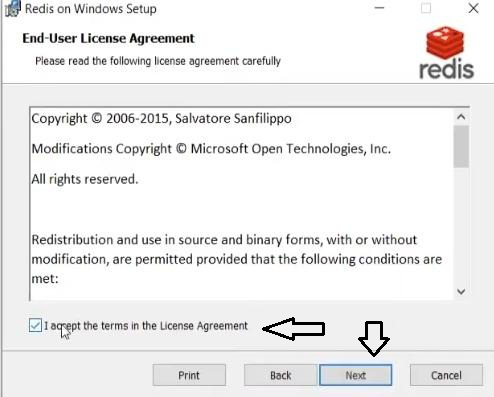
Ste 5: Accept The terms & licenses.
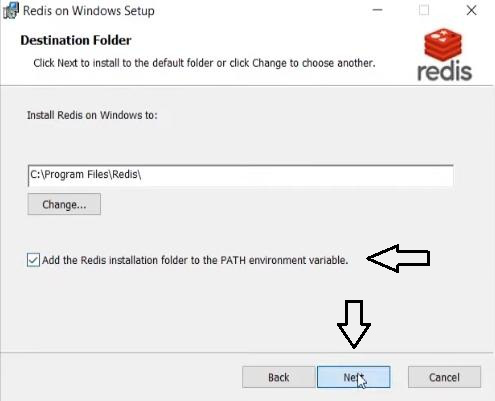
Step 6: Click on the check box to add the Redis installation folder path automatically.
Step 7: Click on Next.
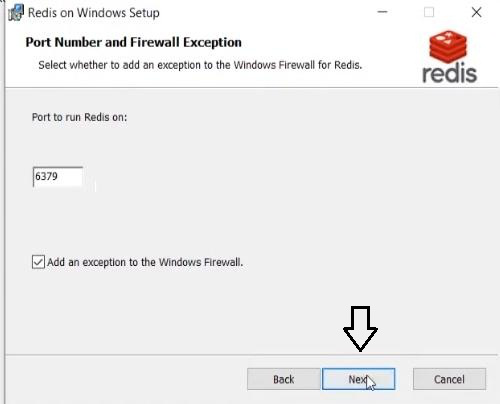
Step 8: Click on Next.
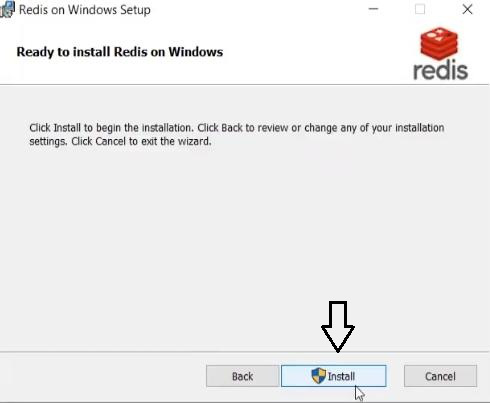
Step 9: Click On Install.
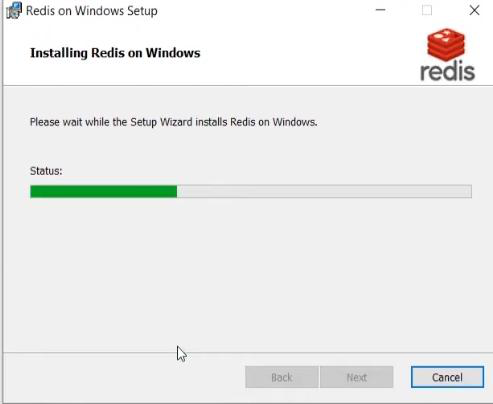
Step 10: Wait till installation is finished.
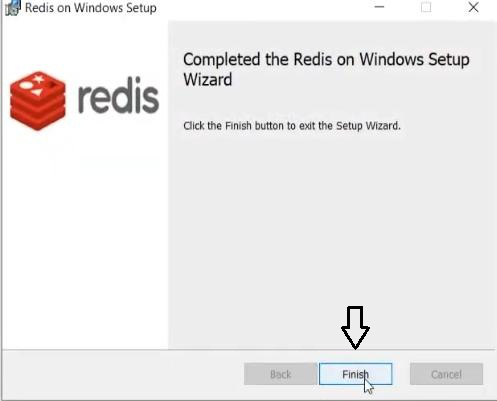
Step 11: Click Finish
Step 12: Open Command Prompt. Then run the below command:
redis-server
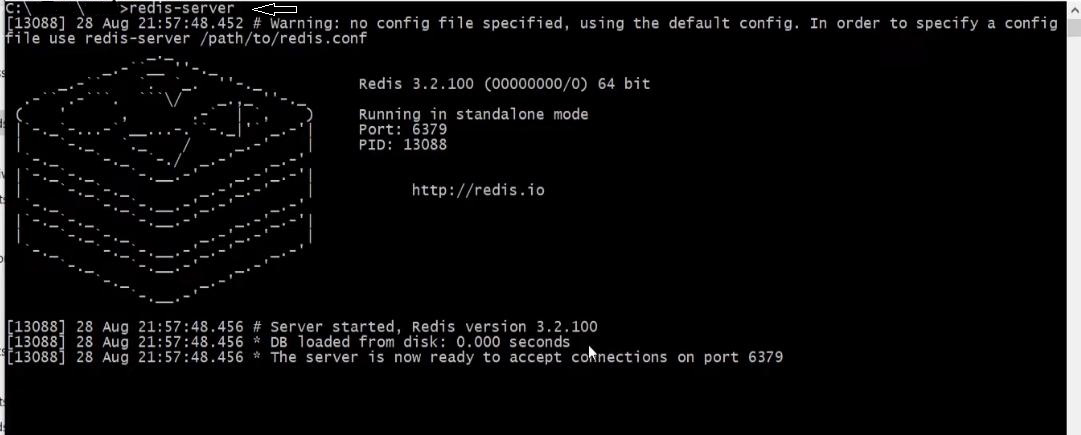
Hence Redis installation is successful.
Provide feedback
Saved searches
Use saved searches to filter your results more quickly
Sign up
Appearance settings
Learn how to easily install and use the Redis extension locally in XAMPP to communicate with Redis Servers.
I’m sure you may have already heard about Redis, the in-memory data structure store, used as a database and cache. Sooner or later, if you ever work with a project built with PHP that handles a significant amount of traffic and may require horizontal scaling, you will have to work with Redis. Of course in a local environment, it would be great to work as well with Redis, so you don’t have to create huge conditionals to check if it’s available in the current environment and run some logic if it isn’t. It would be simpler to have Redis available locally as well, just to make the whole project work as usual in your workstation.
In this article, I will explain how to easily install the Redis extension for PHP in your XAMPP installation in Windows.
Pre-installation notes
You need to know the following information about the PHP distribution that you are currently using in XAMPP:
| Name | Default value |
| Architecture (PHP) | x64 |
| Thread Safety |
Enabled TS: Stands for Thread Safety Enabled NTS: Stands for Thread Safety Disabled |
You can get those values with the function phpinfo() of PHP within an empty script:
<?php

phpinfo();
Once you know these values, you should be able to follow the rest of the tutorial.
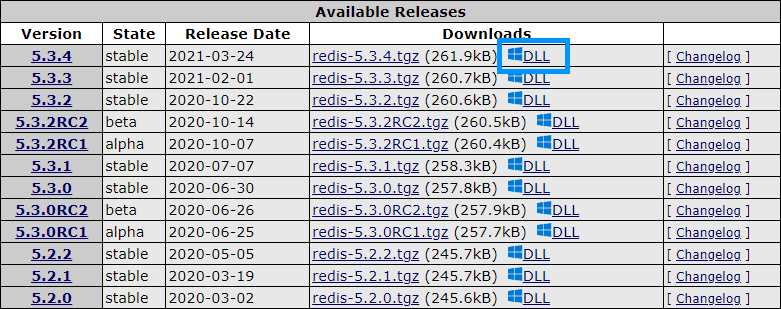
1. Download Redis DLL
The first thing you need is the dynamic link library of Redis, which fortunately for us is already compiled and available in the PECL repository of PHP on this website. You may select the version that fits your needs, in my case, I will use the latest stable version as I’m using PHP 8, click on the DLL link with the windows icon:
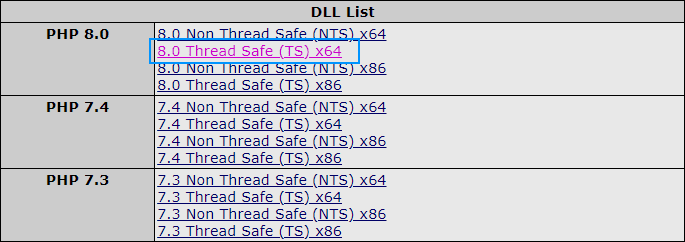
Then a new window will load, in this page scroll to DLL List and click on the right version for your PHP version with correct architecture (of XAMPP, not your operative system) and the Thread Safe in case that it’s enabled in your distribution). In my case, I’m using the latest version of XAMPP with PHP 8.0 of 64 bits with Thread Safety Enabled, so in my case, I will download the following one:
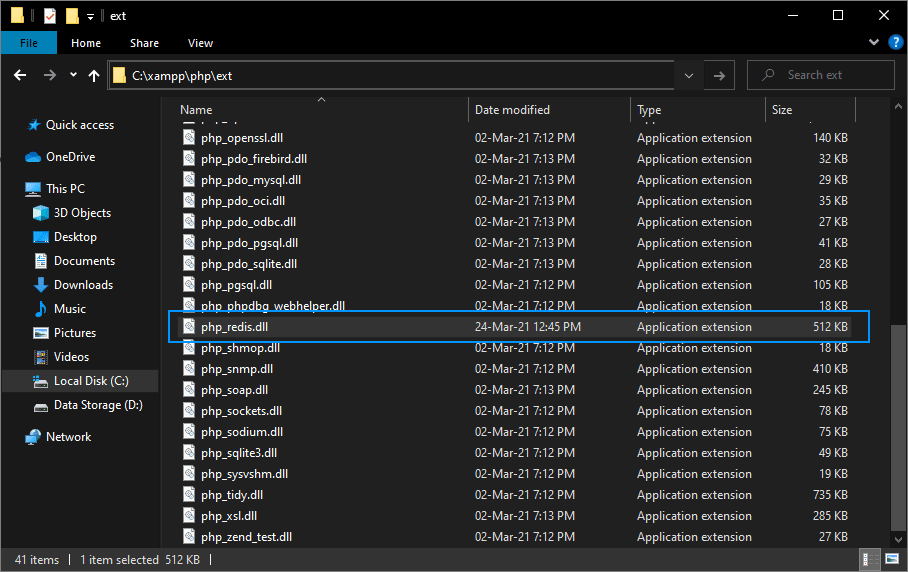
This will start the download of a ZIP file. Of our interest, is the php_redis.dll file that is included in it, so keep it at hand as you will need the file in the next step.
2. Store DLL in ext directory and enable the extension in php.ini
Now, from the downloaded zip, move the php_redis.dll file to the ext directory of PHP in your XAMPP directory (C:\xampp\php\ext):
This will allow us to use the extension in PHP, however, we need to enable it as well. Open the php.ini (C:\xampp\php\php.ini) file and enable the extension adding the following new line under the extensions area:
extension=redisYou won’t find the mentioned line in the configuration file, so that’s why you need to write it by yourself. Save the changes of the ini file and restart Apache, so the changes will apply once it starts again.
3. Testing if the extension is enabled
And that’s it! After restarting apache and enabling the extension in the php.ini, you should be able to use Redis with PHP. You can easily verify if the extension is enabled either by checking in your phpinfo():

Or alternatively, run some code that uses Redis in case that you have a server running Redis through docker locally or a real Redis server, for example, the following code should succeed and print the username «sdkcarlos»:
try {
    // Create a Redis Instance
    $redis = new \Redis();

    // Try to connect to a redis server
    // In this case within the host machine and the default port of redis
    $redis->connect('127.0.0.1', 6379);

    // Define some Key
    $redis->set('user', 'sdkcarlos');

    // Obtain value
    $user = $redis->get('user');

    // Should Output: sdkcarlos
    print($user);
} catch (Exception $ex) {
    echo $ex->getMessage();
}
Happy coding ❤️!
Install Redis & Configure it with WinSW
1. Install PHP 8.2 Redis Extension
Click Here to download PHP 8.2 NTS x64 zip file.
- Unzip the php-redis zip file, a folder will be created, go inside the folder, copy the php_redis.dll file and paste it in C:\php8.2\ext. (C:\php\ext incase of Apache WebServer).
- Now enable php redis extension in php.ini configuration located in C:\php8.2. (C:\php incase of Apache WebServer).
- Now go to Server Manager, open IIS Server and restart it. (or restart Apache incase of Apache WebServer)
2. Install Redis
Click Here to download last recent release of Redis.

Execute the installer to perform the required installation steps
- Accept the terms in the License agreement.
- Add the Redis installation folder to the PATH environment variable.

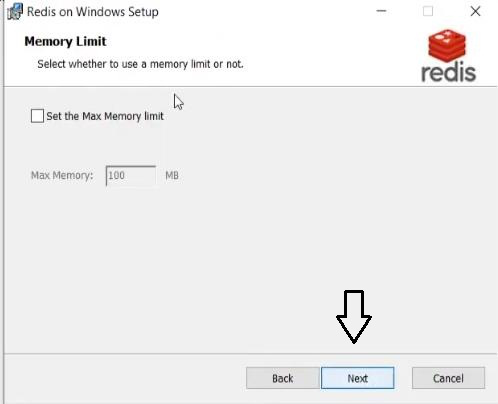
- Set the Max Memory Limit from 300-500 MB.
The Redis installation is finished.
- Now go to windows menu > Run > Services, This can be done by following shortcut win+R, type services.msc & click OK, it will open a new Services tab.
- Find Redis right click on it & go to Properties > Recovery a new tab will open.
- Change first failure, second failure & subsequent failure from Take No Action to Restart the Service & click OK.
Redis has been successfully installed, this can be confirmed in Command Prompt by typing redis-cli, a loopback address will be shown in the Command Prompt.
Install WinSW Service
Download WinSW Config File.
- IIS
- Apache
Unzip the WinSW-{version}.zip file.
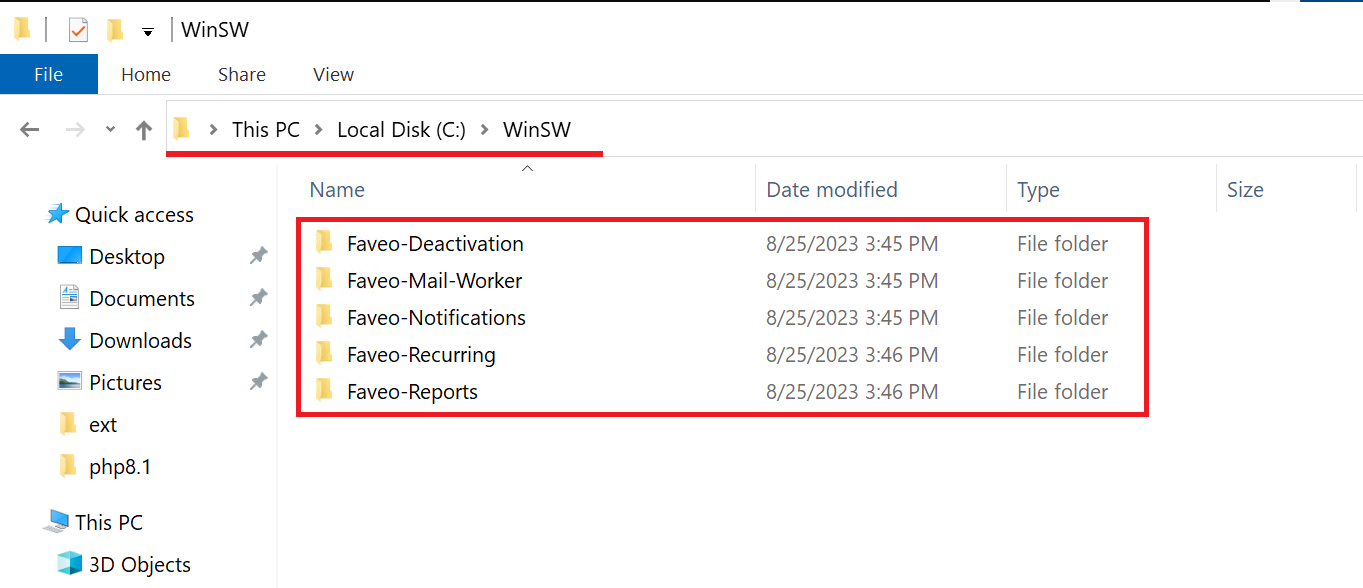
Go inside the folder & copy the WinSW folder & paste it in C:\ .
4. General Instructions to Create WinSW Services
NOTE: These are the General Instructions to create WinSW Services for Faveo. The actual ones are listed below as Faveo-Mail-Worker, Faveo-Recurring, Faveo-Reports, Faveo-Notifications & Faveo Deactivation.
Go to Command Prompt and configure WinSW-SERVICE by typing the following commands. (Faveo-Mail-Worker, Faveo-Recurring, Faveo-Reports, Faveo-Notifications & Faveo-Deactivation are to be configured in actual).
- Install your application as a service using the following command:
This will register your application as a Windows service.
Verifying the Installation
After installing the service, you can use standard service management commands to control it. For example:
- Start the service:
- Checks the status of the service.
- Stop the service:
- Restart the service:
Uninstalling a Service
If you need to remove the service:
Uninstall the service using the following command:
Follow the below steps to create WinSW Services for Faveo-Mail-Worker, Faveo-Recurring, Faveo-Reports, Faveo-Notifications & Faveo Deactivation.
- FAVEO WORKER
Open a Command Prompt window with administrator privileges.
Navigate to the directory containing the WinSW executable and your application files using the cd command.
cd C:\WinSW\Faveo-Mail-Worker
Install your application as a service using the following command:
Start the service:
- FAVEO RECURRING
Open a Command Prompt window with administrator privileges.
Navigate to the directory containing the WinSW executable and your application files using the cd command.
cd C:\WinSW\Faveo-Recurring
Install your application as a service using the following command:
Start the service:
- FAVEO REPORTS
Open a Command Prompt window with administrator privileges.
Navigate to the directory containing the WinSW executable and your application files using the cd command.
cd C:\WinSW\Faveo-Reports
Install your application as a service using the following command:
Start the service:
- FAVEO NOTIFICATIONS
Open a Command Prompt window with administrator privileges.
Navigate to the directory containing the WinSW executable and your application files using the cd command.
cd C:\WinSW\Faveo-Notifications
Install your application as a service using the following command:
Start the service:
- FAVEO DEACTIVATYE AGENTS
Open a Command Prompt window with administrator privileges.
Navigate to the directory containing the WinSW executable and your application files using the cd command.
cd C:\WinSW\Faveo-Deactivation
Install your application as a service using the following command:
Start the service:
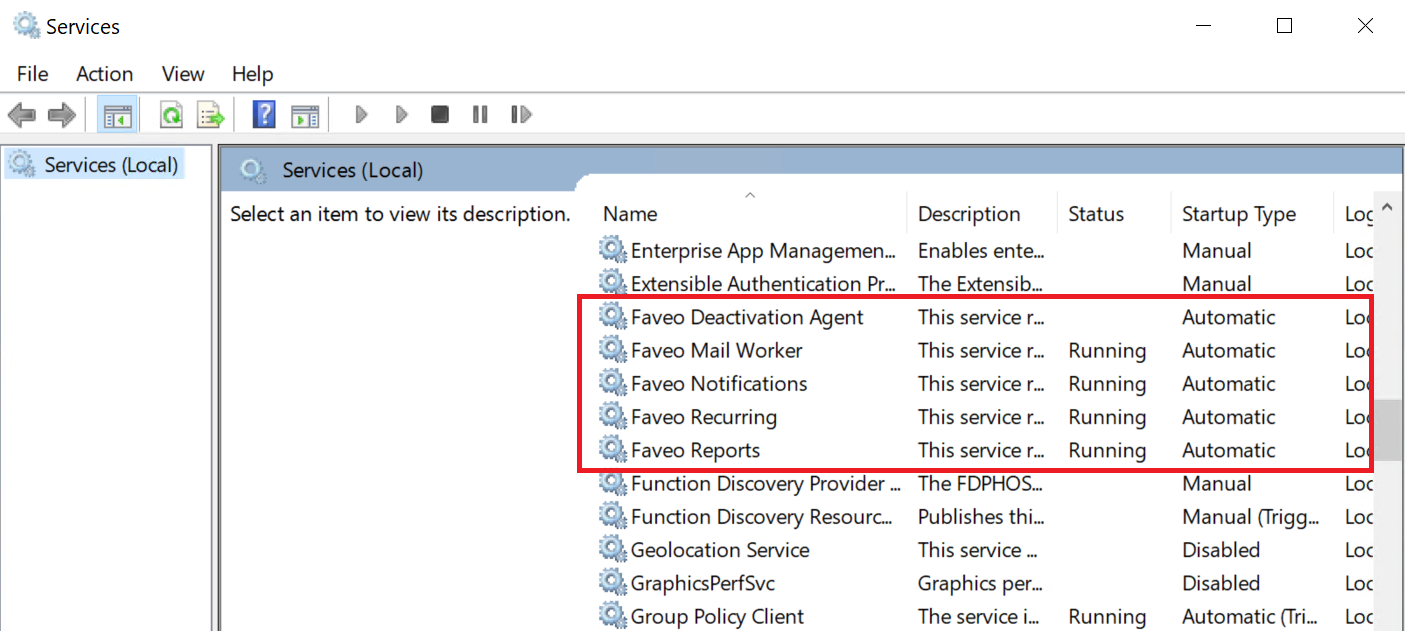
Open service manager and check status of all the services configured by WinSW.
Redis is no longer supported in Windows, but the version
3.2.1is still available to use (ref), so that’s why laragon contain version3.*only. If you want to taste the latest redis version, using Docker through Laradock would be an alternative.
Installing PHP Redis Extension
If you right-click on the dashboard & check on PHP > Extensions, you will not find redis extension because it doesn’t come up with Laragon by default. So you have to add it manually, but yet it so easy.
Downloading The PHP Redis Extension DLL File
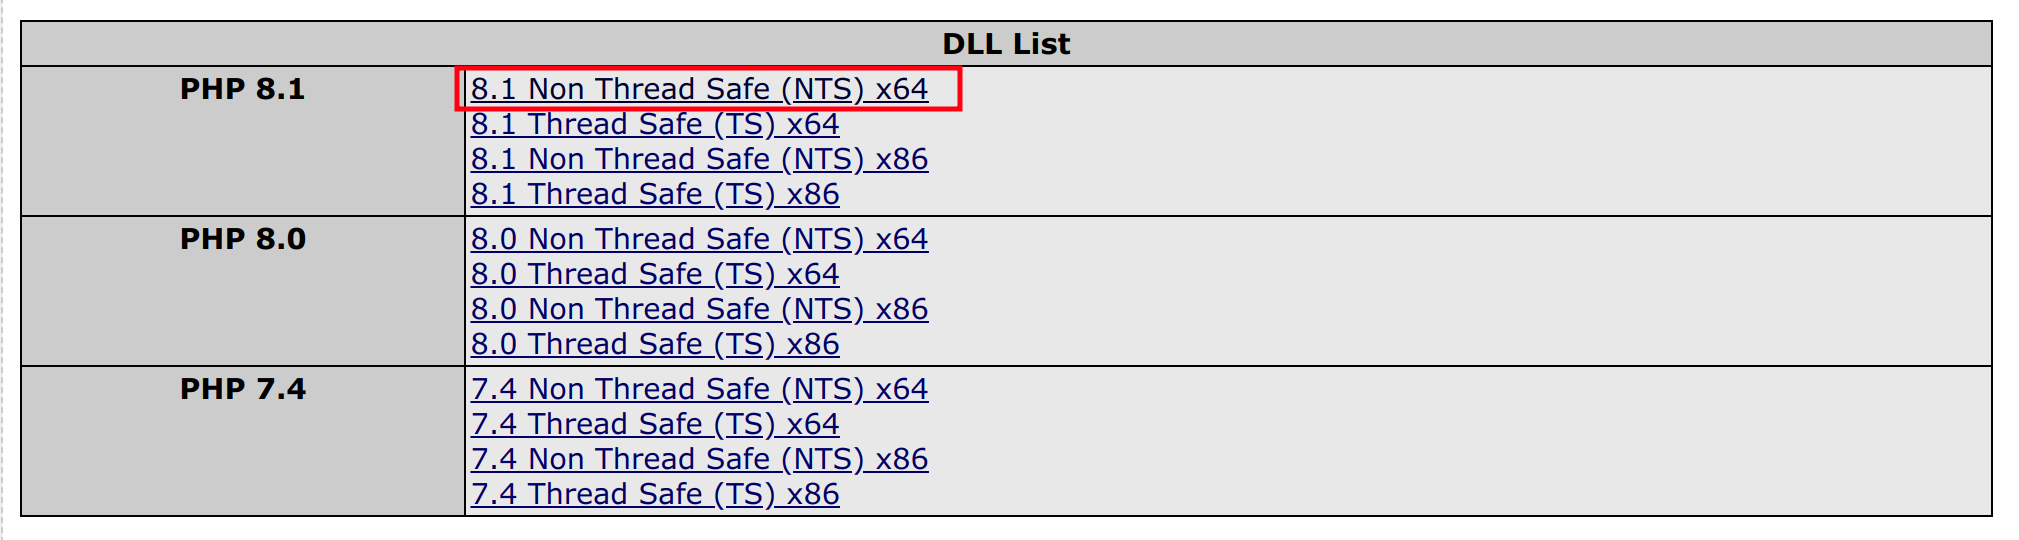
Go to https://pecl.php.net/package/redis and find the right match your current PHP version but also use the latest stable available. In my case, it was version 5.3.4 at the moment and it supports PHP 8.0, 7.4, 7.3.

Click the Windows icon DLL link to get the available distribution for the version. Download the archive that match with your PHP version. You might be confuse which one between Non-Thread-Safe (NTS) and Thread-Safe (TS) should you pick to download. To find out, just check on your Laragon dashboard and see the php version along with NTS or TS indication.

Adding the DLL File to the PHP Extension Folder
On the downloaded archive, you should find the php_redis.dll file.

copy or move the file to the C:\laragon\bin\php\php-7.4.19-Win32-vc15-x64\ext (change to your own path), and then add the line extension=php_redis.dll to the C:\laragon\bin\php\php-7.4.19-Win32-vc15-x64\php.ini file.
the
php.ini filewas generated after a version of php in laragon was run for the first time.
you should see that Redis extension is available now.
Starting The Redis Server
If you installed the full laragon, redis is availabe in this path C:\laragon\bin\redis\redis-x64-3.2.100 (change to your own path). To run the redis server, you can use Command Prompt to execute the redis-server.exe.

And you can also stop it later using Ctrl + C.
The phpRedisAdmin
The phpRedisAdmin also available in the full laragon installation and can be accessed at http://localhost/redis