
Note: Outbyte PC Repair tool has been proven to identify and fix the PHOTOVIEWER.DLL error. See more information about Outbyte and Uninstall Instructions. Please review Outbyte EULA and Privacy Policy.
Введение
Одной из наиболее распространенных ошибок, с которыми сталкивается пользователь Windows, является ошибка отсутствия DLL. Эта ошибка просто не даст вам запустить приложение. При попытке открыть приложение вы увидите всплывающее окно со следующим сообщением об ошибке:
‘Программа не может запуститься, так как PHOTOVIEWER.DLL отсутствует на вашем компьютере’
Не волнуйся! Это распространенная проблема, с которой сталкиваются пользователи Windows во всем мире, и есть несколько способов ее решить.
В этом подробном посте я предоставлю несколько решений для исправления ошибок DLL-файла, не найденных на ПК с Windows 11, 10, 8.1, 8 и 7.
Что такое ошибка PHOTOVIEWER.DLL?
Термин «DLL» относится к динамически подключаемым библиотекам, которые можно найти в Windows 11, 10, 8, 7 и других предыдущих версиях ОС. Динамическая библиотека (DLL) — это набор небольших программ, которые могут загружать более крупные программы, когда это необходимо для выполнения определенных задач. Небольшая программа, называемая файлом DLL, содержит инструкции, помогающие более крупной программе справиться с тем, что может не являться основной функцией исходной программы. Эти инструкции могут быть вызваны несколькими программами одновременно. Когда вы запускаете программу в любой операционной системе Windows, большая часть функциональных возможностей программы может обеспечиваться библиотеками DLL.
Зависимость создается каждый раз, когда DLL используется программой. Если другая программа использует DLL и каким-то образом нарушает зависимость между двумя программами, первая программа больше не будет выполняться. Именно тогда вы увидите такие ошибки, как
‘Программа не может запуститься, так как PHOTOVIEWER.DLL отсутствует на вашем компьютере. Попробуйте переустановить программу, чтобы решить эту проблему».
Причины отсутствия ошибки PHOTOVIEWER.DLL
Типичные причины ошибки «PHOTOVIEWER.DLL отсутствует» в Windows 10, 11, 8, 7 и других версиях приведены ниже .
а) Удалено или повреждено PHOTOVIEWER.DLL — файл DLL, используемый определенной программой, был изменен или удален PHOTOVIEWER.DLL.
b) Отсутствующие или поврежденные файлы распространяемого пакета Microsoft Visual C++ — файл PHOTOVIEWER.DLL является частью библиотеки времени выполнения программного обеспечения Microsoft Visual C++. Библиотеки среды выполнения VC++ — это файлы DLL, необходимые для запуска программ, скомпилированных с помощью Microsoft Visual Studio. Если некоторые файлы отсутствуют или если Visual Studio установлена неправильно, может появиться ошибка «PHOTOVIEWER.DLL отсутствует».
c) Система заражена вирусом или вредоносным ПО. Существует вероятность, что ваша система повреждена вирусом или вредоносным ПО. В результате PHOTOVIEWER.DLL могла быть повреждена или повреждена.
d) Поврежденные/испорченные системные файлы. Если ваши системные файлы Windows повреждены после взаимодействия с программами, содержащими вирус или некоторые вредоносные приложения, то PHOTOVIEWER.DLL может работать неправильно.
Некоторые другие распространенные ошибки PHOTOVIEWER.DLL включают:
PHOTOVIEWER.DLL отсутствует
Не удается зарегистрировать PHOTOVIEWER.DLL
Проблема с запуском PHOTOVIEWER.DLL
PHOTOVIEWER.DLL Нарушение прав доступа
точки входа в процедуру PHOTOVIEWER.DLL
PHOTOVIEWER.DLL ошибка при загрузке
PHOTOVIEWER.DLL сбой
Не удается найти PHOTOVIEWER.DLL
PHOTOVIEWER.DLL не найдено
PHOTOVIEWER.DLL не удалось найти
PHOTOVIEWER.DLL — System Error
The program can’t start because PHOTOVIEWER.DLL is missing from your computer. Try reinstalling the program to fix the problem.
Действия по устранению ошибки отсутствия PHOTOVIEWER.DLL
Есть несколько способов исправить эту ошибку DLL, и мы подробно рассмотрим их ниже.
1. Скачать PHOTOVIEWER.DLL
PHOTOVIEWER.DLL можно загрузить вручную и добавить/заменить отсутствующим или поврежденным файлом DLL.
Шаг 1: Выберите и загрузите файл DLL из таблицы ниже в зависимости от версии вашей Windows (32-разрядная или 64-разрядная),
Скачать PHOTOVIEWER.DLL
| Версия | Описание | Операционные системы | Размер | Язык | MD5 | SHA1 | Скачать |
|---|---|---|---|---|---|---|---|
| 6.1.7601.17514 | Windows Photo Viewer | 32 | 1.39 MB | U.S. English |
5170d04… 517… |
a37a97f… a37… |
|
| 6.1.7601.17514 | Windows Photo Viewer | 64 | 1.65 MB | U.S. English |
254eefa… 254… |
0dbac7f… 0db… |
|
| 6.3.9600.17415 | Windows Photo Viewer | 32 | 1.56 MB | U.S. English |
51aca84… 51a… |
b50df4d… b50… |
|
| 6.3.9600.17415 | Windows Photo Viewer | 64 | 1.76 MB | U.S. English |
6dcb6e4… 6dc… |
8d94380… 8d9… |
Шаг 2: Извлеките загруженный ZIP-файл либо с помощью сжатых папок Windows (поставляется с Windows), либо с помощью такого приложения, как WinRAR.
Шаг 3: Поместите извлеченный файл PHOTOVIEWER.DLL в каталог установки уязвимой программы. Если существует файл PHOTOVIEWER.DLL, замените его новым файлом.
Перезапустите затронутую программу, чтобы проверить, устранена ли проблема. Если нет, попробуйте следующий метод.
2. Автоматически исправить отсутствующую ошибку PHOTOVIEWER.DLL
Отсутствующую ошибку DLL можно исправить с помощью инструмента восстановления, такого как Outbyte PC Repair, который помогает решить любые системные проблемы, очищает ненужные файлы и исправляет любые ошибки DLL в процессе.
Шаг 1: Загрузите установочный файл отсюда.
Шаг 2: Установите PC Repair и просканируйте свой компьютер
Шаг 3: Нажмите «Восстановить», чтобы исправить все элементы, которые могут вызывать ошибки отсутствия DLL.
Шаг 4: Запустите приложение, чтобы проверить, исправлена ли ошибка.
Рекомендуемая загрузка: Исправить ошибку PHOTOVIEWER.DLL или отсутствующую ошибку PHOTOVIEWER.DLL с Outbyte.
Совместимость с Windows 11, 10, 8, 7, Vista, XP и 2000
3. Перерегистрируйте DLL-файл
Еще один эффективный способ исправить ошибку DLL — перерегистрировать файл DLL.
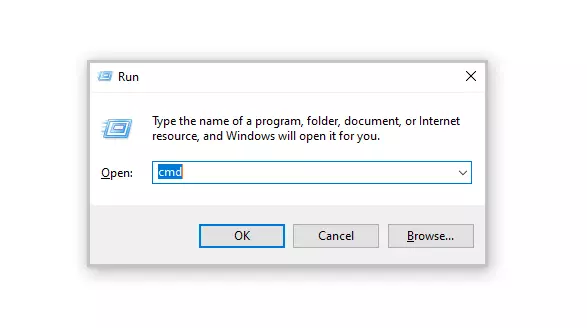
Шаг 1: Запустите утилиту «Выполнить», нажав клавиши Windows + R на клавиатуре. Введите « cmd » в поле ввода текста. Затем нажмите клавиши Ctrl+Shift+Enter , чтобы открыть командную строку в режиме администратора.
Шаг 2: В окне подсказки выберите «Да», чтобы разрешить командной строке вносить изменения в ваше устройство.
Шаг 3: Теперь пришло время отменить регистрацию DLL-файла на вашем компьютере. Введите или скопируйте и вставьте следующую команду, затем нажмите Enter,
regsvr32 /u PHOTOVIEWER.DLL
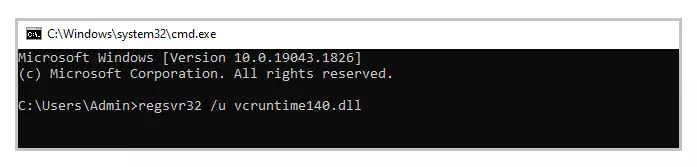
Примечание. Замените vcruntime140.dll на PHOTOVIEWER.DLL
Шаг 4: Далее вам необходимо перерегистрировать файл. Для этого выполните следующую команду:
regsvr32 PHOTOVIEWER.DLL
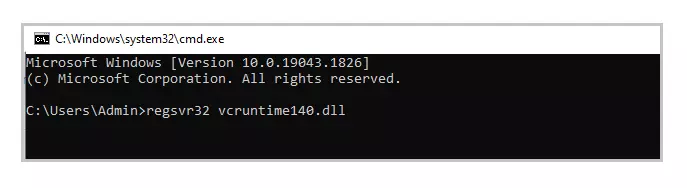
Примечание. Замените vcruntime140.dll на PHOTOVIEWER.DLL
Шаг 5: Выйдите из командной строки и снова запустите приложение.
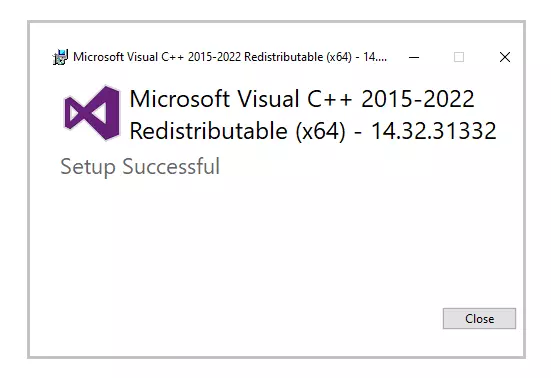
4. Переустановите последнюю версию распространяемого пакета Visual C++ 2015–2022 для Visual Studio.
Наиболее часто используемое решение — переустановить распространяемый Microsoft Visual C++ для исправления ошибок DLL. Выполните шаги, указанные ниже,
Шаг 1: Чтобы получить доступ к официальной странице, с которой можно загрузить распространяемый пакет Microsoft Visual C++, нажмите на ссылку, представленную здесь.
Выберите «Установить». Начнется установка, которая займет пару секунд.
Шаг 2: Кроме того, вы также можете загрузить его снизу в зависимости от версии Windows,
Загрузите версию x86 отсюда
Загрузите версию x64 отсюда
Шаг 3: После того, как вы выбрали файл, перейдите к загрузке. Загрузка может занять некоторое время, в зависимости от скорости вашего интернет-соединения.
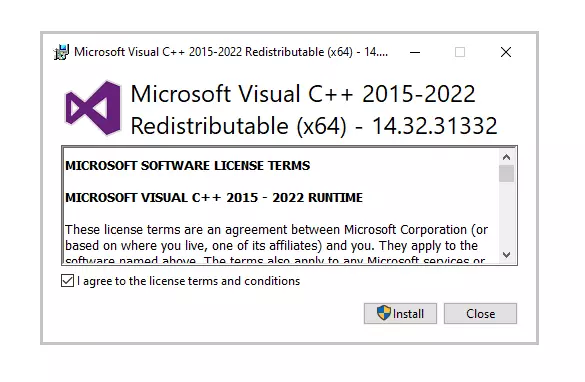
Шаг 4: После завершения загрузки установите загруженный файл. Когда начнется установка, установите флажок «Я согласен с условиями лицензии» и нажмите «Установить».
Шаг 5: Установка может занять несколько минут. После завершения установки перезагрузите компьютер и снова запустите программу, чтобы проверить, исправлена ли ошибка DLL.
5. Запустите сканирование системных файлов (SFC)
Шаг 1: Чтобы открыть утилиту «Выполнить», нажмите Windows + R на своем компьютере. Введите « cmd » в область ввода и нажмите Ctrl+Shift+Enter .
Шаг 2: Выберите «Да» во всплывающем окне, чтобы открыть командную строку в режиме администратора.
Шаг 3: Затем введите приведенную ниже команду и нажмите Enter, чтобы выполнить ее .
ПФС / сканирование
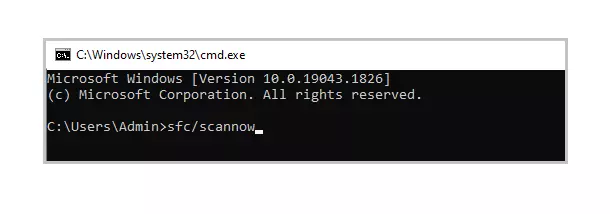
Шаг 4: Эта команда попытается найти и исправить поврежденные системные файлы (включая файлы DLL). После завершения процесса вы можете проверить файл журнала, созданный по пути, указанному в командной строке. Если в файле журнала вы найдете сведения об исправленном файле DLL, вы можете снова запустить приложение.

6. Переустановите Программу, которая не может быть запущена
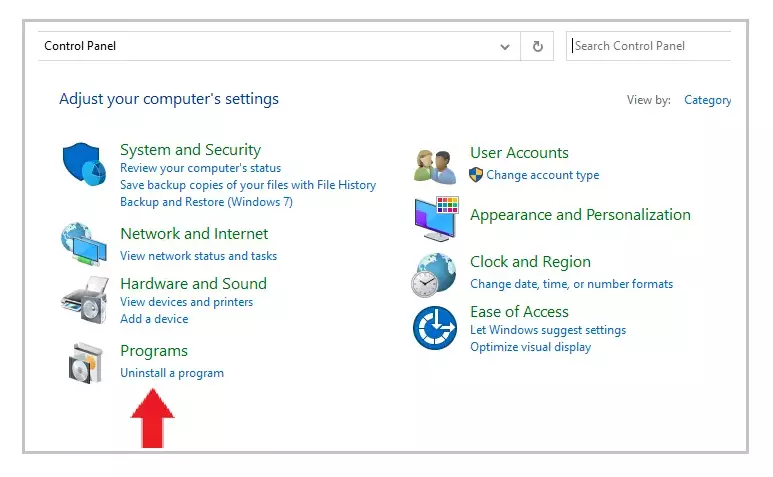
Шаг 1: Откройте панель управления и нажмите «Удалить программу» в разделе «Программы».
Шаг 2: Найдите и найдите программу, с которой у вас возникли проблемы, и нажмите на нее.
Шаг 3: Затем нажмите кнопку «Удалить» и продолжите процедуру удаления приложения.
Шаг 4: Переустановите программу из исходного кода. Либо загрузите установочный файл, либо, если он у вас уже есть, снова запустите установку, чтобы проверить, сможете ли вы запустить приложение на этот раз.
7. Обновите драйверы
В некоторых случаях ошибки DLL могут возникать из-за драйверов. Если сообщение об ошибке DLL появилось во время или после установки программы, сначала обновите драйверы до последней версии.
Кроме того, существует вероятность того, что вы можете столкнуться с ошибкой DLL после обновления драйверов. В таком случае нужно откатить драйвер до предыдущей версии.
Есть два способа обновить драйверы,
Способ 1: автоматическое обновление драйверов
Шаг 1: Используйте такой инструмент, как Outbyte Driver Updater, который автоматически ищет отсутствующие и устаревшие драйверы в вашей системе и обновляет их. Вы можете скачать инструмент здесь.
Шаг 2: Время загрузки зависит от скорости вашего интернет-соединения. После завершения загрузки начните установку инструмента.
Шаг 3: Запустите приложение.
Шаг 4: Внутри приложения запустите обновление. Затем средство обновления драйверов просканирует ваш компьютер на наличие устаревших и отсутствующих драйверов.
Шаг 5: Наконец, выберите драйверы и нажмите «Обновить».
Способ 2: обновить драйверы вручную
Шаг 1: Перейдите в окно поиска на панели задач — введите текст «Диспетчер устройств» и выберите «Диспетчер устройств».
Шаг 2: Выберите аппаратное устройство, которое необходимо обновить. Разверните выбор — выберите устройство, щелкните правой кнопкой мыши и выберите «Обновить драйвер».
Шаг 3: Выберите параметр «Автоматический поиск драйверов».
Шаг 4: Если будут найдены последние версии драйверов, они будут установлены автоматически.
Шаг 5: Иногда Windows не может найти последнюю версию драйвера. В таких случаях пользователь может посетить веб-сайт производителя, найти драйвер и инструкции по установке.
8. Восстановление системы
В этом методе ваш компьютер должен быть восстановлен до его более ранней версии, когда он работал без каких-либо ошибок. Есть вероятность, что новые обновления для вашего ПК вызвали ошибку, поэтому пользователь должен удалить новые обновления и вернуться к предыдущей версии.
Чтобы применить восстановление системы, сначала проверьте, есть ли у вас предыдущая резервная копия вашей системы. Чтобы проверить это,
Шаг 1: Начните с нажатия на кнопку запуска.
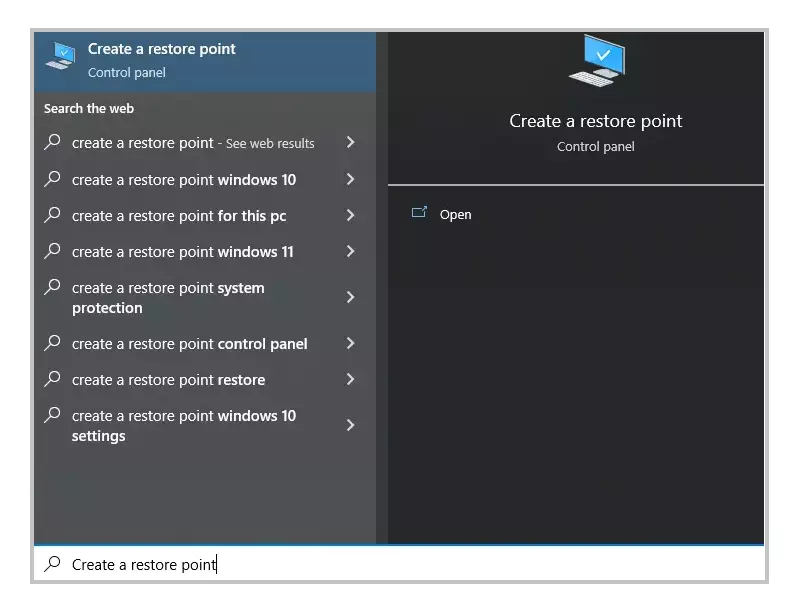
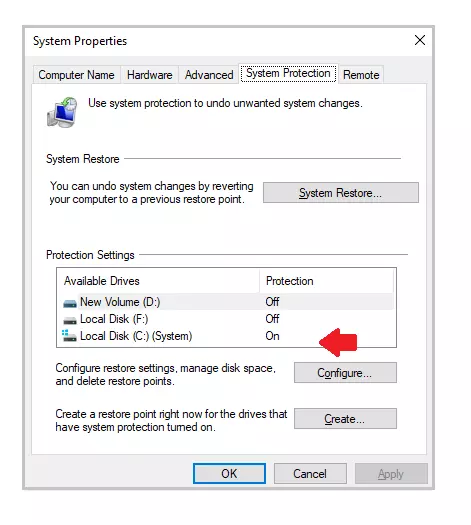
Шаг 2: Чтобы получить доступ к окну «Свойства системы», найдите «Создать точку восстановления» и щелкните первый результат.
Шаг 3: На вкладке «Защита системы» выберите «Системный» диск. Для этого диска должна быть включена «Защита».
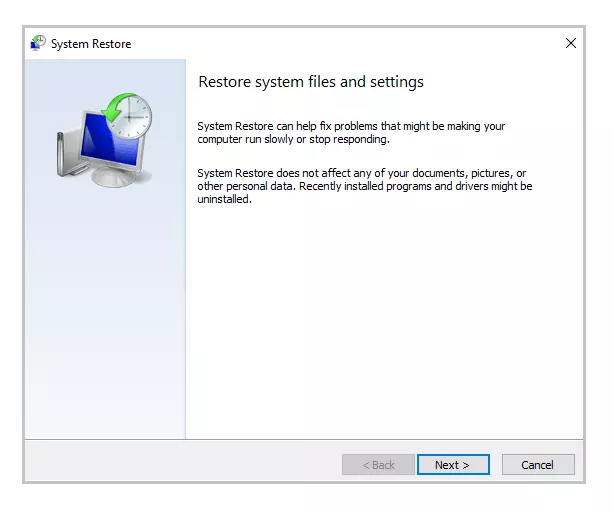
Шаг 4: Выберите «Восстановление системы» и нажмите «Далее» на начальном экране.
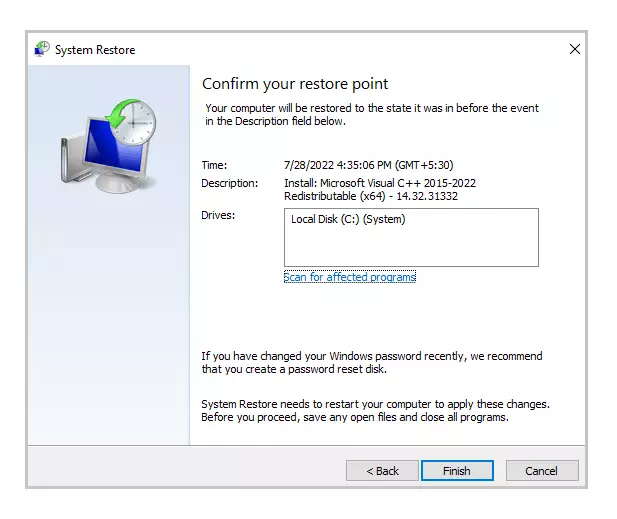
Шаг 5: Отобразится список точек восстановления. Выберите точку восстановления, когда ваше приложение работало правильно и без ошибок. Затем выберите «Далее».
Шаг 6: Проверьте свой выбор и нажмите «Готово». Если появится всплывающее окно с предупреждением, выберите «Да».
Шаг 7: Начнется восстановление системы, и после завершения процесса ваш компьютер перезагрузится. Когда вы снова войдете в систему, вы увидите уведомление о том, что восстановление системы завершено. Теперь вы можете снова запустить приложение, чтобы проверить, исправлена ли ошибка.
Примечание: Если восстановление системы не было настроено ранее или вы никогда раньше не создавали резервную копию своего ПК, этот метод может вам не подойти.
9. Обновление Windows
PHOTOVIEWER.DLL исчезают после обновления до последней версии Windows.
Шаг 1: Перейдите к настройкам, выбрав «Пуск» > «Настройки» или используя сочетание клавиш Windows + I.
Шаг 2: Откройте опцию «Обновление и безопасность».

Шаг 3: Проверьте наличие новых обновлений, нажав «Проверить наличие обновлений».
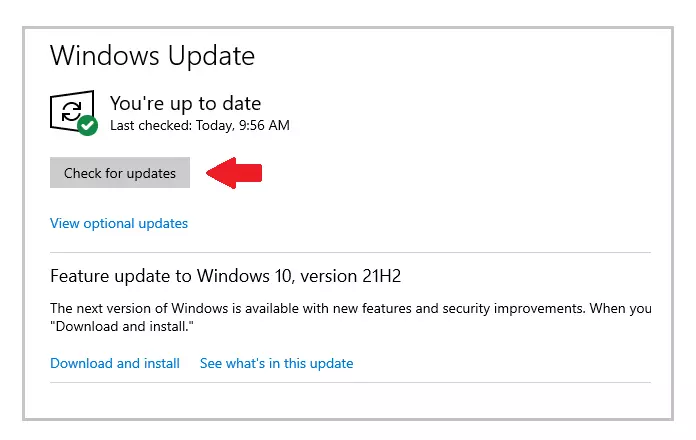
Шаг 4: Если будет обнаружена более новая версия, обновление Windows будет загружено и установлено до последней версии.
Шаг 5: После установки новейшей версии снова запустите программу, чтобы проверить, сталкиваетесь ли вы с ошибкой PHOTOVIEWER.DLL.
Выполнение этих шагов определенно должно было помочь вам исправить отсутствующую ошибку PHOTOVIEWER.DLL.
Иногда система Windows отображает сообщения об ошибках поврежденных или отсутствующих файлов PhotoViewer.dll. Подобные ситуации могут возникнуть, например, во время процесса установки программного обеспечения. Каждая программа требует определенных ресурсов, библиотек и исходных данных для правильной работы. Поэтому поврежденный или несуществующий файл PhotoViewer.dll может повлиять на неудачное выполнение запущенного процесса.
Файл был разработан Microsoft для использования с программным обеспечением Windows. Здесь вы найдете подробную информацию о файле и инструкции, как действовать в случае ошибок, связанных с PhotoViewer.dll на вашем устройстве. Вы также можете скачать файл PhotoViewer.dll, совместимый с устройствами Windows 10, Windows 8.1, Windows 8, Windows 7, Windows 7, Windows Vista, Windows Vista, которые (скорее всего) позволят решить проблему.
Совместим с: Windows 10, Windows 8.1, Windows 8, Windows 7, Windows 7, Windows Vista, Windows Vista
Популярность пользователя
Исправьте ошибки PhotoViewer.dll
- 1 Информация о файле PhotoViewer.dll
- 2 Ошибки, связанные с файлом PhotoViewer.dll
- 3 Как исправить ошибки, связанные с PhotoViewer.dll?
- 3.1 Сканирование на наличие вредоносных программ
- 3.2 Обновление системы и драйверов
- 3.3 Инструмент проверки системных файлов
- 3.4 Восстановление системы
- 4 Скачать PhotoViewer.dll
- 4.1 Список версий файла PhotoViewer.dll
Информация о файле
| Основная информация | |
|---|---|
| Имя файла | PhotoViewer.dll |
| Расширение файла | DLL |
| Тип | Dynamic Link Library |
| Описание | Dynamic Link Library |
| Программного обеспечения | |
|---|---|
| программа | Windows 10 |
| Программного обеспечения | Windows |
| автор | Microsoft |
| Версия программного обеспечения | 10 |
| подробности | |
|---|---|
| Размер файла | 1560064 |
| Самый старый файл | 2009-04-11 |
| Последний файл | 2017-03-18 |
Наиболее распространенные проблемы с файлом PhotoViewer.dll
Существует несколько типов ошибок, связанных с файлом PhotoViewer.dll. Файл PhotoViewer.dll может находиться в неправильном каталоге файлов на вашем устройстве, может отсутствовать в системе или может быть заражен вредоносным программным обеспечением и, следовательно, работать неправильно. Ниже приведен список наиболее распространенных сообщений об ошибках, связанных с файлом PhotoViewer.dll. Если вы найдете один из перечисленных ниже (или похожих), рассмотрите следующие предложения.
- PhotoViewer.dll поврежден
- PhotoViewer.dll не может быть расположен
- Ошибка выполнения — PhotoViewer.dll
- Ошибка файла PhotoViewer.dll
- Файл PhotoViewer.dll не может быть загружен. Модуль не найден
- невозможно зарегистрировать файл PhotoViewer.dll
- Файл PhotoViewer.dll не может быть загружен
- Файл PhotoViewer.dll не существует
PhotoViewer.dll
Не удалось запустить приложение, так как отсутствует файл PhotoViewer.dll. Переустановите приложение, чтобы решить проблему.
OK
Проблемы, связанные с PhotoViewer.dll, могут решаться различными способами. Некоторые методы предназначены только для опытных пользователей. Если вы не уверены в своих силах, мы советуем обратиться к специалисту. К исправлению ошибок в файле PhotoViewer.dll следует подходить с особой осторожностью, поскольку любые ошибки могут привести к нестабильной или некорректно работающей системе. Если у вас есть необходимые навыки, пожалуйста, продолжайте.
Как исправить ошибки PhotoViewer.dll всего за несколько шагов?
Ошибки файла PhotoViewer.dll могут быть вызваны различными причинами, поэтому полезно попытаться исправить их различными способами.
Шаг 1.. Сканирование компьютера на наличие вредоносных программ.
Файлы Windows обычно подвергаются атаке со стороны вредоносного программного обеспечения, которое не позволяет им работать должным образом. Первым шагом в решении проблем с файлом PhotoViewer.dll или любыми другими системными файлами Windows должно быть сканирование системы на наличие вредоносных программ с использованием антивирусного инструмента.
Если по какой-либо причине в вашей системе еще не установлено антивирусное программное обеспечение, вы должны сделать это немедленно. Незащищенная система не только является источником ошибок в файлах, но, что более важно, делает вашу систему уязвимой для многих опасностей. Если вы не знаете, какой антивирусный инструмент выбрать, обратитесь к этой статье Википедии — сравнение антивирусного программного обеспечения.
Шаг 2.. Обновите систему и драйверы.
Установка соответствующих исправлений и обновлений Microsoft Windows может решить ваши проблемы, связанные с файлом PhotoViewer.dll. Используйте специальный инструмент Windows для выполнения обновления.
- Откройте меню «Пуск» в Windows.
- Введите «Центр обновления Windows» в поле поиска.
- Выберите подходящую программу (название может отличаться в зависимости от версии вашей системы)
- Проверьте, обновлена ли ваша система. Если в списке есть непримененные обновления, немедленно установите их.
- После завершения обновления перезагрузите компьютер, чтобы завершить процесс.
Помимо обновления системы рекомендуется установить последние версии драйверов устройств, так как драйверы могут влиять на правильную работу PhotoViewer.dll или других системных файлов. Для этого перейдите на веб-сайт производителя вашего компьютера или устройства, где вы найдете информацию о последних обновлениях драйверов.
Шаг 3.. Используйте средство проверки системных файлов (SFC).
Проверка системных файлов — это инструмент Microsoft Windows. Как следует из названия, инструмент используется для идентификации и адресации ошибок, связанных с системным файлом, в том числе связанных с файлом PhotoViewer.dll. После обнаружения ошибки, связанной с файлом %fileextension%, программа пытается автоматически заменить файл PhotoViewer.dll на исправно работающую версию. Чтобы использовать инструмент:
- Откройте меню «Пуск» в Windows.
- Введите «cmd» в поле поиска
- Найдите результат «Командная строка» — пока не запускайте его:
- Нажмите правую кнопку мыши и выберите «Запуск от имени администратора»
- Введите «sfc / scannow» в командной строке, чтобы запустить программу, и следуйте инструкциям.
Шаг 4. Восстановление системы Windows.
Другой подход заключается в восстановлении системы до предыдущего состояния до того, как произошла ошибка файла PhotoViewer.dll. Чтобы восстановить вашу систему, следуйте инструкциям ниже
- Откройте меню «Пуск» в Windows.
- Введите «Восстановление системы» в поле поиска.
- Запустите средство восстановления системы — его имя может отличаться в зависимости от версии системы.
- Приложение проведет вас через весь процесс — внимательно прочитайте сообщения
- После завершения процесса перезагрузите компьютер.
Если все вышеупомянутые методы завершились неудачно и проблема с файлом PhotoViewer.dll не была решена, перейдите к следующему шагу. Помните, что следующие шаги предназначены только для опытных пользователей
Загрузите и замените файл PhotoViewer.dll
Последнее решение — вручную загрузить и заменить файл PhotoViewer.dll в соответствующей папке на диске. Выберите версию файла, совместимую с вашей операционной системой, и нажмите кнопку «Скачать». Затем перейдите в папку «Загруженные» вашего веб-браузера и скопируйте загруженный файл PhotoViewer.dll.
Перейдите в папку, в которой должен находиться файл, и вставьте загруженный файл. Ниже приведен список путей к каталогу файлов PhotoViewer.dll.
- Windows 10: C:\Program Files\Windows Photo Viewer\
- Windows 8.1: C:\Program Files\Windows Photo Viewer\
- Windows 8: 1: C:\Program Files\Windows Photo Viewer\
- Windows 7: C:\Program Files\Windows Photo Viewer\
- Windows 7: C:\Program Files\Windows Photo Viewer\
- Windows Vista: —
- Windows Vista: —
Если действия не помогли решить проблему с файлом PhotoViewer.dll, обратитесь к профессионалу. Существует вероятность того, что ошибка (и) может быть связана с устройством и, следовательно, должна быть устранена на аппаратном уровне. Может потребоваться новая установка операционной системы — неправильный процесс установки системы может привести к потере данных.
Список версий файлов
Имя файла
PhotoViewer.dll
система
Windows 10
Размер файла
1560064 bytes
Дата
-0001-11-30
| Подробности файла | ||
|---|---|---|
| MD5 | 77f764d25e8325cd395552ab0eb94666 | |
| SHA1 | e24464fd92997b56b0c8b67ce50a75316fbca054 | |
| SHA256 | 771410bff35d47bfe7c40c465b272a11bfaf4d280af46978897cfc9625fb553e | |
| CRC32 | 14047831 | |
| Пример расположения файла | C:\Program Files\Windows Photo Viewer\ |
Имя файла
PhotoViewer.dll
система
Windows 8.1
Размер файла
1638912 bytes
Дата
-0001-11-30
| Подробности файла | ||
|---|---|---|
| MD5 | 51aca8428a24946b8faa80b45093095a | |
| SHA1 | b50df4dfa0f35c9f484b298b26732a54de4c1ea1 | |
| SHA256 | 7285e6ebf612fce3aeb43a702de5665606d10811e3e2143205ff519b34941054 | |
| CRC32 | a3b91c50 | |
| Пример расположения файла | C:\Program Files\Windows Photo Viewer\ |
Имя файла
PhotoViewer.dll
система
Windows 8
Размер файла
1637376 bytes
Дата
-0001-11-30
| Подробности файла | ||
|---|---|---|
| MD5 | d0077261aecfd1443e65688b74d6d442 | |
| SHA1 | fa00874079926a0d35680465da50757332aa184b | |
| SHA256 | ec560107cb205d4a7e5ac441bd339eaa48d24d9be949811d7c3020935823c8cd | |
| CRC32 | 4660b879 | |
| Пример расположения файла | 1: C:\Program Files\Windows Photo Viewer\ |
Имя файла
PhotoViewer.dll
система
Windows 7
Размер файла
1727488 bytes
Дата
-0001-11-30
| Подробности файла | ||
|---|---|---|
| MD5 | 254eefa92a3438879e2a80bd76b0378f | |
| SHA1 | 0dbac7f151995216fe3a7be2d01cf62143ed567d | |
| SHA256 | 5762c1f7eb788f48ffd64bfc30ffd30bad24f1d85f2ac036a7e3e72739a63d32 | |
| CRC32 | 07cc3533 | |
| Пример расположения файла | C:\Program Files\Windows Photo Viewer\ |
Имя файла
PhotoViewer.dll
система
Windows 7
Размер файла
1456128 bytes
Дата
-0001-11-30
| Подробности файла | ||
|---|---|---|
| MD5 | 5170d04359e5d54a06b084aa5d833115 | |
| SHA1 | a37a97f23820a8b99b61a4e27d1e164c0f51af9e | |
| SHA256 | 635539e14c973ea24d4a6c35f9cb6757fd13e097f336a23736659aca44da9325 | |
| CRC32 | b34941d5 | |
| Пример расположения файла | C:\Program Files\Windows Photo Viewer\ |
Имя файла
PhotoViewer.dll
система
Windows Vista
Размер файла
2923520 bytes
Дата
-0001-11-30
| Подробности файла | ||
|---|---|---|
| MD5 | 7d6eda8782f2461cac2f8ed039c293db | |
| SHA1 | ba0a1162374b69ab738e102532e1ab4b5a7f4bf3 | |
| SHA256 | 021d50bbd47bb141f5aac44b09eb42d0da3015c174b316b98726b3816bfa06f2 | |
| CRC32 | 87051e9b | |
| Пример расположения файла | — |
Имя файла
PhotoViewer.dll
система
Windows Vista
Размер файла
2323968 bytes
Дата
-0001-11-30
| Подробности файла | ||
|---|---|---|
| MD5 | edeb29c82e4b4671f99d68c9e0ecbd29 | |
| SHA1 | 54cbacf8e41178cddebd0692d3a2febc6aec8f59 | |
| SHA256 | be2c7acfb8ed4d4d37eb0c3a2dbfda102cbd738a153cae5fb14d169faa624103 | |
| CRC32 | 0ce0057c | |
| Пример расположения файла | — |
Photoviewer.dll Error — What is it?
Photoviewer.dll is a shared library for SampleRes.dll and x3daudio1_1.dll in computers installed with Microsoft Windows 7, 8, Vista, and XP including 32 bit and 64 bit operating systems. Photoviewer.dll is associated with 1728000 system files.
The Photoviewer.dll error occurs when you upgrade your Windows operating system to a new version like Windows 7 or 8 on which this shared library is used. Once you upgrade the Windows and you right-click on JPG images, the Photoviewer.dll error pops up.
This error message is displayed as the following:
- Photoviewer.dll missing/not found
- Photovewer.dll entry point not found/application can’t initiate
Solution
Error Causes
Photoviewer.dll error can pop up due to several reasons. These include:
- Modification of .dll files during Windows installation
- Infection of Trojan virus
- Photoviewer.dll missing /broken
- Photo Gallery was earlier your default image editor before you upgraded your system
It is advisable to repair this issue timely to avoid inconvenience and serious PC threats especially if the cause of this issue is viral infection or registry damage.
Further Information and Manual Repair
Here are some of the best ways to help you resolve Photoviewer.dll error on your system:
1. Rebuild the Windows Photo Gallery
If you were previously using Vista and then you upgraded your system to Windows 7, then try this:
- Go to the Start menu, click on the control panel and go to the folder options.
- Then select the view tab option. Here you’ll find the Advanced setting window, select the show hidden files and folders tab.
- Now click Ok to continue. Navigate to the following folder( %user% is the name of the account with the problem) C:\Usersusername\AppData\Local\Microsoft\Windows\Photo Gallery.
- Then copy files to another location as a backup and delete them from the Windows Photo directory. Once the files have been deleted, try to start Windows Photo Gallery again. If this seems difficult, install Windows Photo Gallery application from the internet on your system.
2. Repair Broken Photoviewer.dll files and Remove Malware
Another way to fix the photoviewer.dll error is to download Restoro.
This is an advanced, user-friendly, and multi-functional PC fixer smoothly integrated with a registry cleaner. By running it on your system you can resolve all Photoviewer.dll error causes in seconds.
Restoro has an easy-to-use interface and a neat layout. It is safe, efficient, and bug-free. In addition to this, it is compatible with all Windows versions.
The registry cleaning utility is deployed with an automated algorithm that scans your entire PC and detects Photoviewer.dll file errors in seconds.
It fixes damaged, misconfigured, and broken Photoviewer.dll files, clears up disk space from unnecessary and obsolete files like the files from the uninstalled Windows programs which could be generating Photoviewer.dll error on your system.
It repairs the registry and modifies the registry keys to their correct configuration thus repairing the Photoviewer.dll error on your PC.
The powerful privacy error detector is integrated with all the properties and characteristics of an anti-virus. It scans for malware and viruses like Trojans and removes them from your system right away.
Besides these utilities, other features integrated into this repair tool include a system stability scanner and Active X and class error detector. It resolves Photoviewer.dll error while optimizing your computer’s speed and performance.
Click here to download Total System Care on your system to resolve the Photoviewer.dll file error today!
Do You Need Help with Your Device?
Our Team of Experts May Help
Troubleshoot.Tech Experts are There for You!
GET HELP
Troubleshoot.Tech experts work with all versions of Microsoft Windows including Windows 11, with Android, Mac, and more.
Share this article:
You might also like
Libmysql.dll is missing or not found error appears in Windows when the user is trying to open and run the application.
In this guide, we will offer you solutions on how to fix and remove this annoying error.
-
Check recycle bin
Some applications or purely by accident itself libmysql.dll gets deleted. If you have not turned recycle bin off go to it and check to see if the file is by any chance there. If you find it, right-click on it, choose restore, the error will be gone.
-
Update drivers
Press ⊞ WINDOWS + X to open the Windows menu and click on Device manager
In device manager locate device which has alert mark next to it
Right-click on it and choose update driver
Reboot your computer -
Run SFC scan
Press ⊞ WINDOWS + X and choose command prompt (admin)
In command prompt type in sfc /scannow and press ENTER
wait for the operation to complete and Reboot your system -
Reinstall application
if you are getting an error only on one application or an error has started to appear after the installation of a particular application go to Windows applications, uninstall it and then install it again. There is a chance that the file has been corrupted during the installation process.
Read More
If you open any program in your Windows 10 PC such as Outlook and suddenly get an error message saying, “Failed to register a VB Script dll. Reinstall or run Regsvr32.exe Vbscript.dll to self-register”, read on, as this post will guide you on what you can do to fix it. The obvious solution to this problem is by re-registering the “vbscript.dll” file on your computer.
Refer to the instructions given below to re-register the VB Script DLL file and to fix the error.
- Step 1: Open the Command Prompt as an administrator from the WinX Menu.
- Step 2: After opening Command Prompt, type in the following command and tap Enter on your keyboard.
regsvr32.exe vbscript.dll
- Step 3: Once you enter the command, it will re-register the VB Script DLL file using the Windows OS tool called Regsvr32 or regsvr32.exe. This tool is a command-line utility used to register and unregister OLE controls such as DLL and ActiveX (OCX) controls in the Windows environment. After the execution of the command, you should see the following pop-up on your screen which means the re-registering of the concerned DLL file has succeeded.
On the other hand, if re-registering the DLL file didn’t work, then you can try logging in using an administrator account and then register the DLL file again or you could also use the System File Checker to figure out what the problem really is and automatically fix it.
System File Checker or SFC is a built-in command utility that helps in restoring corrupted files as well as missing files. It replaces bad and corrupted system files with good system files. To run the SFC command, follow the steps given below.
- Tap Win + R to launch Run.
- Type in cmd in the field and tap Enter.
- After opening Command Prompt, type in sfc /scannow
The command will start a system scan which will take a few whiles before it finishes. Once it’s done, you could get the following results:
- Windows Resource Protection did not find any integrity violations.
- Windows Resource Protection found corrupt files and successfully repaired them.
- Windows Resource Protection found corrupt files but was unable to fix some of them.
Read More
As you know, each time you log out of your Windows 10 computer, it will take you to the login screen where you can switch users or log back in. But there are instances where Windows 10 remains stuck on the signing out screen, along with a blue spinning circle and all you can see is the process of your computer signing out, however, it does not progress and only gets stuck there. Thus, in this post, you will be guided on how you can resolve such an issue on your Windows 10 computer.
So if you are one of the users who experience the same problem, there are several fixes you can check out if your computer is stuck on the signing out screen with a blue spinning circle. You can try to force shutdown your computer or troubleshoot the problem in a Clean Boot State. You could also try to check the status of the User Profile Service or repair User Profile, as well as run System Restore. For more details, refer to each one of the suggestions provided below. But before you troubleshoot the problem, make sure that you are logged in to your computer as an administrator.
Option 1 – Try to force shutdown your computer
The first thing you can do is to force reboot your computer as this simple fix could help in fixing the problem. This option is quite simple, just make sure that before you do it, you have to save all your work.
- First, turn on your computer and press and hold the power button for at least 30 seconds. You might notice the screen flashing or making any changes, just ignore it.
- After that, plug out and plug in your computer and automatically turn it on.
- Once done, check if the issue is now fixed or not.
Option 2 – Put your computer in a Clean Boot State
It is possible that some third-party application is causing your computer to get stuck in the signing out screen. So you can try putting your computer in a Clean Boot State and see if it fixes the problem.
- Log onto your PC as an administrator.
- Type in MSConfig in the Start Search to open the System Configuration utility.
- From there, go to the General tab and click “Selective startup”.
- Clear the “Load Startup items” checkbox and make sure that the “Load System Services” and “Use Original boot configuration” options are checked.
- Next, click the Services tab and select the “Hide All Microsoft Services” checkbox.
- Click Disable all.
- Click on Apply/OK and restart your PC. (This will put your PC into a Clean Boot State. And configure Windows to use the usual startup, just simply undo the changes.)
- Once your computer is in a Clean Boot State, you should now be able to sign out or sign in without any problem.
Option 3 – Try checking the status of the User Profile Service
If forcing your computer to shut down or putting your computer in a Clean Boot State didn’t fix the problem, you can try to check the status of the User Profile Service since it is the one responsible for loading and unloading user profiles. Thus, if this service is disabled or stopped, you will no longer be able to sign out or sign in successfully.
- Tap the Win + R keys to launch the Run utility and type “services.msc” in the field and hit Enter to open the Services Manager.
- From there, look for the User Profile Service and make sure that its Startup Type is set to Automatic and that its status is “Started”.
- Once done, exit the Services Manager and see if the issue is resolved.
Option 4 – Try to repair your corrupted profile via Registry
In this second option, you can try to repair the corrupted profile using the Registry but before you proceed, make sure to create a System Restore Point and then follow the steps below.
- Tap the Win + R keys to open the Run dialog box.
- Then type “regedit” in the field and hit Enter or click OK to open the Registry Editor.
- Next, go to this registry key: ComputerHKEY_LOCAL_MACHINESOFTWAREMicrosoftWindows NTCurrentVersionProfileList
- Once you’ve opened the registry key, you should see a list of all the user profiles on your computer. Now click on each S-1-5 folder and look for the “ProfileImagePath” entry and double click on it to check which user account it is related to. You will see a path like “CUsersACK” where “ACK” is the username.
- You should know which of the user account is corrupted. Just look for a key named “RefCount” and change its Value data to “0” and click OK. And if it isn’t available, simply right-click on the right pane and create it.
- After that, double click on the key named “State” and make sure that the Value data is “0” and click OK.
- Exit the Registry Editor and restart your computer to apply the changes made and then check if it fixed the problem or not.
Option 5 – Run System Restore
- Tap the Win + R keys to open the Run dialog box.
- After that, type in “sysdm.cpl” in the field and tap Enter.
- Next, go to the System Protection tab then click the System Restore button. This will open a new window where you have to select your preferred System Restore point.
- After that, follow the on-screen instructions to finish the process and then restart your computer and check if the problem is fixed or not.
Read More
When you have to connect to a drive that’s on a different computer or on external storage, that’s where the mapped network drives come in. Mapped network drives make accessing files a lot easier. However, there are times when it won’t work for some reason.
Windows will notify you about the unavailability of mapped network drives in several ways. For one, Windows might display a red X on the network drives or it could be that its status will be unavailable when you try to use it from the Command Prompt or via a notification.
It is recommended that you run a few scripts when you log in to your PC as it may so happen that the network drive takes more than usual to connect. Before you start troubleshooting the problem using the given options below, keep in mind that some workouts might only work under certain scenarios. You might need some network access at logon or you might need access to the Group Policy settings. So you need to choose what you prefer more.
You can try the given workarounds below if the mapped network drives are not showing or connecting or working on your Windows 10 computer. These workarounds use scripts to make sure that you are connected to them as soon as you start to use your PC.
As mentioned, before you can troubleshoot, you need to create scripts first. There are two scripts here namely MapDrives.ps1 which is executed by the second script named MapDrives.cmd and is done at a regular and non-elevated Command Prompt. Follow the steps below to get started.
- You have to create a script file named “MapDrives.cmd” first and then save it on a place where the files are safe. To do that, open a text editor like Notepad and then copy and paste the following script:
PowerShell -Command «Set-ExecutionPolicy -Scope CurrentUser Unrestricted» >> «%TEMP%StartupLog.txt» 2>&1
PowerShell -File «%SystemDrive%ScriptsMapDrives.ps1» >> «%TEMP%StartupLog.txt» 2>&1
- After that, save the file and name it “MapDrives.cmd”.
- Next, create a script file named “MapDrives.ps1” and then copy and paste the following content. Just make sure to save both scripts in the same folder.
$i=3
while($True){
$error.clear()
$MappedDrives = Get-SmbMapping |where -property Status -Value Unavailable -EQ | select LocalPath,RemotePath
foreach( $MappedDrive in $MappedDrives)
{
try {
New-SmbMapping -LocalPath $MappedDrive.LocalPath -RemotePath $MappedDrive.RemotePath -Persistent $True
} catch {
Write-Host «There was an error mapping $MappedDrive.RemotePath to $MappedDrive.LocalPath»
}
}
$i = $i — 1
if($error.Count -eq 0 -Or $i -eq 0) {break}
Start-Sleep -Seconds 30
}
Note: Now that you’ve created the script files, it’s time for you to proceed to the options given below.
Option 1 – Try creating a startup item
Note that this option only works on devices that have network access at login. So if it’s not there, the script will fail to reconnect the network drivers automatically. To create a startup item, here’s what you have to do:
- Open the Startup folder located at %ProgramData%MicrosoftWindowsStart MenuProgramsStartUp.
- From there, copy and paste the MapDrives.cmd.
- After that, open the Scripts folder located at %SystemDrive%Scripts copy-paste MapDrives.ps1 and then copy and paste MapDrives.ps1 in there.
Note: After you complete the steps above, a log file named “StartupLog.txt” will be created in the %TEMP% folder. Now all that’s left for you to do is to log out of your computer and then log back in. This will ensure that the mapped drives are open.
Option 2 – Create a scheduled task
It is possible to create a scheduled task that runs as soon as you log in to your computer. To create a scheduled task, follow the steps below.
- You have to copy the MapDrives.ps1 script file to the scripts folder of Windows located at %SystemDrive%Scripts.
- After that, open the Task Scheduler and select Action > Create Task.
- Next, type a name and description of the task in the General tab.
- Then click on the Change User or Group button and select a local user group and click OK.
- Now check the box labeled “Run with highest privileges” and switch to the Triggers tab.
- From there, create a new trigger with the “At Logon” option in the Begin the task drop-down menu and then click OK.
- After that, switch to the Actions tab and create a new action then choose to Start a program.
- Next, type “Powershell.exe” in the Program/Script field, and in the Add arguments (optional) field, type the following:
-windowsstyle hidden -command .MapDrives.ps1 >> %TEMP%StartupLog.txt 2>&1
- And in the Start in the (optional) field, type “%SystemDrive%Scripts” as the location of the script file.
- Now under the Conditions tab, select the “Start only if the following network connection is available” option and then select Any connection and click OK.
- Restart your computer or log off from your account and then log back in so that the task will be executed.
Option 3 – Use the Group Policy settings
You need this option if the mapped network drives are defined via Group Policy settings. You have to update the action of the drive maps to Replace. As a result, it will delete the existing mapped drive and create the mapping on each logon again. However, any settings on the mapped drive that are changed from the Group Policy settings will be gone on each logon. So if the changes don’t work, you need to run the gpupdate command together with the /force parameter in order to refresh the Group Policy setting quickly.
Read More
Error Code 46 – What is it?
Error Code 46 is a device driver error that occurs when Windows fails to access the connected peripheral device to the computer as Windows is in a process of shutting down.
Users experience this error on any Windows 2000 and later operating system versions and usually see a pop-up with the following message:
“Windows cannot gain access to this hardware device because the operating system is in the process of shutting down. (Code 46)”
Solution
Error Causes
Error Code 46 is caused when there is a temporary problem with windows system files which prompts that the system is undergoing a shut down when in fact is it not.
This prevents access to the connected devices. This error may also be caused by a registry issue in which case it has either become corrupted or damaged.
Further Information and Manual Repair
Unlike all other Windows error codes, code 46 is relatively easy to fix with the right knowledge and does not pose any serious threat to the well-being of your PC. Here is how you can do it.
Method 1 – Restart your PC
The simplest method to resolve Error Code 46 is to run a restart of your computer.
The error is most commonly a temporary registry glitch that prevents you from accessing the device connected to your computer. Upon restarting your computer, it will resume working properly as before.
There is no need to run a troubleshooting wizard, use system restore, or run anti-virus software to scan and remove malware or spyware. A simple restart is all that is needed.
Method 2 – Install DriverFIX
Although the error code can be resolved upon restarting the computer, there’s a possibility of damaged or corrupted Windows registry files. This can be fixed by using a program like DriverFIX.
DriverFIX, with its user-friendly approach to help you fix your PC issues, comes with an integrated database that detects which drivers you need to reconfigure within just a few seconds and downloads it automatically.
It further ensures that your drivers are installed in their entirety leaving no room for any corrupted or damaged registry.
Error Code 46 may not be much of an issue, however, to prevent any risk of a Windows system corruption can be disastrous for your computer.
DriverFIX helps you fix your PC registry and device driver problems with user-friendly software and an integrated database. The database which consists of detailed information on what device driver needs to be installed will automatically download the required device driver without you need to refer to your hardware instruction manual.
Registry problems resulting from incomplete program installations and viruses such as malware and spyware damaged registry files. This affects your PC in serious ways.
DriverFIX further has an automatic backup and restoration system that helps create system ‘checkpoints’ which allow you to roll back to a healthier state and resume operations. This can help you avert any Windows error codes in the future.
Click here to download DriverFIX now!
Read More
Outlook PST Errors
Problems occur when your PST file becomes corrupted or hits the size limit. Outlook will start to display error messages. These errors include like 0x80040119, 0x80040600, and 0x8004060c.
Error Causes
You might think Outlook problems are just a minor inconvenience. You can’t access your emails and contact information, but that doesn’t actually affect computer security, right? Wrong! Outlook problems can indicate serious corruption issues within your system.
In many cases, your PST file can even be targeted specifically by a virus.
Today, many viruses are specially designed to steal personal information and then sell that information on the online black market. Since so much personal data is stored within Outlook’s PST file, this is often the first place that viruses look.
If you don’t want some hacker in a foreign country to read your emails, steal your contact information, or do all sorts of other dangerous tasks, then we advise you to fix your PST problem as soon as possible.
Other causes include hitting the 2GB memory limit on older versions of Outlook, erroneous SMTP settings, etc,.
Further Information and Manual Repair
PST errors are an incredibly annoying problem. However, thanks to powerful software like Stellar Phoenix Outlook PST Repair, it has never been easier to fix Outlook and recover all of the data inside your PST file. That means that you won’t lose contact information, calendar entries, emails, or any other information stored in Outlook.
ScanPST.exe rarely fixes problems with the PST file. Since the application is only a few megabytes in size, its effectiveness is very limited. Although Microsoft designed ScanPST.exe to be an effective solution to any PST files, it fails miserably.
Better Alternatives to Microsoft’s ScanPST.Exe
Ultimately, after downloading ScanPST.exe and running it, your Microsoft Outlook will still be unable to send or receive emails. And, to make matters worse, you might also be unable to access contact data or read your old emails.
Unlike other PST repair solutions, ScanPST.exe will not recover deleted emails or other lost Outlook data. In fact, using ScanPST.exe can sometimes cause your personal data to become even more difficult to recover.
If you do want to try out ScanPST.exe, then go ahead. While it probably won’t make your PST errors worse, it won’t even come close to fixing them. If you’re ready for a more serious solution to PST problems, then keep reading.
Why are Outlook problems dangerous?
You might think Outlook problems are just a minor inconvenience. You can’t access your emails and contact information, but that doesn’t actually affect computer security, right? Wrong!
Outlook problems can indicate serious corruption issues within your system. In many cases, your PST file can even be targeted specifically by a virus.
Today, many viruses are specially designed to steal personal information and then sell that information on the online black market. Since so much personal data is stored within Outlook’s PST file, this is often the first place that viruses look.
If you don’t want some hacker in a foreign country to read your emails, steal your contact information, or do all sorts of other dangerous tasks, then we advise you to fix your PST problem as soon as possible.
How do I actually fix Microsoft Outlook PST errors?
Microsoft’s ScanPST.exe application clearly doesn’t work. So what’s the next best option? Well, a program called Stellar Phoenix Outlook PST Repair has been helping PC users solve Outlook problems for several years. As the world’s leading Outlook solution, Stellar Phoenix Outlook PST Repair will quickly and effectively repair any PST problems you encounter.
So how does Stellar Phoenix Outlook Repair work? Well, it starts by finding your PST file. Once the PST file has been found, Stellar Phoenix Outlook PST Repair determines if the file is corrupt or full. It will then repair your PST file either by removing the size limit or by fixing the corrupt files.
How Does Stellar Phoenix Outlook Repair Work?
Once Stellar Phoenix Outlook PST Repair determines that your calendar appointments, contact data, and emails have all been successfully recovered, it permanently restores access to your PST file.
In fact, Stellar Phoenix Outlook PST Repair can even restore Outlook data that you deleted a long time ago. So, instead of just being a PST error recovery tool, Stellar Phoenix Outlook PST Repair is also a powerful data recovery program.
After letting Stellar Phoenix Outlook PST Repair go to work, open up Outlook and try it out. You’ll have full access to all of your Outlook files and folders, and all of those ScanPST.exe problems will be a thing of the past.
Advantages of Stellar Phoenix Outlook PST Repair Software
Stellar Phoenix Outlook PST Repair comes with many advantages. Here are just a few reasons why it’s such a popular program:
- Easy-to-use: Don’t worry if you’re not a computer genius. Stellar Phoenix Outlook Repair is incredibly easy to use. Even if you barely know how to send an email over your computer, the program has a straightforward interface that anybody can understand. If you can click the left mouse button, then Stellar Phoenix will be easy to use.
- Goes to work instantly: It takes only seconds to download and install Stellar Phoenix Outlook PST Repair. Once you’re ready to perform a scan, the program goes to work instantly. It identifies your PST file in an incredibly short amount of time, and before long, you’ll be able to access Outlook once more.
- Effective: Unlike the infamously useless ScanPST.exe application, Stellar Phoenix Outlook PST Repair actually works like it’s supposed to. It allows users to safely recover all of their most important data. While ScanPST.exe can actually damage your PST file, Stellar Phoenix Outlook PST Repair simply goes to work quickly and effectively.
- Multiple support packages: Stellar Phoenix Outlook Repair comes with three different pricing plans. One is designed for people who only need to install the program on a single computer. Another is designed for businesses or households that want to install the program on multiple PCs.And with the third option, the technician package, users can install Stellar Phoenix Outlook PST Repair on an unlimited number of computers. One of the biggest advantages of these packages is that you can spread out the cost of the program among multiple users. If several different people at your workplace are having PST error problems, for example, then you can buy a multiple-license package and share the cost.
- Data recovery: Along with fixing corrupt PST files and removing the size limits from the PST file, Stellar Phoenix Outlook PST Repair can actually recover any Outlook data on your computer. This is useful if you uninstalled Outlook a few months ago but still need to recover that data. In fact, Stellar Phoenix can recover Outlook data even if Outlook is not currently installed on your computer. In that sense, Stellar Phoenix Repair is more than just an Outlook repair program; it’s also a full-service data recovery solution.
Stellar Phoenix PST Repair is superior to ScanPST.exe in every way. But Stellar Phoenix’s most important advantage is that it actually works. If you’re ready to quickly fix your Outlook PST errors, then Stellar Phoenix Outlook PST Repair can help. Download it here today to experience the magic of PST repair for yourself.
Read More
In trying to upgrade your Windows 10 computer, you might have come across the error 0x800F0923. This kind of Windows upgrade/update error is caused by an incompatible driver or software that’s installed on your computer. Thus, to fix the problem, you need a working fix which you can choose from below.
As mentioned, you can try updating the concerned application or software to its latest version to resolve the compatibility issue and in turn, fix error 0x800F0923. Note that depending on where you had installed the application, your steps will change. So if you have it installed directly from the website, refer to these steps:
- Look for the built-in option to check the updates since the most application has this option.
- You also have the option to go to the website of the application and check if there is a new version available. If there is, download and update the app.
On the other hand, if you have downloaded the app from the Microsoft Store, here’s what you have to do:
- Open the Store and click on the three dots located at the top-right of the window.
- Next, click the Download and Updates option.
- From there, check if there is an update available for the store. If there is, update it.
Option 2 – Try to uninstall the application or software
If updating the app or software to its latest version didn’t help and you’re still getting the error 0x800F0923 every time you attempt to install the Windows Updates, you may have to uninstall it. You will need to use the usual Program and Features to uninstall it if you have downloaded it from the website.
- In the search box, type in “control” and then click on Control Panel (desktop app) among the search results.
- After that, select Programs and Features from the list which will give you a list of all the programs installed on your computer.
- From there, look for the concerned program and select it and then uninstall it.
Note: If you have downloaded the app from the Windows Store, you can simply right-click on it from the application list and then uninstall it.
Option 3 – Try to disable your antivirus program
Disabling the antivirus program or any security software installed in your computer is always a good idea you can try when the Windows Update process does not go smoothly. So before you try updating your computer again, make sure to disable the antivirus or security program and once the Windows Update is done, don’t forget to enable the antivirus program back again.
Option 4 – Try to run the Windows Update Troubleshooter
Running the built-in Windows Update troubleshooter could also help you resolve the Windows Update error 0x80073712. To run it, go to Settings and then select Troubleshoot from the options. From there, click on Windows Update and then click the “Run the troubleshooter” button.
Option 5 – Try to do the Update in a Clean Boot state
Putting your PC in a Clean Boot state can also help you install Windows Updates or Upgrades without any trouble because, during this state, you can start the system with a minimum number of drivers and startup programs that will surely help you in isolating the root cause of the issue.
- Log onto your PC as an administrator.
- Type in MSConfig in the Start Search to open the System Configuration utility.
- From there, go to the General tab and click “Selective startup”.
- Clear the “Load Startup items” checkbox and make sure that the “Load System Services” and “Use Original boot configuration” options are checked.
- Next, click the Services tab and select the “Hide All Microsoft Services” checkbox.
- Click Disable all.
- Click on Apply/OK and restart your PC. (This will put your PC into a Clean Boot State. And configure Windows to use the usual startup, just simply undo the changes.)
- After that, try to install the Windows Updates or upgrade again.
Option 6 – Try running Microsoft’s online troubleshooter
You also have the option to run Microsoft’s online troubleshooter which could help you fix Windows Update errors including the error 0x800F0923.
Read More
Brave browser has gained popularity very rapidly and many websites have gone into the territory of recommending it. Sadly although the browser kind of offered better performance, it seems that so much advertised privacy and security was a lie.
Several months ago, Brave was involved in a “scandal”. Unfortunately, this incident did not get much media attention, and it’s hard to search for and discover as of today.
There is an article on the Android police website explaining this issue in detail, you can check it here: https://www.androidpolice.com/2020/06/07/brave-browser-caught-adding-its-own-referral-codes-to-some-cryptcurrency-trading-sites/
But to sum things up and keep them short if you do not want to go through the full article, Brave had been injecting their affiliate codes into popular crypto-currency websites. This means that they had been intercepting your traffic, which they promised was secure by the way, and modifying it.
This means Brave Software has access to all of your information on those crypto-currency sites as well. They can see your payments/purchases, and your activity on the websites (through affiliate statistics).
Now some people might point out that they are not interested in crypto or have been visiting some of the sites but the issue still remains and that is they did all of this, without telling the user. They intentionally didn’t tell the user because they knew it would cause backlash and disruption. They knew one hundred percent what they were doing, and they knew it was unethical.
And the point remains if something like this was already done, who knows what will come up in the future. Personal recommendation is to avoid Brave and go back to other browsers.
Read More
What Is Runtime Error R6034?
Runtime Error r6034 is one of the most commonly occurring errors. This error usually arises in Windows Vista and Windows 7.
The message that appears to the user states ‘An application has made an attempt to load C runtime library incorrectly, please contact the support team for more information’.
As the message suggests, this problematic error occurs simply because an application attempts to load the C runtime library without a manifest.
Solution
Error Causes
Runtime Error r6034 occurs when the system compiler fails to compile the working application. While this is the primary reason, there are some other conditions that trigger Runtime Error r6034 which are outlined below.
- Existence of viruses and malware in the system.
- Corrupt or missing system files.
- Power outages.
- Hardware problems.
- Hardware driver problems.
There are several other reasons that may trigger Runtime Error r6034 that are beyond the scope of this article. Regardless of what triggers this error, it is crucial to ensure that it is fixed as soon as possible.
Further Information and Manual Repair
There are several ways to deal with Runtime Error r6034. However, one of the most effective ways is listed below as follows.
- When this error occurs, restart your computer. Make sure you press F8 before the windows logo is displayed.
- Choose safe mode and press enter.
- Go to the ‘Start’ button and type ‘msconfig’ in the search box. Press enter.
- The MSConfig program will now open.
- Choose ‘Start up’ in the general tab and then click on the ‘Load Start Up’ item.
- Click on the ‘Services’ tab. Now click ‘Hide all Microsoft Services’ and then choose ‘Disable All’.
- Close the system configuration window.
- Restart the computer.
After restarting your computer, you will notice that the Runtime Error r6034 has been removed. If this approach fails to deliver the desired results, it is advised to follow the steps listed below.
- Go to the start button. In the search box, type ‘System Restore’.
- When System Restore appears, click on it.
- The system restore window will open. Make sure any process or application that’s open is now closed.
- In the System Restore window, if a calendar list appears, it means the restore point is open. Now choose the point from where the error appeared and click Next.
- This process may take some time. Your system will restart automatically and the Runtime Error r6034 will disappear.
Read More
As you know, one of the basic apps in the Windows 10 operating system is the calculator and it can even be extended to a scientific calculator which makes it really useful for users. However, there are instances when you might encounter some issues while using this app. One of the issues about the Calculator app that’s been reported recently is that the Calculator app is not working. If you encounter the same problem, then you’ve come to the right place as this post will guide you on what you can do to fix the problem.
Based on the reports, users claimed that the issue with the Calculator app occurred right after they’ve installed a feature update, while other users claimed that the Calculator app never really worked on their computers and there are also cases where the app opens but it either freezes or crashes.
According to researchers, the main causes of the problem include a feature update that could’ve altered the settings. It could also be due to problems with the login account or corrupted and missing files, or the problem could also with the calculate app itself. To resolve this problem, here are some suggestions you can follow.
Option 1 – Run the System File Checker Scan
System File Checker or SFC is a built-in command utility that helps in restoring corrupted files as well as missing files. It replaces bad and corrupted system files to good system files that might be the reason why the calculator app is not working properly. To run the SFC command, follow the steps given below.
- Tap Win + R to launch Run.
- Type in cmd in the field and tap Enter.
- After opening Command Prompt, type in sfc /scannow
The command will start a system scan which will take a few whiles before it finishes. Once it’s done, you could get the following results:
- Windows Resource Protection did not find any integrity violations.
- Windows Resource Protection found corrupt files and successfully repaired them.
- Windows Resource Protection found corrupt files but was unable to fix some of them.
- Reboot your computer.
Option 2 – Run the DISM tool
You can also run the DISM Tool as it helps in repairing the Windows System Image as well as the Windows Component Store in Windows 10. Using this built-in tool, you have various options such as the “/ScanHealth”, “/CheckHealth”, and “/RestoreHealth” that could help in fixing the Calculator app.
- Open the Command Prompt with admin privileges.
- Then type in the following commands and make sure to hit Enter right after you type each one of them:
- Dism /Online /Cleanup-Image /CheckHealth
- Dism /Online /Cleanup-Image /ScanHealth
- Dism (.)exe /Online /Cleanup-image /Restorehealth
- Do not close the window if the process takes a while as it will probably take a few minutes to finish.
Option 3 – Try logging into your computer using a different User Account
You might want to try logging into a different User Account since it is possible that the issue could have something to do with your log-in account. Thus, you can isolate this possibility by logging into a different user account. If you don’t have any other user account, simply create a new one by clicking on the Start icon and then go to Settings > Account > Family & other users. From there, go to the Other user’s section and click on the Add someone else to this PC option, and then inputs all the needed information and restarts your computer. Once your computer has restarted, log into your computer using the newly created user account.
Option 4 – Try to reset or reinstall the Calculator app
If the first three given options didn’t work, you might want to reset or reinstall the Calculator app. To do that, follow these steps:
- Click on the Start button and go to Settings > Apps > Apps and features.
- Next, look for the Calculator app from the app list and click on it to see its other options.
- After that, select the Advanced options and go to the Reset section and then click on the Reset button to reset the Calculator app.
Note: You also have the option to reinstall the Calculator app. All you have the option to visit Microsoft Store and from there, uninstall the Calculator app.
Read More
Copyright © 2023, ErrorTools. All Rights Reserved
Trademark: Microsoft Windows logos are registered trademarks of Microsoft. Disclaimer: ErrorTools.com is not affiliated with Microsoft, nor claims direct affiliation.
The information on this page is provided for information purposes only.
Первым делом:
Скачайте библиотеку — скачать PhotoViewer.dll
Затем:
Поместите PhotoViewer.dll
в одну из следующих папок:
Если у вас 64-битная версия Windows, то поместите файл в:
«C:\Windows\SysWOW64»
Если у вас 32-битная версия Windows, то поместите файл в:
«C:\Windows\System32»
После этого
Перезагрузите компьютер, чтобы изменения вступили в силу.
Всё равно выдаёт ошибку PhotoViewer.dll
не был найден?
Тогда придётся установить этот файл вручную. Для этого:
Зайдите в меню «Пуск».
В строчке поиска введите «cmd». И запустите найденную программу от имени администратора.
В открывшемся окне введите «regsvr32 PhotoViewer.dll
«.
После этого снова перезагрузите компьютер. Теперь ошибка должна быть исправлена.
Если что-то не понятно прочитайте более подробную инструкцию — как установить dll файл.
Скачать сейчас
Ваша операционная система:
Как исправить ошибку Photoviewer.dll?
Прежде всего, стоит понять, почему photoviewer.dll файл отсутствует и почему возникают photoviewer.dll ошибки. Широко распространены ситуации, когда программное обеспечение не работает из-за недостатков в .dll-файлах.
What is a DLL file, and why you receive DLL errors?
DLL (Dynamic-Link Libraries) — это общие библиотеки в Microsoft Windows, реализованные корпорацией Microsoft. Файлы DLL не менее важны, чем файлы с расширением EXE, а реализовать DLL-архивы без утилит с расширением .exe просто невозможно.:
Когда появляется отсутствующая ошибка Photoviewer.dll?
Если вы видите эти сообщения, то у вас проблемы с Photoviewer.dll:
- Программа не запускается, потому что Photoviewer.dll отсутствует на вашем компьютере.
- Photoviewer.dll пропала.
- Photoviewer.dll не найдена.
- Photoviewer.dll пропала с вашего компьютера. Попробуйте переустановить программу, чтобы исправить эту проблему.
- «Это приложение не запустилось из-за того, что Photoviewer.dll не была найдена. Переустановка приложения может исправить эту проблему.»
Но что делать, когда возникают проблемы при запуске программы? В данном случае проблема с Photoviewer.dll. Вот несколько способов быстро и навсегда устранить эту ошибку.:
метод 1: Скачать Photoviewer.dll и установить вручную
Прежде всего, вам нужно скачать Photoviewer.dll на ПК с нашего сайта.
- Скопируйте файл в директорию установки программы после того, как он пропустит DLL-файл.
- Или переместить файл DLL в директорию вашей системы (C:\Windows\System32, и на 64 бита в C:\Windows\SysWOW64\).
- Теперь нужно перезагрузить компьютер.
Если этот метод не помогает и вы видите такие сообщения — «photoviewer.dll Missing» или «photoviewer.dll Not Found,» перейдите к следующему шагу.
Photoviewer.dll Версии
Версия
биты
Компания
Язык
Размер
6.3.9600.17415
64 bit
Microsoft Corporation
U.S. English
1.76 MB
Версия
биты
Компания
Язык
Размер
6.3.9600.17415
32 bit
Microsoft Corporation
U.S. English
1.56 MB
Версия
биты
Компания
Язык
Размер
6.1.7601.17514
64 bit
Microsoft Corporation
U.S. English
1.65 MB
Версия
биты
Компания
Язык
Размер
6.1.7601.17514
32 bit
Microsoft Corporation
U.S. English
1.39 MB
метод 2: Исправление Photoviewer.dll автоматически с помощью инструмента для исправления ошибок
Как показывает практика, ошибка вызвана непреднамеренным удалением файла Photoviewer.dll, что приводит к аварийному завершению работы приложений. Вредоносные программы и заражения ими приводят к тому, что Photoviewer.dll вместе с остальными системными файлами становится поврежденной.
Вы можете исправить Photoviewer.dll автоматически с помощью инструмента для исправления ошибок! Такое устройство предназначено для восстановления поврежденных/удаленных файлов в папках Windows. Установите его, запустите, и программа автоматически исправит ваши Photoviewer.dll проблемы.
Если этот метод не помогает, переходите к следующему шагу.
метод
3: Установка или переустановка пакета Microsoft Visual C ++ Redistributable Package
Ошибка Photoviewer.dll также может появиться из-за пакета Microsoft Visual C++ Redistribtable Package. Необходимо проверить наличие обновлений и переустановить программное обеспечение. Для этого воспользуйтесь поиском Windows Updates. Найдя пакет Microsoft Visual C++ Redistributable Package, вы можете обновить его или удалить устаревшую версию и переустановить программу.
- Нажмите клавишу с логотипом Windows на клавиатуре — выберите Панель управления — просмотрите категории — нажмите на кнопку Uninstall.
- Проверить версию Microsoft Visual C++ Redistributable — удалить старую версию.
- Повторить деинсталляцию с остальной частью Microsoft Visual C++ Redistributable.
- Вы можете установить с официального сайта Microsoft третью версию редистрибутива 2015 года Visual C++ Redistribtable.
- После загрузки установочного файла запустите его и установите на свой ПК.
- Перезагрузите компьютер после успешной установки.
Если этот метод не помогает, перейдите к следующему шагу.
метод
4: Переустановить программу
Как только конкретная программа начинает давать сбой из-за отсутствия .DLL файла, переустановите программу так, чтобы проблема была безопасно решена.
Если этот метод не помогает, перейдите к следующему шагу.
метод
5: Сканируйте систему на наличие вредоносного ПО и вирусов
System File Checker (SFC) — утилита в Windows, позволяющая пользователям сканировать системные файлы Windows на наличие повреждений и восстанавливать их. Данное руководство описывает, как запустить утилиту System File Checker (SFC.exe) для сканирования системных файлов и восстановления отсутствующих или поврежденных системных файлов (включая файлы .DLL). Если файл Windows Resource Protection (WRP) отсутствует или поврежден, Windows может вести себя не так, как ожидалось. Например, некоторые функции Windows могут не работать или Windows может выйти из строя. Опция «sfc scannow» является одним из нескольких специальных переключателей, доступных с помощью команды sfc, команды командной строки, используемой для запуска System File Checker. Чтобы запустить её, сначала откройте командную строку, введя «командную строку» в поле «Поиск», щелкните правой кнопкой мыши на «Командная строка», а затем выберите «Запустить от имени администратора» из выпадающего меню, чтобы запустить командную строку с правами администратора. Вы должны запустить повышенную командную строку, чтобы иметь возможность выполнить сканирование SFC.
- Запустите полное сканирование системы за счет антивирусной программы. Не полагайтесь только на Windows Defender. Лучше выбирать дополнительные антивирусные программы параллельно.
- После обнаружения угрозы необходимо переустановить программу, отображающую данное уведомление. В большинстве случаев, необходимо переустановить программу так, чтобы проблема сразу же исчезла.
- Попробуйте выполнить восстановление при запуске системы, если все вышеперечисленные шаги не помогают.
- В крайнем случае переустановите операционную систему Windows.
В окне командной строки введите «sfc /scannow» и нажмите Enter на клавиатуре для выполнения этой команды. Программа System File Checker запустится и должна занять некоторое время (около 15 минут). Подождите, пока процесс сканирования завершится, и перезагрузите компьютер, чтобы убедиться, что вы все еще получаете ошибку «Программа не может запуститься из-за ошибки Photoviewer.dll отсутствует на вашем компьютере.
метод 6: Использовать очиститель реестра
Registry Cleaner — мощная утилита, которая может очищать ненужные файлы, исправлять проблемы реестра, выяснять причины медленной работы ПК и устранять их. Программа идеально подходит для работы на ПК. Люди с правами администратора могут быстро сканировать и затем очищать реестр.
- Загрузите приложение в операционную систему Windows.
- Теперь установите программу и запустите ее. Утилита автоматически очистит и исправит проблемные места на вашем компьютере.
Если этот метод не помогает, переходите к следующему шагу.
Frequently Asked Questions (FAQ)
QКакая последняя версия файла photoviewer.dll?
A6.3.9600.17415 — последняя версия photoviewer.dll, доступная для скачивания
QКуда мне поместить photoviewer.dll файлы в Windows 10?
Aphotoviewer.dll должны быть расположены в системной папке Windows
QКак установить отсутствующую photoviewer.dll
AПроще всего использовать инструмент для исправления ошибок dll