
В этой статье мы рассмотрим самые базовые настройки Windows Server 2022 — это Active Directory, DNS, DHCP, настройки терминальных лицензий, добавление пользователей… Эти настройки являются не обязательными, но как правило применяются как базовые для большинства задач.
— Скачать бесплатно дистрибутив Windows Server 2022 Standard и Datacenter можете в нашем каталоге.
— Пошаговая инструкция по установке Windows Server 2022 в нашей прошлой статье.
— Приобрести ключи активации для Windows Server 2022 Standard и Datacenter можете так же в нашем каталоге.
1) При установке Windows Server 2022 например на русском языке, добавляется по умолчанию только одна раскладка клавиатуры — «Русский язык», для настроек нам необходима еще английская раскладка клавиатуры. Добавим ее.
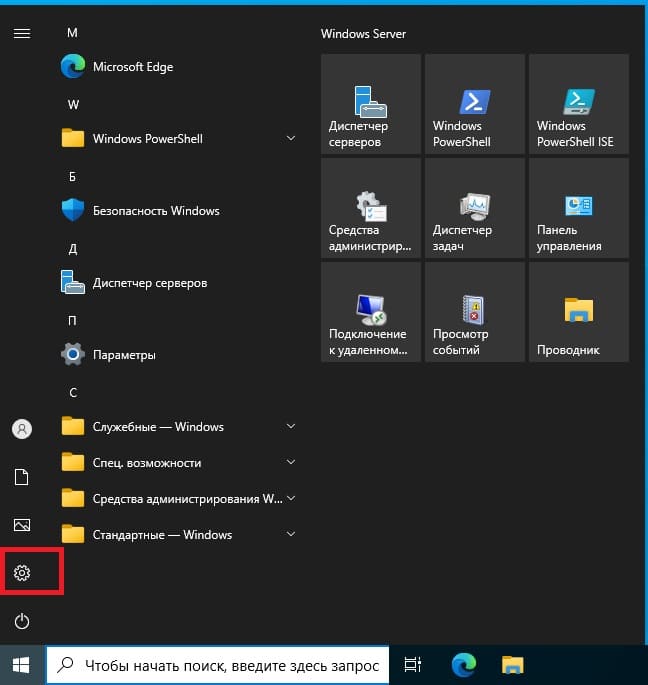
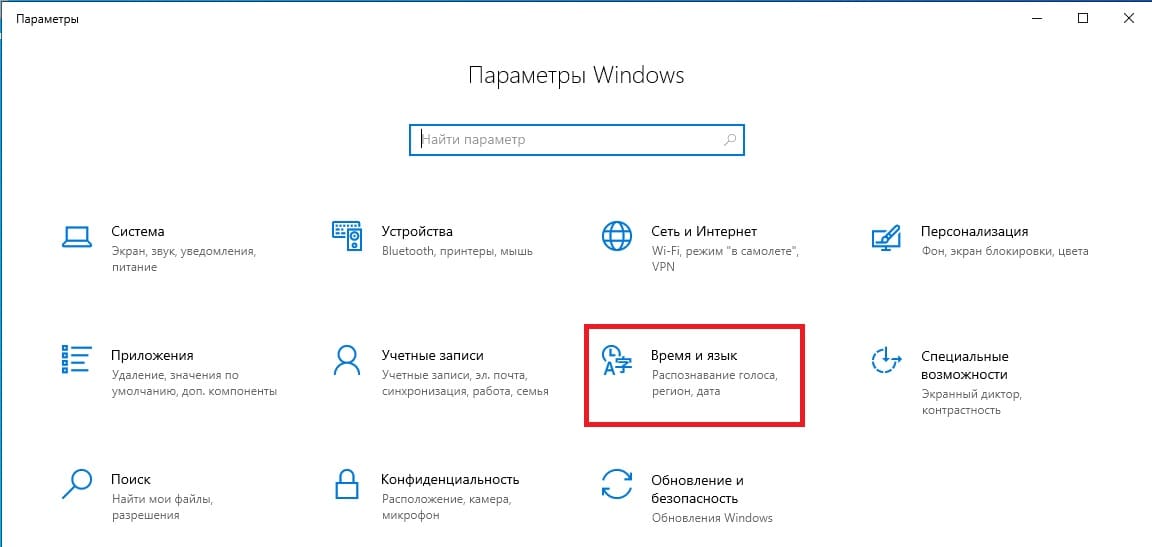
Заходим в меню «Пуск» => Параметры => Время и язык.
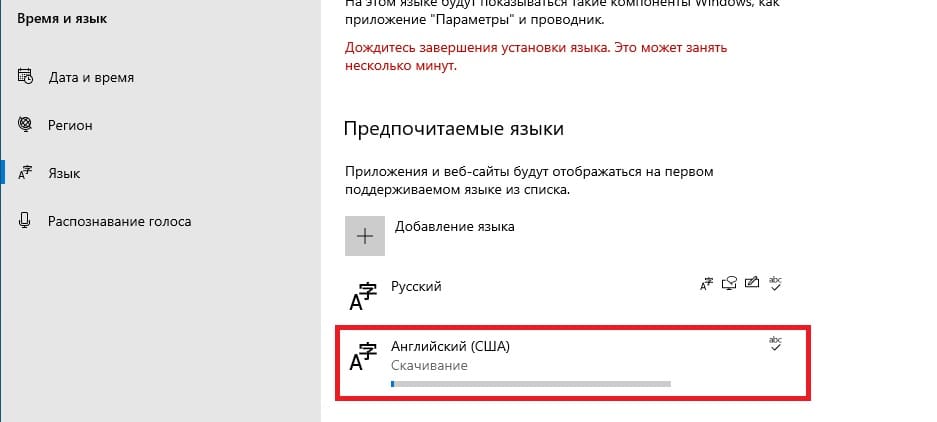
Во вкладке «Язык» нажимаем на «Добавление языка».

Выбираем «Английский» => Далее.
Можем оставить все галки, кроме назначения языком интерфейса и нажимаем «Установить».
Теперь дожидаемся установки языкового пакета, после установки можете перезагрузить сервер и у Вас появится возможность переключения языка раскладки на английский язык.
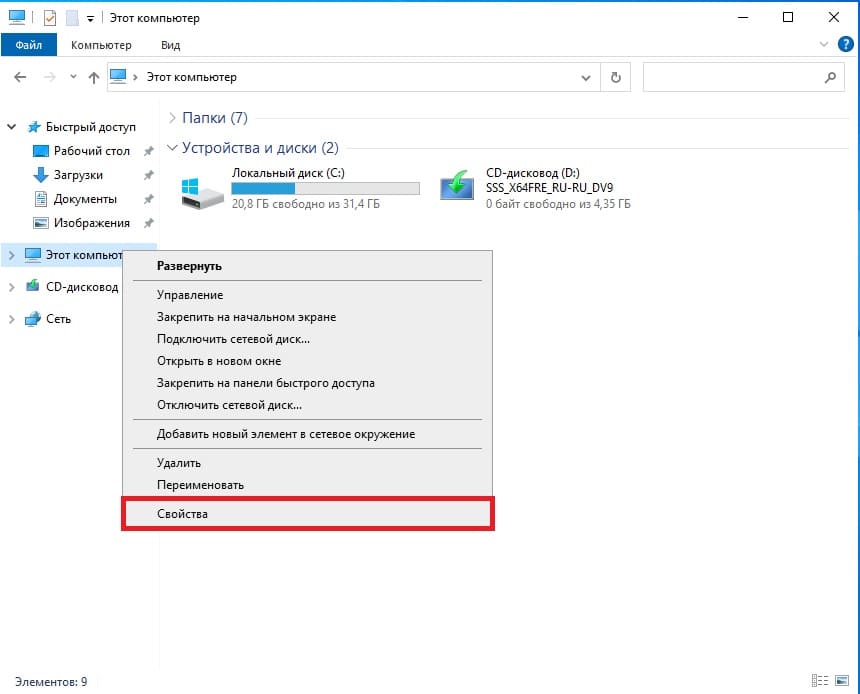
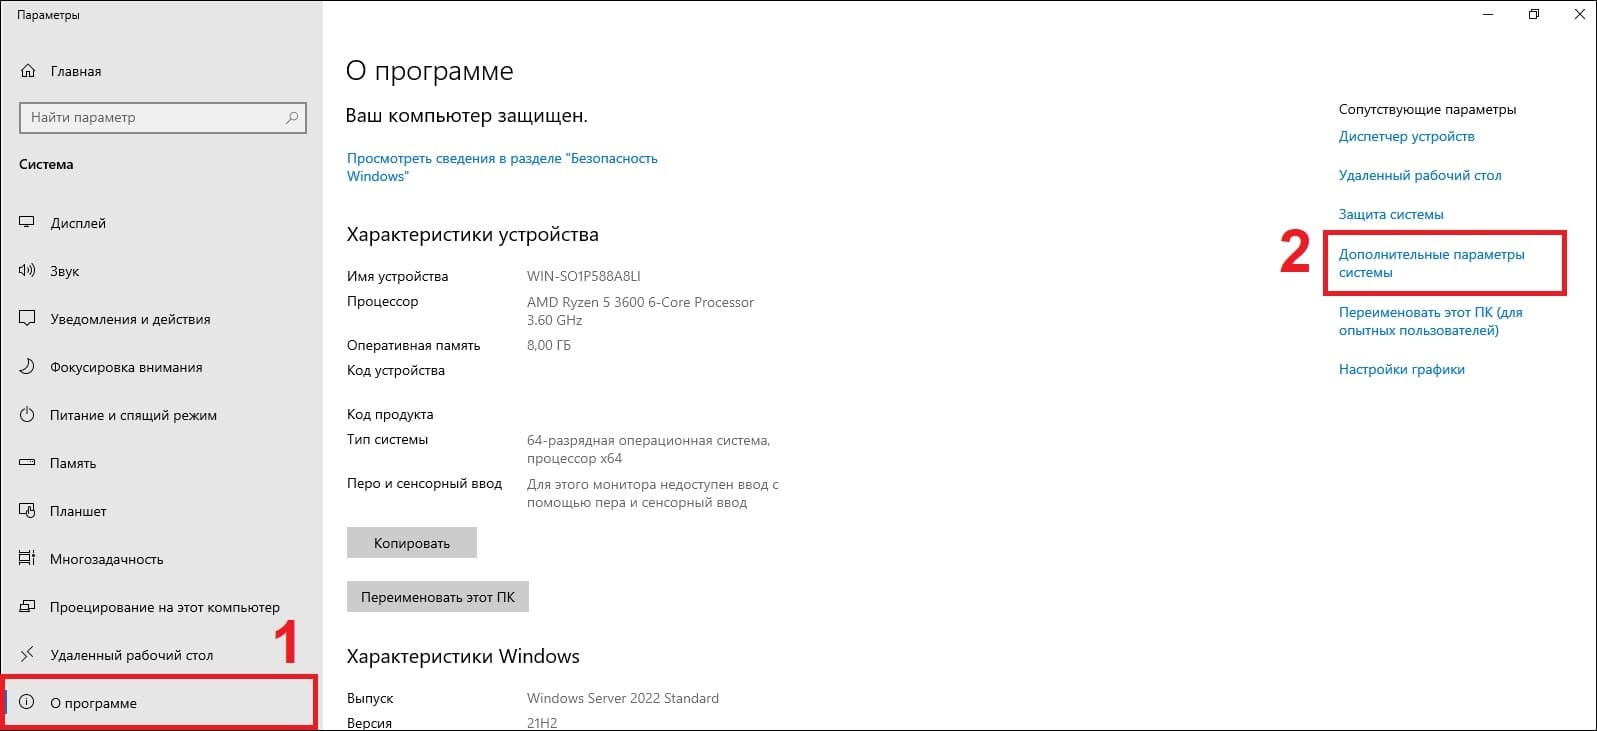
2) Следующим шагом, нам нужно задать имя серверу для более простого подключения к нему. Заходим в проводник => Слева «Этот компьютер» => Свойства.
В меню «О программе» нажимаем «Дополнительные параметры системы».
В новом окне выбираем вкладку «Имя компьютера» => Изменить.
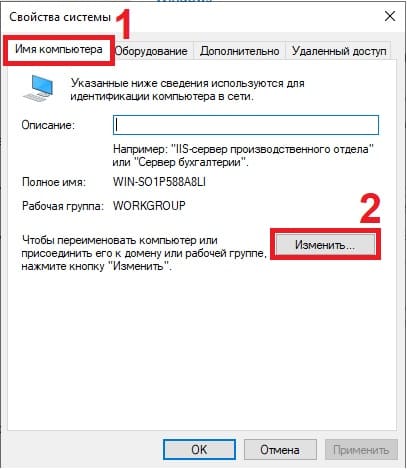
Задаем имя компьютера, имя может быть любое. Рекомендуем не использовать кириллицу, а только латиницу и цифры.
Для применения настроек — перезагружаем сервер.
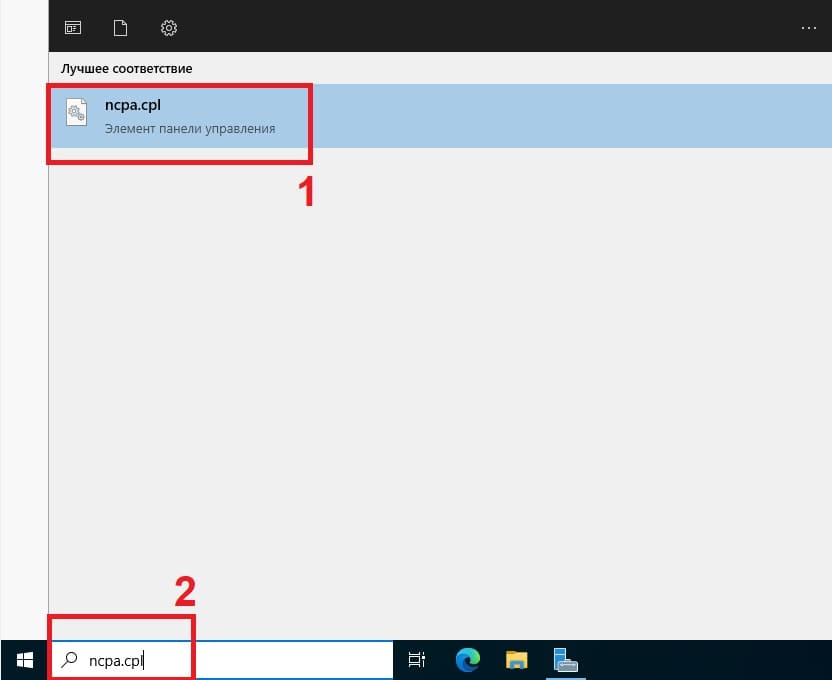
3) Далее, зададим локальный статический IP адрес сервера. Это так же необходимо для бесперебойного подключения к нему. (мы рекомендуем помимо всего использовать так же статический публичный IP для корректного подключения к нему из внешней сети интернет). Так же, данная настройка обязательна для последующей настройки DHCP сервера.
В поиск вводим ncpa.cpl
Правой кнопкой мыши на сетевую карточку => Свойства.
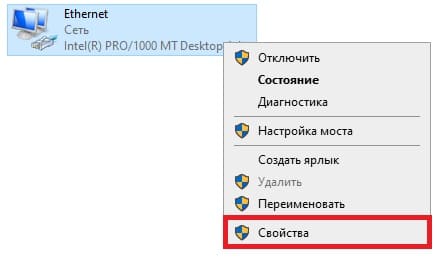
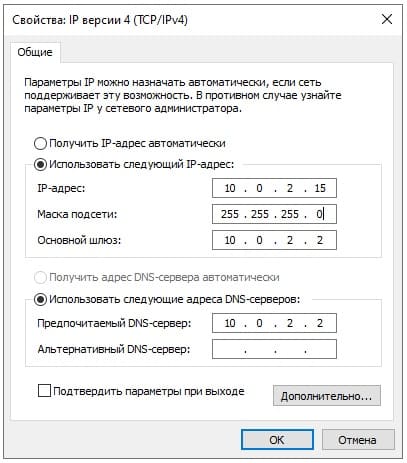
Мы будем настраивать Ipv4, выделяем его курсором и нажимаем «Свойства».
Задаем настройки IP Вашей сети. Внимание! На скриншоте ниже — это пример, у вас должны быть Ваши собственные настройки под Вашу сеть.
3) Теперь переходим к добавлению ролей и компонентов в Active Directory (Диспетчере серверов).
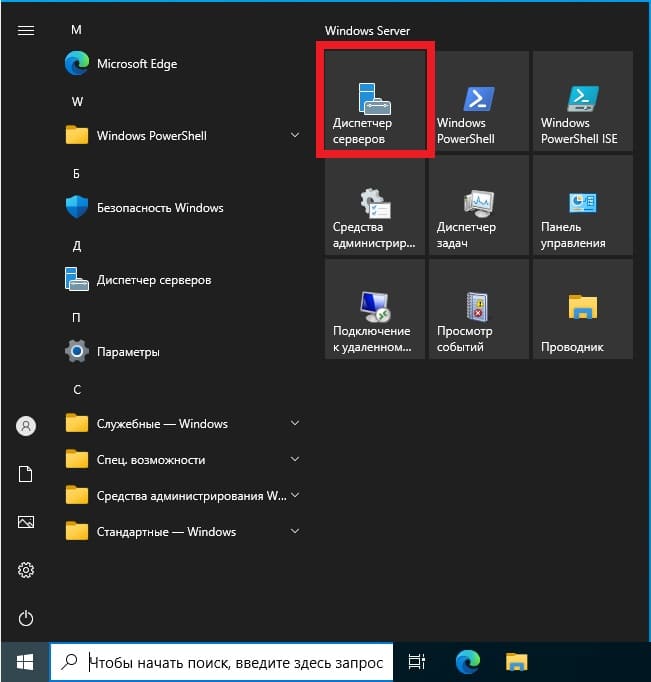
Нажимаем меню «Пуск» => Диспетчер серверов.
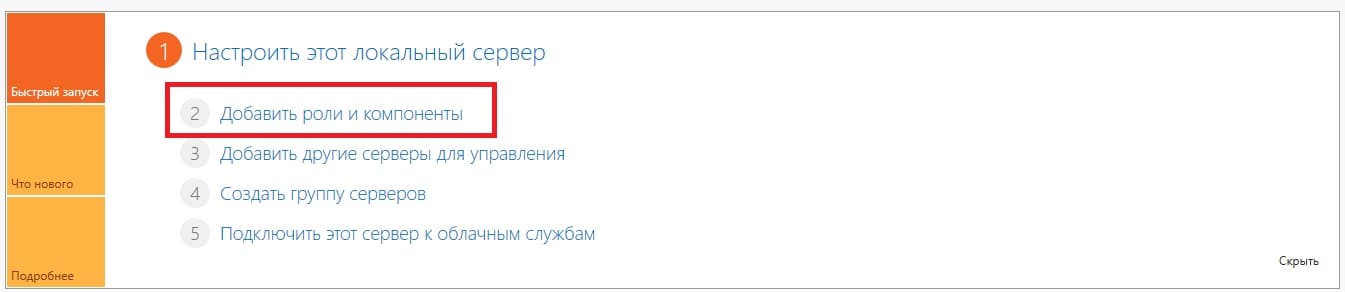
Добавить роли и компоненты.
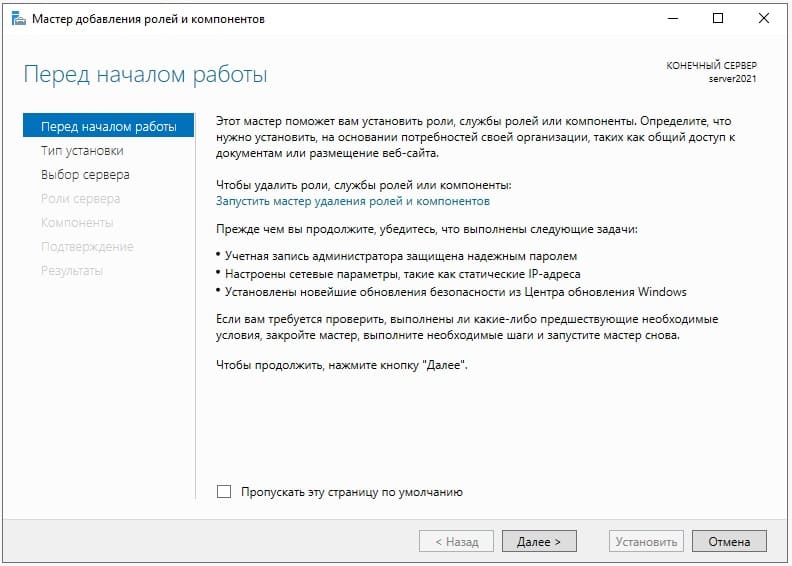
В следующем окне просто нажимаем «Далее».
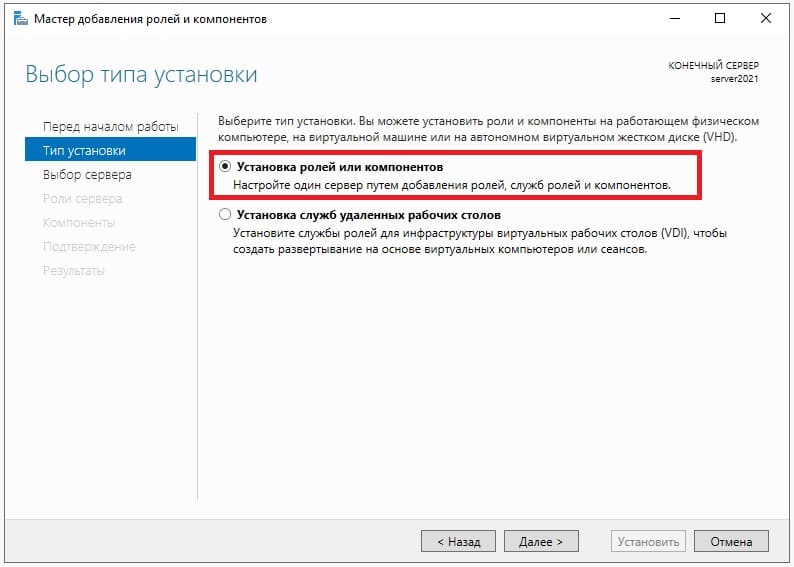
В меню «Тип установки» выбираем пункт => Установка ролей и компонентов.
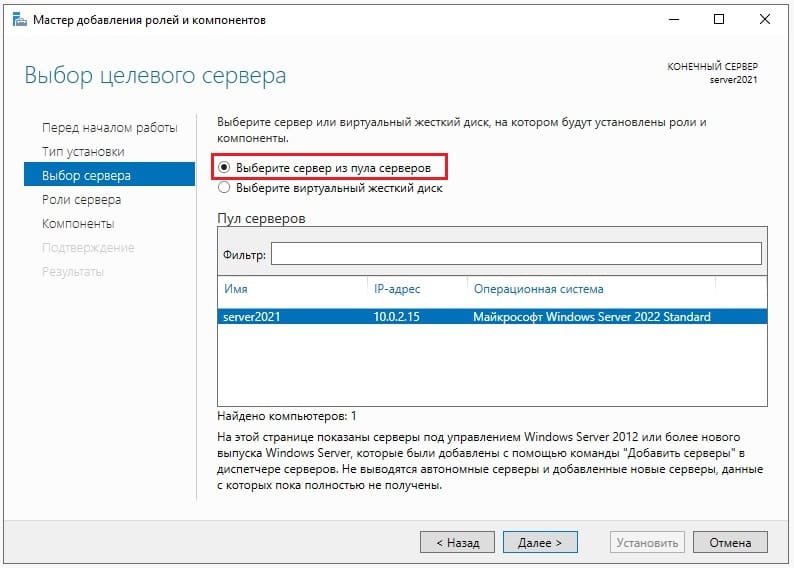
Далее «Выбираем сервер из пула». Он у нас должен быть один.
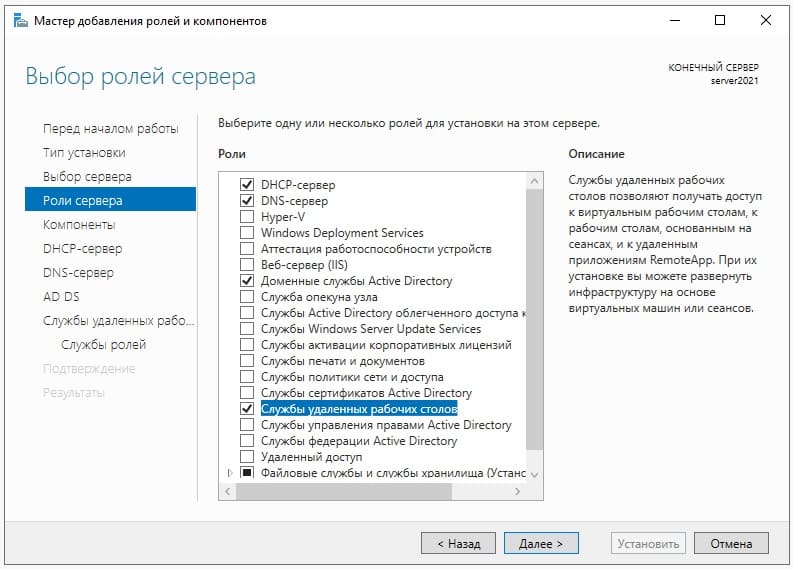
Далее, выбираем нужные Вам роли (функионал сервера), в случае чего, вы всегда сможете добавить что-либо еще, если что-то понадобится дополнительное.
Мы выберем на примере DHCP-сервер, DNS-сервер (Внимание! DNS (домен) не всегда нужен под рабочие задачи, убедитесь, что он нужен именно Вам, прежде чем его выбирать для установки. Мы его устанавливаем лишь для примера.), Доменные службы и Службы для удаленных рабочих столов (для подключения к серверу по RDP).
После выбора нужных служб идем далее.
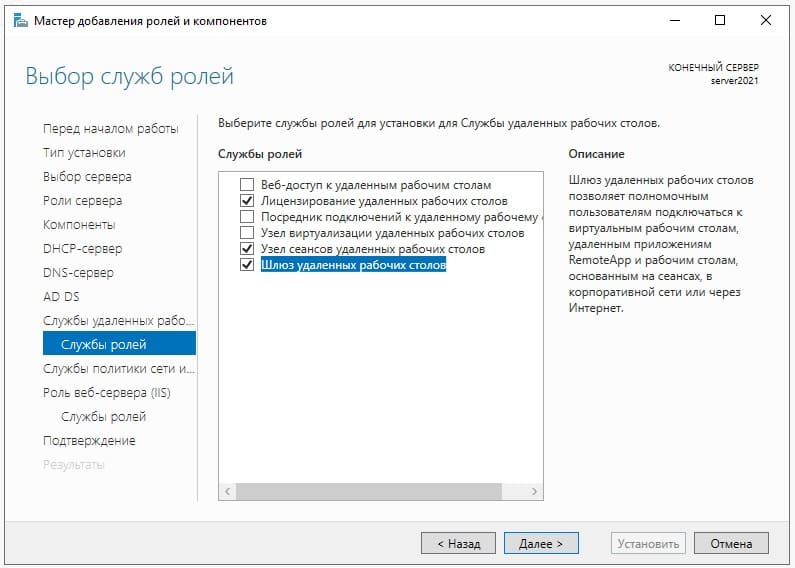
Далее, пролистываем до меню «Службы ролей» в подпункт «Службы удаленных рабочих столов» и выбираем здесь пункты «Лицензирование удаленных рабочих столов», «Узел сеансов удаленных рабочих столов» и «Шлюз удаленных рабочих столов».
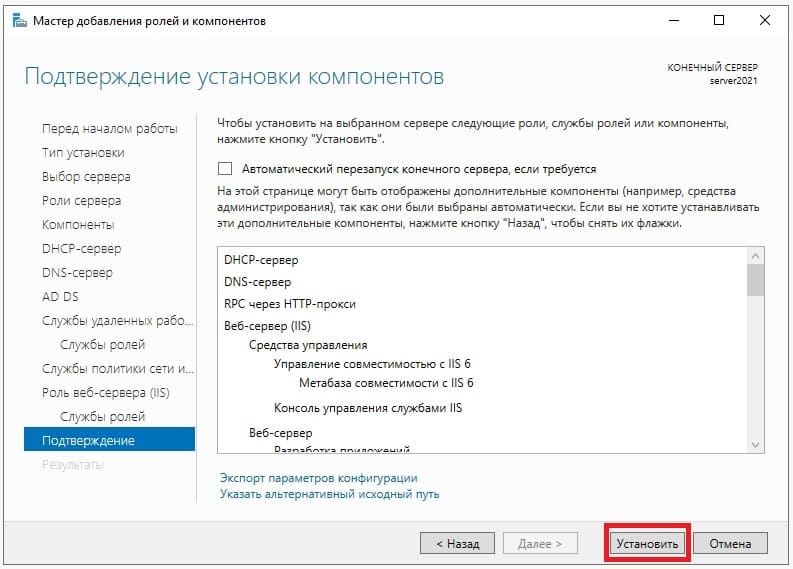
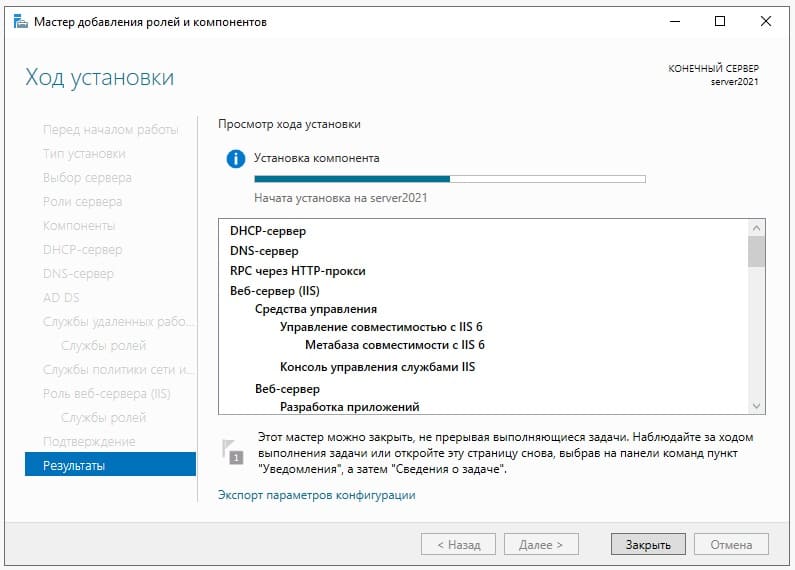
Пролистываем до конца в меню «Подтверждение», нажимаем «Установить» и дожидаемся установки служб.
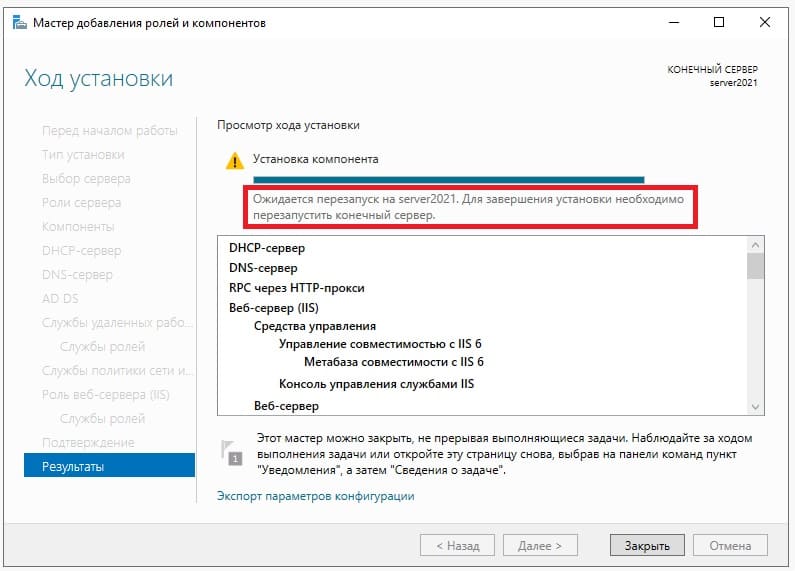
После перезагрузите сервер для применения настроек.
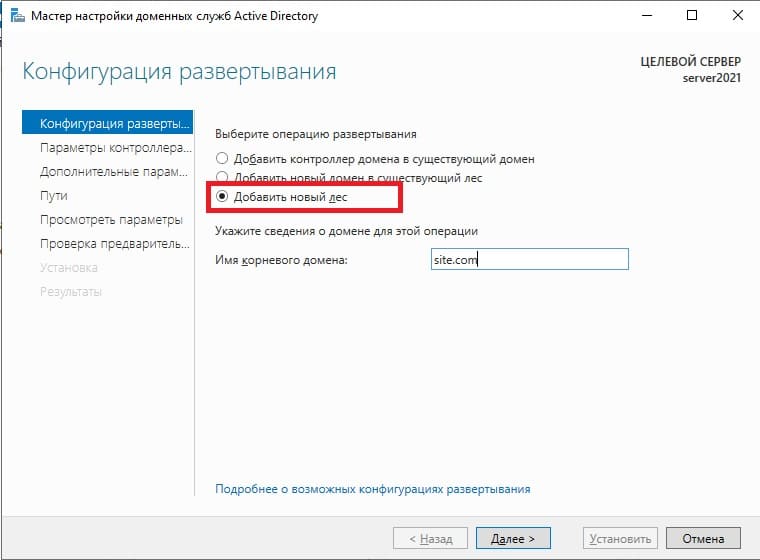
4) После перезагрузки заходим в меню Active Directory (Диспетчер серверов) и перейдем в настройки доменных служб (DNS), если вы не выбирали данную службу, то пропустите этот пункт настройки.
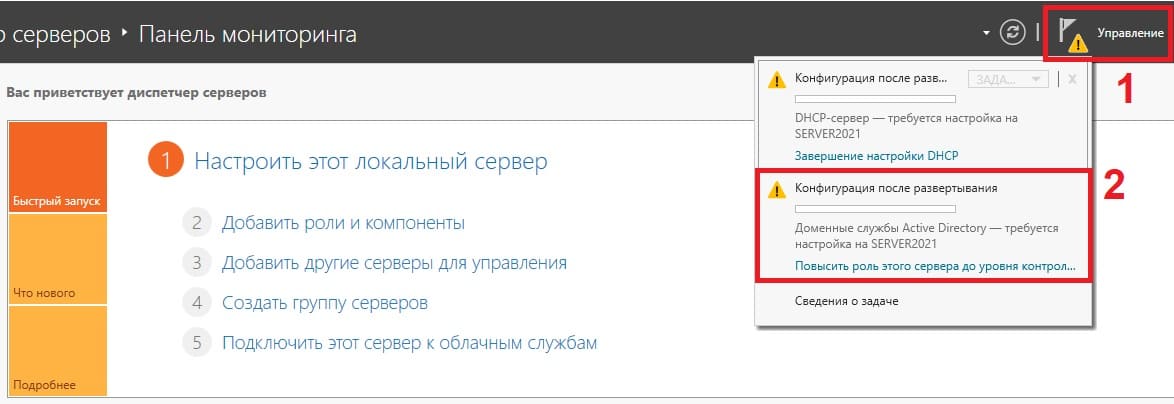
Выбираем пункт «Добавить новый лес» => и задаем имя для домена, он может быть любым, например названием вашей компании, или название вашего сайта. Настоятельно рекомендуем задавать только на латинице (или цифры).
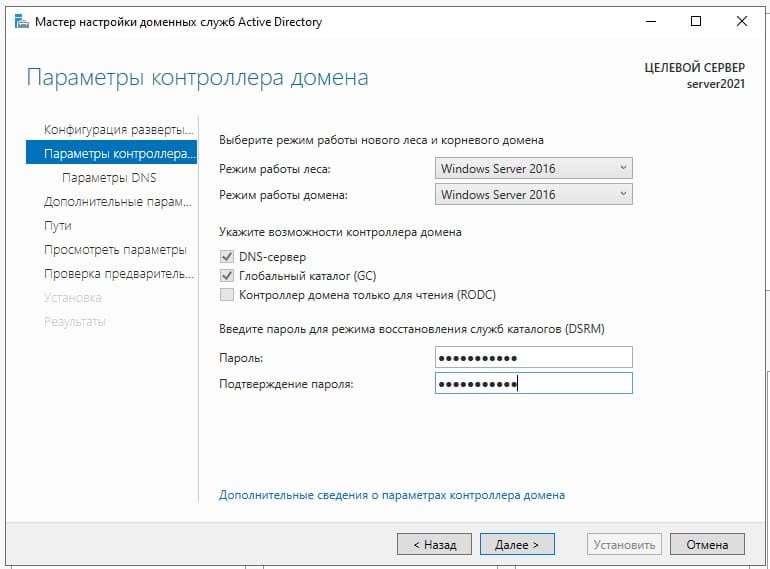
В параметрах контроллера домена задаем пароль для Вашего домена.
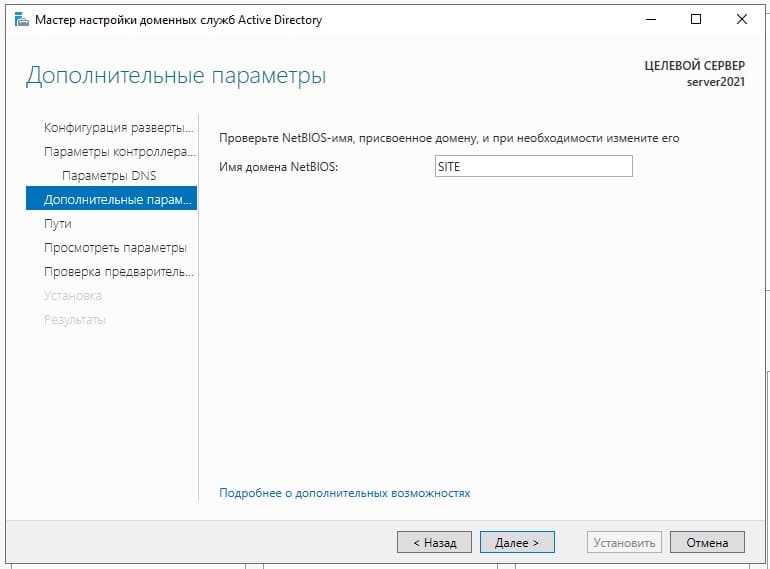
Параметр NetBIOS как правило задается автоматически от имени домена.
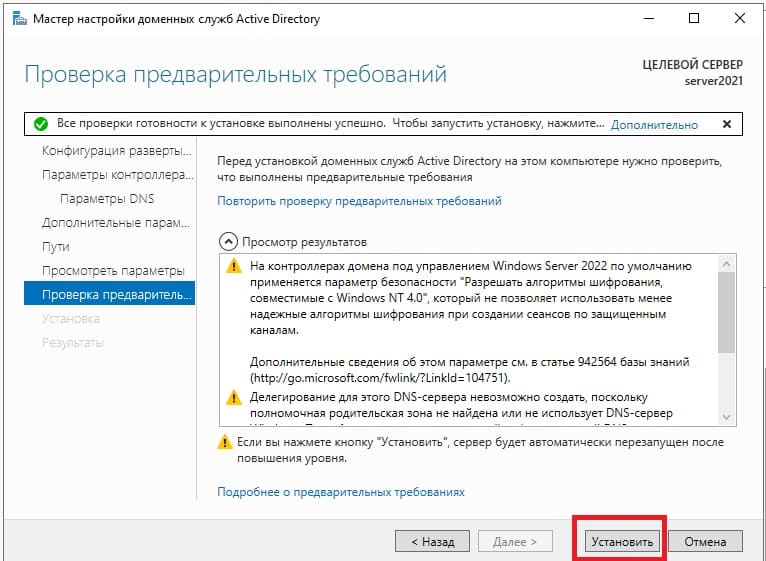
Доходим до проверки предварительных требований и нажимаем «Установить». Дождитесь установки.
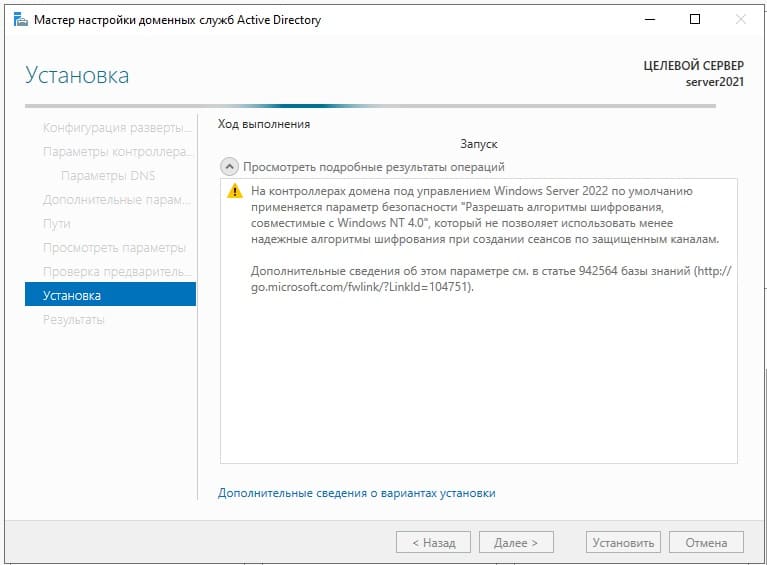
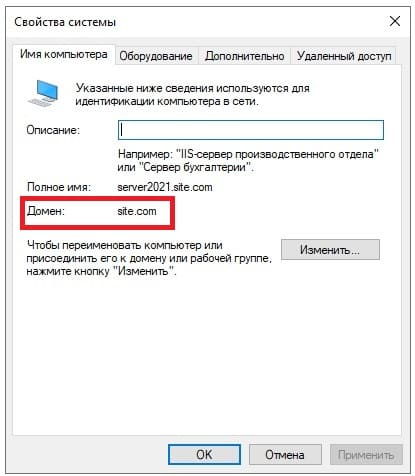
После установки домена можете проверить в свойствах системы, что Ваш сервер добавлен в домен.
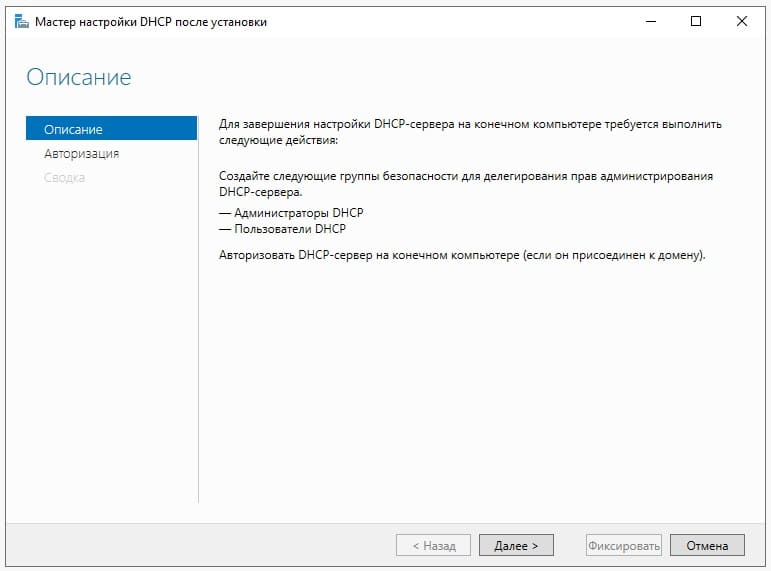
5) Перейдем к настройке DHCP, чтобы сервер мог раздавать IP адреса на клиентские ПК.

Нажимаем «Далее».
Оставляем по умолчанию.
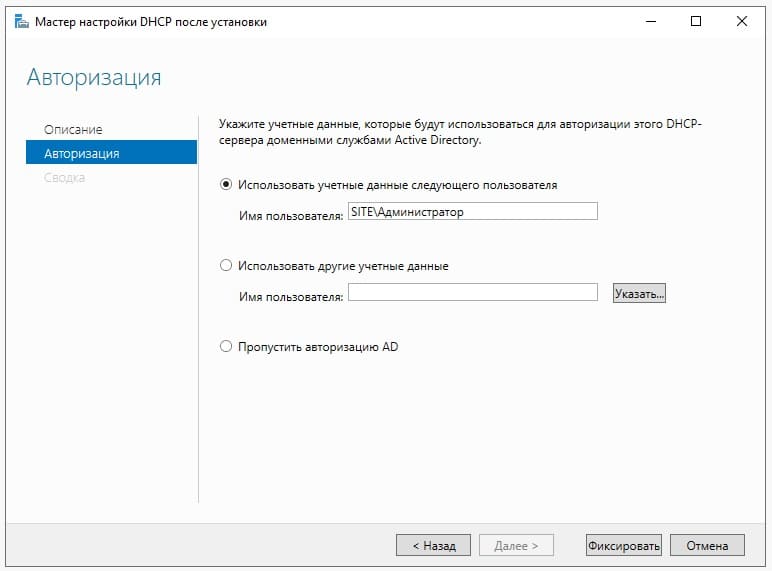
В этой настройке готово.

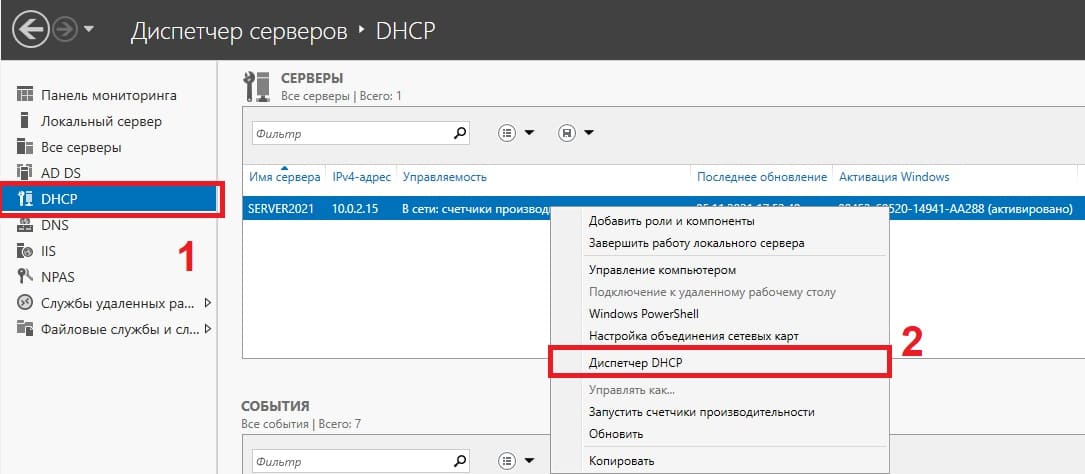
Теперь в диспетчере серверов, в меню слева выбираем пункт DHCP => Правой кнопкой мыши на Ваш сервер => Диспетчер DHCP
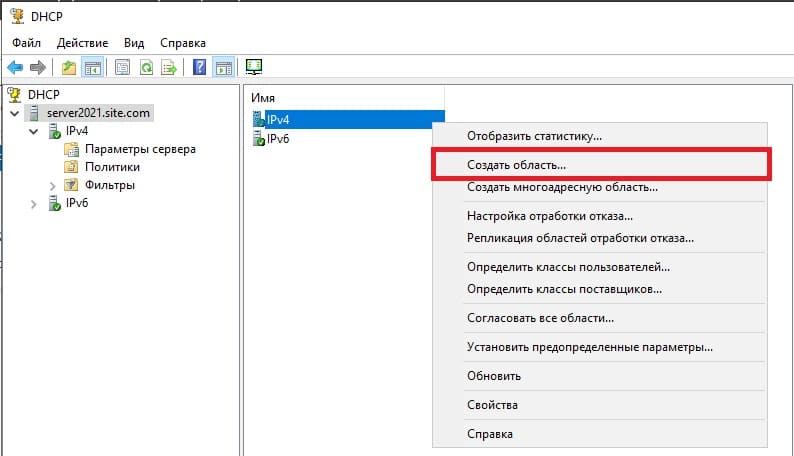
Раскрываем ветку DHCP => Ваш сервер => IPv4, правой кнопкой мыши на этот пункт => Создать область.
В новом окне «Далее».
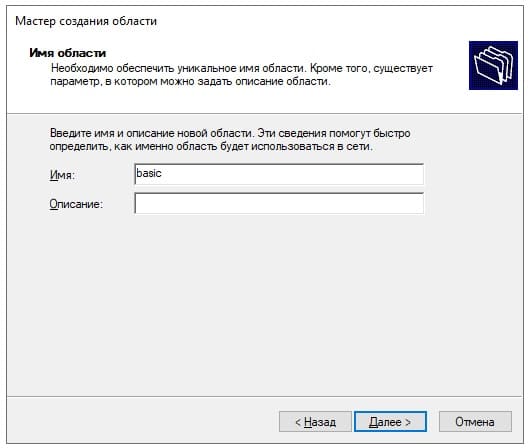
Задаем любое имя области.
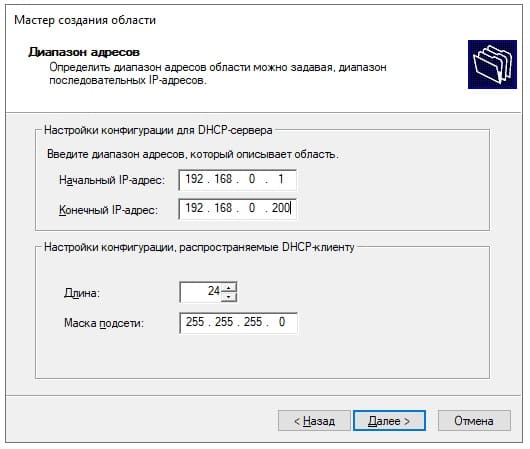
Далее задаем диапазон IP адресов, который будет раздавать сервер на локальные компьютеры, а так же маску подсети. (На скриншоте ниже — это пример, у вас может быть свой диапазон).
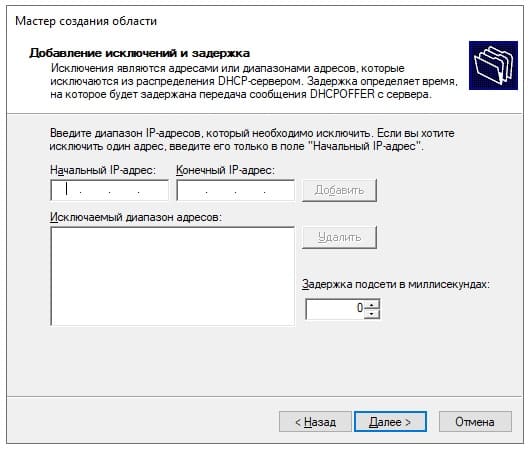
При желании, можете исключить какой-либо промежуток IP адресов, либо просто нажмите «Далее».
Задаем срок действия раздачи IP адреса на компьютеры. Мы зададим большой срок в 365 дней, у вас он может быть любой под Ваши задачи.

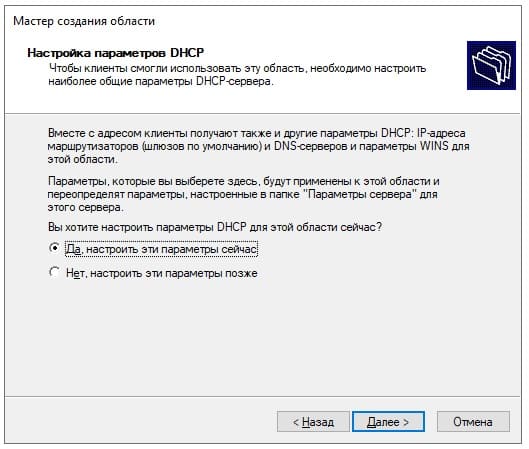
Выбираем пункт «Да, настроить эти параметры сейчас».
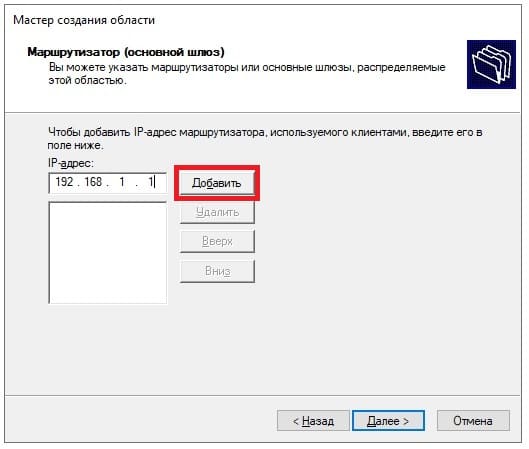
Можете добавить адрес маршутизатора (роутера) из вашей сети.
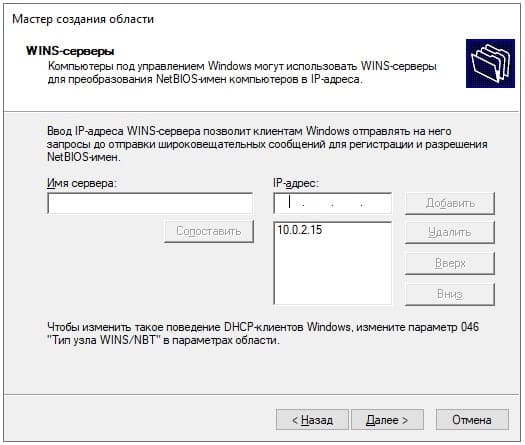
Можете добавить WINS-сервер, если у вас уже он был ранее настроен на сервере, то он добавится автоматически. Либо можете пропустить данный пункт настройки.
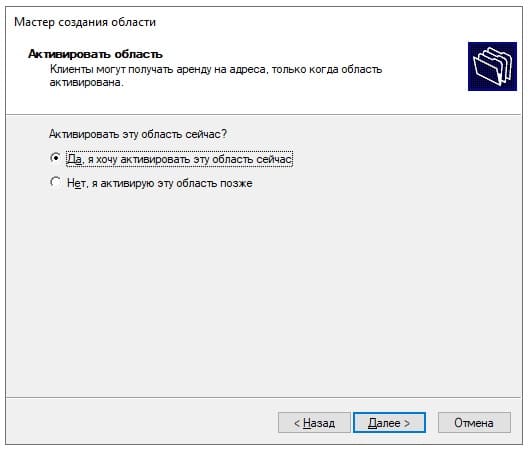
Активировать эту область сейчас.
Готово.
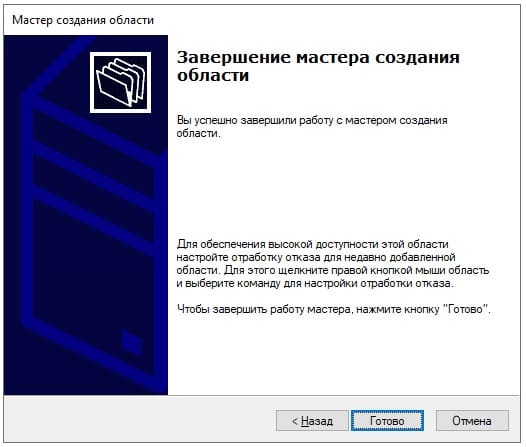
Теперь видим, что область успешно создана.

6) Теперь приступим к лицензированию удаленных рабочих столов (RDP / RDS), чтобы Вы могли подключаться к серверу с клиентских ПК по RDP.
— Первое, что для этого нужно — это ключ активации Windows Server 2022 RDS User или Device CAL. Приобрести его можете в нашем каталоге на следующей странице.
— Чем отличается User CAL от Device CAL можете ознакомиться в нашей прошлой статье.
— Для активации ключа RDS теперь можете воспользоваться следующей инструкцией по настройке и активации данного функционала в нашей прошлой статье. Инструкция является универсальной, начиная от 2012r2 версии до 2022 версии Windows Server.
7) Следующим шагом рассмотрим как добавить пользователя в Windows Server, в случае, если Вы не устанавливали на сервер домен (DNS). С созданными пользователями Вы можете под их данными подключаться к серверу по RDP.
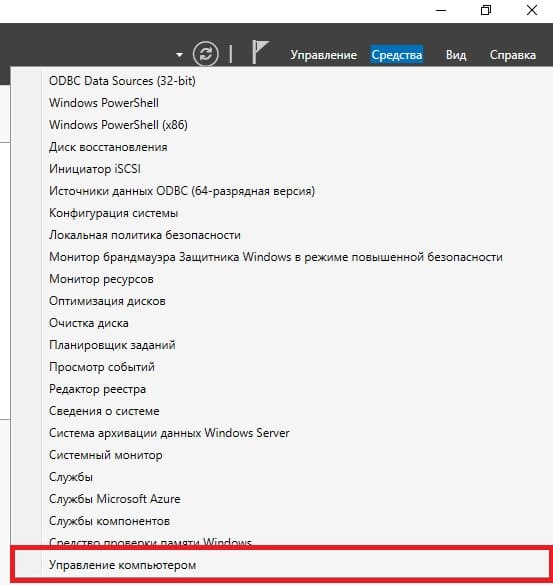
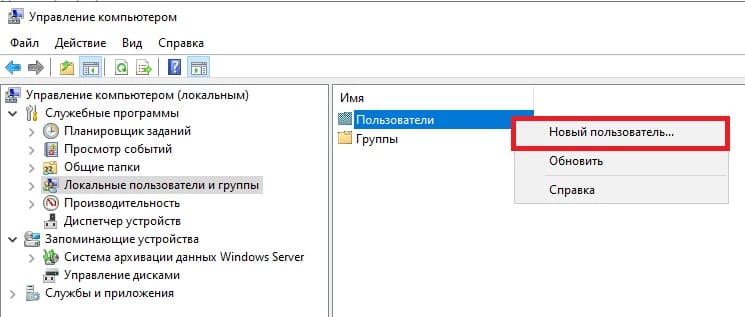
Заходим в Active Directory => Средства => Управление компьютером => Локальные пользователи и группы => Пользователи => Новый пользователь.
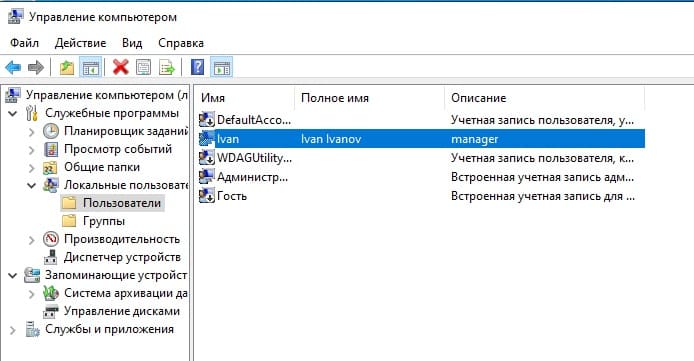
Задаем имя пользователя, можете так же указать его должность, или краткое описание. Обязательно задаем ему пароль для входа. При желании можете установить пункты запрета на смену пароля пользователю и отключение срока действия пароля.
Пользователь создан. Нажав на него двойным кликом курсором мыши можете задать пользователю более детальные настройки, при необходимости.
Currently, Windows Server 2022 is Microsoft’s latest version of Windows Server. This post from MiniTool teaches you how to install, set up, and configure Windows Server 2022. Besides, you can know other information about Windows Server 2022.
Windows Server 2022 was released in 2021 and will receive 10 years of long-term support, which is the latest version of Windows Server from Microsoft in the Long Term Servicing Channel (LTSC). In terms of features, Windows Server 2022 builds on Windows Server 2019.
Microsoft recommends you install Windows Server 2022 since it has new, better, more efficient features.
New Features of Windows Server 2022
This part lists the new features of Windows Server 2022.
- Windows Server 2022 enables TLS 1.3 and HTTPS by default. Typically, this protects client data connecting to the server and eliminates outdated encryption algorithms. It also enhances the security of older versions and aims to encrypt as many handshakes as possible.
- The advanced multi-layer security in the Server 2022 Security Module provides the comprehensive protection servers need in today’s modern technological world.
- Windows Server 2022 is built on three key pillars – Advanced Protection, Simplified Security, and Preventive Defense.
- The DNS client in Windows Server 2022 now supports DNS-over-HTTPS (DoH), which encrypts DNS queries using the HTTPS protocol.
- New improvements to Windows Admin Center for managing Server 2022 include the ability to report on the current status of security core features.
- HotPatching – A new way to install updates on new Windows Server Azure edition virtual machines (VMs) without requiring a reboot after installation.
- Several platform improvements for Windows containers, including application compatibility and the Windows container experience for Kubernetes.
- Microsoft Edge is included in Windows Server 2022, replacing Internet Explorer.
System Requirements of Windows Server 2022 Installation
If you want to install Windows Server 2022, you need to check if your PC meets the minimum hardware requirements. Let’s have a look at them below:
- Processor: 1.4 GHz 64-bit processor compatible with the x64 instruction set. Supports NX and DEP, CMPXCHG16b, LAHF/SAHF, and prefetch.
- Memory/RAM: 512 MB (2GB for servers with the Desktop Experience installation option). ECC (Error Correcting Code) type or similar technology for physical host deployments.
- Disk space: At least 32 GB.
- Network requirements: An Ethernet adapter with a throughput of at least 1 Gb/s. Compliant with the PCI Express Architecture Specification.
- Additional Requirements: UEFI 2.3.1c-based system and firmware supporting Secure Boot, Trusted Platform Module, graphics device, and monitor supporting Super VGA (1024 x 768) or higher resolution.
Tips:
Tip: To get more details about Windows Server 2022 requirements, refer to this post — Check Minimum Hardware Requirements for Windows Server 2022.
Windows Server 2022 Installation Options
Microsoft provides two installation options for you – Server Core and Server with Desktop Experience.
- Server Core (recommended installation option) – This option is a smaller installation that includes the core components of Windows Server and all server roles, but does not include the local graphical user interface (GUI). It is primarily used to remotely deploy images to client computers with the help of Windows Admin Center, PowerShell, or other server management tools.
- Server with Desktop Experience – This is a full installation with a full GUI and a larger footprint than Server Core.
How to Install Windows Server 2022
After downloading Windows Server 2022 ISO from Microsft Evaluation Center, you can start to install it on VMware or a physical machine. There are some differences between the two ways.
First, the bootable media is different. On a physical machine, many users prefer to install Windows Server 2022 from USB. On VMware, you can use the ISO file directly without burning it.
Second, Windows Server 2022 starts differently. On a physical machine, you need to create a bootable USB flash drive with an ISO file, connect the bootable USB flash drive to the server and set the boot priority, and then boot from it. And for VMware, you can directly add the ISO file to boot.
Installing Windows Server 2022 (Server Core)
If you want to install Windows Server 2022 using Server Core, follow the instructions in this section.
On VMware
Step 1: Open VMware Workstation and click Create a New Virtual Machine. Then, choose your Windows Server 2022 ISO as the installer disc.
Step 2: Then, you need to choose language, time and current format, and keyboard or input method. After choosing them click Next to continue.
Step 3: In the next window, click Install Now.
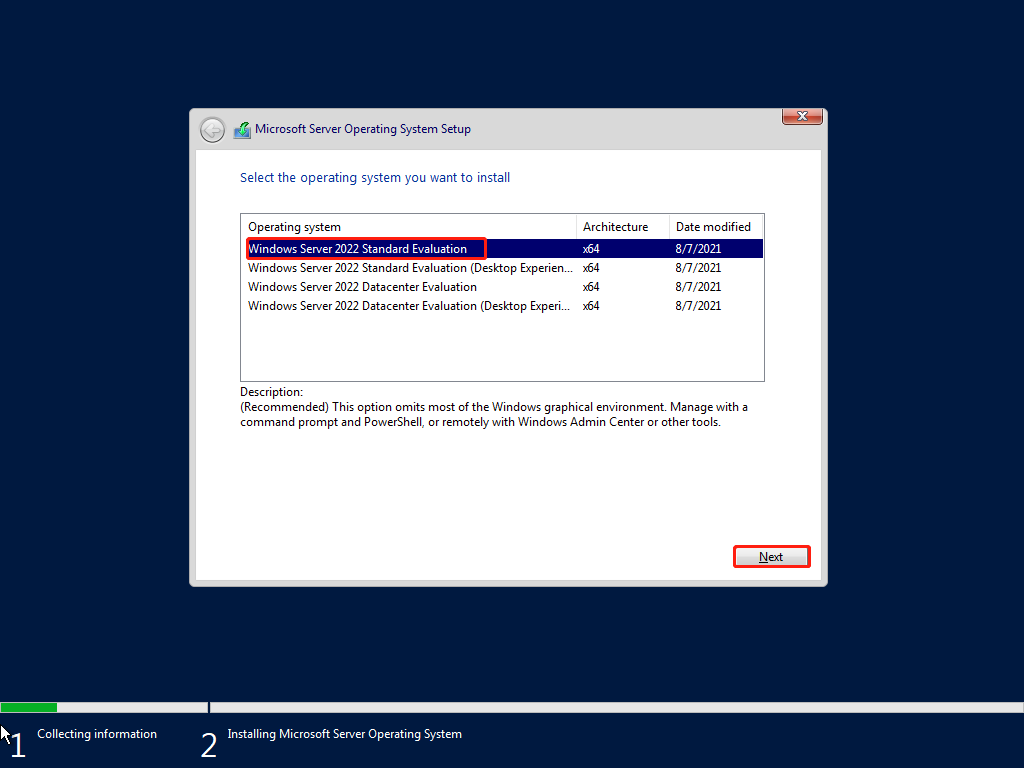
Step 4: Choose the operating system version you need to install. Here, we choose Windows Server 2022 Standard Evaluation and click Next.
Step 5: Check the box to accept the software license terms and click Next.
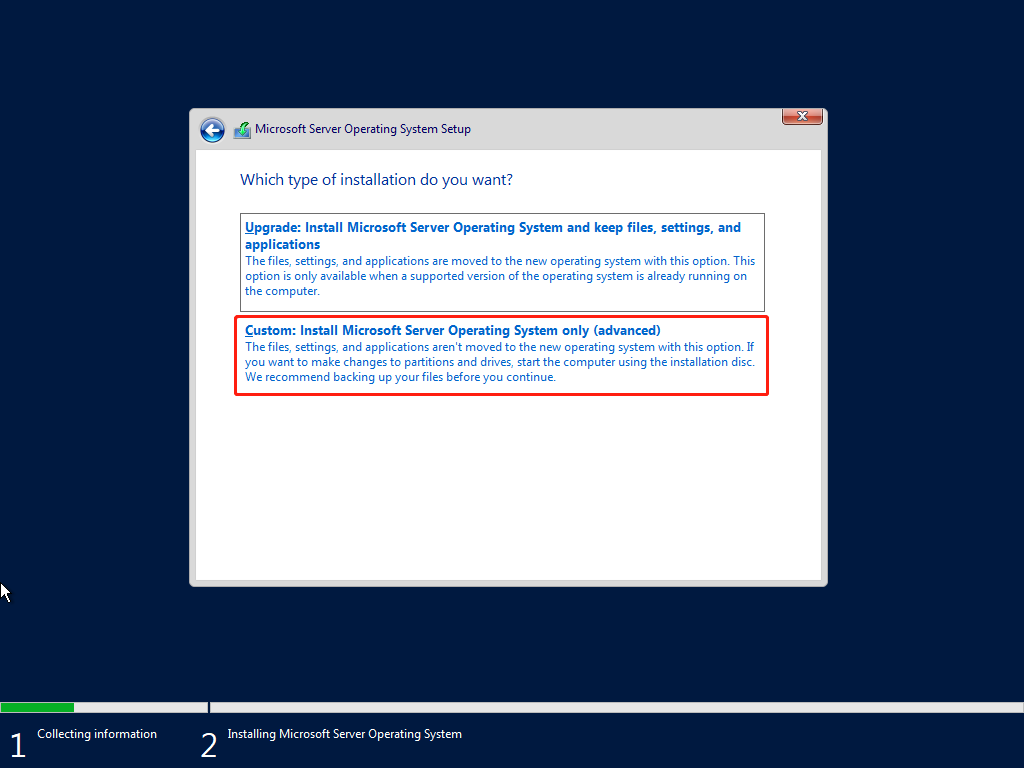
Step 6: Then, choose Custom: Install Windows Server Operating System only. Otherwise, if upgrading from a previous version of Windows Server, choose the Upgrade: Install Microsoft Server Operating System and keep files, settings, and applications option.
Step 7: Select a partition to install Windows Server and click Next. Then, it will start to install the necessary system files. When it’s completed, the system will restart automatically.
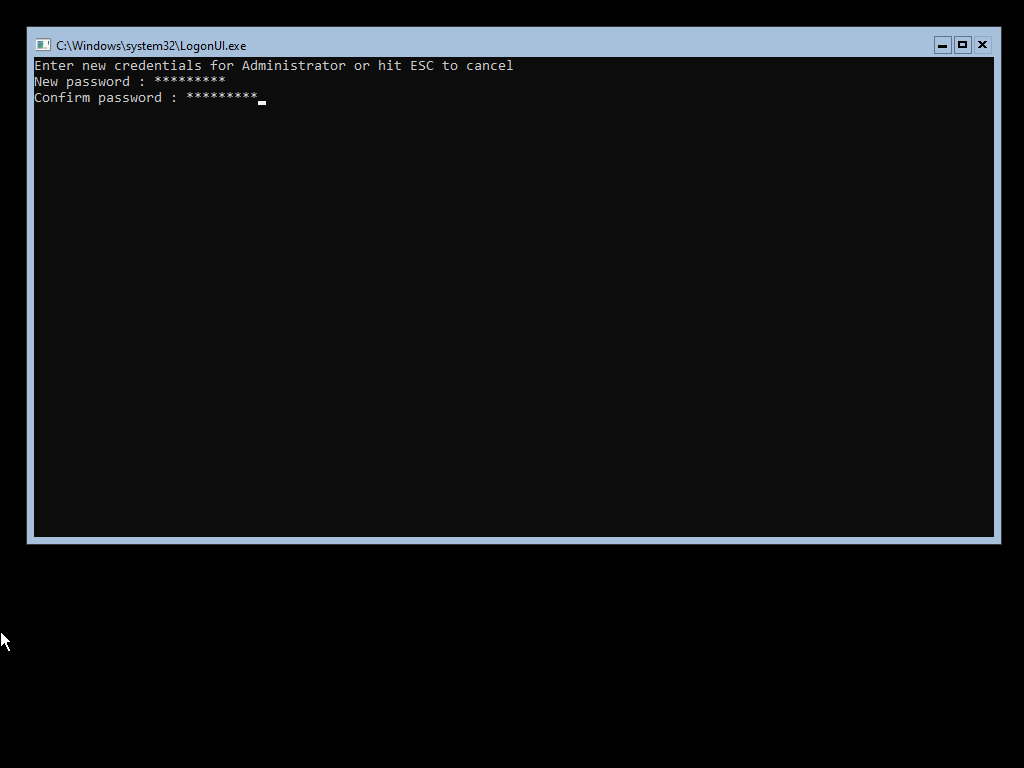
Step 8: Then, you will be asked to change the administrator password. Click OK.
Step 9: Enter the new administrator password and confirm it.
Step 10: Next, you’ll be taken directly into Microsoft’s PowerShell interface, where you can begin managing your newly installed Windows Server 2022 operating system via the Server Core interface.
On a Physical Device:
Step 1: Create a bootable USB flash drive and insert the installation USB into your PC.
Step 2: Restart your computer and press a specific key (eg: ESC, F2, F10) to enter BIOS.
Step 3: Choose the USB drive as the first boot option. Then, press F10 to save your changes and boot from it.
Step 4: Follow Step 2 – Step 10 of installing Windows Server 2022 on VMware. The steps are the same.
Installing Windows Server 2022 (Desktop Experience)
If you want to install Windows Server 2022 using Desktop Experience, follow the instructions in this section.
Step 1: Follow the same instructions as the Server Core installation until your system restarts after installing the operating system.
Note:
You need to select Windows Server 2022 Standard Evaluation (Desktop Experience) when choosing your Windows Server 2022 version.
Step 2: After your system restarts, you’ll be greeted with a graphical interface. You’ll be prompted to create an administrator password before proceeding. Click Finish.
Step 3: The login screen will appear when you press Ctrl + Alt + Del. Enter the password set in the previous step to continue accessing your server.
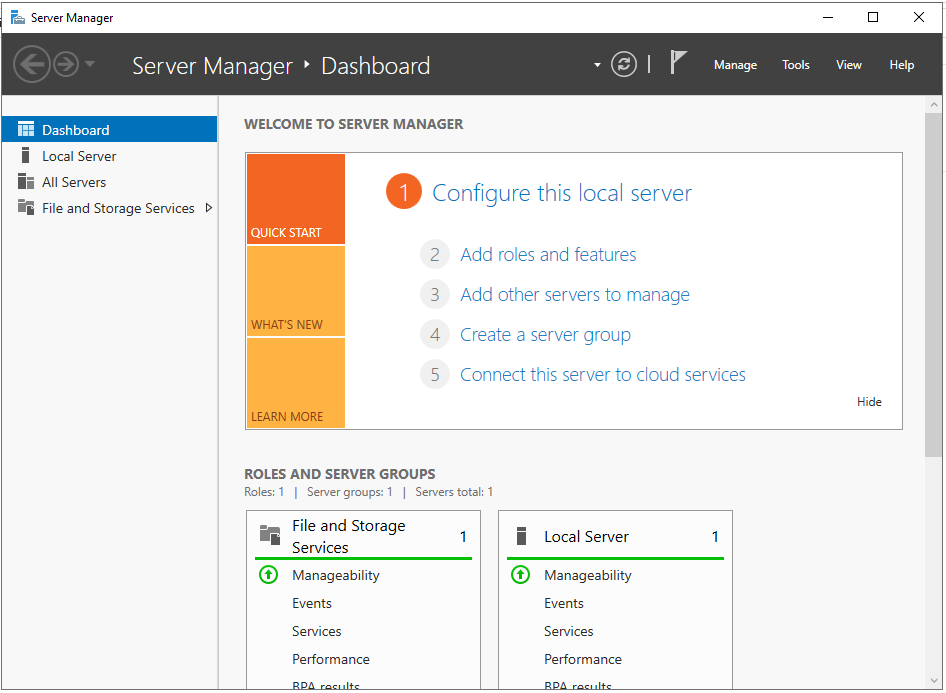
Step 4: Then, Server Manager will be launched. You can start to configure your Windows Server 2022.
How to Configure Windows Server 2022
After installing Windows Server 2022, you can start to configure it. The first things that need configuring on your network are IPs and gateway addresses so that system admins can manage the server remotely and reach other parts of their environments, including internet-based services.
Configure Network on Windows Server 2022 Server Core
if you installed Windows Server 2022 with a Server Core installation, follow the below instructions to configure the network.
Step 1: Run the following command in the Command Prompt area:
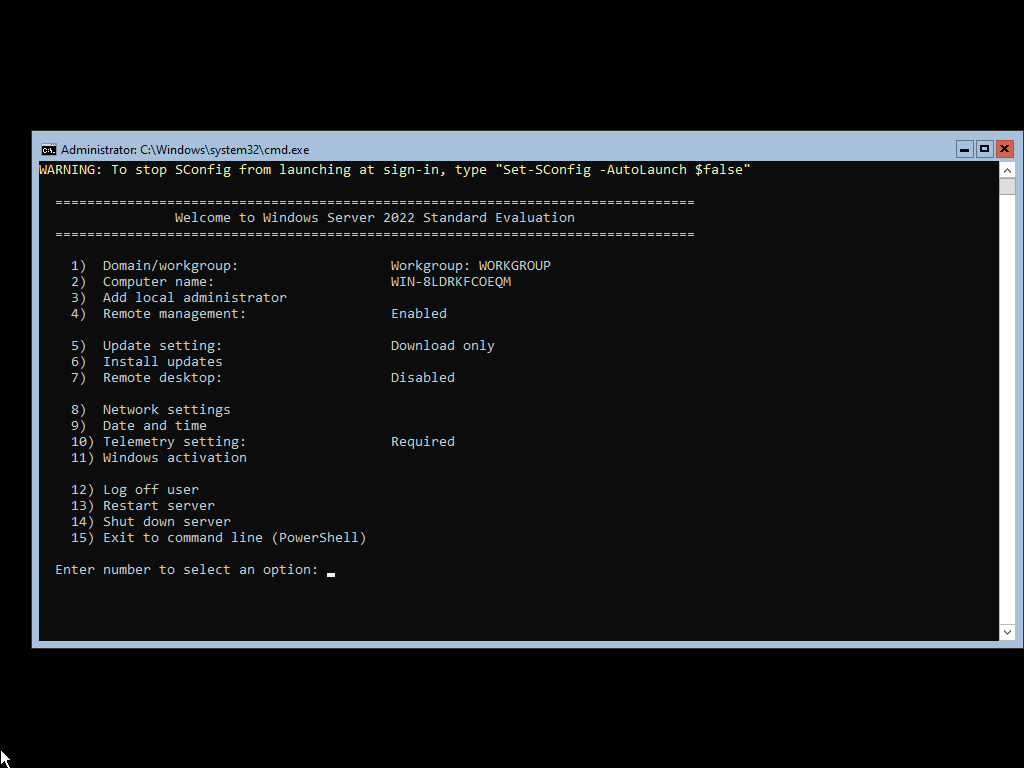
SConfig
Step 2: Then, choose option 8 for Network Settings and you will be taken to your network configuration page.
Step 3: To begin configuration, you need to select which IP to configure first. Normally, you might see multiple options here — select the one you want to work with first.
Step 4: Once you have selected your IP for configuration, you can begin customizing your settings. The computer’s network settings will be automatically updated. The process should take no more than five minutes to complete.
Configure Network on Windows Server 2022 Desktop Experience
If you install Windows Server 2022 with a desktop experience, the instructions below will help you configure the network
Step 1: Press the Windows + I keys together to open the Settings application.
Step 2: Go to Network & Internet > Ethernet > Change adapter options.
Step 3: Right-click the network you want to configure to choose Properties from the context menu. You can begin configuring the network connection.

How to Install the Latest Windows Server Updates
Before starting to use Windows Server 2022, you had better run Windows Update to get the latest security fixes, bug fixes, and any new features.
Step 1: Press the Windows + I keys together to open the Settings application.
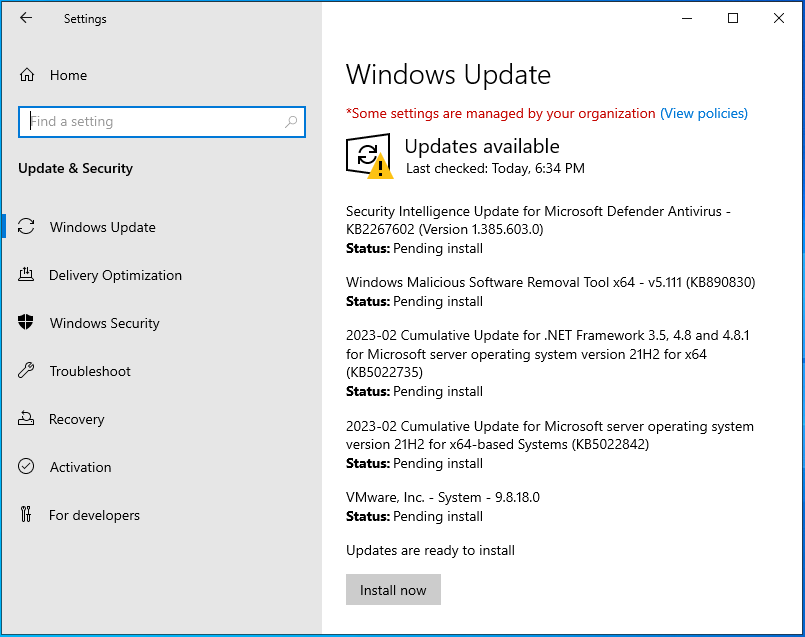
Step 2: Go to Update & Security > Windows Update.
Step 3: Click Check for updates and the latest cumulative updates for Windows Server, .NET Framework, etc. will be listed. You can click Install Now.
Step 4: After installing the Windows Server 2022 updates, your PC will restart several times automatically and you just need to wait patiently.
How to Back up Windows Server 2022
After configuring your Windows Server 2022, it’s highly recommended to back up the system to protect it. To do that, here is a piece of great and professional backup software for you – MiniTool ShadowMaker. It is designed to back up the operating system, disks, partitions, files, and folders.
MiniTool ShadowMaker provides data protection services and disaster recovery solutions for PCs, Servers, and Workstations. It supports Windows Server 2008/2012/2016/2019/2022. Now, we will show you how to use MiniTool ShadowMaker to back up Windows Server 2022.
MiniTool ShadowMaker TrialClick to Download100%Clean & Safe
Step 1. Download, install, and launch MiniTool ShadowMaker. Then click Keep Trial.
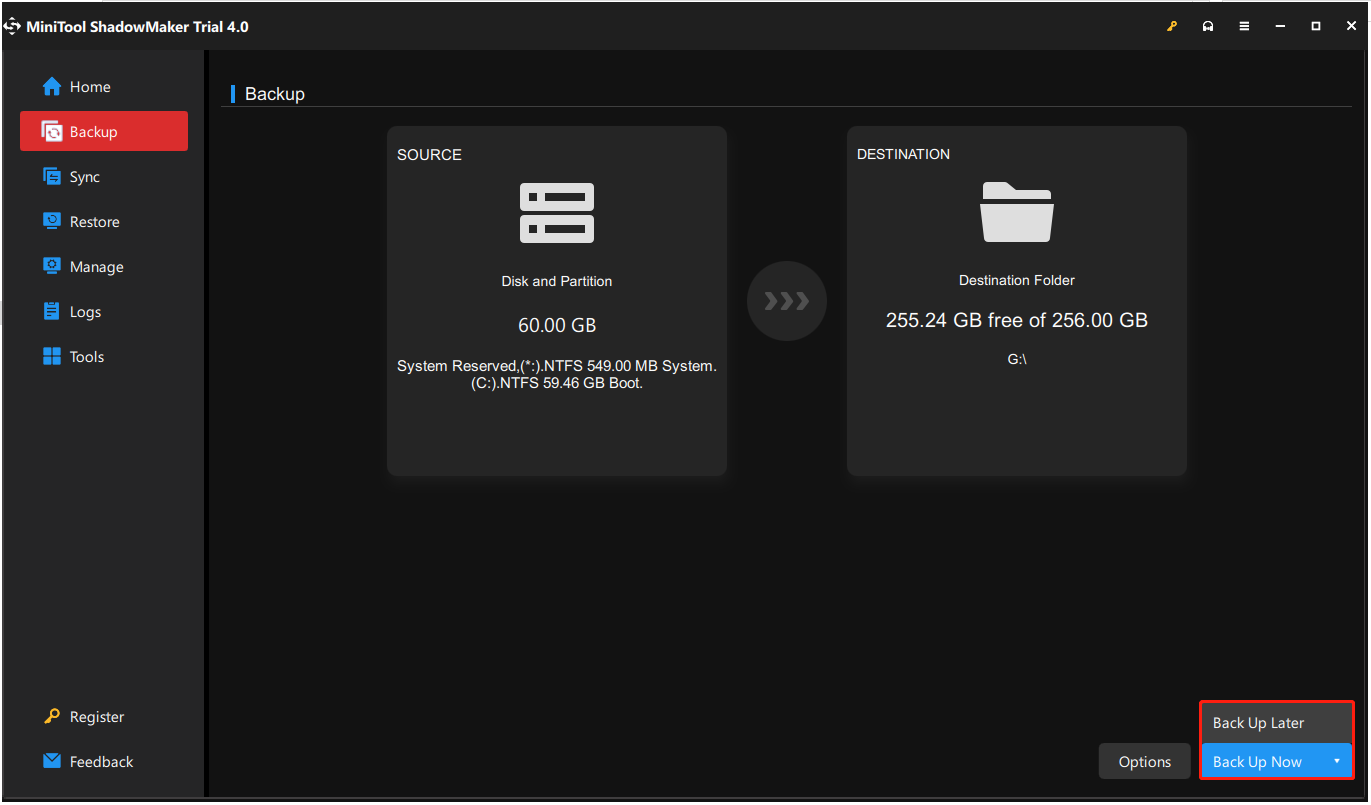
Step 2. After entering its main interface, go to the Backup page. MiniTool ShadowMaker chooses the operating system as the backup source by default.
Step 3. Then click Destination to choose a target disk to save the backup image.
Step 4. Then click Back Up Now to start the Windows Server backup process. Or, you can click Back Up Later to delay the backup task. Then, you can find the task on the Manage page.
After that, you performed a Windows Server backup. If you want to restore the system image, you can go to the Restore page and follow the on-screen wizard to continue. Besides, MiniTool ShadowMaker also enables you to create an Automatic Backup and it offers three different backup schemes.
Bottom Line
The above content teaches you how to install Windows Server 2022. Besides, you can know how to configure the network, how to install the latest updates, and how to back up Windows Server 2022. If you have any questions or suggestions, please contact us via [email protected] or leave a comment.
[rt_reading_time label=”Reading Time:” postfix=”minutes” postfix_singular=”minute”]
Introduction
This Windows Server 2022 Installation Guide is designed to help you set up a Windows Server 2022 “Desktop Edition” virtual machine using Hyper-V Manager. By following this comprehensive guide, you will learn how to create a fully functional Windows Server 2022 virtual machine for exploration and testing purposes. Dive into the world of virtualization and server management with this step-by-step guide on Windows Server 2022 Installation, and enhance your knowledge of server environments.
Setting up the Virtual Machine
Launch Hyper-V Manager
To set up a Windows Server 2022 virtual machine, begin by launching Hyper-V Manager. This application is included with Windows Server and some editions of Windows 10 and 11. If you have not already installed the Hyper-V role on your system, you will need to do so before proceeding. For the purpose of this proof of concept (PoC) I use a Windows 11 operating system.
To download the Windows Server 2022 use the link.
Create a New Virtual Machine
In Hyper-V Manager, click “New” in the Actions pane and then select “Virtual Machine.” This will open the New Virtual Machine Wizard.
Follow the prompts to name your virtual machine and choose the appropriate generation. For Windows Server 2022 Installation, select Generation 2.
Configure Virtual Hardware
Next, allocate memory and processor resources for your virtual machine. We recommend a minimum of 4 GB of RAM and two virtual processors for optimal performance.
Also, create a new virtual hard disk with a minimum size of 100 GB to accommodate the operating system and any additional software.
Finally, connect the virtual machine to an external virtual switch to enable network connectivity.
Installing the Operating System
Mount the Windows Server 2022 ISO
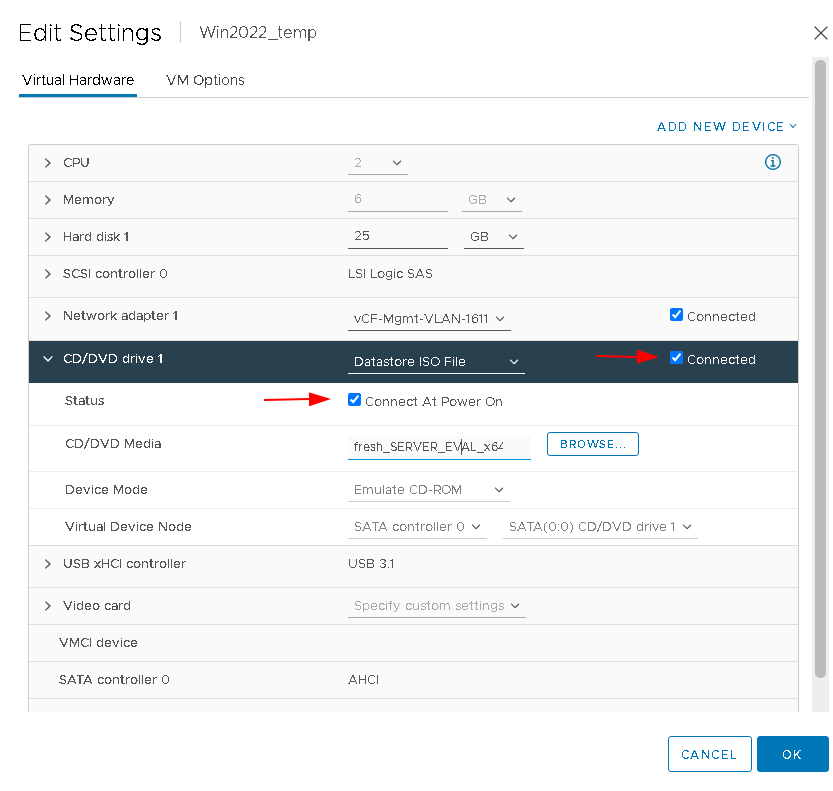
To install the operating system, mount the Windows Server 2022 ISO file to the virtual machine’s DVD drive. This can be done by accessing the virtual machine’s settings in Hyper-V Manager and navigating to the DVD Drive section. Click “Browse” and select the ISO file from your local storage.
IMPORTANT!! When you finish with the wizard. Go back to the Hyper-V Manager and right click to the new created VM and press settings. After that go to security settings and select the Encryption Support -> Enable Trusted Platform Module.
Begin the Installation Process
Start the virtual machine and follow the on-screen prompts to begin the installation process.
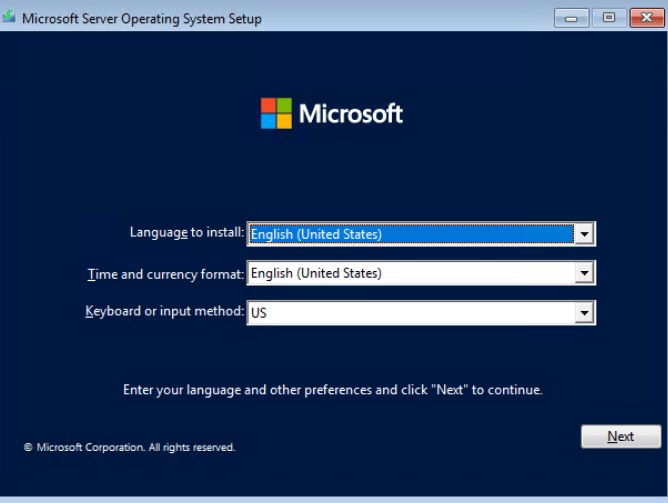
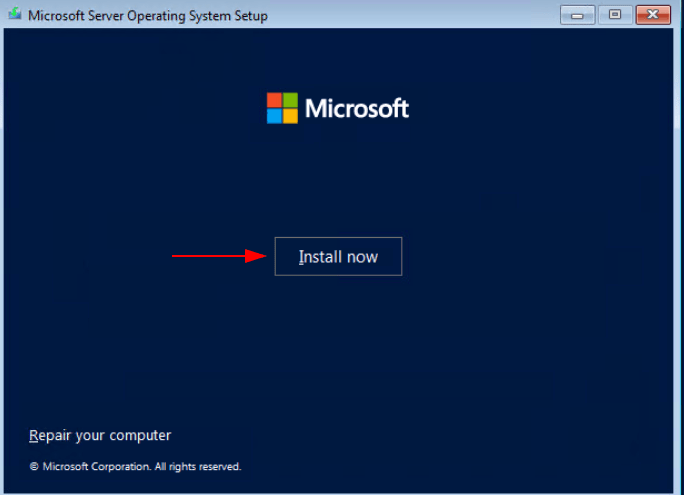
Select your desired language, time and currency format, and keyboard layout. Click “Install now” and enter your product key when prompted.
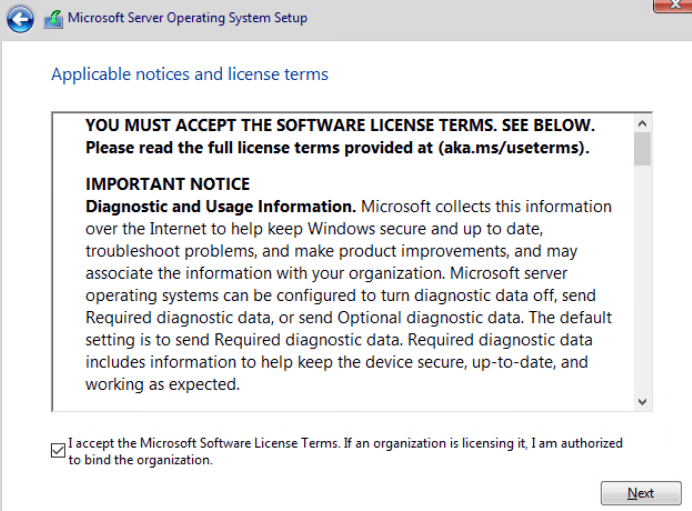
Accept the license terms and select “Custom” when asked which type of installation you want.
Install Windows Server 2022 with Desktop Experience
Choose the right edition, depending on your requirements.
Accept the license terms
Select the type of installation, on our proof of concept we select the Custom type
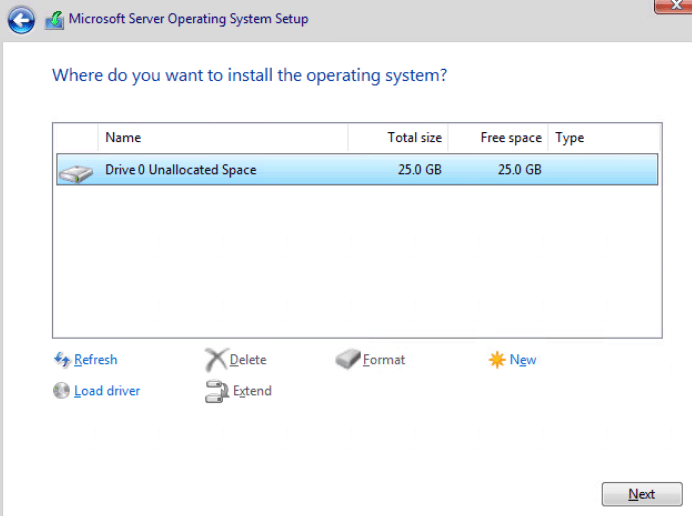
Create a new partition on the virtual hard disk and select it as the installation target. The installation process will now begin and may take some time to complete.
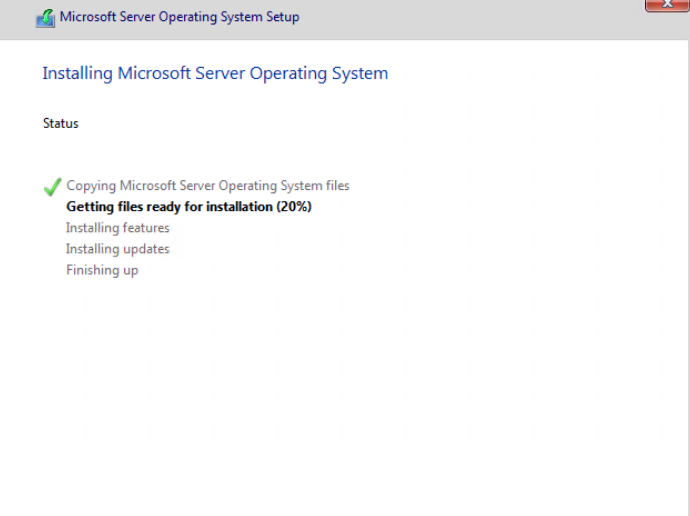
When you press next the installation procedure will start.
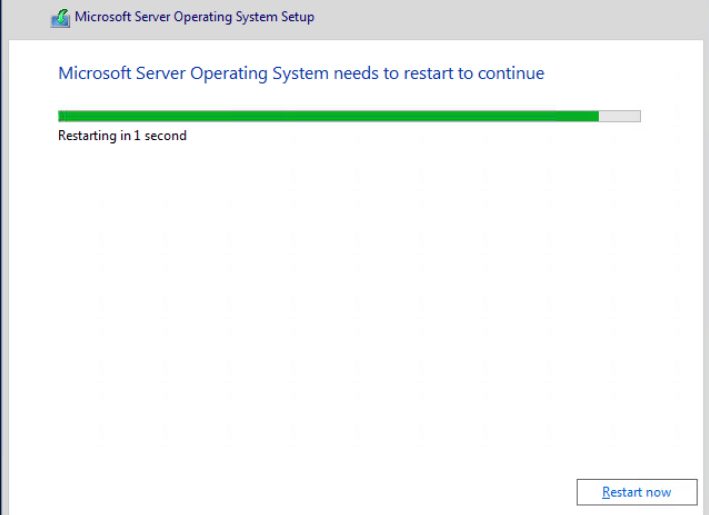
The installation will finish and the system will be reboot in order to get ready.
Configuring the System Settings
Set the Administrator Password
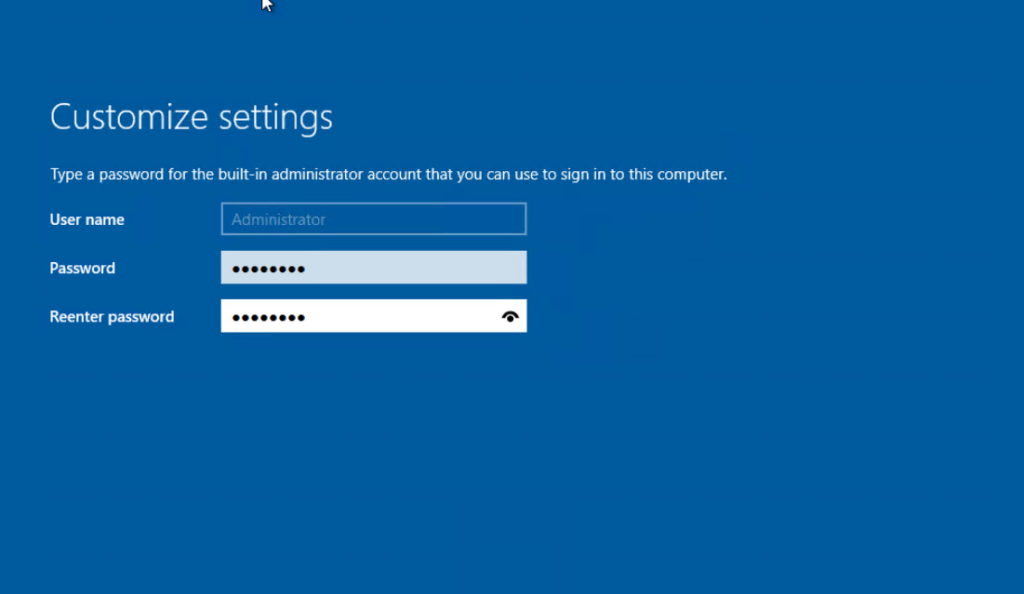
Upon completion of the installation, you will be prompted to set an Administrator password. Choose a strong, unique password to secure your virtual machine.
Configure Regional and Language Options
After setting the Administrator password, you will be taken to the desktop.
When you write the password the following screen will appear:
From here, you can configure regional and language options as needed. This can be done by navigating to the Control Panel and selecting “Region.”
Install Updates and Additional Roles
Ensure your virtual machine is up-to-date by installing any available updates via the Windows Update feature. Additionally, you may want to install any necessary server roles or features, such as Active Directory or Remote Desktop Services.
Installing the Desktop Experience
The Desktop Experience was installed during the operating system installation process when you selected the appropriate edition in Section 3.3. As a result, no additional steps are required in this section.
Finalizing the Installation
Optimize Performance
To ensure optimal performance of your Windows Server 2022 virtual machine, you can adjust various settings, such as disabling unnecessary services and features. In addition, configure the power settings to “High performance” by accessing the Power Options in the Control Panel.
Configure Networking
Verify that your virtual machine has the correct network settings by opening the Network and Sharing Center. If necessary, configure the IP address, subnet mask, and default gateway to match your network environment. Ensure that your virtual machine can access the internet and communicate with other devices on your network.
Install Management Tools
To effectively manage your Windows Server 2022 virtual machine, you may want to install additional management tools, such as the Windows Admin Center or Remote Server Administration Tools (RSAT). These tools allow you to manage your virtual machine remotely and can provide additional functionality and features.
Conclusion
By following this guide, you have successfully set up and configured a Windows Server 2022 virtual machine using Hyper-V Manager. You have installed the operating system, configured the system settings, optimized performance, and set up networking. With your virtual machine now up and running, you can begin exploring the various features and capabilities that Windows Server 2022 has to offer. Use this environment to test new software, configurations, or server roles, all within the safety and isolation of a virtual environment.
References
These links provide further information on the topics covered in the guide, including official documentation, system requirements, and management tools.
- Microsoft Windows Server 2022 Official Documentation
- Hyper-V Virtual Machine Configuration
- Windows Server 2022 System Requirements
- Installing and Managing Hyper-V on Windows Server
- Remote Server Administration Tools (RSAT) for Windows Server 2022
Please feel free to explore these resources for a deeper understanding of Windows Server 2022 and its related components.
In this blog, we will take a look at the installation and configuration of Windows 2022 which is the latest version of the Microsoft Server Operating System.
System Requirements
Microsoft Server 2022 OS Editions
Windows Server 2022 allows you to install the following editions:
1- Windows Server 2022 Standard – A minimal command-line edition
2- Windows Server 2022 Standard (Desktop Experience) – A full-blown GUI edition
3- Windows Server 2022 Datacenter
4- Windows Server 2022 Datacenter (Desktop Experience)
Installing Windows Server 2022.
1- Download Windows Server 2022 ISO from Microsoft Evaluation Center.
2- Mount the ISO to the virtual machine
3- Press a key to boot from the CD/DVD.
4- Choose the OS language and timezone you are located.
5- Press the Install now button to start the OS Install.
6- We will choose 2022 Standard Evaluation as our OS to install

7- Accept the license terms and then click Next.
8- Choose Custom if you are installing a brand new OS on the disk else choose to Upgrade the OS
9- Choose the disk to install the OS onto
10- Install process begins
11 – Once completed, the system will reboot on its own
12- One first boot, we will need to create an administrator password
13- Once logged in, Server Manager will open showing the spec of the VM.

(Visited 693 times, 1 visits today)
By Ash Thomas
Ash Thomas is a seasoned IT professional with extensive experience as a technical expert, complemented by a keen interest in blockchain technology.
Hello everyone, welcome to our Microsoft Windows Server 2022 beginner’s guide, aimed at guiding you through the foundational aspects of working with this robust server operating system. We’ll walk you through the steps to install Windows Server 2022, help you get acquainted with its enhanced and secure interface, and highlight some of its key features and improvements, such as Secured-core server and Azure integration capabilities. Whether you’re setting up a server for the first time or migrating from an earlier version, this guide was made to assist you with installing and using Windows Server 2022 to its full potential. With an emphasis on its advanced security measures and hybrid cloud capabilities, we aim to provide you with the knowledge to efficiently manage and secure your server environment. Here, we, go.
What is Windows Server 2022?
Windows Server 2022 represents the latest version in the long-standing series of server operating systems developed by Microsoft, designed to meet the evolving needs of modern businesses and IT environments. As an advanced server platform, Windows Server 2022 builds upon the foundation of its predecessors by introducing enhanced security features, improved performance, and innovative technologies to support cloud-native applications and facilitate hybrid cloud integration(Azure). This version emphasizes security, with layers of protection built into the operating system to safeguard data against emerging threats, underscored by features like secured-core server and advanced multi-layer security. It aims to provide a highly secure and scalable environment for running business-critical applications and services, making it a pivotal tool for organizations looking to modernize their infrastructure.
Beyond security enhancements, Windows Server 2022 focuses on improving usability and flexibility for a wide range of computing environments. It introduces significant improvements in hybrid cloud capabilities, offering seamless integration with Azure services to extend the server’s functionality into the cloud. This integration allows for more straightforward management of virtual machines, easier backup and disaster recovery solutions, and enhanced support for containerized applications through Kubernetes. Moreover, performance improvements are notable, with enhancements to Windows Containers, networking, and storage technologies, ensuring that Windows Server 2022 can handle the demands of high-performance computing tasks and data-intensive applications.
Windows Server 2022 Features:
- Advanced Multi-layer Security: Integration of secured-core server technology to protect against firmware vulnerabilities and advanced security features to safeguard against emerging threats.
- Azure Arc Enabled: Supports Azure Arc, allowing users to manage Windows Servers using Azure services, facilitating hybrid management and policy enforcement across environments.
- Enhanced Hybrid Capabilities: Improved integration with Azure, including Azure Automanage, Azure Backup, Azure Site Recovery, and Azure Monitor, simplifying hybrid operations.
- Windows Admin Center: Modernized server management tool that provides an intuitive interface for managing Windows Servers, including role and feature deployment, performance monitoring, and configuration.
- TLS 1.3 Support: Enhanced security and performance through the latest version of the Transport Layer Security protocol, making network communication more secure.
- SMB Compression: Improves data transfer speeds and reduces network bandwidth consumption by compressing data during network transfers without needing to compress it on disk.
- SMB over QUIC: Offers a more secure and reliable alternative to traditional SMB over VPN networking, leveraging QUIC protocol for encrypted communications.
- Improved Storage Migration Services: Easier migration of servers to newer versions of Windows Server or Azure, with better support for migrating storage from more types of servers.
- Enhanced Windows Containers: Reduced image size for faster download and simplified network policy implementation, alongside improvements in Kubernetes support.
- New capabilities in Storage Spaces Direct: Including improved performance, scalability, and usability features for software-defined storage.
- Nested Virtualization for AMD processors: Support for running Hyper-V within a Hyper-V virtual machine (VM) on AMD processors, similar to existing support for Intel processors.
Where to Download Windows Server 2022
Windows Server 2022 is enterprise-ready and offers advanced security for any scale of deployment, available for purchase or trial on our official page below.
- Download Windows Server 2022
Windows Server 2022: Standalone vs. Azure Edition
Choosing between Windows Server 2022 standalone and the Azure Edition honestly just depends on your deployment needs and cloud ambitions. You can’t go wrong with either one.
Standalone:
- Traditional on-premises deployments: Ideal for managing physical or virtual servers within your own data center.
- Flexibility: Offers various editions (Standard, Datacenter) to suit different workloads and budgets.
- Full control: You manage all aspects, including security, updates, and infrastructure.
- Limited cloud integration: Primarily focuses on on-premises operations.
Azure Edition:
- Cloud-first approach: Designed specifically for running virtual machines (VMs) on Azure.
- Optimized for Azure: Leverages Azure features like Hotpatching and Azure Extended Networking for enhanced performance and security.
- Simplified management: Azure handles much of the infrastructure management, reducing your workload.
- Subscription-based: Requires an Azure subscription, adding ongoing costs.
Basically the standalone offers flexibility and control for on-premises deployments but lacks deep cloud integration and the Azure Edition provides a streamlined cloud experience with advanced features but requires an Azure subscription and sacrifices some on-premises control.
Once you’ve installed Windows Server 2022, a few initial configurations are crucial to tailor the server to your specific needs and ensure its smooth operation. This guide will walk you through setting up a static IP address, renaming the server, and other essential steps to get your server up and running efficiently.

Configuring Essential Settings Post-Installation for Windows Server 2022
Setting Up a Static IP Address
Dynamic Host Configuration Protocol (DHCP) might be convenient, but a static IP address is essential for a server to ensure it remains consistent and accessible, especially for services like Active Directory, DNS, and file sharing. Here’s how to set it up:
- Open Control Panel > Network and Sharing Center > Change adapter settings.
- Right-click the network connection you want to configure and select Properties.
- Select Internet Protocol Version 4 (TCP/IPv4) and click Properties.
- Choose Use the following IP address and enter your static IP, subnet mask, and default gateway.
- Specify the preferred and alternate DNS server addresses, then click OK to apply the settings.
Renaming the Server
A meaningful server name facilitates easier identification, especially in environments with multiple servers. To rename your server:
- Open Server Manager.
- Click on Local Server.
- Click the current computer name next to Computer name.
- In the System Properties window, click Change.
- Enter the new name for your server and click OK.
- You’ll need to restart the server for the changes to take effect.
How to Activate Windows Server 2022 and Important Post-Activation Steps
Activating Windows Server 2022 is a straightforward process but a crucial step to ensure you’re running a genuine and secure version of Windows. Following activation, there are important steps to secure and update your server.
Activating Windows Server 2022
To activate Windows Server 2022:
- Open Settings from the Start menu.
- Go to Update & Security > Activation.
- Click Activate or Change Product Key if you haven’t entered a key during installation.
- Follow the on-screen instructions to complete the activation.
Important Post-Activation Steps
After activating Windows Server 2022, consider these steps to enhance your server’s security and functionality:
- Enable Windows Update: Ensure your server is always up to date with the latest security patches and feature updates.
- Go to Settings > Update & Security > Windows Update.
- Click Check for updates and install any available updates.
- Configure Windows Defender Firewall: Properly configuring the firewall is vital to protect your server from unauthorized access.
- Open Control Panel > System and Security > Windows Defender Firewall.
- Adjust the settings according to your network security requirements.
- Set Up Roles and Features: Tailor your server to its intended role (e.g., File Server, Web Server, Domain Controller) by adding roles and features through the Server Manager.
This will get you started and ensure your Windows Server 2022 installation is not only tailored to your needs but also it is secure and up to date. We will update this short guide and we will have more in depth articles, just check our Windows Server category for more.
Windows Server 2022 Screenshots
Windows Server 2022 Video
Recommended Windows Server 2022 Books:
- Mastering Windows Server 2022: Comprehensive administration of your Windows Server environment
- Windows Server 2022 & PowerShell All-in-One For Dummies
- Windows Server 2022 Administration Fundamentals: A beginner’s guide to managing and administering Windows Server environments
Windows Server 2022 Resources:
- Datasheet: Download the Windows Server 2022 solution brief
- Learning Path: Windows Server deployment, configuration, and administration
- Deeper Dive: Compare Windows Server standalone vs Azure version
- Forums: Windows Server Community
Post Views: 6,601
Discover more from Windows Mode
Subscribe to get the latest posts sent to your email.