
Are you experiencing network connectivity issues on your Windows device? A simple restart of the Windows Network service might be all you need to resolve the problem. In this article, we’ll delve into the world of Windows Network service, exploring what it is, why you might need to restart it, and providing a comprehensive guide on how to do so.
Understanding Windows Network Service
Before we dive into the process of restarting the Windows Network service, it’s essential to understand what it is and its role in your device’s connectivity. The Windows Network service, also known as the Network Location Awareness (NLA) service, is a critical component of the Windows operating system. Its primary function is to manage your device’s network connections, ensuring that you can access the internet, local networks, and other network resources.
The Windows Network service is responsible for:
- Detecting and connecting to available networks
- Managing network adapter settings
- Resolving DNS queries
- Maintaining network security and firewall settings
Why Restart the Windows Network Service?
There are several scenarios where restarting the Windows Network service might be necessary:
- Network connectivity issues: If you’re experiencing problems connecting to a network, restarting the Windows Network service can often resolve the issue.
- Slow network speeds: A restart can help improve network performance and speeds.
- Network adapter issues: If your network adapter is malfunctioning or not recognized by Windows, restarting the Windows Network service can help resolve the problem.
- After installing new network drivers: Restarting the Windows Network service can ensure that the new drivers are properly loaded and functioning.
Methods to Restart Windows Network Service
There are several ways to restart the Windows Network service, and we’ll explore each method in detail.
Method 1: Restarting via Services Console
This is the most common method to restart the Windows Network service.
- Press the Windows key + R to open the Run dialog box.
- Type services.msc and press Enter.
- In the Services console, scroll down and find the Network Location Awareness (NLA) service.
- Right-click on the service and select Restart.
- Alternatively, you can also stop the service and then start it again.
Method 2: Restarting via Command Prompt
You can also restart the Windows Network service using the Command Prompt.
- Press the Windows key + X and select Command Prompt (Admin).
- Type the following command and press Enter: net stop nlasvc
- Wait for the service to stop, then type the following command and press Enter: net start nlasvc
Method 3: Restarting via PowerShell
If you’re comfortable using PowerShell, you can restart the Windows Network service using the following command:
- Press the Windows key + X and select Windows PowerShell (Admin).
- Type the following command and press Enter: Restart-Service -Name NlaSvc -Force
Method 4: Restarting via Windows Settings
In Windows 10 and later versions, you can also restart the Windows Network service via the Windows Settings app.
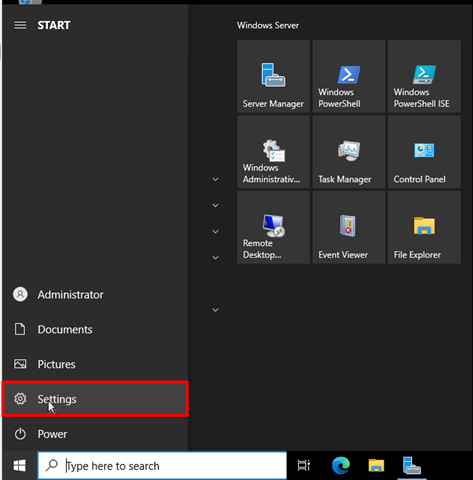
- Press the Windows key + I to open the Settings app.
- Click on Update & Security.
- Click on Troubleshoot.
- Click on Additional troubleshooters.
- Click on Network Adapter.
- Click on Run the troubleshooter.
- Follow the prompts to restart the Windows Network service.
Troubleshooting Tips
If restarting the Windows Network service doesn’t resolve your connectivity issues, here are some additional troubleshooting tips:
- Check your network adapter settings: Ensure that your network adapter is enabled and configured correctly.
- Update your network drivers: Outdated network drivers can cause connectivity issues. Update your drivers to the latest version.
- Disable and re-enable your network adapter: Sometimes, disabling and re-enabling your network adapter can resolve connectivity issues.
- Reset TCP/IP stack: Resetting the TCP/IP stack can resolve issues related to network connectivity.
Common Errors and Solutions
Here are some common errors you might encounter when restarting the Windows Network service, along with their solutions:
- Error 1061: The service cannot accept control messages at this time: This error occurs when the service is not responding. Try stopping the service and then starting it again.
- Error 1068: The dependency service or group failed to start: This error occurs when a dependent service is not running. Try starting the dependent service and then restarting the Windows Network service.
Conclusion
Restarting the Windows Network service can often resolve connectivity issues and improve network performance. By following the methods outlined in this article, you should be able to restart the Windows Network service and get your device connected to the internet or local networks. Remember to troubleshoot further if restarting the service doesn’t resolve your issues, and don’t hesitate to seek help if you’re unsure about any of the steps.
What is the Windows Network Service and why is it important?
The Windows Network Service is a crucial component of the Windows operating system that manages network connections and allows devices to communicate with each other. It is responsible for establishing and maintaining network connections, resolving hostnames, and managing network protocols. The Windows Network Service is essential for accessing the internet, sharing files, and communicating with other devices on a network.
If the Windows Network Service is not functioning correctly, it can cause a range of problems, including lost internet connections, inability to access shared files, and difficulty communicating with other devices. Restarting the Windows Network Service can often resolve these issues and restore network connectivity.
Why do I need to restart the Windows Network Service?
You may need to restart the Windows Network Service if you are experiencing network connectivity issues, such as a lost internet connection or inability to access shared files. Restarting the service can help to resolve these issues by resetting the network connections and re-establishing communication with other devices. Additionally, restarting the Windows Network Service can help to resolve issues with network protocols, such as DNS resolution problems.
Restarting the Windows Network Service is a relatively simple process that can be completed in a few steps. It is a non-invasive process that does not require any technical expertise or specialized tools. By restarting the Windows Network Service, you can quickly and easily resolve network connectivity issues and get back online.
How do I know if the Windows Network Service is not working correctly?
If the Windows Network Service is not working correctly, you may experience a range of symptoms, including lost internet connections, inability to access shared files, and difficulty communicating with other devices. You may also see error messages, such as “No internet connection” or “Unable to connect to network.” Additionally, you may notice that your network icon in the system tray is showing a red X or a yellow exclamation mark.
If you are experiencing any of these symptoms, it is likely that the Windows Network Service is not working correctly. In this case, restarting the service may help to resolve the issue. You can also try troubleshooting the problem by checking your network cables, restarting your router, and running a network diagnostic test.
Will restarting the Windows Network Service affect my internet connection?
Restarting the Windows Network Service will temporarily disconnect you from the internet. However, once the service has been restarted, your internet connection should be restored. You may need to wait a few seconds for the service to restart and for your internet connection to be re-established.
It is worth noting that restarting the Windows Network Service will not affect your internet service provider (ISP) or your internet plan. Your internet connection will be restored as soon as the service has been restarted, and you will be able to access the internet as usual.
Can I restart the Windows Network Service remotely?
Yes, it is possible to restart the Windows Network Service remotely using Remote Desktop or other remote access tools. This can be useful if you need to restart the service on a remote computer or if you are unable to access the computer physically.
To restart the Windows Network Service remotely, you will need to have remote access to the computer and the necessary permissions to restart the service. You can use Remote Desktop or other remote access tools to connect to the computer and restart the service.
How often should I restart the Windows Network Service?
You should only need to restart the Windows Network Service occasionally, such as when you are experiencing network connectivity issues. Restarting the service too frequently can cause unnecessary disruptions to your network connections and may not resolve the underlying issue.
It is recommended to restart the Windows Network Service only when necessary, such as when you are experiencing network connectivity issues or when troubleshooting a network problem. If you are experiencing frequent network connectivity issues, it may be worth investigating the underlying cause of the problem rather than simply restarting the service.
Are there any risks associated with restarting the Windows Network Service?
Restarting the Windows Network Service is a relatively safe process that does not pose any significant risks to your computer or network. However, as with any system service, there is a small risk of data loss or corruption if the service is restarted while files are being transferred or if there are unsaved changes.
To minimize the risk of data loss or corruption, it is recommended to save any open files and close any network-dependent applications before restarting the Windows Network Service. Additionally, you should ensure that you have the necessary permissions and follow the correct procedures for restarting the service.
Все способы:
- Устранение ошибки «Сеть отсутствует или не запущена»
- Способ 1: Конфигурация и перезапуск службы
- Способ 2: Переустановка компонента
- Способ 3: Установка обновления
- Способ 4: Восстановление системы
- Способ 5: Проверка на заражение вирусами
- Вопросы и ответы: 2
Сбои в работе сетевых сервисов в Windows 7 – явление далеко не редкое. При подобных неполадках бывает невозможно запустить приложения или системные компоненты, явно зависящие от подключения к интернету или «локалке». В этой статье мы разберем способы устранения ошибки, связанной с отсутствием или невозможностью запуска сети.
Устранение ошибки «Сеть отсутствует или не запущена»
Данная ошибка возникает при неполадках в работе такого компонента, как «Клиент для сетей Microsoft». Далее, по цепочке, происходит сбой в работе очень важной службы с названием «Рабочая станция» и зависимых от нее сервисов. Причины могут быть разные – от простого «каприза» системы до вирусной атаки. Есть еще один неочевидный фактор – отсутствие необходимого пакета обновления.
Способ 1: Конфигурация и перезапуск службы
Речь пойдет о сервисе «Рабочая станция» и сетевом протоколе SMB первой версии. Некоторые узлы сети отказываются работать с устаревшим протоколом, поэтому необходимо сконфигурировать службу таким образом, что бы она работала с SMB версии 2.0.
- Запускаем «Командную строку» от имени администратора.
Подробнее: Вызов «Командной строки» в Windows 7
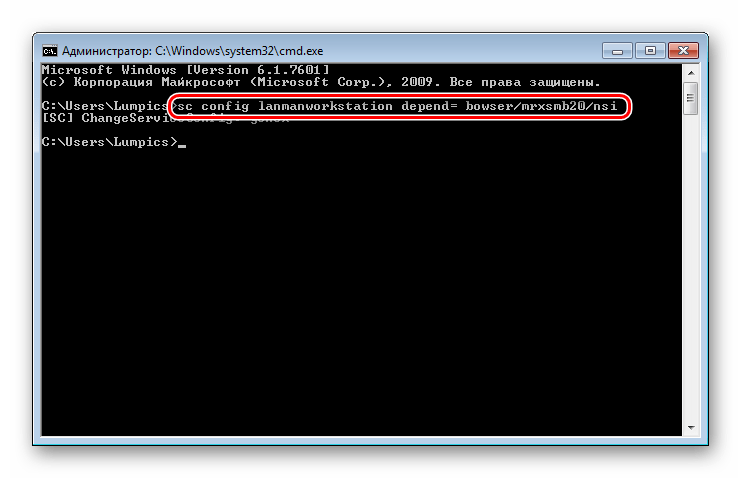
- «Говорим» службе, чтобы она переключилась на протокол второй версии командой
sc config lanmanworkstation depend= bowser/mrxsmb20/nsiПосле ввода нажимаем клавишу ENTER.

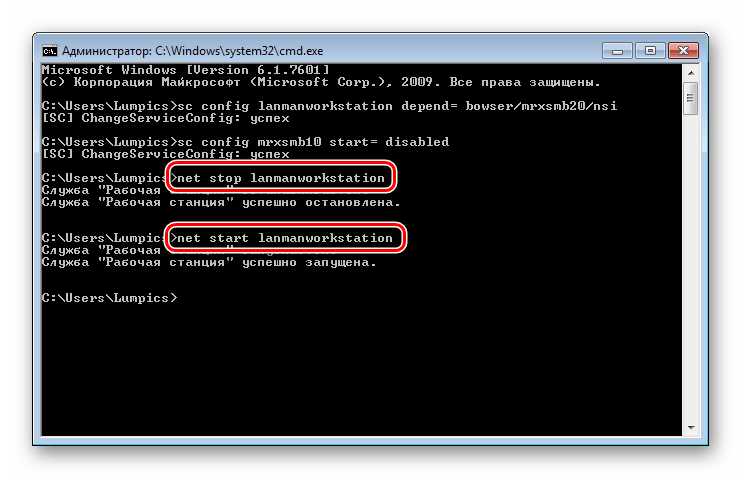
- Далее отключаем SMB 1.0 следующей строкой:
sc config mrxsmb10 start= demand
- Перезапускаем службу «Рабочая станция», выполнив по очереди две команды:
net stop lanmanworkstation

net start lanmanworkstation
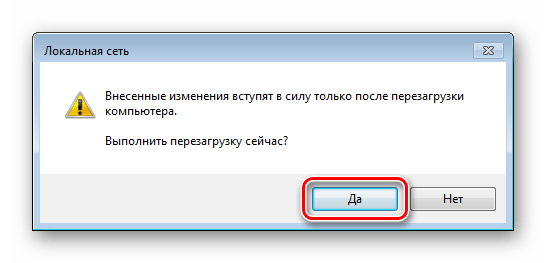
- Перезагружаемся.

Если во время выполнения указанных выше действий возникают ошибки, следует попытаться переустановить соответствующий системный компонент.
Способ 2: Переустановка компонента
«Клиент для сетей Microsoft» позволяет взаимодействовать с сетевыми ресурсами и является одной из важнейших служб. При его сбое неизбежно возникнут проблемы, в том числе и сегодняшняя ошибка. Здесь поможет переустановка компонента.
- Открываем «Панель управления» и переходим к апплету «Центр управления сетями и общим доступом».

- Идем по ссылке «Изменение параметров адаптера».
- Нажимаем ПКМ на то устройство, через которое осуществляется подключение, и открываем его свойства.

- Выделяем в списке «Клиент для сетей Microsoft» и удаляем его.

- Windows запросит подтверждение. Нажимаем «Да».

- Перезагружаем ПК.

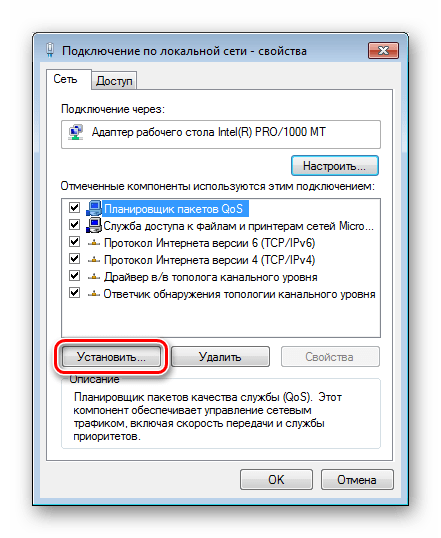
- Далее снова заходим в свойства адаптера и нажимаем кнопку «Установить».
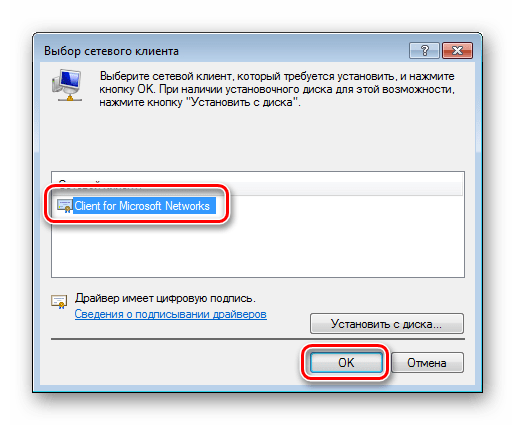
- В списке выбираем позицию «Клиент» и жмем «Добавить».

- Выбираем пункт (если вы вручную не устанавливали компоненты, то он будет единственным) «Client for Microsoft Networks» и нажимаем ОК.

- Готово, компонент переустановлен. Для верности перезагружаем машину.


Способ 3: Установка обновления
Если приведенные выше инструкции не работают, возможно, на вашем компьютере отсутствует обновление KB958644. Оно представляет собой «заплатку» для предотвращения проникновения в систему некоторых вредоносных программ.
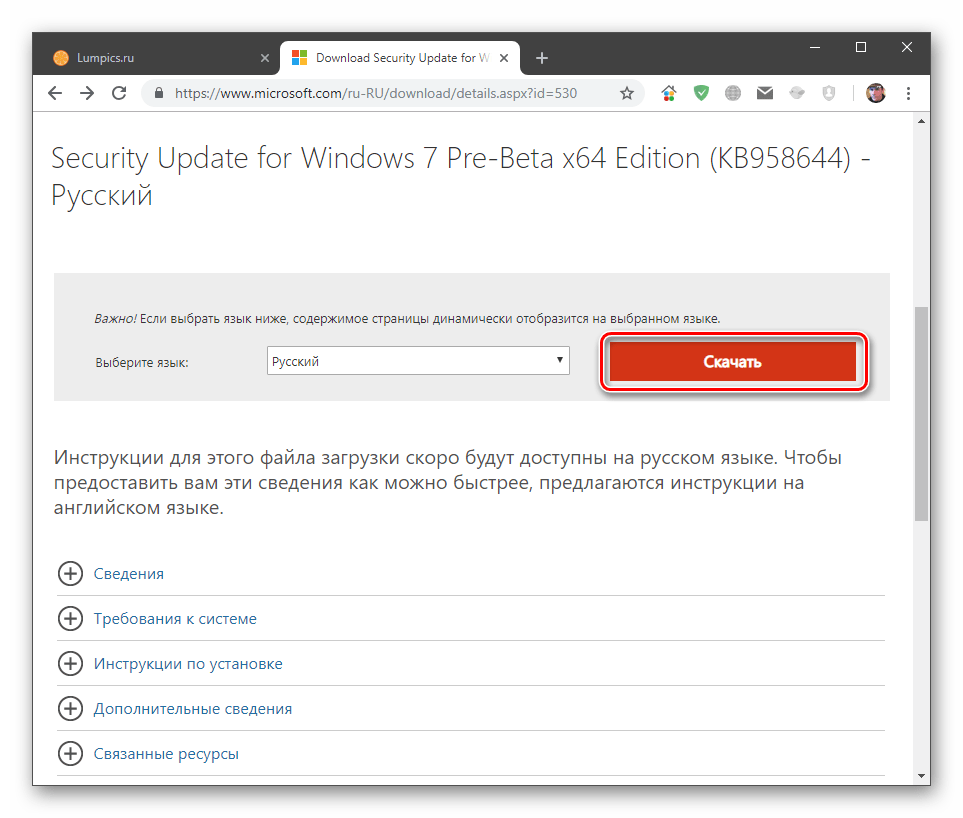
- Идем на страницу загрузки пакета на официальном сайте Майкрософт в соответствии с разрядностью системы.
Страница загрузки для x86
Страница загрузки для x64 - Жмем кнопку «Скачать».

- Получаем файл с названием «Windows6.1-KB958644-х86.msu» или «Windows6.1-KB958644-х64.msu».
Запускаем его обычным способом (двойным кликом) и ждем окончания установки, после чего перезагружаем машину и пробуем повторить действия по настройке службы и переустановке сетевого компонента.
Способ 4: Восстановление системы
Суть данного способа заключается в том, чтобы вспомнить, когда или после каких ваших действий начались проблемы, и восстановить систему с помощью доступных инструментов.

Подробнее: Как восстановить Windows 7
Способ 5: Проверка на заражение вирусами
Виной тому, что при работе возникают ошибки, могут быть вредоносные программы. Особенно опасны те, что взаимодействуют с сетью. Они способны перехватывать важные данные или просто «ломать» конфигурацию, изменяя настройки или повреждая файлы. При возникновении неполадок необходимо незамедлительно произвести сканирование и удаление «вредителей». «Лечение» можно проводить и самостоятельно, но лучше обратиться за бесплатной помощью на специальные сайты.

Подробнее: Борьба с компьютерными вирусами
Как видите, решения задачи по устранению причин ошибки «Сеть отсутствует или не запущена» в целом довольно несложные. Правда, если речь идет о вирусной атаке, ситуация может оказаться весьма серьезной. Удаление вредоносных программ не приведет к желаемому результату, если ими уже были внесены значительные изменения в системные файлы. В таком случае, скорее всего, поможет только переустановка Windows.
Наша группа в TelegramПолезные советы и помощь
- To disable, enable, and restart a network adapter on Windows 11, go to Settings > Network & internet > Advanced network settings.
- You can also disable, enable, or restart a network adapter from the Command Prompt, PowerShell, Device Manager, and the Control Panel on Windows 10 and 11.
All modern computers come with network adapters today so you can connect to the internet and communicate with other devices. However, even the most sophisticated network adapters, whether wired (ethernet) or wireless (wi-fi), can run into issues and not perform as they are supposed to. At this point, a simple restart of the network adapter usually fixes the issues.
By restarting the network adapter, you avoid rebooting the complete computer, and the basic connectivity issues are also resolved.
You may want to restart your network adapter if your computer hasn’t had downtime in quite some time and the internet speed isn’t optimized when you are having trouble connecting to the wireless SSID, or if you are experiencing any sort of issues with network connectivity. Restarting the network adapter should be the first of many steps for troubleshooting.
On Windows 11, restarting the ethernet, wi-fi, or virtual network adapter involves turning it off and then on again. Therefore, the methods discussed in this post to restart any network adapter first let you disable the adapter, and then re-enable it. In case you want to simply disable or enable a network adapter on your Windows PC, you can use the same methods discussed below.
Note: Restarting and resetting the network adapter are two different things. When you reset the network settings, all configurations are lost and need to be redone.
Table of Contents
Restart the network adapter from Settings in Windows 11
Microsoft has introduced the ability to disable and enable any network adapter on your computer directly from the Settings app. You no longer have to open the Control Panel to do it.
Unfortunately, this option is not available in Windows 10.
Use the following steps to restart the ethernet or the Wi-Fi network adapter from the Windows 11 Settings app:
-
Press the Windows Key + i to open the Settings app.
-
Switch to the “Network & internet” tab from the left.
-
Scroll down and click “Advanced network settings.”
 1")
Open advanced network settings -
Click Disable in front of the network adapter that you want to disable or restart.
Disable the network adapter from Settings -
In case you want to restart the adapter, click Enable in front of it.
Enable the network adapter from Settings
 1")
 2")
 3")
If you re-enable the network adapter, you have successfully restarted it. If you were encountering issues with the adapter, check to see if they have been resolved.
Restart the network adapter from Control Panel
Traditionally, you can also restart the network adapter from the Control Panel. This method (and the methods below) also works for Windows 10.
-
Press the Windows Key + R to open the Run Command box.
-
Type in “ncpa.cpl” and press Enter to open the Network Connections applet.
-
Right-click on the adapter that you want to disable/restart and click Disable.
 4")
Disable network adapter from the Control Panel -
To re-enable the adapter, right-click the adapter again and click Enable.
Re-enable the network adapter from the Control Panel
 4")
 5")
Restart the network adapter from Device Manager
To enable, disable, or restart any network adapter of your computer from the Device Manager, use these steps:
-
Press the Windows Key + R to open the Run Command box.
-
Type in “devmgmt.msc” and press Enter to open the Device Manager.
-
Click on “Network adapters” to expand it.
 6")
Expand Network Adapters in the Device Manager -
Right-click on the adapter that you want to disable/restart and click “Disable device.”
Disable network adapter from the Device Manager -
If asked for a confirmation, click Yes.
Confirm action -
To re-enable the adapter, right-click the adapter again and click “Enable device.”
Enable the network adapter from the Device Manager
 6")
 7")
 8")
 9")
After performing the steps above, the selected network adapter will be restarted and should perform optimally now.
Restart the network adapter from PowerShell
If you prefer using the Windows command line instead, then you can use the steps below to disable, enable, or restart the ethernet or the wireless network adapter using Windows PowerShell:
-
Open an elevated PowerShell instance.
-
Run the following command to list all the network adapters:
Get-NetAdapter | format-table 10")
List all network adapter details in PowerShell -
Note down the name of the network adapter that you want to restart/disable.
-
Now use this command while entering your adapter’s name in place of [NetworkAdapterName] to disable it:
Disable-NetAdapter -Name “[NetworkAdapterName]” -Confirm:$false
Disable network adapter from PowerShell -
To re-enable the adapter, use this command:
Enable-NetAdapter -Name “[NetworkAdapterName]” -Confirm:$false
Enable/restart network adapter from PowerShell
 10")
 11")
 12")
Restart the network adapter from Command Prompt
You can also use the Command Prompt to restart any connected network adapter. Here is how:
-
Run the Command Prompt with administrative privileges.
-
List all the network adapter details with this command:
netsh interface show interface
List all network adapter details in Command Prompt -
Note down the name of the network adapter that you want to restart/disable.
-
Now use this command while entering your adapter’s name in place of [NetworkAdapterName] to disable it:
netsh interface set interface “[NetworkAdapterName]” disable
Disable network adapter from Command Prompt -
To re-enable the adapter, use this command:
netsh interface set interface “[NetworkAdapterName]” enable
Enable/restart network adapter from Command Prompt
 13")
 14")
 15")
Ending words
Restarting the network adapters on Windows was already an easy task. However, Windows 11 has made it even more convenient.
Although the Settings app was supposed to replace the Control Panel, Microsoft still hasn’t entirely accomplished the task. They are gradually shifting the controls from the Control Panel over to the Settings app, and the addition of the ability to disable and enable the network adapters from the Settings app is part of that ongoing agenda.
Once you make changes in the server network configuration file, then require to restart the server networking service in order to reflect the changes.
This guide will describe the steps to restart the network interface or network adapter in the Linux and Windows servers.
Restarting Network interface/adapter in Linux OS
Ubuntu / Debian
-
Use the following command to restart the server networking service.
# sudo /etc/init.d/networking restart
or
# sudo /etc/init.d/networking stop
# sudo /etc/init.d/networking start
else
# sudo systemctl restart networking
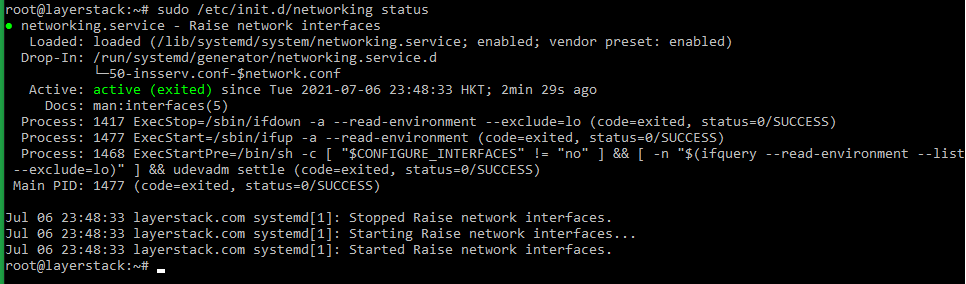
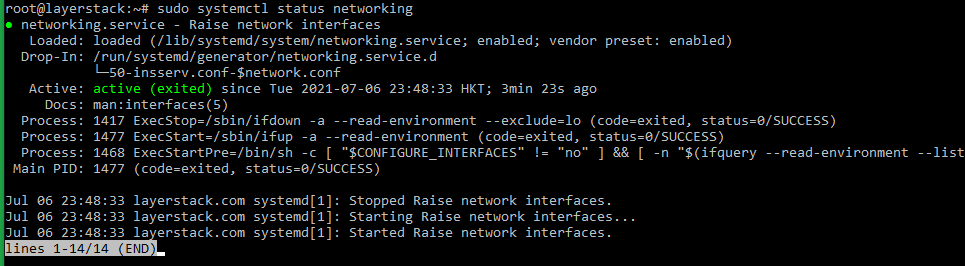
-
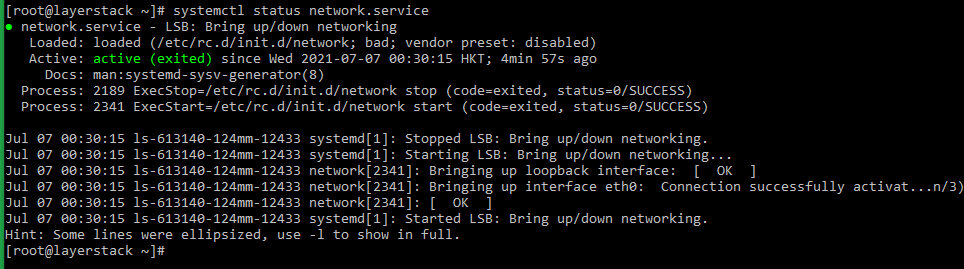
Once this is done, use the following command to check the server network status.
# sudo /etc/init.d/networking status
or
# sudo systemctl status networking


Ubuntu 17.10 and higher versions use NetPlan as the default network management tool and its configuration files are written in YAML syntax with a .yaml file extension.
Run the below command to update networking and then any changes that have been made to the network will take effect:
# netplan apply

AlmaLinux
-
Use the following command to restart the server networking service.
# nmcli networking off
# nmcli networking on
or
# systemctl restart NetworkManager
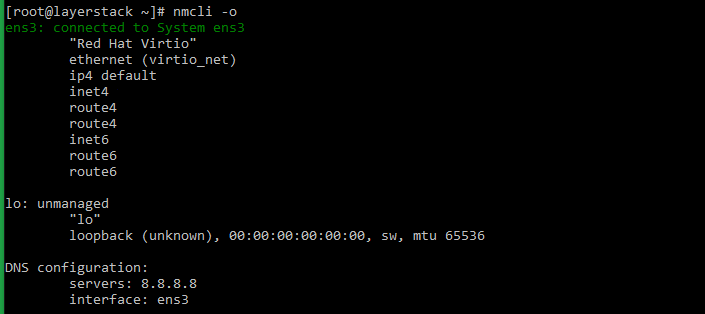
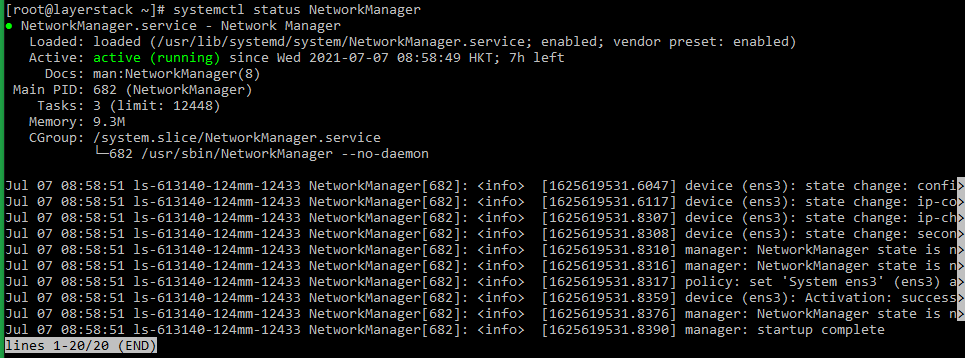
-
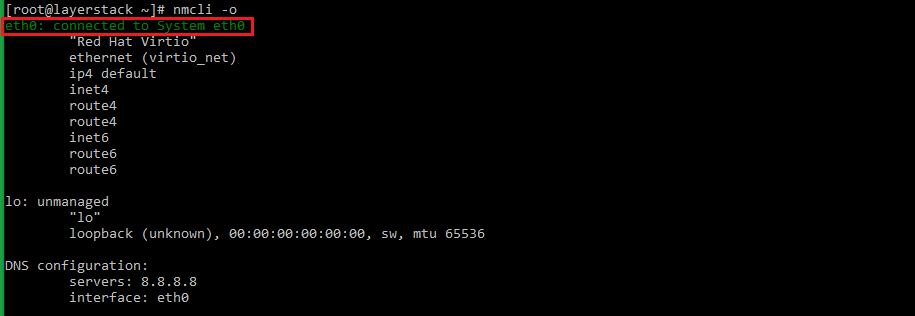
Once this is done, use the following command to check the server network status.
# nmcli -o
or
# systemctl status NetworkManager


Rocky Linux
-
Use the following command to restart the server networking service.
# nmcli networking off
# nmcli networking on
or
# systemctl restart NetworkManager
-
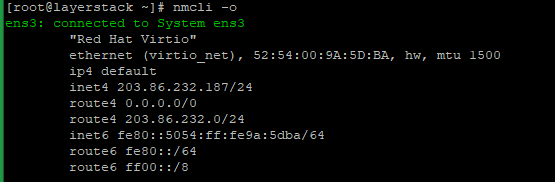
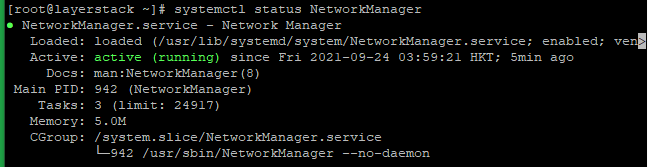
Either of the below commands can be executed to check the status of the networking service.
# nmcli -o
or
# systemctl status NetworkManager


CentOS 8
-
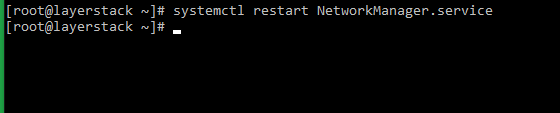
Use the following command to restart the server networking service.
# nmcli networking off
# nmcli networking on
or
# systemctl restart NetworkManager.service
-
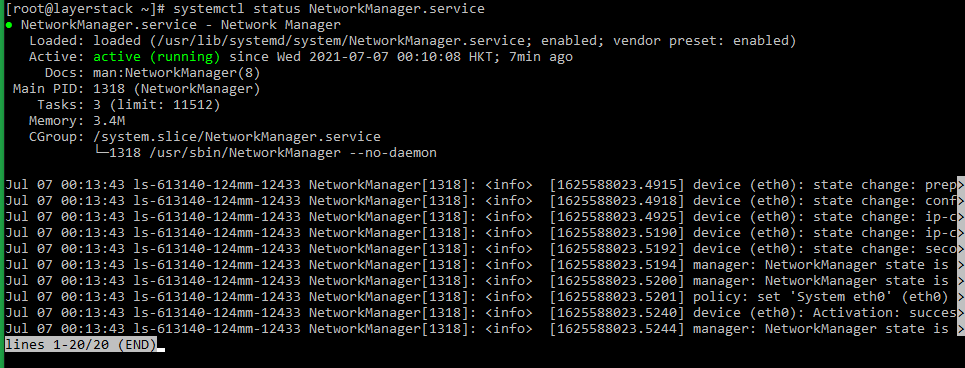
Either of the below commands can be executed to check the status of the networking service.
# systemctl status NetworkManager.service
or
# nmcli -o

CentOS 7
-
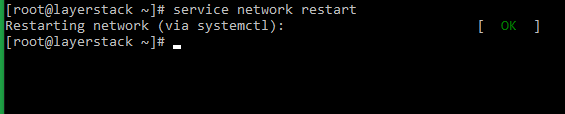
Use the following command to restart the server networking service.
# systemctl restart network.service
or
# service network restart
or
# /etc/init.d/network restart
-
The status of the networking service can be checked by making use of any of the below commands.
# systemctl status network.service
or
# service network status
or
# /etc/init.d/network status


CentOS 6
-
Use the following command to restart the server networking service.
# service network restart
or
# /etc/init.d/network restart
-
Once this is done, use the following command to check the server network status.
# service network status
or
# /etc/init.d/network status


Windows OS
Using the Enable/Disable mode of network adapter
-
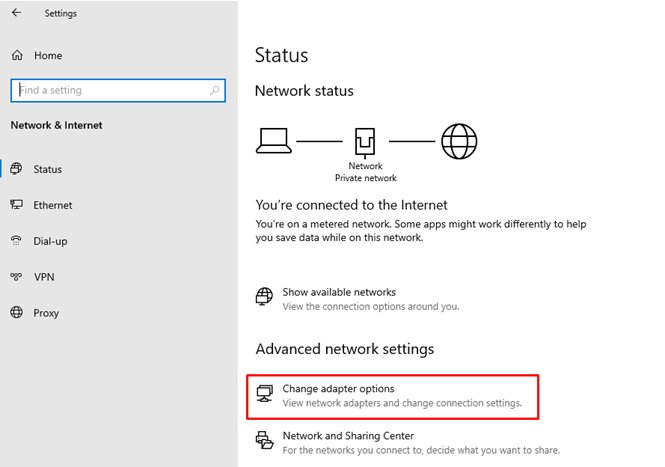
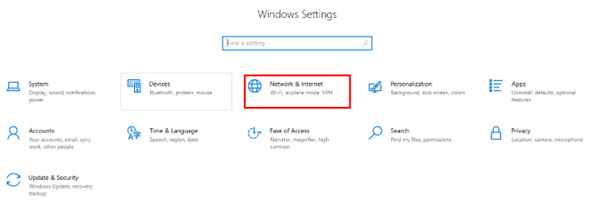
Click on the Windows key to open start and search
Settingsand go to theNetwork and Internetthen click onChange adapter optionwhich is shown in the below image.
Then will get the below page:
-
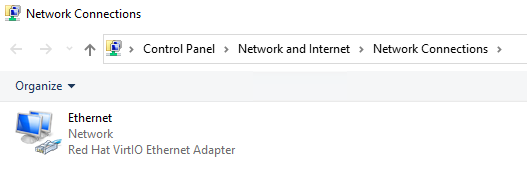
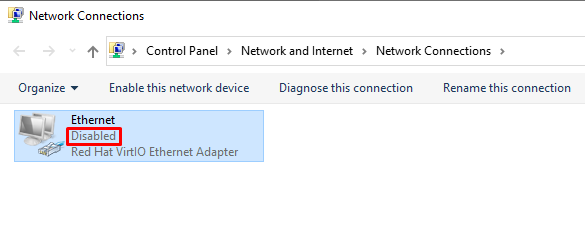
Right-click the
Ethernet deviceand click onDisableoption.
-
Again, Right-click the
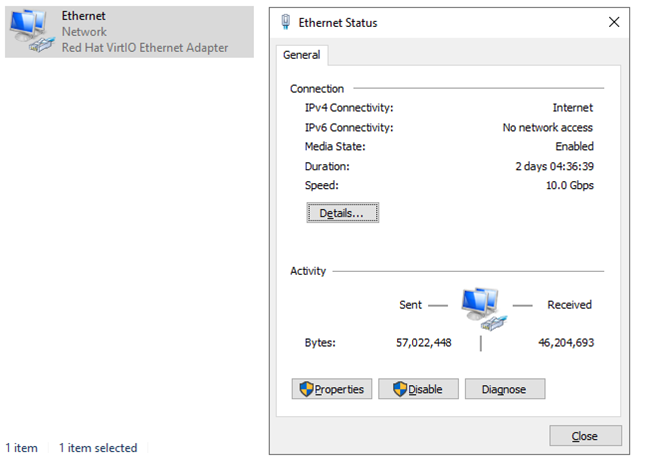
Ethernet deviceand click onenableoption. -
Once this is done, Right-click the
Ethernet deviceand click onstatus.


Using the netsh command
In Windows OS, the command line method involves using the netsh command for resetting the network and TCP/IP stack.
-
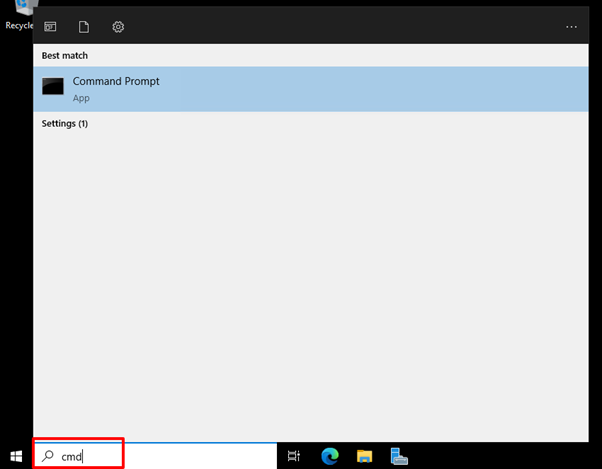
Go to
Startand typeCMDin the search window.
-
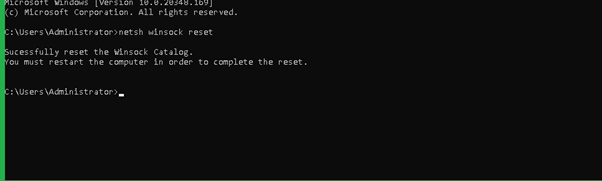
Once opened the
Command Prompt, the command for restarting the network interface, as provided below, can be executed.> netsh winsock reset
-
Regularize the networking process as indicated in the message after restarting the server.
-
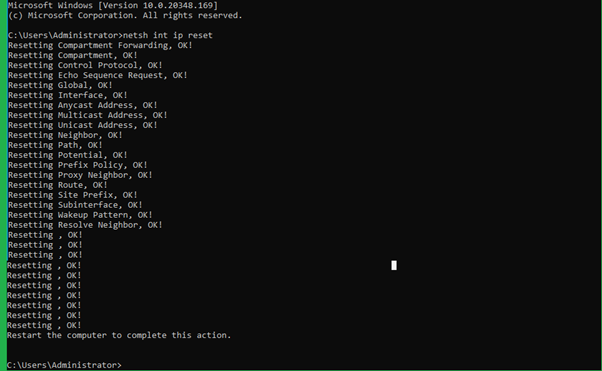
In addition to the above command, may also use the command which resets the TCP/IP stack. The command is as follows.
> netsh int ip resetThe output will be as follows:
Using the Network Reset option (Windows 10/11)
The reset button method can be used in Windows 10 & 11 versions by which the user can restart the Network interface. The steps for this are given below.
-
Click on Windows
Start Menubutton and then selectSettings.
-
From the
Settingsoption, selectNetwork & Internetoption.
-
Here you would be able to see the adapter options i.e
Advanced Network Settings, from which you can click onNetwork Resetoption. -
Click on the
Reset Nowbutton on the right side ofNetwork resetoption and you will be prompted for the confirmation. ChooseYesfor proceeding with resetting the network settings.Once clicked on
Yes, the network adapter will start to reset and you will be able to restart the network interface.
Related Tutorials
-
How to check if TCP / UDP port is open on Linux & Windows Cloud Servers
-
Installing telnet client on Linux and Windows Cloud Servers
-
How to check TCP/IP configuration with ipconfig on Windows Cloud Servers
-
How to check TCP/IP configuration with ifconfig on Linux Cloud Servers
-
How to configure the Static IP Address & Network Card for Linux & Windows Cloud Servers