
Key Takeaways of Update Network Drivers in Windows 10:
Outdated network drivers can cause various issues/errors that can negatively affect your computer’s network performance and connectivity, including slow internet speed, connectivity issues, security risks, compatibility problems, and poor overall performance.
You may be unable to connect Wifi with your PC/Laptop. So, updating your network drivers to enjoy smooth network connectivity is essential. The article provides a step-by-step guide to help users update their network drivers in Windows 10.
| 🎯Goal: | Update Network driver in Windows 10, increasing internet speed. |
| 💻Supported OS: | Windows 10, Windows 11, and older Windows operating systems. |
| ⏳Duration: | 5-10 minutes |
| 🧰Tools: | 1️⃣EaseUS DriverHandy;2️⃣Device Manager; 3️⃣Windows Update; 4️⃣Manufacturers’ Websites |
Introduction
Get ready to supercharge your network connectivity! Network drivers are like the communication superheroes of your computer, ensuring a seamless connection with network devices such as routers, modems, and network interface cards. They keep the flow of information moving smoothly and quickly, providing you with high-speed internet access.
But wait, there’s a catch! These drivers, which are automatically installed during the initial Windows 10 setup process, can become outdated over time, causing various network issues such as slow internet speed, connectivity problems, and even security risks.
Don’t worry, though! In this article, we’re going to show you how to become the network driver superhero and update your drivers to ensure a smooth and fast network connection. We’ll cover the importance of keeping your drivers up-to-date, the consequences of using outdated drivers, and provide you with an easy-to-follow step-by-step guide to updating your drivers.

So, get ready to say goodbye to network issues and hello to speedy internet!
Now it’s time to learn how to update network drivers on your own in Windows 10, whether PC or laptop. Here we share some useful tips and four easy ways with complete instructional steps to make the procedure easier and more comfortable for you.
Method 1. EaseUS DriverHandy
Updating network drivers in Windows can be a tricky process for you if you don’t have technical knowledge or experience but don’t worry. EaseUS DriverHandy made it easier than ever. If you want to save time and energy finding and installing the correct network drivers for your Windows 10 PC automatically, EaseUS DriverHandy is a reliable and efficient solution that can take care of the whole process for you.
This tool is designed to automate the tedious task of driver updates, making it easier than ever to keep your computer running smoothly. With its powerful system, you can rest assured that you’ll receive the most up-to-date and appropriate drivers for all your components and devices.
So if you want to streamline your PC maintenance and ensure that your network drivers are always up-to-date, try EaseUS DriverHandy. Your computer will thank you for it!
Let’s start updating network drivers in Windows 10 through EaseUS DriverHandy:
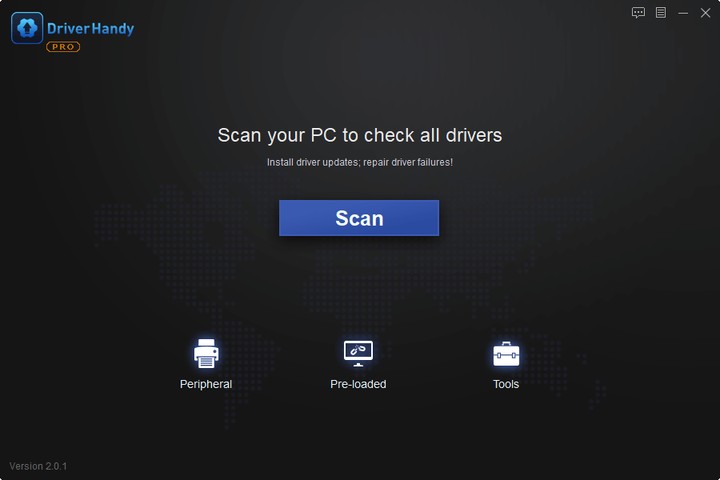
Step 1. Launch EaseUS DriverHandy and click the «Scan» button.
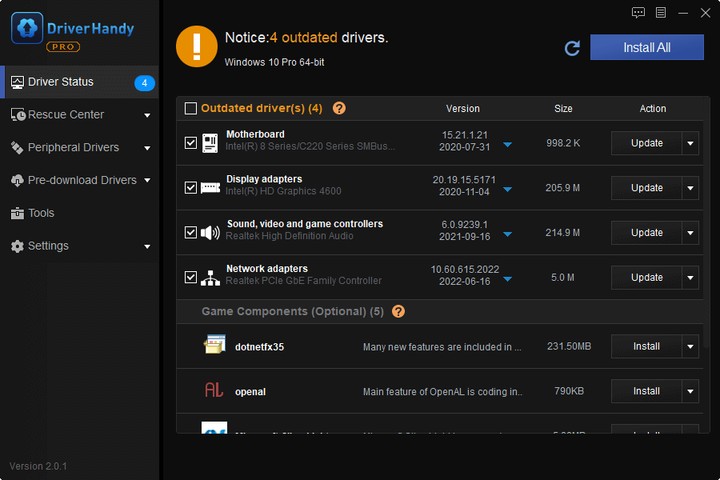
Step 2. Choose the drivers and click «Install All» in the upper right corner to update all drivers. Or you can select the single Motherboard, Sound, or Graphisc drivers and click «Update» on the right side.
Aside from updating network drivers in Windows 10, this software can also ensure you update network drivers on other operating systems, such as to:
Method 2. Device Manager
You can also update the network drivers and several other components using Device Manager.
Here’s a step-by-step guide to updating your device driver using Device Manager:
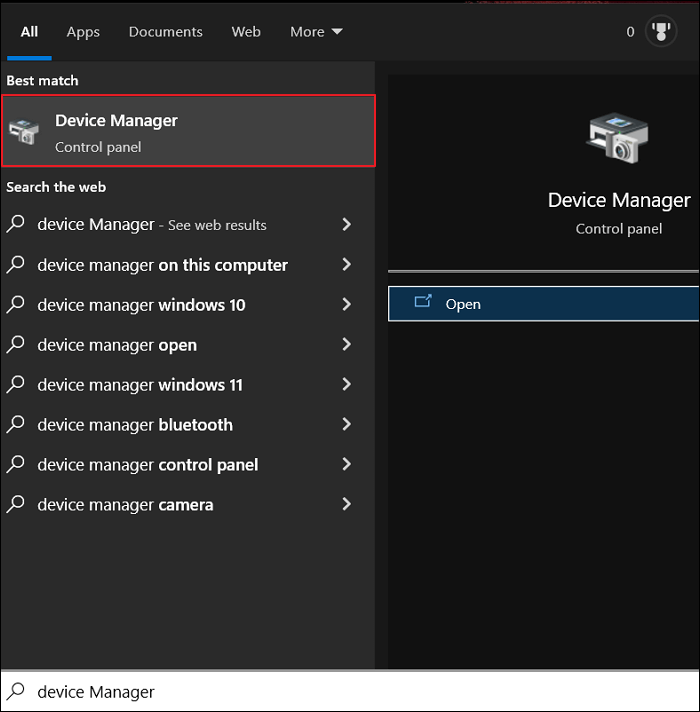
Step 1. Open «Device Manager». Just type it in the search bar from the taskbar.
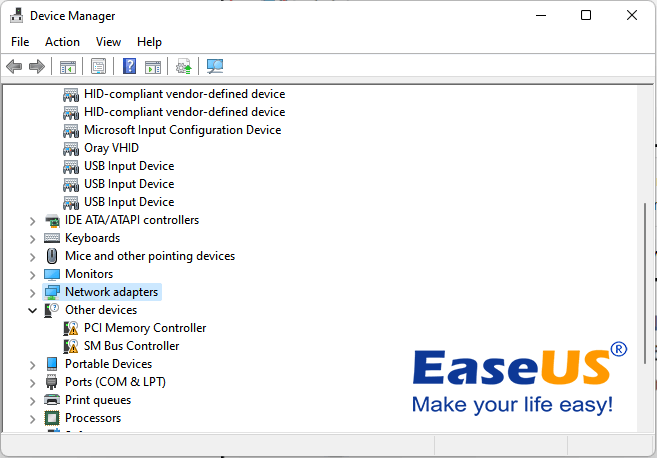
Step 2. Expand «Network adapters» by clicking on (>) equal to sign.
Step 3. From the expanded list, right-click on the desired network drivers.
Step 4. Click «Update driver».

Step 5. Choose any option from two (Search automatically for drivers) or (Browse my computer for drivers).
Note: If you choose the first option (Search automatically for drivers), it’ll automatically search over the internet and update drivers. But due to any reason, if the first option doesn’t work, then you have to choose the second option (Browse my computer for drivers), but remember that before choosing the second option, you need to first download the relevant drivers from the manufacturer’s website as this second method is manual, so you need to do all things manually if you’re choosing this option.
Method 3. Windows Update
The Windows update feature may take some time for the latest driver updates to appear. If you don’t find any update in the Windows update feature, it is recommended to download and install desired drivers manually. Because sometimes this feature doesn’t display or provide any new driver update.
Please follow the instructional steps:
Step 1. Open Settings on your Windows 10 PC.
Step 2. Click «Update & Security.»
Step 3. Click on «Windows Update.»
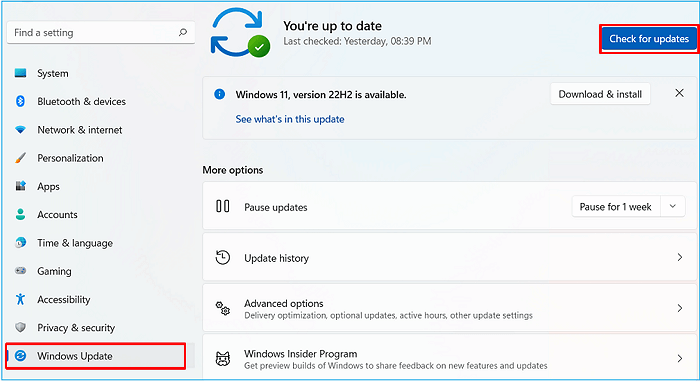
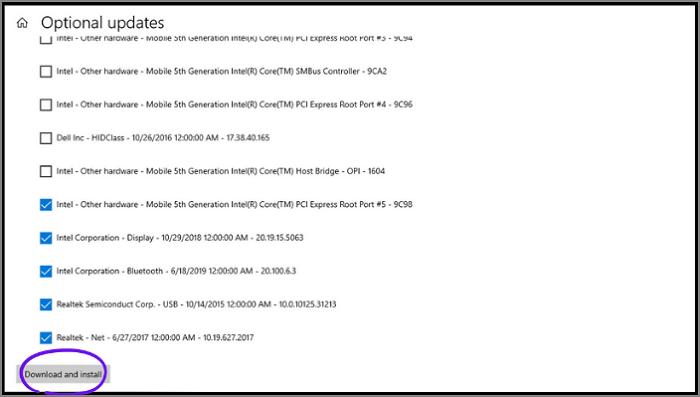
Step 4. Click «View optional updates.»

Step 5. Click «Driver updates.»
Step 6. If any new updates are available, checkmark them.
Step 7. Finally, click on «Download and install» in the left corner.
Method 4. Manufacturers’ Websites
To download and install the latest driver for your network adapter, you can visit the official support website of the hardware manufacturer. For example, it’s Intel for me, so always remember to visit your relevant manufacturer’s website, like Dell, HP, etc. In my case, I’ll visit Intel’s website.
Here are the steps to install the latest Intel network adapter driver for Windows 10 from the Intel website:
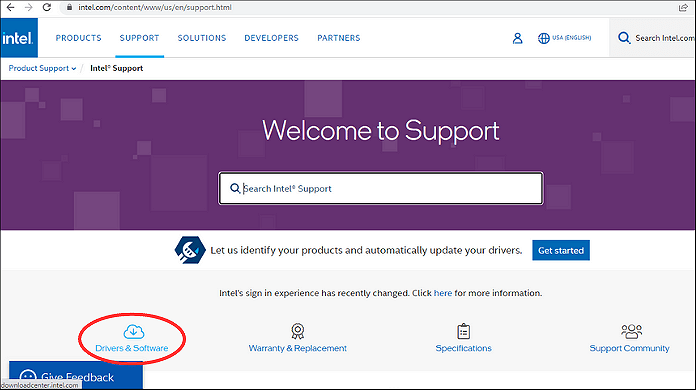
Step 1. Visit the Intel support website.
Step 2. Click on the «Drivers & Software» option.
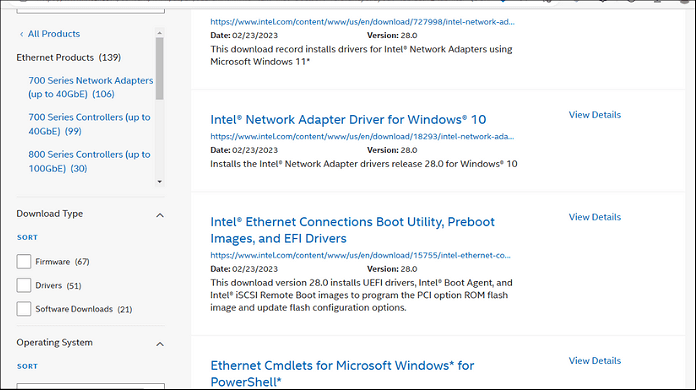
Step 3. Select «Ethernet Products» when prompted to select your product.
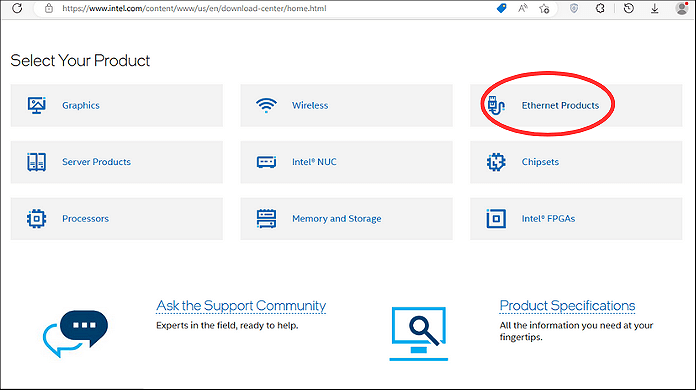
Step 4. Choose the appropriate version of the Intel network adapter driver for your Windows operating system.
Step 5. Click «View Details» and click «Download» to download the driver setup file.
Step 6. After downloading the driver file, double-click on the downloaded file (.exe) and follow the on-screen instructions to install the latest driver.
Step 7. Once the installation process is complete, restart your PC/laptop.
Note: This procedure is about Intel’s driver. However, if your manufacturer is different, you should visit your relevant manufacturer’s website. You may find different options on other manufacturers’ websites, but the rest process is the same for downloading and installing drivers.
What are Network Drivers, and Why Are They Important?
Network drivers are software programs that allow communication between a computer’s operating system and network hardware, such as Ethernet or Wi-Fi adapters. They play a crucial role in enabling devices to connect to the internet and other network resources. Without network drivers, your computer’s Ethernet cards or other networking devices can’t work correctly, and you can’t enjoy a smooth internet facility. So, in this regard, updated network drivers improve network performance, and the internet works fast on our PC/Laptop.
So, if you face slow internet speeds or connectivity issues, check if your network drivers are up-to-date. If not, then instantly update your drivers. You’ll get immediate benefits from updated network drivers, such as improved network performance and enhanced security compatibility with the latest software.
Benefits of updating network drivers in Windows 10:
- Improved network performance and stability
- Bug fixes, security patches, and performance optimizations
- Compatibility with new network hardware and protocols
- Better support for new features and technologies
- Reduced risk of connectivity problems and network crashes
- Enhanced security and protection against network threats
- Improved overall system performance and responsiveness
- More reliable and faster internet speeds
- Better streaming and online gaming experiences
- Reduced latency and network lag
Extended Reading: Why Do You Need to Update Your Network Drivers?
Now you know very well what allows your computer to connect to the Internet. Network drivers! They’re like bridges between your computer’s hardware and the operating system. Without network drivers, you couldn’t surf the web, stream videos, or check your email. Outdated drivers can cause several issues, such as slowing down your internet connection, also cause your computer to freeze or crash, and even putting your personal information at risk.
On the other hand, updating your drivers can work wonders for your computer’s performance, stability, and security. It can improve your internet speed, reduce the likelihood of crashes and system errors, and protect you against potential security threats.
So, if you want to avoid frustration and maximize your computer’s potential, make sure to keep those network drivers up-to-date. If you’re not sure how to do it, don’t worry — look at the above-detailed methods.
Frequently Asked Questions (FAQs)
If you’ve any queries or want to learn more, the FAQs below may be helpful.
1. How do I update my network adapter driver?
There are several methods to update the network driver, such as through Device Manager easily. Go to the Device Manager on your Windows computer, locate the network adapter, right-click it, and select «Update driver.» You can then choose to search for updated drivers automatically or browse your computer for the driver software.
2. How do I install a network driver in Windows 10?
To install a network driver in Windows 10, you can use the Device Manager to search for and install the driver software or you can download the driver directly from the manufacturer’s website and install it manually. But the manual process maybe a little bit difficult for you and require technical expertise. So, in that case, you can automatically install through EaseUS DriverHandy.
3. Do I need to update my network drivers?
If you face any networking or connectivity problems, you need to update network drivers to fix the issue. Updating your drivers can improve performance and eliminate connectivity issues.
4. Does Windows 10 automatically install network drivers?
Usually, Windows 10 automatically install network drivers. Sometimes you need to install drivers or update existing network drivers manually, if you notice any internet connectivity issues, you must install or update network drivers immediately.
Conclusion
Updating network drivers in Windows 10 is crucial for ensuring smooth and reliable network connectivity. Outdated network drivers can cause various issues, including slow internet speed, connectivity issues, security risks, and poor overall performance. Therefore, it is recommended to check and update network drivers regularly for optimal performance. EaseUS DriverHandy is an excellent tool that can automate the tedious task of driver updates, making it easier than ever to keep your computer running smoothly. With just one click, EaseUS DriverHandy can update all drivers, including network drivers. Say goodbye to the frustration of manually searching for drivers online and give EaseUS DriverHandy a try to streamline your PC maintenance and ensure that your network drivers are always up-to-date.
Как обновить или установить драйвер сетевой карты
Обновлено:
Опубликовано:
Используемые термины: драйвер, Windows.
Подход к обновлению не зависит от версии операционной системы. Описанные действия подойдут для Windows 8 / 10 и, а также, 7 и XP.
Процесс обновления сводится к:
- Определению производителя и модели сетевого адаптера.
- Загрузки с сайта производителя нужной версии драйвера.
- Установки программного обеспечения.
Мы рассмотрим каждый процесс пошагово.
Данная инструкция предполагает наличие Интернета. Если его нет на компьютере, скачать сетевой драйвер можно на другом устройстве и перенести нужные файлы на конечный компьютер.
Определяем производителя оборудования
Загружаем драйвер с сайта производителя
Устанавливаем драйвер
С помощью установщика
Вручную
Альтернативные методы установки
В Windows 10
По идентификатору устройства
При помощи специальной программы
Для устройств Realtek
Откатываем или переустанавливаем драйверы
Откат
Переустановка
Что делать, если драйвер не ставится
Другие инструкции
1. Определение производителя
В большинстве случаев, у нас будет несколько сценариев определения модели оборудования:
1. Сетевой адаптер интегрирован в материнскую плату (самый распространенный вариант для проводных соединений). В этом случае можно воспользоваться инструкцией Как узнать модель материнской платы. После мы будем скачивать драйвер сетевой карты для нее.
2. Используется ноутбук. В этом случае нам нужна модель ноутбука. Ее можно посмотреть в документах или на нижней стороне самого компьютера.
3. У нас дискретная сетевая карта (например, WiFi). В этом случае нам нужна конкретная модель устройства. Ее можно узнать по документации, посмотреть на самом устройстве или воспользоваться программой, например, AIDA64.
После определения производителя и модели, переходим к скачиванию программного обеспечения.
2. Загрузка драйвера
Переходим на сайт разработчика оборудования. Например, если мы хотим найти драйвер для интегрированной карты на материнской плате ASUS, переходим на сайт производителя. В поиске вводим определенную на раннем этапе модель:

Среди результатов отсортируем вывод, выбрав только материнские платы:
В найденных результатах переходим к своей материнской плате:

В меню сверху находим Поддержка и переходим на эту страницу:
Переходим на вкладку Драйверы и утилиты:
Выбираем операционную систему, ее версию и разрядность (32- или 64-bit):

В списке драйверов находим программное обеспечение для сети с скачиваем его:

Процесс поиска драйвера для другого производителя материнской платы, ноутбука или сетевого адаптера полностью аналогичен.
После загрузки нужного файла переходим к установке.
3. Установка драйвера
В зависимости от скачанного файла, есть два варианта установки драйвера — с помощью установщика Windows или вручную. Рассмотрим оба варианта.
С помощью мастера установки
В большинстве случаев, драйверы распространяются в виде установщика. Достаточно запустить файл setup.exe(msi)/install.exe(msi) и пройтись по мастеру установки, отвечая далее.
В некоторых случаях настройки применятся сразу, иногда нужно перезагрузить компьютер.
Установка завершена.
Ручная установка
В редких случаях, драйвер скачивается как архив, в котором нет установщика. В таком случае, распаковываем архив с драйверами.
Открываем диспетчер устройств одним из способов:
- Кликаем правой кнопкой мыши по Пуск и выбираем Диспетчер устройств.
- Вводим команду devmgmt.msc.
- Используем поиск Windows.
Раскрываем ветку с сетевыми адаптерами — кликаем правой кнопкой мыши по нужному устройству и выбираем Обновить драйвер:

В открывшемся окне выбираем Найти драйверы на этом компьютере:
Выбираем путь до папки с распакованным архивом с драйверами:

… и нажимаем Далее:
Если драйвер подходит, начнется процесс его установки. По его окончании рекомендуется перезагрузить компьютер.
Дополнительные методы установки драйвера
Выше описан рекомендованный способ установки или обновления сетевого драйвера, так как он гарантирует совместимость с оборудованием. Однако, есть и другие, относительно, более простые методы. Их можно применять, когда производитель больше не поддерживает устройство и нет возможности для него скачать официальную версию драйвера.
Windows 10 / 8.1
Самый простой и безопасный метод. Он гарантирует совместимость драйвера, однако версия данного драйвера не всегда является последней. Способ доступен для версий системы, начиная с 8-ки.
Для обновления просто заходим в диспетчер устройств одним из описанных выше методов, кликаем по устройству правой кнопкой мыши и выбираем Обновить драйвер:
В открывшемся окне кликаем по Автоматический поиск драйверов:

Ждем результата поиска.
Установка по коду устройства
У каждого оборудования, которое видит система Windows, есть специальный код, по которому можно найти драйвер. Это универсальный метод установки, но он обеспечивает меньшую гарантию совместимости, нежели которую можно получить от производителя.
Подробнее процесс описан в инструкции Как найти драйвер по коду устройства.
Использование специальной программы
Данный метод позволяет без особых усилий обновить сразу все драйверы — просто устанавливаем программу и выбираем устройства для обновления, независимо от версии системы Windows. Однако, данный способ самый опасный и иногда приводит к фатальным ошибкам. Его стоит применять осторожно и в крайнем случае.
Примеры программ, который позволяют автоматически скачивать и устанавливать драйверы для устройств нашего компьютера — DriverHub, Driver Pack. Некоторые программы имеют офлайн версию, в базе которой есть все драйверы для сети — это позволит установить их на компьютере без Интернета.
Драйвер Realtek
Большая доля сетевых адаптеров принадлежит производителю Realtek. Мы можем скачать последнюю версию драйвера от самого производителя сетевой карты.
Драйвер можно скачать на сайте производителя в разделе загрузки.
Откат или переустановка драйвера
Если после установки обновления драйвера компьютер стал работать хуже, можно выполнить откат версии или удаление с последующей установкой.
Откат
Для этого открываем диспетчер устройств и переходим к свойству устройства:

На вкладке Драйвер кликаем по кнопке Откатить:
* если данная кнопка не будет доступна для нажатия, значит драйвер не был обновлен и на компьютере стоит единственная версия. Откат сделать нельзя.
Переустановка
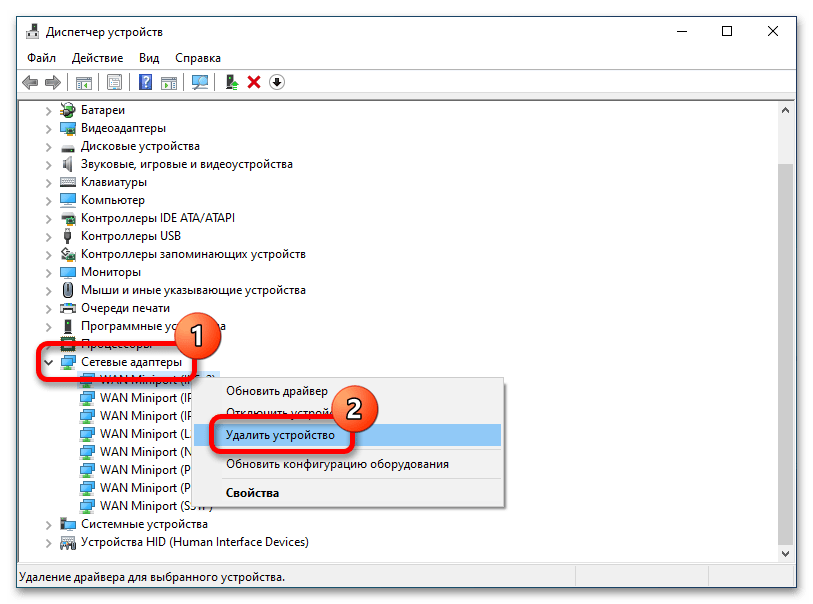
Сначала удаляем драйвер. Для этого заходим в диспетчер устройств, кликаем правой кнопкой мыши по сетевому устройству и выбираем Удалить устройство:

Если доступна галочка Удалить программы драйверов для этого устройства, ставим ее. Нажимаем Удалить:
После удаления драйвера перезагружаем компьютер и устанавливаем программное обеспечение по инструкции выше.
Если драйвер не устанавливается
В процессе установки или обновления мы можем получить различные ошибки. Как правило, их причина — это попытка установить неподходящий драйвер. Внимательно проверяем, что мы скачали программное обеспечение для подходящей версии операционной системы. В некоторых случаях, проблему может вызывать неправильно работающее устройство.
В качестве решения, можно попробовать воспользоваться одним из альтернативных методов установки, например, с помощью специализированной программы.
Читайте также
Похожие статьи с тематикой установки драйверов:
1. Как обновить драйвер видеокарты
2. Как установить драйвер на звук
3. DriverHub — автоматическая установка и обновление драйверов
4. Как найти драйвер по коду устройства
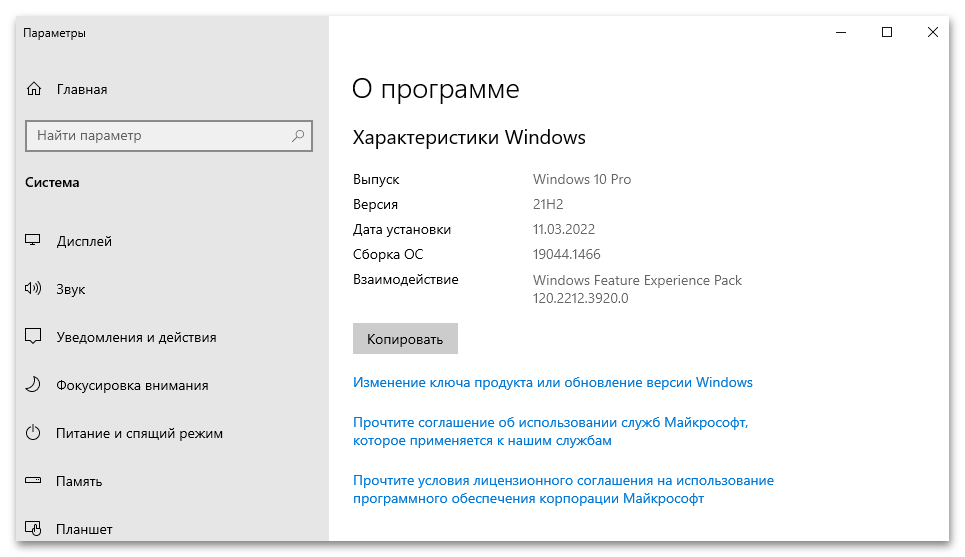
Важно! Все действия, представленные в статье, выполняются на примере Windows 10 версии 21H2 (19044.1466). Другие сборки операционной системы могут немного отличаться в плане визуального оформления и месторасположения некоторых элементов интерфейса, но каждый описанный дальше способ все равно остается актуальным. Узнать версию установленной на компьютере ОС можно в свойствах, что подробно описано в другой статье на нашем сайте.
Подробнее: Как посмотреть характеристики компьютера на Windows 10
Способ 1: Параметры системы
Самый простой метод восстановления настроек сетевого адаптера предполагает выполнение некоторых действий в параметрах системы. Для этого потребуется сделать следующее:
-
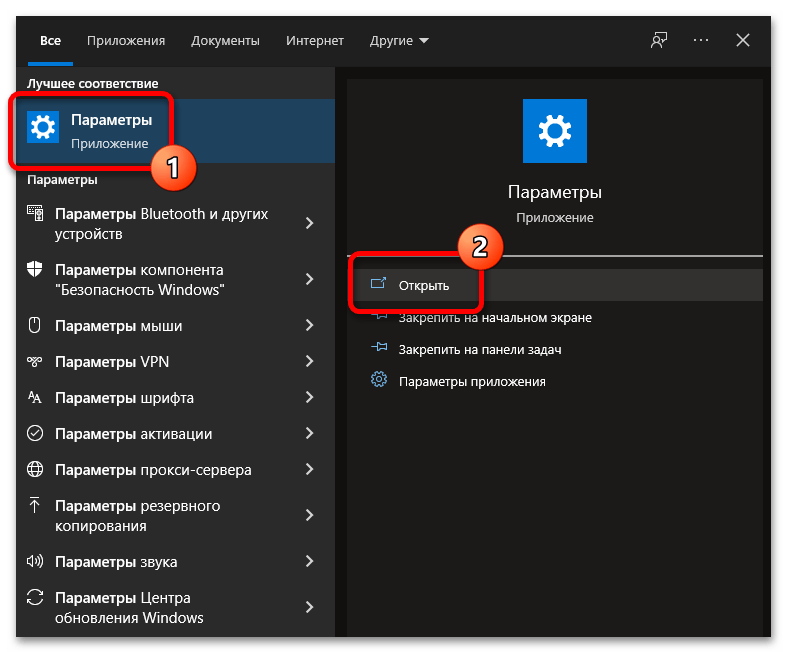
Откройте окно настроек, воспользовавшись любым удобным способом. Сделать это можно посредством поискового запроса. Следует кликнуть по соответствующей области на панели задач и ввести запрос
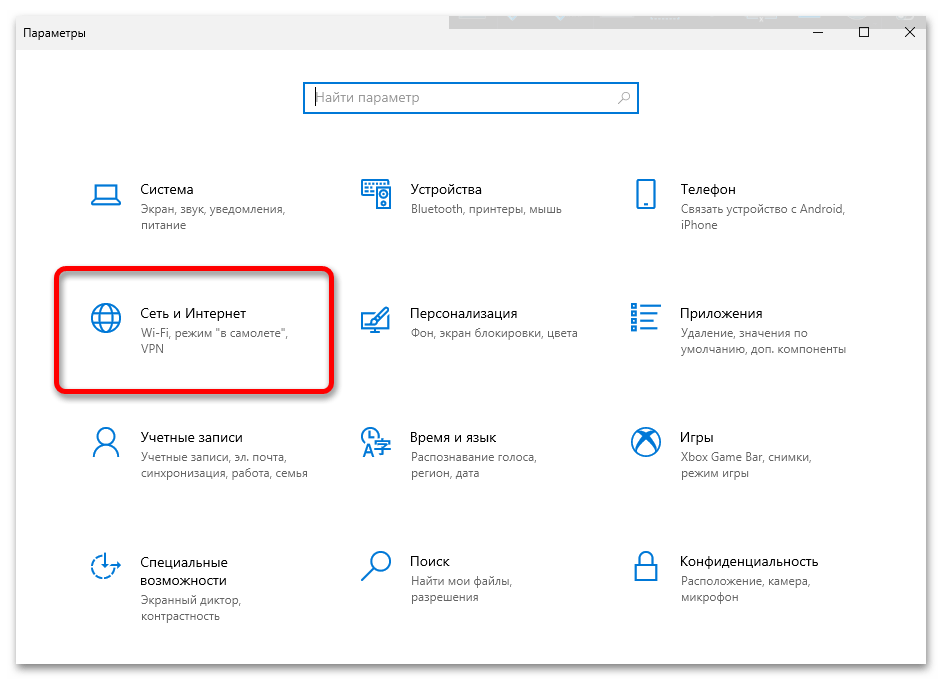
«Параметры», после чего кликнуть в результатах по одноименному пункту. - В открывшемся окне перейдите в раздел «Сеть и интернет».
- Находясь на вкладке «Состояние», опуститесь по странице вниз и щелкните по пункту «Сброс сети».
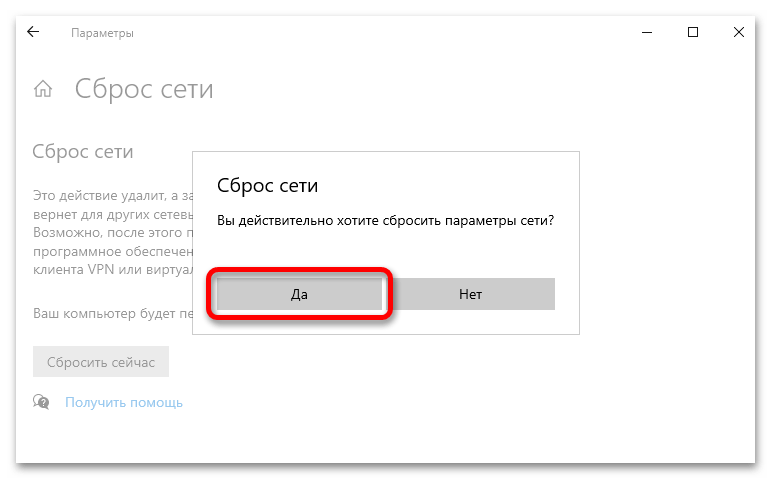
- В новом открывшемся меню подтвердите действие, кликнув по кнопке «Сбросить сейчас».
- Во всплывающем диалоговом окне ответьте на вопрос утвердительно, чтобы завершить процесс отката параметров сети до заводских настроек.


После выполнения описанных действий компьютер необходимо перезапустить, чтобы изменения вступили в силу. Система сделает это автоматически, установив соответствующий таймер на 5 минут.
Читайте также: Как настроить интернет на компьютере с Windows 10
Способ 2: «Командная строка»
Если произвести сброс сетевых параметров путем изменения системных настроек с графическим интерфейсом не получается, можно воспользоваться специальными консольными командами, инициализацию которых следует производить в окне «Командной строки».
-
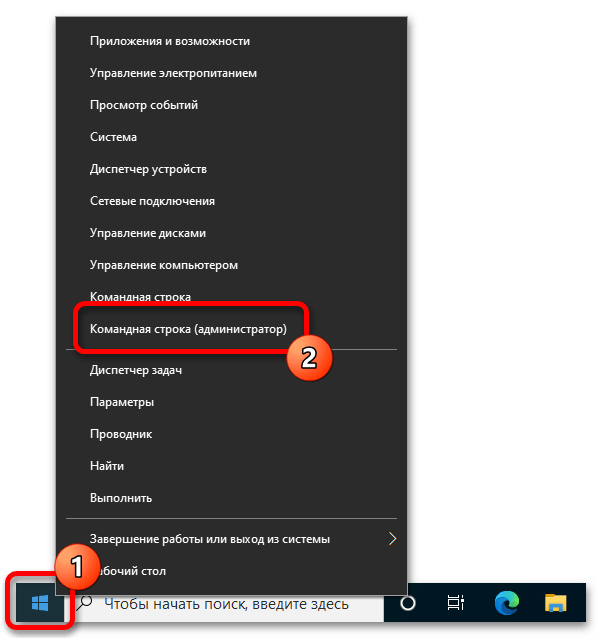
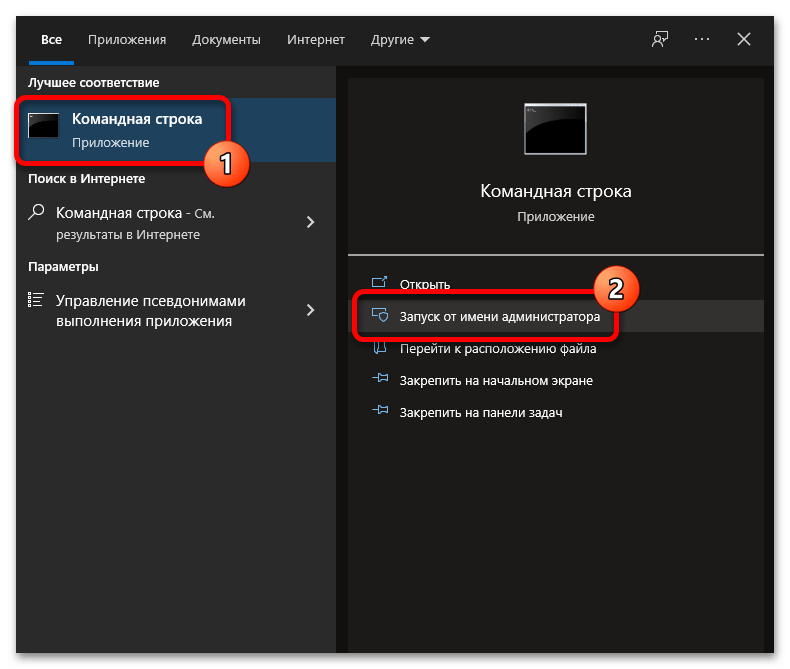
Откройте окно консоли от имени администратора. Сделать это можно через контекстное меню кнопки «Пуск». Щелкните по ней правой кнопкой мыши и выберите пункт «Командная строка (администратор)».

В качестве альтернативы можно воспользоваться другими способами запуска консоли, рассмотренными в отдельной статье на нашем сайте.
Подробнее: Как запустить «Командную строку» от имени администратора в Windows 10
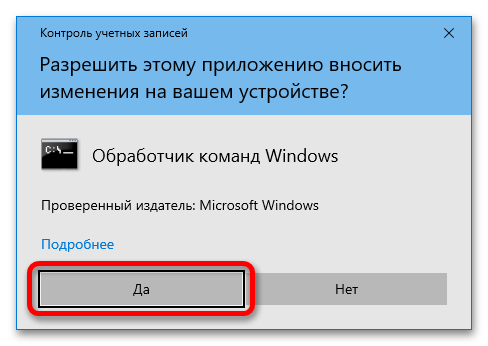
- В появившемся диалоговом окне подтвердите запуск, щелкнув по кнопке «Да».
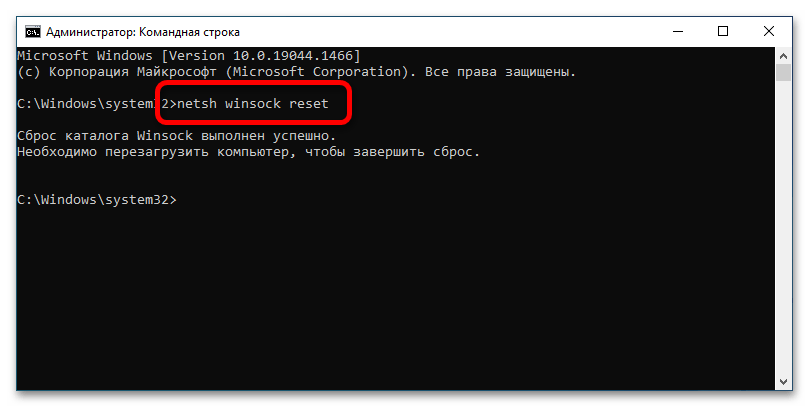
-
Перезапустите службу, отвечающую за взаимодействие всех сетевых экранов, введя нижеприведенную команду и нажав клавишу Enter:
netsh winsock reset -
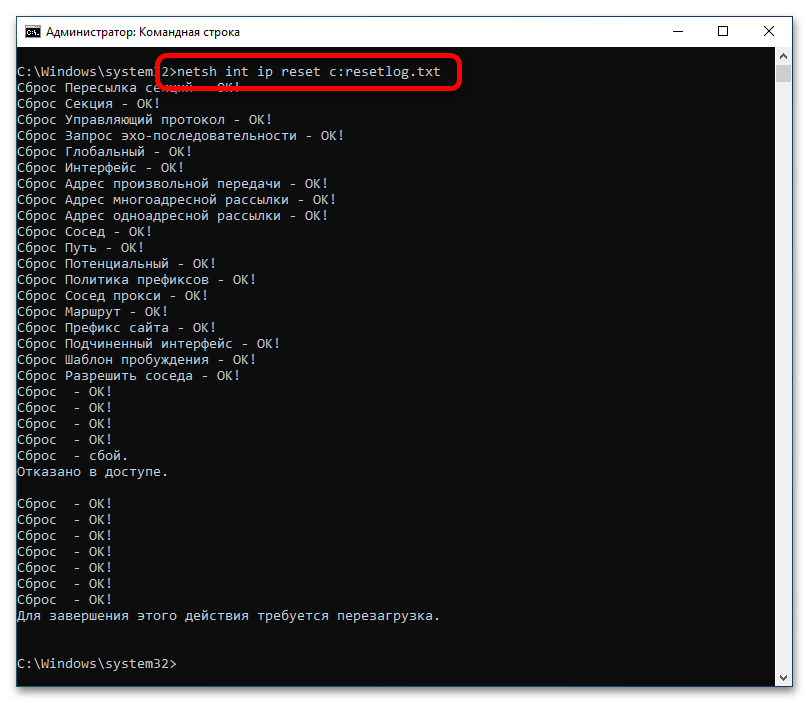
Удалите, а затем восстановите работу протоколов TCP/IP, которые отвечают за корректную обработку пакетов данных, переданных по интернету. Делается это посредством следующей команды:
netsh int ip reset c:resetlog.txt -
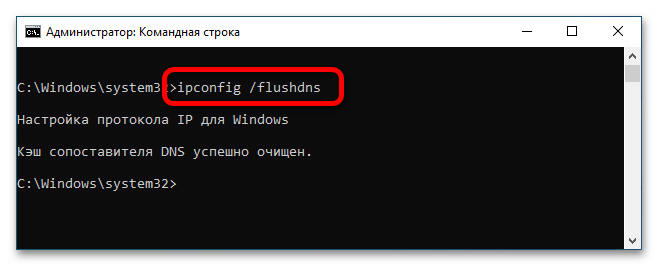
Очистите сетевой кэш с помощью представленной ниже команды с последующим нажатием по клавише Enter:
ipconfig /flushdns
Все параметры сети будут сброшены до изначальных, останется только перезапустить компьютер, чтобы изменения вступили в силу.
Читайте также: Что делать, если пропал Wi-Fi на ноутбуке с Windows 10
Способ 3: Переустановка драйвера
Если описанные ранее способы сброса сети не помогли, проблема может наблюдаться непосредственно в драйвере сетевой карты. В таком случае потребуется переустановить это программное обеспечение. Выполняется это посредством полного удаления с последующей повторной инсталляцией.
Важно! Перед выполнением инструкции обязательно скачайте на компьютер все драйверы сетевых устройств, так как после их удаления соединение с интернетом пропадет и сделать этого не получится. В отдельной статье на нашем сайте есть подробное руководство, в котором поэтапно описаны все необходимые для этого действия.
Подробнее: Поиск драйверов по ID оборудования
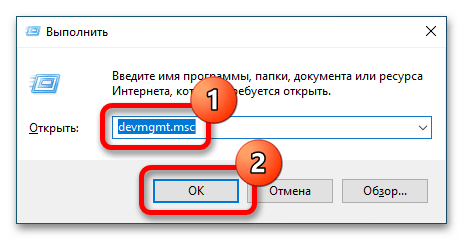
-
Запустите «Диспетчер устройств» любым доступным способом. В качестве примера будет использован интерпретатор «Командной сроки». Вызовите окно «Выполнить» с помощью сочетания горячих клавиш Win + R, после чего введите в единственное доступное поле значение
devmgmt.mscи нажмите «ОК».
Это не единственный метод открытия «Диспетчера устройств» в Windows 10. Если воспользоваться им не получилось, ознакомьтесь с тематической статьей на нашем сайте.
Подробнее: Все способы запуска «Диспетчера устройств» в Windows 10
- В открывшемся окне разверните ветку «Сетевые адаптеры» и кликните правой кнопкой мыши по первому названию в списке. В контекстном меню выберите опцию «Удалить устройство».
- В появившемся диалоговом окне подтвердите это действие, щелкнув по кнопке «Удалить». После завершения процедуры проделайте такие же действия со всеми оставшимися устройствами из списка.
- Перезапустите компьютер, а после повторного старта системы откройте папку, в которую предварительно загрузили другие драйверы всех сетевых адаптеров. Поочередно выполните их установку, следуя инструкциям на экране.

После выполнения всех описанных действий рекомендуется повторно перезапустить ПК, чтобы операционная система зарегистрировала новые компоненты.
Наша группа в TelegramПолезные советы и помощь
Quick Guide
If you’re in a hurry, here’s how to download & install the correct version of drivers with one click!
Want to reinstall your Wi-Fi driver on your Window 10 PC? If so, you’ve come to the right place! After reading this article, you should be able to reinstall your Wi-Fi driver easily and quickly!
If you’re having wireless performance or connectivity issues, it is a good choice to reinstall the driver for your wireless network adapter. By reinstalling your Wi-Fi driver, you can fix many unexpected network issues.
Follow these steps
- Uninstall the driver for your wireless network adapter in Device Manager
- Reinstall the driver for your wireless network adapter
- Bonus tip: How to update your network driver automatically
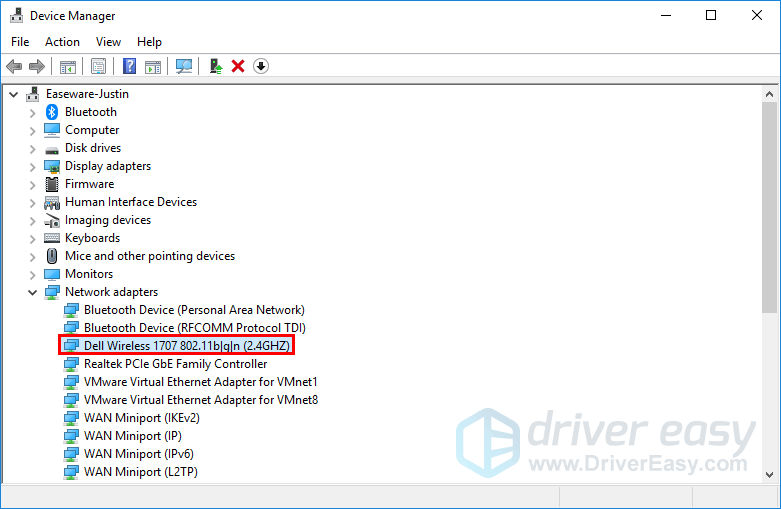
Note: the screenshots below come from Windows 10, but the fixes also work on Windows 11, Windows 8 and Windows 7.
Step 1: Uninstall the driver for your wireless network adapter in Device Manager
You can uninstall the driver for your wireless network adapter in Device Manager. Here is how to do it:
- On your keyboard, press the Windows logo + R keys simultaneously to open the Run box.
- Type devmgmt.msc and hit Enter.
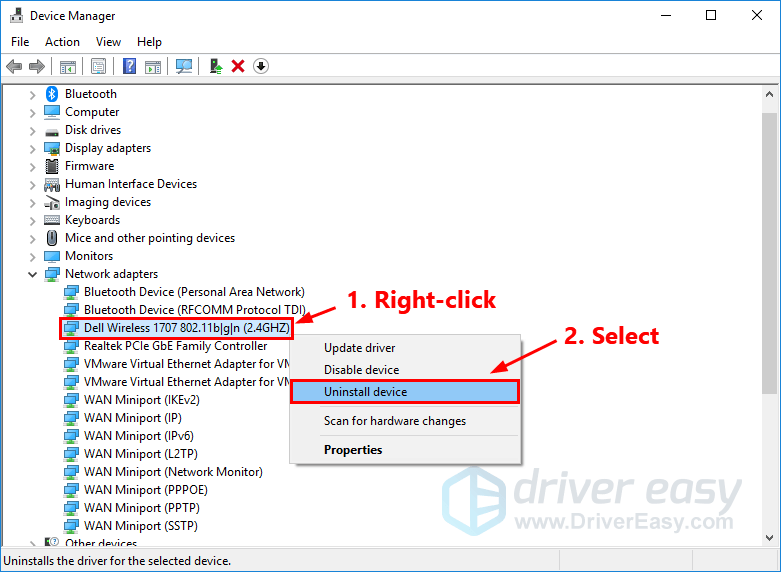
- In Device Manager, right-click on the name of your wireless network adapter and select Uninstall device to uninstall the driver for your wireless network adapter.

- Check the box next to Delete the driver software for this device and click Uninstall.
When it is finished, your wireless network adapter will disappear from the list of Network adapters.
Step 3: Reinstall the driver for your wireless network adapter
It is pretty easy to reinstall the driver for your wireless network adapter. Here is how to do it:
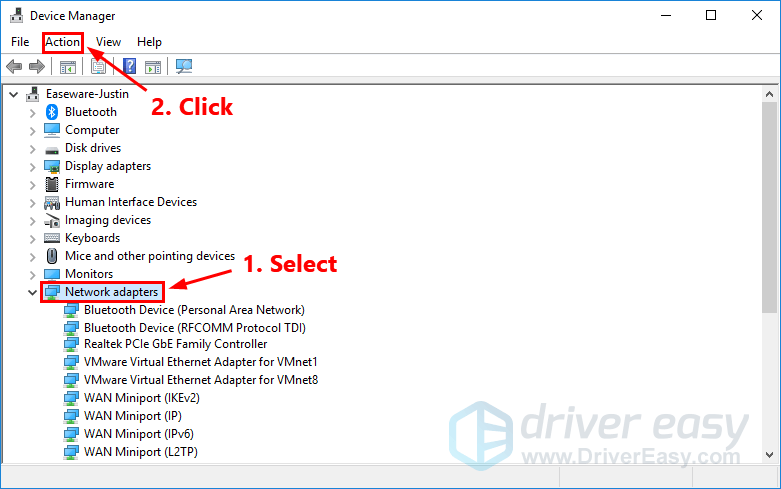
- In Device Manager, select Network adapters. Then click Action.

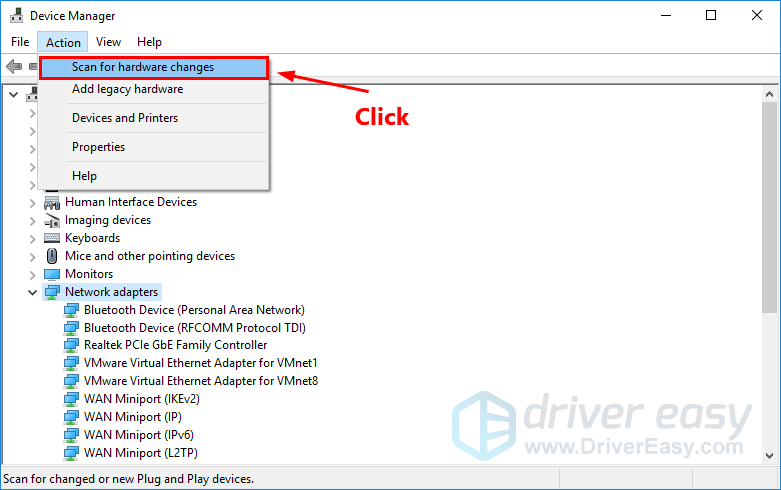
- Click Scan for hardware changes. Then Windows will detect the missing driver for your wireless network adapter and reinstall it automatically.

- Double-click Network adapters. Normally, your wireless network adapter will reappear in the list, which suggests the driver for your wireless network adapter has been reinstalled.

Bonus tip: How to update your network driver automatically
Sometimes, reinstalling the driver for your wireless network adapter may not resolve the Wi-Fi connectivity issues. To fix these issues, you need to update the driver for your wireless network adapter.
If you don’t have the time, patience or computer skills to update your network driver manually, you can, instead, do it automatically with Driver Easy.
You don’t need to know exactly what system your computer is running, you don’t need to risk downloading and installing the wrong driver, and you don’t need to worry about making a mistake when installing. Driver Easy handles it all.
All the drivers in Driver Easy come straight from the manufacturer. They‘re all certified safe and secure.
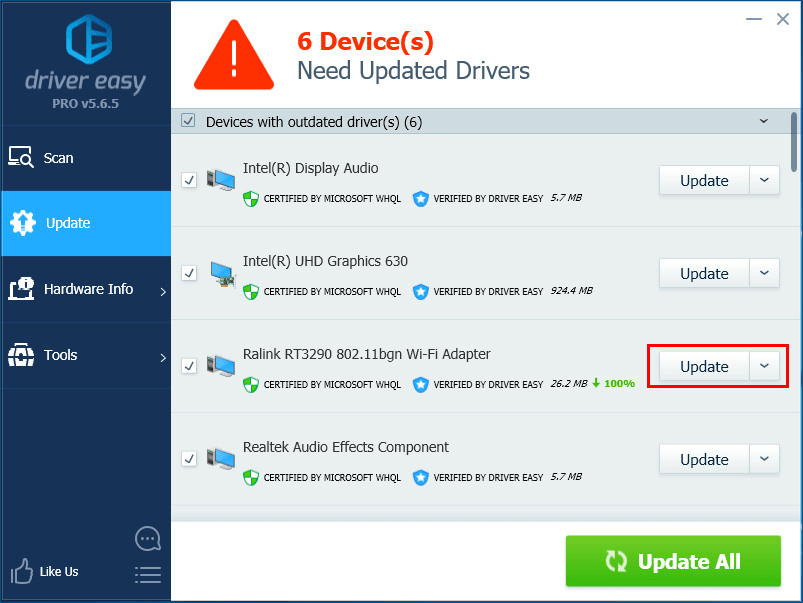
- Download and install Driver Easy.
- Run Driver Easy and click the Scan Now button. Driver Easy will then scan your computer and detect any problem drivers.

- Click Update next to your wireless network adapter to automatically download the correct version of its driver, then you can install it manually. Or click Update All to automatically download and install the correct version of all the drivers that are missing or out of date on your system (This requires the Pro version – you’ll be prompted to upgrade when you click Update All. You get full support and a 30-day money back guarantee).


If you need assistance, please contact Driver Easy’s support team at support@drivereasy.com.
If you have any questions or suggestions, please leave us a comment below.
60
60 people found this helpful
You sometimes can face a problem where you can’t connect your computer to a network. There are many possibilities for this error, but the most common being outdated network adapter drivers. It is recommended that you update your network adapter drivers regularly to avoid issues with connection. And with this update network adapter drivers guide, you can resolve any adapter driver issues with all devices and improve the performance of your PC comprehensively. Read and follow the upcoming steps for network adapter driver download and installation on Windows 10 desktops and laptops.

Some of the main reasons to update network adapter drivers on Windows 10 are:
- Maintain reliability of the system network card.
- Receive and implement firmware updates to solve compatibility issues.
- Access web pages properly with compatible and updated drivers on your PC.
- Interface any device with your PC without any network connectivity issues.
To update network adapter driver on Windows 10, follow the below steps:
1. Hit the Windows key and type Device Manager, click on Open as shown.

2. You will see the Network adapters on the main panel; double-click on it to expand it.

3. Right-click on the network driver (e.g. Intel(R) Dual Band Wireless-AC 3168) and click Update driver as depicted below.

4A. Now, click on Search automatically for drivers option to locate and install a driver automatically and skip to Step 6A.

4B. Or, choose to Browse my computer for drivers to locate and install a driver manually.

5B. Now, click on the Browse… button to choose the installation directory and click Next.

6A. The drivers will be updated to the latest version if they are not updated. Restart your PC to implement the update.
6B. If they are already in an updated stage, the screen displays the following message: The best drivers for your device are already installed. Click on Close to exit the window.

Frequently Asked Questions (FAQs)
Q1. Is it mandatory to update network drivers?
Ans. If you are having network connectivity issues, then it is the best option to update the current network drivers on your system, which may be causing those network problems. However, it is recommended that you should keep your network drivers updated to prevent these issues from happening on the system in the first place.
Q2. Which network drivers can be updated?
Ans. Users can update these hardware drivers on their system:
- Network card drivers
- Keyboard drivers
- Display drivers
- Mouse drivers
- Modem drivers
- Motherboard drivers
- Removable media drivers
- Scanner drivers
- Printer drivers
- Sound card drivers
- Video drivers
- BIOS updates
- Controller drivers, etc.
Q3. From where can I update network adapter drivers?
Ans. You can begin the update process by opening the device manager window on your system. For a detailed and clear explanation of this process, please read the above steps again and follow them diligently.
Recommended:
- How to Rollback Drivers on Windows 10
- Fix Network Connection Error 0x00028002
- Fix The Feature You Are Trying to Use is on a Network Resource That is Unavailable
- 4 Ways to Update Graphics Drivers in Windows 10
We hope you found this article useful and were able to perform network adapter driver download and update on your Windows 10 PC safely. Feel free to reach out to us with your queries and suggestions via the comments section below.