
Last Updated :
20 Oct, 2020
The move is an internal command found in the Windows Command Interpreter (cmd) that is used to move files and folders/directories. The command is robust than a regular move operation, as it allows for pattern matching via the inclusion of Wildcards in the source path.
The command is a very generic one and is available (in one form or the other) in almost every single operating system out there (under different aliases). In this article, we will learn about the move command and would learn various uses/applications of it.
Description of the Command :
MOVE [/Y | /-Y] [drive:][path]dirname1 dirname2
- [drive:][path]filename1 –
Specifies the location and name of the file or files you want to move. - destination –
Specifies the new location of the file. The destination can consist of a drive letter and colon, a directory name, or a combination. If you are moving only one file, you can also include a filename if you want to rename the file when you move it. - [drive:][path]dirname1 –
Specifies the directory you want to rename. - dirname2 –
Specifies the new name of the directory. - /Y –
Suppresses prompting to confirm you want to overwrite an existing destination file. - /Y –
Causes prompting to confirm you want to overwrite an existing destination file.
The switch /Y may be present in the COPYCMD environment variable. This may be overridden with /-Y on the command line. The default is to prompt on overwrites unless the MOVE command is being executed from within a batch script. The above output can be obtained by executing the command move /? in cmd.
The above text is a little cryptic at first, but the command is really basic and follows the minimal blueprint.
Syntax :
MOVE [options] (Source) (Target)
Key :
- [option] –
An optional flag denoted by /Y or /-Y, that is used to suppress the confirmation prompt on overwritten files. The default is to prompt on overwrites unless the MOVE command is being executed from within a batch script. - (Source) –
A path of the file/files that would be used to move them. This path can contain wildcards ( * ? ) in the path. If more then files are made to move, then wildcards are used. - (Target) –
A path for the new location of the file.
Using the Command :
Throughout this section, we would take the following directory as example for demonstrating the usage of move command.

Moving a File from One Folder to Another :
move source_path destination_path
- source_path –
It is the path of the file which we are willing to move, and the destination_path is the location to which we want the file to be moved.
Example :
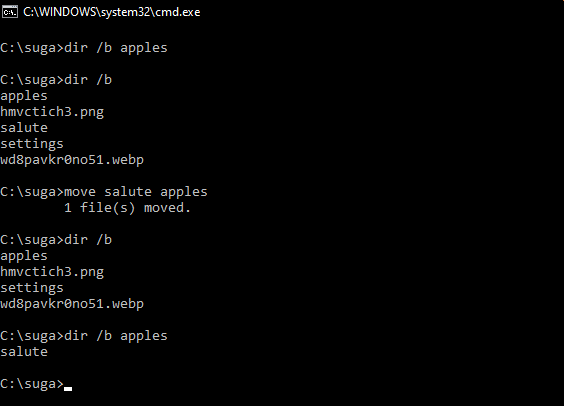
- The Dir /b command is used to list all the files and folders inside a directory.
- In the above example, we have moved an extension-less file named salute from C:\suga to C:\suga\apples directory.
Moving Multiple Files from One Path to Another :
move source_path destination_path
- source_path –
It is a path containing wildcards that will allow more than one file to be taken as a source. The destination_path is now a path to a directory where the moved files would reside (should not contain wildcards).
Example :

- In the above example we have moved all the files inside C:\suga folder which matches the pattern *.* to C:\suga\Apples directory.
- It should be noted that wildcard in source_path should match with the file(s) otherwise it would result in source_path being null, and a subsequent error.
Moving Directory from One Path to Another :
move source_dir_path Destination_dir_path
- source_dir_path –
It is the path to the directory to which we are moving, and destination_dir_path is the new location where it would be moved to.
Example :

- In the above example, we have moved the C:\suga\apples directory to C:\Users\Public directory.
- Multiple Directories can be moved using the method described in Moving multiple files from one path to another (with little modification to make is eligible for directories).
Moving a File to Another Folder with a Same Name File already existing :
There are two ways to tackle this situation –
- Abort the move process.
- Continue the move process, by overwriting the existing file with the newer one.
By default, the move command upon encountering any name collisions would prompt the user, asking whether he wants to rewrite the existing file with the new one, or stop the move process (via a Y/N prompt). To abort the move process, the user can simply enter N in the prompt input, stating that the file should not be overwritten. The prompt seeking for user input (for overwrite of files) appears as follows –
Overwrite {full_file_path}? (Yes/No/All):
When the users enter N in the prompt the output appears as follows –
Overwrite {full_file_path}? (Yes/No/All): N

0 file(s) moved.
When the user enters Y in the prompt the output appears as follows –
Overwrite {full_file_path}? (Yes/No/All): Y

1 file(s) moved.
To continue the move process by overwriting existing files (on all name collisions), a /Y switch needs to be added to the command as follows –
move /Y source_path destination_path
In the Windows Command Prompt, we use the move command to move files from one directory to another (cut and paste).
The syntax of the move command is as follows:
move <Source> <Target>We can also use the move command to move folders from one location to another.
Command Options
| /Y | Do not ask for confirmation if a duplicate file is found at the destination. The destination file will be overwritten. |
| /-Y | Ask before overwriting destination files. |
Examples
Move sales.doc in the current directory to C:\backup directory:
move sales.doc C:\backupMove C:\data\sales.doc to C:\backup directory. The file will be overwritten if it already exists in the destination folder:
move /y C:\data\sales.doc C:\backupMove C:\data\finance to C:\backup folder:
move C:\data\finance C:\backupMove all files in a directory
You can use wildcards with the move command. For example, the following command moves all files in the C:\data to C:\backup.
move /y C:\data\* C:\backupThe following command moves all files with a .doc extension to the backup folder:
move /y C:\data\*.doc C:\backupIn the following example, all files whose names start with screenshot are moved to the C:\backup directory.
move /y C:\data\screenshot* C:\backup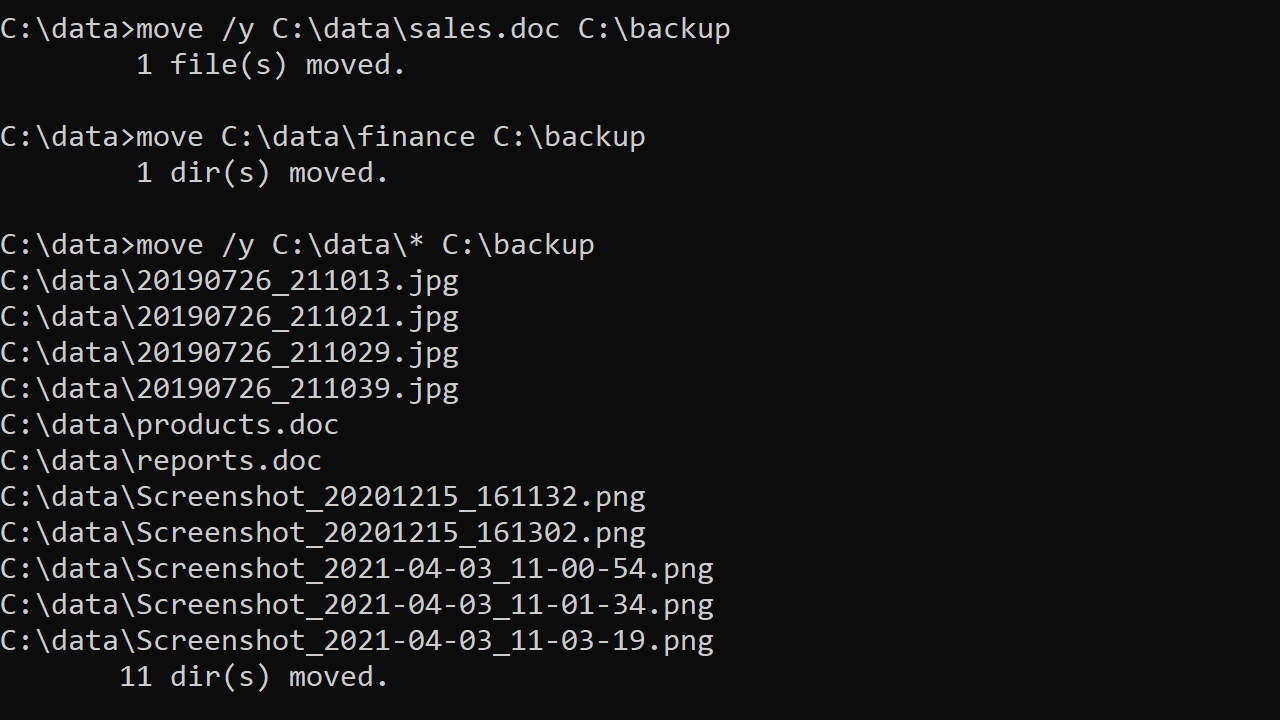
Move two or more files
To move two or more files without using wildcards, you have to use a for loop, as shown in the following example:
for %i in (sales.doc, products.doc) do move /y %i C:\backupIf you want to run the for command in a batch file, you would use two % (%%) with the variable.
for %%i in (sales.doc, products.doc) do move /y %%i C:\backupThe move command deletes the source file after it is copied to the destination. If you want to keep the original file, use the copy or xcopy.
This tutorial explains how to move files or directories to another location on a Windows system.
Move files to another directory
move filename destinationFolder
Example: to move file ‘data.docx’ to the folder ‘d:\backup\folder’
move data.docx d:\backup\folder\
You can also rename the file while moving it to the new location
move data.docx d:\backup\folder\newData.docx
We can’t move multiple files with single command. i.e the below command would not work.
move file1 file2 D:\folder1\folder2
This would give the error The syntax of the command is incorrect.
However we can use wildcards to move files in bulk. For example, if you want to move all text files from current folder to a new location you can use the below command.
move *.txt destinationDirectory
To move all files starting with letter ‘A’, you can use below command.
move A* destinationDirectory
Move directories
Syntax:
move directory newDirectoryPath
Example: To move the directory ‘data’ to ‘D:\data\folder1\’
move data D:\data\folder1
1. Can we move multiple directories using wild cards like the way we do it with files?
No, wild cards does not work for directories. You get the below error
C:\>move tmp* Documents\folder1\
The filename, directory name, or volume label syntax is incorrect.
2. How to specify the directories/files which have white spaces in the names?
You need to enclose the name of the file/directory in double quotes.
Example: move "file with spaces" "D:\directory with spaces"
Errors
If you do not have write privileges on source file/directory or on the destination folder, you would get error as below.
C:\Users\user1>move mydata.pdf c:\users\user2
Access is denied.
        0 file(s) moved.
- How to Move Files Using Command Prompt
- An Easier Option to Move Files — EaseUS Todo PCTrans
Command Prompt provides a quick method to perform this transfer process to save you from manual copy and pasting, which allows users to write a single command to complete the file transfer operation; it’s powerful and efficient, especially for beginners. However, before you start, you need to know its limits:
- Only transfer data within one computer and can’t transfer between different devices.
- Challenging for beginners to use the command lines, possibly causing data loss.
All of these problems can be solved by using EaseUS Todo PCTrans for a beginner-friendly experience. You can download this tool and follow the guide in Part 2 to transfer files.
Compared to CMD, EaseUS Todo PCTrans has the following advantages:
- 🚩Todo PCTrans is easy-to-use file transfer software. Without any commands, users can easily achieve file transfer.
- 🚩It can transfer apps/games to another drive or another PC without reinstalling.
- 🚩You can only transfer files within the same system with the help of Command Prompt. In contrast, EaseUS Todo PCTrans helps you seamlessly share or transfer files from one computer to another.
Now, let’s go through the rest of the article to understand the process of moving files using the Command Prompt.
When your computer starts working slowly, low storage in the C drive can be a possible reason for this problem. You can effortlessly solve this problem by transferring some files or directories from one particular drive to another to free up some space.
Within this section, we will explain two ways to move files using the Command Prompt to help users understand the process.
Guide 1. Move Files Using Command Prompt
You can move any folder or file from one location on your computer to another with the help of this method. Once you run this command, the original file will get deleted, so you can only access the file from the destination folder.
The process may be challenging for users who do not know how to use the command prompt app for different functions. However, such users can learn from these instructions to move files quickly using the Command Prompt.
Step 1. Begin the process by clicking the «Start» icon from the taskbar to access a pop-up menu. Now, write «Command Prompt» in the search box and right-click on this particular application to access a new menu. From here, hit the «Run as Administrator» option to run the CMD as admin on your device.
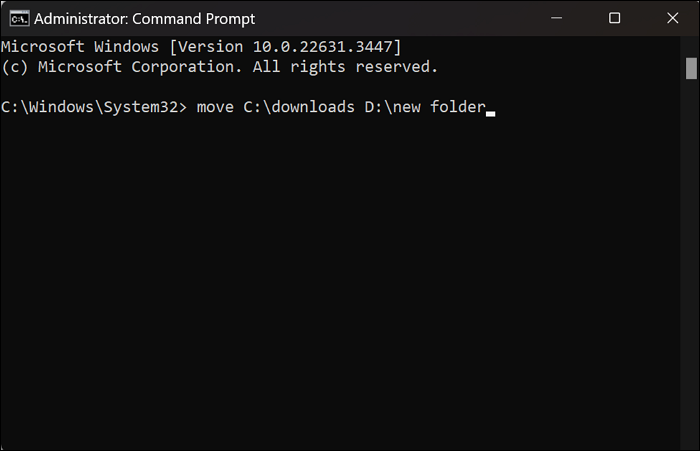
Step 2. After accessing the CMD application, you have to write a command by following the «move [source] [destination]» commands. In addition, type the name of the file and folder name along with the source and destination for a successful process. Upon writing the following example prompt, hit the «Enter» key to complete the data transfer.
move C:\downloads D:\new folder
If you find this process helpful for file or folder transfer, we encourage you to share this article with others. By sharing this guide to move files using the Command Prompt, you can help your friends streamline the way they move files within their computers.
Guide 2. Use «XCOPY Command» to Move Files
Command Prompt also allows you to retain the original files after pasting them in the destination folder. For this purpose, users need to utilize the XCOPY command in place of the previously used Move command. However, this process is going to be more complex for people without technical knowledge. If you also want to move or copy files using the Command Prompt, follow the steps explained below:
Step 1. First, press the «Win + R» keys to access the «Run» dialog box on your device. Now, type «CMD» in the «Open» text box and hit the «Enter» key to open the Command Prompt.
Step 2. Moving forward, follow the «Xcopy /E /H /C /I» pattern to move files from one location to another. After typing the following prompt in the CMD window, hit the «Enter» key to complete this folder transfer process.
Xcopy C:\downloads D:\new folder /E /H /C /I
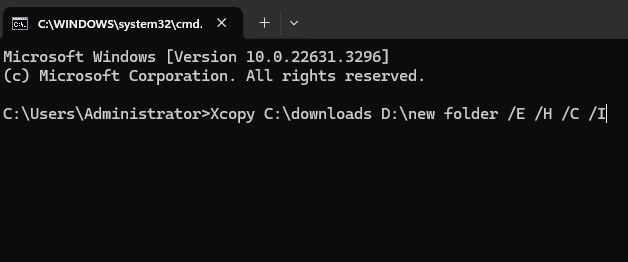
- /E means to replicate all subdirectories, even those that are empty.
- /H signifies copying and pasting hidden and system files.
- /C indicates that the copying process will persist despite encountering errors.
- /I means creating a new directory if the destination is incorrect or doesn’t exist.
An Easier Option to Move Files — EaseUS Todo PCTrans
Beginners who still don’t understand how to move files using the Command Prompt should go for EaseUS Todo PCTrans for an easier option. Using this file transfer tool, you can also migrate data/folders/programs and software from one drive to another or from one PC to another with a simple method. It’s easy for beginners to move files using EaseUS Todo PCTrans.
Download this tool and follow the tutorial below to try.
Step 1. Create a backup file of the source hard drive
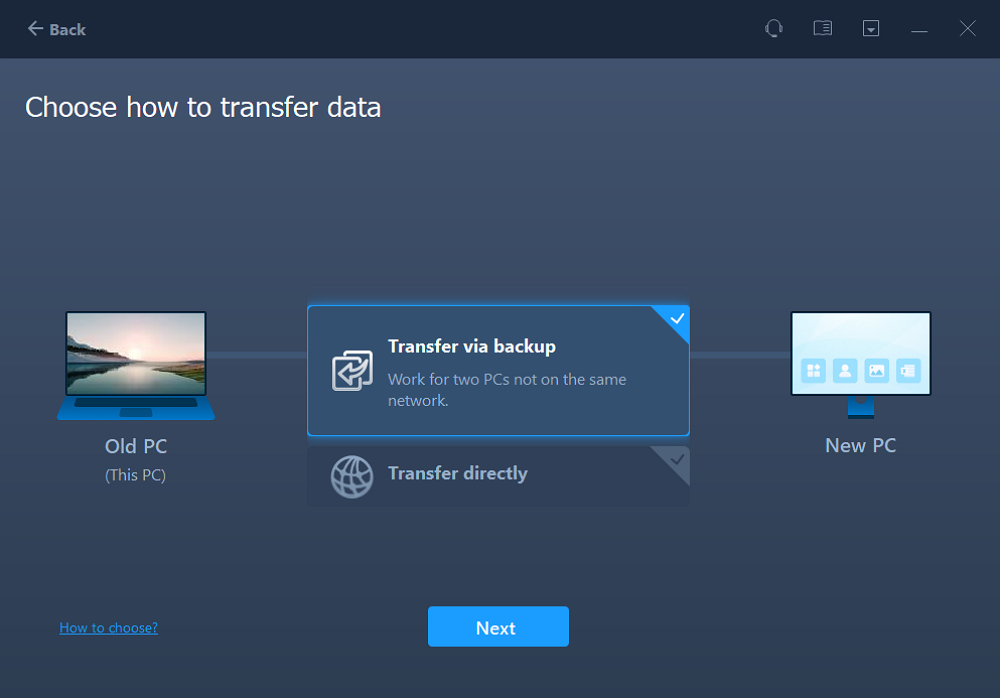
Launch EaseUS Todo PCTrans on your Windows computer. Click «data transfer» and select «Transfer via backup.»
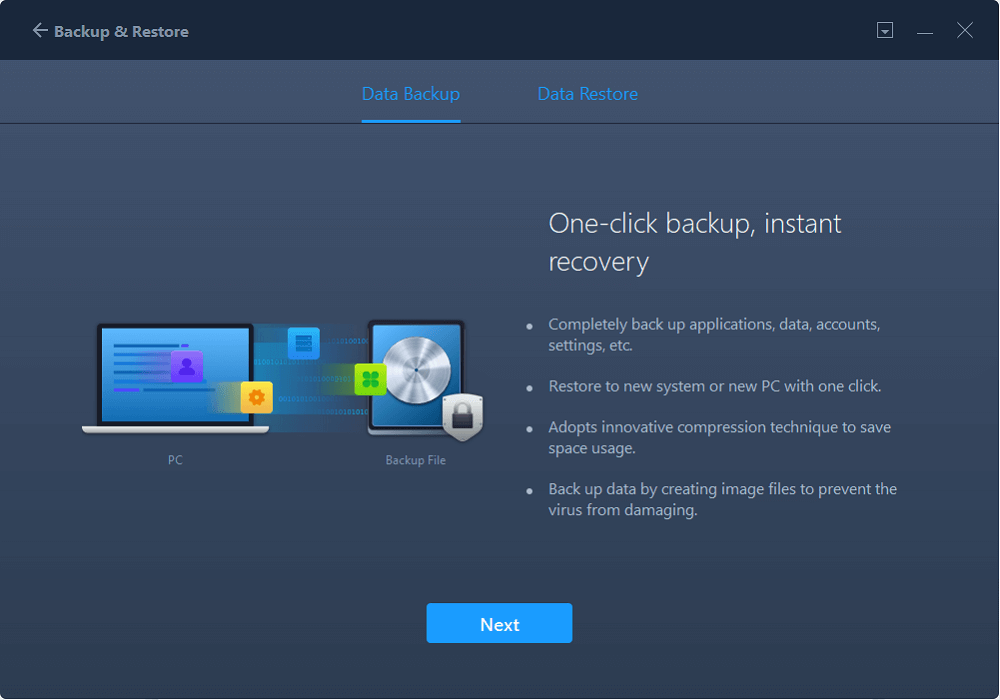
Hover your mouse over «Data Backup», and click «Next». Later, confirm the default settings of the file name and file path, or you can customize the settings on your own.
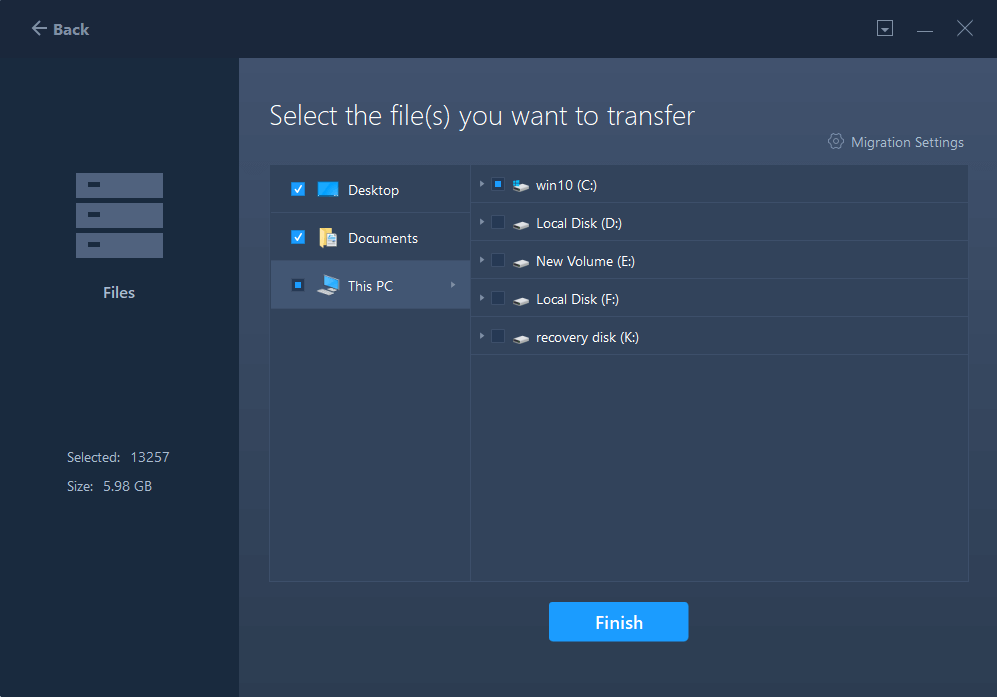
Now select the items you want to transfer to the other hard drive. EaseUS Todo PCTrans allows users to create backup files of multiple file types, including applications, personal data, and user accounts. To transfer files from one drive to another, deselect the «Applications» and «Accounts», hover your mouse over «Files», and click «Edit».

This is where you need to select files on the source drive. Expand the drive so you can selectively choose desired files, after then click «Finish». In the end, click «Backup». Wait for the process completes.
Step 2. Restore the file to the destination drive
Launch EaseUS Todo PCTrans and follow the same way to reach the step of selecting a transfer method. This time choose «Data Restore» and click «Next».
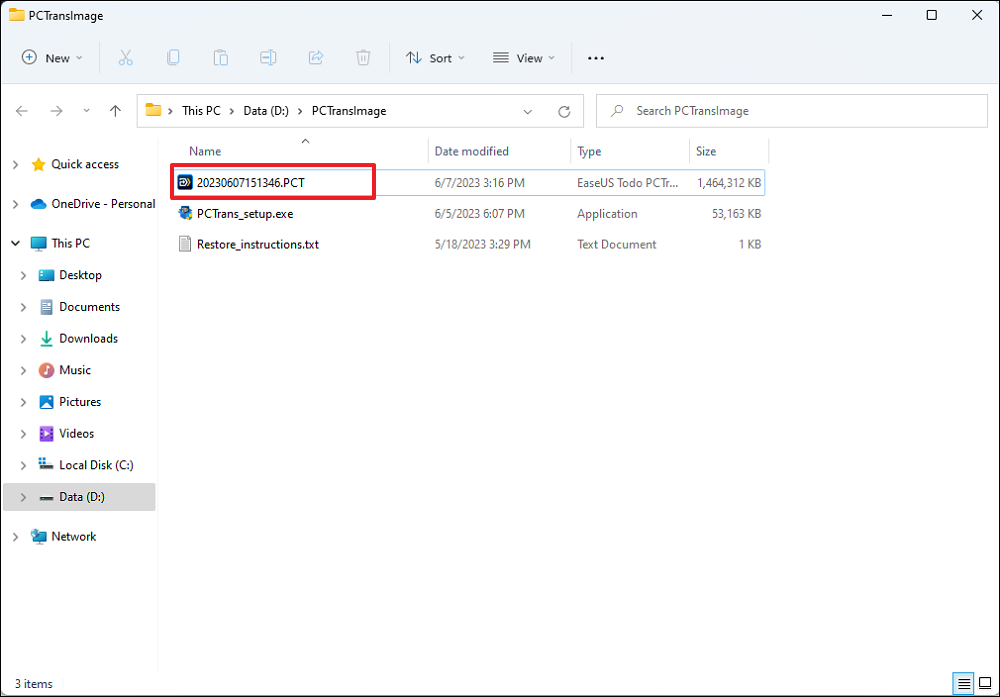
Choose the existing backup file presenting on the interface, or navigate to the exact file path where the backup file is, click «Restore».
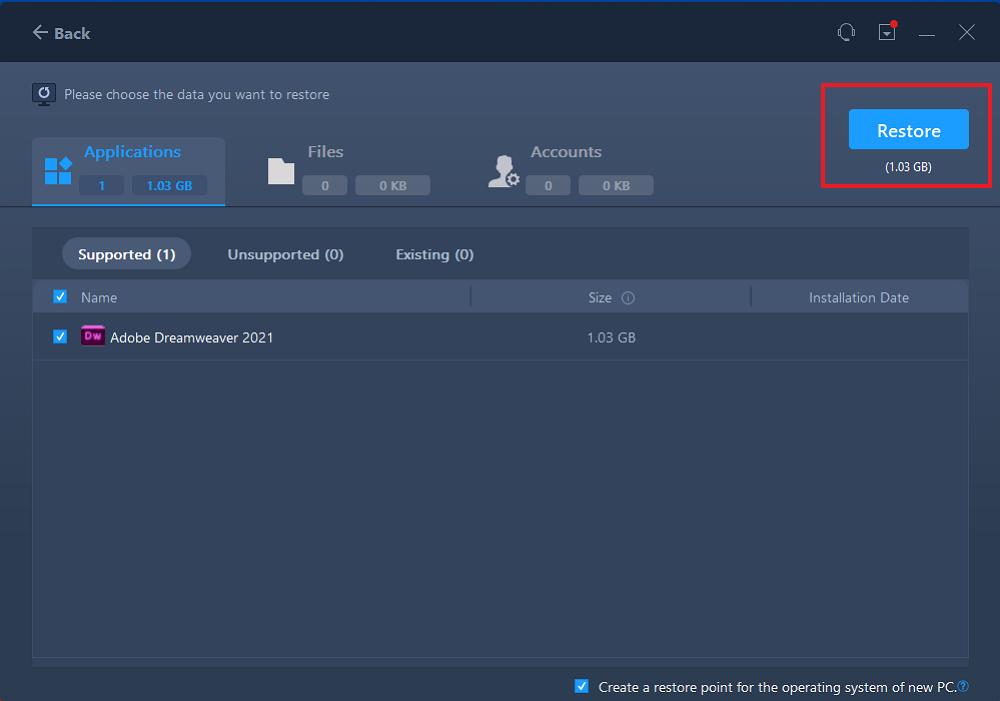
You’re back to the «Files», click «Edit» to get in. The backup file is viewable here. You need to click the pencil icon to set the target location, which is the other hard drive, and submit the change. After the basic settings, click «Finish» and finally «Restore». Wait patiently until the transfer process is over.
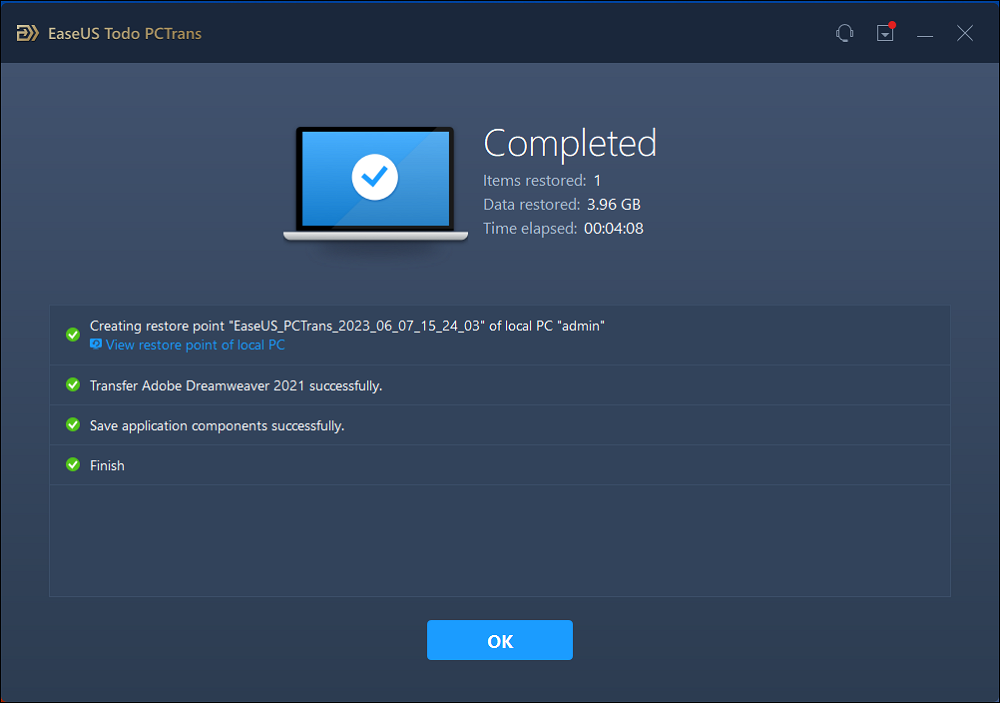
As you can see, EaseUS Todo PCTrans has the simplest steps to migrate data from an older computer to a newer one. So, we recommend you download this tool to streamline the way you share files within different devices.
Conclusion
After going through this article, you will become an expert in moving files using Command Prompt without any hassle. However, there will still be room for mistakes due to the complexity of the process. Therefore, we recommend you shift to a better alternative, like EaseUS Todo PCTrans. With its simple method and extensive file-sharing features, this tool should be your go-to option for data transfer.
Move Files Using CMD FAQs
All the methods explained throughout this article will help you become an expert in transferring files. However, people still having confusion should go through these answers to further learn how to move files using the Command Prompt.
1. How to move files in the Command Prompt Windows 10?
The process of transferring files using the Command Prompt is a bit complex and requires utmost care during execution. You can follow the steps given below to move files via Command Prompt within your Windows 10 operating system.
- Begin by accessing the command prompt application through the «Start» menu. For this, write «Command Prompt» in the text box and run it as an administrator.
- Now, write the prompt using the command following the «move [filename] [destination]» format. Finally, hit the «Enter» key to move your files from one drive to another within the same PC.
2. What is the command that moves a file?
You can utilize different commands to transfer files within the same computer with the help of a command prompt. One such prompt is «Move Command,» which helps you migrate files or folders to your destination while deleting the original file. Users who want to retain the original files can use the «Xcopy» command to carry out the transfer process.
3. How to copy files using CMD?
With a simple copy command, users get to migrate their data within the same computer. The following steps can help you carry out the process using the command prompt application.
1. First, access the command prompt software on your device through the «Run» dialog box.
2. Upon opening this application, type a prompt on the «copy format» and hit the «Enter» key. Let’s see this example prompt to learn how to move files using the Command Prompt.
copy C:\myfile.txt D:
-
Home
-
News
- How to Use Commands to Move Files in Windows 10/11? [2 Ways]
By Vega | Follow |
Last Updated
Why need to use commands to move files? How to move files using CMD in Windows 10/11? A lot of users are confused about these questions. Now, this post of MiniTool Partition Wizard explains the move file CMD operation in detail.
Why Need to Use Commands to Move Files?
When the computer is running low on space, especially when the system drive (C drive) is full, many Windows users wonder how to free it. Since some files are stored on the C drive by default, it’s obviously a good idea to migrate your files to another drive.
However, sometimes various issues and errors may appear while moving files, such as 0x8007112A, “Can’t Move the Folder on Windows PC” etc. In these cases, you might consider using CMD move files to another folder. You can use different move commands in Command Prompt. To learn more about move file CMD lines, you can refer to this article.
External Hard Drive Freezes When Copying Files| Fix It Now
How to Use Commands to Move Files?
How to efficiently CMD move file to another folder in Windows 10/11? In the following, we will share 2 commands to move files.
Way 1. Move Command
The move command is the command used in CMD to move files or folders. It is more powerful than normal copy-paste because it can migrate files out of the original path.
Step 1: Press the Win + R key to open the Run dialog box. Then press CMD in it and press Enter.
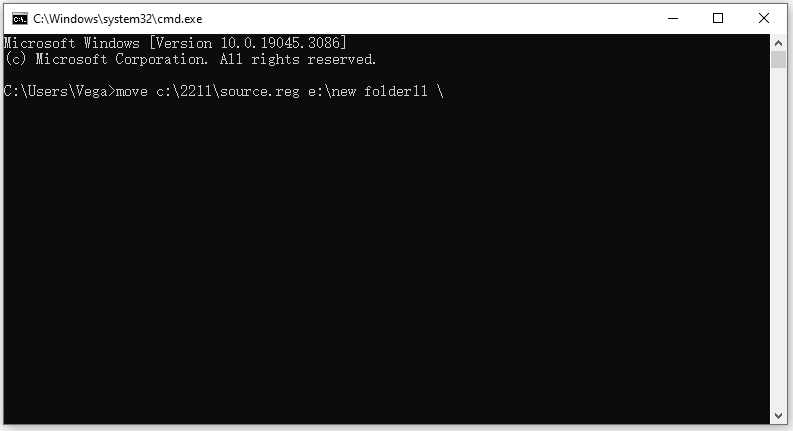
Step 2: In the Command Prompt window, type the Move command as follows to move the file. For example, if you want to move all files with the Source.reg from the \2211 folder on the C drive to the \New folder11 folder of the E drive, enter the Move command as follows:
move c:\2211\source.reg e:\new folder11\
Way 2. XCOPY Command
XCOPY command is a more advanced command on Windows operating systems that can copy directories, copy source directory structures from one drive to another, etc.
NOTE: If you are copying content between two different filesystems, it will fail.
Step 1: Open the elevated Command Prompt window as we explained above.
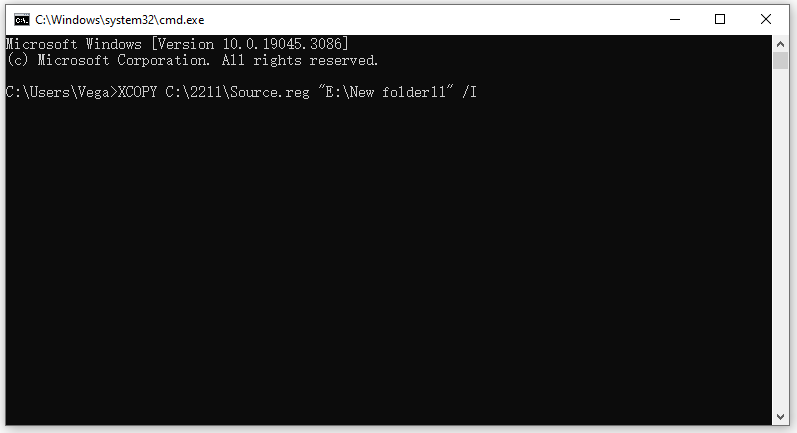
Step 2: Now, type the XCOPY command as follows to copy the file. For example, if you want to copy the Source.reg file from the 2211 folder of the C drive to the New folder11 folder of the E drive, enter the XCOPY command as follows:
XCOPY C:\2211\Source.reg “E:\New folder11” /I
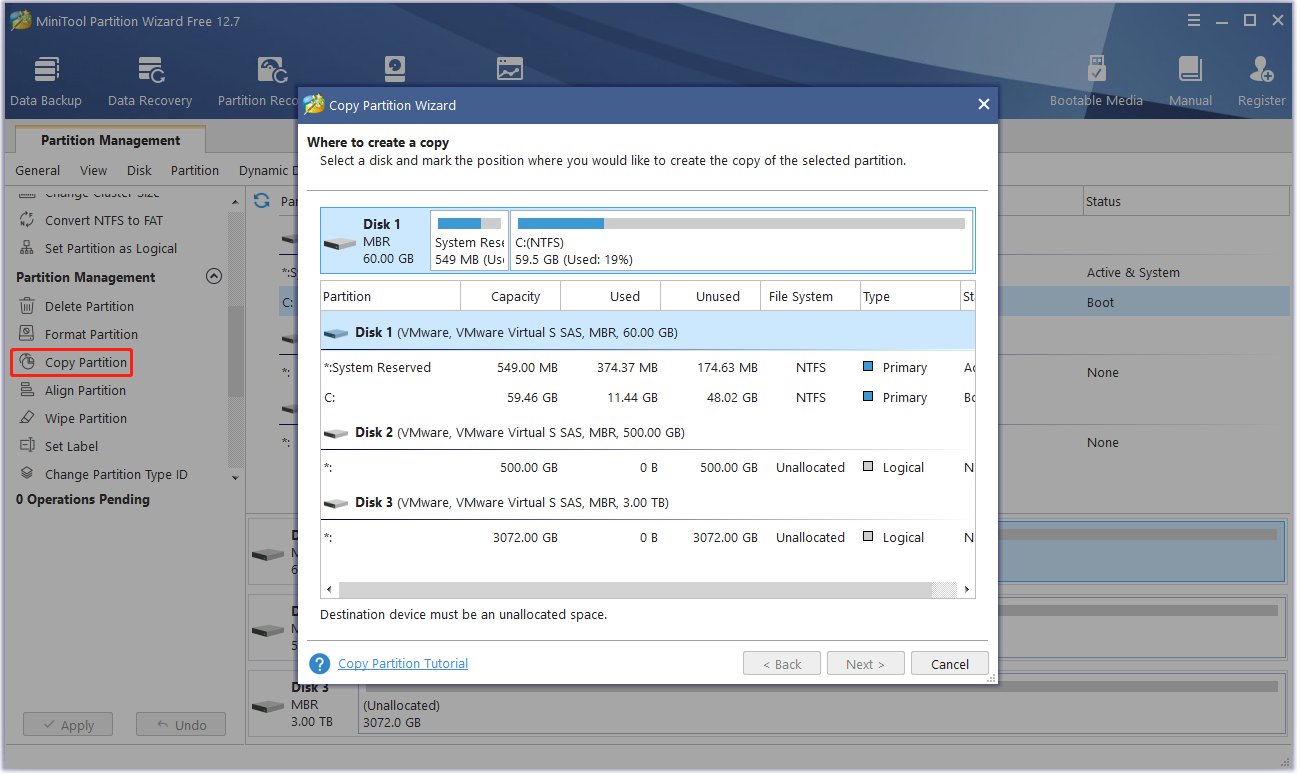
Move Files with a More Handy Tool – MiniTool Partition Wizard
As shown above, both Move and Xcopy require running long and complex commands in the Command Prompt. The commands may refuse to work if the corresponding parameters are used incorrectly. Even worse, you may be at risk of losing your files.
Also, these parameters might not be friendly for those who are not good at computers. Therefore, when you need to transfer files or folders, it is recommended that you rely on third-party software – MiniTool Partition Wizard.
MiniTool Partition Wizard is a professional software that allows you to transfer files easily and safely. This tool is so handy that even a computer novice can learn how to move files in minutes. Besides, it can be used to copy disk, migrate OS to SSD/HD without reinstalling, convert MBR to GPT, etc.
MiniTool Partition Wizard FreeClick to Download100%Clean & Safe
About The Author
Position: Columnist
Vega joined MiniTool as an editor after graduation. She enjoys helping people with computer problems, including disk management, data recovery, and more. She is constantly expanding her knowledge in related fields. And she will continue to bring more easy-to-understand professional articles to help people solve various problems on the PC. In her daily life, Vega enjoys hanging out with friends, shopping online and listening to music. She is someone who knows how to enjoy life.