
Ночной режим или функция «Ночной свет» в Windows 10 предназначена для того, чтобы уменьшить количество голубого (синего) цвета на экране монитора, который, как пишут, может подавлять выработку мелатонина и мешать нормальному сну. То есть при включении ночного режима цвета на экране становятся более тёплыми.
Некоторые пользователи Windows 10 сталкиваются с тем, что включение и отключение ночного света не работает или срабатывает не всегда, не удается отключить ночной режим или же кнопка ночного режима в области уведомлений не активна. В инструкции подробно о том, как исправить все эти проблемы.
Как включить или отключить «Ночной свет» в Windows 10
Для начала о том, как включить или отключить «Ночной свет» в Windows 10 при отсутствии проблем, на случай если вы этого не знаете:
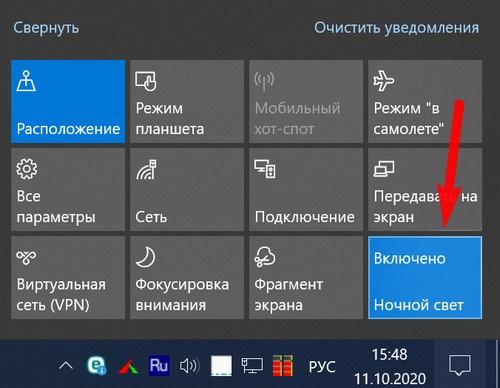
- Откройте область уведомлений Windows 10 (нажатие по крайней правой кнопке на панели задач) и нажмите по кнопке «Ночной свет» для включения или отключения ночного режима.
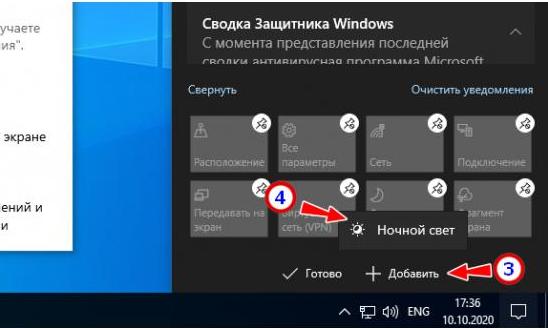
- Если кнопка отсутствует, можно попробовать нажать «Развернуть» (если такой пункт присутствует») или нажать по любой плитке действий правой кнопкой мыши, выбрать пункт «Редактировать быстрые действия» и добавить кнопку «Ночной свет» в список доступных действий.
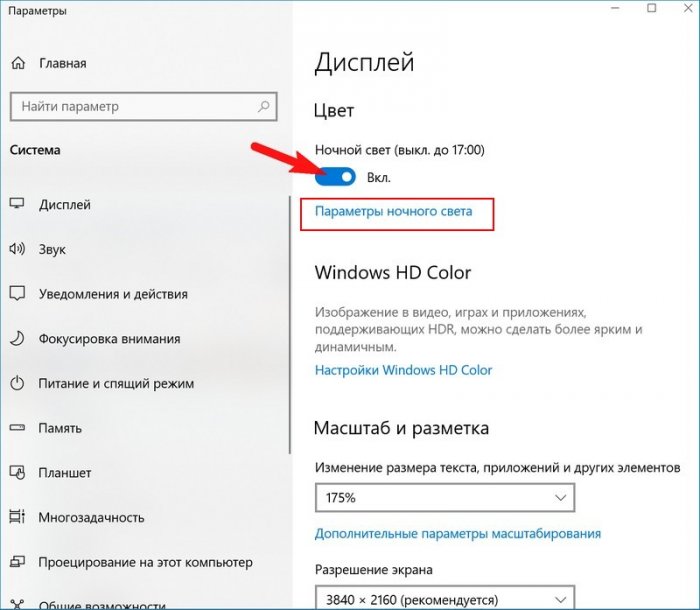
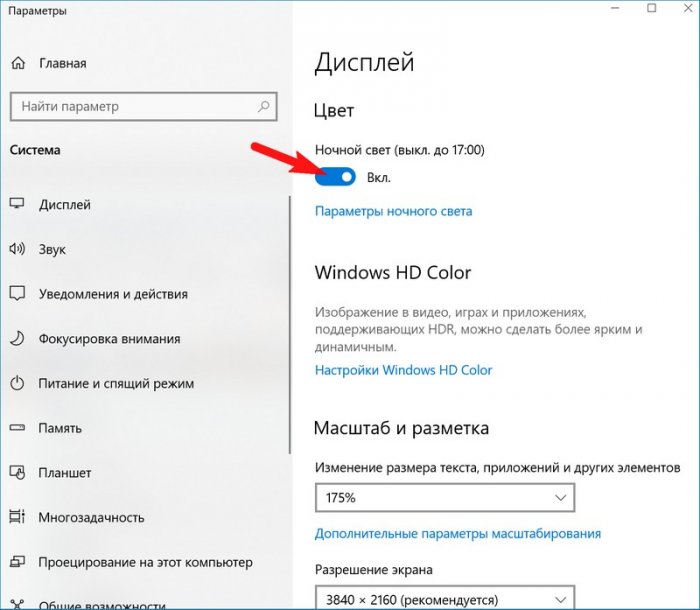
- Еще один метод включения «Ночного света» — зайти в Параметры (клавиши Win+I) — Система — Дисплей и включить или отключить соответствующий пункт вверху страницы параметров.

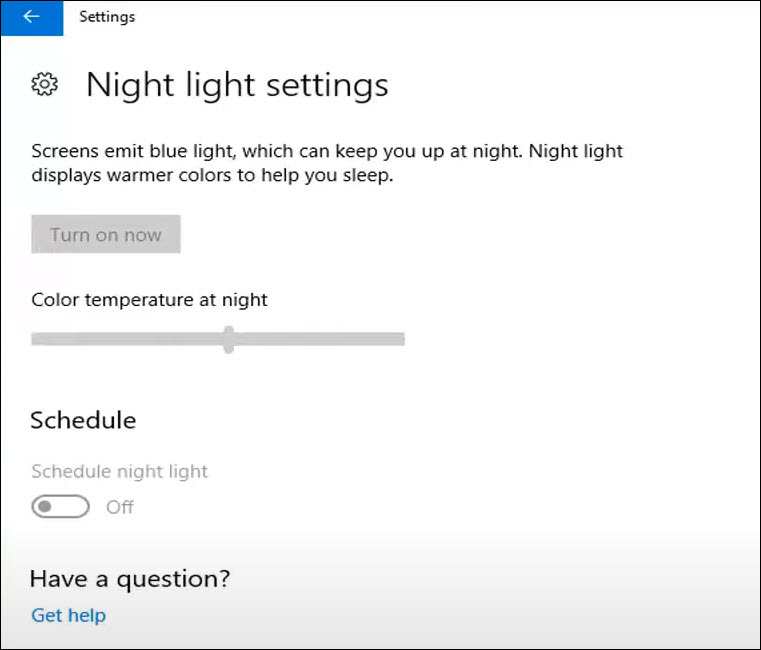
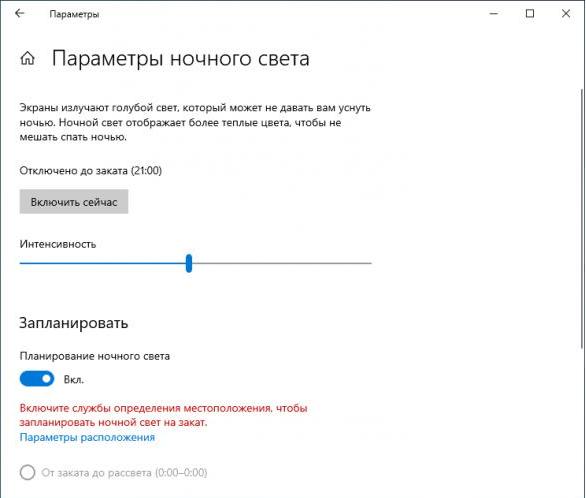
- Обратите внимание: если там же перейти по ссылке «Параметры ночного света», вы можете включить или отключить автоматическое включение ночного режима по графику, а также изменить интенсивность блокирования синего излучения.


Как правило, описанное работает без каких-либо проблем, но не всегда.
Что делать, если не работает Ночной свет (ночной режим) в Windows 10
Не работать «Ночной свет» может по-разному, среди распространенных вариантов:
- Кнопка включения «Ночной свет» в области уведомлений или включение ночного режима в параметрах не влияет на изображение на экране.
- Кнопка включения не активна.
- Ночной свет иногда работает, а иногда — нет.
Рассмотрим все варианты по порядку.
Ночной режим не включается при нажатии на кнопку
В первом случае ситуация чаще всего объясняется неправильно работающими или не установленными драйверами видеокарты, при этом здесь важно отметить: часто речь идёт не о дискретной видеокарте NVIDIA или AMD, а об интегрированном видео, обычно — Intel.
Решение: установить последние официальные драйвера для вашей видеокарты (скачав с официальных сайтов и установив вручную, а не используя «обновление драйвера» в диспетчере устройств), а при наличии интегрированного видео — и на него тоже (на интегрированное видео ноутбуков драйвер лучше взять с официального сайта производителя ноутбука). После установки перезагружаем компьютер и проверяем, была ли решена проблема.
Внимание:
- На всякий случай загляните в параметры ночного света, как это было описано в начале инструкции. Если параметр «Интенсивность» выставлен в крайнее левое значение, вы не увидите отличий между включенным и отключенным ночным режимом.
- Если на вашем компьютере или ноутбуке используется или использовался TeamViewer, обратите внимание на раздел, касающийся драйверов монитора, которые устанавливает эта программа в статье Что делать, если не работает яркость в Windows 10.
Кнопка включения «Ночной свет» не активна
В ситуации, когда кнопка включения ночного режима Windows 10 не активна, попробуйте создать reg-файл cо следующим содержимым:
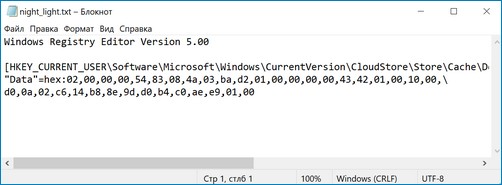
Windows Registry Editor Version 5.00
[HKEY_CURRENT_USER\Software\Microsoft\Windows\CurrentVersion\CloudStore\Store\Cache\DefaultAccount\$$windows.data.bluelightreduction.bluelightreductionstate][HKEY_CURRENT_USER\Software\Microsoft\Windows\CurrentVersion\CloudStore\Store\Cache\DefaultAccount\$$windows.data.bluelightreduction.bluelightreductionstate\Current]
"Data"=hex:02,00,00,00,54,83,08,4a,03,ba,d2,01,00,00,00,00,43,42,01,00,10,00,\
d0,0a,02,c6,14,b8,8e,9d,d0,b4,c0,ae,e9,01,00
и импортировать его в реестр. Перезагрузите компьютер и проверьте, решило ли это проблему.
Ночной режим работает не всегда: иногда его можно включить и отключить, а иногда — нет
Если включение функции «Ночной свет» срабатывает через раз, проверьте: работает ли режим «Ночной свет» сразу после перезагрузки компьютера или ноутбука. Важная деталь здесь — требуется именно перезагрузка, а не завершение работы и последующее включение, поскольку эти два действия в Windows 10 работают по-разному.
Если после перезагрузки всё работает исправно, а после завершения работы с последующим включением — нет (или не всегда), попробуйте отключить функцию «быстрый запуск» Windows 10 и понаблюдать, решило ли это проблему.
И два дополнительных нюанса:
- если вы ранее устанавливали какие-либо сторонние программы, влияющие на то, как отображаются цвета на экране (альтернативные средства включения ночного режима, программное обеспечение монитора), то они, теоретически могут мешать работать системной функции «Ночной свет».
- Функция «Ночной свет» появилась в версии Windows 10 1809, в более ранних версиях системы вы её не найдёте.
Windows 10 and 11 have a built-in blue light filter, called Night Light. By enabling this feature, your display will show warmer colors at night to help you reduce eye strain and get to sleep. However, many users are experiencing problems with this feature. Some users reported that they couldn’t turn on the Night Light as this option is grayed out. Others said that the Night Light couldn’t turn off no matter what they did. If you happen to be one of them, don’t worry. Here are some working fixes you can try.
6 Fixes for Night Light not working
You might not need to try them all. Just work down the list until you find the one that does the trick.
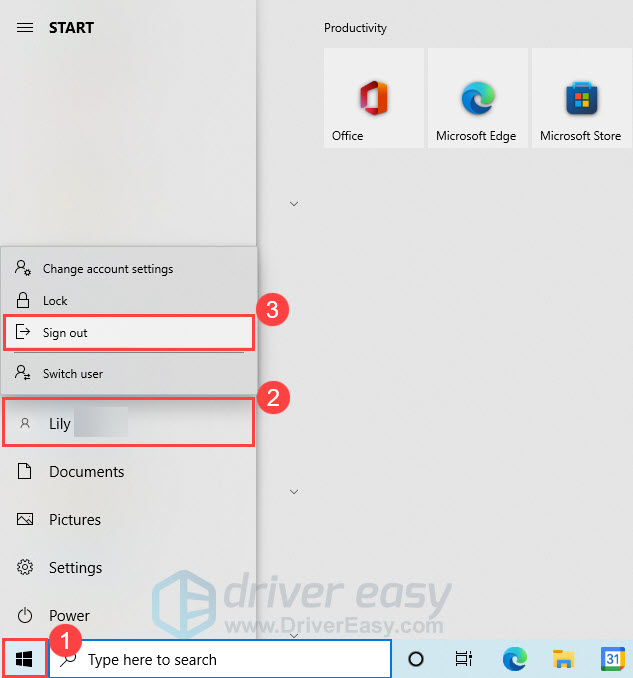
- Sign out of your account and sign back in
- Update your display driver
- Reset Night Light settings manually
- Check date and time settings
- Turn on Location services
- Check for Windows updates
Fix 1: Sign out of your account and sign back in
Sometimes, the Night Light not working issue could be caused by a temporary glitch. If that’s the case, you can try to fix the problem by signing out of your account and then signing back in.
Check if the Night Light starts working again. If your issue persists, go ahead and try the next fix.
Fix 2: Update your display driver
One of the most common causes of the Night Light not working is that you’re using a faulty or outdated display driver. So you should update your display driver to see if it fixes your problem.
There are mainly two ways to update your display driver: manually or automatically.
Manual driver update – You can update your display drivers manually by going to the manufacturer’s website (NVIDIA, AMD or Intel), and searching for the most recent correct driver. Be sure to choose only drivers that are compatible with your Windows version.
Automatic driver update – If you don’t have the time, patience, or computer skills to update your display drivers manually, you can, instead, do it automatically with Driver Easy. Driver Easy will automatically recognize your system and find the correct drivers for your exact display adapter, and your Windows version, and it will download and install them correctly:
- Download and install Driver Easy.
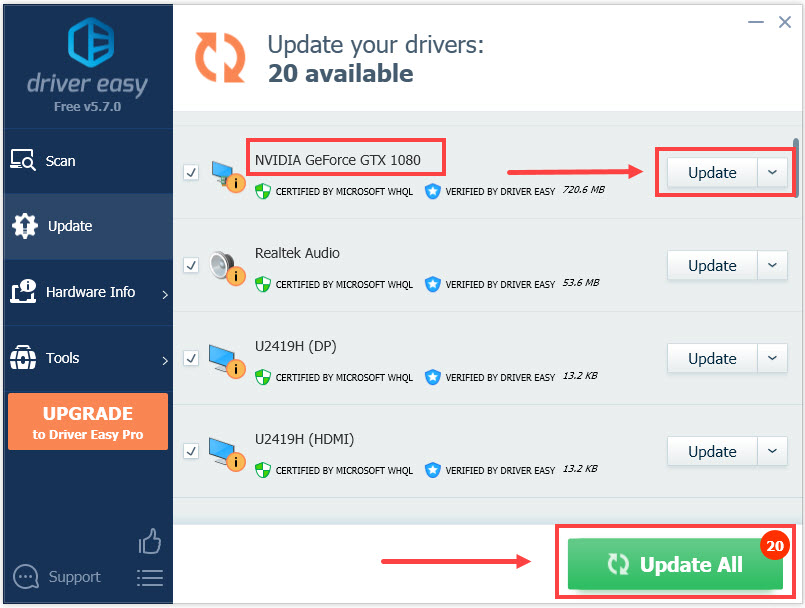
- Run Driver Easy and click the Scan Now button. Driver Easy will then scan your computer and detect any problem drivers.

- Click Update All to automatically download and install the correct version of all the drivers that are missing or out of date on your system. (This requires the Pro version — you’ll be prompted to upgrade when you click Update All.)
Or click the Update button next to the flagged display driver to automatically download the correct version of that driver, then you can manually install it (you can do this with the FREE version).


The Pro version of Driver Easy comes with full technical support. If you need assistance, please contact Driver Easy’s support team at support@drivereasy.com.
After updating your display driver, restart your computer and check if the Night Light works properly.
If your issue remains, check out the next fix.
Fix 3: Reset Night Light settings manually
If the Night Light option on your PC is grayed out, you can try resetting this feature by editing the Windows registry. Here’s how to do it:
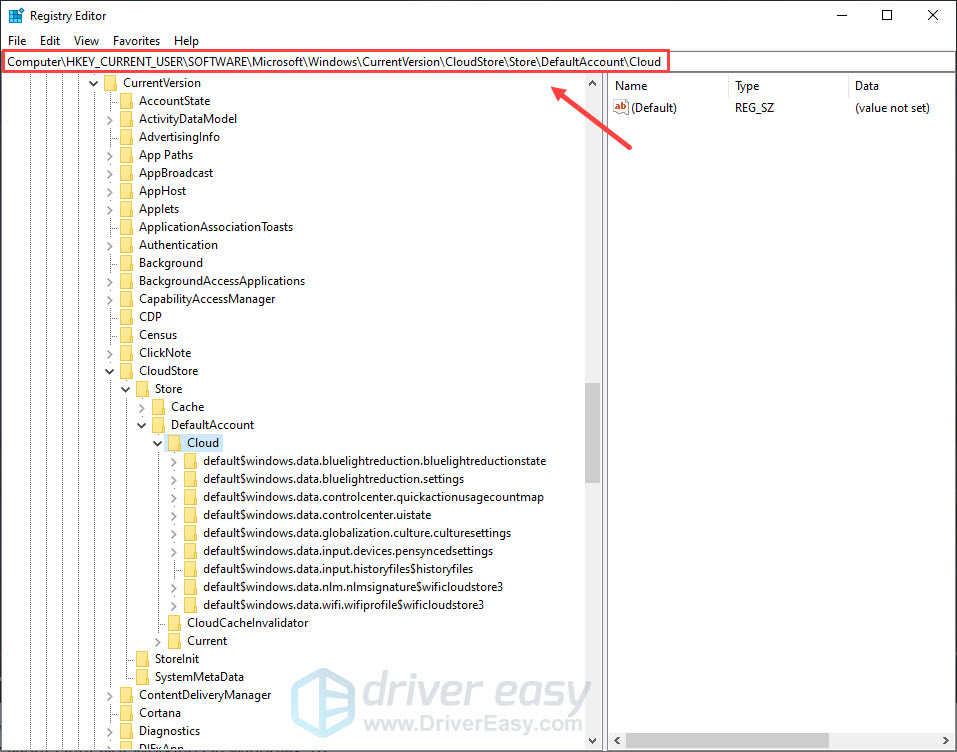
- On your keyboard, press the Windows logo key and R at the same time to invoke the Run dialog. Then type regedit and click OK to open Registry Editor.
- Click Yes if prompted by User Account Control.

- In Registry Editor, paste the following path into the address bar and press Enter.
Computer\HKEY_CURRENT_USER\SOFTWARE\Microsoft\Windows\CurrentVersion\CloudStore\Store\DefaultAccount\Cloud
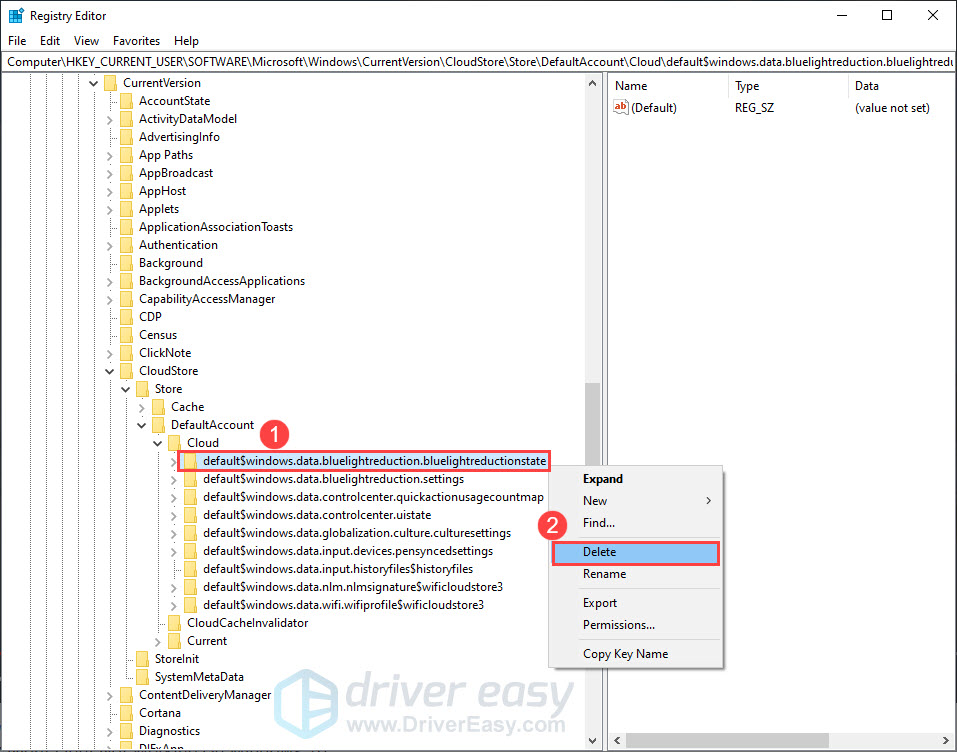
- Under the Cloud key, right-click and delete the first two registry keys one by one.
default$windows.data.bluelightreduction.bluelightreductionstatedefault$windows.data.bluelightreduction.settings
- Once done, close and exit Registry Editor.
- Restart your PC and check if your problem has been resolved.
If the Night Light still doesn’t work properly, continue with the next fix.
Fix 4: Check date and time settings
Windows allows you to set a schedule to turn on and turn off the Night Light feature. If the date and time settings on your PC are set incorrectly, you might be unable to use this feature properly. To check your PC’s date and time settings:
- On your taskbar, right-click the time and select Adjust date/time.
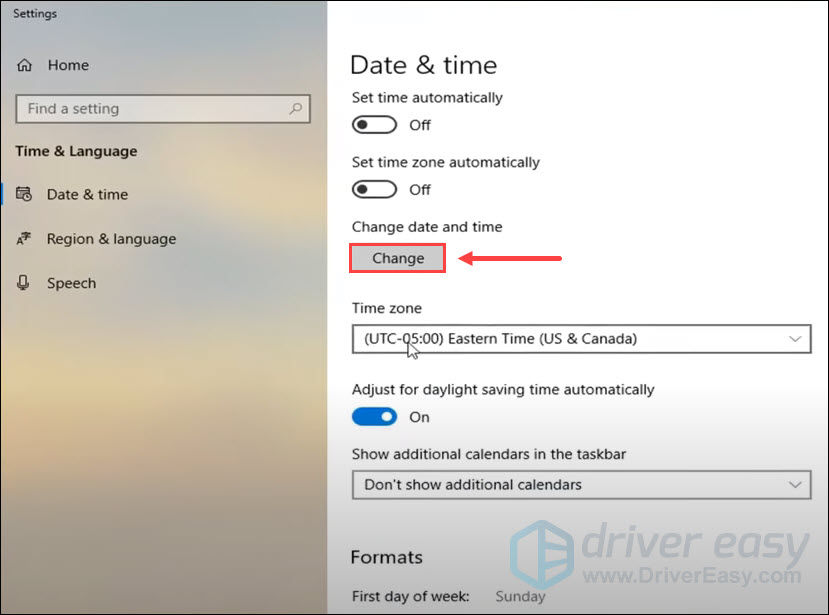
- In the pop-up window, make sure the date and time on your device are set correctly for your time zone. If not, you can click the Change button to change the date and time.

Note: the options for Set time automatically and Set time zone automatically must be set to Off to make this change.
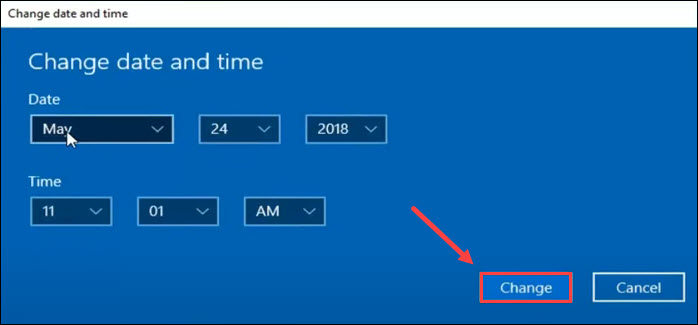
- Change the date and time according to your need, then click Change.

If the date and time are correct and you still encounter the Night Light not working issue, you may need to check Location services.
Fix 5: Turn on Location services
If you want to schedule the night light from sunset to sunrise, you need to turn on Location services, as the exact time of sunset and sunrise depends on your location and date. Here’s how to do it:
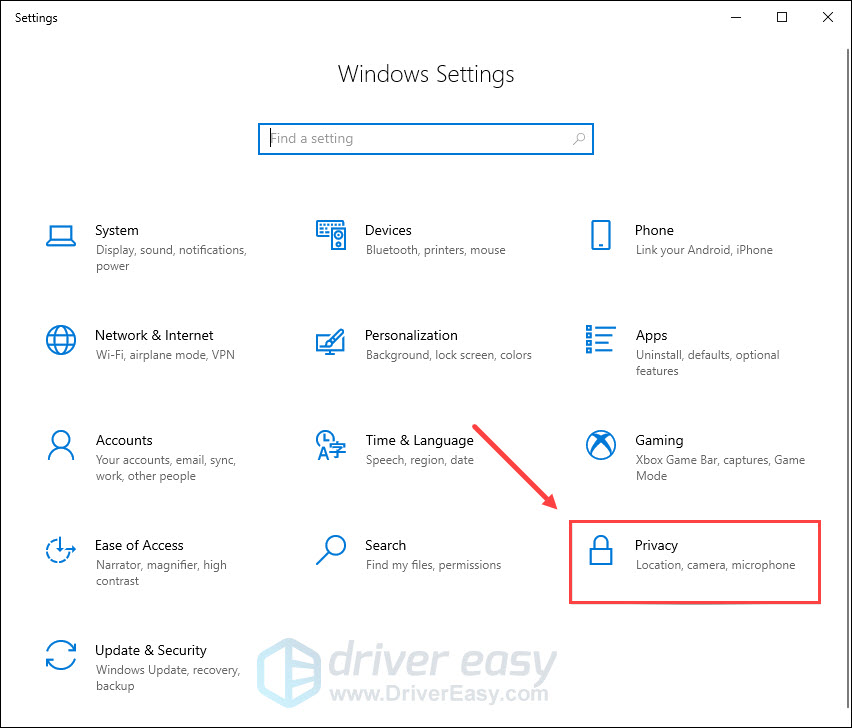
- On your keyboard, press the Windows logo key and I together to open Windows Settings. Then click Privacy.

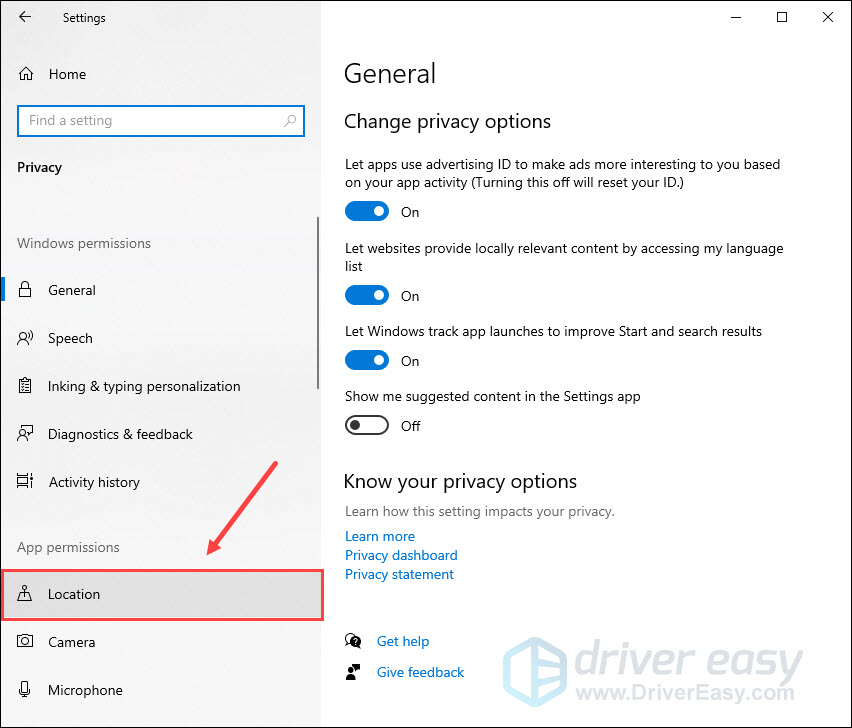
- In the left panel, select Location.
- Make sure the Location for this device is On. If not, you can click the Change button to turn it on. Also, make sure that Allow apps to access your location is set to On.


Now try to use the Night Light feature again and see if it works properly.
Fix 6: Check for Windows updates
Windows updates often include bug fixes, security patches, and some new features. So chances are that your problem can be solved by installing the new updates. To check for Windows updates:
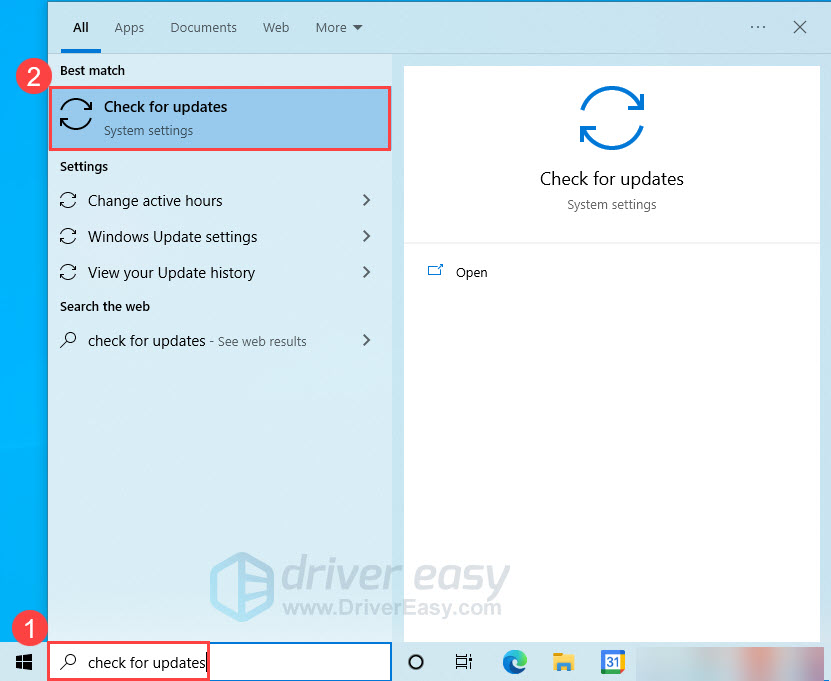
- In the search field on your taskbar, type check for updates. Then select it from the search results.

- In the new window, click Check for updates. Windows will automatically download and install all pending updates if available.

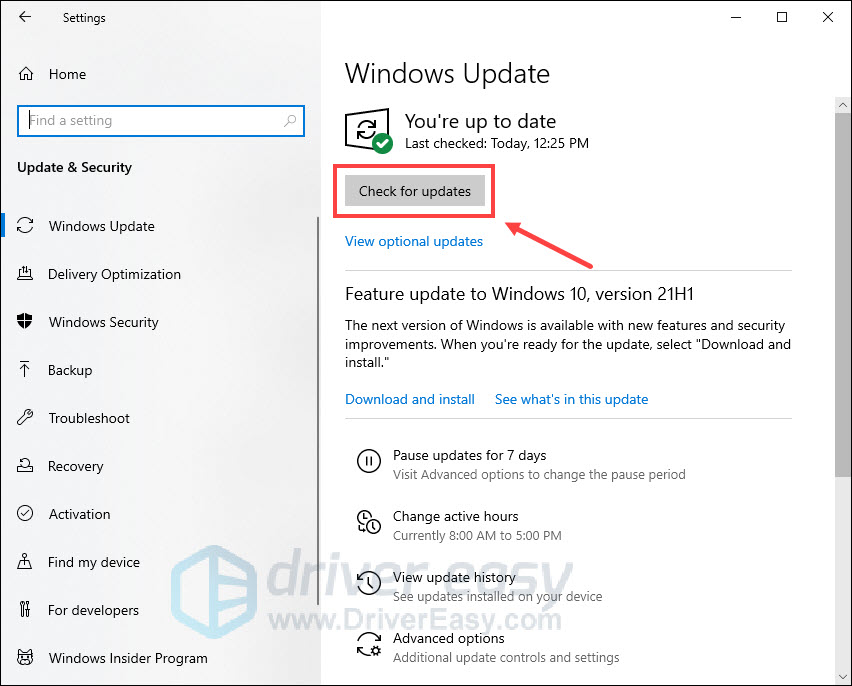
Once you’ve installed all updates, restart your PC and check if your issue has been resolved.
If you’ve tried all fixes listed above and still can’t get the Night Light to work, consider using a third-party app like f.lux to do the same work for you.
That’s all for now. Hopefully, this post helped. If you have any further questions or suggestions, feel free to leave us a comment below.
5
5 people found this helpful
Функция «Ночной свет» впервые появилась в Windows 10 Crеators Uрdate, вышедшей в первой половине 2017 года. Как следует из названия, предназначалась она для более комфортной работы на компьютере в вечернее и ночное время, в общем, в условиях плохой освещённости. Есть также мнение, что внедрением «ночного света» в Windows 10 в Microsoft решили дать адекватный ответ разработчикам весьма популярной утилиты F.lux, служащей для смягчения жёсткого синего спектра. Так ли это или иначе, но справляется со своей задачей функция неплохо, впрочем, нашлось немало пользователей, у которых она оказалась в нерабочем состоянии.
Причин у неполадки может быть несколько. «Ночной свет» может быть просто выключен на вашем компьютерном устройстве. Включаем его в приложении «Параметры экрана» в разделе «Дисплей». Для тех из новичков, кто не в курсе, настройки ночного света находятся в разделе «Параметры ночного света».
В них вы можете изменить яркость дисплея, включить планирование и настроить интенсивность подавление синего света.
Также функцию можно быстро включить и отключить в центре уведомлений нажатием плитки с названием функции.
Но иногда сам сам переключатель бывает не активен, т. е. его нельзя переключить, либо функция просто не работает, хотя и переключатель, и плитка в центре уведомлений активны.
Если неполадка была обнаружена внезапно, а до этого «Ночной свет» работал нормально, попробуйте для начала перезагрузить компьютер.
Если переключатель или плитка «Ночного света» неактивны, примените восстанавливающий настройки твик реестра. Чтобы не утомлять вас процедурой ручной правки реестра, предлагаем скачать уже готовый REG-файл по этой ссылке.
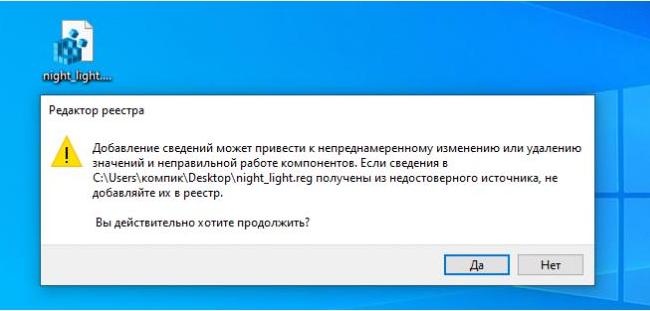
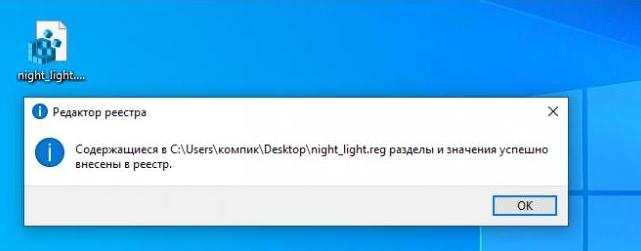
Выполните его слияние, а затем перезагрузите компьютер. Твик создаёт отвечающий за работу функции ключ с параметрами по умолчанию, ниже на скриншоте показано, как файл выглядит изнутри, будучи открыт текстовым редактором.
Если опции включения/отключения ночного света активны, но при этом они не работают («Ночной свет» не включается или не выключается), это может говорить о том, что драйвера интегрированной видеокарты, как правило, интеловской, не совсем вам подходят.
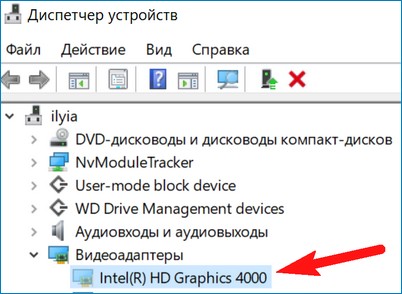
На явную проблему с видеодрайвером станет указывать принципиальная невозможность изменения яркости дисплея с помощью ползунка или функциональных клавиш. Решается данная проблема установкой оригинальных драйверов для вашей модели видеокарты. Если у вас ноутбук, к нему нередко прилагается компакт-диск с официальными «родными» драйверами. Можете установить видеодрайвер с него.
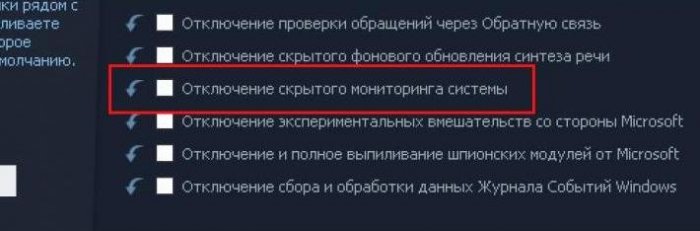
Любителям использовать различного рода твикеры и оптимизаторы рекомендуем восстановить настройки по умолчанию и проверить работу ночного света. Так, многие пользователи жаловались, что после активации опции «Отключение скрытого мониторинга системы» популярной программой Win 10 Tweaker у них переставала работать функция ночного света.
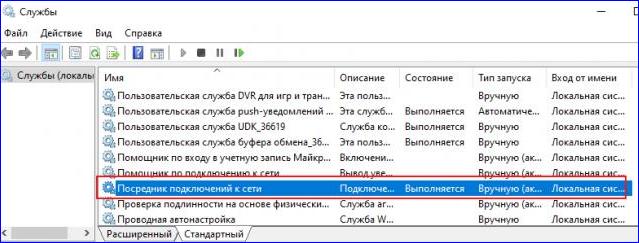
А ещё в оснастке управления службами проверьте активность служб «Посредник подключений к сети»
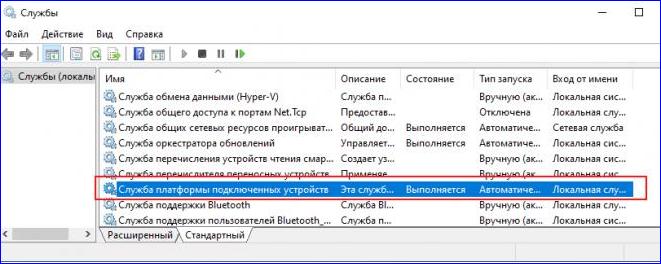
и «Служба платформы подключенных устройств». Они должны выполнятся.

Отсутствие плитки «Ночной свет» на панели уведомлений в большинстве случаев является не следствием какой-либо неполадки, а банального отключения её показа. Чтобы включить отображение плитки, зайдите в приложении «Параметры» в раздел «Система → Уведомления и действия» и нажмите ссылку «Редактировать быстрые действия».
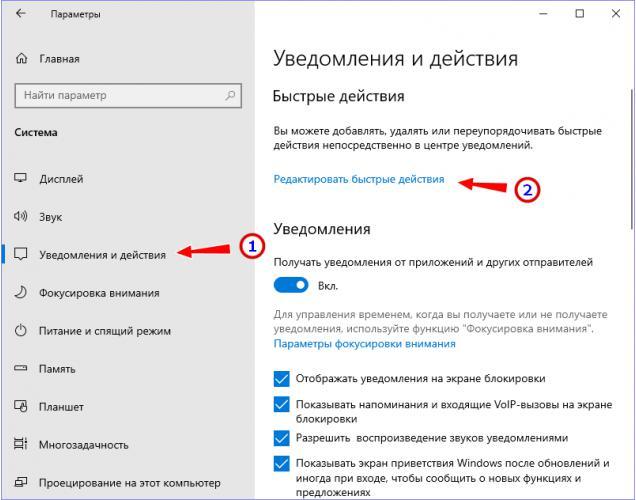
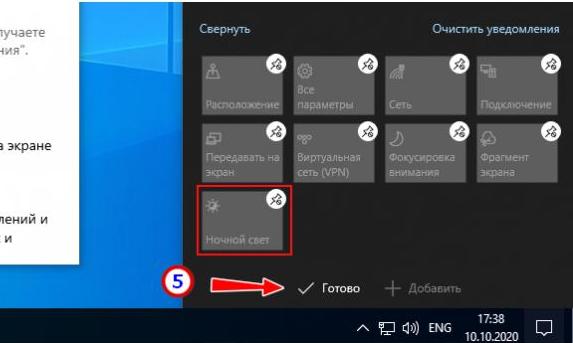
Откроется панель уведомлений, нажмите в нижней её части кнопку «Добавить» и выберите в появившемся меню пункт «Ночной свет». Нажмите «Готово», чтобы сохранить настройки.
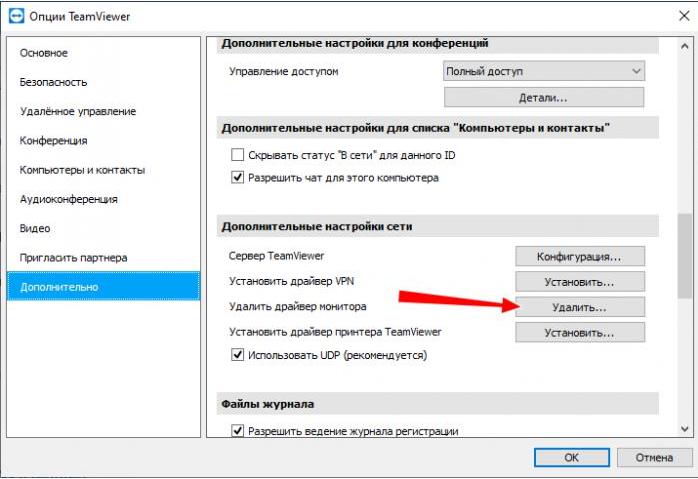
На что ещё обратить внимание? Если нелады с ночным светом начались после установки сторонних приложений для конфигурации монитора, возможно, каким-то образом они создали конфликт функций. В общем, смотрите настройки этих приложений или удаляйте сами программы. И ещё один момент: у кого установлен TeamViewer, попробуйте удалить в его дополнительных настройках драйвер монитора, если таковой окажется инсталлированным.
Constant exposure to blue light from electronic devices can cause visual problems and ruin your sleep pattern. On Windows 10, the Night Light feature prevents digital eye strain and improves sleep quality by reducing blue light emission from your computer’s display.
Despite its benefits, there are times when the feature malfunctions. If you’re on this page because Windows 10 Night Light is not working on your Windows 10 computer, try the potential solutions listed below.

1. Check Night Light Schedule
If you configured Windows to activate Night Light automatically but it doesn’t, check your Night Light schedule settings and confirm the hours. Go to Settings > System > Display and click Night light settings.

Choosing Windows’ preset “Sunset to sunrise” schedule means Night Light will come on by 7:30 PM every day and go off 6:30 AM in the morning. If you choose to set your own custom hours, make sure you enter the accurate time in the provided boxes.

2. Adjust Night Light Strength
Does your screen look the same after enabling Windows 10 Night Light? Does Windows fail to display a warm color when you toggle on Night Light?
That could be because you’ve reduced the Night Light strength to the minimum. Go to Settings > System > Display > Night light settings and move the Strength slider to the right to increase the intensity of the warm color.

3. Turn on Location Services
Night Light is one of the many Windows features that require location access to work optimally. If the preset “Sunset to sunrise” schedule option is greyed out, that’s most likely because location access is disabled on your PC.

Go to Settings > Privacy > Location to check your device’s location settings. Click the Change button and toggle on Location access for this device.

Scroll to the “Allow apps to access your location” section and toggle on the option.

Return to the Night Light settings menu and check if you can use the “Sunrise to sunset” schedule.
4. Check Date and Time Settings
A lot can go wrong on your computer if the date, time, or timezone settings are inaccurate. Your browser may fail to load certain webpages, Microsoft Store won’t download apps, and so on. Other Windows apps and features (Night Light, for example) may also malfunction if your PC’s date & time settings are incorrect.
To prevent these from happening, head to Settings > Time & Language > Date & time and toggle on these two options: Set time automatically and Set time zone automatically.

Afterward, click the Sync now button in the “Synchronize your clock” section. That’ll trigger your computer to obtain accurate date & time information from the Windows Time Server.
5. Restart Your Computer
If the problem is due to a temporary glitch with your operating system, rebooting your computer might help restore Night Light to normalcy. Before you restart your device, try signing out of your profile/account and signing back in—press the Windows button, click on your profile icon, and select Sign out. Reboot your computer if Windows 10 Night Light still doesn’t work when you sign back in.
6. Update or Reinstall Display Driver
You may encounter difficulties using Night Light if your computer’s graphic/display driver is outdated, broken, or buggy. If the problem persists after trying the recommendations above, update or reinstall your graphics/display drive.
Note: Windows 10 Night Light does not work on devices using a DisplayLink graphic driver or Microsoft’s Basic Display driver. If you use either of these drivers, visit your PC manufacturer’s website to download a different graphics driver.
Right-click the Start Menu icon (or press Windows key + X) and select Device Manager on the Quick Access menu.
Expand the Display adapters section, right-click the graphics driver, and select Update driver.

Click Search automatically for updated driver software.

Windows will scan your computer and the internet for an updated version of your graphics driver. If Windows doesn’t find any available update, return to the Device Manager and uninstall the graphics driver.
Don’t worry, you won’t break anything on your computer; Windows will automatically reinstall a clean, error-free copy of the driver when you reboot your PC.
Right-click on the driver and select Uninstall device.

Leave the “Delete the driver software for this device” option unchecked and click Uninstall.

Restart your computer when prompted to. Before you click Yes, make sure you close all active programs so you don’t lose unsaved data.

7. Reset the Windows 10 Night Light Settings
Is the Night Light option grayed out in the Action Center and Windows Settings? Have you tried all possible fixes but to no avail? Head to the Windows Registry and reset the Night Light functionality.
Note: The Windows Registry is a database of sensitive files and settings. Damaging any registry file may corrupt the Windows OS and cause your computer to malfunction. Therefore, it’s important to make a backup of the registry before you attempt to make changes to the registry. Refer to this guide on backing up and restoring the Windows Registry.
Launch the Windows Run box (Windows key + R), type regedit in the dialog box, and click OK.
Paste this path below in the Registry Editor’s address bar and press Enter.
HKEY_CURRENT_USER\Software\Microsoft\Windows\CurrentVersion\CloudStore\Store\DefaultAccount\Cloud

On the left sidebar, locate and delete these two subfolders: $$windows.data.bluelightreduction.bluelightreductionstate and $$windows.data.bluelightreduction.settings.

Simply right-click on the folder(s) and select Delete.

Close the Registry Editor and restart your computer.
8. Update Windows
Apparently, there’s a known bug in version 1903 of Windows 10 that causes the Night Light to malfunction. Type winver in the Windows Search bar and press Enter to check the Windows version installed on your device.
If you’re running version 1903 (or older), go to Settings > Update & security > Windows Update to update your computer.
Even if you aren’t running version 1903, you should still install any official update available in the settings menu. Keeping your computer updated at all times can improve performance and fix other hidden issues.
Keep Your Eyes Protected
If Windows 10 Night Light won’t turn off, fails to warm your display when activated, or randomly comes on when it’s not supposed to, these troubleshooting techniques would get the feature working correctly again.
Related Posts
- How to Fix a “This file does not have an app associated with it” Error on Windows
- How to Fix an Update Error 0x800705b4 on Windows
- How to Resolve “A JavaScript error occured in the main process” Error on Windows
- How to Fix the Network Discovery Is Turned Off Error on Windows
- How to Change Folder Icons in Windows
While working on the computer for long hours, continuous exposure to blue light can cause eye strain and disrupt sleep patterns. Microsoft introduced the Night Light function with Windows 10 Creators update in 2017. The feature that switches the screen to warmer tones is excellent. However, it sometimes stops working due to several reasons.
If you also encounter issues with the night light or cannot turn it on on Windows 10 or 11, We’re here to help.
Common Issues with Night Light
- Night Light interferes with sleep mode.
- The Night Light automatically turns on or off.
- The Night Light feature is greyed out and appears to be dysfunctional.
Causes for Windows Night Light Not Working
- Recent Windows 11 update
- Outdated or corrupt display driver
- The computer connects via a docking station.
- You are not logged into your Microsoft account.
How To Fix Can’t Turn On Night Light – Windows 10/11
Now that we know the problem and what can cause it, let us explain how to fix the issue of the Night Light not working on Windows 11,10.
Fix 1. Check If the Night Light is Enabled or Not
Before we learn the technical ways, let’s check whether the Night Light feature is turned on. If not, follow these steps to get Night Light enabled:
- Press the Windows + I keys to access Windows Settings.
- Click System > select Display.
- Go to Brightness & color section > enable Night Light by sliding the switch next to it.

- Double-click on Night Light to adjust the settings & prevent it from auto start and auto stop.
- To set a schedule, slide the button next to Schedule night light and Set Hours to run the Night Light automatically at a scheduled time.

- Restart the PC to see if Windows 10,11 Night Light is working.
Fix 2. Set the Correct Date and Time
As reported by some users, wrong date and time settings can also be the reason for Windows 10,11 Night Light greyed-out issues. Therefore, to fix it, try checking the data and time.
- Press Windows + I to open Windows Settings.
- Select Time & language > click on Date & time.
- Toggle on both the options – Set time automatically and Set time zone automatically.

- Click the Additional settings section > Sync Now. This will automatically synchronize the system date and time.
Fix 3. Check Night Light Strength
Sometimes, when the strength of the night light is weak, you might face issues with it not working with Windows 10. To fix it, make the following changes to the Settings menu.
- Open Windows Settings by pressing Windows + I.
- Click System > Display.

- Select Night Light and move the slider under the Strength menu. As you increase the strength level, you will see the difference.

Fix 4. Enable the Location Services
The location service on the PC should be enabled to get the night light feature working on Windows 11. This helps us know the time of day and evening. Therefore, if the Location service is disabled, you might face Windows Night Light grayed out. To enable the Location services, follow these steps:
- Open Windows Setting by pressing the Win + I key.
- Select Privacy & Security > click Location under the App permissions.
- Enable Location services.

Fix 5. Automatically Update Graphics Card Driver
A corrupt or problematic graphics card driver can sometimes set off Night Light. We suggest updating the graphics card to the latest version to fix it. The best way to update the driver without any hassle is to use a driver updating tool like Advanced Driver Updater. To use it, follow these steps:
- Download and install Advanced Driver Updater.
- Run it and click Start Scan Now to scan the PC for corrupt drivers.

- Review the scan results and update the outdated drivers.

- Remember, if you are using the free version, you can update only one driver in a go using the Update Driver link. However, if you are a paid user, you can update all outdated driver by clicking the Update All button.

- After updating the driver, reboot the PC to apply changes.
Now check the Windows 11. The night light should be working.
Read Advanced Driver Updater Review Here – Is it Safe to Use Best Driver Updating Utility
Fix 6. Turn the HDR Feature Off and On
The HDR feature is used in Windows to make pictures look vibrant. However, sometimes, this feature interferes with Windows 11 Night Light, and the PC doesn’t wake up from Sleep mode. Hence, we suggest toggling the switch off and on to fix the issue.
- Open Windows settings.
- Click System > Display.
- Disable and re-enable the Use HDR option.
Now check the night light issue; it should be fixed.
Fix 7. Use Windows Registry to Modify Night Light Settings
If the above methods did not help, we suggest changing the Windows Registry to get Night Light mode working.
If you are unsure about making changes to the registry, please take a backup of the Windows Registry. Once you have the backup, follow the steps to make changes to the registry.
- Press the Win + R key to open the Run dialog box.
- Type Regedit and press the Enter key.
- Go to the following path:
HKEY_CURRENT_USER > Software > Microsoft > Windows > CurrentVersion > CloudStore > Store > DefaultAccountCloud > Cloud
- Right-click the following folder
default$windows.data.bluelightreduction.bluelightreductionstate
Select Delete.

- Restart PC. The Night Light should now be working.
Must Read: – How To Update Drivers On PC
Bonus Solutions –
For users who use the Docking Station
– If you connect your computer via a docking station, disconnect it and connect it directly to the monitor. Once this is done, enable Night Light.
Not Logged in with a Microsoft Account
– If none of the above fixes have worked, ensure you are logged in with your Microsoft account. Logging into your Mircosoft account will fix the issue.
Fixed Night Light Not Working on Windows
Night Light mode in Windows is an excellent feature that reduces eye strain. When the feature stops working, it creates problems for those who are habitual in using it. The above fixes will help fix the issue of the night light not working on Windows 11 and 10. However, if it doesn’t help, we suggest resetting Windows 11. To do so, press Windows + I open Windows Settings > click Update & Security > System > Recovery > Reset this PC.


So, before using the feature, ensure you have a data backup and proceed. Now, try to use the Night Light feature; it should work fine.
We hope that, using the step explained above, you were able to fix the problem of being unable to use Night Light mode on Windows 11,10. Please share your feedback in the comments section.
Also Read: How To Update Realtek Bluetooth Driver – Windows 11,10