
This blog provides information and detailed instructions to set up or configure an Exchange account in the Microsoft Outlook application.
Microsoft Outlook application allows configuration of multiple email accounts like Gmail, Office 365, IMAP, Exchange Server, and more and provides the synchronization facility. Here, we are giving the process to add Microsoft Exchange in Outlook 2013 manually.
Note: There is no provision for setting up an Exchange Account manually in Microsoft Outlook 2016 and 2019 versions.
Manually configure Microsoft Exchange account in Outlook 2013
Before going to the steps to configure Microsoft Exchange account in Outlook 2013, please confirm the following pre-requisites.
- Exchange Server is ON and is available
- Exchange Services are running
- Microsoft Outlook 2013 is installed on the Exchange client machine
After ensuring all the above requirements, perform these steps to add Microsoft Exchange account in Outlook 2013 manually.
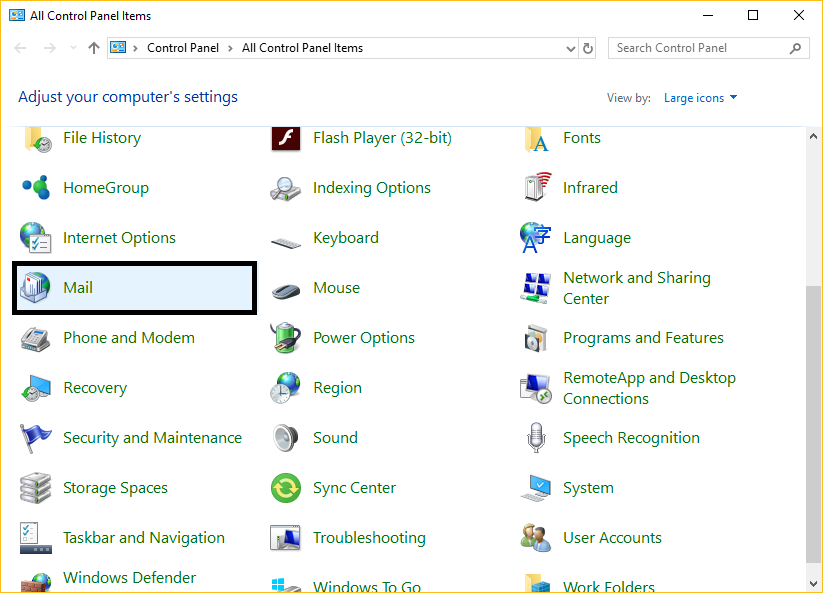
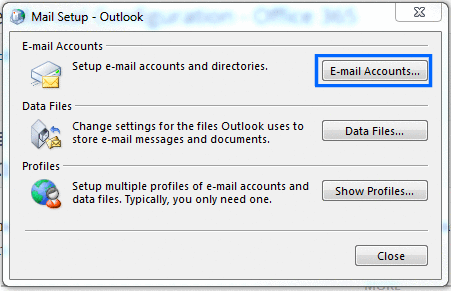
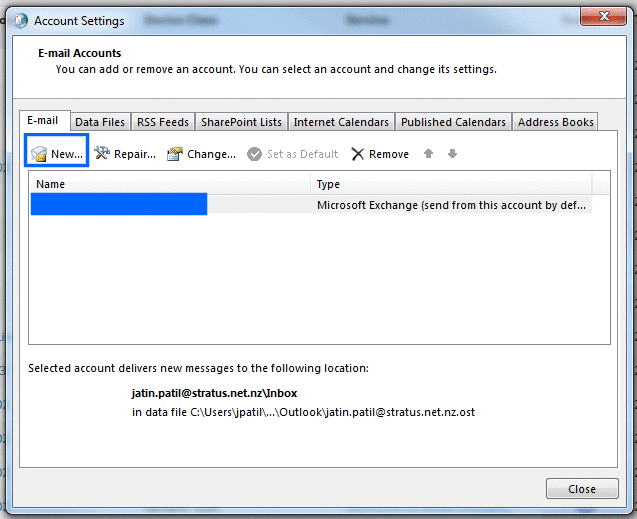
- Open Control Panel on your Exchange client machine. Click on the Mail option.

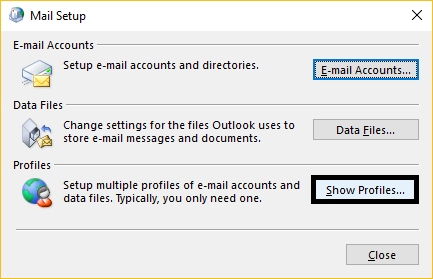
- On the Mail Setup page, click on Show Profiles option.

- Click Add to create a new profile. Then type any profile name and click OK.
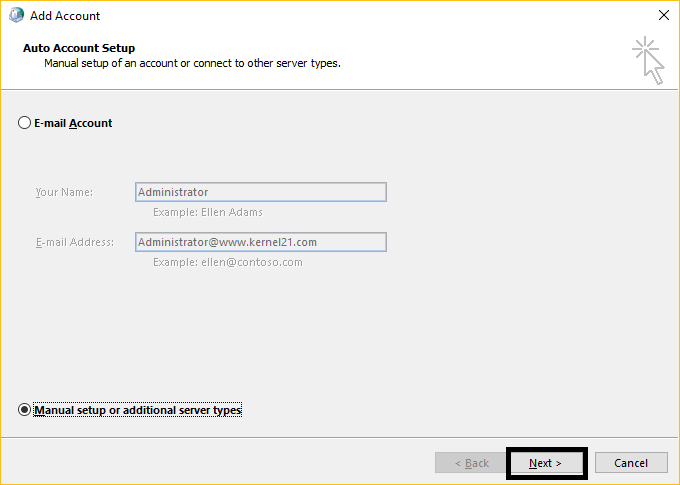
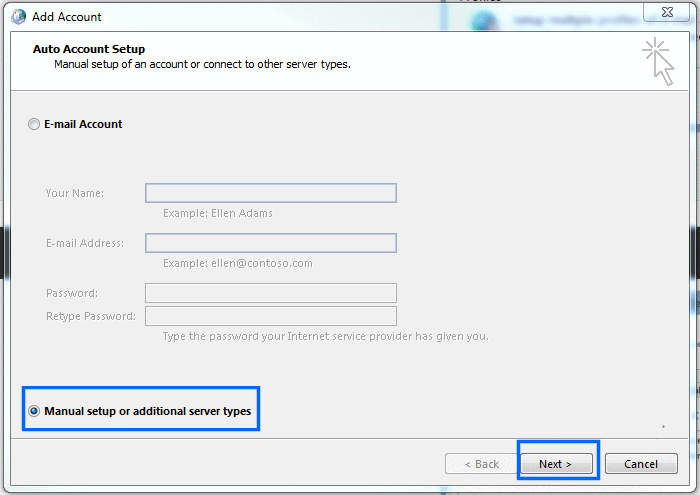
- Next, the Add Account page will get opened. Select Manual setup or additional server types and click Next.

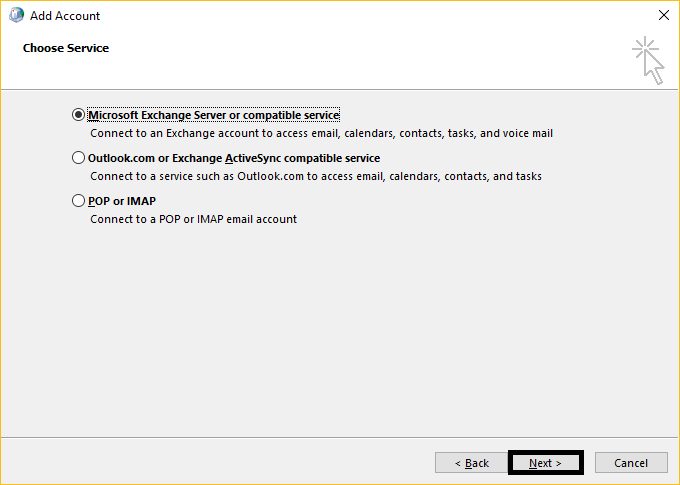
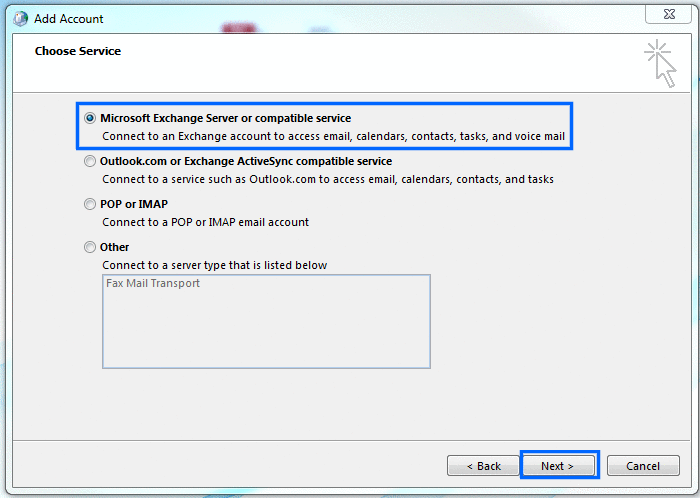
- Choose Service as Microsoft Exchange Server or compatible service and click on Next.
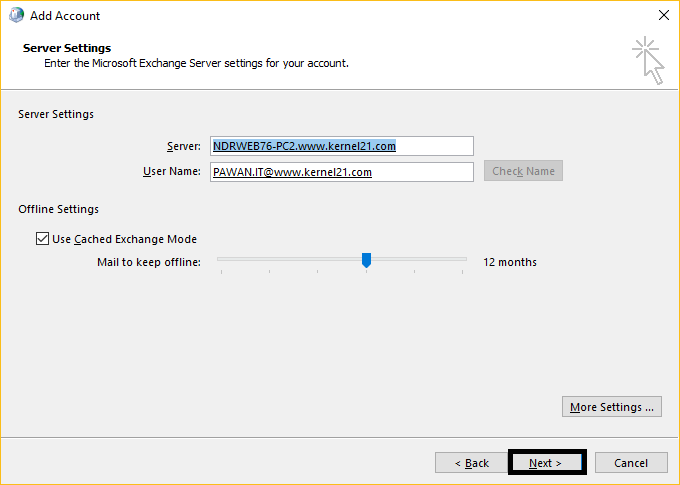
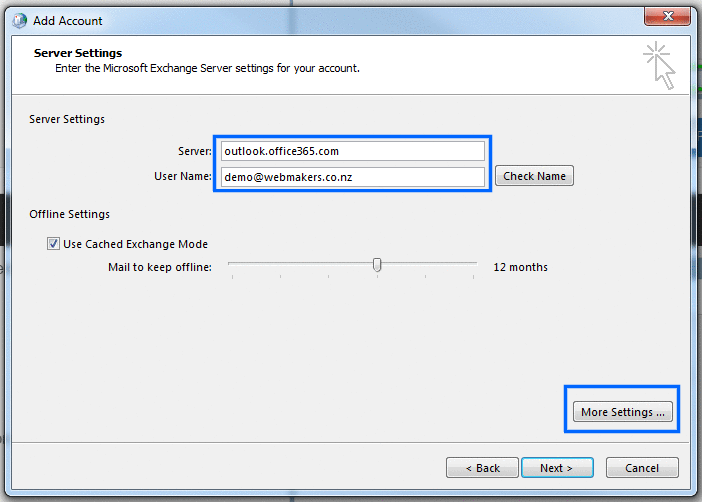
- Under the Server Settings section, add your Exchange Server name, Username, and then click on Check Name option. Using the Autodiscover feature in Exchange Server, the Exchange Server and Username address are successfully verified and added. Click Next. It may ask you to add the credentials for this Username along with the password; please provide it to continue.
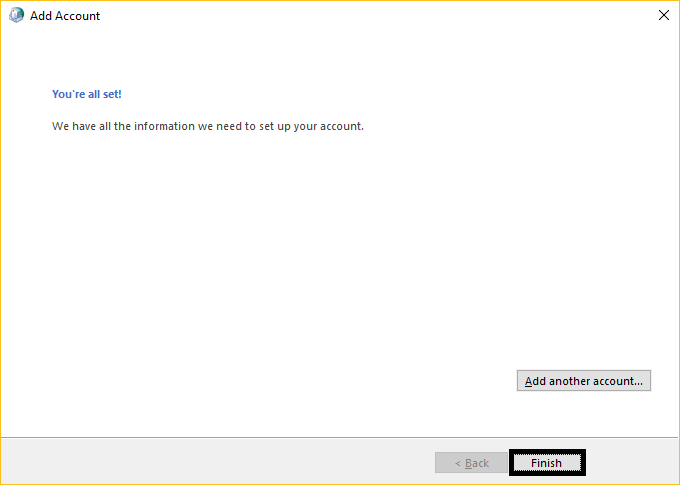
- The added account will start configuring, and then it will display the confirmation message. Click Finish to confirm again.
- Next, in the opened Show profiles page on Mail, select your created profile from the list under Always use this profile section and click OK.
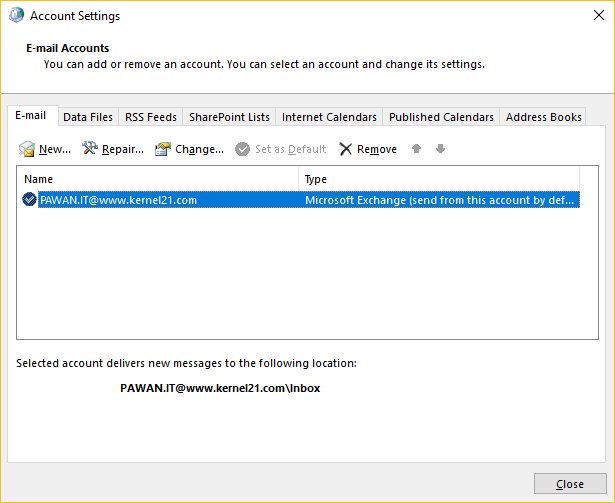
- Go to your Account Settings and check if the currently added account is Set as Default. If not, please set it to default by selecting it and clicking on Set as Default option.

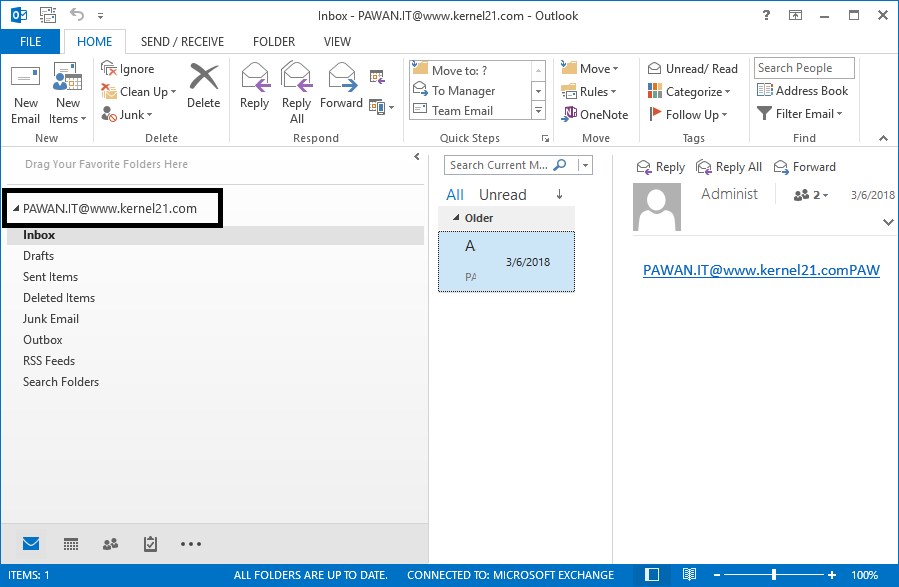
- Now, open your Microsoft Outlook application. You can now view and access the just configured Exchange Server user account.

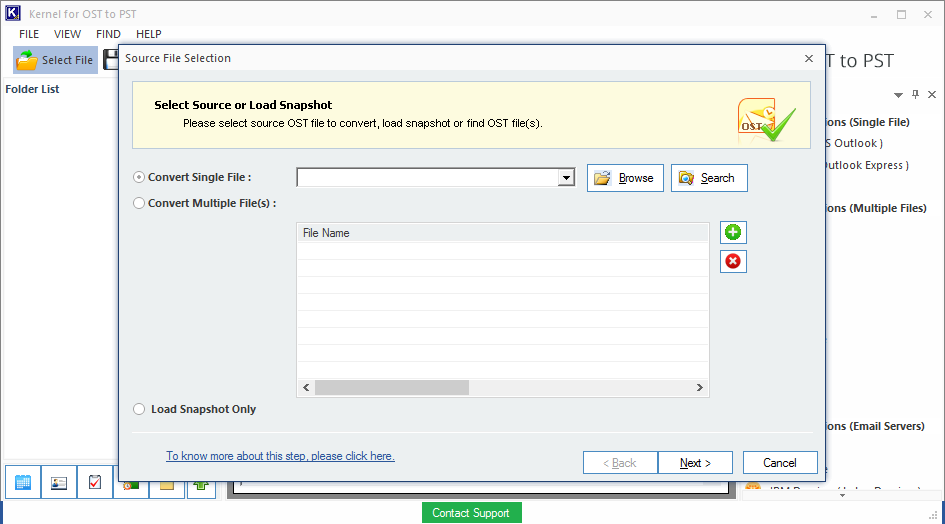
Now, you have the desired Exchange account configured in your Outlook email client and all the data saved as an OST file in offline mode (if the Cached Exchange Mode is enabled). In addition to facilitating offline working, the OST file works as a backup file for you to access the lost or deleted Exchange data again after converting it to PST file format.
Though you can try free methods to convert OST to PST file, these methods are not at all reliable or secure. For your help, we suggest an advanced converter tool that offers to convert OST to PST files efficiently without any need for the Exchange Server availability. Kernel for OST to PST tool is an OST converter tool which offers conversion of even corrupted or orphaned OST files in no time. It lets users preview OST data for selective data recovery. Other than conversion to PST file format, the tool provides OST data migration to Office 365, Exchange Server, Gmail, and more.
Conclusion
The blog has described the complete method to manually add Microsoft Exchange in Outlook 2013. It also offers an advanced OST converter tool to convert your OST files into PST format for accessing in difficult situations or use it as a backup for Exchange data.
- Download Free
- Buy Now
This article will guide you through configuring your email in Microsoft Outlook
Note: Third-party software cannot be supported directly by Namesco. If you have further questions about configuring your Outlook 2013 for any reason, please visit: http://office.microsoft.com
Your Outlook software may look slightly different depending on the version you have, but the setup procedure will be exactly the same.
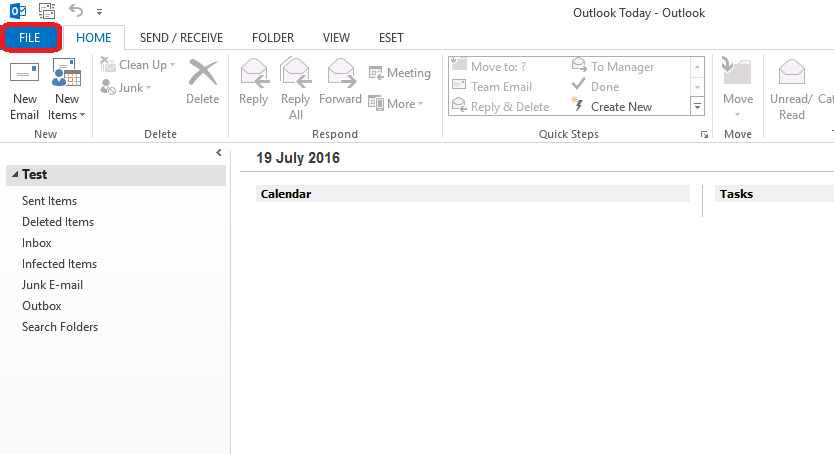
The first step to set up your emails is to find and select File.
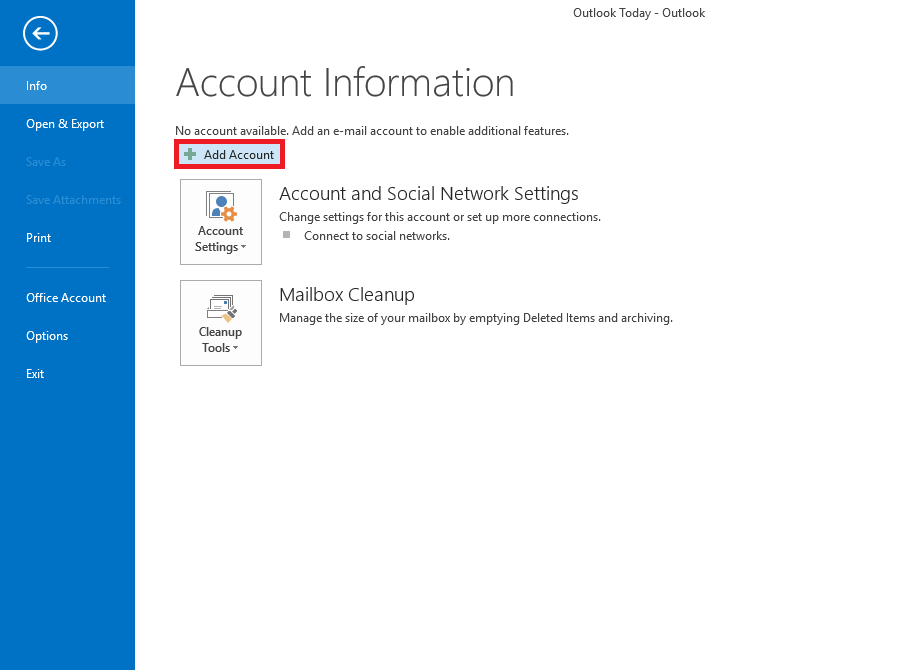
Next select Add Account, as shown below.
On the Auto Account Setup select the option Email Account, and in fill in the following information:
- Your Name – enter your own name or company name depending on what you would like recipients to see.
- Email Address – enter the email address for the user you are setting up
- Password – enter the password for the user you are setting up
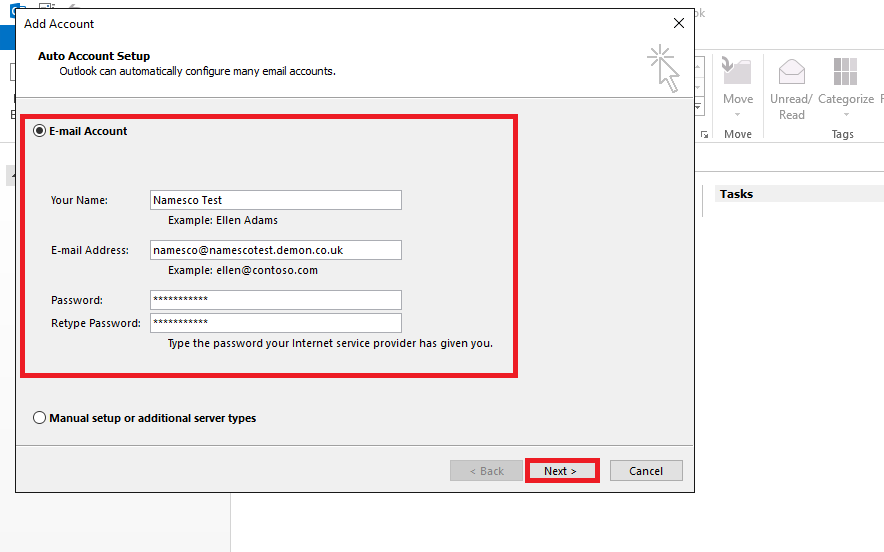
Click Next to proceed.
You will most likely be prompted to re-enter the password.
Click Finish to complete the setup.
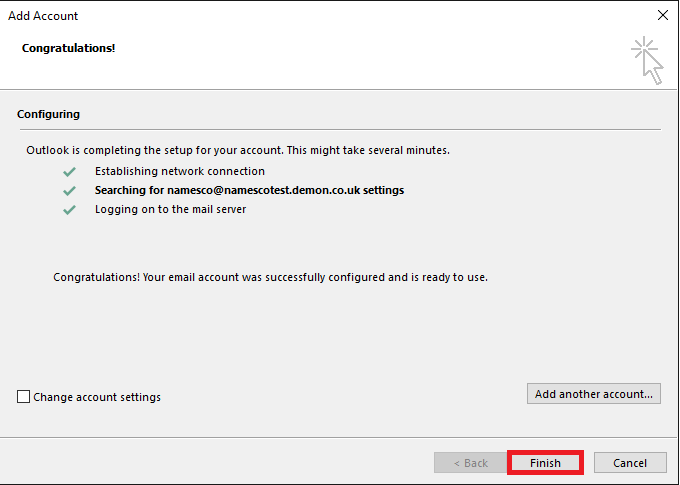
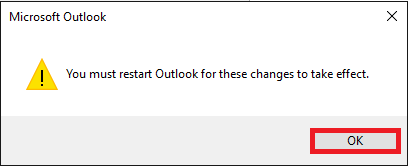
You will need to restart your Outlook to begin using your email account.
How to Add Exchange Email to Outlook? Find the Solution
Approved By
Anuraag Singh
Published On
September 24th, 2022
Reading Time
6 Minutes Reading
Want to know how to add Exchange email to Outlook? This is the most common query asked by many naive users because Exchange email plays an important role in business communication and in the IT industry. An Exchange email message data comprises of so many things like organization blueprint and policy, project information, financial details, employee data, etc.
Exchange Server provides Transport Layer Security (TLS) for the communication between the client and the Exchange Online Servers. It provides encryption all the time that prevents the users from spoofing attempts and it keeps the email secure through encryption.
This is very good but the Exchange Server has its own downsides too. The first and foremost thing is that it needs the IT Administrator to handle Exchange Server. Space issue, Exchange database file corruption, virus attack, Exchange Server crash, logfile deleted, etc. are the issues that Exchange Server faces.
All this problem can be removed but it needs Technical Expertise to resolve all the errors faced by Exchange Server. Moreover, it is a very time-consuming and expensive method. Therefore, it is better to save Exchange Mailbox email to some other email clients like Outlook. Hence, for this, we came up with this write-up & provide you the most efficient solution to add Exchange Server email to Outlook.
What is the Need to Add Exchange Email to Outlook?
Yes, it is also important to understand why users are preferring Outlook rather than the other email clients. The reason behind it is that Outlook is widely used as a professional email client across the world and everyone is familiar with it. So, it is very easy to understand and users can access their Exchange email in a hassle freeway.
Note: If the user doesn’t want to add their Exchange email to Outlook. They can easily add their Microsoft Exchange email into PDF / MSG / EML / MBOX / HTML file formats by using the automated tool i.e. mentioned below.
There is always the direct and indirect solution that will help users i.e. Manual and Automated solutions. With the manual solution firstly the user has to convert the EDB email to the PST file. Then import Data Outlook File into Outlook.
Manual Solution to Add Microsoft Exchange Email to Outlook
In the manual solution, the user has to use the Exchange PowerShell commands to convert Exchange Database Email into PST file format.
Below is the following command:
New-MailboxExportRequest -Name “Ron” -Mailbox saif -FilePath “\\SERVER01\PSTFiles\Ron.pst”
-IncludeFolders “#Inbox#”
This command help users to convert EDB emails to PST and after that, they can add Microsoft Exchange email to Outlook. But, there are certain limitations with PowerShell such as if the Exchange Database file is corrupted, disconnected, or dismounted than users have to use automated solutions because this cannot be done by Exchange PowerShell.
How to Add Exchange Email to Outlook: Professional Solution
This method provides all in one solution that covers up all the issues faced by the users in Exchange Server and PowerShell. Users can try SysTools EDB Conversion software to convert EDB email into PST.
This utility provides scan mode option that resolves database corruption Exchange 2010, 2013, 2016 and repair Exchange mailbox. To remove minimal corruption select the Quick scan and to recover the severely corrupted Exchange EDB file click on advance scan. This option repair EDB file and recover permanently deleted Exchange database mailbox and item from offline / dismounted EDB file. Users can select this scan mode and recover deleted mailbox after retention period.
It provides graphical user interface that even a naive user can use it without any technical knowledge. The user can convert multiple Exchange emails to PST file format because there is no file size constraint in this software. Users can perform bulk Exchange email conversion into the specified file format.
The Software adds Exchange email all its metadata properties such as Body, Subject, From, To, Cc, Bcc, Attachment info & Sent Size. It converts email attachments of different types like File (DOCX, PPTX, PDF, XLXS, etc) and Images (PNG, JPG, GIF, JPEG).
Users can preview convert emails located in all the folders Inbox, Drafts, Sent Items, Deleted Items.
Note: This software is capable to add Microsoft Exchange Email to Outlook 2007/2010/2013/2016 versions and extract mailbox from EDB file Exchange 2016/2013 into PST / PDF/ EML / MSG / MBOX / HTML file formats.
User can access Exchange email from browser when they convert Exchange database mailbox email to HTML file format. If they want to export archive mailbox to PST Exchange 2016/2013/2010. They can easily perform this operation because the utility allows exporting different Exchange database mailbox such as: user, shared, legacy, disconnected, archive to the selected file format simultaneously.
Features of an Automated Software
1. It converts offline .edb mailbox into the standard file formats.
2. Remove (SMIME/OpenPGP) email encryption from EDB.
3. Quick and Advance scan option to recover corrupted and deleted Exchange Mailbox.
4. Maintain Folder Hierarchy and Data Integrity.
5. Support all versions of Windows OS, Outlook, and Exchange Server.
A step-by-Step method to convert Exchange Email
Below are the steps are given that help user of how to add Exchange Email to Outlook:
Step 1: Download and Run the software on Window Operating System

Step 2: Click Add File button to add Exchange Database File

Step 3: Select all the Exchange Email and click on the Export selected button

Step 4: Choose the Export type option as PST & click on Export

Step 5: After the successful conversion, add the PST file to Outlook to view Emails
Steps to Import PST File to Outlook to Access Exchange Emails
Step 1: Login to the Microsoft Outlook and Click on the File button
Step 2: Click on open & export > Select the Import/Export option
Step 3: Click on the “import from another program or file” option > Click on Next button
Step 4: Click on Outlook Data File and select the next button
Step 5: Click the browse button > Select the PST file you want to export > Click on next button
Step 6: If the .pst file is password protected, enter the credentials and click on OK button
Step 7: Select the “import items into the currect folder” radio button > Click on finish button
Bringing It All Together
To know how to add Exchange Email to Outlook, the user needs to convert EDB emails to PST file and then import the resultant file to the MS Outlook. In the above section, we have described the method to import Exchange Database emails into Outlook Data File. Users can use the efficient solution provided above rather than any prolonged and time-consuming solution using Exchange PowerShell.
By Kumar Raj
Kumar Raj has more than 14 plus years of expertise in migration technology. He likes to create, edit, and optimize web material on topics conversion of email data, and migration of email data. For the majority of the past ten years, he has been a devoted fan of the technology scene.
View all of Kumar Raj’s posts.
The following guidelines step through the method of manually configuring your Office 365 Exchange Online account with Outlook 2010, 2013, and 2016 for Windows. This may be required when configuring secondary account or if you run into issues with the automatic configuration process.
Step 1: Open Control Panel.
Step 2: Click Mail (32-bit) or Mail (Microsoft Outlook 2013) as per Outlook client installation on machine.
Step 3: Click E-mail Accounts…
Step 4: Click New…
Step 5: Select Manual setup or additional server types, then click Next.
Step 6: Select Microsoft Exchange Server or compatible service, then click Next.
Step 7: Enter the details as below:
- Server: outlook.office365.com
- User Name: As supplied by Systems Administrator/E-mail Manager
When above details are entered, Click More Settings …
*Note: Do not click the Check Name button at this step, still some settings to be finished before you click Check Name.
Step 8: Click the Security tab. And make below changes:
- Uncheck Encrypt data between Microsoft Outlook and Microsoft Exchange.
- Choose Anonymous Authentication from the Logon network security drop-down menu.
Step 9: Click on the Connection tab. Check Connect to Microsoft Exchange using HTTP, then click Exchange Proxy Settings…
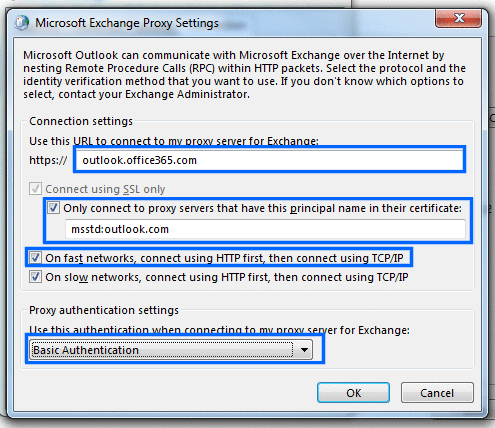
Step 10: Adjust the settings as below in Microsoft Exchange Proxy Settings dialogue box.
- 1. In the Use this URL to connect to my proxy server for Exchange field, enter outlook.office365.com.
- 2. Check the Only connect to proxy servers that have this principal name on their certificate, then enter msstd:outlook.com in the associated text field.
- 3. Check the On fast networks, connect using HTTP first then connect using TCP/IP box.
- 4. Select Basic Authentication from the Use this authentication when connecting to my proxy server for Exchange drop-down menu.
- 5. Click OK.
Step 11: Click OK on Microsoft Exchange dialogue box.
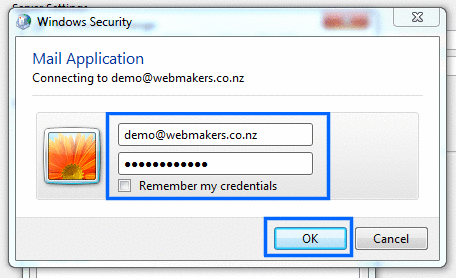
Step 12: Click Check Name.
Step 13: An authentication prompt will appear. Enter your User Name (or Email ID) and IdentiKey password in the corresponding fields, then click OK.
Step 14: Click Next and then Click Finish. Your account will be setup and you can open Outlook to begin using your Exchange account.
If this article helped you or if you have further suggestions, please feel free to comment below. 🙂
For Microsoft Exchange 2013 accounts linked to an existing email address and Microsoft Outlook 2013 for Windows
Learn how to set up your Microsoft Exchange account in Outlook. The Outlook Configurator saves you the trouble of time-consuming manual configuration.
Please Note
The Outlook Configurator can only be used with Microsoft Exchange 2013 accounts that are associated with an existing email address. If you have set up a Microsoft Exchange 2013 account with a new email address, set up the Microsoft Exchange 2013 account manually in Outlook.
Requirements
- You have set up an active Microsoft Exchange 2013 account with IONOS.
- You have Microsoft Outlook 2013 installed on your PC or laptop.
Downloading the Outlook Configurator
-
Log in to Microsoft Exchange 2013 administration tool with your Microsoft Exchange email address and password.
-
In the Outlook tile, click on Downloads & Configuration.
- Scroll to the Outlook Configurator download and click on Download Outlook Configurator.
The OutlookConfigurator.exe file is downloaded.
Configuring Outlook 2013
-
Open the OutlookConfigurator.exe file.
-
Enter the email address that you have associated with your Microsoft Exchange account.
-
Select Automated Setup and click Continue.
- Confirm the success message by clicking OK.
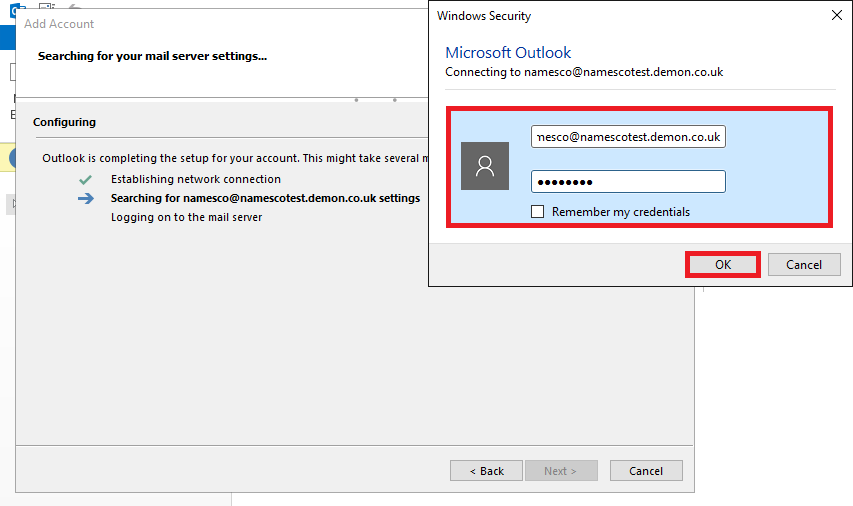
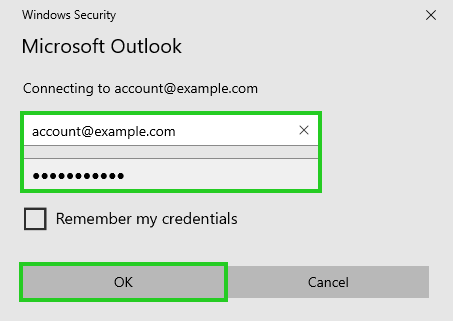
Outlook will start automatically and the Windows Security window will be displayed.
-
In the first field, enter your full Microsoft Exchange email address. In the second field, enter the password you assigned when you set up the Microsoft Exchange account. Then click OK.
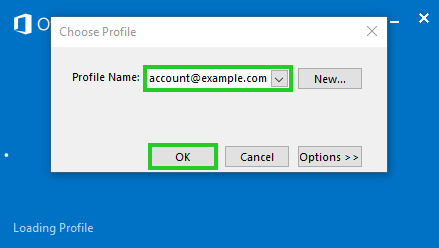
The Select Profile window is displayed.
-
Make sure that the profile created by Outlook Configurator is selected in the Select Profile window and click on OK.
Outlook 2013 loads your data for the first time. This process can take a few minutes, depending on how many emails, calendars and contacts are stored in your account. Even after the Outlook interface is launched, the software is still reloading data in the background. The complete synchronization may well take several hours.