
If you’re on Windows 10 and your Wi-Fi is slow or goes on and off from time to time, you’re not alone. Many HP laptop users are reporting this problem as well. But don’t worry – it’s not a hard problem to fix.
Here are 4 fixes for you to try. You may not need to try them all; just work your way down the list until you find the one that works for you.
Step 1: Reinstall Wireless Adapter Driver
Step 2: Update Wireless Adapter Driver
Step 3: Check and Reset Hardware Settings
Final Option: Refresh or Reset Windows 10
To start off, if you have not yet performed automatic troubleshooting to look into the problem, you should do that right away.
Run Auto Network Troubleshooter
There are two ways you can launch the Auto Network Troubleshooter:
Way 1 – Run Auto Network Troubleshooter from the Settings app
Way 2 – Run Auto Network Troubleshooter from the elevated Command Prompt
Way 1 – Run Auto Network Troubleshooter from the Settings app
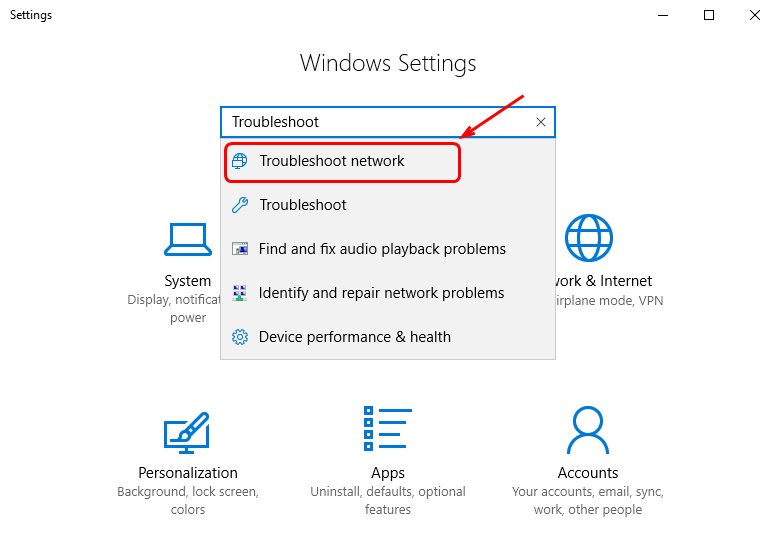
1) On your keyboard, press the Windows logo key and X at the same time, then choose Settings.
2) In the search box, type in Troubleshoot and choose Troubleshoot network.
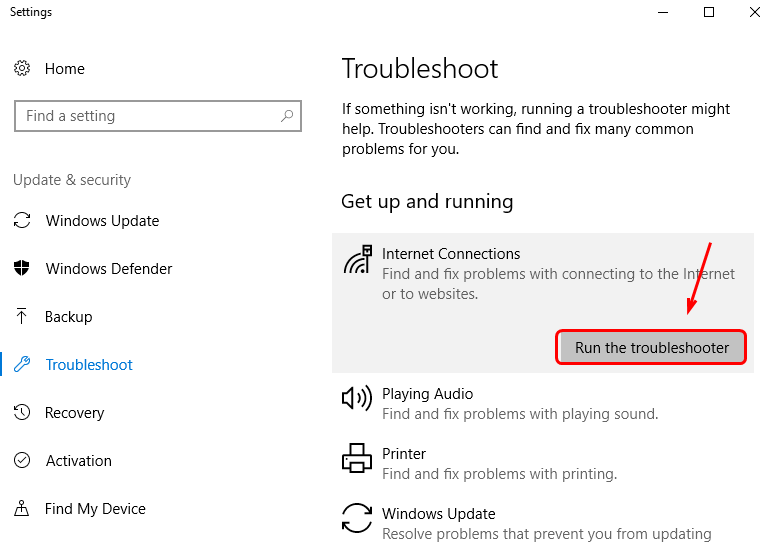
3) On the right side of the pane, click Run the troubleshooter under Internet Connections.
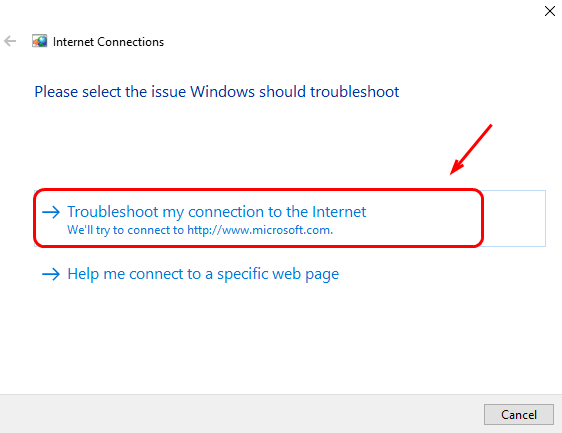
4) Select Troubleshoot my connection to the Internet.
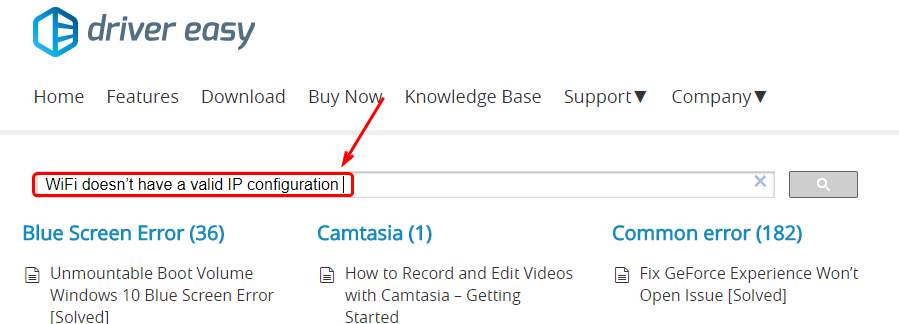
5) When the automatic troubleshooter finishes running the procedure, you will be able to see certain error notifications. For instance:
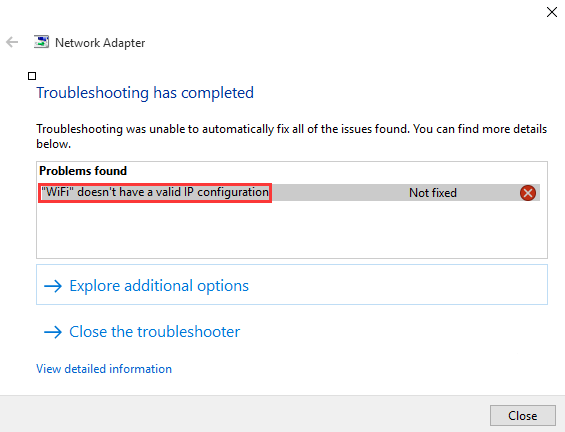
You can type the error notification you see here in our Knowledge Base and see if you can locate the exact fixes here:
If you do not see the exact notification showing on your screen, feel free to leave us a comment and we will do whatever we can to help 🙂
Way 2 – Run Auto Network Troubleshooter from the elevated Command Prompt
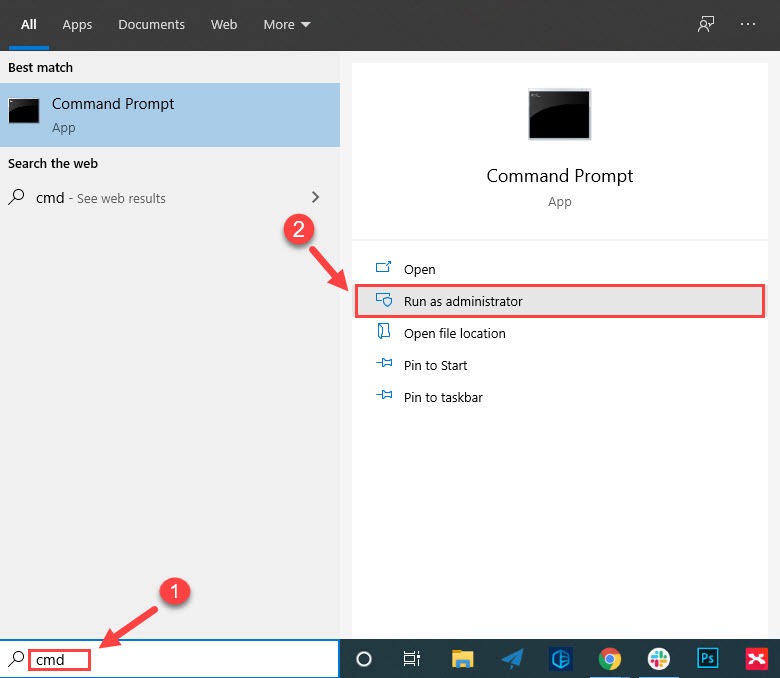
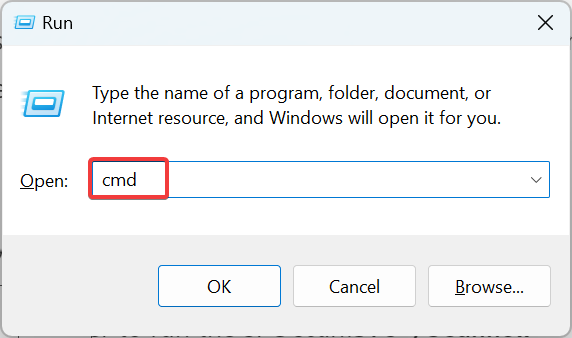
1) Type cmd in the search box on your taskbar, and select Run as administrator.
2) Copy & paste the following command line into the Command Prompt window and press Enter.
msdt.exe -id DeviceDiagnostic
3) Click Next in the popped-up window and the troubleshooter will start detecting hardware problems automatically.
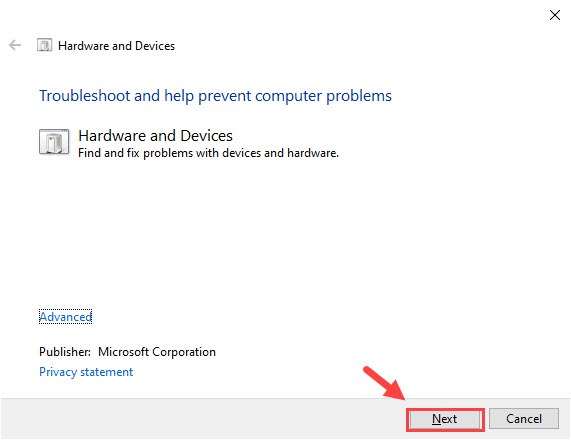
4) Wait for the troubleshooting process to complete. Then follow the onscreen instructions to fix the issue, if possible.
Step 1: Reinstall Wireless Adapter Driver
1) On your keyboard, press the Windows key and X at the same time, then choose Device Manager.
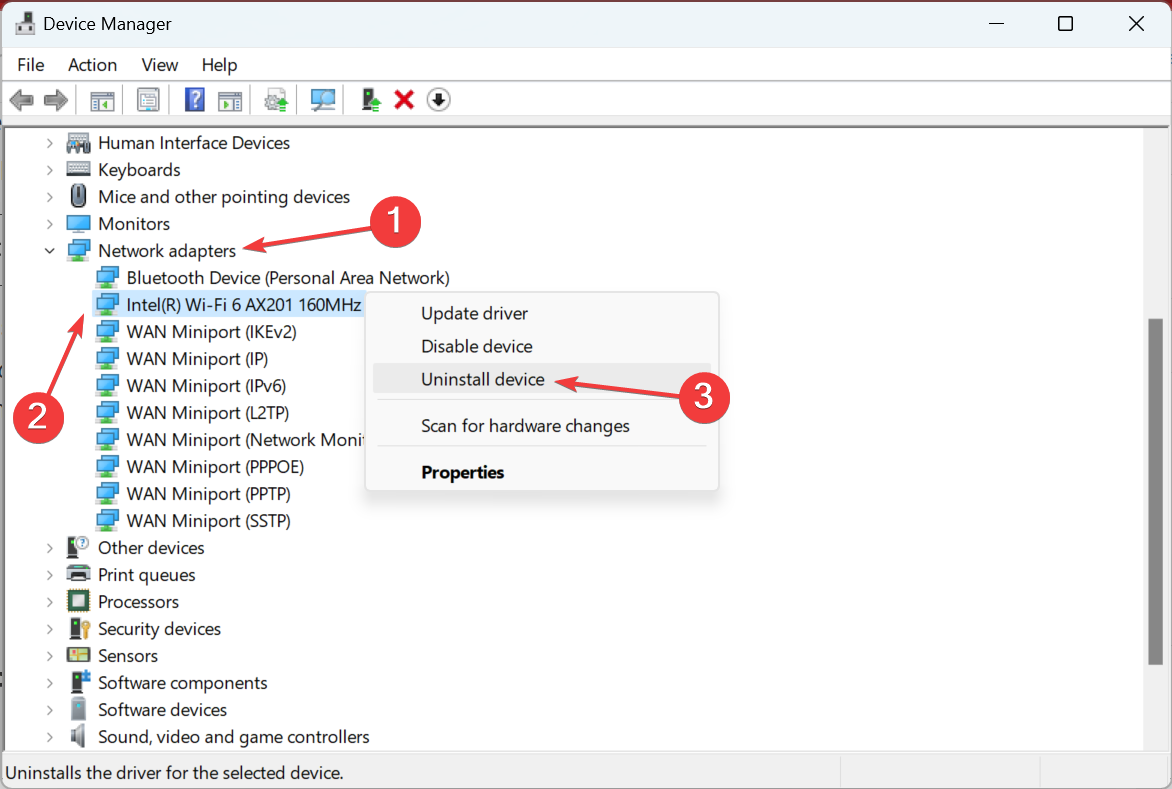
2) Locate and expand Network adapters option.
3) Then right click the wireless network adapter you have and choose Uninstall device.
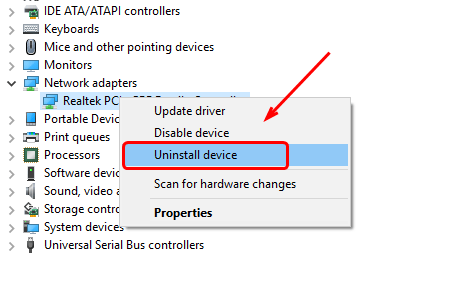
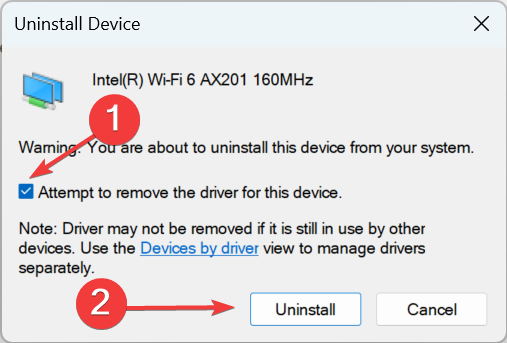
4) When the confirm window appears, hit the Uninstall button to continue.
5) Now, navigate to the top bar and click the icon for Scan for hardware changes.
6) Your HP laptop will start to reinstall the wireless network adapter driver for you. When the process finishes, close Device Manager and restart your laptop.
7) After the restart, try Wi-Fi connection again. If the problem remains, skip to Step 2.
Step 2: Update Wireless Adapter Driver
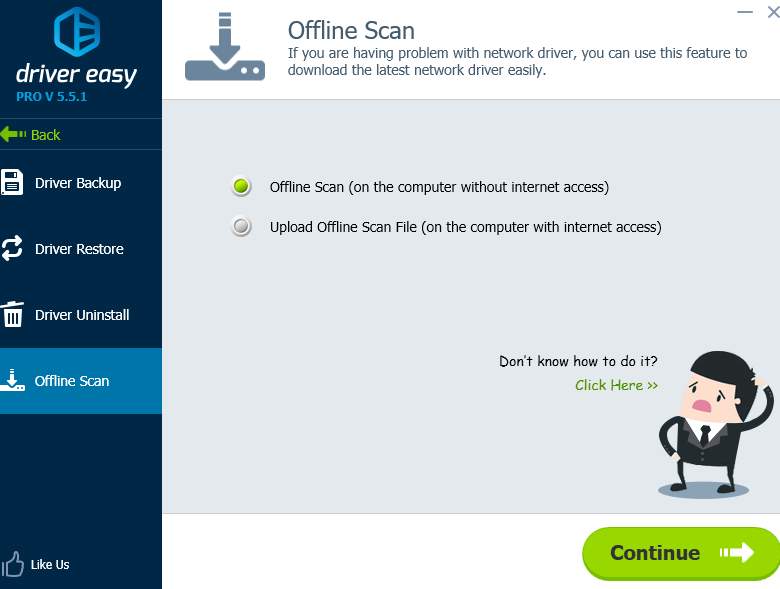
The following instructions require an workable Internet connection. We recommend you use Driver Easy Offline Scan feature to locate the correct driver for your wireless adapter first.
1) On your keyboard, press Windows key and X at the same time, then choose Device Manager.
2) Locate and expand Network adapters option.
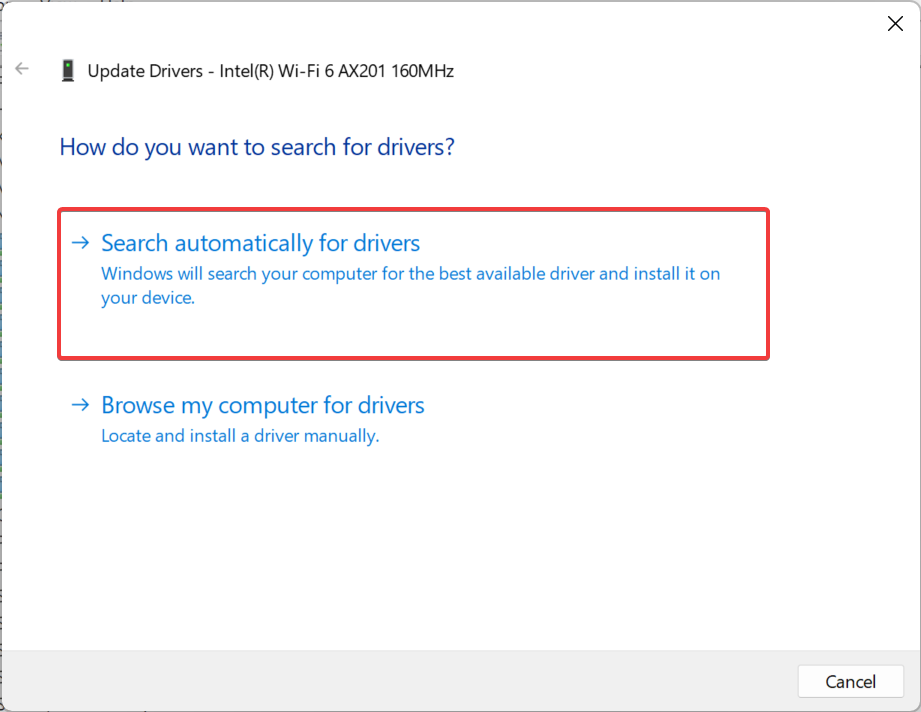
3) Then right click the wireless network adapter you have and choose Update driver.

4) Select Search automatically for updated driver software.
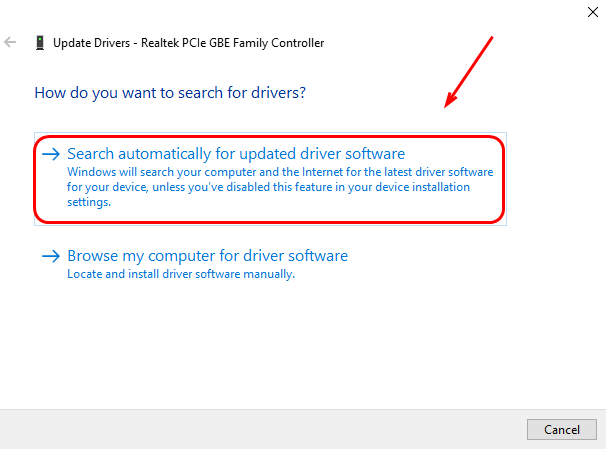
5) Your PC will start the search for you. The process could take some time.

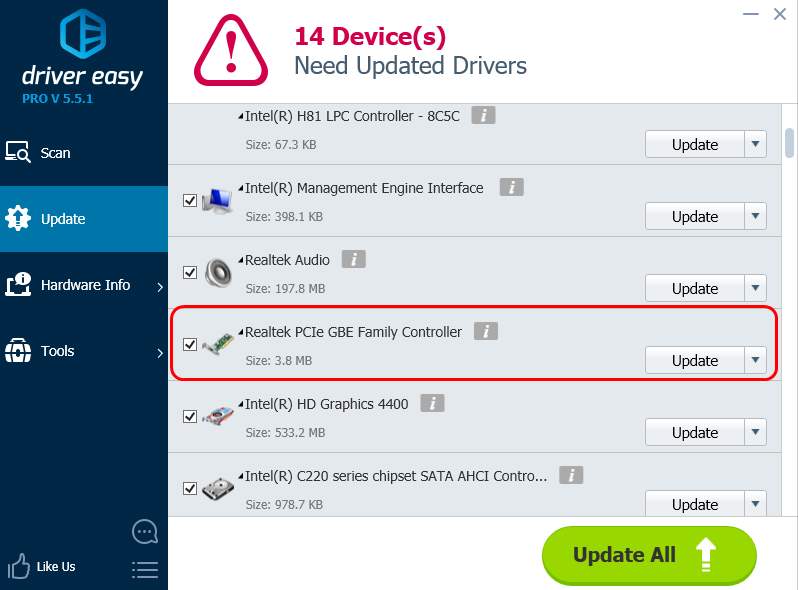
If the newer driver cannot be found in this way, it is suggested that you go to the HP website or the manufacturer of your wireless adapter (in our case, Realtek) and locate the driver by yourself.
If you are but a computer novice and have no idea how to update your Wi-Fi adapter driver, we recommend Driver Easy to you. It’s a tool that detects, downloads, and (if you go pro) installs drivers your laptop needs.
It also helps you find the correct network adapter driver with its Offline Scan feature.
With Driver Easy, the process of updating the driver narrows down to only two clicks: first on the Scan Now button, second on the Update button. The correct driver will be downloaded and you can install them as you want – either manually via Windows or automatically with Driver Easy Pro.
If you need assistance, please contact Driver Easy’s support team at support@drivereasy.com.
Step 3: Check and Rest Hardware Settings
1) Turn off your laptop first. Disconnect all peripheral devices, such as printers, keyboards, mice, and a second monitor. Unplug the AC adapter. Then, remove the battery.
2) Press the power button on your laptop for at least 15 seconds.
3) Unplug the power cord for your wireless router or modem. If your network includes a separate broadband modem, unplug its power cord as well.
4) Wait for 5 seconds, then plug the cord(s) back. The light should be all on. If only the power light is on and the Internet light blinks on and off, there might be some problem with the ISP (Internet Service Provider) and you may need to contact them for greater details.
5) Insert the battery in your laptop and plug in the AC adapter. Do not plug in the external devices just yet.
6) Power on your laptop. Use the arrow key to choose Start Windows Normally and hit the Enter key.
7) When you log into the desktop normally, right-click the network icon on the tray section and choose Open Network and Sharing Center.
 Then choose Change adapter settings.
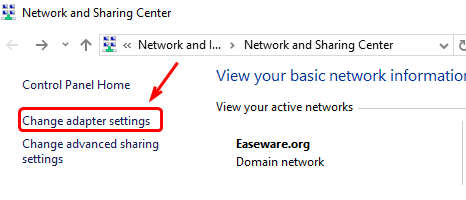
9) Check the status of your network connection. If you see the status of it is Disable, right-click your wireless connection and choose Enable.
Final Option: Refresh or Reset Windows 10
If your laptop was able to connect to your wireless network just fine, but not now, you may need to consider restoring your Windows 10, back to the date when wireless networking was working well.
For more detailed instructions, you can check the post below:
How to reset & refresh Windows 10?
Hopefully, this post helped you resolve the issue. If you have any further questions or ideas, please feel free to leave a comment below. Thanks for reading!
Если вы столкнулись с тем, что Wi-Fi постоянно отключается на ноутбуке через разные промежутки времени, обычно можно сравнительно легко разобраться, почему это происходит и решить проблему.
В этой инструкции подробно о том, по каким причинам может отключаться Wi-Fi на ноутбуке и как это исправить. Также может быть полезным: Что делать, если не работает Wi-Fi на ноутбуке.
- Определяем, где искать проблему
- Исправление отключения Wi-Fi на ноутбуке
- Если причина со стороны роутера или провайдера
Определяем, где искать причины проблемы
Прежде всего рекомендую определить, где именно проблема: в вашем ноутбуке или с самой сетью Wi-Fi, а возможно — с роутером или со стороны Интернет-провайдера. Для этого обратите внимание на следующие моменты:
- Продолжает ли работать подключение по Wi-Fi и Интернет в эти же моменты на других устройствах, желательно физически расположенных там же, где и ноутбук. Если на других устройствах всё в порядке, велика вероятность, что дело все-таки в ноутбуке. Если и на других устройствах Интернет по Wi-Fi пропадает, дело либо в роутере (а также ряде других факторов, которые мы тоже рассмотрим), либо со стороны провайдера.
- Пропадает подключение Wi-Fi (то есть требуется заново выбирать сеть и подключаться к ней) или подключение по Wi-Fi остается активным, но пропадает доступ к Интернету? Если первый вариант и на всех устройствах, явно дело в роутере, его расположении или соседских сетях. Если второй и на всех устройствах, то проблема может быть в роутере, кабеле провайдера или со стороны оборудования провайдера.
В действительности, возможны разные варианты, но имея предположения о том, где именно проблема, того, что отключается Wi-Fi или Интернет по беспроводной сети, можно в первую очередь обратить внимание на основные для этого устройства (ноутбука или Wi-Fi роутера) моменты, а если они не помогли — переходить к следующим вариантам решения. Если описанное выше показалось вам слишком сложным, можете просто пропустить эти моменты и выполнять далее описанные действия по порядку: они расположены от простых к сложным и от более эффективных методов решения проблемы к более редко встречающимся.
Прежде чем начать, еще один нюанс: если отключение Wi-Fi на ноутбуке происходит в моменты высокой активности на других подключенных к роутеру устройствах — телефонах, компьютерах, игровых консолях (загружаются объемные файлы, особенно через торрент, выполняется просмотр онлайн видео и подобное), то причина может быть в том, что роутер не справляется с нагрузкой — случается для недорогих массовых моделей.
Исправление отключения Wi-Fi на ноутбуке
В случае, если мы предполагаем, что проблема со стороны ноутбука, то мы можем предпринять следующие действия, в зависимости от ситуации.
Если отключается Wi-Fi подключение — происходит обрыв связи с роутером и нужно заново подключаться к беспроводной сети
В описанном сценарии возможны простые причины проблемы:
- Расположение Wi-Fi роутера, не позволяющее обеспечить уверенный прием сигнала. Наличие металлических или железобетонных конструкций, электросетей между ноутбуком и роутером.
- Влияние беспроводных сетей соседей и другие помехи.
Чтобы разобраться, в этом ли причина, по возможности попробуйте проверить, а будет ли проблема появляться снова, если работать за ноутбуком в прямой видимости от роутера. Если при этом проблема исчезла, можно попробовать изменить расположение беспроводного маршрутизатора. Также можно попробовать выбрать свободный канал Wi-Fi на роутере в случае, если вы «видите» много сетей соседей.
Если зависимости от расположения ноутбука нет, а проблем с Wi-Fi роутером мы не предполагаем, на ноутбуке попробуйте сделать следующее:
- Если вы вручную не устанавливали драйверов Wi-Fi для вашего ноутбука, найдите сайт производителя вашего ноутбука и в разделе «Поддержка» скачайте драйверы беспроводного адаптера именно для вашей модели, а затем установите их. Если на официальном сайте есть драйверы не для той версии Windows (а только для более старой или наоборот), что у вас установлена, все равно попробуйте их установить — как правило, они работают.
- Зайдите в диспетчер устройств (для этого можно нажать клавиши Win+R на клавиатуре, ввести devmgmt.msc и нажать Enter), затем в разделе «Сетевые адаптеры» найдите ваш Wi-Fi адаптер (обычно имеет слова Wi-Fi или Wireless в названии) и дважды нажмите по нему.
- На вкладке «Электропитание» отключите пункт «Разрешить отключение этого устройства для экономии энергии» и примените настройки.

- Зайдите в Панель управления и откройте пункт «Электропитание» (либо нажмите по значку батареи в области уведомлений и выберите аналогичный пункт). Напротив выбранной схемы электропитания нажмите «Настройка схемы электропитания».

- В следующем окне нажмите «Изменить дополнительные параметры питания».

- В параметрах адаптера беспроводной сети в пункте «Режим энергосбережения» установите «Максимальная производительность» и примените настройки.

- Если у вас Windows 10 или 8.1, а проблема появляется только после режима сна или после «завершения работы» через меню Пуск, но не появляется сразу после перезагрузки, отключите гибернацию.
- В случае, если Wi-Fi отключается на всех устройствах при подключении какого-то одного конкретного устройства, попробуйте найти параметр WMM в дополнительных настройках беспроводной сети в веб-интерфейсе Wi-Fi роутера и отключить его.


По завершении описанных действий понаблюдайте, продолжает ли появляться проблем с отключением Wi-Fi снова.
В случае, если Wi-Fi сеть остается активной, но пропадает доступ в Интернет
В указанном сценарии в первую очередь попробуйте установить официальные драйверы Wi-Fi адаптера, как в первом пункте предыдущего раздела, затем — отключить любые сторонние антивирусы, если используются — то сервисы VPN, а также отключить прокси. Затем также наблюдаем за поведением сети.
Если отключения продолжаются, попробуйте скачать утилиту AdwCleaner с официального сайта https://ru.malwarebytes.com/adwcleaner/, установить в параметрах утилиты настройки как на скриншоте ниже, а затем запустить сканирование и очистку системы.

После выполнения сканирования, очистки и перезагрузки компьютера проверьте, решена ли проблема. Если на вашем компьютере установлена Windows 10, попробуйте также сбросить параметры сети.
Отключения происходят по вине Wi-Fi роутера или провайдера
Когда проблема наблюдается со стороны роутера или провайдера, то отключения будут происходить не только на ноутубке, но и на телефоне и других устройствах. Но на телефоне это может быть незаметно, если он автоматически переключается на мобильную сеть. Что может быть причиной на уровне роутера:
- Проблемы с электропитанием (плохое подключение кабеля питания, его повреждения, неродной или неисправный блок питания).
- Если сеть Wi-Fi остается активной, но пропадает доступ в Интернет, причиной может оказаться плохое подключение сетевого кабеля провайдера или его повреждение.
- Сильный перегрев, аппаратная неисправность Wi-Fi роутера.
- Проблемы с прошивкой роутера. В этом случае имеет смысл зайти в настройки роутера и проверить, доступны ли новые прошивки (как правило, современные роутеры умеют сами проверять их наличие и устанавливать).
- Бывают и особенные (но не слишком редкие) случаи: например, внутри роутера поселяются домашние насекомые и в ходе своей жизнедеятельности устраивают замыкания.
Во всех случаях разобраться может помочь следующий простой метод (если отключение Wi-Fi происходит достаточно часто): работаем в Интернете и наблюдаем за индикаторами сети Интернет, Wi-Fi, локальной сети и питания на роутере. Если при обрыве:
- Гаснут все индикаторы — видимо, что-то с питанием или аппаратная неисправность. Иногда — сбои работы, вызванные прошивкой с ошибками.
- Пропадают индикаторы Интернет-подключения или подключения кабеля провайдера — проблемы с кабелем, что-то не так со стороны провайдера, в редких случаях — что-то не так с прошивкой. Иногда что-то не так с настройками Интернет-подключения на роутере.
- Гаснет индикатор Wi-Fi — что-то странное, вероятнее всего аппаратное или проблемы с прошивкой.
При условии, что все варианты исключены, существует вероятность тех или иных проблем со стороны вашего провайдера Интернета (на роутере в этом случае увидим отключение Интернет-соединения при активном Wi-Fi). Если они появились совсем недавно, возможно, выполняются какие-то работы по обслуживания и скоро отключение Wi-Fi на ноутбуке разрешится само собой.
Если же проблема наблюдается давно, но у других жителей дома всё работает исправно, еще раз перепроверьте все настройки вашего Wi-Fi роутера и сверьте их с параметрами, предлагаемыми провайдером, попробуйте изменить адрес LAN в настройках роутера (с 192.168.1.1 на 192.168.0.1 или наоборот, зависимости от текущего — проблема возможна, когда адреса оборудования провайдера и вашего роутера совпадают), убедитесь в исправности Интернет-кабеля провайдера по всей его длине. При наличии возможности также проверьте, будут ли происходить отключения при использовании другого Wi-Fi роутера.
И, конечно, вы можете, по возможности максимально подробно и по пунктам описать, как именно отключается Wi-Fi на ноутбуке в вашем случае ниже в комментариях, описать поведение других устройств и, возможно, какие-то закономерности, а я постараюсь помочь.
1185678
Если Wi-Fi все таки заработал после установки, переустановки, или обновления до Windows 10, то не всегда он работает стабильно. И часто бывает, когда подключение по Wi-Fi в Windows 10 просто отключается. Например, когда подключение к Wi-Fi держится несколько минут, и просто обрывается. Или пропадаете подключение в момент какой-то нагрузки: онлайн игра, торрент, просмотр видео и т. д.
Эта статья будет посвящена именно проблеме нестабильной работы Wi-Fi сети в Windows 10, когда подключение все время обрывается, и приходится заново подключать свой ноутбук к беспроводной Wi-Fi сети. Если вы вообще не можете подключится к беспроводной сети, то возможно вам пригодится статья как включить Wi-Fi в Windows 10, когда нет кнопки Wi-Fi. Или универсальная статья с решением практически всех проблем, и ответом на вопрос что делать, если не работает Wi-Fi на ноутбуке.
Что касается Windows 10, то проблем с Wi-Fi там хватает. И как правило, все они вызваны отсутствием драйверов. Точнее, стабильных и рабочих драйверов. Конечно же, не редко виновата сама «десятка», точка доступа, или еще что-то. Если проблема с отсутствием доступа к интернету, когда ошибка «Подключение ограничено», то в этом случае хотя бы еще понятно, из-за чего может возникнуть ошибка, и как ее решить. А вот когда интернет после подключения работает несколько минут, и периодически обрывается подключение по Wi-Fi, ноутбук вообще отключается от Wi-Fi сети, или переходит в статус «без доступа к интернету», то здесь уже намного сложнее. В данном случае не ясно из-за чего это происходит, не говоря уже о решениях.
Именно в этой статье мы постараемся собрать рекомендации, которые помогут наладить стабильную работу Wi-Fi сети в Windows 10.
Пропадает Wi-Fi на ноутбуке с Windows 10. Решение №1
Решением, о котором я напишу ниже, поделился Александр в комментариях к одной из статей на этом сайте. У него Wi-Fi отваливался в играх, на ноутбуке Аcer. Там же в комментариях, Павел проверил этот способ, и у него беспроводное подключение вроде бы начало работать стабильно, и перестало обрываться.
Вот этот комментарий:

Нужно в свойствах своей сети поставить галочку возле пункта «Подключаться, даже если сеть не ведет вещание своего имени (SSID)». Именно эта настройка помогла решить проблему с обрывами подключения к интернету.
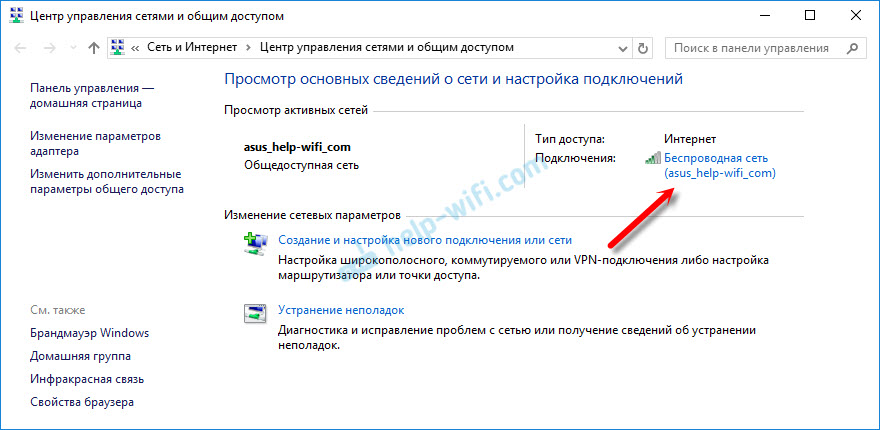
Зайдите в «Центр управления сетями и общим доступом».
Обновление: в новых версиях Windows 10 (после обновления) центр управления сетями открывается иначе. Информация здесь: Куда пропал «Центр управления сетями и общим доступом» в Windows 10.

Дальше нажмите на свою Wi-Fi сеть. Выглядит это примерно вот так:
В новом окне нажмите на кнопку «Свойства беспроводной сети». Поставьте галочку возле пункта «Подключаться, даже если сеть не ведет вещание своего имени (SSID)», и нажмите «Ok».
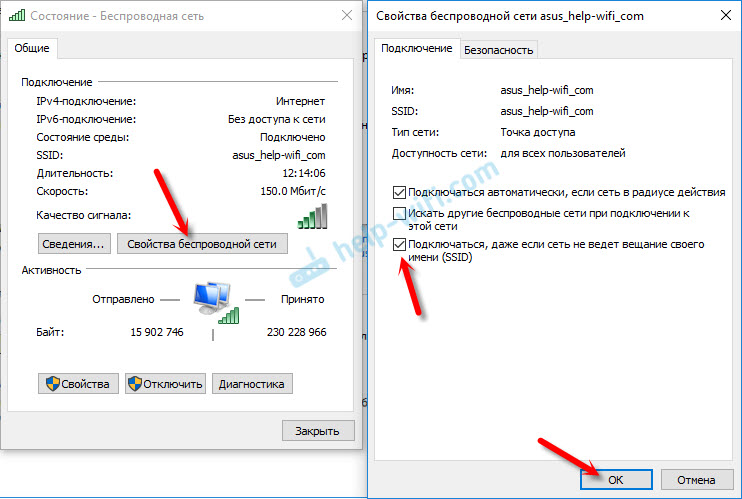
После этих действий перезагрузите ноутбук. Возможно, беспроводная сеть после этого заработает стабильно, и подключение по Wi-Fi отключатся не будет.
В том случае, если проблема останется, можете попробовать обновить, переустановить, откатить, или удалить драйвер Wi-Fi адаптера. У нас есть отдельная статья по этой теме: https://help-wifi.com/reshenie-problem-i-oshibok/reshenie-problem-s-drajverom-besprovodnogo-wi-fi-adaptera-v-windows-10/
Обновление: в комментариях уже несколько раз поделились решением, которое помогло решить проблему с нестабильным подключением к Wi-Fi в Windows 10.
Нужно в диспетчере устройств отключить Microsoft Wi-Fi Direct Virtual Adapter (Виртуальный адаптер Wi-Fi Direct (Майкрософт)) и/или Microsoft Hosted Network Virtual Adapter (если он есть). Эти адаптеры нужны для раздачи Wi-Fi с компьютера. Если вы не пользуетесь этой функцией, то можете их отключить.

После отключения нужно перезагрузить компьютер.
Подробнее в статье: Microsoft Wi-Fi Direct Virtual Adapter: что это, драйвер, как включить, отключить, удалить?
Обновление: отключите защитник Windows. В комментариях есть отзывы, что это помогло решить проблему с отключением Wi-Fi в Windows 10.
Если вам известны другие решения этой проблемы, то прошу вас поделится этой информацией в комментария. Так же можете написать, помог вам описанный выше способ, или нет.
Did you just buy a brand new HP laptop but it is not detecting Wi-Fi? No need to panic! It is a common problem which many Hewlett Packard (HP) users have faced and is quickly fixable. This issue may arise in your old HP laptops too. Thus, we decided to compile this troubleshooting guide for our beloved readers using Windows 10 HP laptops. Implement these tried and tested methods to get resolution for HP laptop not connecting to Wi-Fi error. Make sure to follow the solution corresponding to the relevant reason for this problem. So, shall we begin?

Table of Contents
How to Fix Windows 10 HP Laptop Not Connecting to Wi-Fi Issue
There are numerous reasons why you may not be able to connect to your wireless connection, such as:
- Outdated Network Drivers – When we forget to update our network drivers or run drivers that are incompatible with the current system, this issue may arise.
- Corrupt/ Incompatible Windows – If the current Windows operating system is corrupt or incompatible with Wi-Fi network drivers, then the said issue might occur.
- Incorrect System Settings – Sometimes, HP laptops not detecting Wi-Fi issue occurs due to incorrect system settings. For instance, if your system is on Power Saving Mode, it would disallow any wireless connection from connecting to the device.
- Improper Network Settings – You may have entered an incorrect password while connecting to your wireless network. Also, even minute changes in proxy address can cause this problem.
Method 1: Run Windows Troubleshooter
The basic troubleshooting tools provided in Windows 10 can resolve most issues.
1. Press the Windows key and click on the gear icon to open Windows Settings.
2. Click on Update & Security, as shown.

3. Now, click on Troubleshoot in the left panel. Then, click on Additional Troubleshooters in the right panel, as depicted below.

4. Next, select Internet Connections and click Run the troubleshooter.

Windows will find and fix problems with internet connectivity automatically.
Also Read: How to Limit Internet Speed or Bandwidth of WiFi Users
Method 2: Update Windows
Your laptop might just be running on an outdated window, which does not support your current wireless connection causing HP laptop not connecting to Wi-Fi on Windows 10 issue. Keeping Windows OS & apps updated should be a part of your usual routine to avoid common glitches & errors.
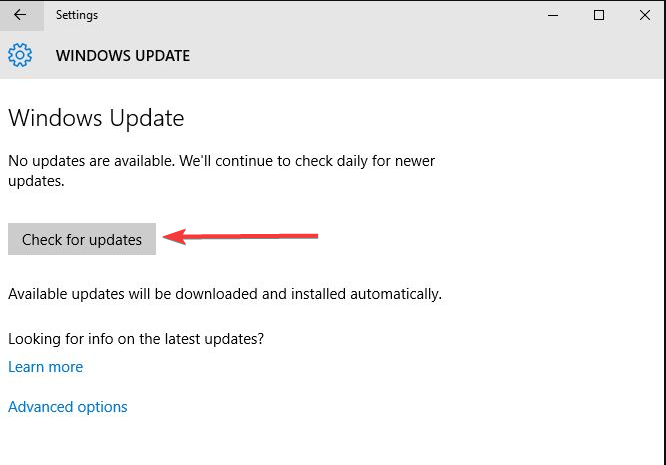
1. Hit the Windows key and type Windows Update Settings, then click on Open.

2. Here, click on Check for updates.

3A. Download & Install the updates, if available.

3B. If your system has no pending update, then the screen will display You’re up to date, as shown.

Method 3: Change Wi-Fi Proxy Settings
Often, the wrong network settings of the router or laptop may cause HP laptop not connecting to Wi-Fi problem.
Note: These settings do not apply to VPN connections.
1. Click on Windows Search Bar and type proxy setting. Then, hit Enter to open it.

2. Here, set the proxy settings accordingly. Or, toggle on Automatically detect settings option as it will automatically add the required settings.

3. Restart Wi-Fi router and laptop. This would aid your laptop in providing the correct proxy to your router. In turn, the router would be able to provide the laptop with a strong connection. Thereby, solving issues in input settings if any.
Also Read: Fix Windows could not automatically detect this Network’s Proxy settings
Method 4: Turn Off Battery Saver Mode
To connect to and run Wi-Fi successfully, it is important for the system to be fully functional. At times, certain settings like battery saver may trigger HP laptop not connecting to Hilton Honors Wi-Fi issue.
1. Press Windows + I keys simultaneously to open Windows Settings.
2. Click on System, as highlighted below.

3. Click on Battery in the left pane.
4. Here, toggle off the option titled To get more from your battery when it’s running low, limit notifications and background activity.

Method 5: Disable Power Saver for Wireless Adapter
Sometimes, Windows automatically enables the Power Savings mode for network adapter to save power during instances of low-battery. This will cause the wireless adapter to turn off and lead to HP laptop not connecting to Wi-Fi issue.
Note: This method will only work if Power Saving for Wi-Fi is turned on, by default.
1. Right-click on the Start icon and select Network Connections, as shown.
2. Click on Change adapter options under Change your network settings.

3. Next, right-click on Wi-Fi, and then select Properties.

4. In the Wi-Fi Properties windows, click on Configure… button as shown.

5. Switch to the Power Management tab
6. Uncheck the box next to Allow the computer to turn off this device to save power option. Click OK to save changes.

Method 6: Reset Network Settings
Usually, resetting the network settings will resolve HP laptop not connecting to Wi-Fi issue, as follows:
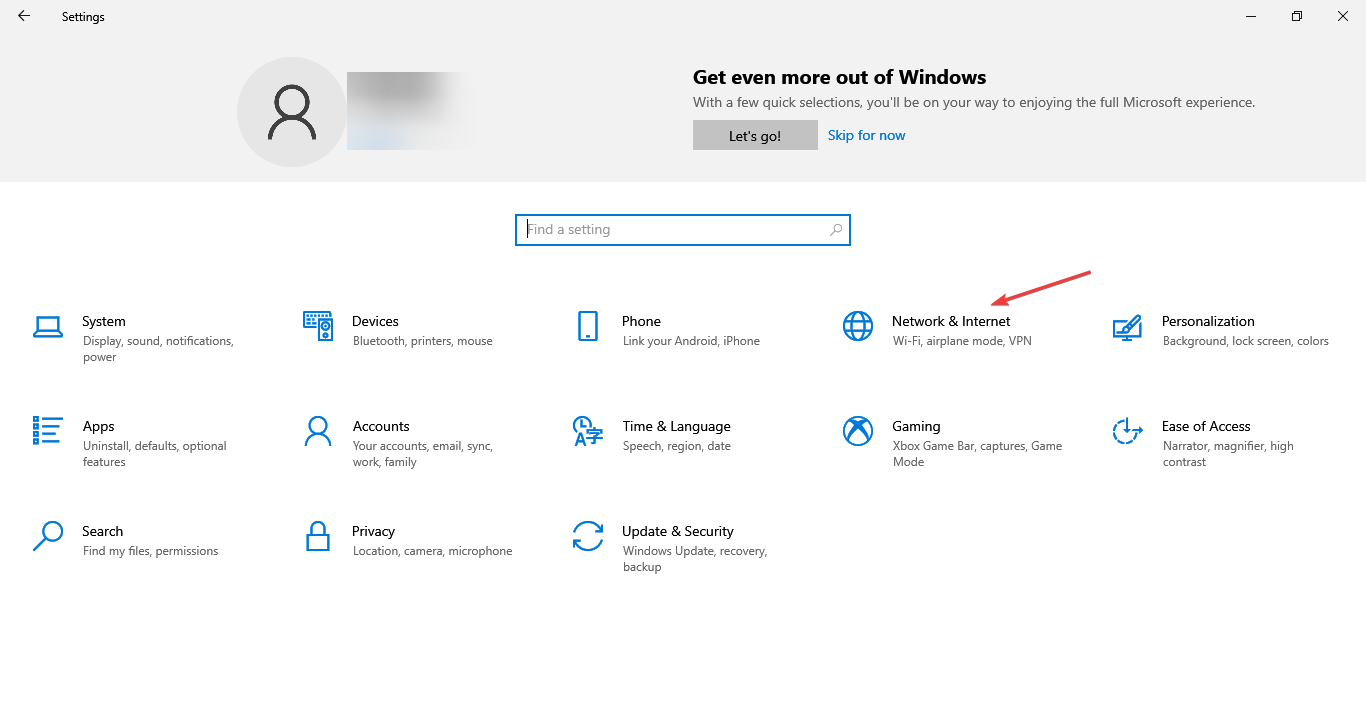
1. Press Windows + I keys together to open Windows Settings.
2. Click on Network & Internet option, as highlighted.

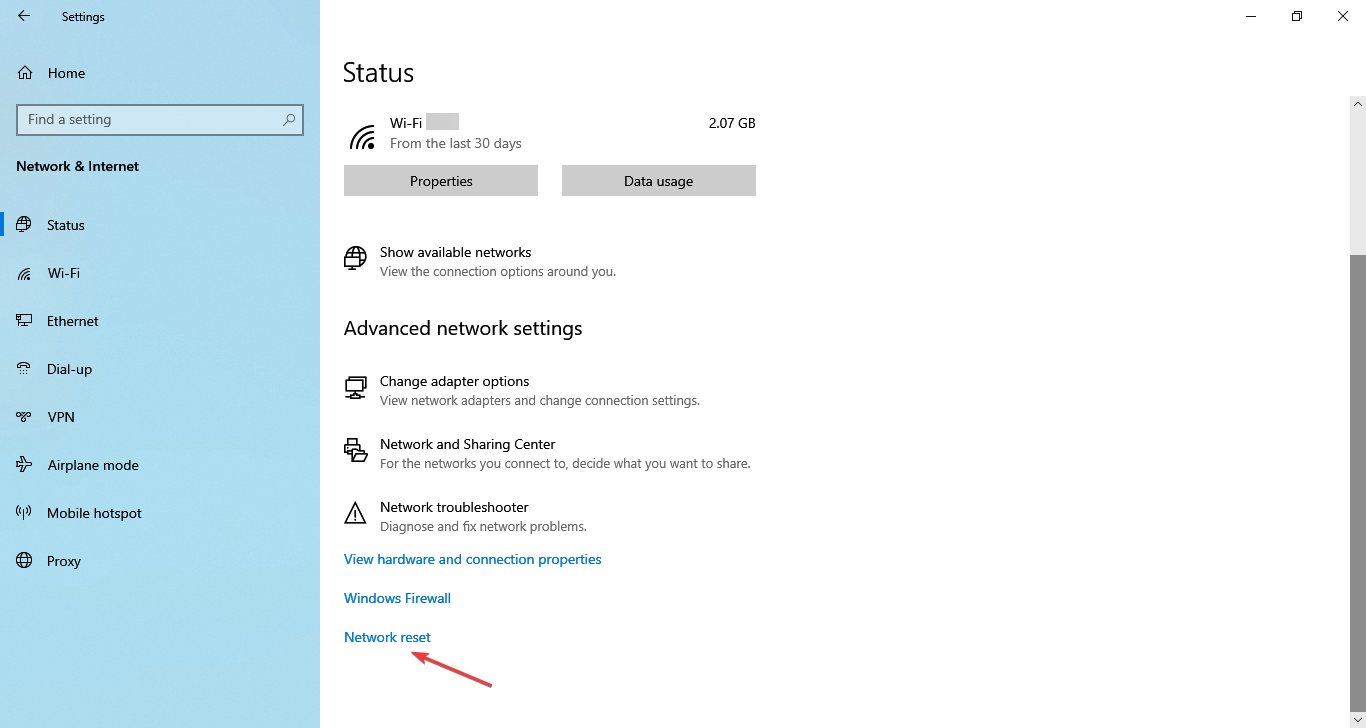
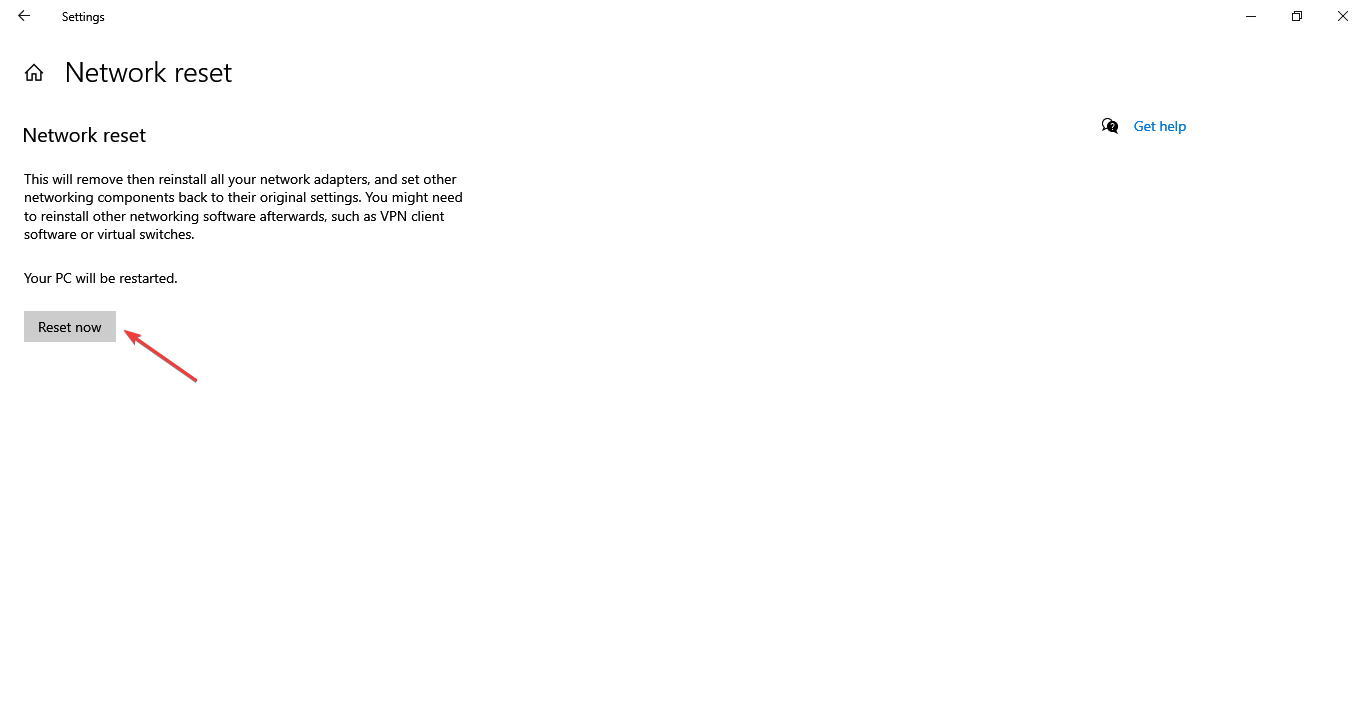
3. Scroll down and click on Network reset at the bottom of the screen.

4. Next, click Reset now.

5. Once the process is completed successfully, your Windows 10 PC will restart.
Method 7: Reset IP Configuration & Windows Sockets
By entering some basic commands in Command Prompt, you will be able to reset IP Configuration and connect to Wi-Fi without any problems.
1. Press Windows key and type cmd. Press Enter key to launch Command Prompt.

2. Execute the following commands by typing and hitting Enter after each:
netsh winsock reset
netsh int ip reset
ipconfig /release
ipconfig /renew
ipconfig /flushdns

This will reset network and Windows sockets.
3. Restart your Windows 10 HP laptop.
Also Read: WiFi doesn’t have a valid IP configuration error? 10 Ways to Fix it!
Method 8: Reset TCP/IP Autotuning
If none of the above methods worked for you, then try resetting the IP Autotuning, as explained below:
1. Click on Windows Search Bar and type cmd. Then, click Run as administrator.

2. Execute the given commands in Command Prompt, as earlier:
netsh int tcp set heuristics disabled
netsh int tcp set global autotuninglevel=disabled
netsh int tcp set global rss=enabled

3. Now, type the command: netsh int tcp show global and hit Enter. This will confirm whether the previous commands for disabling auto-tuning were completed successfully or not.
4. Restart your system and check if the issue is resolved. If not, try the next fix.
Also Read: Windows could not find a Driver for your Network Adapter [SOLVED]
Method 9: Update Network Driver
Update your network driver to fix HP laptop not connecting to Wi-Fi issue. Follow the below-mentioned steps to do so:
1. Go to Windows Search Bar and type device manager. Then, click Open, as shown.

2. Double-click on Network adapters to expand it.
3. Right-click on your wireless network driver (e.g. Qualcomm Atheros QCA9377 Wireless Network Adapter) and select Update driver, as depicted below.

4. Next, click on Search automatically for drivers to automatically download and install the best available driver.

5A. Now, the drivers will update and install to the latest version, if they are not updated.
5B. If they are already in an updated stage, the message saying The best drivers for your device are already installed will be shown.
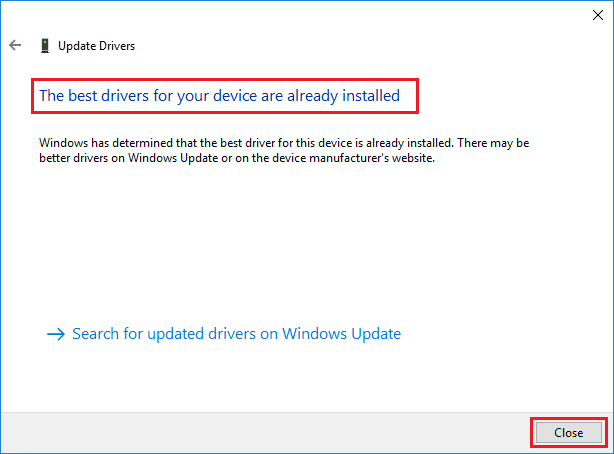
6. Click on the Close button to exit the window and restart your PC.
Method 10: Disable Microsoft Wi-Fi Direct Virtual Adapter
Read our guide on How to Disable WiFi Direct in Windows 10 here.
Method 11: Reinstall Wireless Network Adapter Driver
There are two methods available to HP users to fix Windows 10 HP laptop not detecting Wi-Fi or No WiFi networks found problem by reinstalling network drivers.
Method 11A: Through Device Manager
1. Launch Device Manager and navigate to Network adapters as per Method 9.
2. Right-click on your wireless network driver (e.g. Qualcomm Atheros QCA9377 Wireless Network Adapter) and select Uninstall device, as depicted below.

3. Confirm the prompt by clicking on the Uninstall button after checking Delete the driver software for this device option.

4. Go to the HP official website.
5A. Here, click on the Let HP detect your product button to allow it to suggest driver downloads automatically.

5B. Alternatively, Enter your laptop serial number and click on Submit.

6. Now, select your Operating System and click Driver-Network.
7. Click on the Download button with respect to the Network driver.

8. Now, go to the Downloads folder to run .exe fileto install the downloaded driver.
Method 11B: Through HP Recovery Manager
1. Go to Start Menu and search for HP Recovery Manager, as shown below. Press Enter to open it.

2. Allow the device to make changes to your computer.
3. Click on the Reinstall drivers and/ or applications option.

4. Then, click on Continue.

5. Check the box for suitable wireless network driver (e.g. HP Wireless Button Driver) and click on Install.

6. Restart your PC after installing the driver. You should no longer face issues with Wi-Fi connectivity.
Recommended:
- How to Remove Duplicate Files in Google Drive
- How to Increase Volume on Windows 10
- How to Increase WiFi Internet Speed on Windows 10
- Why Windows 10 Sucks?
In the age of pandemic, all of us have been working or studying from our homes. In this article, you learnt how to fix HP laptop not detecting or connecting to Wi-Fi issue. Kindly provide us with your feedback in our comment section below. Thanks for stopping by!
Readers help support Windows Report. We may get a commission if you buy through our links.
Read our disclosure page to find out how can you help Windows Report sustain the editorial team. Read more
Different software and hardware problems can result in your HP laptop not connecting to Wi-Fi in Windows 10. Unfortunately, this has been a problem for many users of the Microsoft OS.
It means you may be blocked from using the Internet and some of your favorite online services, which can be frustrating. The problem usually arises out of the blue or after making changes to the computer, and in both cases, it’s easily fixable.
Why my HP laptop is not connecting to Wi-Fi?
We have gathered that a few things may trigger this problem on HP computers. Here are some that you should be aware of:
- Driver issues – If you run on outdated drivers, you will likely encounter this error. In most cases, you should pay attention to the wireless drivers.
- HP laptop Wi-Fi disabled – Some HP laptops have dedicated keys that enable or disable the Wi-Fi settings. You should make sure this has not been turned off.
- Hardware issues – You may also witness this problem due to a bad network card. In this case, replacing it may be the best alternative.
How can I fix an HP laptop that’s not connecting to Wi-Fi?
Before you go into any of the solutions below, we recommend trying the following quick fixes:
- Ensure the laptop is placed well within the range of the Wi-Fi router and that there are obstructions in between. Try moving it right next to the router if possible.
- Restart both the computer and the router. For the latter, keep it powered off for at least a few minutes.
- Check if there is a Wi-Fi switch on the laptop or if a keyboard shortcut that acts as one, and make sure it’s not disabled. For some devices, it’s a Function key, so check that.
- Update Windows if there’s a bug in the current version preventing the HP laptop from establishing a Wi-Fi connection.
- Verify whether the HP laptop is not connecting to any Wi-Fi network or a particular network. Because if it’s the latter, the problem may lie with the router itself, in which case resetting (or replacing) the router would be a viable solution.
If none of these work, head to the solutions listed next.
1. Scan for hardware changes
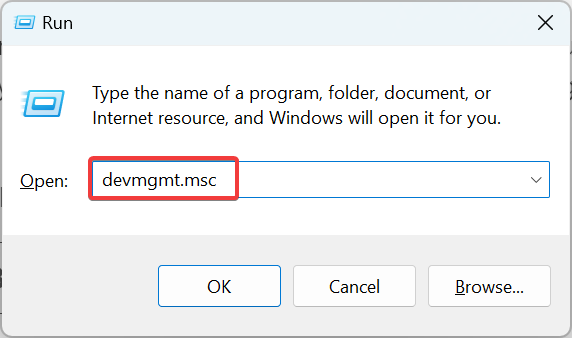
- Press Windows + R to open Run, type devmgmt.msc in the text field, and hit Enter.

- Now, click on the Action menu, and choose Scan for hardware changes from the list of options.

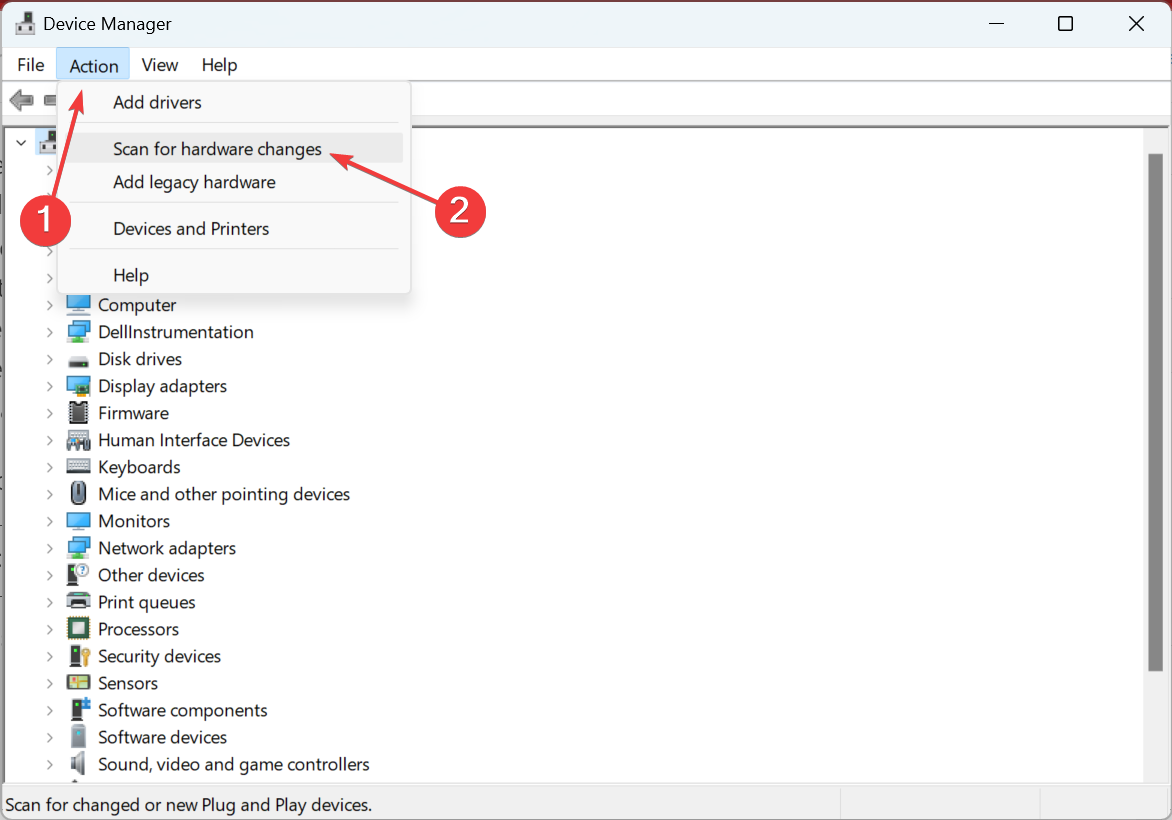
If the Wi-Fi adapter is not listed in the Device Manager and, subsequently, your HP laptop is not connecting to the Internet, scanning for hardware changes might do the trick.
2. Reinstall the Wi-Fi driver
- Press Windows + X to open the Power User menu, and choose Device Manager from the list.
- Expand Network adapters, right-click on the Wi-Fi adapter, and then choose Uninstall device from the context menu.

- Tick the checkbox for Attempt to remove the driver for this device, and then click on Uninstall.

- Once done, restart the device, and Windows will automatically install the best drivers for the Wi-Fi adapter.
Corrupt drivers are just as likely to cause issues and lead to the HP laptop not connecting to Wi-Fi. A simple fix here would be to reinstall the drivers.
3. Run the SFC scan
- Press Windows + R to open Run, type cmd, and hit Ctrl + Shift + Enter.
- Click Yes in the UAC prompt.
- Paste the following command and hit Enter to run the SFC scan:
sfc /scannow
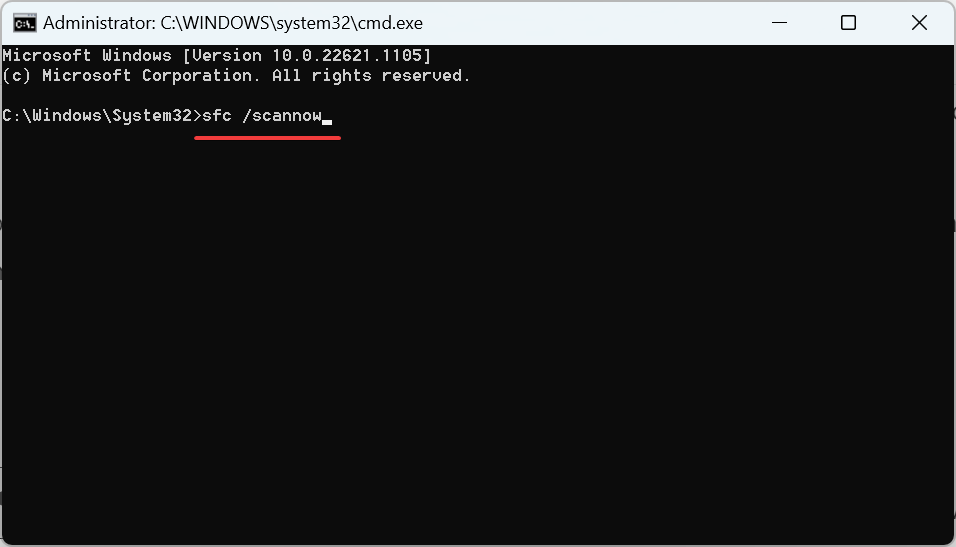
An SFC (System File Checker) scan identifies the corrupt system files and replaces them with their cached copy stored on the PC. So, if corrupt system files are why your HP laptop is not connecting to Wi-Fi, running the scan would do.
4. Modify the Power Management settings
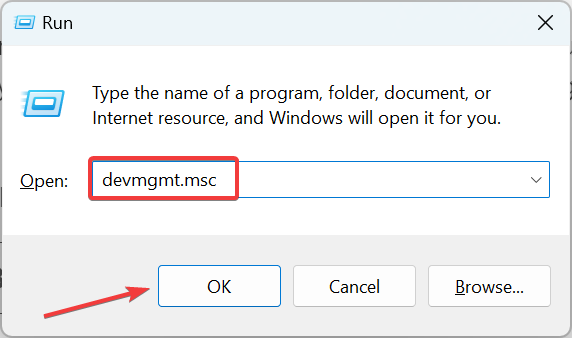
- Press Windows + R to open Run, type devmgmt.msc, and click OK.
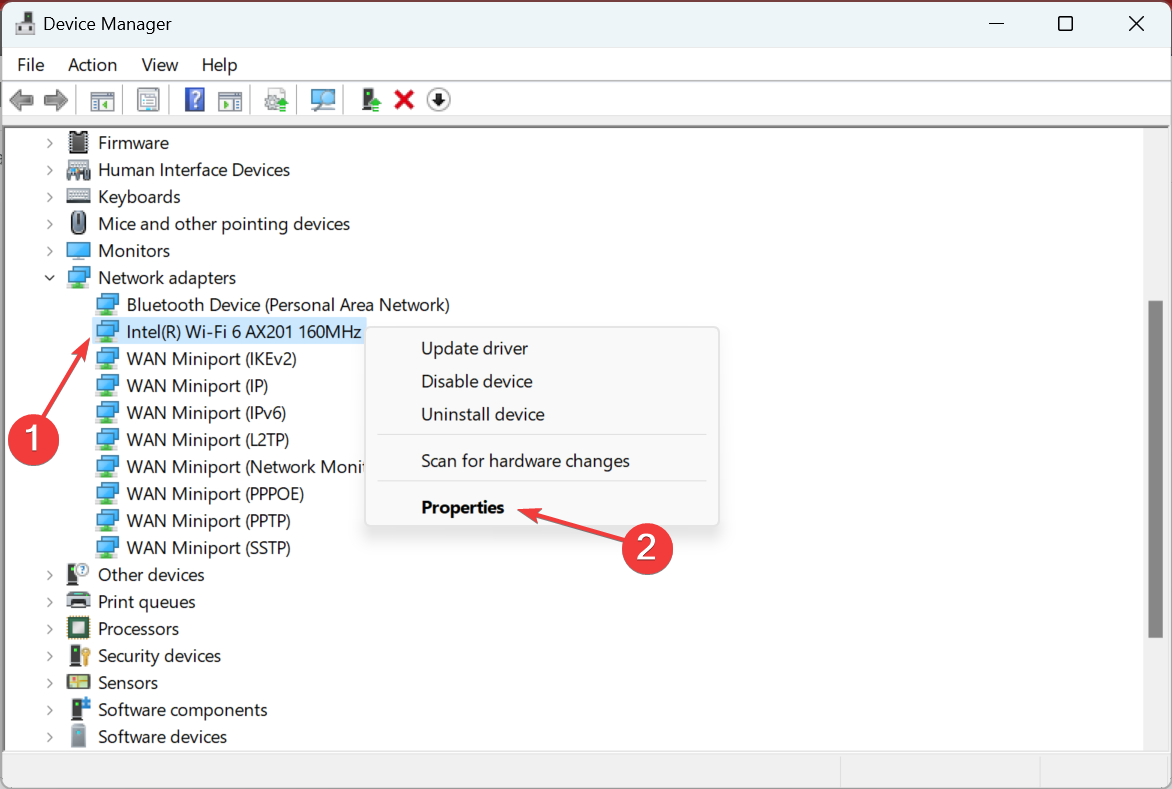
- Now, locate the Wi-Fi adapter under the Network adapters entry, right-click on it, and choose Properties.
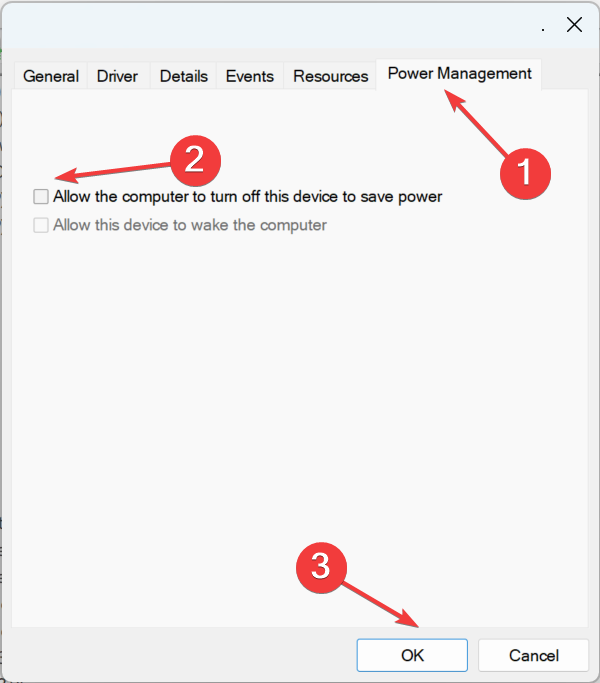
- Head to the Power Management tab, untick the checkbox for Allow the computer to turn off this device to save power, and click on OK to save the changes.

- Once done, restart the computer, and Wi-Fi should be working.
- How to Fix Errors Related to the LibGLESv2.dll File
- Omen Gaming Hub is Not Showing CPU Temperature [Solved]
5. Update wireless network drivers
NOTE
If nothing so far has worked, you will need to update the drivers. Since Internet connectivity is required for it, we recommend you connect to Ethernet to complete the process.
5.1 Windows Update
- Select the search box, type updates, and select Windows Update settings.
- Select Check for Updates.

- New updates will be installed, after which you can try connecting to the Internet again.
Windows updates often come with essential driver updates.
5.2 HP Support Assistant
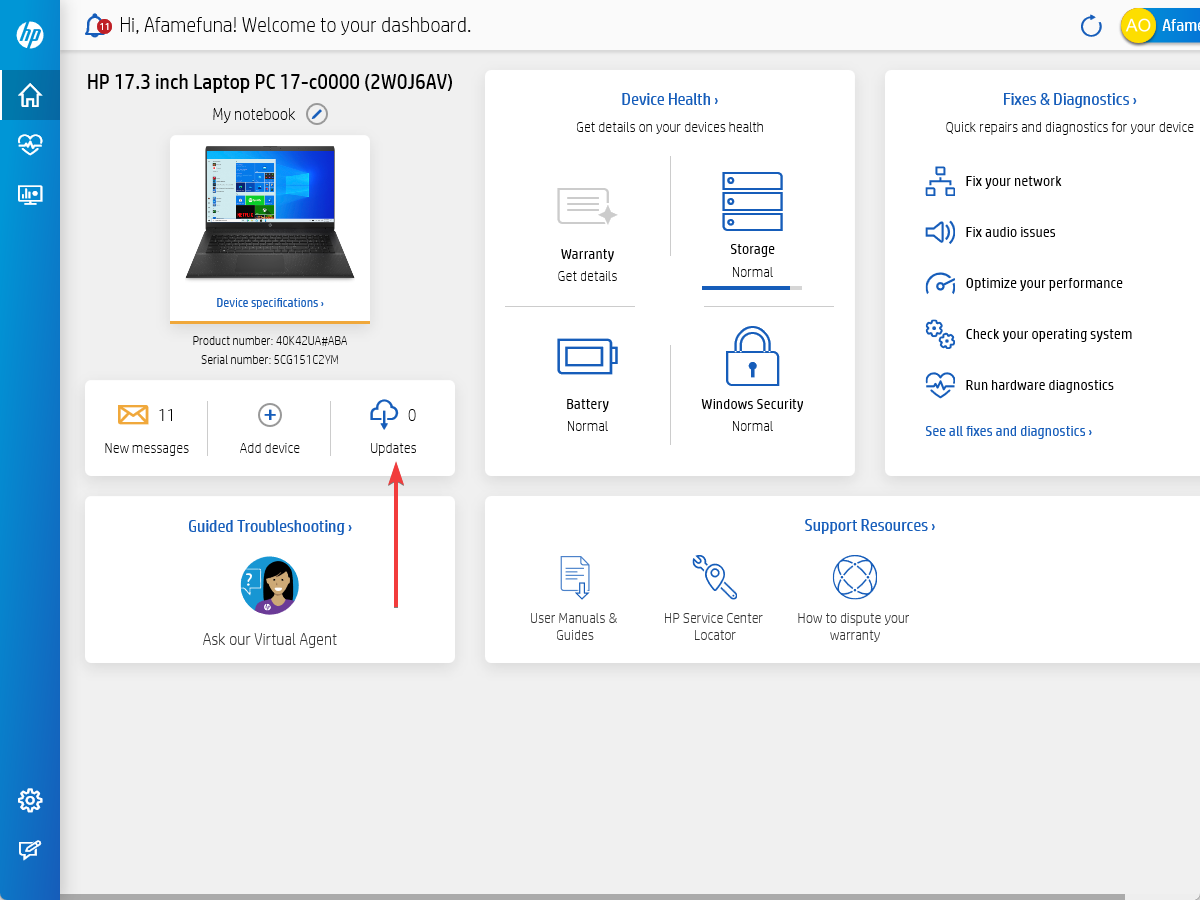
- Press Windows + S to open the Search box, type HP support assistant, and click on the app.
- If there are available updates, click Updates to view the available ones.

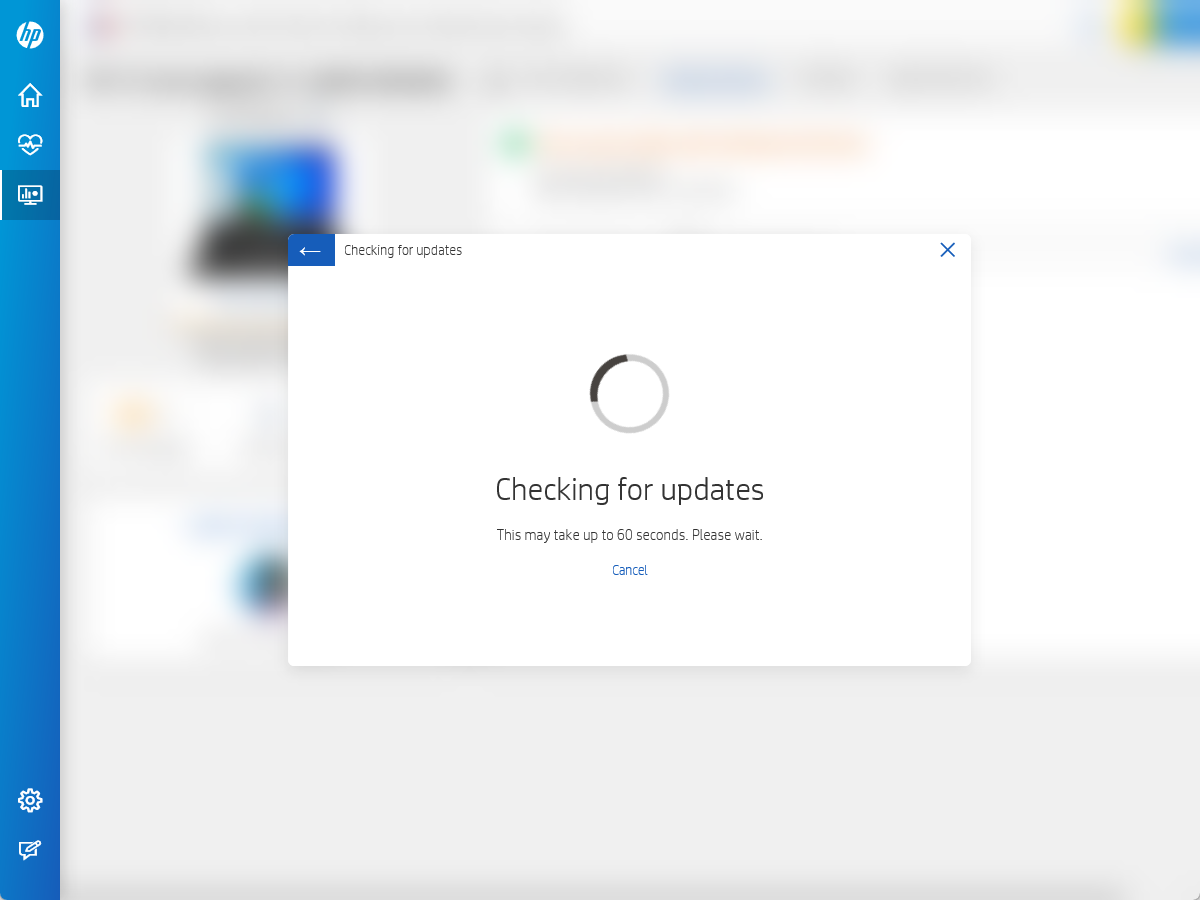
- Give it about 60 seconds to check for updates.
- Click Install now icon next to the update, and then try connecting to the Internet again.
5.3 Driver updates from Device Manager
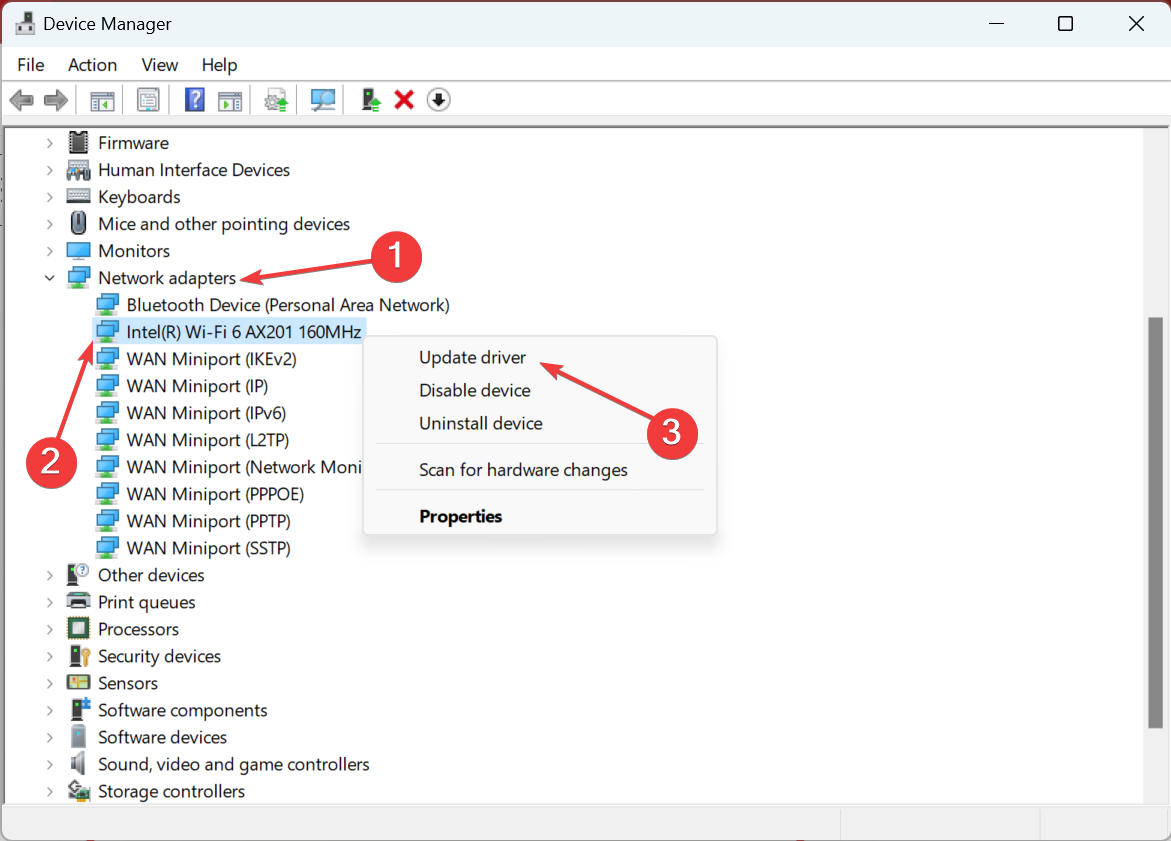
- Right-click Start and select Device Manager.
- Go to Network adapters and click to expand the list, right-click on your adapter, and select Update driver.

- Select Search automatically for drivers, and Windows will install the best available driver.

5.4 Update drivers automatically
Most common Windows errors and bugs can result from faulty or incompatible drivers. An outdated system can lead to lags, system issues, or even BSoDs.
You can prevent these problems by using an automatic tool that will search and install the correct drivers on your computer with just a few clicks. That’s why we recommend you use Outbyte Driver Updater.
Here’s how to do it:
- Download and install the Outbyte Driver Updater app.
- Launch the software.
- Wait for the app to detect all incompatible drivers.

- Afterward, it will show you a list of the drivers found to select the ones to Update or Ignore.
- Click on Update & Apply Selected to download and install the newest versions.
- Restart your PC to ensure the applied changes.

Outbyte Driver Updater
Use this software and solve all driver-related issues from your PC.
Disclaimer: You may need to upgrade the app from the free version to perform specific actions.
6. Use automatic troubleshooting
6.1 Using HP support assistant
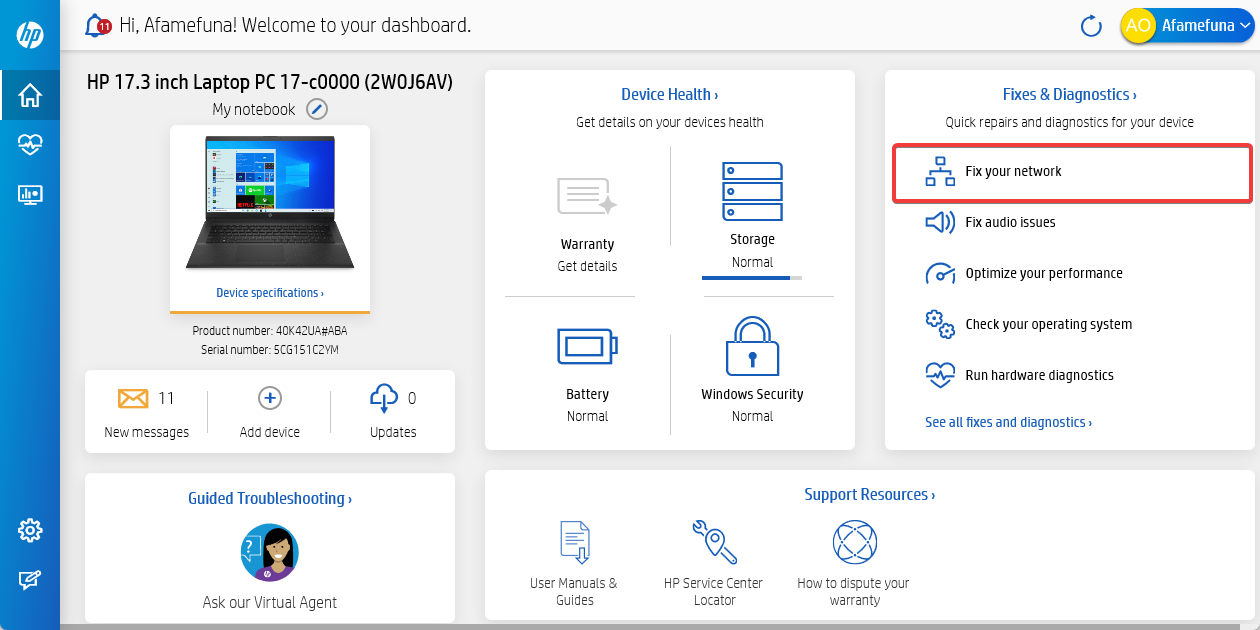
- Go to the search box, type HP support assistant, and click on the app.
- Click on Fix your network.

- This will detect, diagnose, and repair any network errors, including errors of your HP laptop not connecting to the Wi-Fi.
HP Support Assistant is a software support diagnosis and troubleshooting tool that resolves many networks and Internet connection issues, specifically for HP machines.
If you don’t have it, use the automated troubleshooter that comes with Windows 10.
6.2 Using built-in troubleshooter
- Enable the wireless signal by turning your computer’s wireless key or button.
- Right-click the wireless connection icon on the taskbar and select Troubleshoot problems.
- The Windows Network Diagnostic window will open and begin the troubleshooting process.
- After troubleshooting, see the list of problems and what was fixed, plus remedial actions to resolve the issues, and then perform the suggested activities.
- Try and reconnect to the Internet again.
7. Reset the network settings
- Press Windows + I to open Settings, and click on Network & Internet.

- In the Status tab, click on Network reset at the bottom.
- Click the Reset now button to confirm.
There you go! One of these fixes should help resolve issues behind the HP laptop not connecting to Wi-Fi.
Once you have the connection up and running, find out how to fix slow Internet speed in Windows.
Did any of these solutions work for you? Please share with us in the comments section below. Also, leave any other questions, and we’ll check them out.
Milan Stanojevic
Windows Toubleshooting Expert
Milan has been enthusiastic about technology ever since his childhood days, and this led him to take interest in all PC-related technologies. He’s a PC enthusiast and he spends most of his time learning about computers and technology.
Before joining WindowsReport, he worked as a front-end web developer. Now, he’s one of the Troubleshooting experts in our worldwide team, specializing in Windows errors & software issues.