
- To run shell scripts on Windows, you must enable WSL and Virtual Machine Platform, install a WSL distro, and use “Bash Script.sh” to execute it.
- Alternatively, use third-party tools like Cygwin, Cmder to run Linux commands on top of Windows OS.
If you have worked with Linux distributions and repositories, you would know what shell scripts are. To run shell scripts on top of a Windows computer can be challenging, as the process is not quite straightforward.
Shell scripts are a piece of code written in plain text but have the “.SH” file extension. These are usually used to automate tasks and execute Linux or Unix packages. These are written in Bash and start with “#! /bin/sh“.
You do not need to install a Linux or Unix distribution alongside your Windows operating system to run a shell script. In this article, we’ll show you how to run a shell script on a Windows PC.
Table of Contents
What are Shell (.SH) Files
The Linux/Unix operating system uses shell or .SH script files to perform certain tasks. In comparison, it can be substituted by Windows batch files for the Windows operating systems, which are used to execute commands on a computer.
The Batch language is a simple and interpreted programming language, unlike C++ or C#. However, you do not have to translate a shell script file to batch to perform similar tasks on a Windows computer, as you do on a Linux PC.
There are different methods to run the same .SH file on a Windows computer as on a Linux system. Let us show you how to run a shell file on a Windows PC.
Run Shell Script (.SH) File on Windows
There are both native and third-party methods to run shell files on a Windows computer. You can use Cygwin, or a third-party tool of your choice, to run a shell script on Windows OS. Alternatively, you can install the Windows Subsystem for Linux feature on Windows and then execute the shell script file through it.
Below you’ll find the methods to run the file using both methods.
Run Shell Script File using Windows Subsystem for Linux (WSL)
This section has been divided into 3 steps to make the process easier to understand. You must do the following 3 things to run a shell script file in the given order:
- Install WSL
- Install a Linux distro
- Run the shell script file
Note: If you are performing these steps on a Virtual Machine, then you will need to enable Nested Virtualization.
Install WSL
Use the following steps to install WSL on your computer:
-
Press the Windows Key + R shortcut keys to open the Run Command box.
-
Type in “optionalfeatures” and press Enter.
Open the Optional Features applet -
Select “Windows Subsystem for Linux” and “Virtual Machine Platform,” and then click Ok.
 Scripts In Windows 2")
Enable WSL and Virtual Machine Platform The wizard will now install WSL.
-
When the installation is completed, click “Restart now.”
Restart computer
 Scripts In Windows 2")
 Scripts In Windows 3")
Once the computer restarts, it is time to install a Linux distro.
Install a Linux Distribution
Use the following steps to install a Linux distribution:
-
When it restarts, press Windows Key + R again to open Run.
-
Type in “cmd” and press CTRL + Shift + Enter to run Command Prompt as administrator.
-
Run the following command to obtain a list of available Linux distros:
wsl --list --online
Get list of all available Linux distros in Command Prompt Note down the name of the distro you want to install.
-
Use the following command to install the preferred distro while substituting its name:
wsl --install -d [DistributionName]
Install a Linux distro in WSL The distro will now begin to download and install.
-
Set up a username and password.
Set up username and password -
Restart the computer.
 Scripts In Windows 4")
 Scripts In Windows 5")
 Scripts In Windows 6")
Now, the next step is to simply run the shell script file.
Run the Shell Script File
Follow the simple steps below to run the shell script file on a Windows PC:
-
Press the Windows Key + R again to open Run.
-
Type in “cmd” and press CTRL + Shift + Enter to run Command Prompt as administrator.
-
Use the CD cmdlet to change the directory to the location of the shell script file.
CD [PathToShellScriptFile]
Change directory to the shell script file location -
Now, use the following command to run the shell script file while substituting [ShellFileName] with the complete and correct name of the shell file:
Bash [ShellFileName].sh
Run the shell script file using Windows Subsystem for Linux
 Scripts In Windows 7")
 Scripts In Windows 8")
This is how you run a shell script (.SH) file on a Windows computer using WSL.
If this seems like a lengthy process for you, then you can also use the alternative method given below.
Run Shell Script File using Third-Party Tools
You can also run a shell script file on a Windows computer using a third-party tool. In the steps below, we have used Cygwin.
Follow these steps to run a .SH file on a Windows PC:
-
First, download and install Cygwin from their official website.
-
Once installed, run the Cygwin app.
-
In the Cygwin terminal, use the
CDcommand to change the directory to the shell script file location.Note: In Cygwin, the syntax to change the directory is different from Command Prompt or PowerShell. Use the following command syntax and example in the image to change your directory in Cygwin.
CD /cygdrive/[driveLetter]/[Subfolder1]/[Subfolder2]
Change directory to the shell script file location in Cygwin -
Now, make the shell script file executable through this command:
chmod +x [ShellFileName].sh
Make the shell script file executable -
Now, use the following syntax to run the shell script file:
./[ShellFileName].sh
Run shell script file on Windows using Cygwin
 Scripts In Windows 9")
 Scripts In Windows 10")
 Scripts In Windows 11")
These are the two methods to run shell script files (.SH) on a Windows PC. Of course, there are many other third-party tools available that allow you to run Linux and Unix files on a Windows computer.
Frequently Asked Questions (FAQs)
How to create a shell script (.SH) file?
I you know what you want to write inside the shell script file, all you need to do is follow these simple rules:
– Create a new notepad file
– Start the script with “#! /bin/sh”
– Write the code below it
– Save the file with a “.sh” extension
– To run the script, type “bash [FileName].sh” after navigating to the folder.
Can I run shell scripts on Windows?
Yes, shell script files can be executed on a Windows computer using Windows Subsystem for Linux, or third-party tools like Cygwin, kiTTY, ConEmu, Cmder, etc.
Why use shell scripts on Windows?
Shell scripts are used to perform repetitive tasks to save time and resources. They are also used to automate tasks. With the WSL feature, Microsoft has opened doors to natively run shell scripts on Windows operating systems.
Rick Akura
Trying to run a shell script (.sh) file on your Windows device? Find out how with this tutorial, complete with the steps you need to make it happen.
What if you want to run a .sh or shell script file in Windows 11/10? If you’ve worked with Unix or Linux operating systems, you’re likely familiar with shell scripts, which are commonly used to automate tasks and simplify complex workflows. However, running these files on a Windows computer is a bit tricky, as it’s an uncommon file type and many users don’t know how to execute them.
Fortunately, there are a few different ways to execute a .sh or shell script file in Windows 11/10. In this article, we’ll explore the various methods to execute .sh or shell script files on a Windows machine.
Table of Contents
- What Are Shell Script (.sh) Files?
- How to Run a Shell Script (.sh) File in Windows 11/10
- Execute the Shell Script File With Windows Subsystem for Linux (WSL)
- Using Cygwin
- Frequently Asked Questions
What Are Shell Script (.sh) Files?
The .sh or Shell Scripts file is a type of script file that runs in the Linux operating system. It’s analogous to Windows batch files, which are used to run tasks on a computer. Running .sh files in Windows can be done with the help of several programs like Cygwin and BASH for Windows.
How to Run a Shell Script (.sh) File in Windows 11/10
To run a shell script file (.sh) in Windows, you should first make sure that the program you want to execute is available on your machine and that the path of the executable has been added to environment variables. The best way to do this is by using software like Cygwin which provides a UNIX-like interface in Windows, allowing access to various GNU/Linux utilities.
In case you don’t want to install any additional software there are other methods such as installing WSL (Windows Subsystem for Linux) which allows users to install Bash or Ubuntu terminal directly from the Microsoft Store, just like any other app that can be found on it but with restricted access as compared with applications running as Administrator privileges because of security purposes.
1. Execute the Shell Script File With Windows Subsystem for Linux (WSL)

The Windows Subsystem for Linux is a tool that allows software developers to use a Linux operating system on their Windows computers. This means they can run Linux software, like command-line tools and applications, directly on their Windows computer without needing to use a virtual machine or switch between different operating systems.
You can use the Windows Subsystem for Linux (WSL) to run shell script files on Windows because WSL allows you to run a Linux environment on your Windows machine. This environment includes most command-line tools and applications that are typically used on Linux, including the ability to run shell scripts.
- Navigate to the Settings app from your Start menu, or by using the Windows + I keyboard shortcut.
-
Select «Privacy & security,» and then choose «For developers.»

-
Make sure that the «Developer Mode» option is enabled. You can do this by ensuring that the toggle is turned on. Click “Yes” if prompted.
-
Open the Windows Search interface from your taskbar, or by pressing the Windows + S keyboard shortcut. Here, search for «Turn Windows features on or off» and open the applet from the search results.
-
Scroll down until you see «Windows Subsystem for Linux,» and then check the box next to it to install it. Click OK and reboot the system. BASH should now be available in both the Command Prompt and PowerShell.
-
Press the Windows + R keys on your keyboard, and type in «cmd» without the quotes. Click the OK button to launch the Command Prompt.
-
Find the name of the Shell Script you’re trying to run, and copy it. In the Command Prompt, type `bash` followed by the .sh file name (such as `bash myscript.sh`) and then press the Enter key.
- The script will execute and an output will appear, depending on the file.


Using WSL is an easy and straightforward way to run shell scripts in Windows 11/10. When you run a shell script file on WSL, it is interpreted by the Linux environment running on your Windows machine, which makes it possible to run shell scripts without needing a separate Linux installation.
2. Using Cygwin

Cygwin is a Unix-like environment and command-line interface for Microsoft Windows. It provides a way to run many Unix or Linux tools and utilities on a Windows machine. Here’s how to use Cygwin to run a .sh or shell script file:
- First, you need to download and install Cygwin on your Windows machine. You can download it from the official Cygwin website.
- Once Cygwin is installed, open it from the Start menu or by searching for «Cygwin» in the Windows search bar.
- In the Cygwin terminal, navigate to the directory where your script file is located. You can use the `cd` command to change directories. For example, if your script file is located in the “Documents” folder, you can navigate to it by typing `cd Documents` and pressing Enter.
- Next, you need to make the script file executable. To do this, use the `chmod` command followed by the `+x` option and the name of your script file. For example, if your script file is named `myscript.sh`, you would type `chmod +x myscript.sh` and press Enter.
- Finally, you can execute the script by typing `./.sh` and pressing Enter. For example, if your script file is named `myscript.sh`, you would type `./myscript.sh` and press Enter.
Cygwin provides a way to run Unix or Linux tools and utilities on a Windows machine, which can be useful if you’re familiar with Unix or Linux commands and want to use them on your Windows machine.
Frequently Asked Questions
Can I run a shell script on Windows without using any third-party tools?
Unfortunately, there’s no built-in way to run shell scripts on a Windows machine. You need to use third-party tools like Git Bash, WSL, Cygwin, or MinGW.
What if my script has dependencies on Unix-specific tools or utilities?
If your script has dependencies on Unix-specific tools or utilities, you may need to install those tools or utilities on your Windows machine. Alternatively, you can use a tool like Cygwin or WSL, which provides a Unix-like environment on Windows and includes many Unix-specific tools and utilities.
Can I use PowerShell to run shell scripts on Windows?
PowerShell is a powerful command-line shell and scripting language for Windows, but it’s not compatible with shell scripts written for Unix or Linux systems. You need to use one of the methods mentioned in this article to run shell scripts on a Windows machine.
What’s the difference between a .sh and .bash file extension?
Both .sh and .bash file extensions are used for shell scripts, but .bash is typically used for scripts that are specific to the Bash shell, while .sh can be used for scripts that are compatible with other shell programs as well.
Is it safe to run shell scripts on a Windows machine?
Running shell scripts on a Windows machine can be safe as long as you trust the source of the script and know what the script does. However, it’s always a good practice to review the script before running it and to run it in a controlled environment to avoid any unintended consequences.
One More Thing
We’re glad you’ve read this article.  Thank you for reading.
If you have a second, please share this article on your socials; someone else may benefit too.
Subscribe to our newsletter and be the first to read our future articles, reviews, and blog post right from your inbox. We also offer deals, promotions, and updates on our products and share them via email. You won’t miss one.
Related Articles
» How to Run Windows Apps on Mac Without Running Windows
» How to Open .ASPX Files on Windows 11/10
» How to Open RAR Files in Windows 11/10
To open a file in PowerShell, you can use the `Invoke-Item` cmdlet, which opens the specified file with its associated application.
Invoke-Item "C:\path\to\your\file.txt"
Understanding PowerShell File Management
PowerShell is a powerful command-line interface that allows users to automate and manage system tasks, including file manipulation. It provides a set of cmdlets specifically designed to interact with files and directories, making it an essential tool for both system administrators and casual users.
When we talk about how to open a file in PowerShell, we refer to various command-line methods available to access files quickly and efficiently. The capability to open files properly enhances productivity and aids in streamlined workflows.
Delete File in PowerShell: A Simple Guide
Different Methods to Open Files in PowerShell
Using the `Start-Process` Cmdlet
The `Start-Process` cmdlet is one of the most straightforward ways to open files directly from PowerShell. It serves to initiate a process or application with the specified file.
Example Usage:
Start-Process "C:\path\to\your\file.txt"
This command opens the specified text file with the default text editor on your system. Additionally, the cmdlet supports various parameters that allow you to control the behavior of the process, such as `-File` to specify a run from a file directly or `-WindowStyle` to adjust the window’s appearance.
Opening Files with the `Invoke-Item` Cmdlet
Another handy cmdlet for opening files is `Invoke-Item`. This cmdlet simplifies the process of opening files or folders by invoking their associated application.
Example Usage:
Invoke-Item "C:\path\to\your\file.txt"
This command may be particularly useful when you want to open them with the default application linked to the file type. If the file is an image, PDF, or even a script, `Invoke-Item` will automatically launch it in the correct program.
Using `notepad` Command
For those who prefer using Notepad specifically to open text files, you can invoke Notepad directly from PowerShell.
Example Usage:
notepad "C:\path\to\your\file.txt"
This approach is great for quick text editing, and using Notepad in this way ensures that the application opens immediately without navigating any dialog boxes.
OpenSSL PowerShell: Unlocking Encryption with Ease
Opening Files of Different Types
Opening Text Files
When working with text files, the `Get-Content` cmdlet allows you to read and display the contents in the PowerShell window rather than opening it in an editor.
Example Usage:
Get-Content "C:\path\to\your\file.txt"
This command is particularly useful for quick inspections of file contents without needing to open a separate application.
Opening Image Files
You can also open image files using the `Start-Process` cmdlet or equivalent commands. Utilizing your default image viewer can provide an effortless way to view images from PowerShell.
Example Usage:
Start-Process "C:\path\to\your\image.jpg"
This launches the image using whatever application is set as the default for JPEG files, allowing for quick access to visuals.
Opening PDF Files
PDF documents are commonly accessed using the same methods. Opening a PDF file is typically straightforward, as most systems come with a default PDF viewer.
Example Usage:
Start-Process "C:\path\to\your\document.pdf"
This command immediately opens the specified PDF file in the associated viewer, making it fast and convenient.
Mastering New Line in PowerShell: A Simple Guide
Advanced Techniques for Opening Files
Opening Files with Specific Applications
Sometimes, you might want to open a specific file type with a particular application rather than the default one. This can be done using the `Start-Process` cmdlet along with the path to the target application.
Example Usage:
Start-Process "C:\Program Files\Microsoft Office\root\Office16\WINWORD.EXE" -ArgumentList "C:\path\to\your\document.docx"
This specifies that the document should be opened in Microsoft Word, even if another application is set as the default for `.docx` files.
Opening Multiple Files at Once
PowerShell also allows batch processing of files from a folder. This can be particularly helpful for quickly opening several documents without having to specify each one manually.
Example Usage:
Get-ChildItem "C:\path\to\your\folder\*.txt" | ForEach-Object { Start-Process $_.FullName }
This command searches for all text files within a specific folder and opens each one using the default application.
Invoke-PowerShell: Mastering Command Execution Effortlessly
Best Practices for Opening Files in PowerShell
-
Efficiently Managing File Paths: Always ensure that file paths are correct. If a path contains spaces, wrap the path in quotes to prevent errors.
-
Quotation Marks: Paths with spaces require proper handling. If your file is located in a folder with spaces in the name, always enclose the path in double quotes. For example:
Start-Process "C:\My Documents\file.txt" -
Handling Errors and Exceptions: Familiarize yourself with common errors. If a file fails to open, check your file path and ensure you have the necessary permissions.
Find a File in PowerShell: Quick and Easy Methods
Troubleshooting Common Issues
When using PowerShell to open files, you might encounter certain issues.
-
Common Error Messages: Errors like “Path not found” usually indicate problems with how the file path is written. Always double-check the path for any typographical errors.
-
Checking Permissions: Ensure that you have the necessary permissions to open the file requested. Lack of permission can prevent access.
-
Debugging: If a command doesn’t execute as expected, try running slower commands in isolation to narrow down the problem.
Unblock File PowerShell: Quick Steps to Safety
Conclusion
In summary, knowing how to open a file in PowerShell is crucial for improving efficiency and effectively utilizing this robust tool. By experimenting with the various cmdlets and methods discussed, users can streamline their workflows and enhance task execution. As you explore these commands, you will find that they not only aid in the quick access of files but also uncover the powerful file management capabilities of PowerShell.
Understanding Null in PowerShell: A Clear Guide
Call to Action
For further learning on PowerShell commands and techniques, we invite you to subscribe for more tips and resources. Check out our additional articles or courses for deeper insights, and don’t miss our special promotions for new students eager to expand their PowerShell skills!
Navigating the Windows Terminal to open files and folders is a skill that enhances productivity and efficiency, particularly for those who prefer command-line interfaces (CLI) over graphical user interfaces (GUI). Windows Terminal, a modern application in Windows 11, integrates traditional command-line environments like Command Prompt (CMD) and PowerShell, providing a robust platform for performing a variety of tasks.
To open a file using CMD within Windows Terminal, you first need to navigate to the directory where the file resides using the cd command. Once there, the start command, followed by the file name, will open the file with its default application. In the case of PowerShell, navigating to the file’s directory is similar
Windows Terminal is not just limited to file and folder management; it offers a range of features and customization options, from appearance settings like themes and color schemes to functionality enhancements such as multiple tabs and panes. It also supports various command-line tools, including SSH, Azure Cloud Shell Connector, and the Windows Subsystem For Linux (WSL), making it a versatile tool for developers, system administrators, and power users
For those new to Windows Terminal or seeking to refine their command-line skills, these fundamental operations form the basis of a much broader set of capabilities. The Terminal’s integration of CMD and PowerShell in a single application, coupled with its extensive customization options, underscores its utility in a modern computing environment. Whether managing files, editing settings, or developing scripts, Windows Terminal in Windows 11 offers a powerful interface for advanced users and novices alike to harness the full potential of their system’s command-line tools.
How to Open a File in Terminal using Command Prompt (CMD)
Opening a file using CMD in Windows Terminal involves navigating to the directory where the file is located and then executing it with its associated application. This method is straightforward and effective for users who prefer or require the use of Command Prompt for their tasks. It’s particularly useful when operating in environments where graphical user interfaces (GUIs) are unavailable or when automating tasks through scripts
-
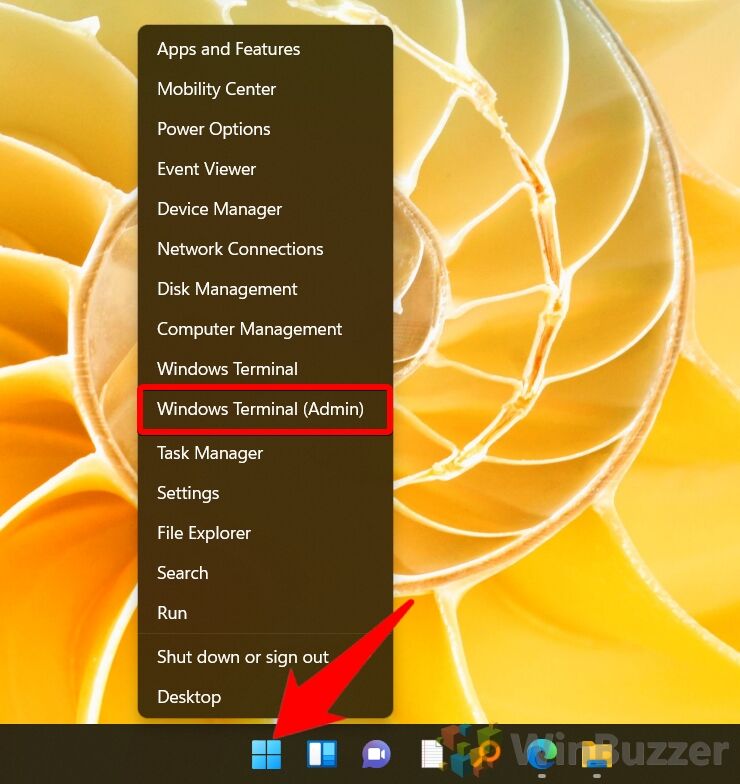
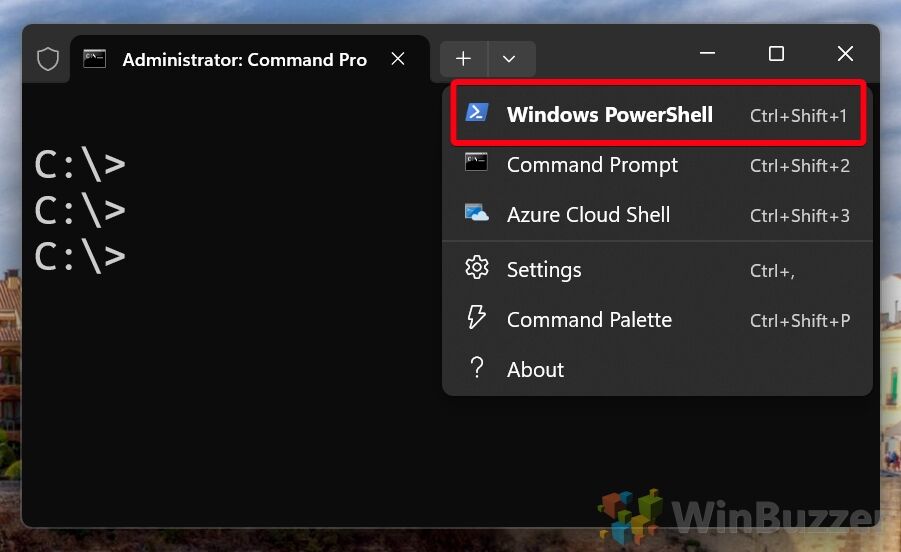
Launch Windows TerminalStart by right-clicking the Start button and selecting “Windows Terminal (Admin)”.

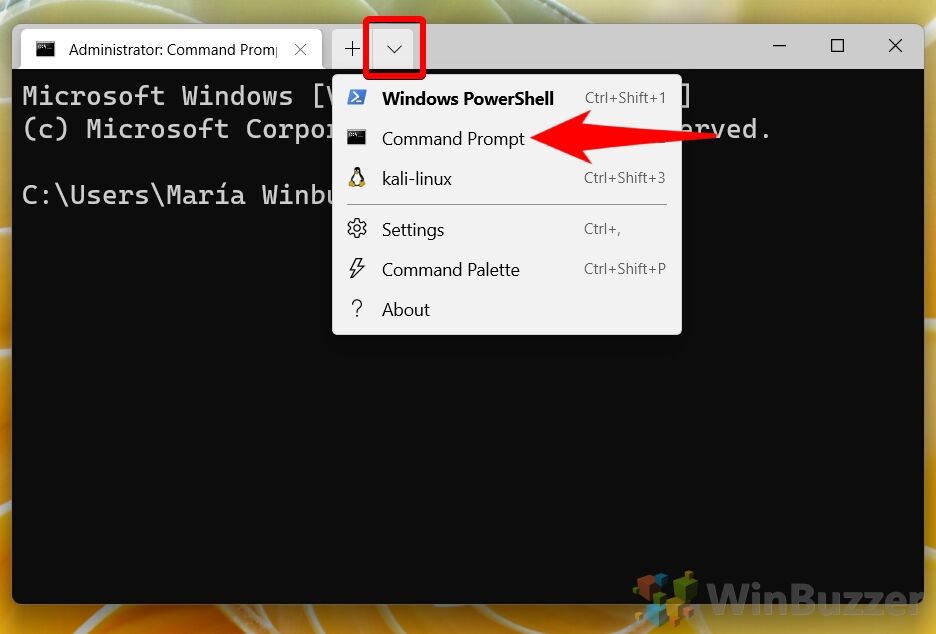
- Choose InterfaceIn the Terminal, click the dropdown next to the plus icon. For CMD, select “Command Prompt”.

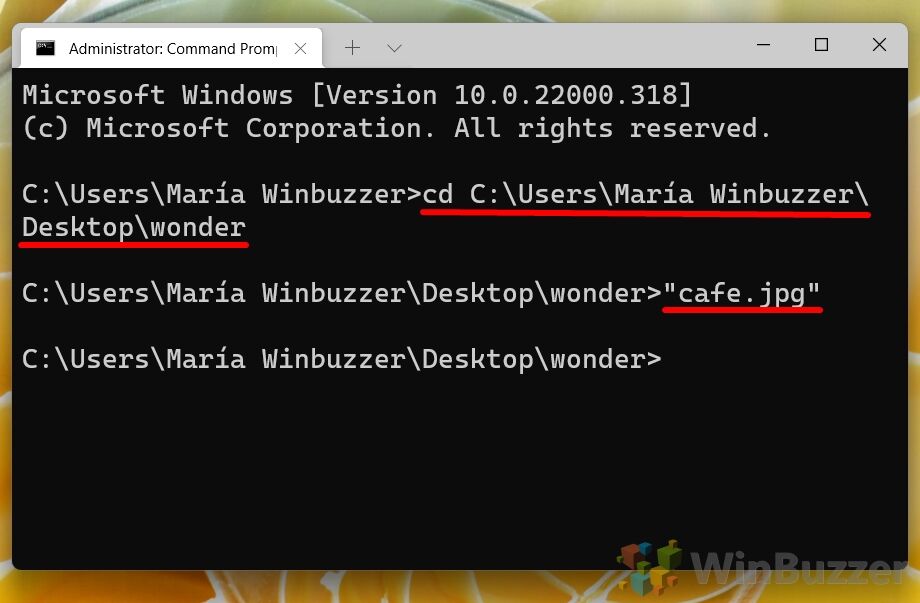
- Navigate to the File Folder and Open the File
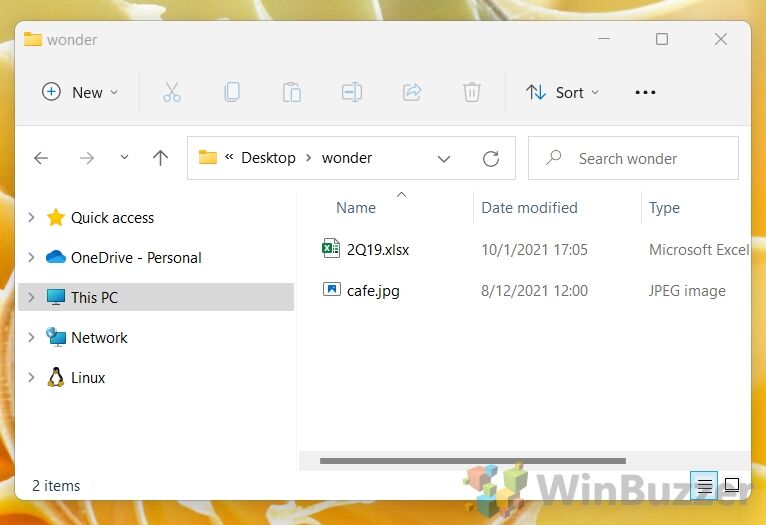
For example, our file is in the “wonder” folder on our desktop. To get there, you would type:
cd C:\Users\User Name\Desktop\wonder
We know that the file is called “cafe” and is a jpeg filetype, so to open it we can just type"cafe.jpg"and press Enter.
If you’re unsure what your file is called, you can run the commandDIRwhile in a folder. This will list every file inside of it in CMD.

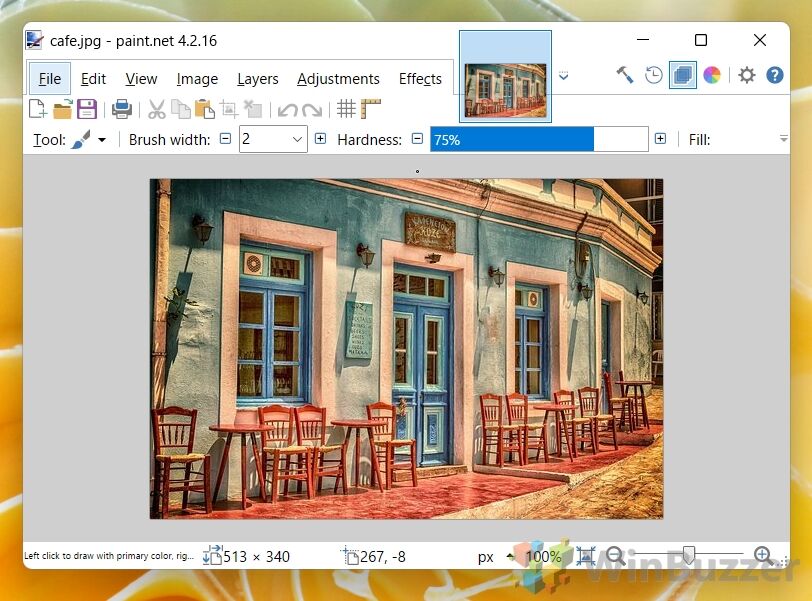
-
The File Opens in the Default ProgramThe file will now open in the application associated with its file type.

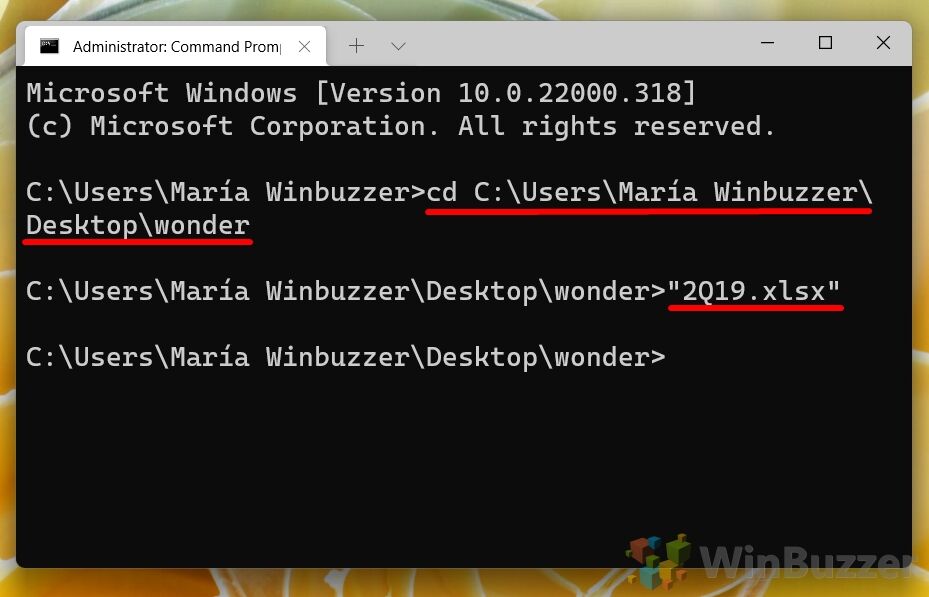
- Try opening a different file type
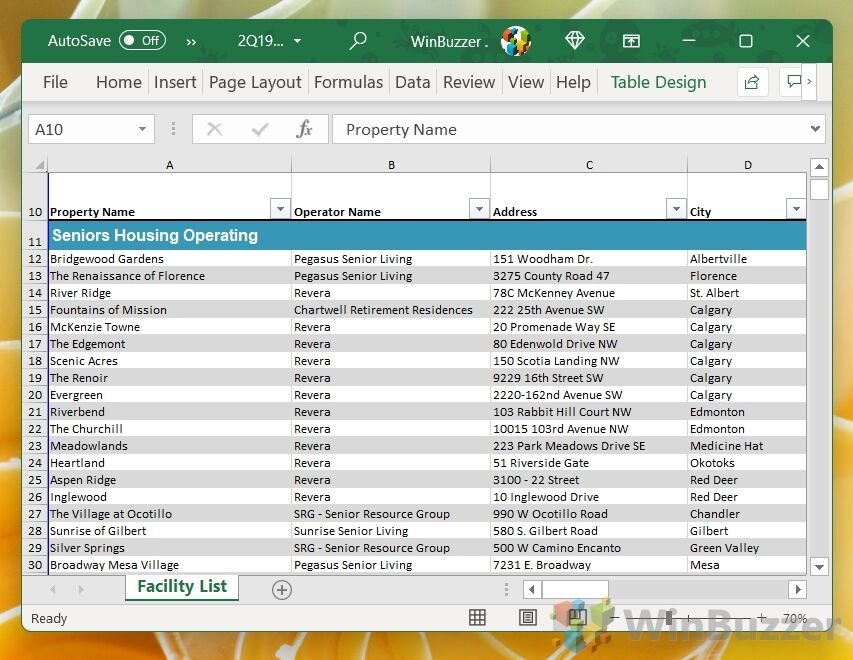
This trick works not just with images, but documents and basically any file on your PC that you have the software to open. In the example below, we navigate to a folder on the desktop and then open an Excel worksheet:
cd C:\Users\Maria Winbuzzer\Desktop\wonder
"2019.xlsx"

- Your Excel workbook will open in its default program: Excel

How to Open a File in Terminal using PowerShell
Using PowerShell to open a file in Windows Terminal expands upon CMD’s capabilities by offering more advanced scripting features and cmdlets. PowerShell is a powerful tool for managing Windows systems, and opening files through it can involve more sophisticated commands and scripts. This method is ideal for users who need to incorporate file operations into larger automation tasks or who prefer PowerShell’s extensive command set
-
Launch Windows TerminalStart by right-clicking the Start button and selecting “Windows Terminal (Admin)”.
- Choose InterfaceIn the Terminal, click the dropdown next to the plus icon. Select “PowerShell”.

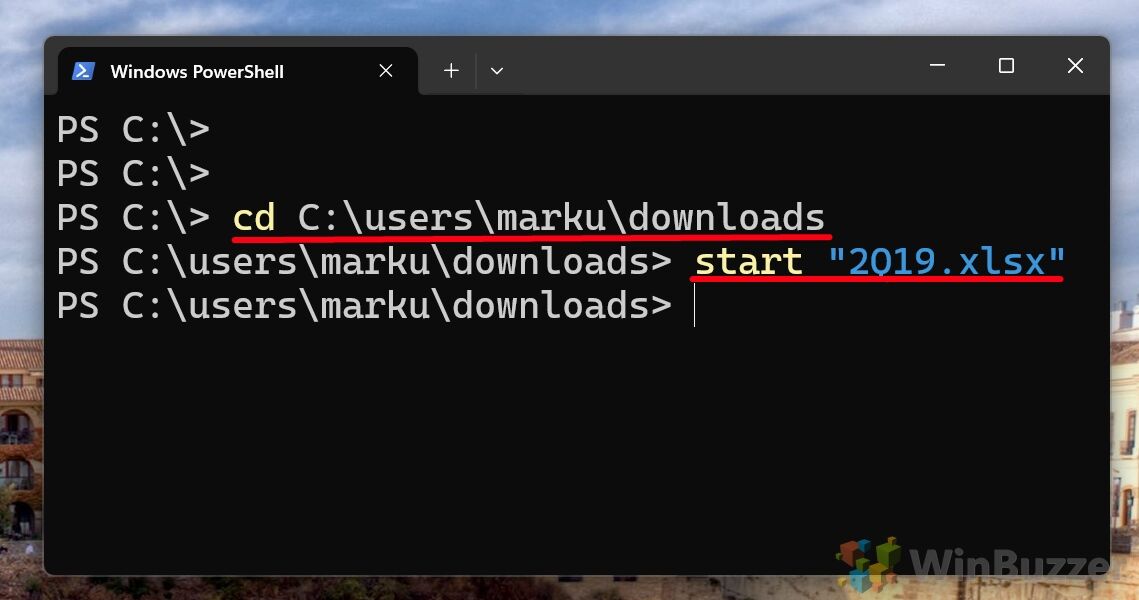
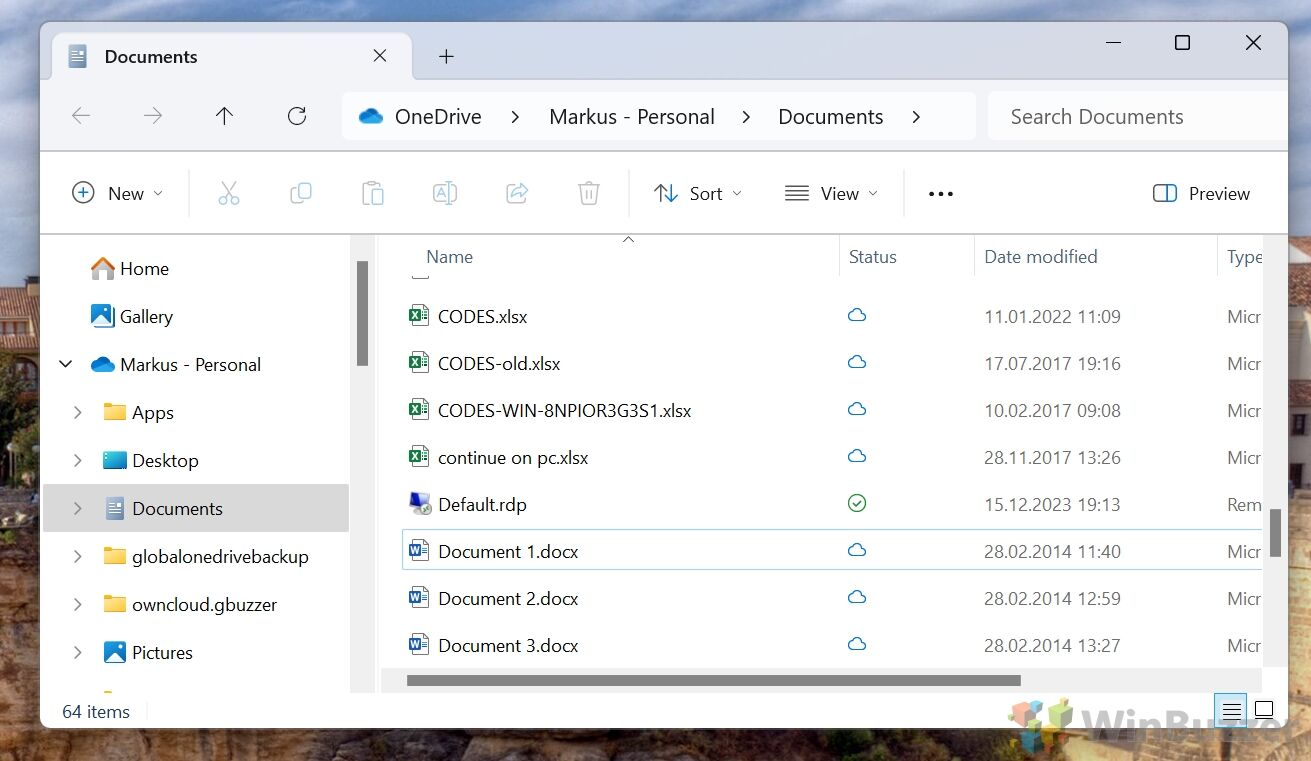
- Navigate to your desired folder with “cd”, then type your file name in quotes
For example, our file is in the “downloads” folder. To get there, you would type:
cd C:\Users\User Name\downloads
We know that the file is called “cafe” and is a jpeg filetype, so to open it we can just type"start "cafe.jpg"and press Enter.
If you’re unsure what your file is called, you can typelswhile in a folder. This will list every file inside of it in PowerShell.

- Your file will open in its default program
How to Open a Folder from Terminal using Command Prompt (CMD)
Opening a folder from CMD in Windows Terminal allows users to quickly access directories in File Explorer directly from the command line. This method streamlines the process of switching between the CLI and the GUI, facilitating easier file and directory management. It’s particularly handy when you need to visually inspect the contents of a directory or manipulate files using the GUI after locating them via the command line
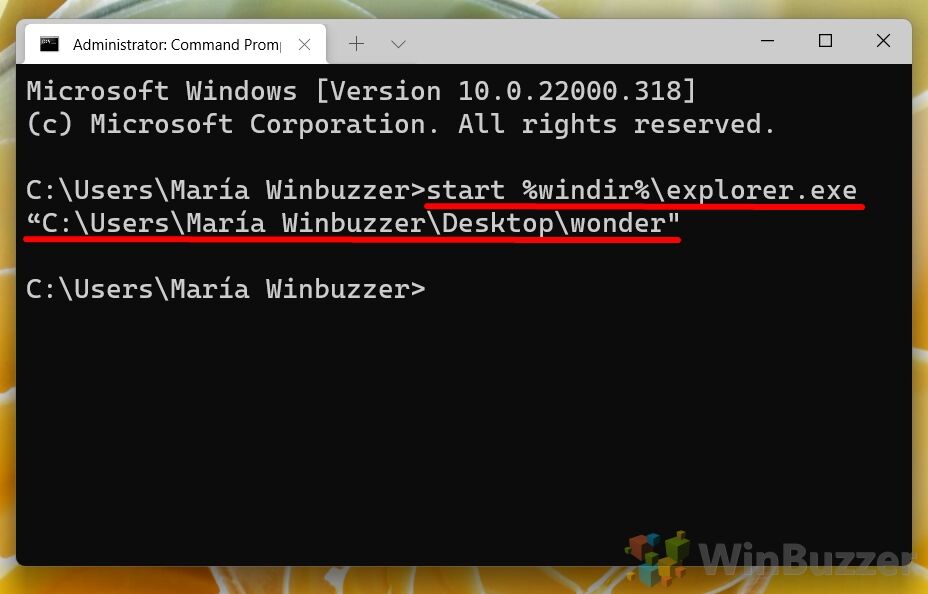
- Type the following command and Press Enter
With Command Prompt selected in your terminal type the following command and substitute the folder path with one to the folder you want to open:start %windir%\explorer.exe "C:\Users\Maria Winbuzzer\Desktop\wonder"
-
The Folder OpensThe specified folder will appear in File Explorer.

How to Open a Folder from Terminal using PowerShell
PowerShell offers a similar functionality to CMD for opening folders, but with the added flexibility and power of PowerShell scripting. Opening a folder in File Explorer from PowerShell within Windows Terminal can be part of a larger script or simply a quick way to access GUI-based file management. This approach is well-suited for users who are already working within a PowerShell session and want to maintain a streamlined workflow
- Type the following command and Press Enter
With PowerShell selected in terminal, type the following command and substitute the folder path with one to the folder you want to open, like in our case “C:\Users\” for the personal user folder.& "$env:windir\explorer.exe" /select "folder path"

-
The Folder OpensThe specified folder will appear in File Explorer.


FAQ – Frequently Asked Questions About Handling Files, Folders, and Tasks in Windows Terminal
How do I open a file in a specific application from Windows Terminal?
To open a file with a specific application via Windows Terminal, use the command start application.exe “file path” in CMD, where application.exe is the executable name of your application and “file path” is the full path to your file. In PowerShell, use Start-Process -FilePath “application.exe” -ArgumentList “file path”. This explicitly specifies the file path to the application and the argument list with the file you wish to open. Ensure the application can open the file type you’re working with.
How do I create a new file from Windows Terminal?
To create a new file in CMD, navigate to your desired directory and execute echo.> filename.ext, where filename.ext is the name and extension of your new file. This creates a file with minimal content. In PowerShell, the command New-Item filename.ext -ItemType “file” creates a new file in the current directory. Replace filename.ext with the intended name and extension of your file.
How do I copy or move files using Windows Terminal?
In CMD, use copy “source path” “destination path” to copy files, and move “source path” “destination path” to move files. Replace the paths with your file’s current and desired new locations. In PowerShell, use Copy-Item -Path “source path” -Destination “destination path” to copy, and Move-Item -Path “source path” -Destination “destination path” to move files. These commands allow for file management within the terminal environment.
How can I delete a file or folder through Windows Terminal?
To delete a file in CMD, use the command del “filename”. For folders, use rmdir /S /Q “foldername”. In PowerShell, the commands are Remove-Item “filename” -Force for files and Remove-Item “foldername” -Recurse -Force for folders. The -Force and -Recurse parameters in PowerShell ensure deletion of read-only files and all contents within a folder, respectively.
How do I list all files of a specific type in a directory using Terminal?
In CMD, to list files of a specific type, use dir *.ext, replacing *.ext with the desired file extension. This displays all matching files in the current directory. In PowerShell, the command Get-ChildItem -Filter *.ext lists files of a specific type, with the -Filter parameter allowing you to specify the desired file extension or pattern.
How do I see hidden files in a directory from Windows Terminal?
To list hidden files in CMD, use the command dir /A:H. In PowerShell, the equivalent command is Get-ChildItem -Force, which reveals hidden files and directories in the listing by overriding the default behavior to hide certain items.
How can I change file attributes from Windows Terminal?
In CMD, use attrib +AttributeType filename to add an attribute or attrib -AttributeType filename to remove an attribute from a file, where AttributeType could be R (read-only), H (hidden), S (system), or A (archive). In PowerShell, use Get-Item “filename” | Set-ItemProperty -Name Attributes -Value “ReadOnly, Hidden” to manage file attributes in a more structured manner.
How do I find the current version of Windows from Terminal?
In CMD, systeminfo | findstr /B /C:”OS Name” /C:”OS Version” filters the output to show only the OS name and version. In PowerShell, use Get-ComputerInfo -Property “OsName”, “OsVersion” to display the operating system name and version in a formatted output, providing a clear view of your current Windows version.
How do I terminate a running process using Windows Terminal?
In CMD, use taskkill /IM “processname.exe” /F to forcibly terminate a process, replacing “processname.exe” with the actual process name. The /F parameter forces the command to stop the specified process. In PowerShell, the command Stop-Process -Name “processname” -Force achieves a similar outcome, with -Name specifying the process by name and -Force ensuring the process is terminated, providing a method to manage running processes effectively.
How can I view the network configuration and active connections in Terminal?
In CMD, ipconfig displays the current network adapter configuration, while netstat lists active connections and listening ports. In PowerShell, Get-NetIPConfiguration provides detailed network configuration info, and Get-NetTCPConnection shows active TCP connections, offering insights into network activity with structured output and filtering options.
How do I schedule tasks from Windows Terminal?
CMD’s schtasks utility allows for comprehensive task scheduling, such as creating, modifying, and querying tasks. Use schtasks /create with appropriate parameters to set up new tasks. In PowerShell, combine New-ScheduledTask, New-ScheduledTaskAction, and Register-ScheduledTask for granular task scheduling, with each cmdlet providing specific functionalities for creating and managing scheduled tasks in a more detailed manner.
How do I compress or extract files using Windows Terminal?
To compress files in CMD, use compact /c /s:”directory” “filename” and expand “source” “destination” to extract. PowerShell’s Compress-Archive and Expand-Archive cmdlets offer straightforward commands for compressing and extracting files, respectively, providing a simple and efficient way to manage file compression and extraction within Windows Terminal.
How can I update Windows from the Terminal?
Although CMD doesn’t provide a direct command for Windows updates, PowerShell enables launching the update interface with Start-Process “ms-settings:windowsupdate”. This command opens the Windows Update settings, allowing manual check and installation of updates, serving as a bridge to Windows Update functionality from the Terminal.
How do I repair system files from Windows Terminal?
The sfc /scannow command in CMD scans and repairs system files by replacing corrupted files with a cached copy. This tool is crucial for system integrity. In PowerShell, the same command can be used to perform system file checks and repairs, maintaining system health and troubleshooting issues effectively.
How can I manage Windows Firewall settings through Terminal?
CMD provides netsh advfirewall commands for Windows Firewall configuration, such as enabling/disabling the firewall and setting rules. PowerShell introduces cmdlets like Get-NetFirewallRule and New-NetFirewallRule for viewing and creating firewall rules, offering a structured approach to firewall management with detailed rule configuration parameters, enhancing security management capabilities within the Terminal.
Related: How to Open Command Prompt with the “Open Command Window Here” in File Explorer
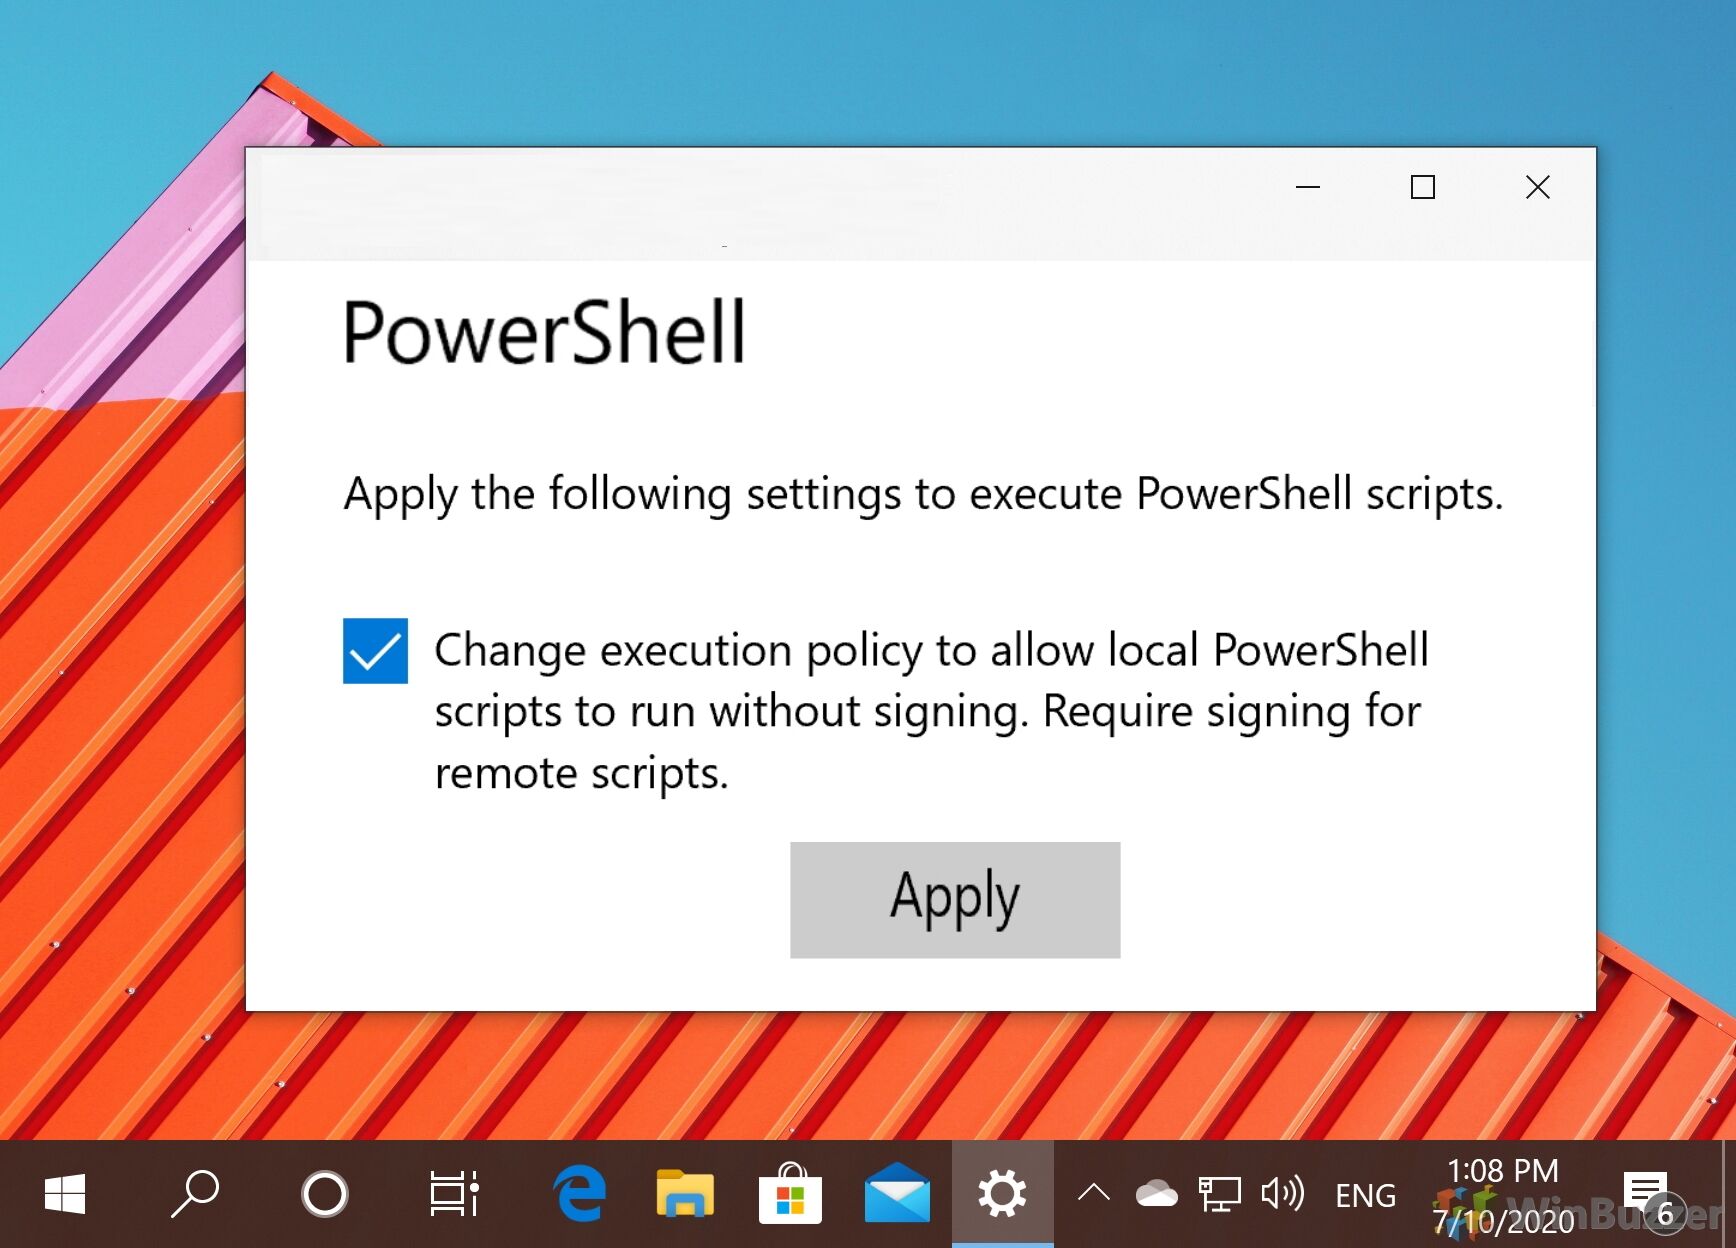
Related: How to Enable PowerShell Scripts via PowerShell Execution Policy
PowerShell is a powerful tool that many, including myself, don’t use to its full potential. That’s why most of us rely on PowerShell scripts crafted by others, but this can have its own hurdles. Often, you’ll see errors like “PowerShell: running scripts is disabled on this system”. To Enable PowerShell scripts in Windows, you must first set the execution policy. In our other guide, we show you how to enable PowerShell scripts in Windows by setting your execution policy via the command-line.
Related: How to Stop, Start, and Restart a Service with Command Prompt
As we mentioned, there are hundreds of things you can do with Command Prompt rather than using the UI. One of them is managing your services. You can learn how by following our dedicated guide here.

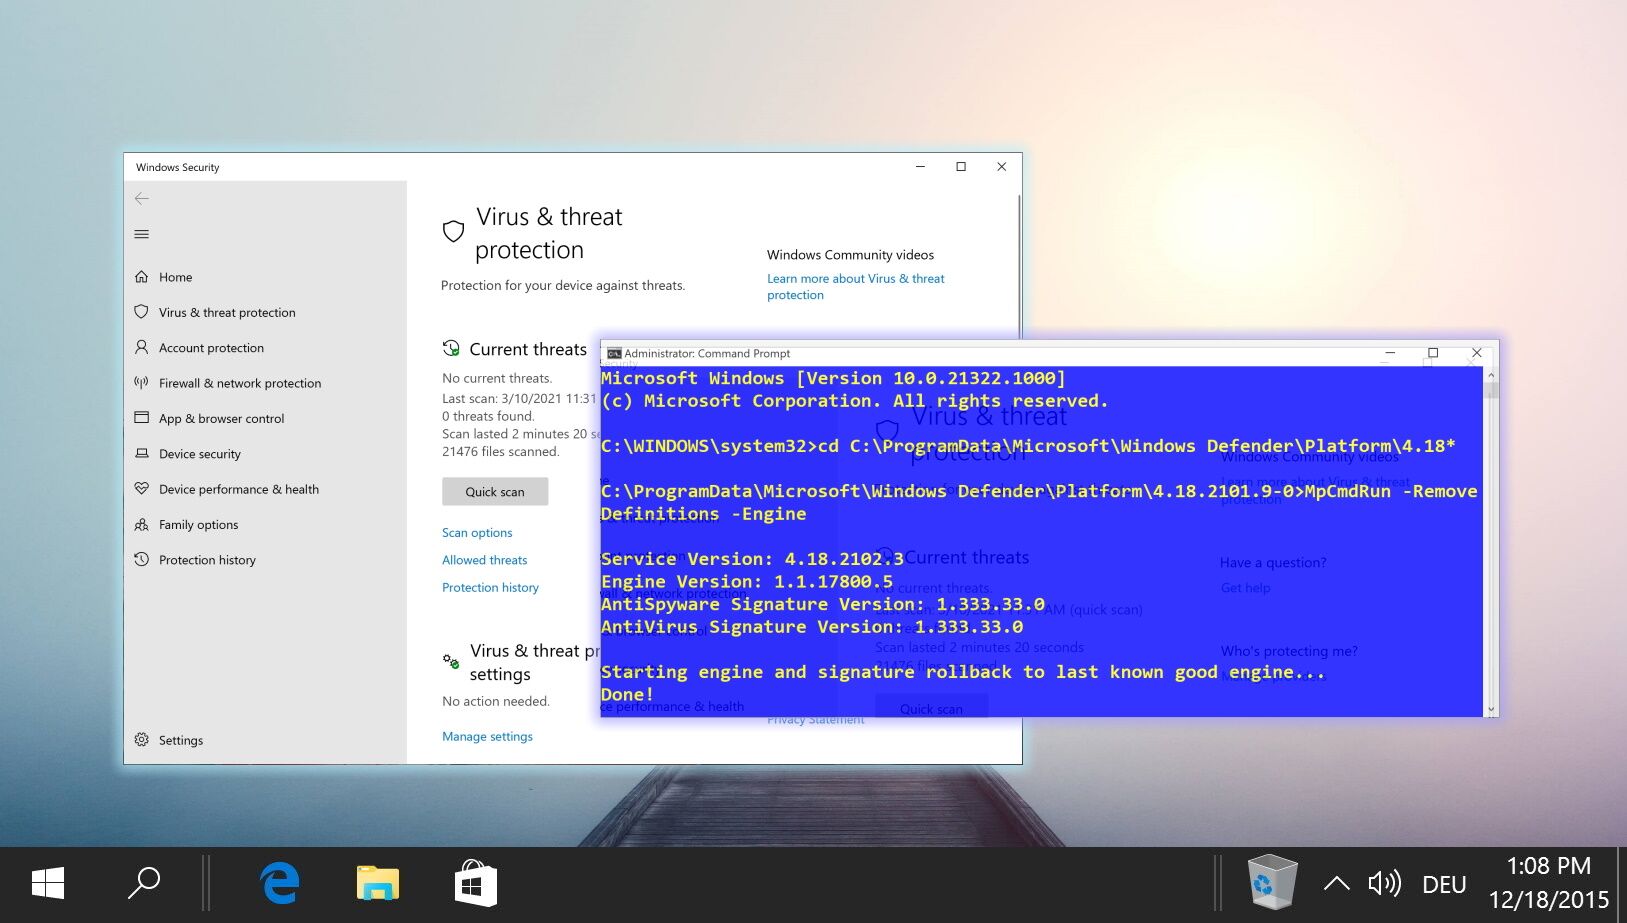
Related: How to Run Microsoft Defender from the Command Line (CMD)
Knowing how to run Microsoft Defender (formerly Windows Defender) from the command line can be very useful. Perhaps you’ve been locked out of its UI due to malware, are trying to run a scan from recovery media, or are using a GUI-less Windows Server install. In any of these situations, knowing a scan command or two can save you a lot of trouble. In our other tutorial, we show you how to use Microsoft Defender via CMD commands.
Last Updated on November 7, 2024 9:48 pm CET
Home
Windows
By
Anup Thapa
Files with the .sh extension, i.e., shell scripts, are designed to be run by Unix shells such as Bourne or GNU Bash. If you attempt to run shell scripts in Windows, it won’t work as the commands won’t be recognized by default.
Instead, you’ll have to introduce a compatibility layer to be able to run such scripts in Windows. There are various ways to do this, with the popular ones being Windows Subsystem for Linux, Cygwin, and Git Bash.
In this article, we’ve listed all the necessary steps to run Shell Scripts in Windows using these methods.
Windows Subsystem For Linux
The first method is to install a Linux distro through the Windows Subsystem for Linux feature. Cygwin and Git are convenient, but users often have difficulty running complex shell scripts and Linux applications with them. As such, WSL is the recommended option. Here are the necessary steps for this:
- Press Win + R, type
optionalfeatures, and press Enter. - Enable the Windows Subsystem for Linux and Virtual Machine Platform features, and press OK.

- After the changes are applied, restart the computer.
- When booting, press the BIOS key (Fn keys or Del).
- Go to the Advanced CPU Configuration or similar section and look for the virtualization option. It will be named something like AMD-V, SVM, VT-d, or VT-x.
- Enable the virtualization option if it isn’t already so, and press F10 to save the changes and exit.

- After booting, download and install the WSL2 Linux Kernel Update Package.
- Press Win + R, type
powershell, and press Enter. - Execute the following command to set WSL 2 as the default version when installing new Linux distros:
wsl --set-default-version 2 - Open the WSL Store, select your preferred distro, and press Get to download it. If you’re unable to install WSL Linux Distros from the Microsoft Store, you can directly download and install them using these links provided by Microsoft.

- After it’s downloaded, press Open.
- On the first launch, the installation will take a couple of minutes.
- After the installation completes, enter a new UNIX username and password.

- Before anything else, it’s good practice to update and upgrade your packages. On Debian-based distros, you can do this with the following command:
sudo apt update && sudo apt upgrade
- Navigate to the location of the script file.
- Hold Shift, right-click, and select Open Linux Shell here.
- Enter
sh scriptname.shto run the shell script.


Note: For common WSL issues encountered both during and after the installation, we recommend referring to this troubleshooting guide from Microsoft.
Use Cygwin
Cygwin is a run time environment used to run code designed for Unix environments on Windows. Here’s how you can run shell scripts in Windows using Cygwin:
- Download and launch the Cygwin installer.
- Select Install from Internet as the download source.
- Specify the root directory to install Cygwin to. Also, select whether Cygwin should be available for all users or just the current one.
- Select the default options for local package directory and internet connection.
- For the download site, choose a mirror geographically close to you if possible. Otherwise, any mirror will do fine. The difference in download speed shouldn’t be anything major.
- Don’t select any packages for the time being. Just press Next and follow the on-screen instructions to complete the installation.

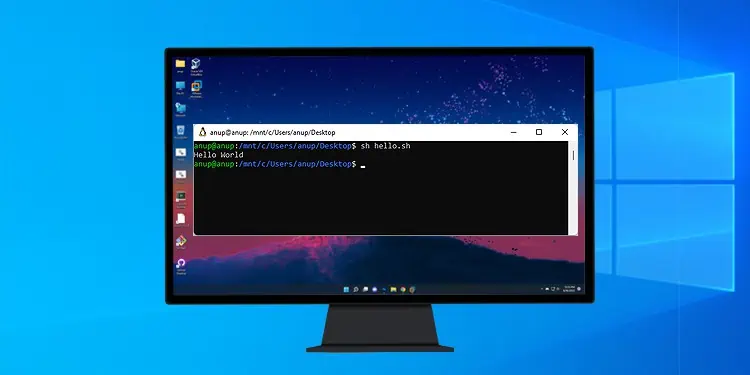
- Open the Cygwin64 Terminal and navigate to the location where the shell scripts are stored.
cd <scriptpath> - Use the following command to run the shell script:
sh scriptname.sh


Use Git Bash
During its installation, Git optionally adds some UNIX tools to the PATH in Windows, with sh.exe being one of them. Here’s how you can install Git and run shell scripts using Git bash:
- Download and install Git.
- During the installation, make sure to include Git bash and add Git to the PATH variable.

- After the installation is complete, navigate to the folder with the shell script.
- Right-click on an empty area and select Show More Options > Git bash here.
- Once again, use the
sh scriptname.shcommand to run the shell script.

