
В последней версии Windows 10 появилась новая особенность — зарезервированное хранилище, отнимающее 7 Гб места на системном разделе диска, что не для каждого может быть удобным, особенно при недостатке свободного пространства на диске C. Также может быть полезным: Как очистить диск C.
В этой инструкции подробно о том, как отключить зарезервированное хранилище Windows 10 с помощью редактора реестра. Однако, если вы не испытываете недостатка в свободном месте на диске, рекомендую не отключать его: зарезервированное хранилище может оказаться полезным и помочь предотвратить некоторые проблемы, которые иногда возникают, например, при установке обновлений на почти заполненный диск.
Отключение зарезервированного хранилища с помощью редактора реестра
Прежде чем приступить, рекомендую проверить, а есть ли у вас зарезервированное хранилище: оно по умолчанию включается не на всех системах. Для этого:
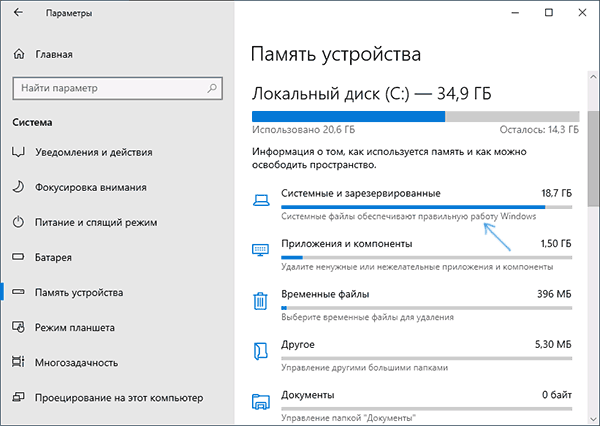
- Зайдите в «Параметры» — «Система» — «Память устройства» и нажмите по пункту «Показать больше категорий».

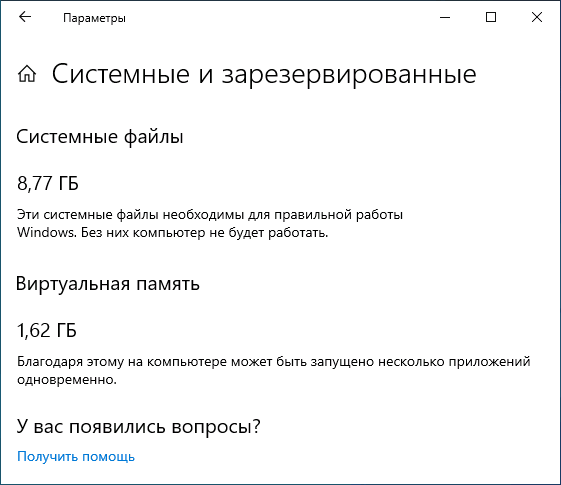
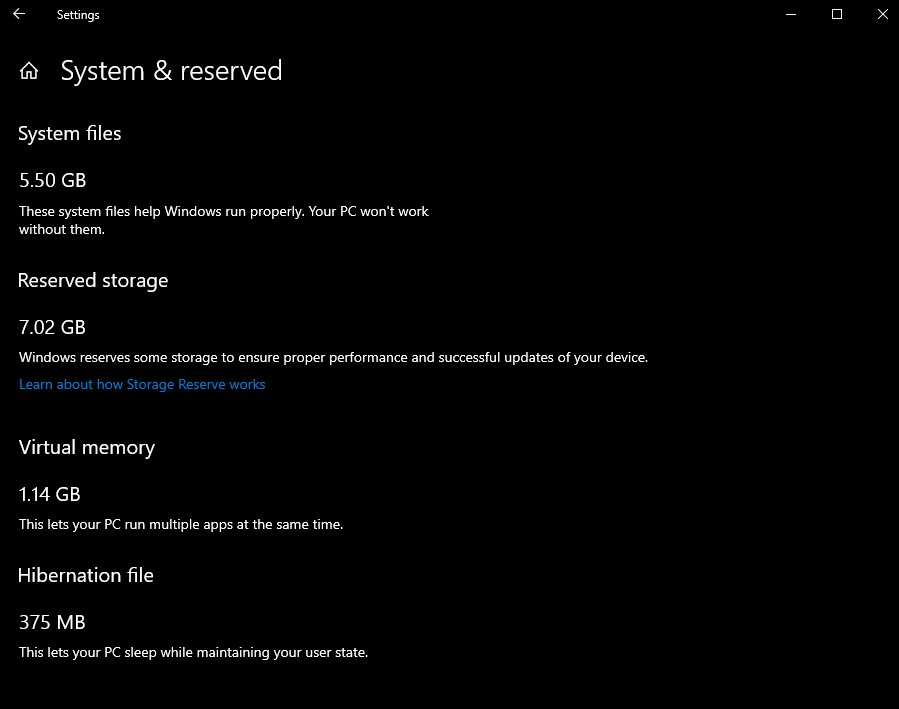
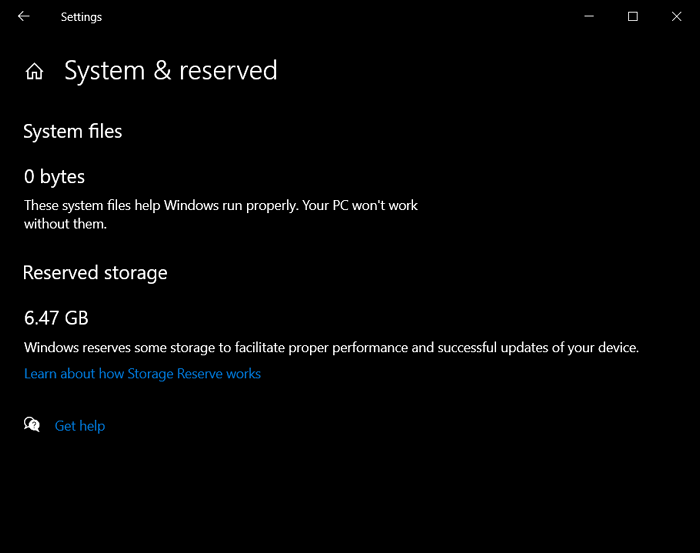
- В следующем окне нажмите по пункту «Системные и зарезервированные».

- Посмотрите, присутствует ли раздел «Зарезервированное хранилище» в списке.


Если такой пункт присутствует, там же вы увидите размер этого зарезервированного хранилища: обычно, около 7 Гб, но не исключено, что со временем размер может и увеличиться.
Чтобы отключить зарезервированное хранилище, выполните следующие шаги:
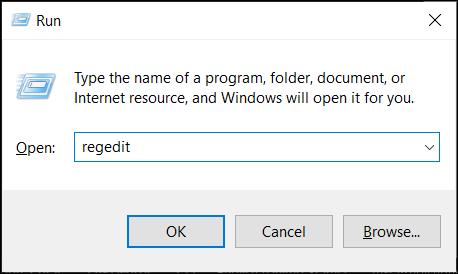
- Нажмите клавиши Win+R на клавиатуре, введите regedit и нажмите Enter.
- В открывшемся редакторе реестра перейдите к разделу
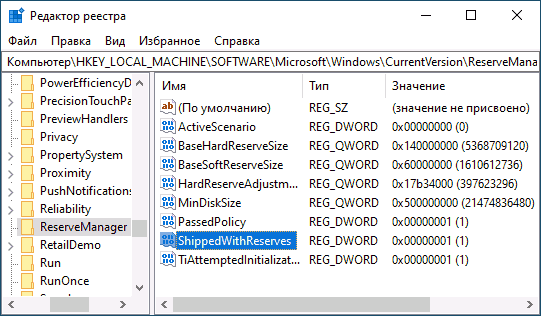
HKEY_LOCAL_MACHINE\SOFTWARE\Microsoft\Windows\CurrentVersion\ReserveManager

- Дважды нажмите по параметру с именем ShippedWithReserves и измените его значение на 0.
- Нажмите Ок, закройте редактор реестра и перезагрузите компьютер.
После выполнения этих действий проделайте шаги из первого раздела инструкции, чтобы посмотреть в параметрах Windows 10, исчез ли пункт «Зарезервированное хранилище».
Если зарезервированное хранилище всё так же остается, дождитесь любого обновления Windows (или инициализируйте его скачивание в Параметры — Обновление и безопасность — Центр обновления Windows — Проверить наличие обновлений). В моем тесте, измененный параметр начинал действовать, а зарезервированное хранилище исчезало только после установки очередных обновлений системы и перезагрузки ОС.

On Windows 10, Reserved Storage is a feature designed to allocate part of your device available storage for updates and upgrades to avoid problems as a result of not enough space.
The feature has been available since version 1903, and it comes enabled by default after a clean installation or on newly manufactured devices.
Starting with version 2004, Windows 10 is introducing new commands for the Deployment Image Servicing and Management (DISM) command tool, which allows you to determine if Reserved Storage is configured as well as to enable or disable the feature.
In this guide, you’ll learn the steps to enable or disable Reserved Storage using the DISM commands on Windows 10 version 2004.
- How to enable Reserved Storage using DISM command
- How to disable Reserved Storage using DISM command
How to enable Reserved Storage using DISM command
DISM command to enable Reserved storage on Windows 10:
-
Open Start.
-
Search for Command Prompt, right-click the top result, and select the Run as administrator option.
-
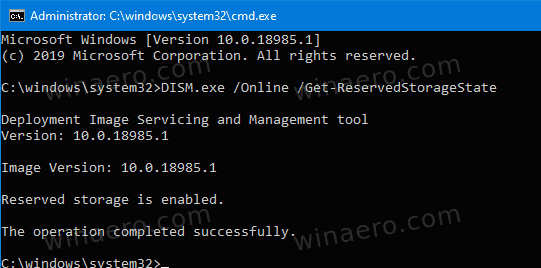
Type the following command to confirm whether Reserved Storage is enabled or disabled, and press Enter:
dism /Online /Get-ReservedStorageState
-
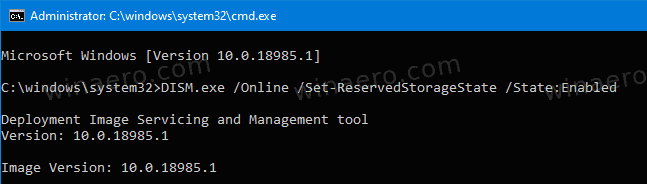
Type the following command to enable Reserved Storage and press Enter:
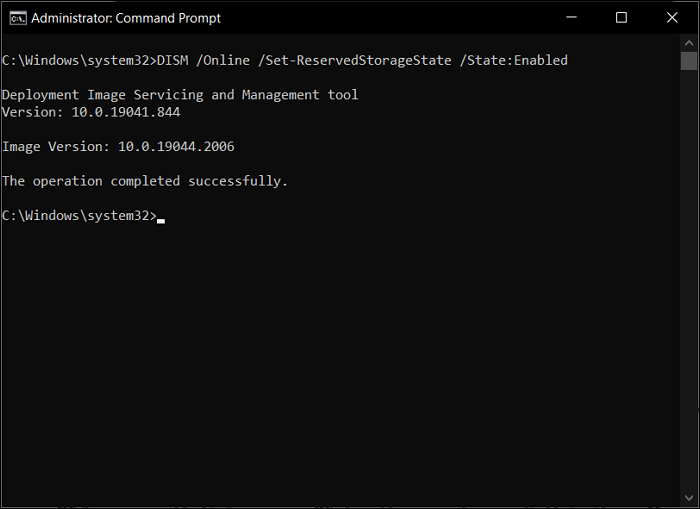
dism /Online /Set-ReservedStorageState /State:Enabled

Windows 10 enable Reserved Storage DISM command

After you complete the steps, Reserved Storage will enable on your device setting aside a part of the available storage to avoid problems during updates and upgrades.
How to disable Reserved Storage using DISM command
DISM command to disable Reserved storage on Windows 10:
-
Open Start.
-
Search for Command Prompt, right-click the top result, and select the Run as administrator option.
-
Type the following command to confirm whether Reserved Storage is enabled or disabled, and press Enter:
dism /Online /Get-ReservedStorageState
-
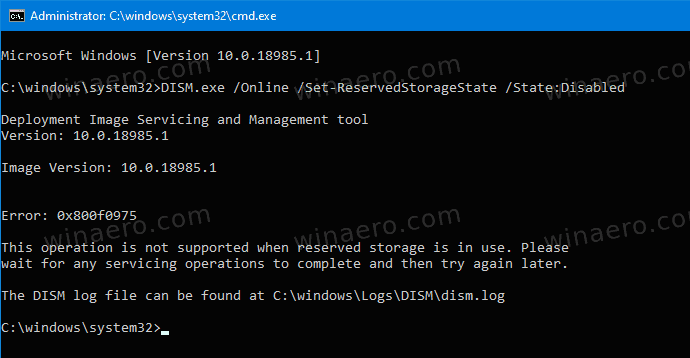
Type the following command to disable Reserved Storage and press Enter:
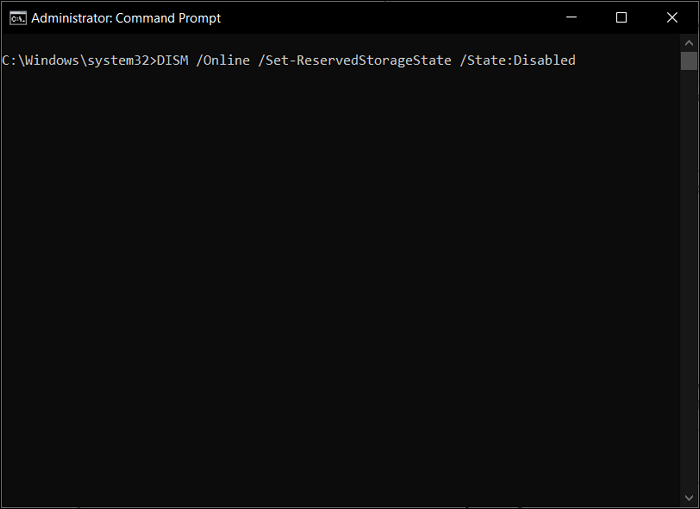
dism /Online /Set-ReservedStorageState /State:Disabled
Windows 10 disable Reserved Storage DISM command

Once you complete the steps, Windows 10 will unlock the storage previously reserved to prevent problems during updates without users having to free up space.
Although you can enable or disable Reserved Storage using the DISM command tool, it won’t take effect until the next upgrade of Windows 10.
Mauro Huculak is a
Windows How-To Expert and founder of
Pureinfotech
(est. 2010). With over 21 years as a technology writer and IT Specialist,
Mauro specializes in Windows, software, and cross-platform systems such as Linux, Android, and macOS.
Certifications:
Microsoft Certified Solutions Associate (MCSA),
Cisco Certified Network Professional (CCNP),
VMware Certified Professional (VCP),
and
CompTIA A+ and Network+.
Mauro is a recognized Microsoft MVP and has also been a long-time contributor to Windows Central.
You can follow him on
YouTube,
Threads,
BlueSky,
X (Twitter),
LinkedIn and
About.me.
Email him at [email protected].
Starting with Windows 10 1903, Microsoft introduced Reserved Storage which allocates a portion of the disk for upcoming updates and fixes. The presence of extra space reserved for cumulative updates resolves several bugs that occur due to not having enough storage. Previously, users need to make a few changes inside the registry to either enable or disable Reserved Storage on their PC. However, one can perform this task simply using the DISM utility.

The company adds three commands – the first one to view its current status, while the second and third ones are to enable and disable Reserved Storage on Windows 10 version 20H1 respectively. Let’s explore how-to run these codes effectively –
Here’s how to either enable or disable reserved storage on Windows 10 devices –

Note: The below methods are applicable only if you have already upgraded your operating system to 20H1. If you are using either Windows 10 19H1 or 19H2 version, read how to enable or disable reserved storage on Windows.
How to Enable Reserved Storage using DISM Command Tool
To enable reserved storage using the DISM Command tool, use the steps –
- Open Command Prompt as an administrator.
- If the UAC prompts on the screen, click on the Yes button.
- Once the elevated command prompt opens, you need to confirm whether the reserved storage is enabled or disabled.
- To do this, type the below command and then hit the Enter key
dism /Online /Get-ReservedStorageState
- In order to enable Reserved Storage, type the following command and then press Enter –
dism /Online /Set-ReservedStorageState /State:Enabled
Once you complete the above steps, Reserved Storage gets enabled on your device. It will preserve your device from having problems while updating and upgrading process.
How to Disable Reserved Storage using DISM Command Tool
To disable reserved storage using the DISM Command tool, use the steps –
- Press the Window+R shortcut key to open the Run dialog box.
- In the text area, type “cmd” and press Ctrl+Shift+Enter together to launch the elevated Command Prompt.
- When the UAC prompts on the screen, click on the Yes button.
- In the Command Prompt window, type the following code and press Enter to know its current status –
dism /Online /Get-ReservedStorageState
- To execute the above command lines, press the Enter key.
- In order to enable Reserved Storage, type the following command and then press Enter –
dism /Online /Set-ReservedStorageState /State:Disabled
After performing the above steps, you can disable the Reserved Storage on your device. It unlocks the storage previously reserved to hamper the issues during updating and upgrading issues without requiring to free up space.
Should I disable reserved storage Windows 10?
If you have no available space on your computer to install Windows updates, you can remove and reinstall them. However, this is not a good situation for users and could lead to further issues in the future. In case you need to reduce storage, you should turn off reserved storage.
That’s it.
Microsoft has silently added a couple of improvements to the Reserved Storage feature in Windows 10 version 2004. From now, changing the Registry is no longer required to enable or disable it, there are new DISM commands for that.
Starting in Windows 10 19H1, version 1903, Microsoft made a few changes to how Windows 10 manages disk space. Some disk space, reserved storage, is now used by updates, apps, temporary files, and system caches.
Windows 10 will reserve some disk space to ensure that critical OS functions always have access to disk space. If a user almost fills up his storage, several Windows and application scenarios become unreliable. For example, Windows Update may fail to download new update packages. Reserved storage solves this issue. It is enabled out of the box on devices that come with Windows 10 pre-installed or those where Windows 10 was clean installed.
Tip: Find Reserved Storage Size in Windows 10
Starting in Windows 10 ’20H1′, version 2004, Microsoft has added three new commands to enable or disable the Reserved Storage feature. As you may recall, you had to apply a Registry tweak prior to 20H1 builds. Now, you can use the following commands.
- Open a new elevated command prompt.
- Type
DISM.exe /Online /Get-ReservedStorageStateto see if the Reserved Space feature is enabled or disabled.
- Execute the following command to enable Reserved Storage:
DISM.exe /Online /Set-ReservedStorageState /State:Enabled.
- Run the following command to disable Reserved Storage:
DISM.exe /Online /Set-ReservedStorageState /State:Disabled.
You are done. The change will be applied instantly, no restart required.
Also in version 2004, you can use PowerShell to manage Reserved Storage.
Note: If Windows 10 is performing a servicing operation, e.g. it is installing an update, you won’t be able to enable or disable the Reserved Storage feature. The operation will fail. You should try to execute the appropriate DISM command later.
Note: The amount of reserved space will vary over time based on how you use your device. For example, temporary files that consume general free space today on your device may consume space from reserved storage in the future.
When enabled, reserved storage will instantly reserve its full allotment of disk space. However, on disk-space-constrained devices, enabling reserved storage will leave the user space and will only take the minimum—which is 2% of system volume capacity or 3GB of disk space, whichever is lower—to ensure that the device is functional and accessible to the user for further operations. Reserved storage will grow back to its original allocated size as space becomes available, such as when old Windows installations are removed or then Storage Sense cleanup tasks are conducted.
You can uninstall optional features and language packages to reduce the amount of space that Windows 10 will reserve for updates. Check out the post: Reduce Reserved Storage Size in Windows 10.
Thanks to deskmodder.
Support us
Winaero greatly relies on your support. You can help the site keep bringing you interesting and useful content and software by using these options:
If you like this article, please share it using the buttons below. It won’t take a lot from you, but it will help us grow. Thanks for your support!
Windows is among the most renowned operating systems in the world, with features that explain the varying operability of the OS. While they are designed to execute many vital tasks, they are built to provide ease of use to their users. Such is the case with Windows, which tried to bring improvement in its user experience.
In Windows 10, the OS came up with a great feature under its belt, which was named «Reserved Storage.» This article is all about discussing Reserved Storage Windows 10 and providing users with a guide on how they can enable and disable it across their devices.
An Overview of Reserved Storage Windows 10
The Reserved Storage feature was introduced in Windows 10 version 1903, which changed the methodology of handling disk space. As users mostly faced issues with managing their disk spaces, the need for a reserved space was the need of the hour. Therefore Windows 10 provided the update of taking out some reserved storage from HDD, which will be dedicated to the system tasks.
While almost 7GB of disk space is reserved for the OS, this will help them store updates, temporary files, applications, and system cache (Windows SSD cache included). It provides a smoother flow of operations for the OS, which would drive adaptability and accessibility according to the environment. The size of the Reserved Storage Windows 10 is believed to vary over time. It majorly depends on the utility of the system and its smooth workflow.
Having the Reserved Storage feature across your Windows 10 computer is lucrative in many ways. While it prevents the complete use up of the disk storage across the computer, it smoothens the operability of the device many times. To give users more control over this feature, it is always up to them to enable and disable the feature of Reserved Storage across their Windows 10 devices.
How to Enable Reserved Storage Windows 10?
Reserved Storage Windows 10 is one of the features with its pros and cons in terms of usability across the device. This is why it is up to the user to control the use of this feature within their Windows 10 device. If you wish to enable it across your computer, there are two different methods and approaches. Let’s see how you can enable Reserved Storage on your Windows 10:
Method 1: Through the Registry Editor
Method 2: Through Command Prompt
Method 1: Through the Registry Editor
Step 1: You need to start by launching the Run program on your computer. Use the shortcut keys of «Windows + R» to process. Once the window appears on the front, type in «regedit.» This will open up the Registry Editor in front of you.
Step 2: You need to navigate the following path across the Registry Editor. For that, you can easily copy and paste this across your address bar:
Computer\HKEY_LOCAL_MACHINE\SOFTWARE\Microsoft\Windows\CurrentVersion\ReserveManager
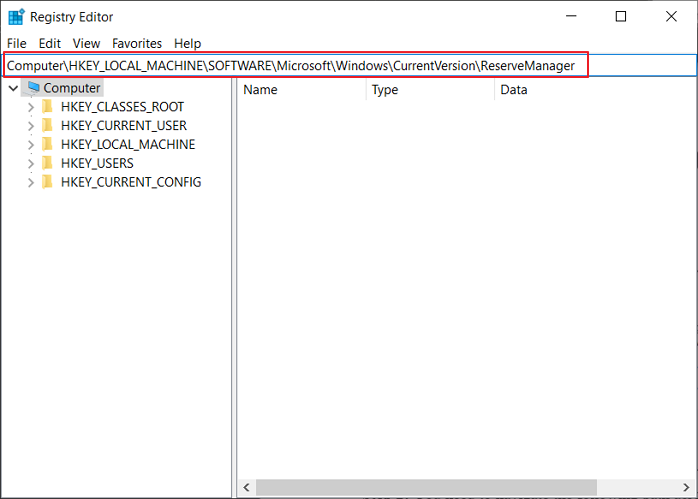
Step 3: As you search through this address, ensure that the «ReserveManager» folder is in the list.
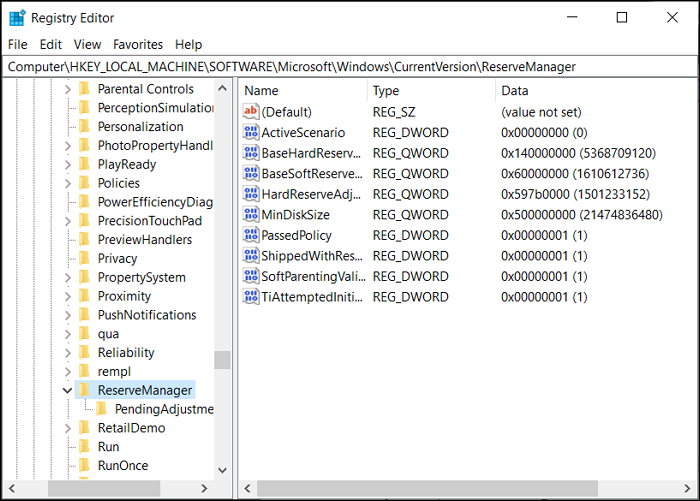
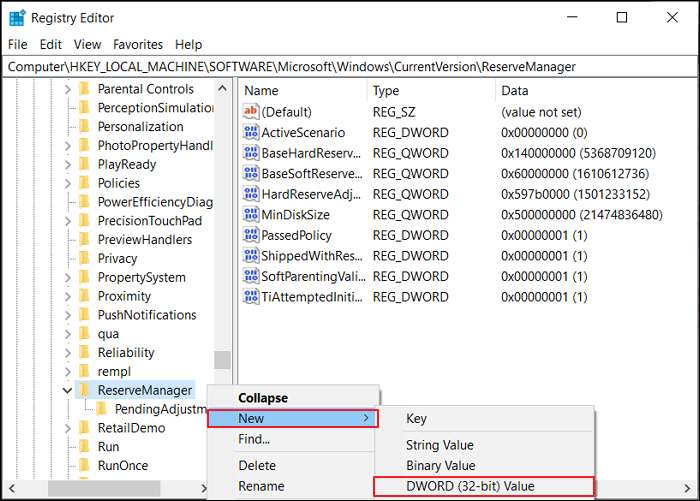
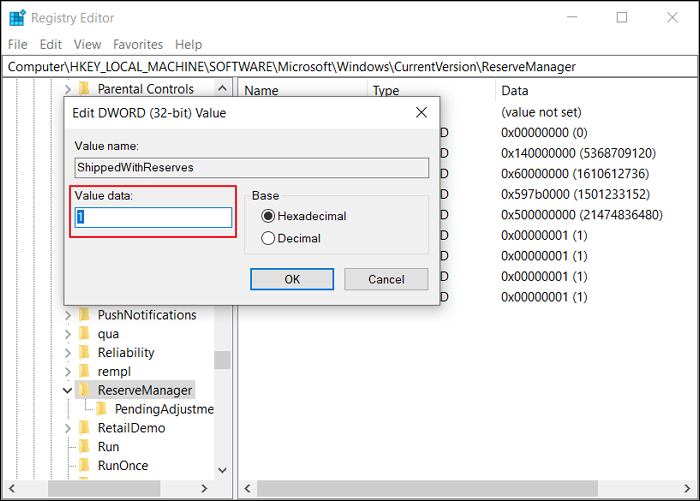
Step 4: On the right-sided panel, right-click on the vacant area and select the option of «New.» You need to add a «DWORD (32-bit) Value.» Name the registry key as «ShippedWithReserves.»
Step 5: You need to open the registry key by double-clicking it. Type the value of «1» across the «Value data:» space and click «OK.» Restart your computer to make the changes.
Method 2: Through Command Prompt
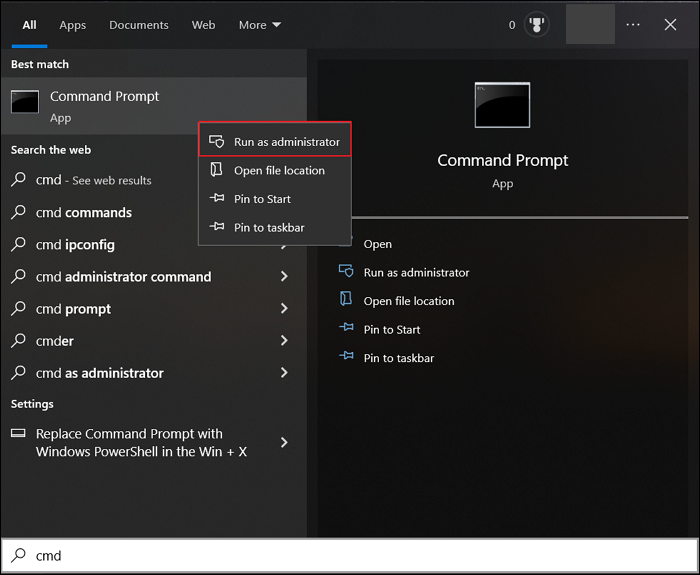
Step 1: To start the Command Prompt, go across the «Search» icon on the taskbar and type «cmd.» As the results appear, right-click on the «Command Prompt» option and select the option of «Run as administrator.»
Step 2: This will open up the Command Prompt in front of you. Next, you must ensure that the Reserved Storage feature is turned on. For that, type in the following command in the CMD:
DISM /Online /Get-ReservedStorageState
Step 3: If you wish to enable your Reserved Storage Windows 10 feature, you need to provide the following command:
DISM /Online /Set-ReservedStorageState /State:Enabled
How to Disable Reserved Storage Windows 10?
While you can enable this feature across Windows 10, you can also try to disable it with ease. You can also work through two methods to disable the feature across your Windows 10. Look through the methods to know more about the process in detail:
Method 1: Through the Registry Editor
Method 2: Through Command Prompt
Method 1: Through the Registry Editor
Step 1: Access the «Search» icon on the taskbar and type «Run» to launch the Run program. As it opens up, type in «regedit» to open the Registry Editor.
Step 2: Add in the following path navigation across the address bar on the top:
Computer\HKEY_LOCAL_MACHINE\SOFTWARE\Microsoft\Windows\CurrentVersion\ReserveManager
As you move into the respective address, find and select the «ReserveManager» folder in the left-sided panel.
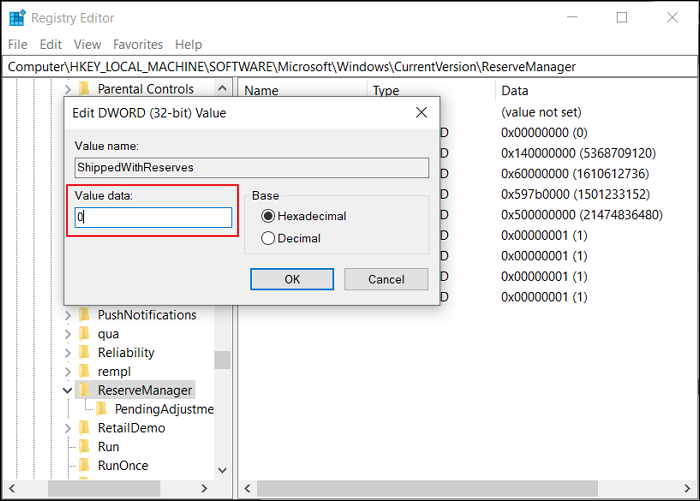
Step 3: On the right-handed panel, search for «ShippedWithReserves» and double-click to open it. Insert the value of 0 across the «Value data:» section and click «OK.» You will then need to restart your Windows 10 computer to apply the changes.
Method 2: Through Command Prompt
Step 1: To start Command Prompt as an administrator, you need to type in «cmd» across the Search tab of your Windows 10. As you observe the results across it, find the option of «Run as administrator» in the window’s right pane.
Step 2: With the command prompt opened up, check the status with the following command:
DISM /Online /Get-ReservedStorageState
On assessing the status, you can use this command to disable the feature across your Windows 10:
DISM /Online /Set-ReservedStorageState /State:Disabled
Final Words
This article has reviewed and assessed the feature of Reserved Storage Windows 10 and provided users with an insight into how they can use this function. With the methods available for enabling and disabling this feature, you would surely get to know how you can utilize this feature across your Windows device.
Reserved Storage FAQs
While you get to know more about the Reserved Storage feature across Windows 10, specific questions may arise in the user’s mind. For that, we have outlined some important questions as follows:
1. Can I remove reserved storage for Windows 10?
Yes, you can remove or disable the Reserved Storage across your Windows device. You can also decrease the required space by uninstalling the available optional features.
2. Do I need reserved storage in Windows 10?
Multiple files need to be processed across the Windows device. With limited spaces, having no dignified space would get quite complicated for Windows and lead to unresponsive processes. To avoid this and ensure a smooth operation of Windows, you provide a certain reserve of your storage to help it easily manage its updates, system caches, applications, and temporary files. This would avoid all abnormal operations of the Windows device.
3. What is using all my storage Windows 10?
If you wish to check out where the storage is being consumed across Windows 10, open up «Settings» across your computer and proceed to the «System» section. There, find out the option of «Storage» and check out the section of the C: drive. You will get to see what is taking up the hard drive space. Navigate to the «Show more categories» option for viewing other file types. You can also view the use of the storage of other drives across the «View storage usage on other drives.»