
Важно! В этой статье будет рассказано о том, как отключить в операционной системе Windows 10 функцию автоматического обновления. Если вам необходимо отключить службу апдейтов полностью, обратитесь за помощью к другой нашей статье, перейдя по представленной ниже ссылке.
Подробнее: Как навсегда запретить обновление Windows 10
Чтобы отключить обновления в Windows 10, необходимо открыть «Редактор локальных групповых политик», перейти в соответствующий раздел и изменить значение параметра, отвечающего за эту функцию.
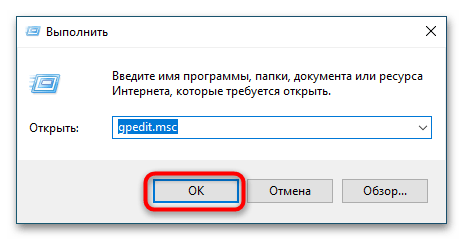
- Откройте «Редактор локальных групповых политик» любым доступным способом. Например, это можно сделать посредством окна «Выполнить». Вызовите его с помощью горячих клавиш Win + R, а затем введите команду
gpedit.mscи нажмите по кнопке «ОК». - Воспользовавшись навигационной панелью в левой части окна, перейдите по представленному ниже пути.
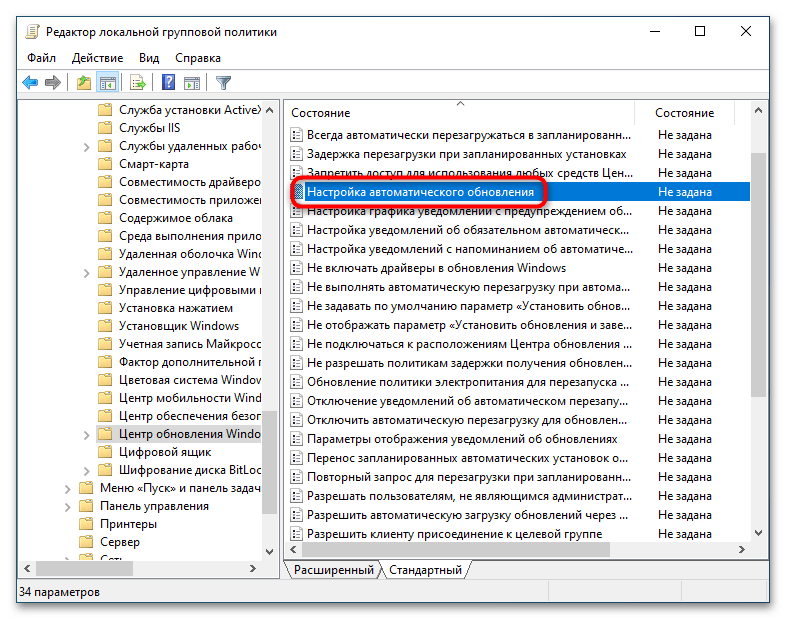
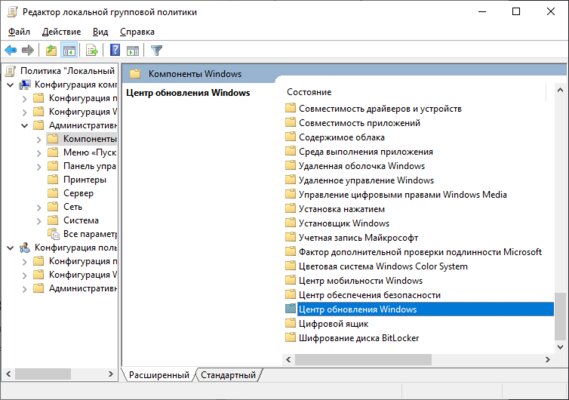
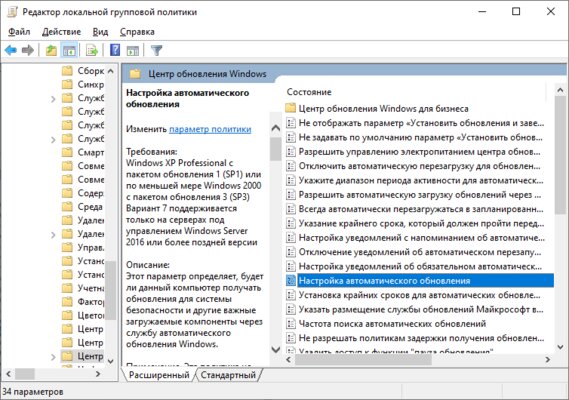
«Локальный компьютер» → «Административные шаблоны» → «Компоненты Windows» → «Центр обновления Windows»Попав в целевую директорию, в основной области найдите параметр с названием «Настройка автоматического обновления» и вызовите его окно свойств. Для этого достаточно кликнуть дважды левой кнопкой мыши по имени файла.
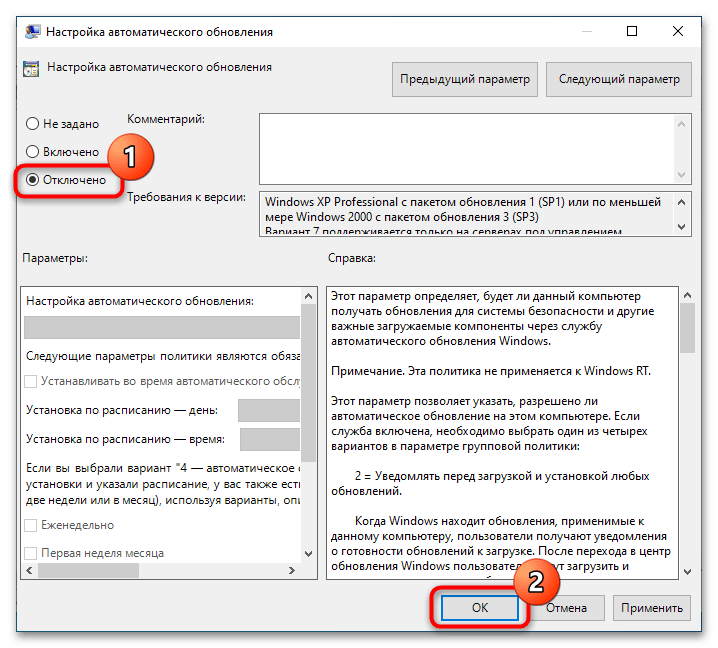
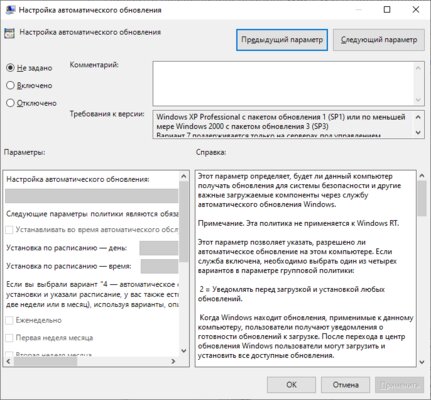
- В свойствах переведите переключатель, расположенный в верхнем левом углу окна, в положение «Отключено». Затем кликните по кнопке «ОК», чтобы применить внесенные изменения.
После проделанных действий операционная система перестанет обновляться в автоматическом режиме. Для этого вам потребуется вручную проверять выход новых апдейтов и инициализировать их инсталляцию. У нас на сайте есть отделительная статья, в которой наглядно демонстрируется то, как это делать.
Подробнее: Установка обновлений Windows 10
Наша группа в TelegramПолезные советы и помощь
GPO — Disable automatic updates on Windows
GPO — Disable automatic updates on Windows
Would you like to learn how to configure a group policy to disable automatic updates on Windows? In this tutorial, we will show you how to disable automatic updates from the Windows update service using a GPO.
• Windows 2012 R2
• Windows 2016
• Windows 2019
• Windows 10
• Windows 7
Equipment list
The following section presents the list of equipment used to create this tutorial.
As an Amazon Associate, I earn from qualifying purchases.
Windows Related Tutorial:
On this page, we offer quick access to a list of tutorials related to Windows.
Tutorial GPO — Disable automatic updates on Windows
On the domain controller, open the group policy management tool.

Create a new group policy.

Enter a name for the new group policy.

In our example, the new GPO was named: MY-GPO.
On the Group Policy Management screen, expand the folder named Group Policy Objects.
Right-click your new Group Policy Object and select the Edit option.
On the group policy editor screen, expand the Computer configuration folder and locate the following item.
Access the option named Windows Update.
Disable the option named Configure automatic updates.

To save the group policy configuration, you need to close the Group Policy editor.
Congratulations! You have finished the GPO creation.
Tutorial — Applying the GPO to disable automatic update
On the Group policy management screen, you need to right-click the Organizational Unit desired and select the option to link an existent GPO.

In our example, we are going to link the group policy named MY-GPO to the root of the domain.

After applying the GPO you need to wait for 10 or 20 minutes.
During this time the GPO will be replicated to other domain controllers.
On a remote computer, verify the Windows update settings.

In our example, we disabled the Windows automatic updates on all domain computers using a GPO.
VirtualCoin CISSP, PMP, CCNP, MCSE, LPIC22021-02-13T12:16:17-03:00
Related Posts
Page load link
Ok
This article explains how you can disable Check for Updates using Group Policy. To prevent users from manually downloading updates from Microsoft, you can disable the check for updates button.
Most organizations today use Configuration Manager to deploy software updates to computers. Why? Because SCCM makes it easy to deploy and manage the updates.
With Configuration Manager deploying the software updates, you ensure the client computers are patched with the latest updates.

The software update point (SUP) interacts with the WSUS services to configure the software update settings and to request synchronization of software updates metadata.
If you have set up a standalone WSUS server to deploy Windows Updates to your computers, you ensure only the approved updates are deployed to all computers.
When you are using ConfigMgr/WSUS to manage updates, you basically have a complete control over the updates that you deploy. You don’t want users to manually check updates from Microsoft update and install it.
If you are allowing users to check for updates from Microsoft update, any user can download the updates and install. You don’t want users to download unwanted updates and cause issues with the laptop.
And when WSUS or SCCM attempts to deploy the latest updates, it would detect the client computer already has the updates installed.
Why should you disable Check for Updates?
Here are some reasons why you should prevent domain users from using Check for Updates option in Windows.
- A user can manually go to Start > Settings > Windows Update and run check for updates. This option should be disabled on domain computers because a user can manually download unapproved updates. Since these updates aren’t tested by admins, it may affect the stability of the computer.
- When a user manually downloads and installs the updates from Microsoft update, an operating system upgrade could occur. This has been the case in several organizations where an OS upgrade occurred just because the user wanted newer version of operating system. After the upgrade, some applications may not work properly and some settings may change. Overall, it’s a big challenge for system admins to roll back the operating system. To prevent such things, you can restrict users checking updates from Microsoft.
- Allowing users to manually check for updates from Microsoft update defeats the purpose of having WSUS, Configuration Manager in the setup. When you have invested money in a tool that deploys updates to your domain computers, it’s of no use when users download the updates directly from Microsoft update.
The below screenshot is from a computer that is just joined to the AD domain and managed by Configuration Manager.
Notice that check for updates button is active and enabled. In addition, there is a cumulative update available for installation.
If the user clicks download and install, the quality update will download from Microsoft update and install on the computer.
The user may think that the computer requires that optional update whereas it clearly states that it’s an optional quality update.
Now, do you see a reason why you must disable check for updates on domain computers?
 1")
Therefore, in most organizations, a group policy is deployed to the client computers to disable check online for updates from Microsoft update site.
Thankfully, with “Remove access to use all Windows Update features” GPO setting, administrators can disable the “Check for updates” option for users.
The group policy setting essentially blocks the access to Windows update. If you enable this policy setting, user access to Windows Update scan, download and install is removed.
Any background update scans, downloads and installations will continue to work as configured.
How To Disable Check for Updates using Group Policy
The best way to disable check for updates on computers is by using group policy (GPO). Group Policy can be used to apply security settings to users and computers.
The Group Policy allows administrators to define security policies for users and for computers. The GPO is a vast topic, and you can start learning about Group Policy from Microsoft Documentation.
When you create a group policy, you either deploy it to the entire AD domain or select Organizational Units. Whenever you create a new GPO, ensure you test it on pilot computers and then deploy it to wider set of computers.
Let’s create a new group policy disable check for updates from Microsoft Update. Launch the Server Manager and click Tools > Group Policy Management console.
In the Group Policy Management console, expand the domain and right-click Group Policy Objects and select New.
 2")
Specify the GPO name as “Disable Check for Updates from Microsoft Update” or something similar. Click OK.
 3")
After you create the GPO, right click the GPO and select Edit. Edit the GPO and specify the settings to disable check for updates.
 4")
In the Group Policy Object Editor, expand Computer Configuration > Administrative Templates > Windows Components > Windows Update.
In the right pane, from the list of settings, right click the setting Remove access to use all Windows Update features and select Edit.
 5")
The GPO setting Remove access to use all Windows Update features removes access to scan for Windows Updates. The check for updates from Microsoft update button will be disabled.
 6")
Group Policy Result – Check for Updates Disabled
After you apply the above group policy, run the command gpupdate /force on the client machines.
Read: How to Modify Group Policy Refresh Interval for Windows computers.
On the Windows 10 computer, click Start > Settings > Windows Update. Notice that Check for updates button is now disabled. The option to check online for updates from Microsoft update is also gone.
Instead, you see This option is managed by your organization.
 7")
Let’s check if the check for updates button is disabled for Windows 11 computer. On the Windows 11 computer, click Start > Settings > Windows Update. Yes, the check for updates button is disabled. The option to check online for updates from Microsoft update is not available.
 8")
Still Need Help?
If you need further assistance on the above article or want to discuss other technical issues, check out some of these options.
Отключение автоматического обновления в Windows Server 2019 можно реализовать несколькими способами, но в данной инструкции мы рассмотрим способ отключения автоматического обновления через групповые политики.
Этот способ хорош тем, что мы не перманентно отключаем обновления, а отказываемся от их автоматического скачивания.
Заходим в оснастку Редактор локальной групповой политики. Для этого нам необходимо нажать на кнопку Пуск правой кнопкой мыши, выбрать пункт Выполнить и ввести:
Далее идём по следующему пути: Конфигурация компьютера > Политики > Административные шаблоны > Компоненты Windows > Центр обновления Windows.
Находим пункт Настройка автоматического обновления и заходим в него. В открывшимся окне выбираем пункт Отключено. Нажимаем кнопку Применить и выходим из оснастки.
Для того, чтобы изменения вступили в силу, нужно заново считать групповую политику. Обновление политики будем делать через командную строку (cmd.exe), нужно ввести:
Настройки Windows Server и обслуживание серверов мы осуществляем в рамках услуги ИТ-аутсорсинг.
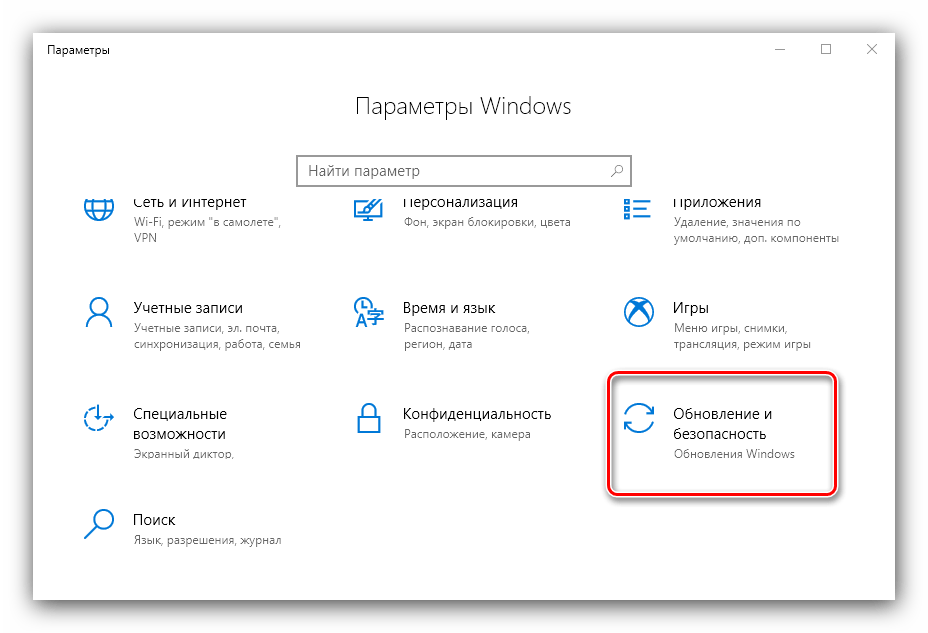
Довольно часто очередное обновление операционной системы Windows 10 ставит пользователя в тупик — иногда нужно быстро выключить компьютер и уйти по делам, либо же наоборот включить систему и выполнить какое-то действие. Вместо этого приходится смотреть на экран установки обновления, которое иногда может занять пять-десять минут. И, к сожалению, с каждой свежей версией ОС разработчики из Microsoft закрывают возможности эти апдейты отключить — пользоваться устаревшей версией системы буквально затруднительно. Но, конечно, есть сразу несколько вариантов решения данной проблемы.
Отключение обновлений через настройку прав пользователей
Первый способ позволяет полностью запретить операционной системе запускать обновление через перенастройку прав пользователей.
Для этого нужно выполнить несколько простых шагов:
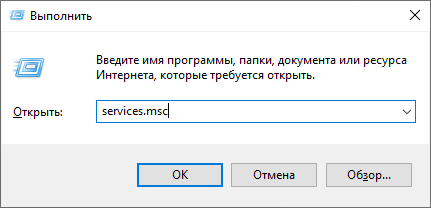
- нажмите Win+R на клавиатуре, в открывшемся окне введите команду services.msc и нажмите Enter;

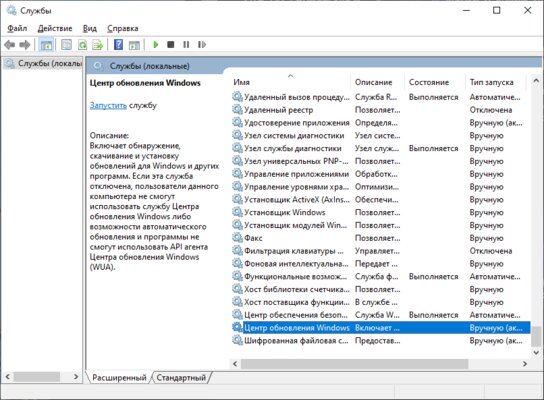
- в открывшемся списке найдите службу «Центр обновлений Windows» и два раза кликните по ней;

- во вкладке «Общие» откройте выпадающее меню «Тип запуска» и выберите пункт «Отключена»;
- нажмите на «Остановить»;
- в этом же окне перейдите во вкладку «Вход в систему»;
- выберите пункт «С учётной записью» и нажмите на кнопку «Обзор»;
- в открывшемся окне выберите пункт «Дополнительно», после чего откройте поиск и в открывшемся списке кликните по «Гость»;

- нажмите «ОК»;
- удалите пароль для пользователя «Гость», после чего примените изменения;
- перезагрузите компьютер.

После внесённых изменений служба «Центр обновлений Windows» будет полностью отключена, а её права настроены как «Гость», то есть без прав администратора — возможности вносить изменения в систему у данной службы нет. А поскольку устанавливать обновления можно только от имени администратора, Windows 10 больше не будет обновляться без разрешения самого пользователя.
Отключение обновлений через редактор групповой политики
Операционная система Windows 10 может похвастаться достаточно продвинутым набором различных утилит, которые могут настраивать даже самые важные функции ОС. Среди них — редактор групповой политики, благодаря которому тоже можно отключить обновления в Windows 10.
Для этого нужно выполнить несколько простых шагов:
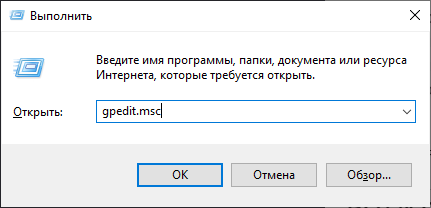
- нажмите Win+R на клавиатуре;
- в открывшемся окне введите команду gpedit.msc;
- перейдите по адресу: Конфигурация компьютера\Административные шаблоны\Компоненты Windows;
- выберите категорию «Центр обновления Windows»;

- найдите пункт «Настройка автоматического обновления»;
- переведите параметр в режим «Отключено»;

- нажмите «ОК».
Отключение обновлений через планировщик задач
Благодаря утилите «Планировщик задач» определённые процессы в операционной системе запускаются автоматически — к ним относятся и обновления системы.
К счастью, функции данной утилиты тоже можно ограничить:
- нажмите Win+R на клавиатуре;
- в открывшемся окне введите команду taskschd.msc;
- проследуйте по адресу: Библиотека планировщика заданий\Microsoft\Windows\UpdateOrchestrator;

- отключите всё, что связано с обновлением Windows.

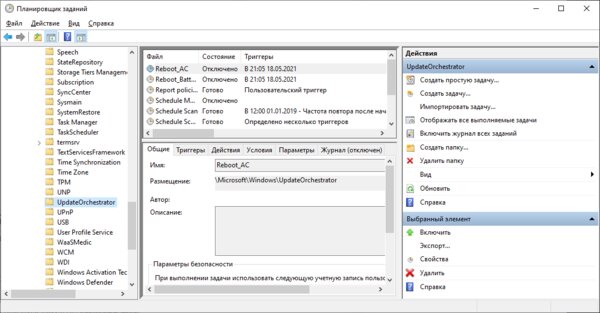
⚠️ Важно: разработчики из Microsoft периодически переименовывают службы, так что стоит искать всё, что связано со словом Update.
Всё и сразу
В большинстве ситуаций для отключения апдейтов хватает одного из вышеуказанных способов, но для наибольшей надёжности стоит воспользоваться сразу всеми. В этом случае Windows 10 будет гораздо труднее обойти запреты и запустить обновление автоматически, без ведома пользователя.