
Компоненты Hyper-V в Windows 10 позволяют создавать виртуальные машины встроенными средствами системы (подробнее: Виртуальные машины Hyper-V в Windows 10), а также служит для работы таких компонентов как Песочница Windows 10. Однако в некоторых случаях включенные компоненты Hyper-V могут мешать: например, для запуска виртуальных машин VirtualBox или эмуляторов Android.
В этой инструкции подробно о том, как отключить Hyper-V в Windows 10 двумя способами: первый предполагает отключение соответствующих компонентов системы, второй — отключение гипервизора без удаления самих компонентов Hyper-V.
- Отключение Hyper-V путем удаления в компонентах
- Как отключить Hyper-V без удаления
- Видео инструкция
- Дополнительные способы удалить Hyper-V
Отключение Hyper-V в компонентах Windows 10
Первый способ отключить Hyper-V предполагает использование соответствующего раздела «Программы и компоненты» в панели управления, шаги будут следующими:
- Откройте Панель управления, для этого можно использовать поиск в панели задач, либо нажать Win+R на клавиатуре, ввести control и нажать Enter.
- В панели управления перейдите в раздел «Программы и компоненты» или «Удаление программы».
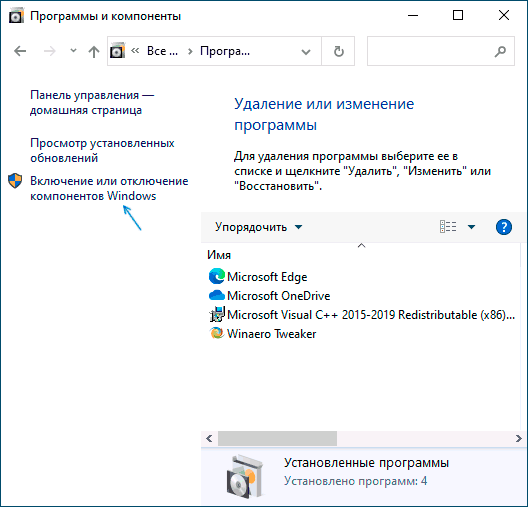
- Слева нажмите по пункту «Включение или отключение компонентов Windows».

- Снимите отметку с пункта «Hyper-V» и примените настройки.

- При появлении запроса на перезагрузку, перезагрузите Windows 10 для вступления изменений в силу.

Обычно указанных действий достаточно, чтобы устранить проблемы, которые иногда могут быть вызваны наличием Hyper-V в системе.
Если указанные шаги не помогли, попробуйте там же в компонентах отключить пункт «Песочница Windows» и также перезагрузить компьютер при необходимости.
Как отключить Hyper-V без удаления компонентов
Предыдущий метод отключения Hyper-V предполагает удаление соответствующих компонентов из системы, однако можно обойтись и без этого:
- Запустите командную строку от имени Администратора, для этого можно использовать поиск в панели задач, а потом выбрать пункт «Запуск от имени администратора». Другие способы запуска командной строки от имени администратора.
- Введите команду
bcdedit /set hypervisorlaunchtype off
и нажмите Enter.
- Перезагрузите компьютер.
После перезагрузки Hyper-V (гипервизор) будет выключен и не будет влиять на запуск каких-либо других виртуальных машин, при этом сам компонент останется включенным.
Чтобы снова включить Hyper-V, используйте ту же команду, но измените off на auto и перезагрузите компьютер. Также есть возможность создания меню загрузки для выбора режима, в котором будет запускаться система — с включенным или отключенным Hyper-V, об этом в инструкции Как запускать виртуальные машины Hyper-V и VirtualBox на одном компьютере.

Видео
Дополнительные способы удалить Hyper-V
Помимо описанных способов, вы можете удалить компоненты Hyper-V в PowerShell с помощью команды
Disable-WindowsOptionalFeature -Online -FeatureName Microsoft-Hyper-V-Hypervisor
Или, при использовании командной строки, с помощью команды:
DISM /Online /Disable-Feature:Microsoft-Hyper-V
Надеюсь, материал помог разобраться. Если же остаются вопросы — задавайте в комментариях. Также помните, что для работы виртуальных машин и эмуляторов следует включить аппаратную виртуализацию.
Key Takeaways
- You may disable Hyper-V in Windows in many ways, including using the Control Panel, Command Prompt with BCDEdit or DISM commands, PowerShell cmdlets, or even BIOS settings.
- Using the Control Panel is the most user-friendly approach, while the Command Prompt requires administrator privileges and specific commands.
- It is possible to use the BIOS method, but this requires familiarity with your specific system’s BIOS navigation.
Method 1: Using Control Panel
The simplest method to disable Hyper-V is by using the Control Panel. Repeat the following steps:
Step 1: Press the Windows key to open the Start Menu. Type control panel in the search box and press Enter to open the app.

Step 2: Click on the Programs option.

Step 3: Go to the Programs and Features area. Click on the Turn Windows features on or off option.

Step 4: Scroll down and click on the checkbox before the Hyper-V option to disable it. Then click on the OK button.

Step 5: Wait for Windows to remove Hyper-V from your PC. Then click on the Close button.

Step 6: Restart your PC.
Method 2: Using the Command Prompt
To disable Hyper-V, you may run two commands on the Command Prompt: BCDEdit and DISM. We explore them below.
The BCDEdit Command
Boot Configuration Data (BCD) contains all the crucial files required for the Windows operating system to boot correctly. If the Control Panel is not opening, you can use the BCDEdit command-line tool to manage the hypervisor launch mode. Follow the steps below:
Step 1: Press the Windows key to open the Start Menu. Type cmd in the search box and click on the Run as administrator option.

Step 2: The User Account Control window will open. Click on the Yes button to open the Command Prompt with administrator privileges.
Step 3: Type the following command in the Command Prompt window and press Enter:
bcdedit /set hypervisorlaunchtype off
Step 4: Close the Command Prompt app.
Step 5: Restart your PC to apply the changes.
The DISM Command
DISM is a command-line tool that is useful in repairing Windows component stores. However, you can use it to manage Hyper-V in Windows as well. Remember that you must be connected to the internet to use the DISM tool. Here’s how to do it:
Step 1: Press the Windows key to open the Start Menu. Type cmd in the search box and click on the Run as administrator option.
Step 2: The User Account Control window will open. Click on the Yes button to open the Command Prompt with administrator privileges.
Step 3: Type the following command and press Enter to execute it:
dism /online /disable-feature /featurename:Microsoft-hyper-v-all
Step 4: Close the Command Prompt window.
Step 5: Restart your PC to apply the changes.
Method 3: Using PowerShell
You can also use a cmdlet in PowerShell to disable Hyper-V on your Windows PC if Command Prompt isn’t working. Here’s how to do it:
Step 1: Press the Windows key to open the Start Menu. Type PowerShell in the search box and click on the Run as administrator option.

Step 2: The User Account Control window will launch. Click on the Yes button to open the PowerShell with administrator privileges.
Step 3: Type the following command in the PowerShell window and press Enter to execute it:
Disable-WindowsOptionalFeature -Online -FeatureName Microsoft-Hyper-V-All
Step 4: Type Y and press Enter to restart the PC and apply the changes.

Method 4: Using BIOS
Hyper-V utilizes the hardware virtualization technology to share the underlying hardware with the virtual machine. But if your PC doesn’t have hardware virtualization enabled, Hyper-V won’t run. So, if you don’t use virtualization software, you must disable it using BIOS settings. Here’s how:
Step 1: Restart your PC.
Step 2: Press the designated F-key or Esc key to open the BIOS Settings page. The key differs between OEMs, so find it using the support document or manufacturer’s website.
Step 3: Switch to the Configuration tab. Remember that the virtualization option might appear under a different section on your PC.

Step 4: Use the arrow keys to select the Virtualization Technology option. Then select the Disabled option.

Step 5: Press F10 to save the changes and exit.
Step 6: Boot your PC and log in to your profile. Hyper-V won’t be active anymore.
Was this helpful?
Thanks for your feedback!
The article above may contain affiliate links which help support Guiding Tech. The content remains unbiased and authentic and will never affect our editorial integrity.
Microsoft Hyper-V is a type 1 hypervisor that you can install on Windows – including on Windows 10 and Windows Server 2019. In some scenarios, you may need to uninstall Hyper-V on your Windows machine. For example, VMware Workstation and Hyper-V are not compatible when installed on the same machine. The same issues occur with other type 2 hypervisors like VirtualBox.
Whatever your case, learn how to uninstall Hyper-V in Windows using two methods: via the GUI (graphical user interface) and via the CLI (command line interface).
Note: The processes explained for Windows 10 are applicable to Windows 11. The processes explained for Windows Server 2019 also work for Windows Server 2022 and 2016.
How to Disable Hyper-V in Windows 10 and 11 in Control Panel
Using the Control Panel to uninstall Hyper-V is the most convenient method and is preferred by most users for Windows 10 or 11. As a result, the Hyper-V feature is uninstalled completely.
To uninstall Hyper-V, do the following:
- Click Start, type Control Panel, and open it. Press Win+R. In the Run field, type appwiz.cpl and press Enter.
- In the Control Panel window, click Turn Windows features on or off.
- In the Windows Features window that opens, deselect the Hyper-V checkbox. Make sure that checkboxes in Hyper-V subfolders are deselected.

- Locate and deselect Virtual Machine Platform and Windows Hypervisor Platform.
- Hit OK to save settings and start the Hyper-V uninstallation process.
- Click Restart now to restart your computer to finish the process and uninstall Hyper-V.


How to Uninstall Hyper-V in Windows 10 and 11 with the Command Prompt
You can uninstall Hyper-V in the command line interface (CLI) just as with the previous method in the graphical user interface (GUI). This workflow works in both Windows 10 and Windows 11.
Check the Hyper-V installation status in the command line before you start to uninstall Hyper-V and to make sure that this hypervisor has been removed from your Windows system after you have uninstalled Hyper-V.
- Open the command line (CMD) as administrator. Open the Windows Start menu, type cmd, right-click the cmd entry, and click Run as administrator.
- Run
systeminfoto check whether Hyper-V is installed.- If Hyper-V is not installed, in the Hyper-V requirements section, you see the names of the technologies required to install Hyper-V and the status of their availability on the machine.
- If Hyper-V is installed, you should see the following message in the Hyper-V Requirements line:
A hypervisor has been detected. Features required for Hyper-V will not be displayed.
- As an alternative, you can run
msinfo32.exeto check whether Hyper-V is uninstalled in the GUI. The needed information is located in the System Summary section at the bottom of the item list.
Now, once you have verified that Hyper-V is installed, you can uninstall Hyper-V in Windows 10 by using the command line.
- Open PowerShell with administrative privileges (type PowerShell in the Start menu, right-click PowerShell, and click Run as administrator just as you do to run CMD).
- Run the following command to remove the Hyper-V feature from Windows 10:
Disable-WindowsOptionalFeature -Online -FeatureName Microsoft-Hyper-V-All
- Do you want to restart the computer to complete this operation now?
Type Y and hit Enter.
- Restart is required after executing this command. You can type N (No) and restart Windows manually.


Removing Hyper-V with DISM
DISM (Deployment Image Servicing and Management) is a tool for working with Windows images (.wim files) and installing/uninstalling Windows drivers, features, and packages.
Open PowerShell with administrative privileges, and run this command to disable Hyper-V:
DISM /Online /Disable-Feature:Microsoft-Hyper-V

You may need to disable Secure Boot in UEFI/BIOS settings of a computer to finish the uninstallation process and uninstall Hyper-V. The sequence to disable Secure Boot depends on your hardware vendor and differs for different motherboard vendors and models.
How to Disable Hyper-V in BCDEDIT
You can change Hyper-V startup options when Windows boots without uninstalling Hyper-V completely. In this case, Hyper-V is installed but inactivated. Hyper-V is not booted before Windows boots if you disable Hyper-V by using the command line bcdedit tool. Bcdedit is the command line tool to manage Boot Configuration Data or BCD. BCD store is used to describe boot parameters for applications, add boot menu entries, etc.
If you use BCD to disable Hyper-V, the Hyper-V feature is disabled but not uninstalled completely from Windows. As you remember, Hyper-V is the first-type hypervisor that boots before Windows boots. The idea of using this method is to disable Hyper-V in boot configuration.
To use this method to disable Hyper-V, run the command prompt (CMD) as administrator and run the following command:
bcdedit /set hypervisorlaunchtype off

Note: If you need to enable Hyper-V again, run bcdedit /set hypervisorlaunchtype on
For more convenience, you can create two boot entries for your Windows machine. One boot entry is used to boot the operating system with Hyper-V, and another one is used to boot the OS without Hyper-V.
- Run the following command to copy the default boot configuration to the new entry. “Hyper-V disable” is the name of the new boot entry in my case.
bcdedit /copy {default} /d "Hyper-V disable" - The following output message is displayed:
The entry was successfully copied to {xxxxxxxx-xxxx-xxxx-xxxx-xxxxxxxxxxxx}.
- Run the command to edit Hyper-V boot options for the new boot entry you have created. Copy the value in brackets {} from the above output message and paste to this command:
bcdedit /set {xxxxxxxx-xxxx-xxxx-xxxx-xxxxxxxxxxxx} hypervisorlaunchtype off
- You should see the message: The operation completed successfully.
- Edit the name of the default boot entry with Hyper-V to “Windows 10 Hyper-V” for more convenience:
bcdedit /set {default} description "Windows 10 Hyper-V" - Restart your computer.

Now you have two boot menu entries. Select “Hyper-V disable” to boot Windows without Hyper-V or select “Windows 10 Hyper-V” to boot Windows with Hyper-V.

You can also watch how to uninstall Hyper-V in Windows in this video:
How to Uninstall Hyper-V on Windows Server 2019
The process of removing Hyper-V in Windows Server 2019 is slightly different compared to Windows 10. In this section, we cover how to uninstall Hyper-V in Windows Server 2019. The workflow to uninstall Hyper-V on Windows Server 2022 and 2016 is identical.
Using the GUI
If your Windows Server is installed with the graphic experience and has a graphical user interface (GUI), then the easiest way to uninstall Hyper-V is using Server Manager and the Remove Roles and Features wizard.
- Open Server Manager (Start > Server Manager), and click Manage > Remove Roles and Features.

The Remove Roles and Features wizard opens.
- Before You Begin. There is nothing to configure at this step, but you can select the Skip this page by default option to avoid displaying this page in the future. Click Next to continue.
- Server Selection. Select a server from the server pool and select your server in the list. The server name is Hyper-V-Repl.test.net in my case. Hit Next at each step of the wizard to continue.

- Server Roles. Deselect the Hyper-V checkbox in the list of roles to uninstall Hyper-V.
- The popup window opens. Check the features that you are about to remove. Select Remove management tools (if applicable) to remove Hyper-V Manager Windows tools. Click Remove Features.

- Features. There is no need to remove custom features when you uninstall Hyper-V. Leave features configuration as is.
- Confirmation. Check all items that are going to be removed. Select the checkbox if you want your server to restart automatically when the Hyper-V role is removed. Otherwise, you need to restart Windows manually for changes to take effect and finish Hyper-V uninstallation. Click Remove to finish and uninstall Hyper-V.


Using PowerShell
The PowerShell command to uninstall Hyper-V in Windows Server 2016, 2019, and 2022 is not the same as in Windows 10.
- Open PowerShell as administrator.
- Run the following command to uninstall Hyper-V on Windows Server 2016:
Remove-WindowsFeature -Name Hyper-V
- Restart the server to finish the removal process.

Issues That Can Occur
Sometimes issues may occur when you try to uninstall Hyper-V in Windows 10 and Windows Server 2016, 2019, or 2022. Let’s explain some common issues and offer recommendations to help fix these issues.
Case 1
If you see a message that Windows cannot uninstall Hyper-V components, try to check system files and their storage. Different error codes are displayed, for example, 0x800F0831, 0x80073701, etc. Use command line tools to fix this issue. Open the command line (CMD) with administrative privileges and run the following commands.
Dism /Online /Cleanup-Image /RestoreHealth
Dism.exe /online /Cleanup-Image /StartComponentCleanup
sfc /scannow
Disable-WindowsOptionalFeature -Online -FeatureName Microsoft-Hyper-V-All
After executing these commands, logs are written to CBS.log and dism.log. Logs are useful for troubleshooting.
Case 2
Hyper-V is not uninstalled because a virtual network adapter or a virtual switch created by Hyper-V is present in a host Windows system. Remove virtual Hyper-V network adapters, and try to uninstall Hyper-V again. Here are some posts about Hyper-V network adapters and virtual switches from our blog.
Case 3
You disable Hyper-V but after reboot, Hyper-V is enabled again. A possible cause may be that a group policy is set to enable Hyper-V automatically on login after each boot. A system administrator should edit the group policy configuration to fix this issue. Remember, that Device Guard and Credential Guard are features using Hyper-V to work in Windows. Check Computer Configuration -> Administrative Templates -> System -> Device Guard in the group policy editor to make sure that there are no settings to force run Device Guard on a Windows machine.
Conclusion
Hyper-V can be uninstalled with a graphical user interface or a command line interface in Windows 10 and 11 and Windows Server 2016/2019/2022. The workflow is different for Windows 10 and Windows Server operating systems. If you have uninstalled Hyper-V, you can use another hypervisor to run virtual machines. Remember to back up your virtual machines to protect your data. NAKIVO Backup & Replication supports backup of VMware VMs as well as Hyper-V VMs.
Встроенный в Windows 10 и 11 гипервизор Hyper-V — полезный инструмент, но порой возникает потребность в его отключении. О том, как это сделать, вы узнаете из нашего материала.
Как уже говорилось выше, Hyper-V — это один из множества встроенных элементов системы. Соответственно, управлять им можно через меню «Компоненты». Алгоритм деактивации программы выглядит следующим образом:
- Запустите «Панель управления» и откройте раздел «Удаление программ»;
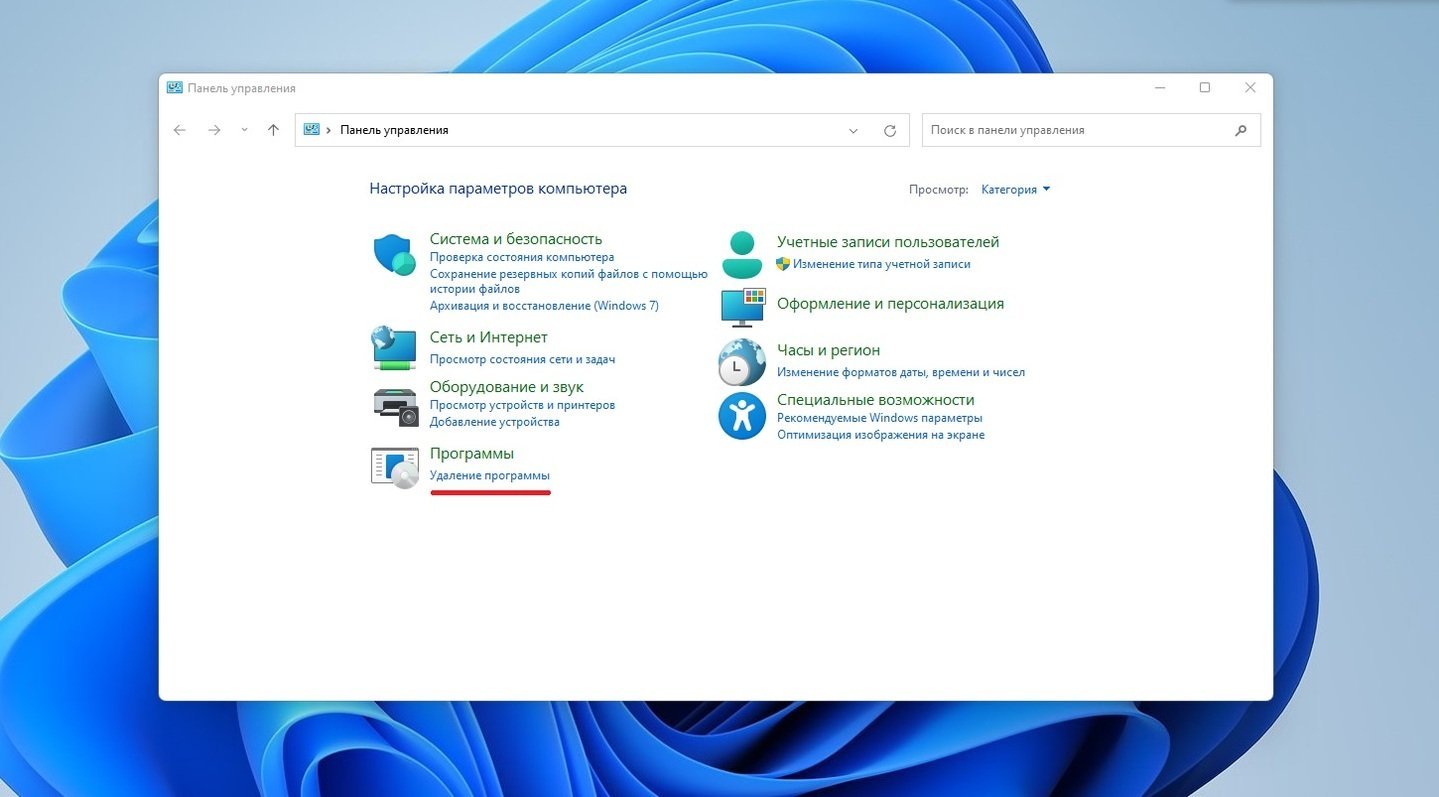
Источник: CQ / «Панель управления» в Windows
- С левой стороны кликните на пункт «Включение или отключение компонентов Windows»;
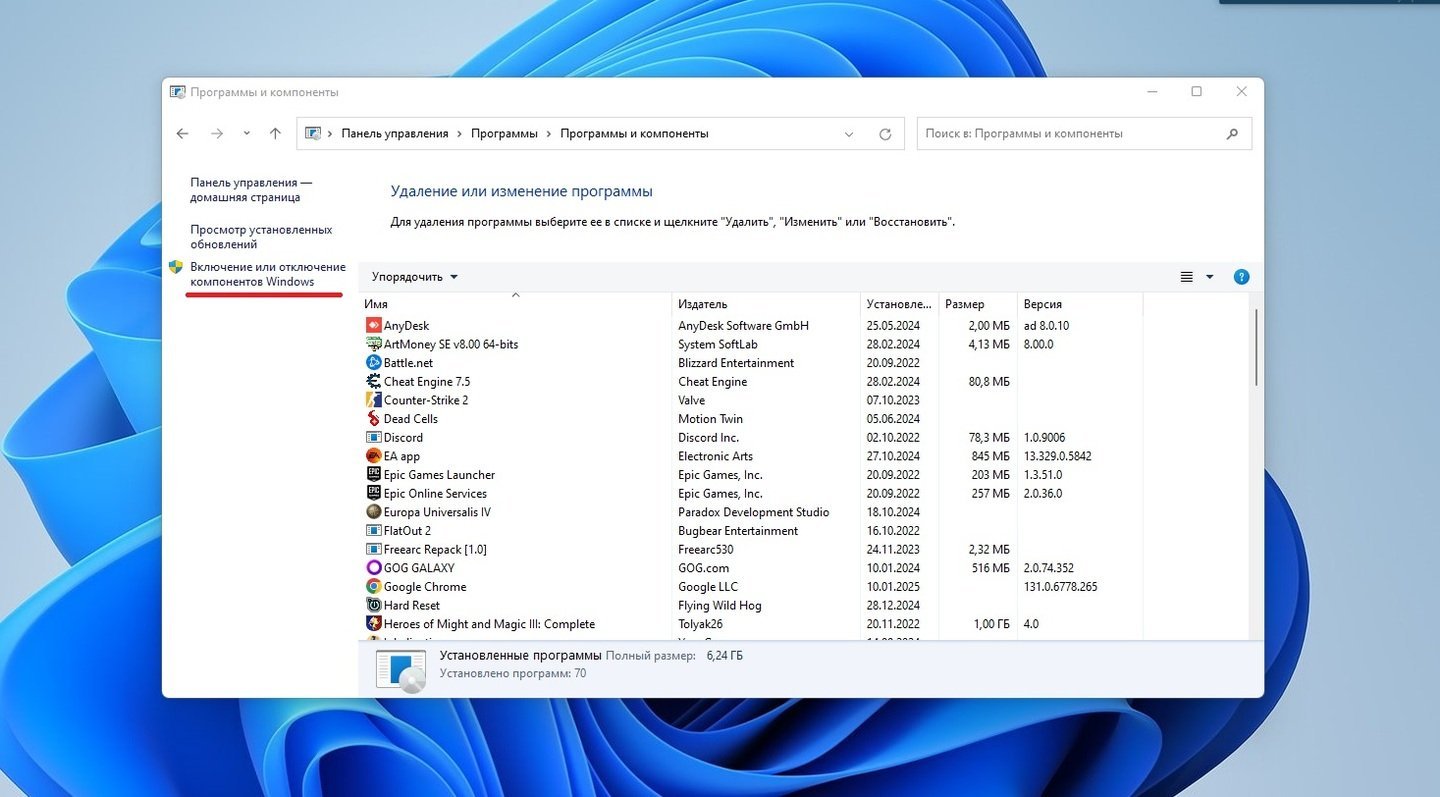
Источник: CQ / «Удаление или изменение программ» в Windows
- В загрузившемся перечне найдите Hyper-V и уберите галочку напротив него.

Источник: CQ / Окно для отключения Hyper-V
После этого остается только все сохранить и перезагрузить компьютер, чтобы изменения вступили в силу.
Через терминал Windows
В число множества функций терминала Windows входит и отключение гипервизора. Для этого:
- Кликните правую кнопку мыши на «Пуск» и запустите терминал PowerShell с правами администратора;
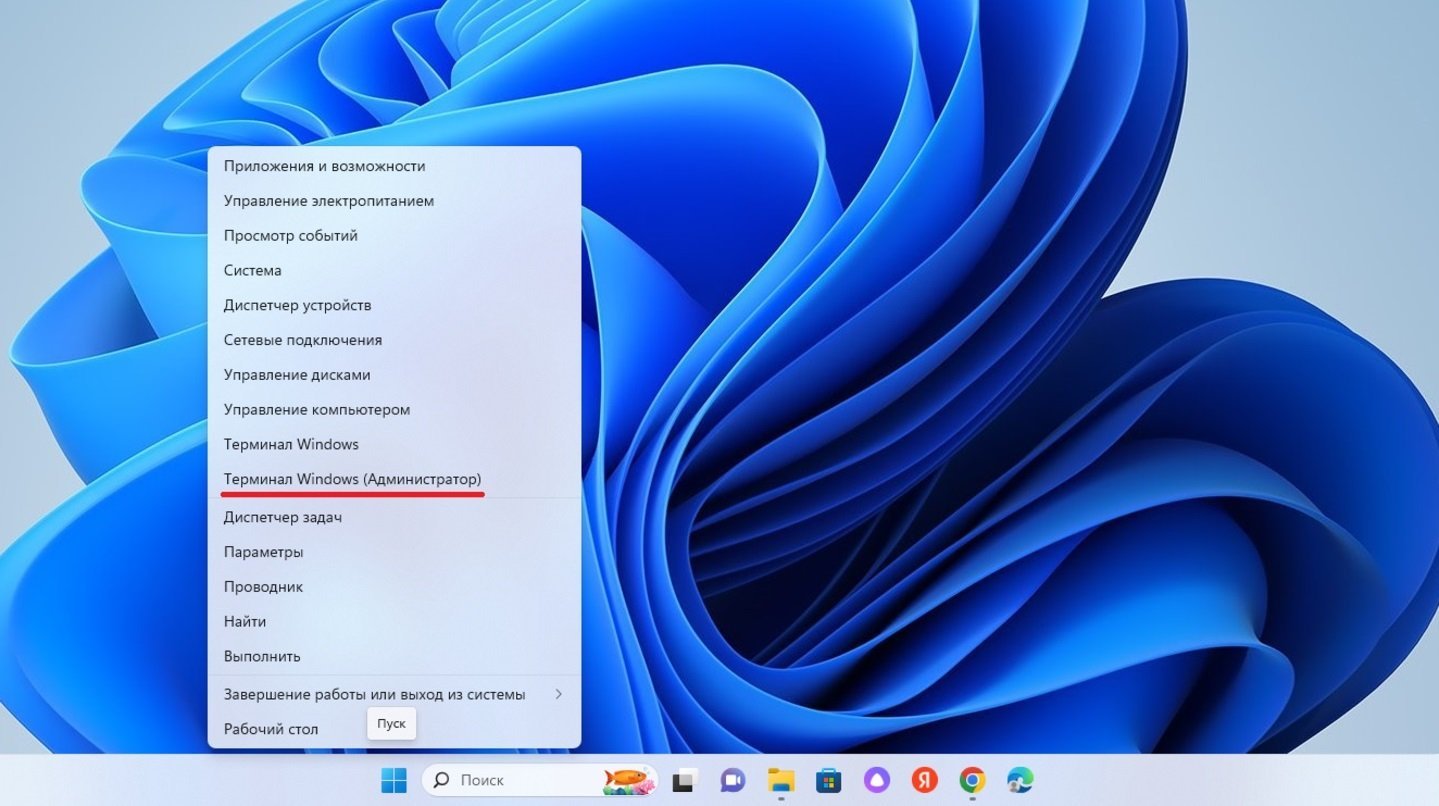
Источник: CQ / Запуск терминала PowerShell
- Введите команду Disable-WindowsOptionalFeature -Online -FeatureName Microsoft-Hyper-V-All и нажмите клавишу Enter.
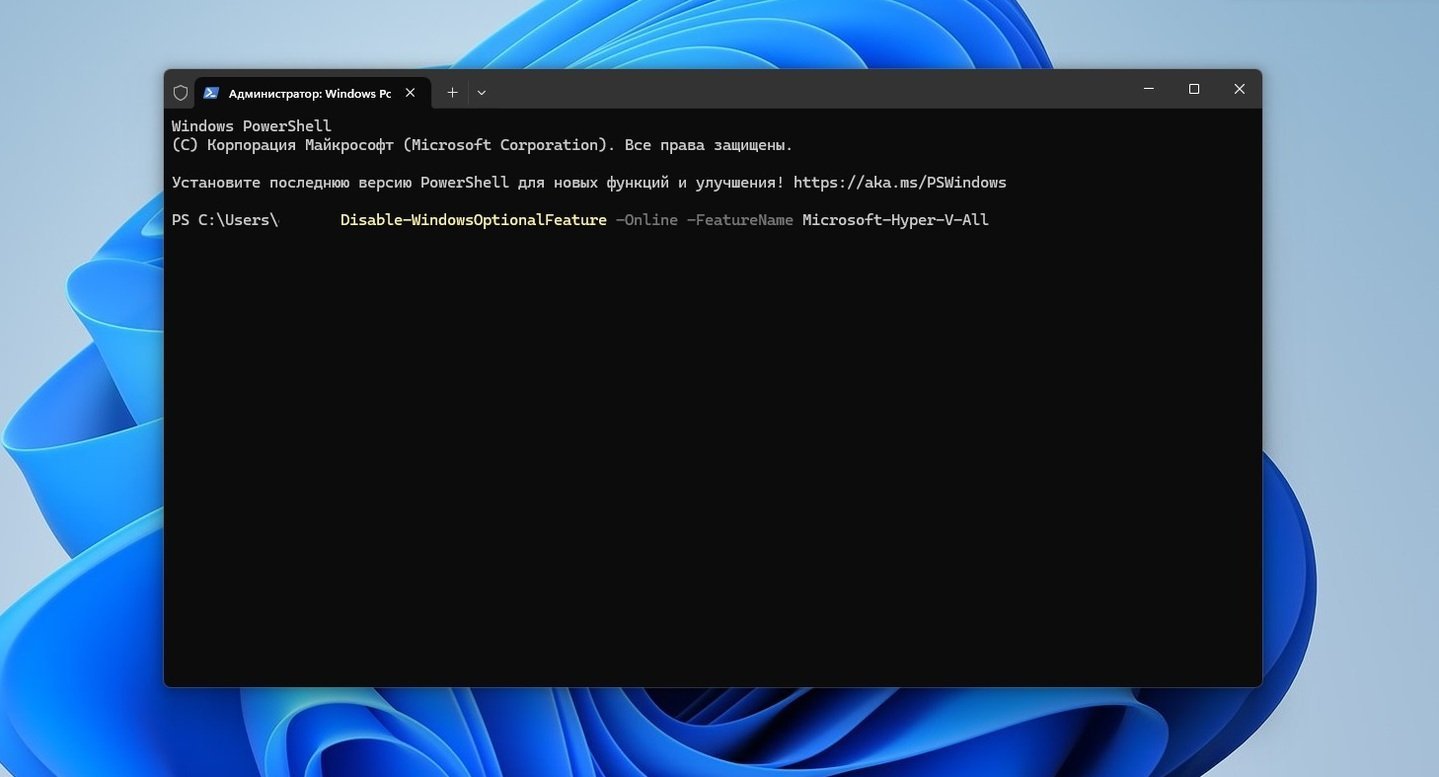
Источник: CQ / Отключение Hyper-V через терминал PowerShell
Результатом процедуры станет выключение на устройстве приложения Hyper-V.
Через командную строку
Здесь происходит практически все то же самое, что и в предыдущем пункте, за исключением того, что в этот раз используется хранилище системных компонентов DISM.
- Через «Пуск» или поисковую панель найдите и запустите командную строку;
- В загрузившемся поле наберите команду dism.exe /Online /Disable-Feature:Microsoft-Hyper-V-All и нажмите клавишу Enter.

Источник: CQ / Отключение Hyper-V через командную строку
И снова, дождитесь до момента, пока система не сообщит об отключении гипервизора Hyper-V. Кстати, тут перезагрузка не требуется, поскольку все изменения вступают в силу сразу.
Существует еще один вариант деактивации приложения через командную строку. Его главное отличие кроется в том, что системный элемент просто отключается и не мешает работе остальных программ, а не удаляется с устройства.
- Запустите командную строку;
- Введите в поле команду bcdedit /set hypervisorlaunchtype off и нажмите клавишу Enter.
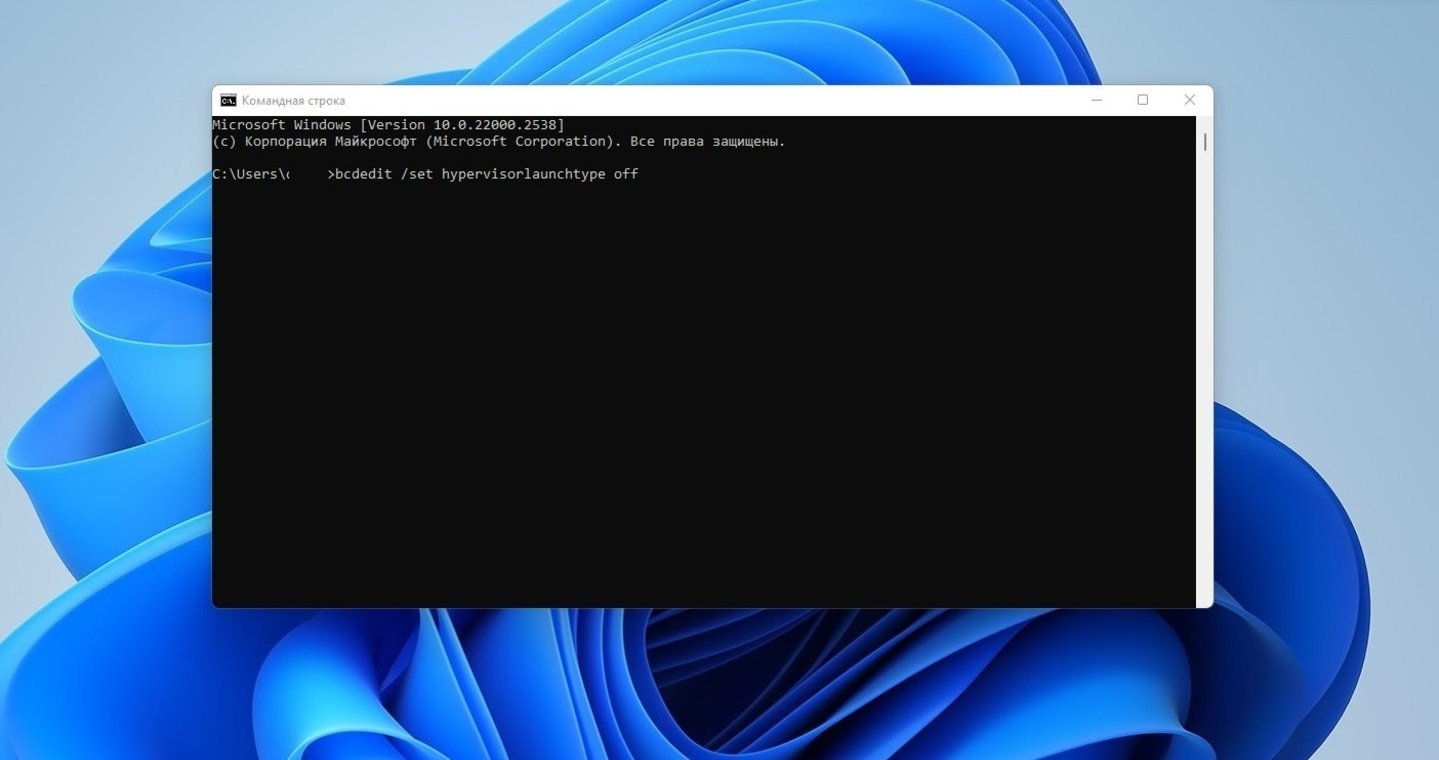
Источник: CQ / Еще один способ отключить Hyper-V через командную строку
В конце обязательно перезагрузите компьютера.
Как узнать, включен ли Hyper-V
Проверить, включен ли на вашем устройстве гипервизор или нет, очень просто. Для этого откройте командную строку и введите команду msinfo32.exe. В появившемся окне «Сведения о системе» пролистайте до самого низа, где и будут все данные о Hyper-V.
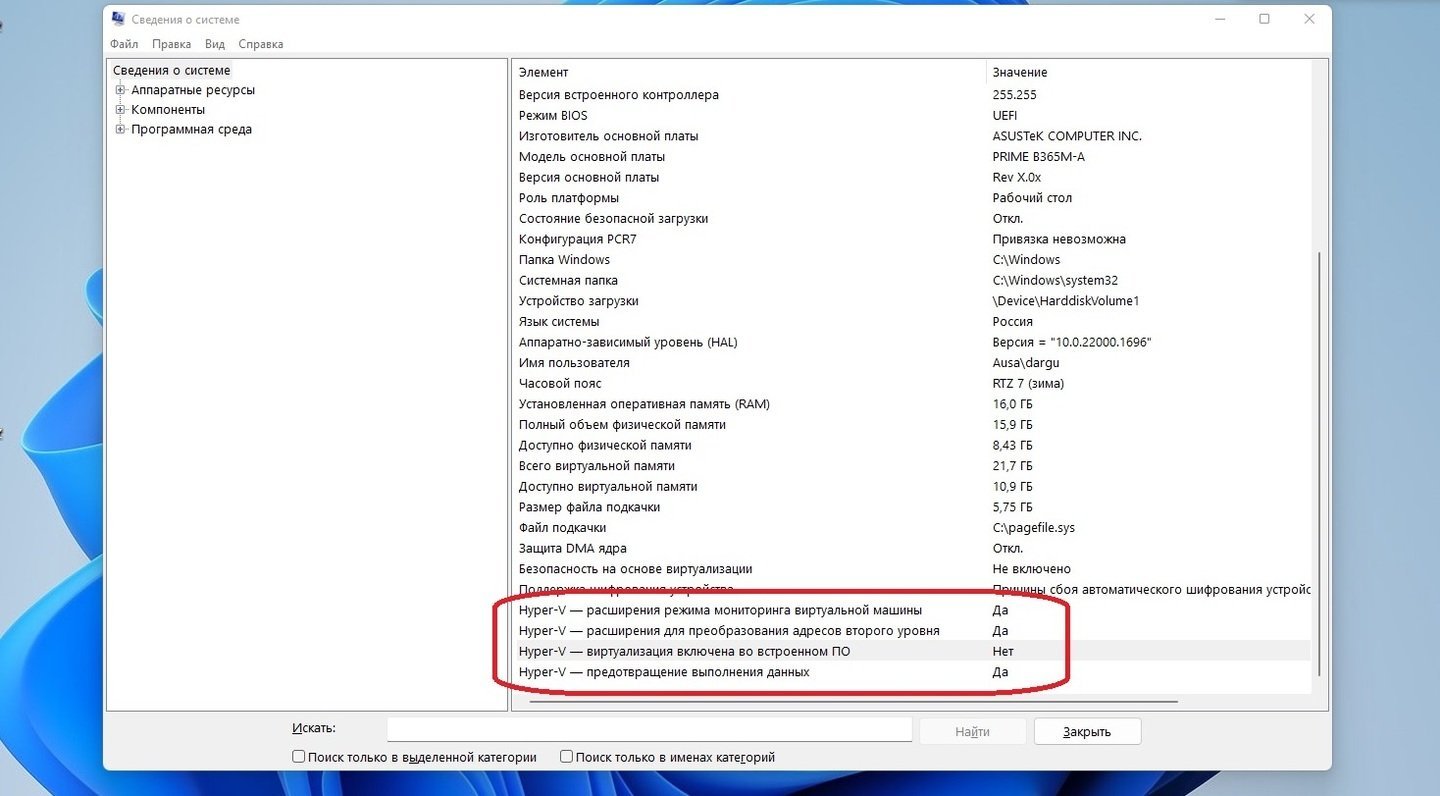
Источник: CQ / «Сведения о системе» в Windows
Что делать, если Hyper-V не отключается
Иногда попытки отключить Hyper-V могут закончиться неудачей. В этом случае необходимо проверить целостность системных файлов и хранилищ. Для диагностики откройте командную строку и включите команду sfc /scannow.
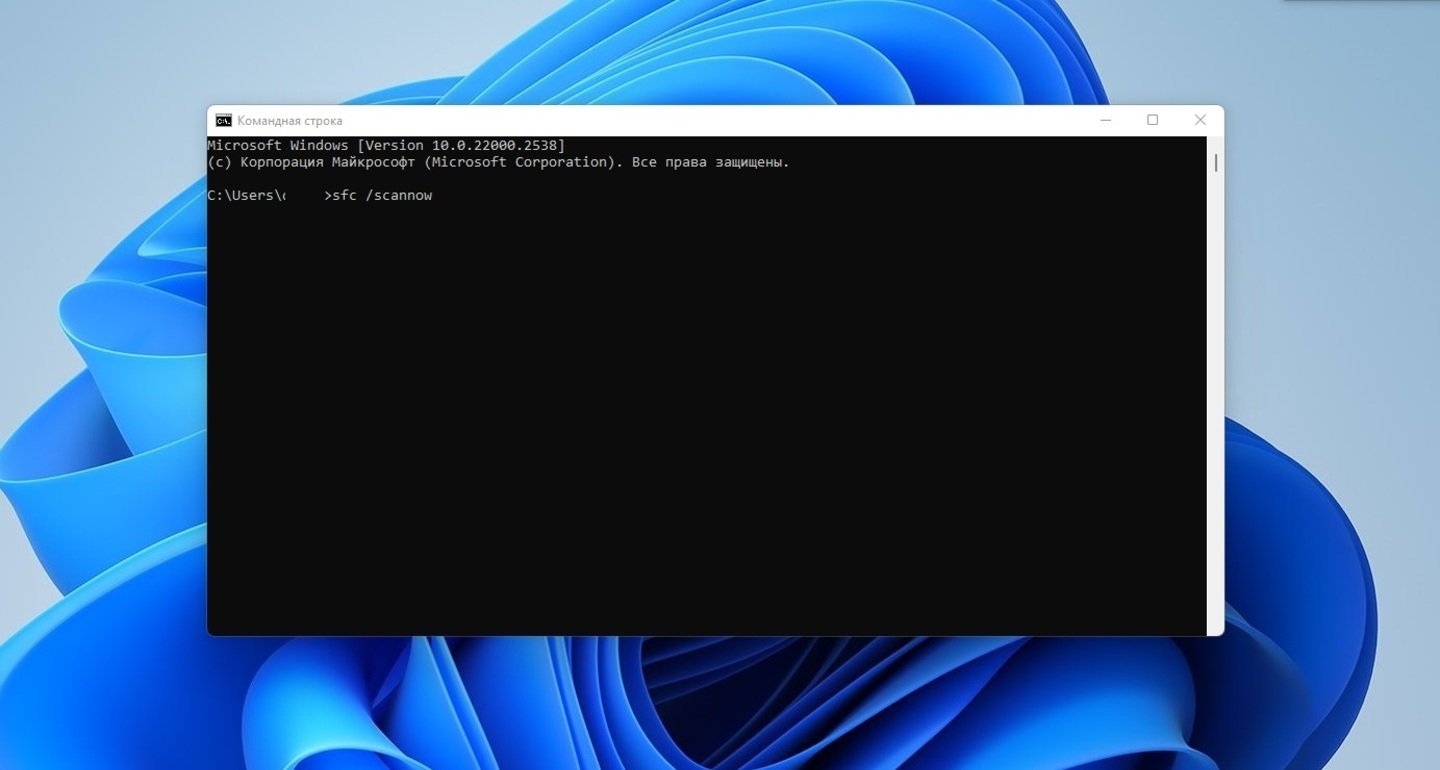
Источник: CQ / Диагностика системных файлов
Если никаких ошибок обнаружено не было, то опробуйте команду DISM /Online /Cleanup-Image /RestoreHealth. Обычно этого хватает, чтобы Windows нашла и исправила все сбои.
Читайте также:
- Как снять защиту от записи с флешки
- Как переместить панель задач вниз экрана в Windows
- Как исправить ошибку «Среда восстановления Windows недоступна»
- Для чего нужен порт RDP в Windows
- Explorer.exe — что это за процесс в Windows
Заглавное фото: ICON Eyecare
Since Windows 8, we can create a virtual machine with Hyper-V. As a newly publish function, it has some unignorable shortcomings while compares to VirtualBox and VMware. Such as Hyper-V needs to configure virtual switch manager to connect to the network and it cannot connect to USB flash disk directly. That’s why most people tend to utilize VMware or VirtualBox instead. Besides, Hyper-V conflicts with VMware and VirtualBox. So, let’s go ahead and get started on how to disable or turn off Hyper-V in Windows 10.
- Option 1: Disable Hyper-V Windows 10 by Control Panel
- Option 2: Turn off Hyper-V Windows 10 via Computer Management
- Option 3: Disable Hyper-V Windows 10 by Command Prompt
- Option 4: Disable Hyper-V Windows 10 PowerShell
Option 1: Disable Hyper-V Windows 10 by Control Panel
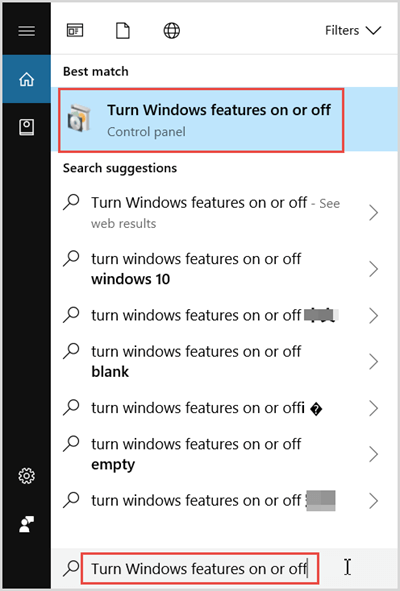
Step 1: Type Turn Windows features on or off in the Windows search bar and hit Enter to open it. Or you can navigate to Control Panel > Program > Turn Windows features on or off.
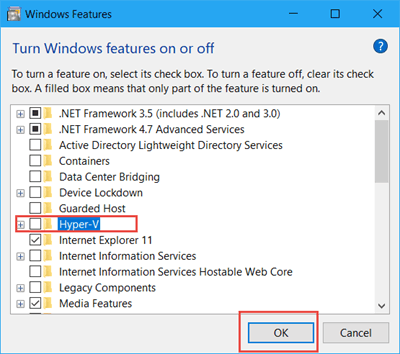
Step 2: Uncheck the box of Hyper-V and click OK. Restart your computer to disable Hyper-V completely.
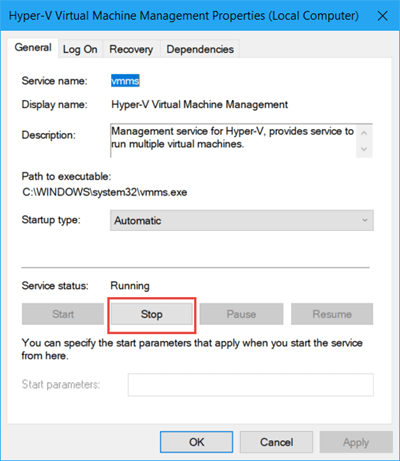
Option 2: Turn off Hyper-V Windows 10 via Computer Management
Step 1: Right-click on This PC icon then select Manage.
Step 2: In the Computer Management window, expand Services and Applications > Services and double Hyper-V Virtual Management.
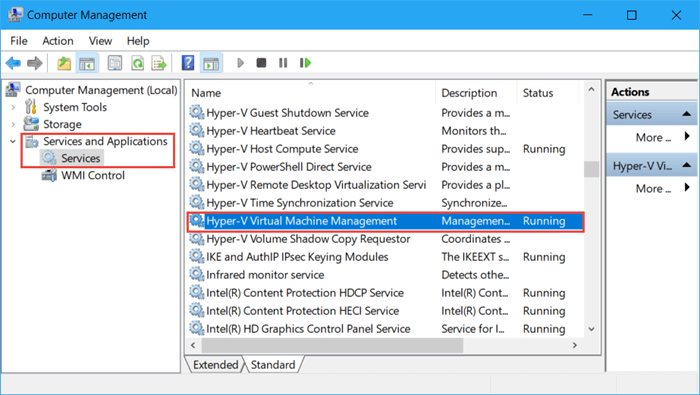
Step 3: Tap on Stop button to turn off Hyper-V in Windows 10.
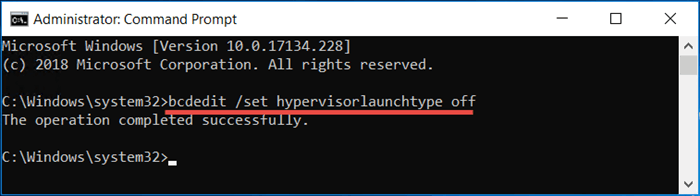
Option 3: Disable Hyper-V Windows 10 by Command Prompt
Step 1: Type cmd in the search bar and Run Command Prompt as administrator.
Step 2: Execute the “bcdedit /set hypervisorlaunchtype off” to disable Hyper-V in Windows 10. Restart to take effect.
Note: To enable Hyper-V in Command Prompt, you can run “bcdedit /set hypervisorlaunchtype auto” instead.
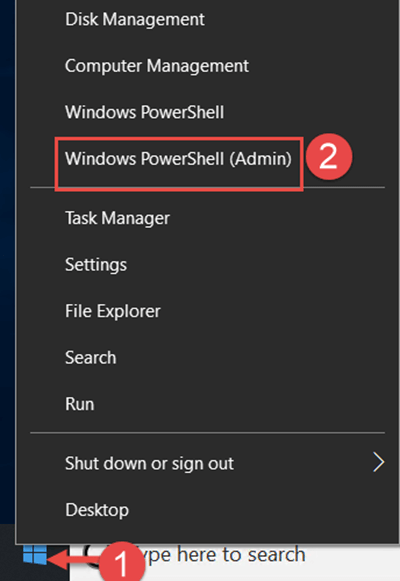
Option 4: Disable Hyper-V Windows 10 PowerShell
Step 1: Right-click on the Start icon and select Windows PowerShell (admin).
Step 2: Copy the command line below and run it.
Disable-WindowsOptionalFeature -Online -FeatureName Microsoft-Hyper-V-All
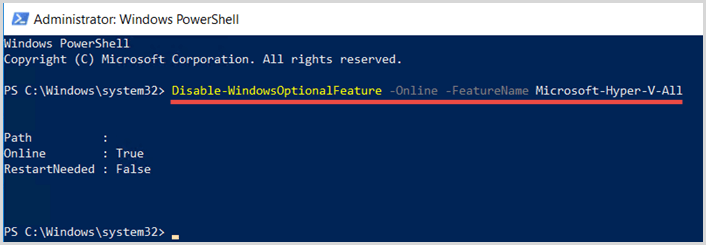
Step 3: Reboot Windows 10 to make changes effect.