
В случае, если вы не хотите, чтобы кто-то мог использовать ваш компьютер, когда вы от него отлучились, в Windows есть возможность вручную настроить время до автоматической блокировки — по истечении этого времени вход в систему потребуется выполнить заново.
В этой инструкции для начинающих подробно о методах автоматической блокировки в Windows 11/10 и настройке времени до неё. Также может быть полезен дополнительный связанный с темой материал: Возможности настройки экрана блокировки Windows в реестре.
Параметры экрана блокировки
Основной метод настройки времени до блокировки компьютера (системы) — использование параметров экрана блокировки. В Windows 11 и 10 шаги будут почти идентичными:
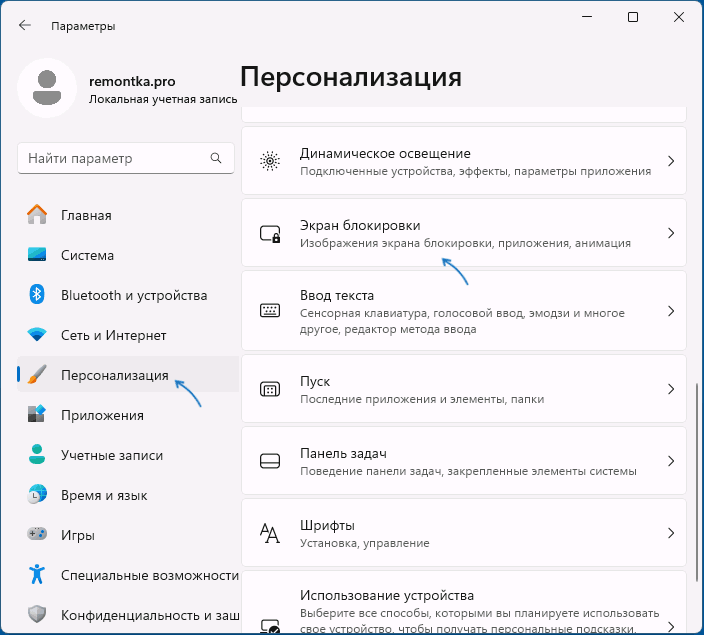
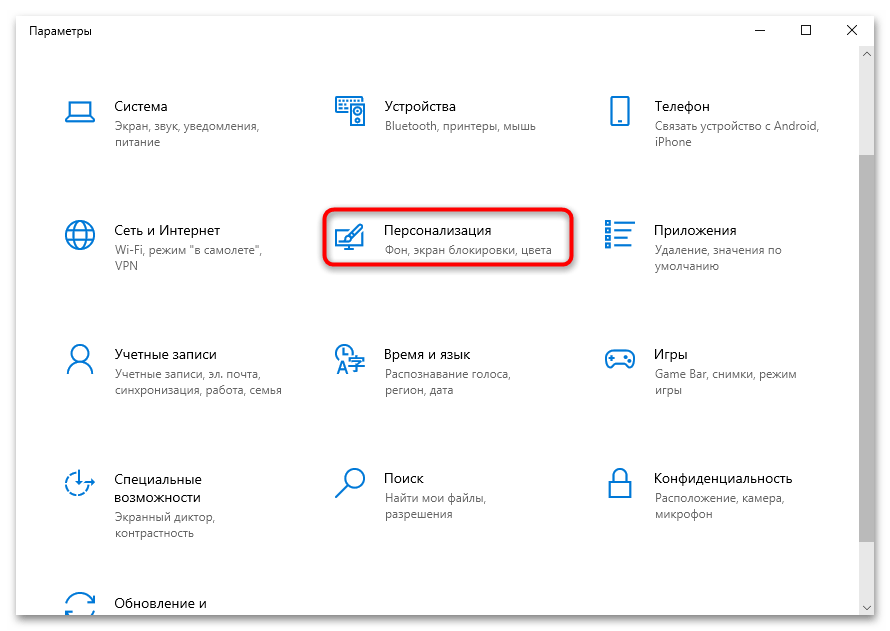
- Откройте «Параметры» (например, через контекстное меню кнопки «Пуск») — Персонализация — Экран блокировки.

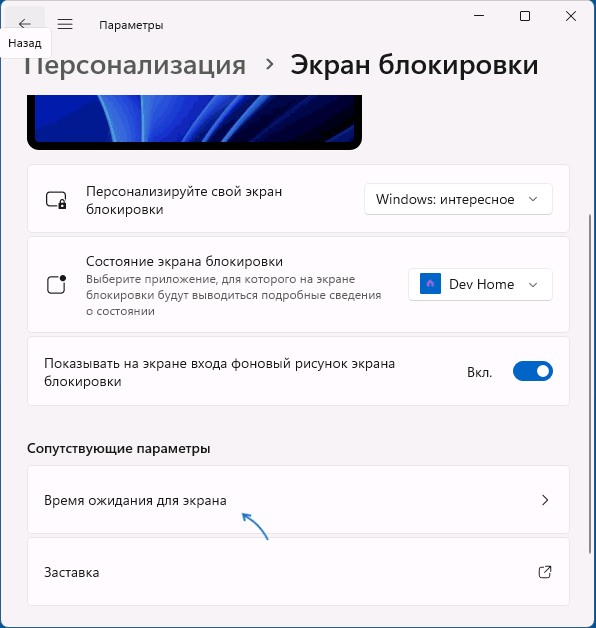
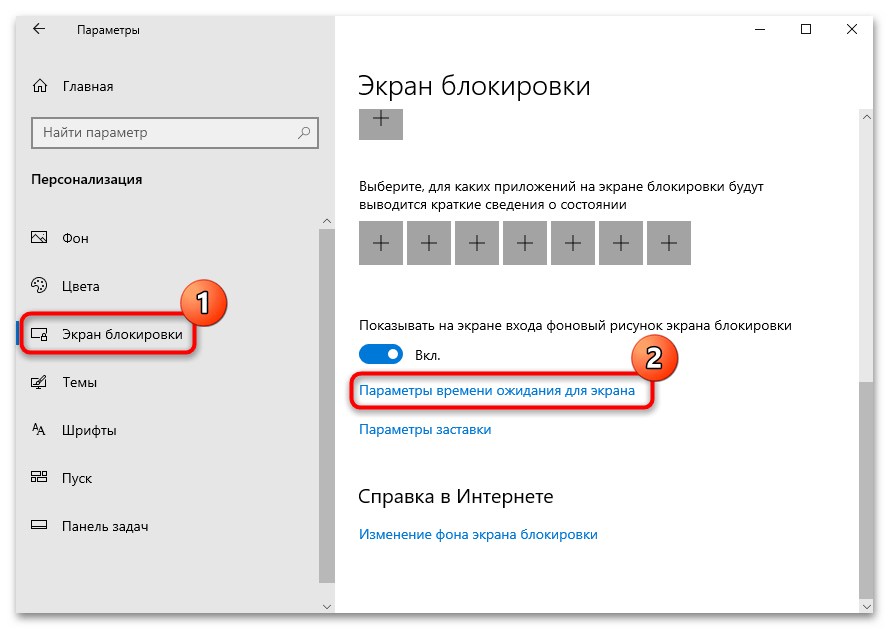
- В Windows 11 нажмите «Время ожидания для экрана» в разделе «Сопутствующие параметры», в Windows 10 — «Параметры времени ожидания для экрана».

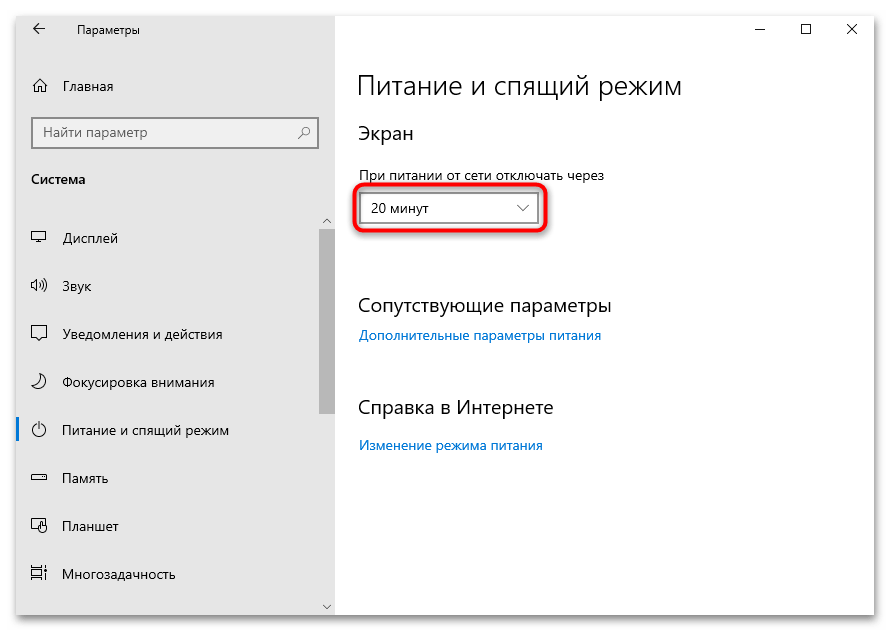
- В разделе «Экран и спящий режим» установите время отключения экрана.
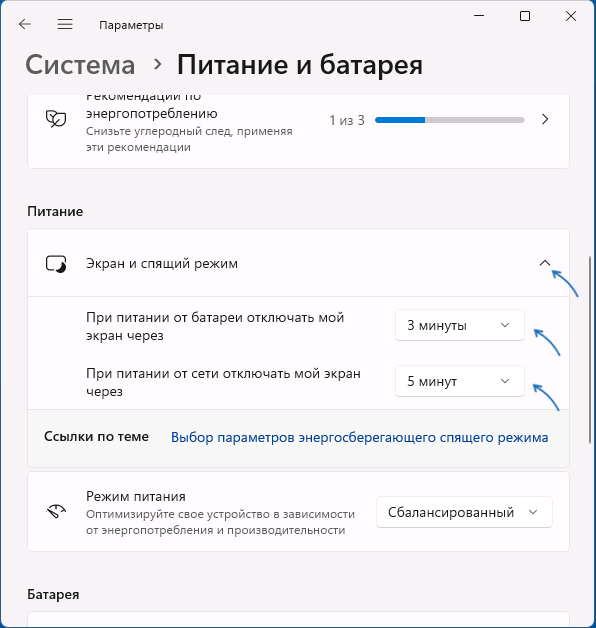
После выполнения этих действий экран ПК или ноутбука будет выключен при бездействии в течение указанного времени, а при последующем его включении по нажатии клавиш или движению мыши пользователь попадет на экран блокировки для входа в систему.
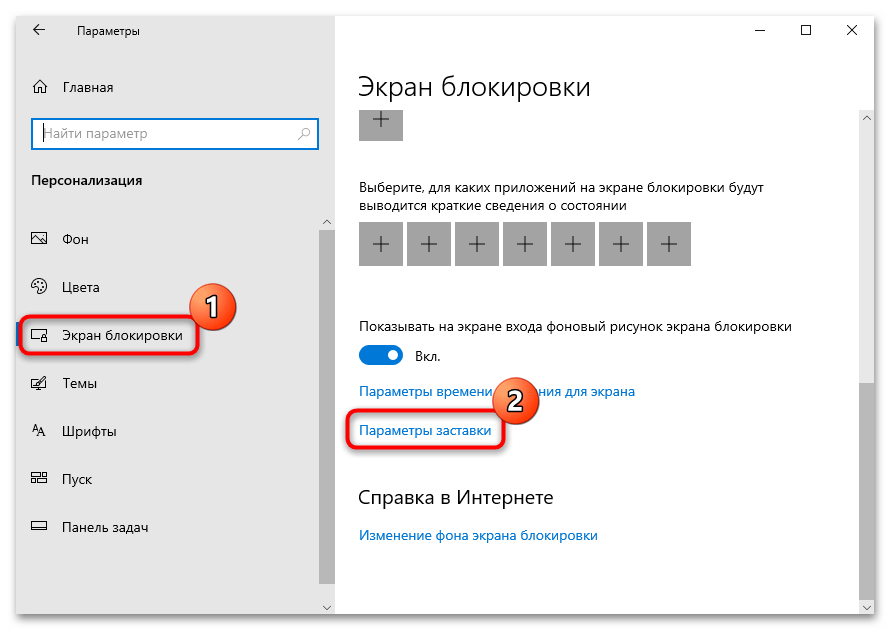
Это основной метод, доступный в системе, однако имеет свои нюансы: например, при его использовании выключается экран, что не всегда является желаемым. В этом случае можно воспользоваться дополнительным вариантом: на 2-м шаге вместо «Время ожидания для экрана» нажмите «Параметры заставки».

Вы попадете в окно настроек экранной заставки (скринсейвера), где можно выбрать заставку, указать время до её включения при бездействии системы и установить отметку «Начинать с экрана входа в систему» — чтобы после заставки потребовалось выполнять вход в систему.
Дополнительная информация
В завершение — несколько дополнительных деталей, касающихся блокировки системы автоматически или вручную:
- Вы можете заблокировать компьютер вручную с помощью сочетания клавиш Win+L или нажав по имени пользователя в меню «Пуск» и выбрав пункт «Блокировка».
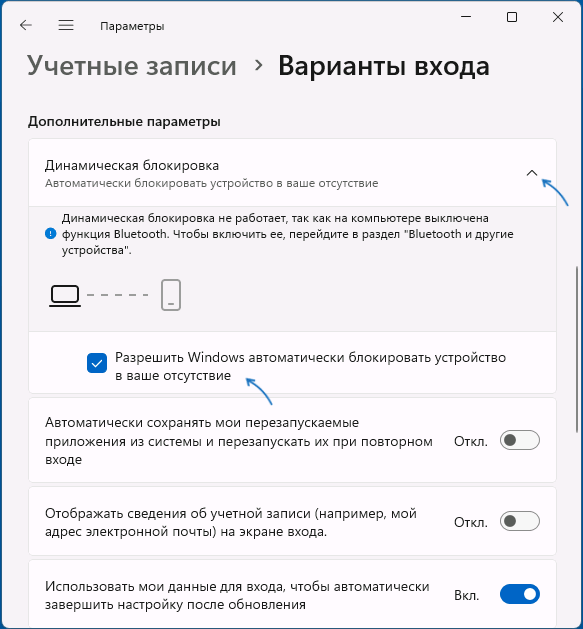
- Если ваш смартфон и компьютер связаны по Bluetooth, вы можете включить опцию «Динамическая блокировка» в разделе Параметров «Учетные записи» — «Варианты входа». В этом случае Windows будет блокироваться, когда связь с вашим мобильным устройством будет теряться.

- При необходимости можно отдельно настроить время выключения экрана на экране блокировки.
Если у вас остаются вопросы по рассмотренной теме, можно задать их в комментариях ниже, я постараюсь помочь.
You may want to change lock screen timeout settings because either the time is set to too low or high for Windows to lock screen when the PC is idle. This is a good feature when you want to secure your PC when you are not using it. So what Windows does is that it locks your screen automatically after your PC is idle for a certain amount of time and it either displays screensaver or turns off the display.

Earlier the Screensavers were used to prevent burn out on CRT monitors, but nowadays it’s more of a security feature. For example, if you are away from your computer for a few hours, the chances are that someone might access your files, passwords etc. if the PC is not locked or turned off by you. But if you have correctly set the lock screen timeout setting, then the display will automatically turn off after the PC is left idle for few minutes and if someone tries to access it, Windows will as for login password.
The only problem with this security feature is that sometimes the lock screen timeout is set to 5 minutes, meaning that the computer will lock screen after the PC is left idle for 5 minutes. Now, this setting annoys a lot of users as their PC can get lock frequently and they have to enter the password every time which waste their lot of time. To prevent this from happening, you need to increase the lock screen timeout setting in Windows 10 to frequently prevent turning off the display.
Table of Contents
Make sure to create a restore point just in case something goes wrong.
Method 1: Increase Screen Timeout Setting from Windows Settings
1.Press Windows Keys + I to open Settings then click on Personalization.

2. From the left-hand menu, choose Lock Screen.
3. Now scroll down till you find Screen timeout settings and once you find it click on it.

4. Set the time setting under Screen to a little higher if you want to avoid turning off the screen every now & than.

5. If you want completely disable the setting then choose Never from the dropdown.
6. Make sure that the sleep time is set higher than the screen turn off time or else the PC will go to sleep, and the screen wouldn’t be locked.
7. It’s preferred if Sleep is disabled or at least set at 30 minutes or more, in this case, you will have a lot of time to get back to your PC; if not, it will go into sleep mode.
8. Reboot your PC to save changes.
Method 2: Change Lock Screen Timeout Setting from Control Panel
Note: This is just an alternative of the above method if you have followed that then skip this step.
1. Press Windows Key + X then select Control Panel.
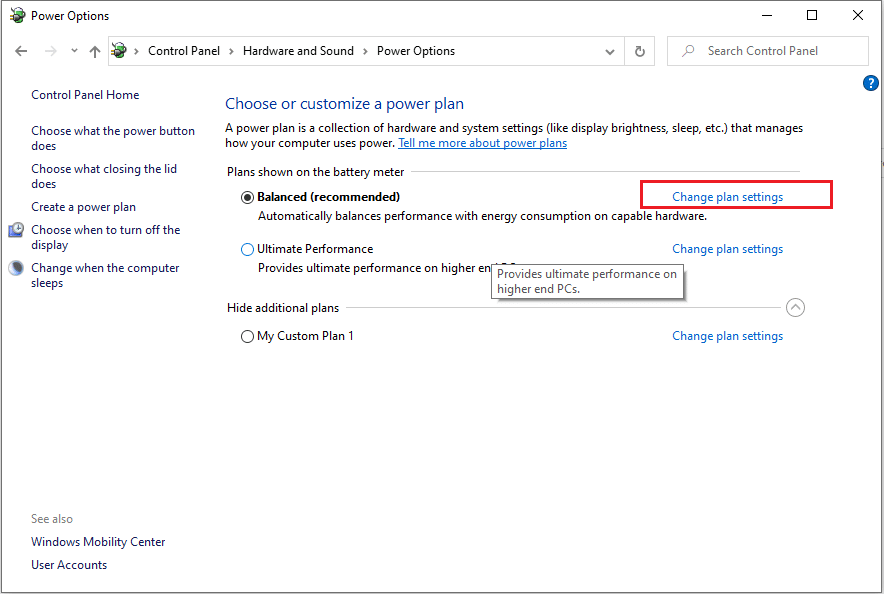
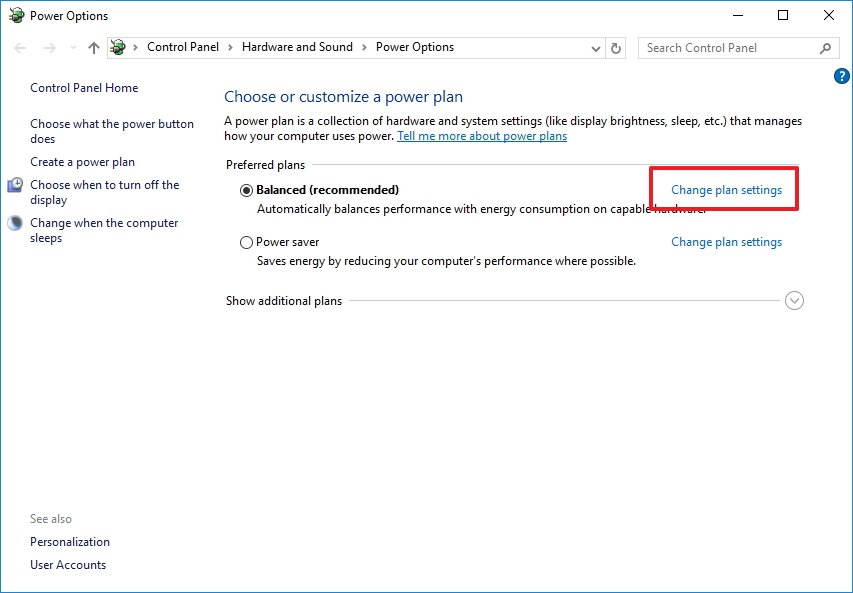
2. Click System and Security then click on Power Options.

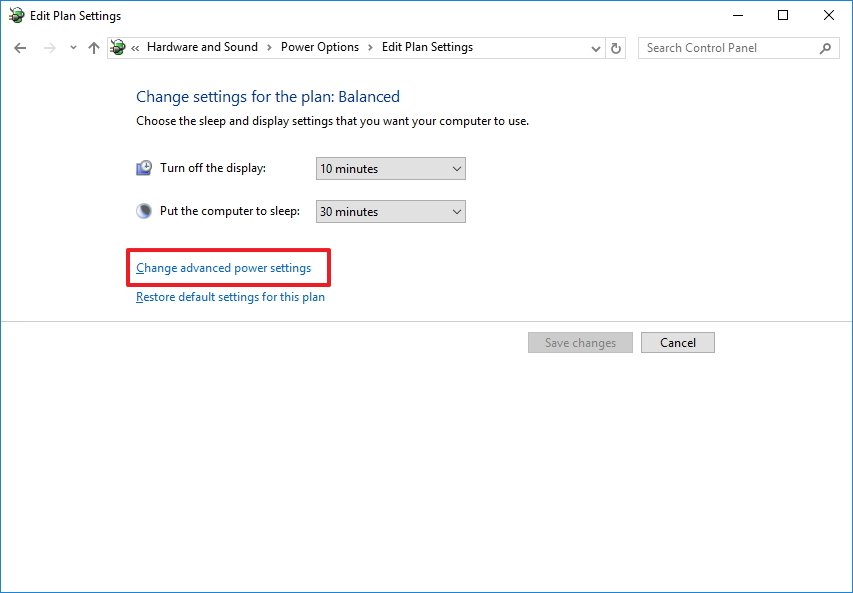
3. Now click Change plan settings next to your currently active power plan.
4. Again set the same settings as advice in the previous method.

5. Make sure to set the settings for both batteries and plugged in option.
Method 3: Using Registry
1. Press Windows Key + R then type regedit and hit Enter to open Registry Editor.
2. Navigate to the following path in the Registry:
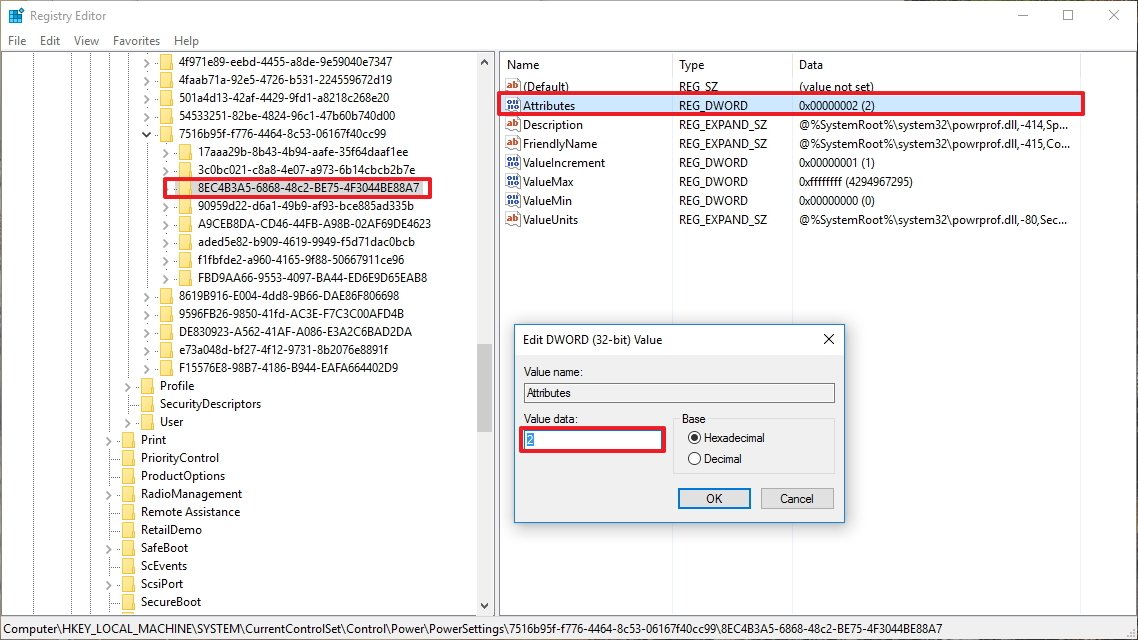
HKEYLOCAL_MACHINE\SYSTEM\CurrentControlSet\Control\Power\PowerSettings\7516b95f-f776-4464-8c53-06167f40cc99\8EC4B3A5-6868-48c2-BE75-4F3044BE88A7
3. On the right-hand side window, double click on Attributes DWORD.

4. If you can’t find it, you need to create the DWORD, right-click in an empty area in the right-hand side window and select New > DWORD (32-bit) value.
5. Name it as Attributes and double click on it.
6. Now change its value from 1 to 2 and click OK.
7. Reboot your PC to save changes.
8. Now right-click on Power icon on the system tray and select Power Options.
9. Click Change plan settings next to your currently active plan.
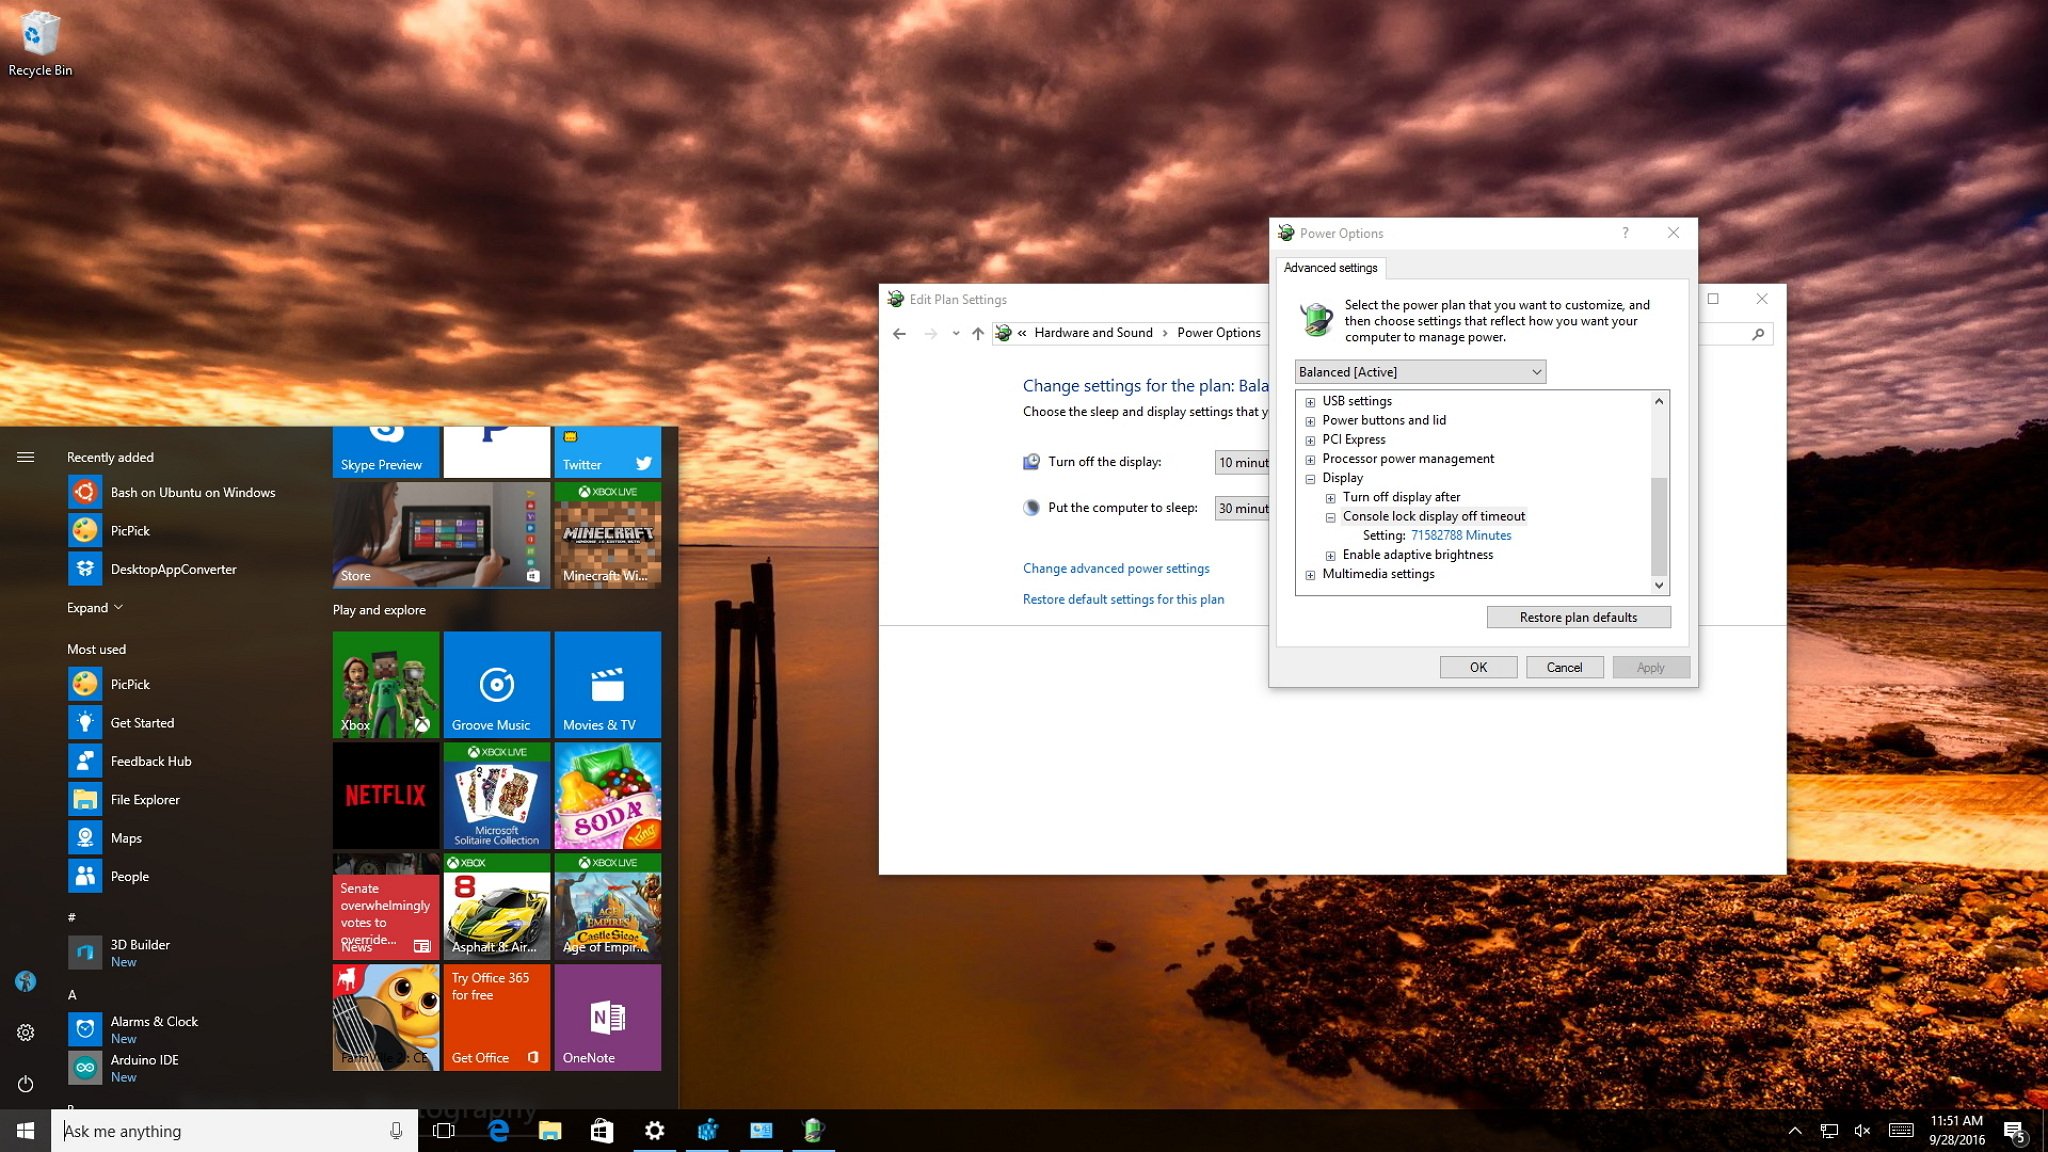
10. Then click Change advanced power settings.

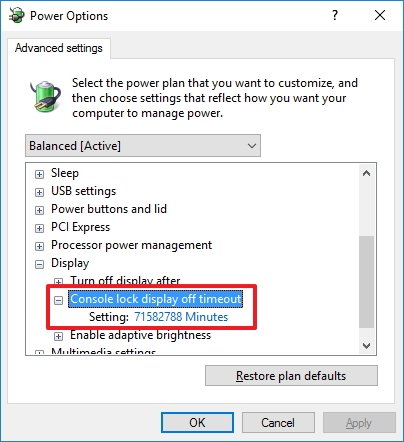
11. Scroll down till your see Display, then click on it to expand its settings.
12. Double click on Console lock display off a timeout and then change its value from 1 minute to the time you want.

13. Click Apply, followed by OK.
14. Reboot your PC to save changes.
Method 4: Change Lock screen timeout Settings using Command Prompt
1. Press Windows Key + X then select Command Prompt (Admin).
2. Type the following command and press Enter:
powercfg.exe /SETACVALUEINDEX SCHEME_CURRENT SUB_VIDEO VIDEOCONLOCK 60
powercfg.exe /SETDCVALUEINDEX SCHEME_CURRENT SUB_VIDEO VIDEOCONLOCK 60

Note: You must replace the “60” in the above command with the screen timeout setting you want (in seconds) for example if you want 5 minutes then set it at 300 seconds.
3. Again type the following command and hit Enter:
powercfg.exe /SETACTIVE SCHEME_CURRENT
4. Reboot your PC to save changes.
Recommended:
- Fix DPC_WATCHDOG_VIOLATION Error 0x00000133
- Fix Windows could not automatically detect this network’s proxy settings
- Resolve Windows 10 Freezes Randomly Issue
- Fix There was a problem resetting your PC error
That’s it you have successfully learned How to Change Lock Screen Timeout Setting in Windows 10 but if you still have any questions regarding this post then feel free to ask them in the comment’s section.
On Windows 10, similar to Windows 8.1, the operating system features a Lock screen before you sign in to your account. The new experience showcases date and time, quick status for apps you choose, and more importantly a background image, which typically, users opt to display personal pictures or those from Windows Spotlight.
While the Lock screen provides useful information and beautiful pictures, you probably noticed that your computer’s display turns off after 60 seconds when you lock your Windows 10 account. This happens even if you change the power options to never turn off the monitor or never put the computer to sleep.
The reason is that by design, the operating system includes a function that detects when the device is locked and waits for 60 seconds. After the time expires, the computer screen goes black. This is a function, which for a mysterious reason, users can’t customize in Control Panel or the Settings app. However, you can modify the Registry to enable a new option in the power settings to change the time to anything you want.
In this Windows 10 guide, we’ll walk you through the steps to tweak the Registry (or Command Prompt) to customize the operating system should way until turning the display off, which will give you more time to see the background, status, and interact with Cortana on the Lock screen.
- How to change the time when the display turns off when your PC is locked
- How to change the Lock screen timeout using Command Prompt
How to change the time when the display turns off when your PC is locked
Important: Before diving into this guide, it’s worth noting that editing the registry can be dangerous, and it can cause irreversible damage to your system if you don’t do it correctly. It’s highly recommended to make a full backup of your PC before proceeding. You’ve been warned!
- Use the Windows key + R keyboard shortcut to open the Run command, type regedit, and click OK to open the registry.
- Browse the following path:
HKEYLOCAL_MACHINE\SYSTEM\CurrentControlSet\Control\Power\PowerSettings\7516b95f-f776-4464-8c53-06167f40cc99\8EC4B3A5-6868-48c2-BE75-4F3044BE88A7 - On the right side, double-click the Attributes DWORD.
- Change the value from 1 to 2.
- Click OK.
These steps only enabled the option on Windows 10 called «Console lock display off timeout.» Now the only thing left to do is to customize this option to any time you want. To do this, use these instructions:
- Use the Windows key + X keyboard shortcut to open the Power User menu and select Power Options.
- Click the Change plan settings link for the selected plan.
- Click the Change advanced power settings link.
- On Advanced settings, scroll down and expand the Display settings.
- You should now see the Console lock display off timeout option, double-click to expand.
- Change the default time of 1 minute to the time you want, in minutes.
- Click Apply.
- Click OK to complete the task.
Once you complete the steps, you can test the new settings by locking your computer (Windows key + L keyboard shortcut), and now the screen shouldn’t turn off until the time you set expires.
All the latest news, reviews, and guides for Windows and Xbox diehards.
At any time, you can revert the changes by following the previous steps, but this time, on step 4 change the registry value key from 2 to 1.
How to change the Lock screen timeout using Command Prompt
The beauty of Windows is that you can configure the same feature in a number of ways. Alternatively, you can use the PowerCfg.exe utility to change you display timeout setting when your computer is locked. When it’s connected to AC power or when your device is running on battery (DC power).
To change the Lock screen timeout using Command Prompt, do the following:
- Use the Windows key + X keyboard shortcut to open the Power User menu and select Command Prompt (admin).
- Type the following command and press Enter:
powercfg.exe /SETACVALUEINDEX SCHEME_CURRENT SUB_VIDEO VIDEOCONLOCK 60Important: You must change «60» in the command-line with the timeout time you want to use, in seconds. For example, if you want the screen to turned on for 5 minutes, then you need to use 300 at the end of the command. - Type the following command and press Enter:
powercfg.exe /SETACTIVE SCHEME_CURRENT

- Use the Windows key + L keyboard shortcut to lock your PC and see if the new settings work.
The command mentioned in step 2 will work when your computer is using AC power. You must replace /SETACVALUEINDEX for /SETDCVALUEINDEX if you want to change the timeout setting on your laptop or tablet running on battery.
It’s worth noting that while changing the Registry settings is an advanced task, during my test, I have found that sometimes using the command lines may settings may not work as expected, but it’s an alternative.
On the other hand, changing the Registry worked perfectly, and after making the tweak, I can simply go to the Power Options settings in Control Panel and adjust the Lock screen timeout without having to use any commands.
More Windows 10 resources
For more help articles, coverage, and answers on Windows 10, you can visit the following resources:
- Windows 10 on Windows Central – All you need to know
- Windows 10 help, tips, and tricks
- Windows 10 forums on Windows Central
Mauro Huculak has been a Windows How-To Expert contributor for WindowsCentral.com for nearly a decade and has over 15 years of experience writing comprehensive guides. He also has an IT background and has achieved different professional certifications from Microsoft, Cisco, VMware, and CompTIA. He has been recognized as a Microsoft MVP for many years.
Можете ознакомиться с нашим отдельным материалом на сайте, где описаны способы настройки экрана блокировки, в том числе установка пароля и изменение оформления.
Подробнее: Настройка блокировки экрана в Windows 10
Способ 1: «Командная строка»
Самый быстрый способ изменить время до блокировки экрана в операционной системе Windows 10 – это выполнить простую команду через «Командную строку»:
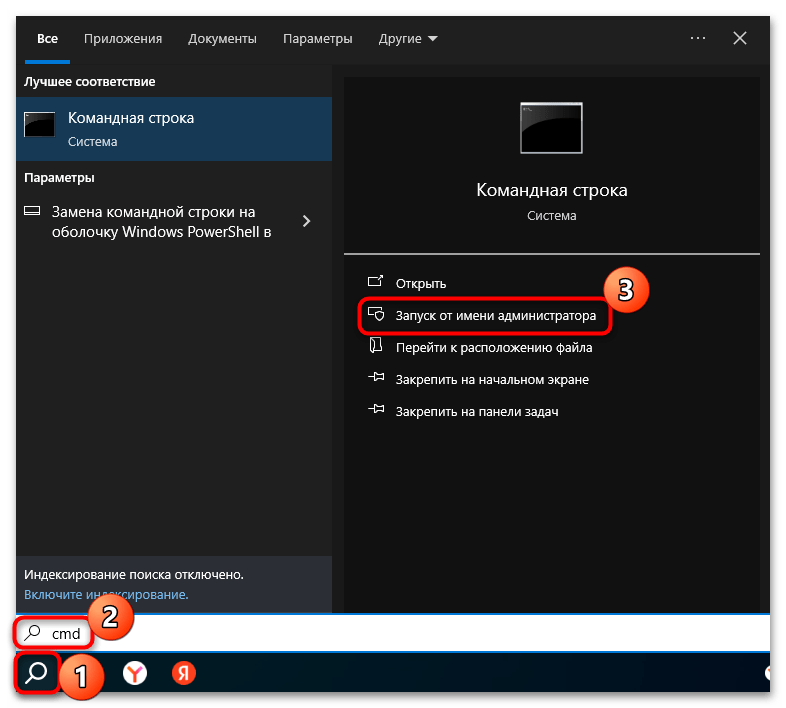
- В строке поиска введите
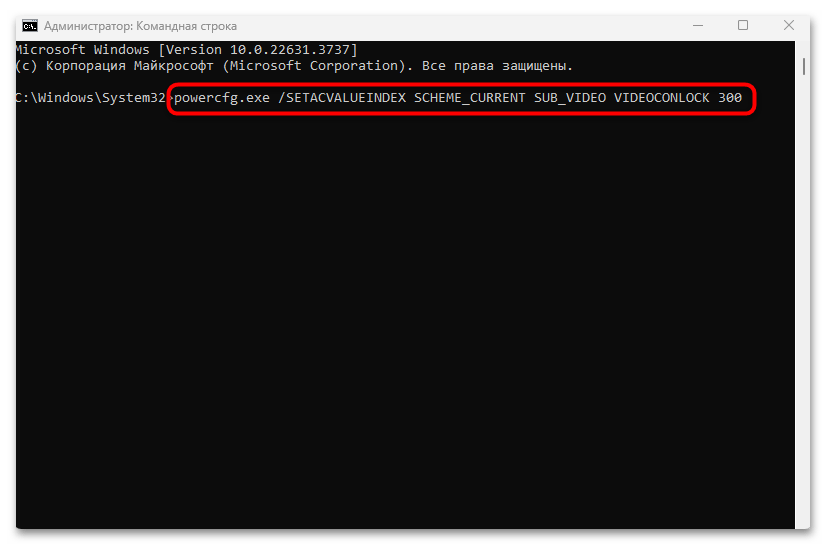
cmdи выберите запуск «Командной строки» от имени администратора. - В открывшееся окно вставьте такую команду:
powercfg.exe /SETACVALUEINDEX SCHEME_CURRENT SUB_VIDEO VIDEOCONLOCK X, где в конце вместо X нужно написать время в секундах. Например, если это 5 минут, тогда команда будет выглядеть следующим образом:powercfg.exe /SETACVALUEINDEX SCHEME_CURRENT SUB_VIDEO VIDEOCONLOCK 300. Нажмите на клавишу «Enter», чтобы выполнить ее.
С помощью такой команды и меняется время, через которое начнет отображаться экран блокировки ОС.
Способ 2: Системные «Параметры»
Если предыдущая инструкция вас по каким-то причинам не устраивает, всегда можно прибегнуть к возможностям штатного приложения «Параметров» в Windows 10.
- Запустите «Параметры», в главном меню нажав на значок в виде шестерни.
- Перейдите в раздел «Персонализация».
- На панели слева переключитесь на вкладку «Экран блокировки», затем в центральной части окна кликните по строке «Параметры времени ожидании для экрана».
- В меню «При питании от сети отключать через» выберите нужное время. На ноутбуках есть дополнительная опция «При питании от батареи отключать через» — для нее тоже выставьте подходящее значение.
В последующем при простое в течение заданного времени экран будет отключаться автоматически, а при использовании мыши или клавиатуры вы сможете продолжить работу.
У этого способа есть нюанс – при блокировке может отключаться экран, но заставка не появится. Если ее наличие важно, проделайте дополнительную манипуляцию:
- Снова откройте «Параметры» > «Персонализация», через панель слева переключитесь на «Экран блокировки» и в этом окне выберите пункт «Параметры заставки».
- Отобразится окно с параметрами экранной заставки (еще это также называется скринсейвер). Здесь можно выбрать само оформление экрана, а также задать время до ее включения при бездействии (пункт «Интервал»).
- После изменения настроек не забудьте их сохранить, нажав на кнопку «ОК».

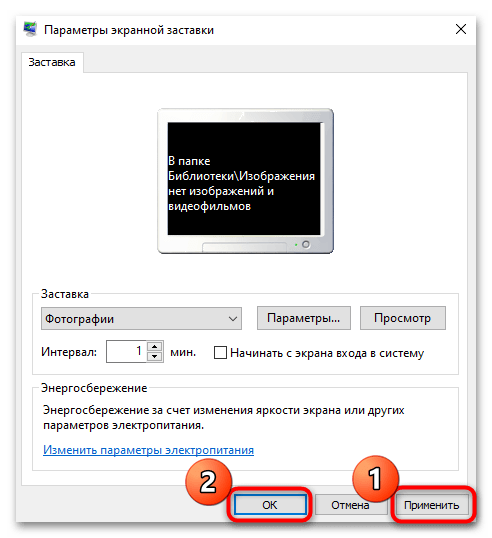
Кроме того, есть возможность сделать так, чтобы при отображении экранной заставки происходила блокировка учетной записи – для этого отметьте пункт «Начинать с экрана входа в систему». Теперь понадобится каждый раз, когда начнет отображаться заставка, понадобится вводить пароль для входа в Windows. Если он у вас не установлен, рассматриваемая функция не сработает.
Способ 3: «Панель управления»
Увеличение времени до появления экрана блокировки экрана Windows 10 происходит и через параметры электропитания в классической «Панели управления»:
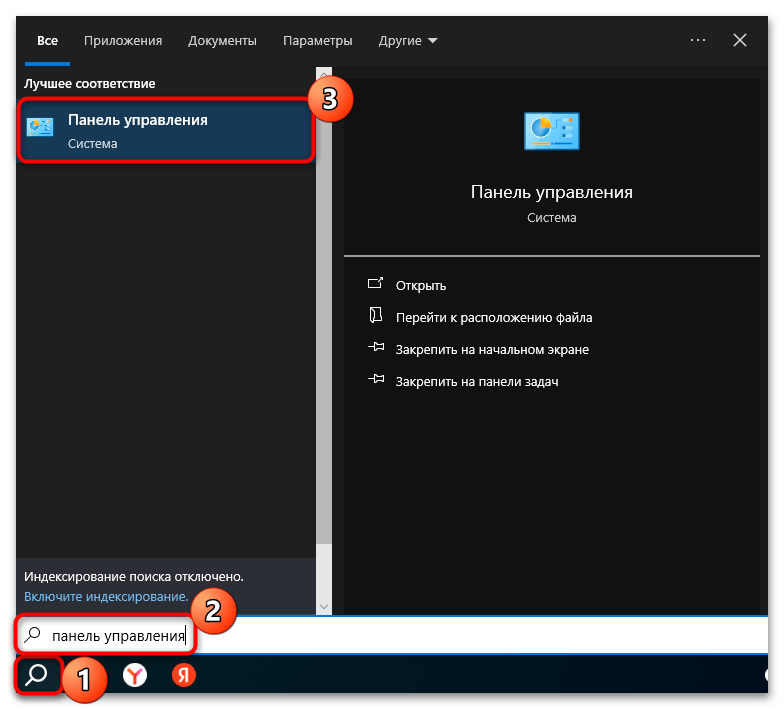
- Запустите «Панель управления», отыскав средство в главном меню либо с помощью строки поиска системы.
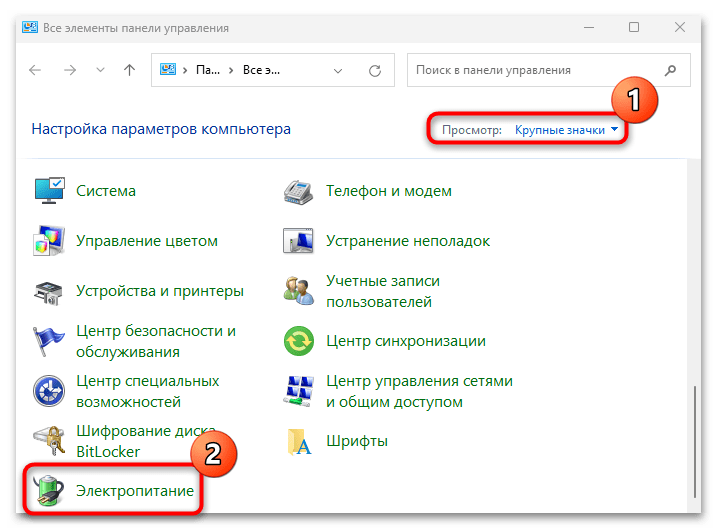
- В меню «Просмотр» для удобства выставьте отображение разделов в качестве мелких или крупных значков, затем перейдите в «Электропитание».
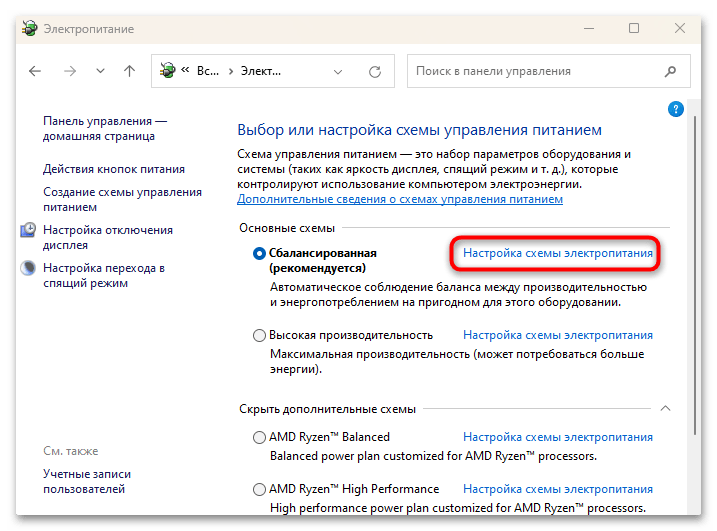
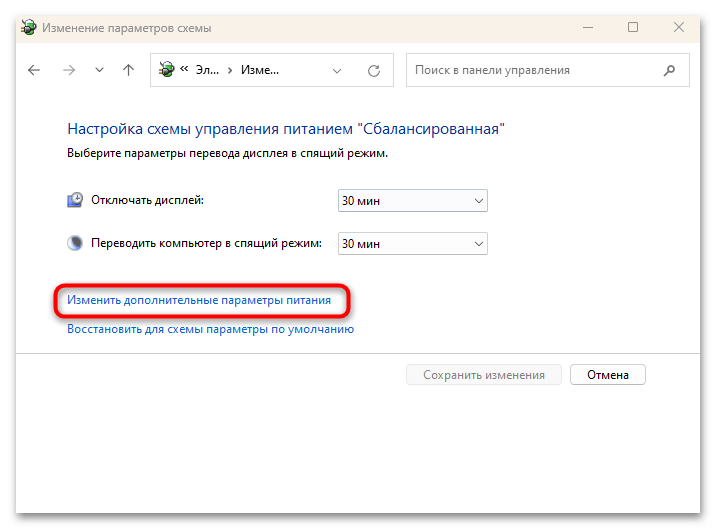
- Кликните по строке «Настройка схемы электропитания» у действующей схемы.
- В новом окне щелкните по «Изменить дополнительные параметры питания» для более тонкой настройки.
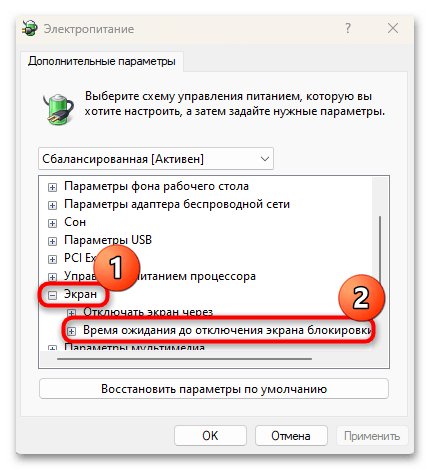
- В появившемся списке разверните пункт «Экран», затем – «Время ожидания до отключения экрана блокировки».
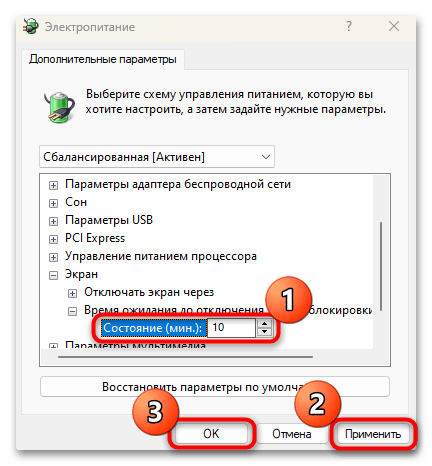
- В строке «Значение» задайте нужное время. Примените и сохраните настройки системы.
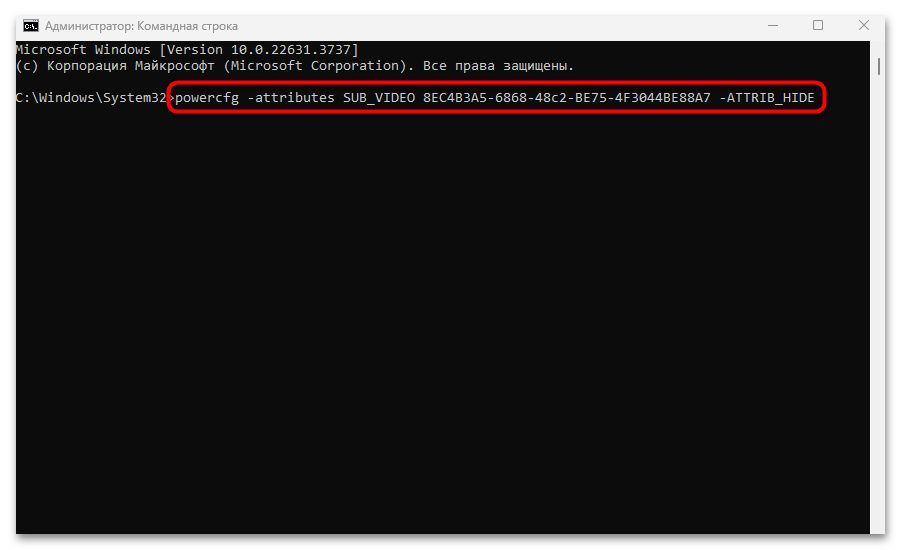
Если нужного пункта нет (что часто бывает по умолчанию), придется предварительно активировать отображение нужного пункта в окне с дополнительными параметрами питания. Для этого запустите консоль от имени администратора и выполните команду powercfg -attributes SUB_VIDEO 8EC4B3A5-6868-48c2-BE75-4F3044BE88A7 -ATTRIB_HIDE.
Наша группа в TelegramПолезные советы и помощь
Приветствую уважаемые друзья!
Зажмите Win + I или откройте меню Пуск и нажмите кнопку (шестеренки) для запуска окна Параметры.
Теперь откройте следующий раздел:
Персонализация > Экран блокировки > Параметры заставки
Теперь снимите галочку Начинать с экрана входа в систему или измените значение интервала. Из этого кона вы также можете открыть окно Электропитание, нажав Изменить параметры электропитания. В окне электропитания можно проверить следующие настройки (кнопки в левом верхнем углу):
- Настройка перехода в спящий режим. Здесь проверьте, не переходит ли ПК автоматически в спящий режим. Из-за него может срабатывать блокировка.
- Действия кнопок питания. Кстати в этом разделе есть галочка, что при нажатии кнопки блокировки, перехода в спящий режим, а также при закрытии крышки — автоматически включается блокировка. Если этой галочки нет — нажмите Изменение параметров, которые сейчас недоступны и снимите галочку.
Динамическая блокировка
В Windows 10 есть функция Динамическая блокировка, которая автоматически блокирует экран при бездействии. Ее отключить можно так — откройте окно Параметры (зажмите Win + I), далее перейдите по Учетные записи > Варианты входа, в блоке Динамическая блокировка снимите следующую галочку:

Удачи и добра, берегите себя!
На главную!
15.02.2022