
Download Windows Speedup Tool to fix errors and make PC run faster
The Snipping Tool of Windows is quite useful when taking screenshots and recording their screens. However, recently some users have seen an error message stating that the recording stopped. We will see what you can do if you see the error message:
Recording stopped
Something happened, and we’ve stopped recording. Wait a bit, then try again. If this continues, send us your feedback.

If you see Recording stopped message in the Snipping Tool of Windows 11/10, follow the solutions mentioned below:
- Disable screen projection
- Update the Snipping Tool
- Reset the Snipping Tool app
- Run the Windows app troubleshooter
- Scan for corrupt system files
- Change the default save location for screen recordings
- Re-register the Microsoft Store
Let’s get started with these solutions.
1] Disable screen projection
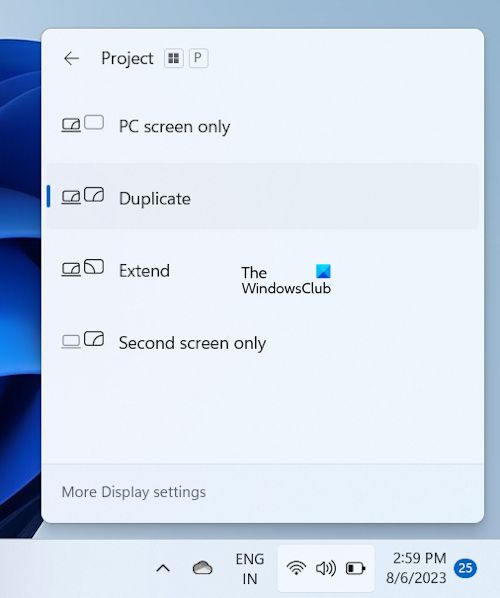
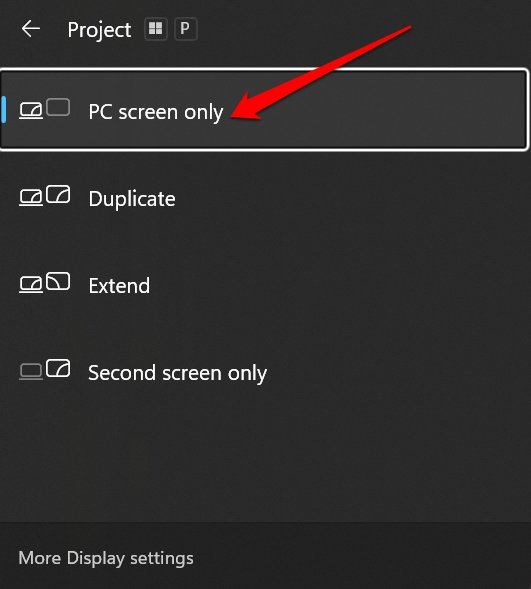
One of the most common reasons for the Snipping tool to stop recording is users accessing multiple displays at a time. Therefore, make sure to disable the display projection by clicking Win + P to open the Project panel, and changing it to PC screen only. Once done, launch the app, and see if this was the cause or not. If not, move on to the next solution.
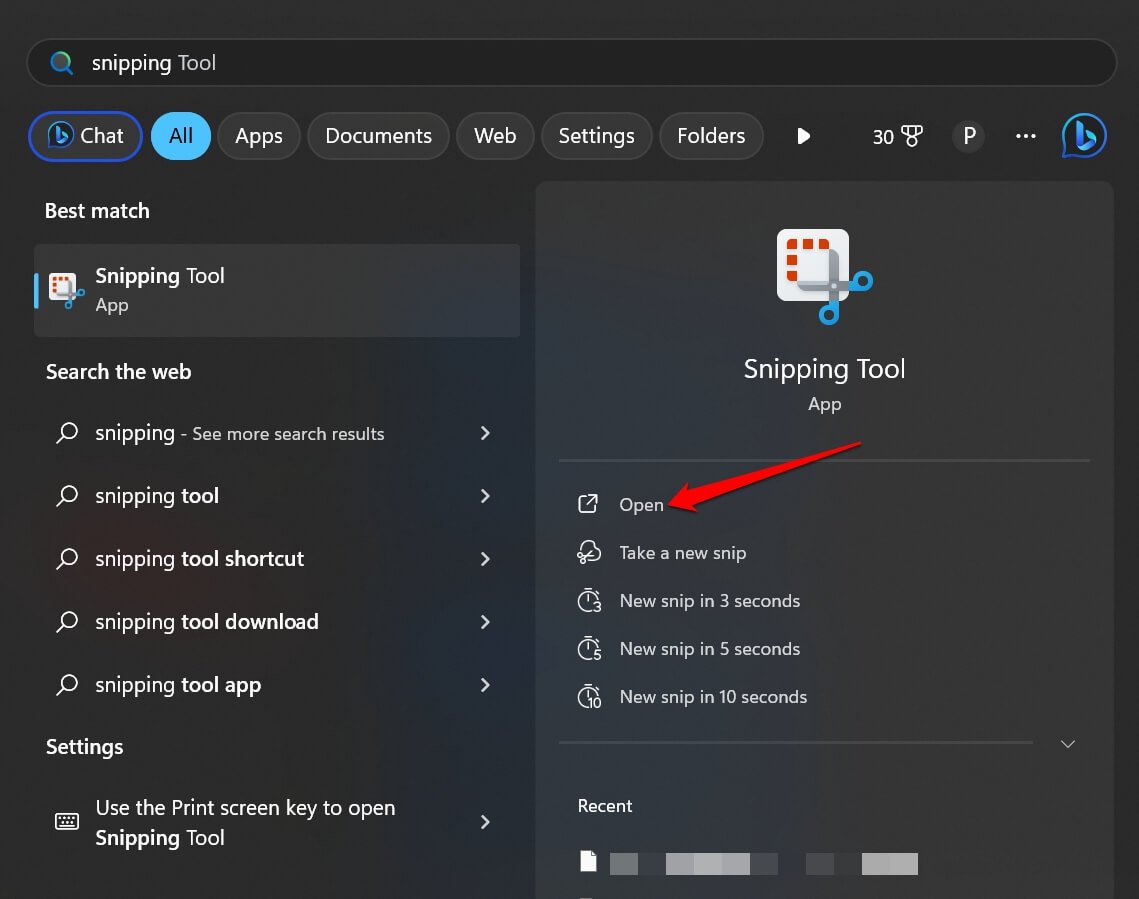
2] Update the Snipping Tool app
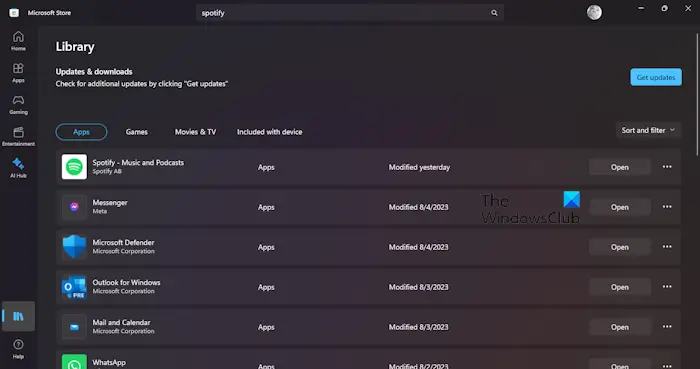
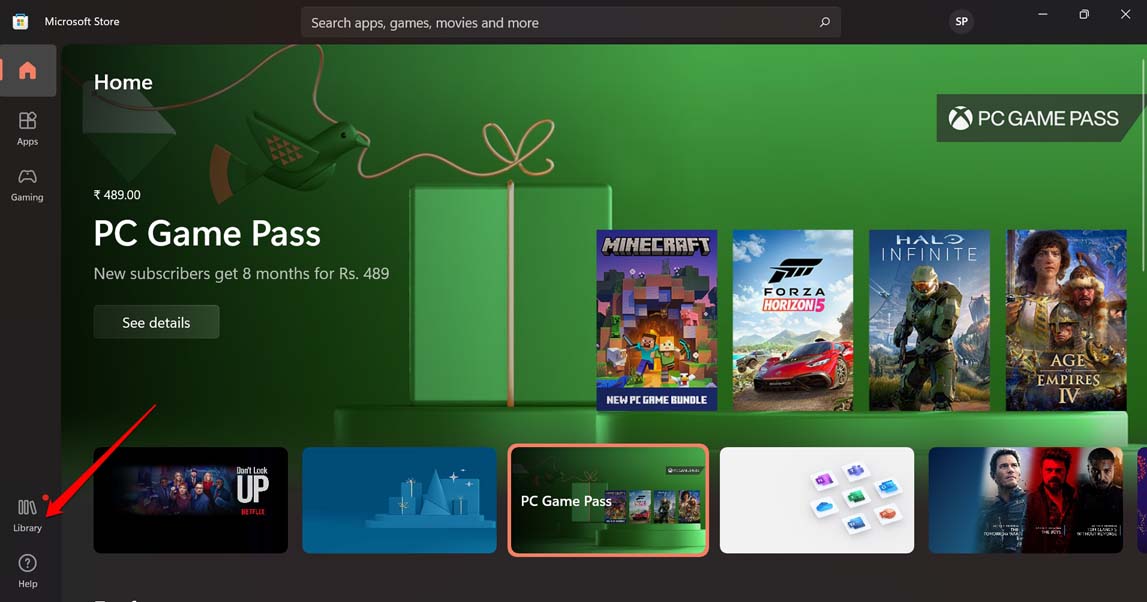
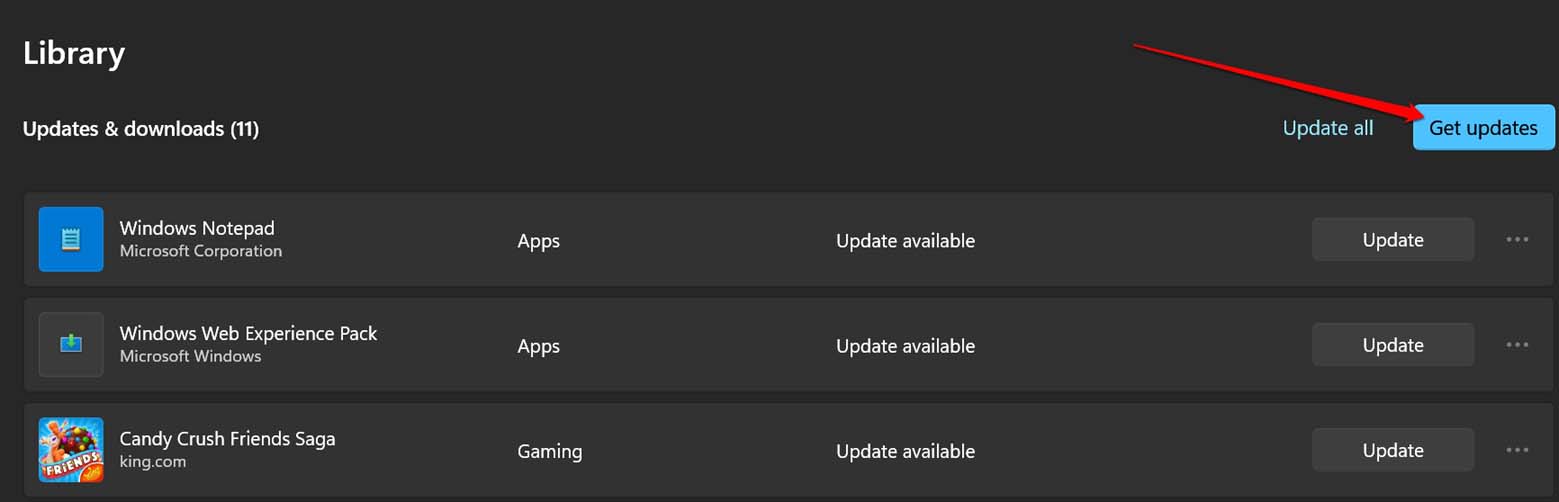
Bugs make life difficult not just for the user but also for the developer. However, they take note of these bugs and release fixes as quickly as possible. They could have released an update that can fix this bug as well. To find that out, open the Microsoft Store, go to Library, and click on Get Updates or Update all. Let the app update and check if the issue is resolved.
Related: The Snipping Tool is not working on your computer right now
3] Reset the Snipping Tool app
It is not uncommon for an app to get corrupted, resulting in various issues like the one we face. Acknowledging the challenge, Windows lets us repair or reset the app.
Here’s how to reset the app:
- Click Win + I to open Settings, and then select the Apps tab.
- Go to Apps and Features or Install apps, scroll down, and look for Snipping Tool.
- Windows 11: Select the three vertical dots, and then the Advanced options.
- Windows 10: Click on the app and select Advanced Options.
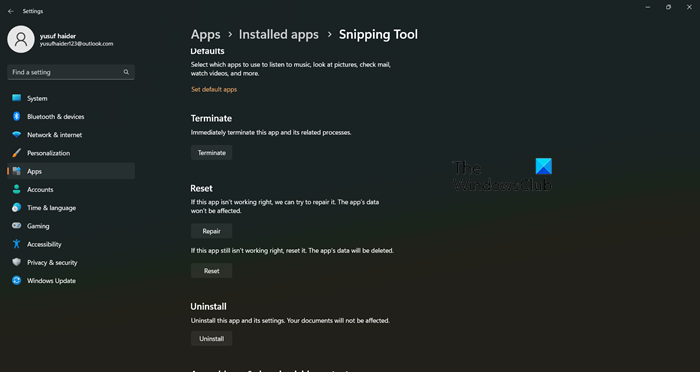
- Now, there are two options available here, Repair and Reset, click on Repair first, and then if the issue is not resolved, click on Reset.
Once done, restart the Snipping tool and try to record the screen again.
4] Run the Windows Store Apps troubleshooter
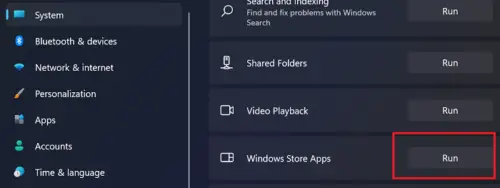
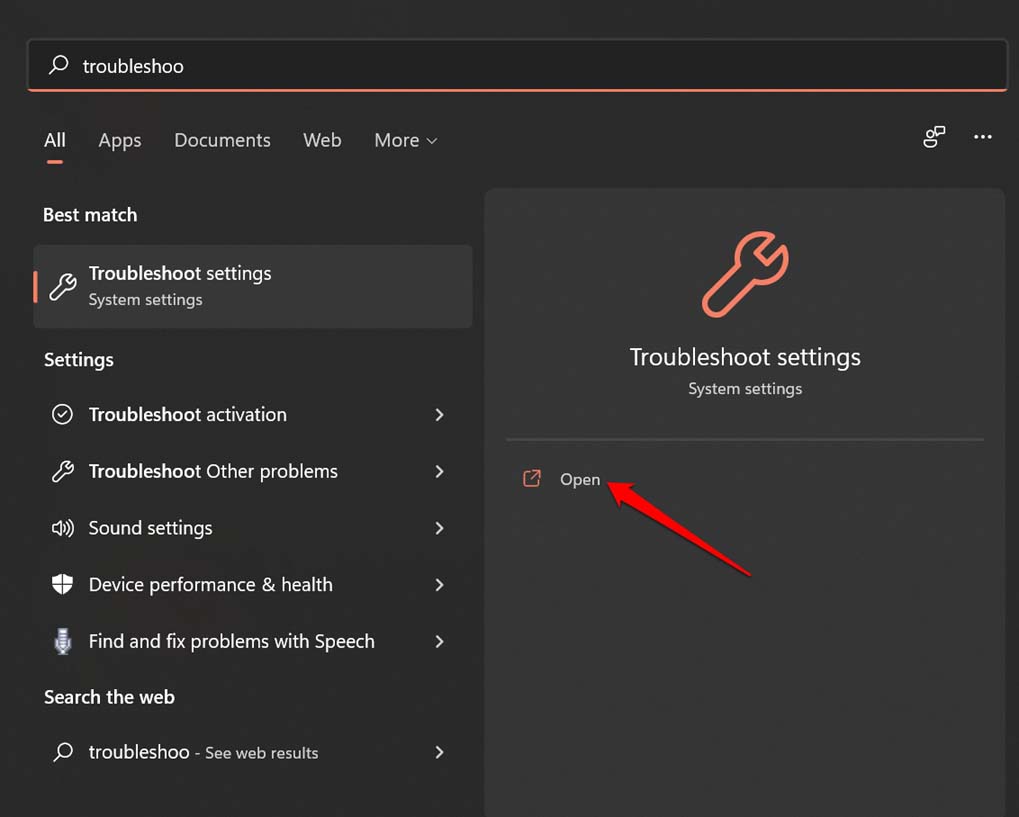
Windows Store Apps Troubleshooter is a built-in utility that scans what’s wrong with apps hosted by Microsoft Store and then provides a remedy. You can open it via Windows Settings.
5] Scan for corrupt system files
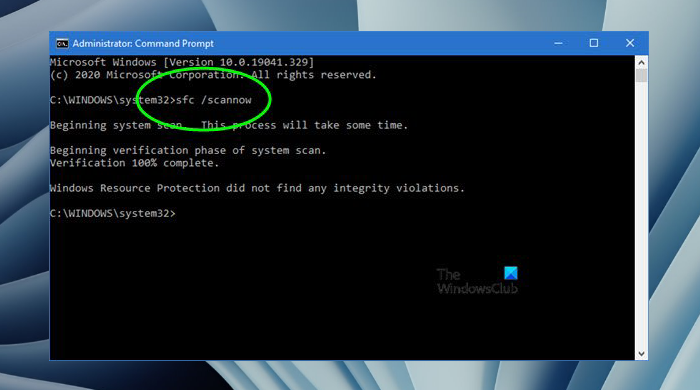
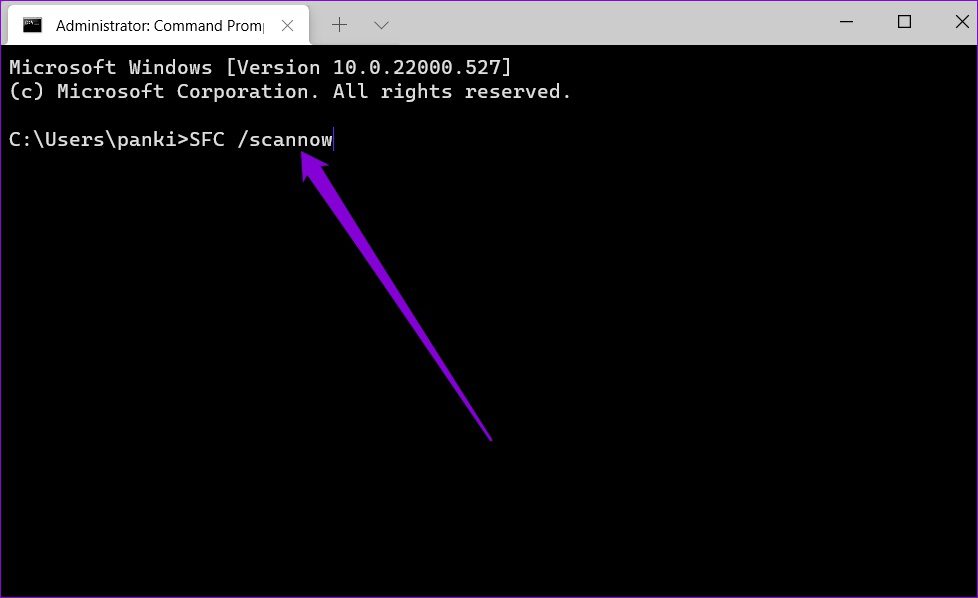
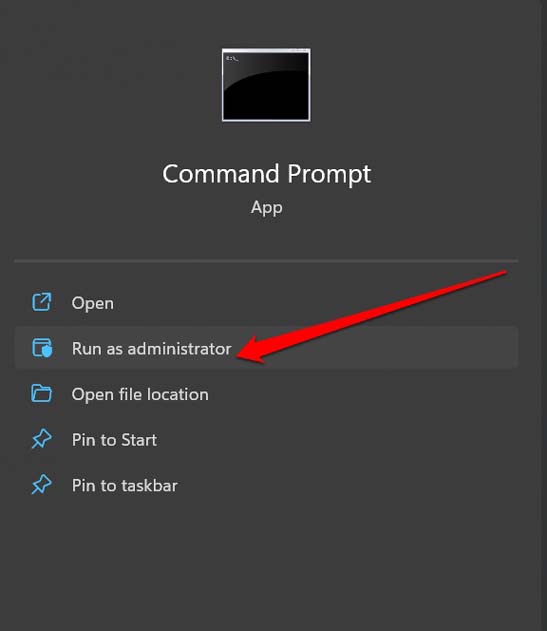
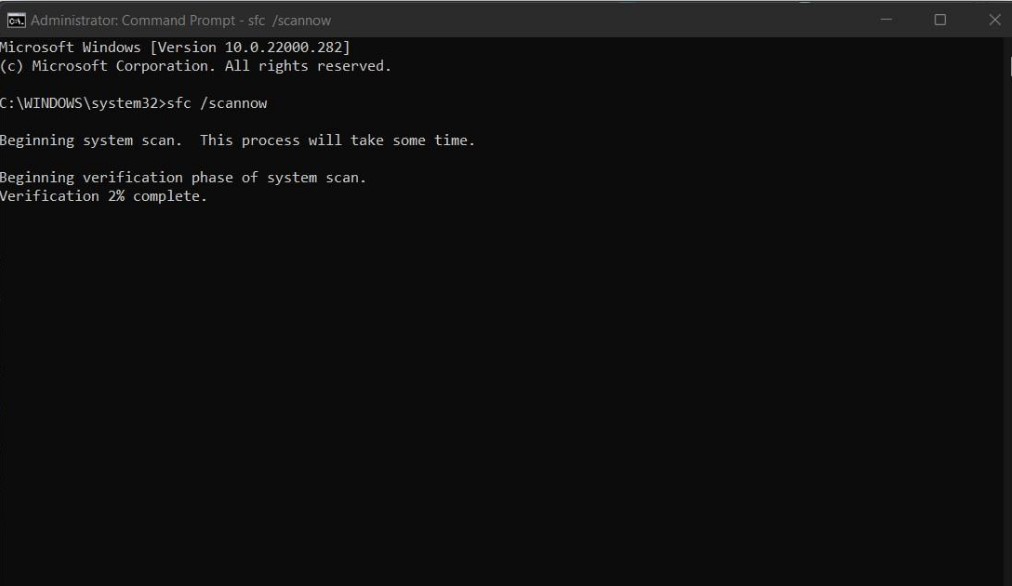
As the Snipping tool is a Windows tool, we can leverage the System File Checker to go through the protected system files and fix it for us if any corruption is found. To use it, go to the Search box, type cmd, and run it with administrator rights. Type the following command and then hit the Enter button.
sfc/scannow
This will take some time, and once the whole process is completed, check whether the Snipping tool is back to its previous state.
6] Change the default save location for screen recording
The error Recording stopped can appear if the app is unable to access the location of the screen recordings. In such cases, we recommend changing the location and then seeing if it resolves the matter at hand or not. Follow the steps mentioned below to do the same.
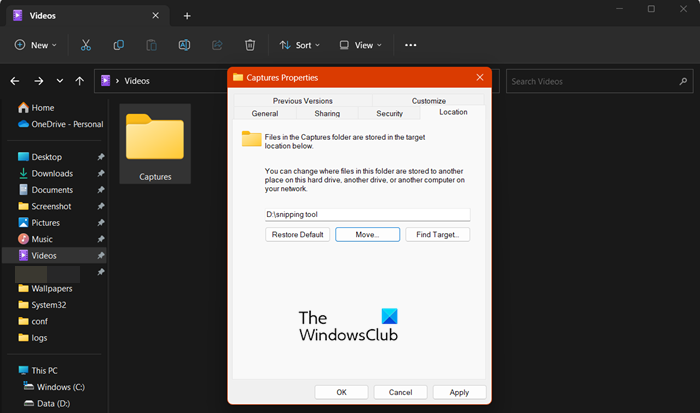
- Hit the Win + E to open the File Explorer and click on the Videos folder.
- Right-click the Captures folder, and then click the Properties option.
- Go to the Location tab, select the Move button, and then define a specific location.
- Press the Select Folder button, and lastly, select the Apply and OK buttons to save the changes.
Relaunch the app, start recording again, and hopefully, this time, there won’t be any error message on the screen. However, if it continues to show, then see the last solution.
7] Re-register the Microsoft store
Sometimes, improper functioning of the Microsoft store can also indirectly impact the performance of some of its apps. When this happens, users are either not able to access the app completely or some function gets affected. In all such cases, we can re-register the Microsoft Store apps. Follow the steps mentioned below to do the same.
Generate an initial System Restore point and then hit the Win + S to open the Windows Search menu.
Type Powershell, and then select and right-click the Windows Powershell to select the Run as administrator option.
Navigate to the administrative Windows PowerShell window, type the following command, and hit the Enter key.
To re-register Microsoft Store Apps for All Users:
Get-AppxPackage -allusers Microsoft.WindowsStore | Foreach {Add-AppxPackage -DisableDevelopmentMode -Register "$($_.InstallLocation)\AppXManifest.xml"}
To re-register Microsoft Store Apps for Current Users:
Get-AppXPackage *Microsoft.WindowsStore* | Foreach {Add-AppxPackage -DisableDevelopmentMode -Register "$($_.InstallLocation)\AppXManifest.xml"}
After the command is executed, quit Powershell and reboot the device. Doing so will re-register the app.
If nothing helps, run the Snipping tool in Clean Boot State and try to identify the offender.
We hope you can resolve the issue using the solutions mentioned in this post.
Read: Snipping Tool Tips & Tricks to capture screenshots
How do I Reset my Snipping Tool app?
To reset the Snipping tool in case it crashes, does not function properly, or the recording stops, go to the Windows Settings by clicking Win + I, click the Apps tab, and select Apps & Features or Installed apps. There, search for the Snipping tool, once found, select the vertical dots beside it or click on the app, and then select the Reset option. Similarly, if whatever you are facing continues, then you can opt for the Repair option via the same steps.
Read: How to Disable Snipping Tool or Print Screen in Windows
Does Snipping Tool support screen recording?
To answer this question simply, yes, the Snipping tool can now not only take screenshots but also record the screen without any third-party help if a user is operating Windows 11. Developers have launched an updated 11.2211.35.0 version of this tool that makes it possible for us to record videos without any third-party aid. So, you can nonchalantly record videos in Snipping Tool now.
Read: Fix Snipping Tool This app can’t open error.
Yusuf is an Engineering graduate from Delhi. He has written over 1000 technical articles and has knowledge of programming languages including Java, and C++, and technologies such as Oracle 12C and MsSQL. Troubleshooting Windows is his favorite past-time.
Helping millions of people navigate the world of technology.
Quick Tips
- Change the default save location for Snipping Tool recordings to see if that resolves the issue.
- Repairing or resetting the Snipping Tool app on Windows can help fix such errors.
- Try scanning your PC for corrupt system files using the SFC and DISM scans if the error persists.
Try Basic Fixes
- Disable screen projection: The Snipping Tool may sometimes have trouble recording the screen if you are using multiple displays. You can disable display projection temporarily to see if that gets things going. Press the Windows + P keyboard shortcut to access the Project panel and select PC screen only.
- Update the app: An outdated Snipping Tool app can cause problems. Open the Microsoft Store to update the app and see if that helps.
- Install Windows update: Errors like “Recording Stopped” can also occur due to a buggy or outdated Windows build. Consider installing pending updates and try using the Snipping Tool again.
Fix 1: Change the Default Save Location for Screen Recordings
The “Recording stopped” error in Windows 11 may also occur if the Snipping Tool cannot access the location to save screen recordings. You can try changing the Snipping Tool’s default save location to see if that helps.
Step 1: Press the Windows key + E to open the File Explorer.
Step 2: Select Videos from the left pane. Right-click on the Captures folder and select Properties.

Step 3: Under the Location tab, click the Move button.

Step 4: Specify another location and click the Select Folder button.

Step 5: Click Apply > OK.

Fix 2: Repair or Reset the App
Another option is to use Windows 11’s built-in app repair feature to address the “Recording stopped” error. Here are the steps for this.
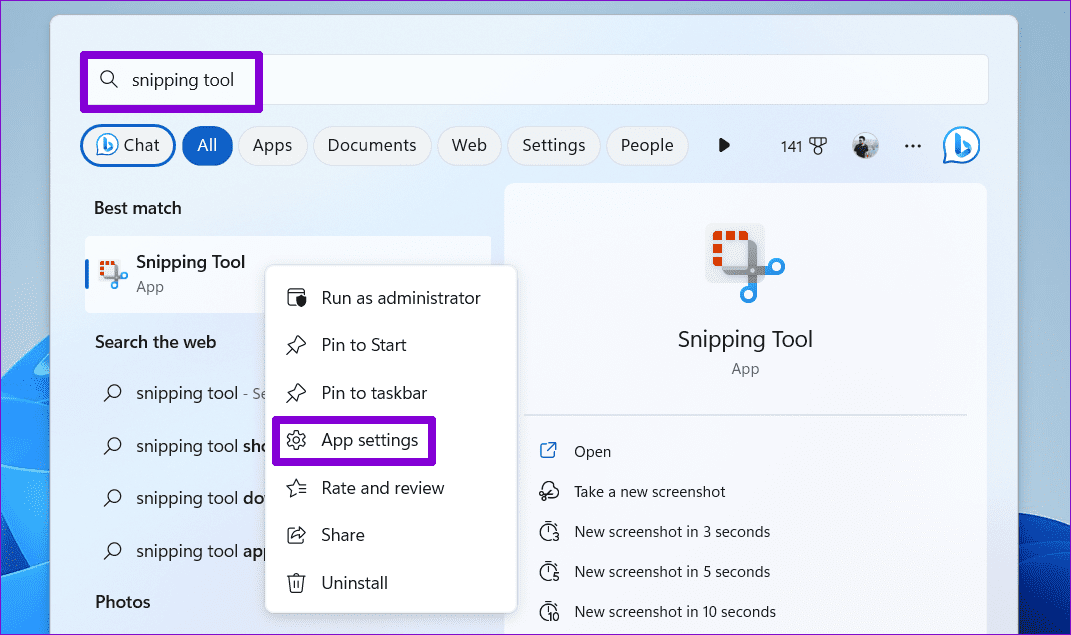
Step 1: Press the Windows + S keyboard shortcut to open the search menu. Type snipping tool in the text box, right-click on the first result, and select App settings.
Step 2: Under the Reset section, click the Repair button.
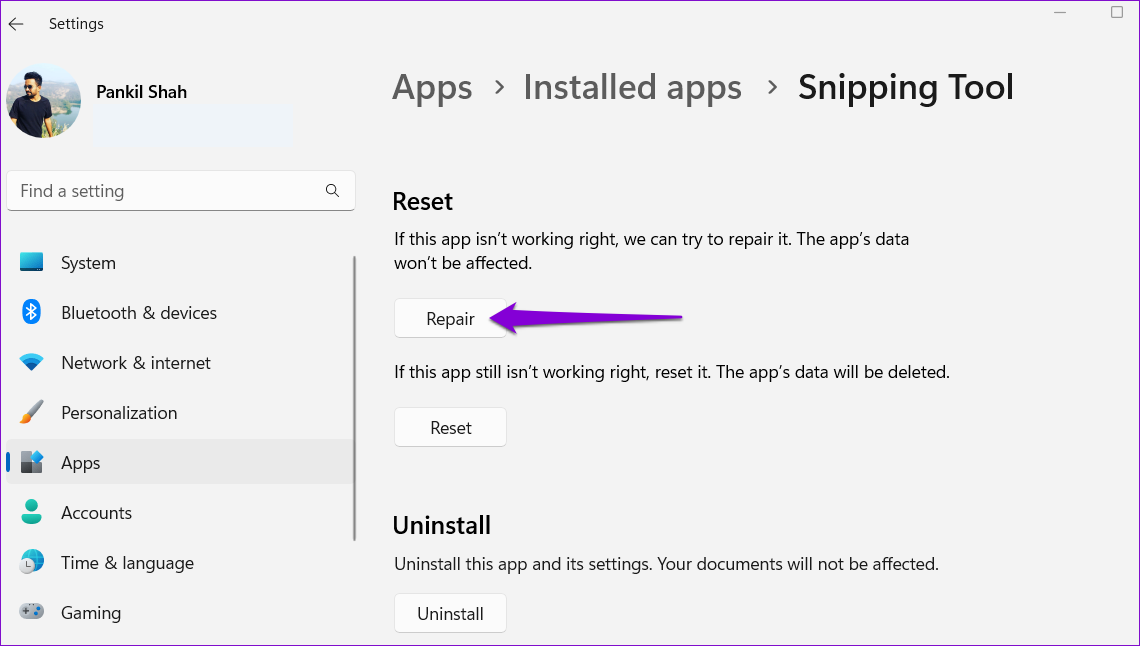
If the error persists, try resetting the Snipping Tool app from the same menu. This will delete all the existing app data and restore the app configuration to its default values.

Fix 3: Scan for Corrupt System Files
Apps like Snipping Tool could misbehave on Windows if some system files are corrupt or missing. Windows offers tools like SFC (System File Checker) and DISM (Deployment Image Servicing and Management) that can repair such corrupt system files. Here’s how to use them.
Step 1: Right-click the Start icon and select Terminal (Admin) from the list.

Step 2: In the console, type the following command to run an SFC scan and press Enter.
SFC /scannow
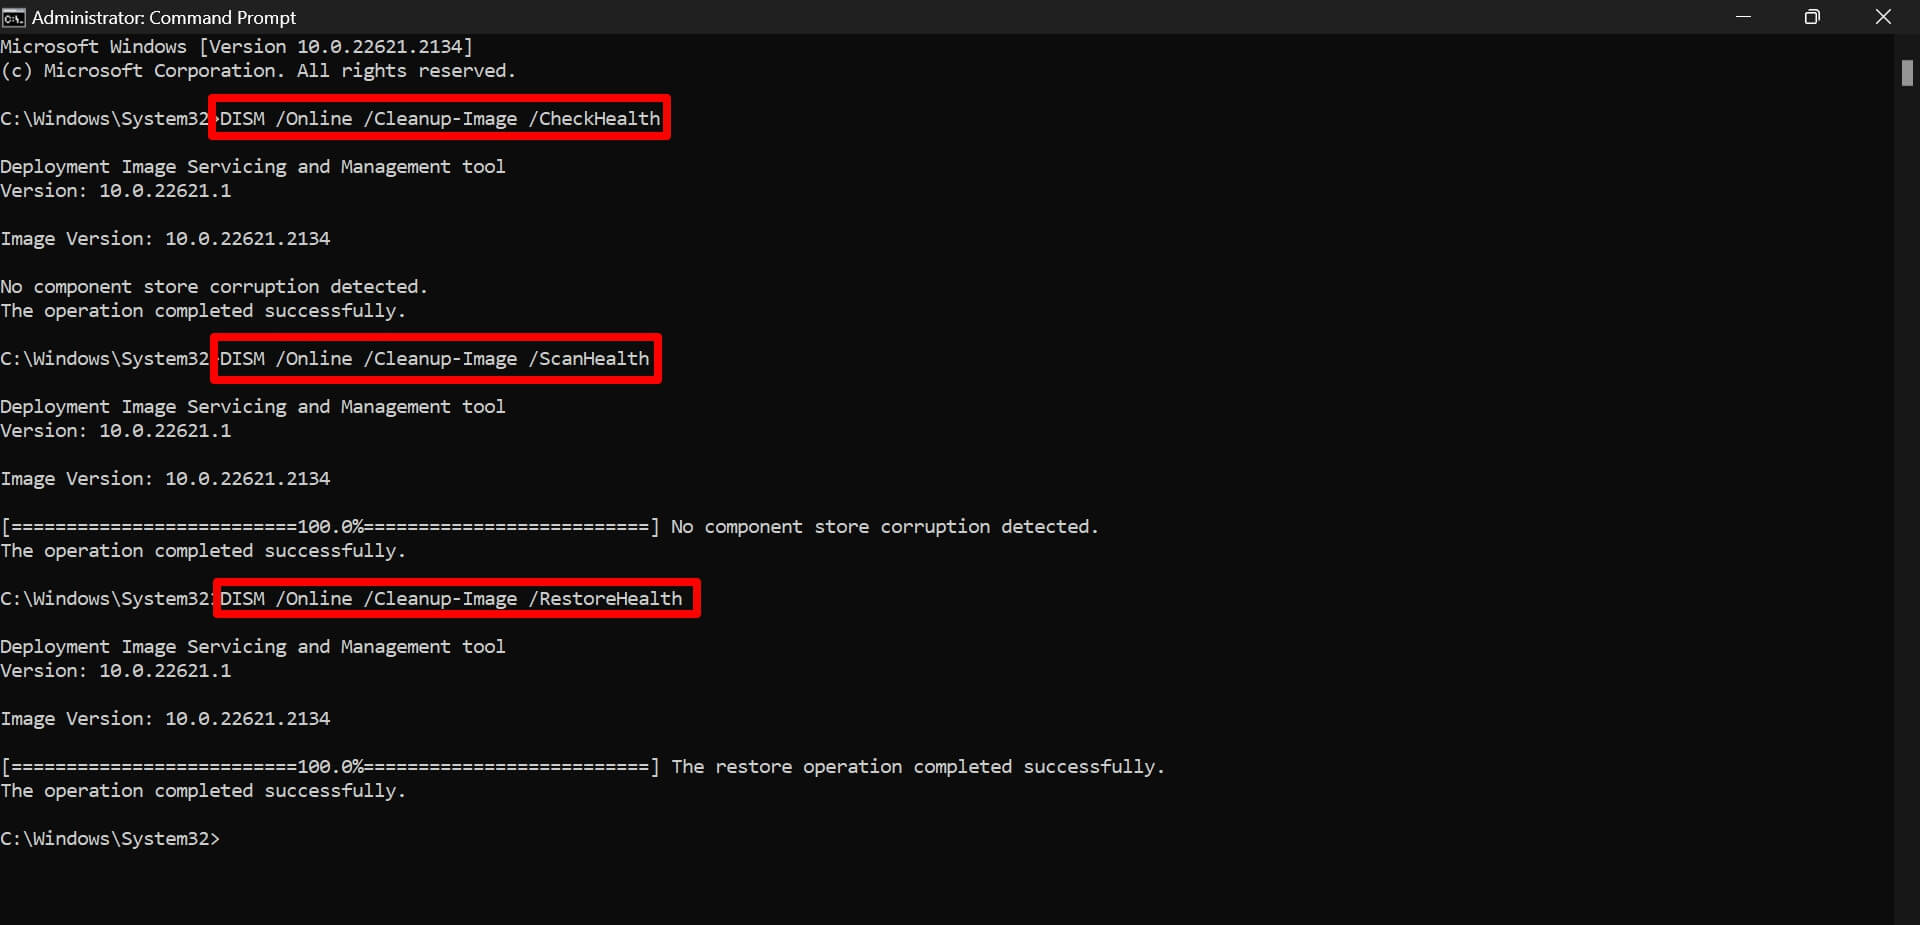
Step 3: Copy and paste the following commands one by one into the console to run a DISM scan and press Enter after each one:
DISM /Online /Cleanup-Image /CheckHealth
DISM /Online /Cleanup-Image /ScanHealth
DISM /Online /Cleanup-Image /RestoreHealth

Wait for the scan to finish and restart your PC. After that, check if the Snipping Tool can record the screen as before.
Was this helpful?
Thanks for your feedback!
Last updated on 14 August, 2024
The article above may contain affiliate links which help support Guiding Tech. The content remains unbiased and authentic and will never affect our editorial integrity.
Is Video Recording Not Working with Snipping Tool on Windows PC. Here is the Simple Guide to Fix Recording Stopped Error in Snipping Tool for Windows 11.
In this guide, I have offered various troubleshooting tips to fix the recording stopped error in the Snipping tool. For capturing screenshots and recording the screen Snipping tool is a native app present in the Windows OS.
The Snipping tool may not work if the app has some bug or its functioning is affected due to corrupt system files on the PC. Also, when the screen projection is enabled, it can stop the Snipping tool from recording the screen.

Follow these fixes and make the Snipping tool functional on Windows 11.
1. Run the Troubleshooter for Windows Store Apps
Use the native troubleshooting tool offered by Windows to fix issues with the apps on the Windows Store. As the Snipping Tool can be found on the Windows Store, this tool should fix any underlying issues with the app.
- Launch the Troubleshoot settings on your PC.

- Click on Other Troubleshooters

- Press the Run button beside Windows Store Apps.


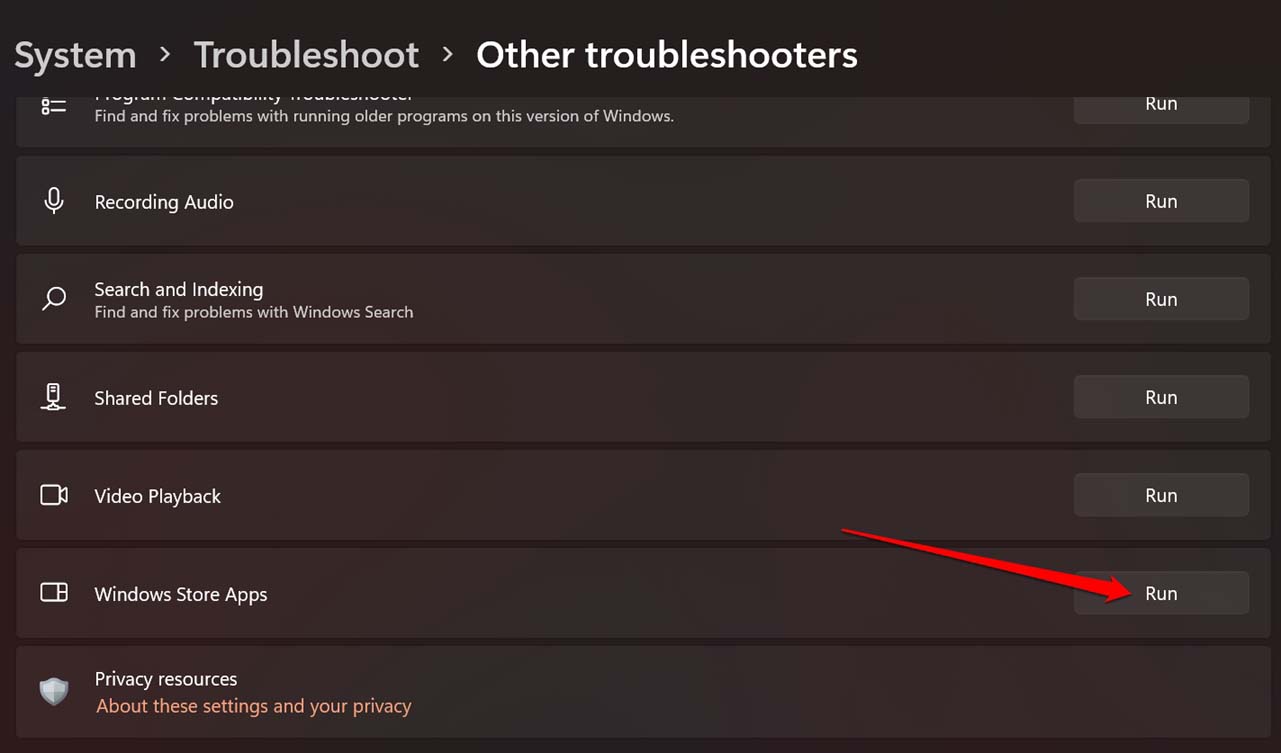
Once the process is over, launch the Snipping Tool and check if it can capture screen recordings without errors.
2. Force Close Snipping Tool
If there is any random error with the Snipping Tool, force closing the app and restart should fix the problem.
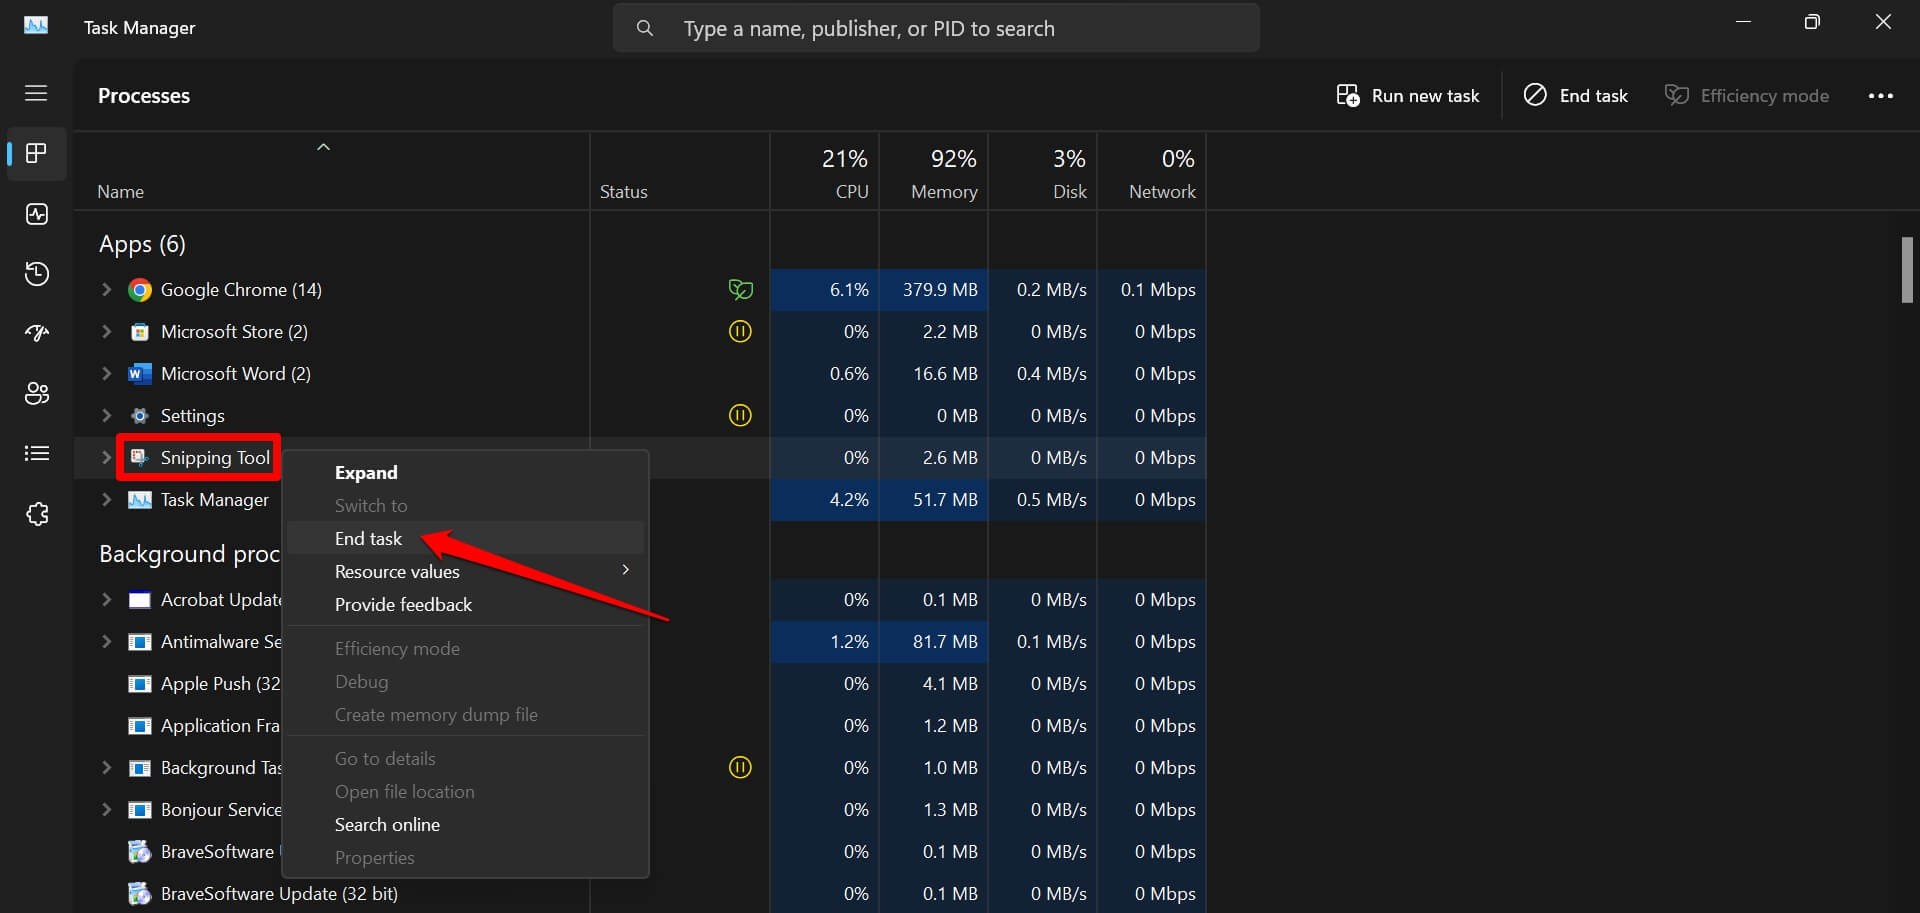
- Press Ctrl + Shift + Esc to launch the Task Manager.
- Go to Snipping Tool, right-click on it, and select End Task.

- After a few seconds, press Windows + S to open the search window.
- Search for Snipping Tool and open it.

3. Install Windows Update
Check that your computer is running on the latest version of Windows 11. Having bugs in the current iteration of Windows 11 can also affect the working of other apps on the PC.
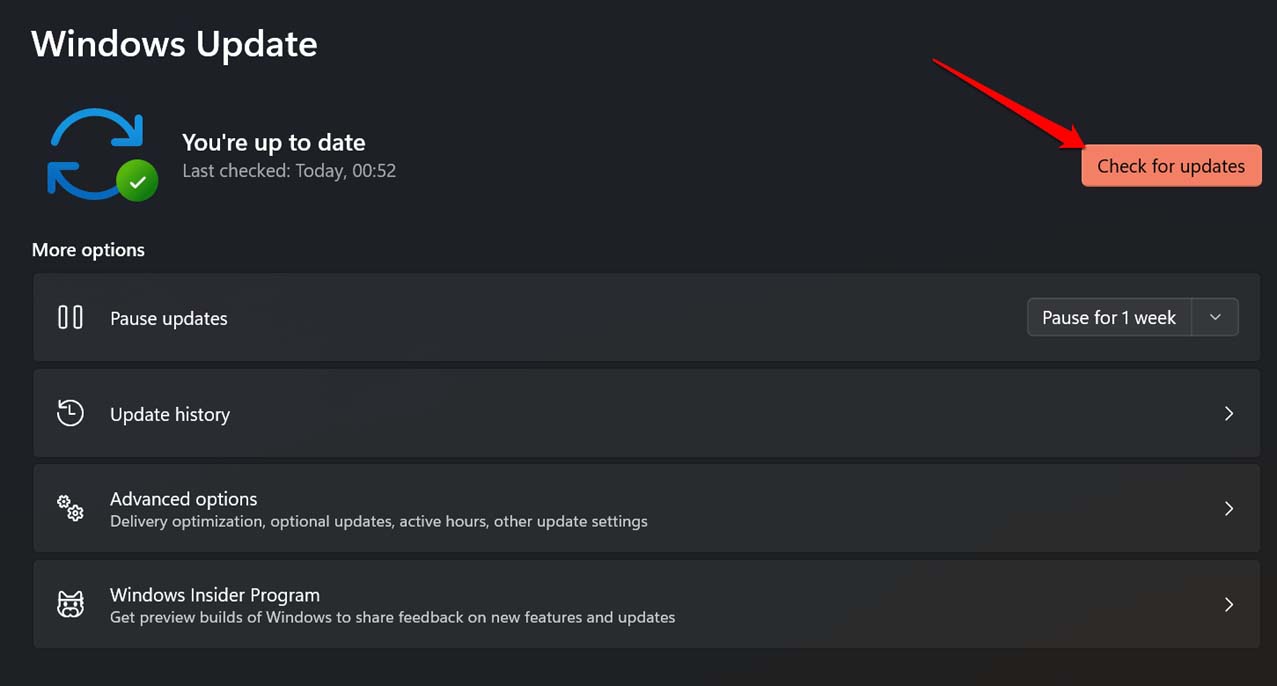
- Open Windows Update Settings using search.

- Click on Check for Updates.

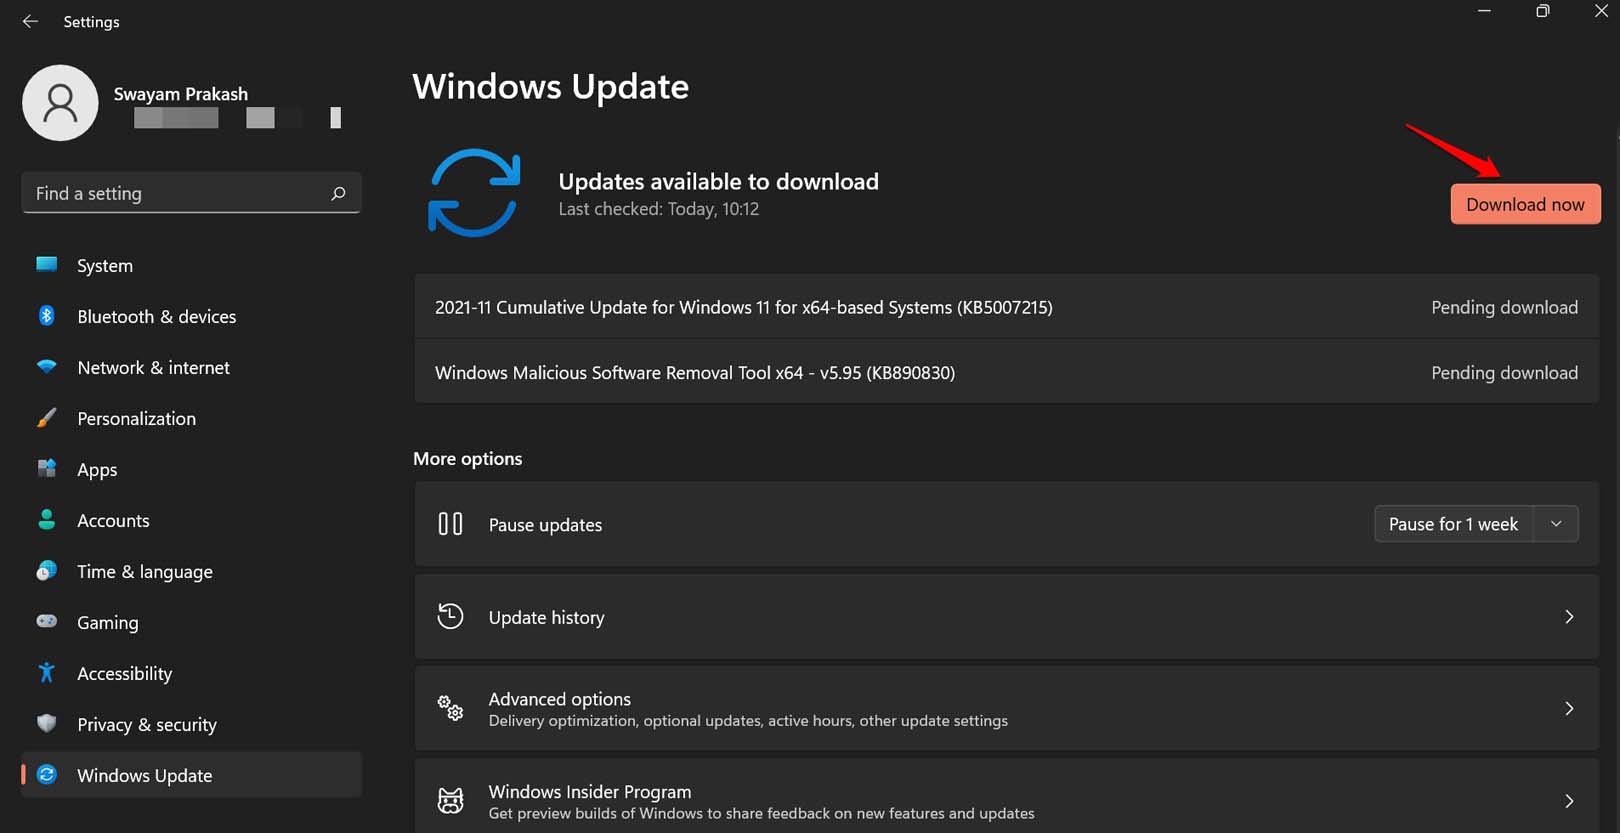
- If any update is available for download, click on Download Now to start downloading.


After installing the new Windows update, restart the PC and check if the Snipping Tool is recording the screen without any trouble.
4. Disable Screen Projection
Disabling screen projection and setting it to your PC screen should fix the recording error on the Snipping Tool.
- Press Windows + P to launch the quick projection settings panel.
- Select the option PC Screen only.

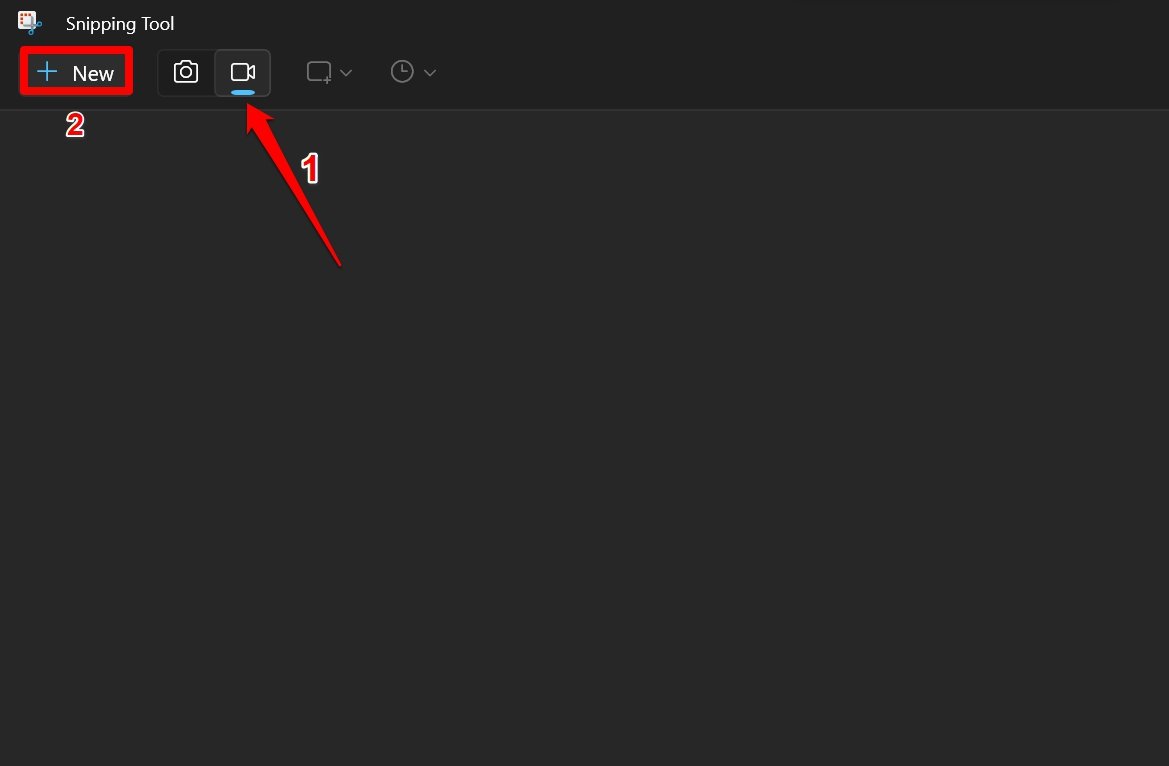
- Next, launch the Snipping Tool using Windows search.
- Press the video icon > New to start the screen recording.

- Select the portion of the screen you want to record.
With screen projection disabled, you should not encounter the recording stopped error in the Snipping Tool.
5. Repair the Snipping Tool App
If other fixes are not yielding any solution to the recording stopped error on the Snipping Tool, try repairing the app.
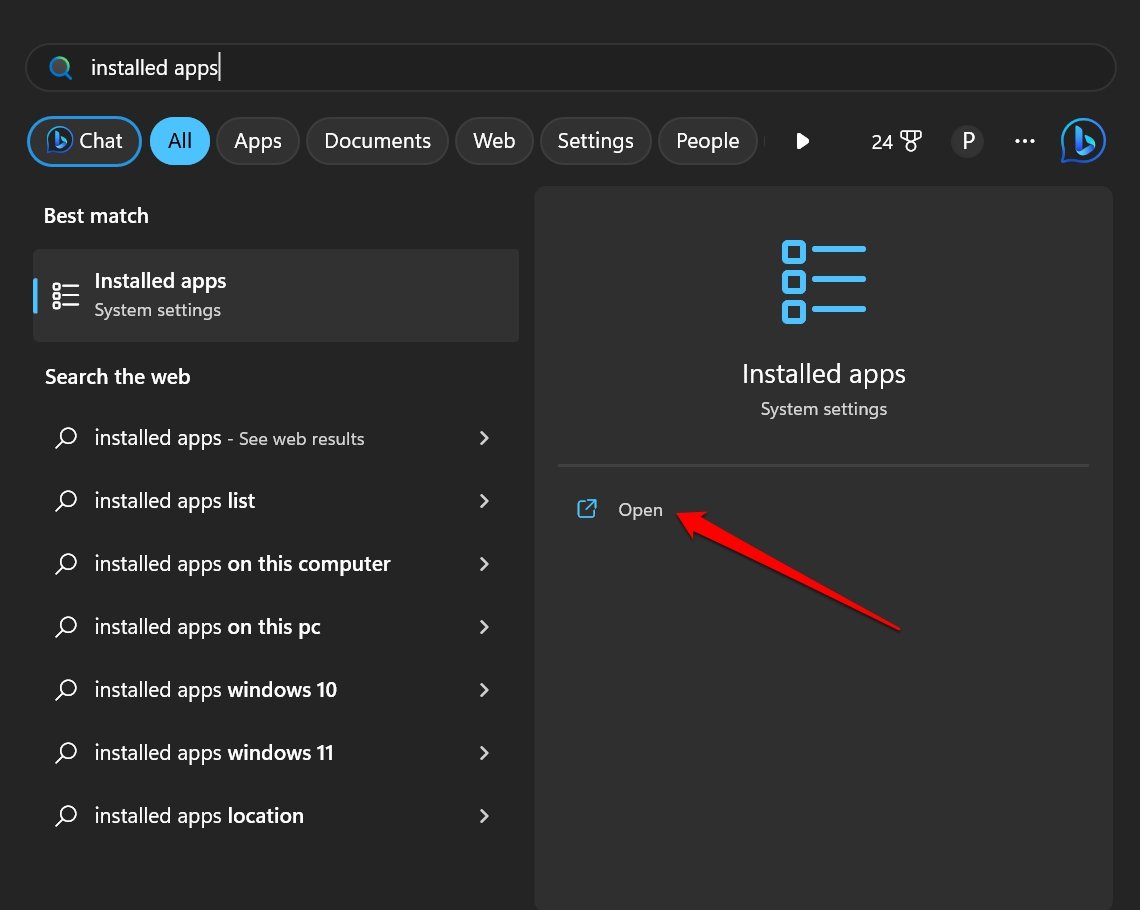
- Launch Installed Apps using Windows search Win + S.

- In the search field of Installed Apps, type Snipping tool.
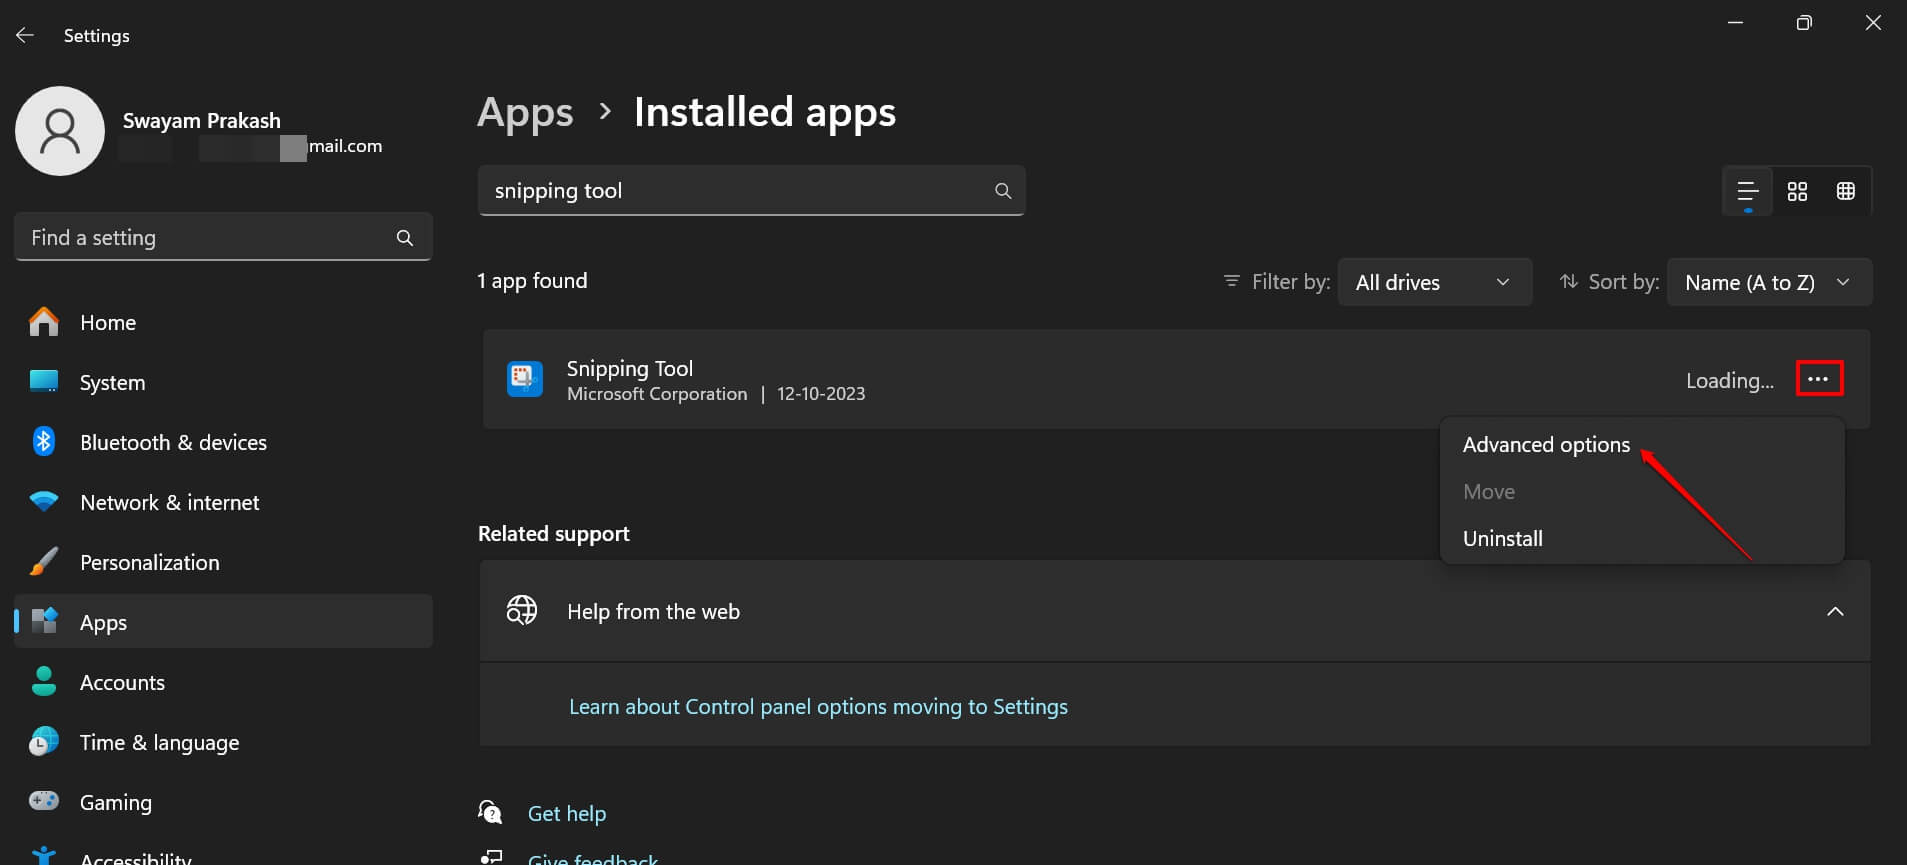
- Click the overflow menu icon beside the Snipping Tool and select Advanced Options.

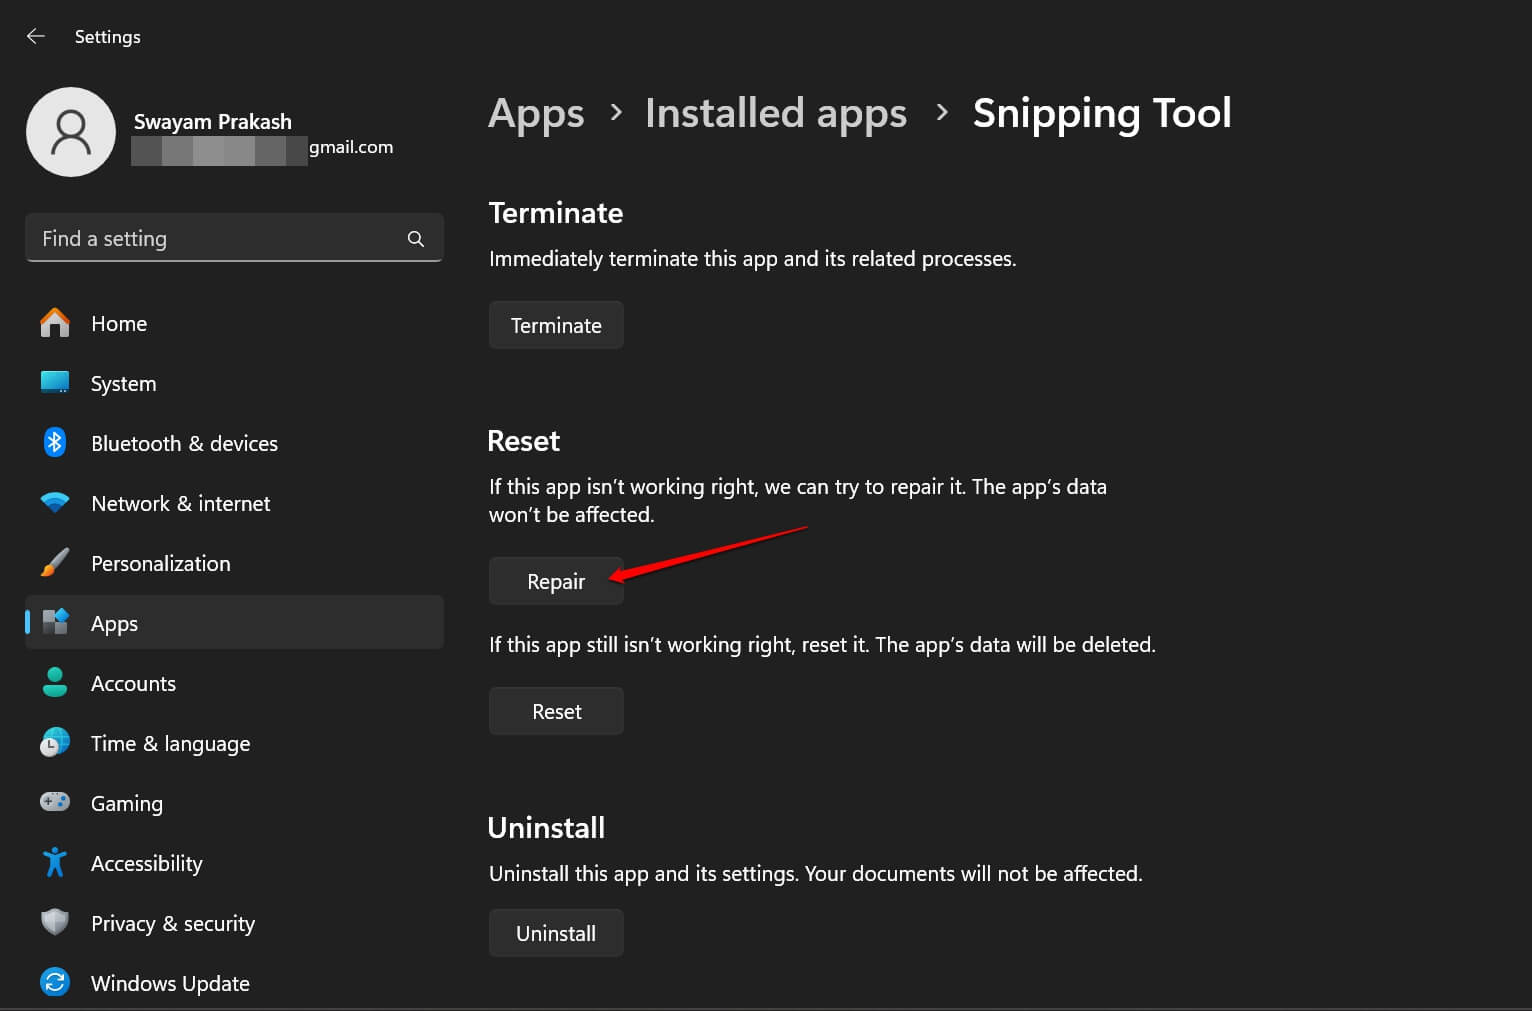
- Scroll to the Reset section and click the button Repair.

- You may also click on Reset to delete all the app data and reset it to default.
Launch the Snipping Tool after repairing the app. Check if it is working without returning any error messages.
6. Fix Corrupt System Files Present on the PC
Get rid of corrupt system files on your computer that may cause the Snipping Tool to show an error during screen capturing. Use Command Prompt to look for corrupt system files and fix them.
- Launch Command Prompt.

- Enter the command.
sfc/scannow

- Press enter and wait for the system to discover the corrupt files, and fix them.
You may also use the DISM scan to eliminate corrupt system files from your PC.
-
- Open Command Prompt.
- Enter these commands one by one and execute them.
DISM /Online /Cleanup-Image /CheckHealth

DISM /Online /Cleanup-Image /ScanHealth

DISM /Online /Cleanup-Image /RestoreHealth

- Open Command Prompt.
7. Install the Pending Update for the Snipping Tool
The Snipping Tool may have an update pending in the Windows Store. When you install a new version of the app, it will fix any errors on the current version running on your PC.
- Launch the Microsoft Store app.
- Click on Library.

- Then press Get updates.

- If the Snipping Tool has a new update available on the Microsoft Store, it will install automatically.
Otherwise, you will find the Snipping tool among the apps that have been updated.
Capture Screen Effortlessly with Windows Snipping Tool
The snipping tool facilitates capturing high-quality screenshots and screen recordings. If your work involves grabbing screenshots, it gets affected when the Snipping Tool is not working. With these useful tips and tricks, you can fix the recording stopped error in the Snipping Tool on your Windows PC.
If you’ve any thoughts on How to Fix Recording Stopped Error in Snipping Tool for Windows 11?, then feel free to drop in below comment box. Also, please subscribe to our DigitBin YouTube channel for videos tutorials. Cheers!
Xbox Game Bar: Осуществить запись сейчас невозможно. Повторите попытку позже. [Translate]…
Discus and support Xbox Game Bar: Осуществить запись сейчас невозможно. Повторите попытку позже. [Translate]… in XBoX on Windows to solve the problem; Во всех играх и приложениях при попытке записать клип Xbox Game Bar выдает сообщение: Осуществить запись сейчас невозможно. Повторите попытку позже….
Discussion in ‘XBoX on Windows’ started by LoveYouInsideOut, Jul 15, 2019.
-
Xbox Game Bar: Осуществить запись сейчас невозможно. Повторите попытку позже. [Translate]…
Во всех играх и приложениях при попытке записать клип Xbox Game Bar выдает сообщение: Осуществить запись сейчас невозможно. Повторите попытку позже. При этом драйверы видеокарты обновлены до последней версии, ранее на этом же ПК всё работало нормально, при
использовании комбинации клавиш Win+Alt+R также не работает. Подскажите, в чём может быть причина этой проблемы и как её исправить.[Translate by Mod]
In all games and apps, when you try to record an Xbox Game Bar clip, it says: You can’t record it now. Try again later. At the same time, the drivers of the graphics card have been updated to the latest version, previously on the same PC everything worked
normally, when using the combination of keys Win’Alt’R also does not work. Tell me what the cause of this problem might be and how to fix it
-
Xbox Game Bar «осуществить запись сейчас невозможно, повторите попытку позже»
[Сотрудник использует приложение переводчика, пожалуйста, имейте в виду, что могут возникнуть грамматические ошибки или неправильный синтаксис] Привет, ылс, Благодарим вас за обращение на форумы Xbox. Вы упомянули, что на панели Xbox Game Bar возникает проблема: «Не удается записать сейчас, повторите попытку позже». У этого ОП была похожая проблема, и отмеченный ответ решил эту проблему для 62 других. Я скопировал шаги ниже, пожалуйста, попробуйте их и дайте мне знать, если они работают для вас:
Запустите Windows PowerShell от имени администратора. Для этого нажмите кнопку Пуск > все приложения > Windows PowerShell Щелкните правой кнопкой мыши Windows PowerShell и выберите пункт Дополнительные > запуск от имени администратора. В окне Windows PowerShell скопируйте и вставьте следующую команду: Get-AppxPackage *xboxapp* | Удалить-AppxPackage Перезагрузите компьютер, чтобы изменения вступили в силу. Перед перезагрузкой убедитесь, что вы сохранили и закрыли все открытые приложения. Загрузите приложение Xbox из Магазина Windows. Обратитесь к шагам ниже: Выберите Магазин на панели задач или нажмите кнопку Пуск, а затем в списке приложений выберите Магазин. В Магазине выберите Приложения или Игры. Найдите приложение Xbox. Нажмите кнопку Загрузить. Пожалуйста, дайте мне знать, если это решит вашу проблему, нажав «Да» ниже. XBF – Дрю
English translation:
[Associate is using a translator application, please be aware that grammatical errors or incorrect syntax may occur]
Hello Ryls,
Thank you for contacting Xbox forums. You mentioned that Xbox Game Bar is having the issue, “Can’t record now, try again later.” This OP had a similar issue and the marked answer has resolved this issue for 62 others. I copied the steps below, please try them and let me know if they work for you:
- Launch Windows PowerShell as an administrator. To do this, click Start > All apps > Windows PowerShell
- Right-click Windows PowerShell and click More > Run as Administrator.
- In theWindows PowerShell window, copy and paste the following command: Get-AppxPackage *xboxapp* | Remove-AppxPackage
- Restart your computer so that the changes can take effect. Make sure that you save and close any apps that you have opened before you restart.
- Download the Xbox app from the Windows Store. Refer to the steps below:
- Select Store on your taskbar, or select Start, and on the apps list select Store.
- In the Store, select Apps or Games.
- Search for the Xbox app.
- Click Download.
Please let me know if this solves your issue by tapping “Yes” below.
XBF – Drew
-
Xbox Game Bar: Осуществить запись сейчас невозможно. Повторите попытку позже. [Translate] Xbox Game Bar: You can’t record now. Try again later.
Are you in the insiders program by chance? It could be a bug, You may want to report it if so. Have you checked to make sure no updates are needed?
-
LoveYouInsideOut
Win UserXbox Game Bar: Осуществить запись сейчас невозможно. Повторите попытку позже. [Translate] Xbox Game Bar: You can’t record now. Try again later.
Sorry to hear it. Have you tried powering your pc fully down to see if that is the issue? Also, make sure you have enough space in your storage device.
Nothing changes. 200 gb are obviously enough.
-
LoveYouInsideOut
Win UserXbox Game Bar: Осуществить запись сейчас невозможно. Повторите попытку позже. [Translate] Xbox Game Bar: You can’t record now. Try again later.
Are you in the insiders program by chance? It could be a bug, You may want to report it if so. Have you checked to make sure no updates are needed?
I’m in program, but I scarcely think that it affects. Reported, waiting for an answer.
-
Xbox Game Bar: Осуществить запись сейчас невозможно. Повторите попытку позже. [Translate] Xbox Game Bar: You can’t record now. Try again later.
Sorry to hear it. Have you tried powering your pc fully down to see if that is the issue? Also, make sure you have enough space in your storage device.

Xbox Game Bar: Осуществить запись сейчас невозможно. Повторите попытку позже. [Translate]…
-
Xbox Game Bar: Осуществить запись сейчас невозможно. Повторите попытку позже. [Translate]… — Similar Threads — Game Bar Осуществить
-
May 12, 2025 — PC Gaming Preview — Xbox App [2505.1000.41.0] & Game Bar for Windows…
in XboX Insiders
May 12, 2025 — PC Gaming Preview — Xbox App [2505.1000.41.0] & Game Bar for Windows…: Hey Xbox Insiders! A new version of the Xbox App on Windows has been released for users enrolled in the PC Gaming Preview. Check the release notes linked below to learn more:May 12, 2025 — PC…
-
Xbox game bar on party chat mic muted fix (possible)
in XboX Insiders
Xbox game bar on party chat mic muted fix (possible): Hi guys,Had an issue where my outgoing audio was muted in a party but my mic was showing as working in the Xbox app itself. Mic wasn’t muted and all that, loads of various guides online but no…
-
Game bar is resetting every time it’s closed
in XboX Insiders
Game bar is resetting every time it’s closed: Every time I open and close the Game Bar and without any notification every widget refreshes, and on compact mode it starts on the home widget instead of the latest one I was using, along with… -
Game Bar Works in SOME Parties but not all of them
in XboX Insiders
Game Bar Works in SOME Parties but not all of them: Game bar worked in a party of 1 friend, but i joined a party with other people that are not friends and i could not hear or talk. Also, my privacy settings are set to everyone for everything.
what… -
Game Bar Permanently Never Working
in XBoX Games and Apps
Game Bar Permanently Never Working: Crashes. Messages Don’t send. Party invites don’t work. Messages don’t load. Etc.Tried everything.
15e6463c-25ab-4333-b51b-6e7d7d8f460c
-
May 9, 2025 — PC Gaming Preview — Xbox App [2505.1000.40.0] & Game Bar for Windows…
in XboX Insiders
May 9, 2025 — PC Gaming Preview — Xbox App [2505.1000.40.0] & Game Bar for Windows…: Hey Xbox Insiders! A new version of the Xbox App on Windows has been released for users enrolled in the PC Gaming Preview. Check the release notes linked below to learn more:May 9, 2025 — PC…
-
How do you fix a dead/broken Xbox app and semi dead Game bar app?
in XBoX on Windows
How do you fix a dead/broken Xbox app and semi dead Game bar app?: Last night I opened my Xbox app and started a game and then Game Bar around 30 seconds after, it then preceded to crash my pc and upon my pc rebooting, rendered both the Xbox app and Game Bar… -
May 2, 2025 — PC Gaming Preview — Xbox App [2505.1000.35.0] & Game Bar for Windows…
in XboX Insiders
May 2, 2025 — PC Gaming Preview — Xbox App [2505.1000.35.0] & Game Bar for Windows…: Hey Xbox Insiders! A new version of the Xbox App on Windows has been released for users enrolled in the PC Gaming Preview. Check the release notes linked below to learn more:May 2, 2025 — PC…
-
Game bar will not open, but still appears in task manager, how do I fix it?
in XBoX Rewards & Social
Game bar will not open, but still appears in task manager, how do I fix it?: [img]On windows 10, latest version.
I have uninstalled and reinstalled game bar and the Xbox app
I have made sure that the game bar is activated, both in the registry and windows settings
I…
Users found this page by searching for:
-
осуществить запись сейчас невозможно повторите попытку позже
,
-
игровой режим осуществить запись сейчас невозможно повторите попытку позже
Why doesn’t my screen recording work on Windows? Is there a way to fix the screen record not working issue? If you are experiencing issues with your screen recording, read this post and we’ll provide workable solutions for you.
There is a built-in screen recorder that is the Xbox Game Bar on your Windows. Recording your Windows 10/11 screen using this tool is handy when you want to capture and share a clip with friends, family, and colleagues.
However, it can be quite frustrating when screen recording stops working. To help you with this, in this article, we will discuss why your screen recording isn’t working and provide 7 easy solutions to fix the screen recording not working issue.
Let’s dive in!
Why is My Screen Recording Not Working on Windows?
Although the built-in Xbox Game Bar brings great convenience to screen recording on Windows 10/11, there are still some issues that can occur when using it to record screens.
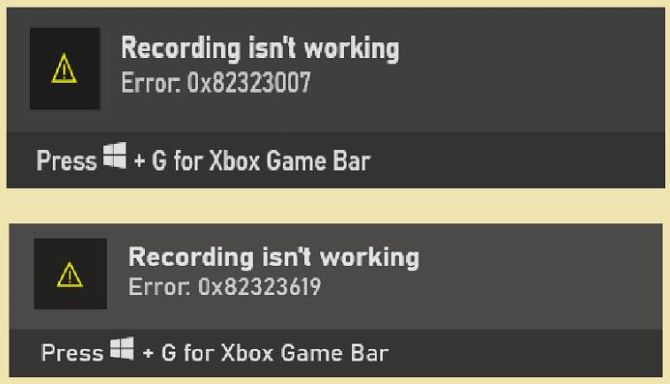
When you encounter screen recording issues with Game Bar, you might get a message like “Recording isn’t working error. 0x82323007”, “Recording isn’t working error. 0x82323619”, etc.
Actually, this issue might be caused by various reasons. In general, common reasons include:
- The permission for screen recording isn’t enabled
- The screen record settings aren’t adjusted correctly or are disabled
- Insufficient space on your computer
- Copyright issues
- …
How to Fix the Screen Record Not Working Issue on Windows 10/11
Although it’s quite frustrating when encountering the screen recording not working on your Windows computer, you can solve this problem in several workable ways.
The solutions provided below will assist you in fixing problems when your Windows screen capture does not work. You can go through the various fixes for the issue and get the screen recording working easily.
Solution 1: Make Sure Xbox Game Bar is Enabled
First and foremost, you should check if the screen recording in Xbox Game Bar is enabled when you can’t screen record.
To do this, please follow the steps below:
1. On your PC, click the Start menu and select Settings.
2. Select Gaming > Xbox Game Bar.
3. Be sure to toggle on the “Open Xbox Game Bar using this button on a controller” option to enable Game Bar.
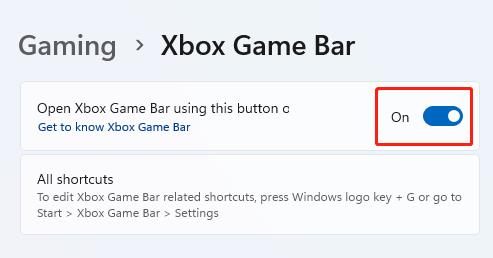
For Windows 10 users, toggle on the “Enable Xbox Game Bar for things like recording game clips, chatting with friends, and receiving game invites” option.
If you’ve already enabled the Game Bar and still can’t screen record on Windows, please try the following solutions.
Solution 2: Make Sure Xbox App Services are Enabled
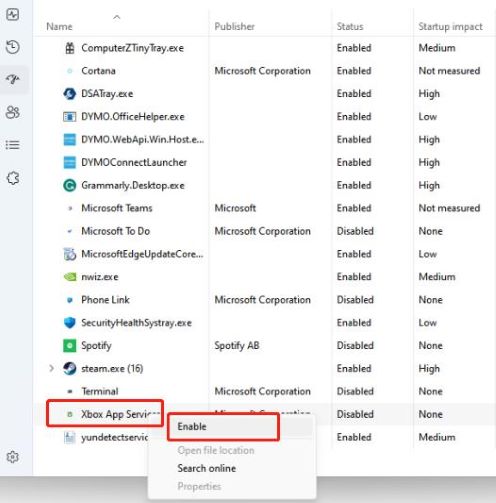
If your screen recording is not working and you are getting the error message 0x82323007 on your computer screen, you may need to enable Xbox App Services.
Here’s how to do this:
1. On your PC, press Ctrl + Shift + Esc to open Task Manager.
2. Click the Startup Apps tab.
3. Navigate to Xbox App Services under the Name tab.
4. If you see Disabled next to Xbox App Services, right-click on it, then click Enable.
Solution 3: Close Excess Background Apps
Too many running processes running in the background can affect your recording, your computer may be too bogged down and use too many resources to smoothly record a video.
So make sure you don’t have any unused applications open to avoid the screen recording not working issue. Here’s how you can do this with Task Manager:
1. On your PC, press Ctrl + Shift + Esc to open Task Manager.
2. Go to the Processes Tab.
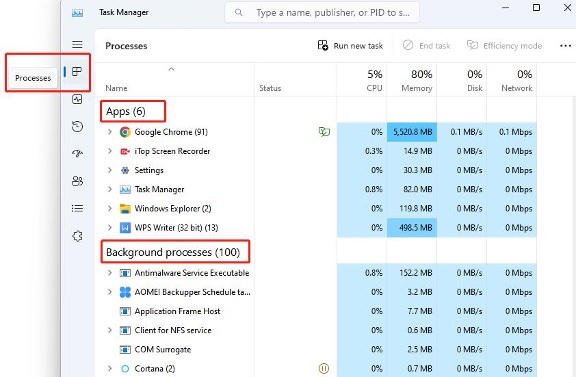
3. Check if there are any apps taking up too much CPU and you don’t necessarily need them.
4. Select the apps, right-click on it and click End task.
Solution 4: Free Up Some Space
If you don’t have enough space on your hard drive to capture your screen, your screen recording will fail.
In this situation, free up some space by uninstalling programs you don’t use with Storage Sense. Check the steps below to do this:
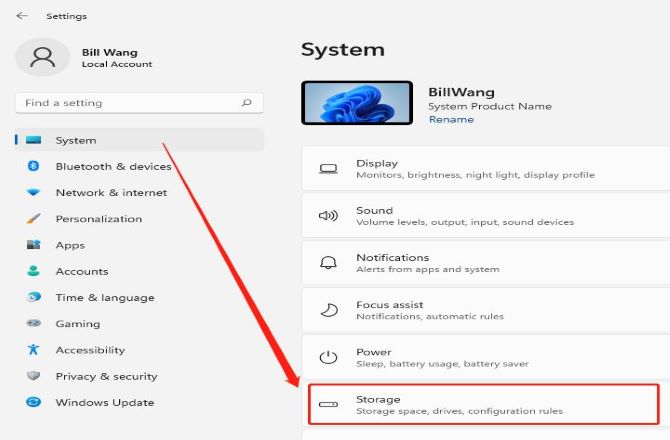
1. On your PC, click the Start menu and select Settings >System > Storage.
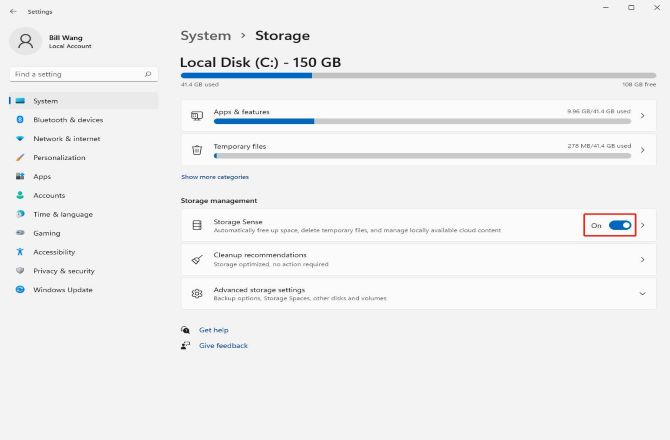
2. Under Storage Management, and turn on the Storage Sense option.
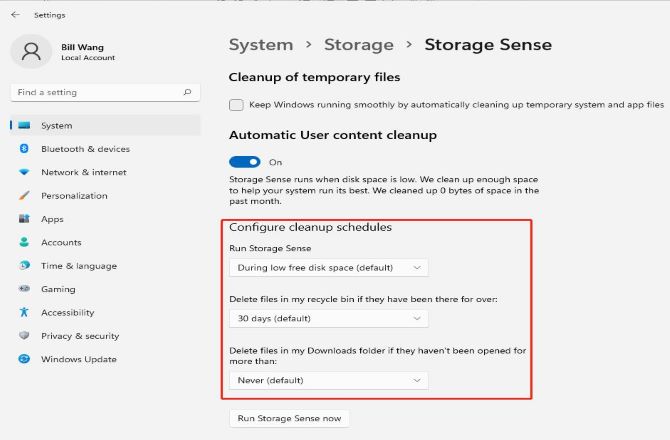
3. Then, click on Storage Sense to configure the cleanup schedules and select how often you want it to run.
4. Click Run Storage Sense Now. This will run Storage Sense and will delete all files that meet the criteria that you selected.
Solution 5: Update the Graphics Driver
The graphics driver affects whether or not the screen recording works normally, and screen record usually requires the latest graphics driver.
If you find that your screen capture is jerky, black, or missing frames, you may be using an outdated graphics driver. Try to update the graphics driver to resolve the screen capture not working issue.
1. Open the Start menu and type Device Manager in the search box and open it.
2. Go to Display adapters and click on the drop-down menu.
3. Right-click on your graphics driver, and choose Update driver.
4. Choose Search automatically for drivers. Wait for the scan to complete and then install the available graphics driver updates.
Solution 6: Restart your Windows Computer
Sometimes the screen capture not working problem can be fixed by simply restarting your PC. This is a rather simple but quite useful way to solve the problem when the screen recording function doesn’t work.
All you need to do is click the Windows logo, click Power, and select Restart.
Solution 7: Try an Alternative Screen Record Software
It is important to note that the built-in screen recorder doesn’t work for everything. Suppose the screen recording still doesn’t work after the restart, you can try an alternative third-party screen recorder to complete the screen recording task.
iTop Screen Recorder is such an excellent screen recorder that we’d like to recommend it to you. This powerful tool can deliver an innovative and convenient way to record screens on Windows 10/11 professionally.
iTop Screen Recorder can record high-resolution (even 4K) and high-quality videos on your Windows. It never limits your recording time nor leaves a watermark on your video. Besides, it offers multiple video formats when exporting like MOV, MP4, WEBM, and AVI.
Key Features of iTop Screen Recorder
- Easily capture screen on Windows with no watermark and time limit.
- Record HD video smoothly with advanced hardware acceleration.
- Record online meetings, YouTube videos, live streams, video tutorials, etc.
- Save Windows screen captures to MP4/AVI etc., and share in one click.
Steps to screen record on Windows using iTop Screen Recorder
1. Download, install, and run iTop Screen Recorder on your PC.
2. Click the drop-down arrow behind Full Screen to set the region you want to record.
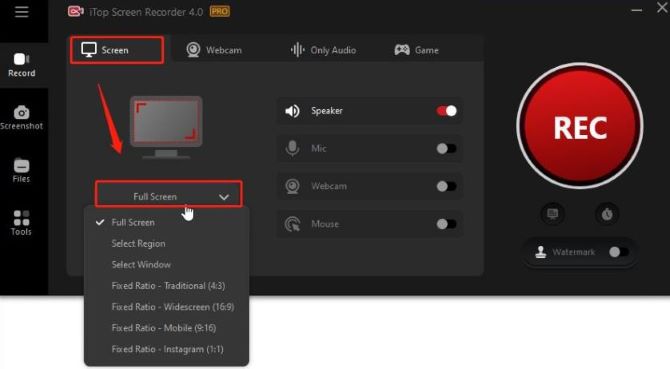
3. Turn on your Speaker, and keep your Microphone, Webcam, and Mouse off.

4. Click the big red REC button, and then it will record your Windows screen instantly.
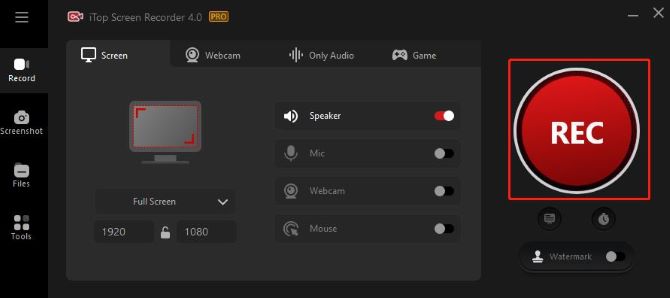
5. Click the Stop button when you are finished.
Note:
You can make further settings by clicking Options (three lines on the top left) > Settings.
FAQs about Screen Recording Not Working on Windows 10, 11
Q1. How do I enable screen recording on Windows 10/11?
A: If you’re using the Xbox Game Bar, press Win + G to open it and click on the Capture button. In third-party software, you may need to adjust settings to enable screen recording.
Q2. Why is my screen recording laggy or choppy on PC?
A: Laggy or choppy screen recordings can be caused by various factors, such as insufficient hardware resources, outdated graphics drivers, high CPU usage, or recording at a high resolution. Try lowering the recording resolution or closing unnecessary applications to solve the issue.
Q3. My screen recording has no sound on Windows 10/11. How can I fix it?
A: Ensure that the audio input is properly configured in your screen recording software. Additionally, check your Windows sound settings to make sure the correct audio device is selected for recording.
Q4. Which screen recording software should I use on Windows?
A: Windows 10 and Windows 11 come with a built-in screen recording tool called Xbox Game Bar. However, you can also use third-party software like OBS Studio, iTop Screen Recorder, or Bandicam for more advanced features.