
Все способы:
- Способ 1: Использование стандартного средства устранения неполадок
- Способ 2: Проверка состояния связанных служб
- Способ 3: Сброс компонентов «Центра обновления Windows»
- Способ 4: Установка актуальных региональных настроек
- Способ 5: Проверка целостности системных файлов
- Способ 6: Удаление сторонних VPN
- Способ 7: Ручная установка обновления
- Способ 8: Сброс Windows 11 до заводских настроек
- Вопросы и ответы: 0
Способ 1: Использование стандартного средства устранения неполадок
В списке инструментов стандартного средства устранения неполадок в Windows 11 есть и тот, который предназначен для решения распространенных ошибок с «Центром обновления Windows». Данный инструмент может помочь исправить ситуацию, когда при попытке инсталляции апдейта на экране появляется ошибка с кодом 0xc190011f. Вам понадобится только запустить это автоматическое средство и дождаться результатов сканирования.
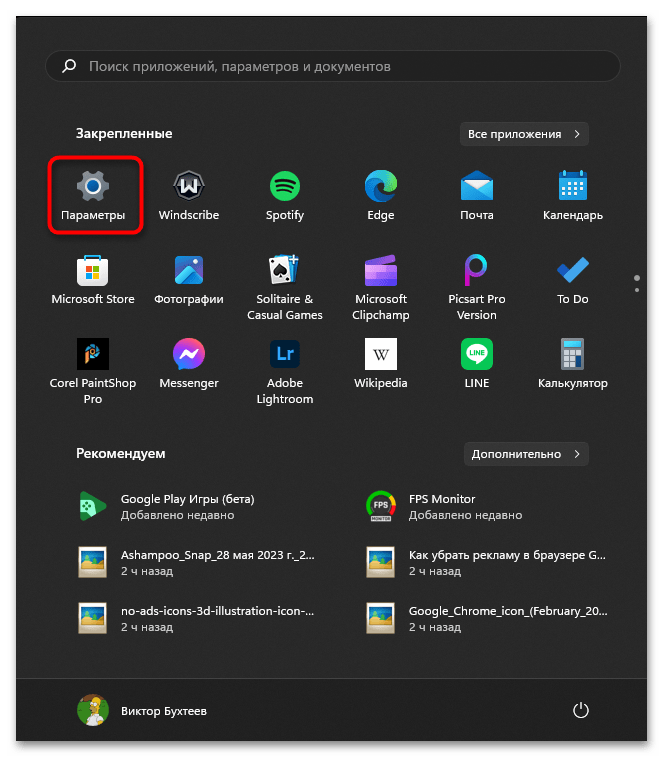
- Откройте «Пуск» и перейдите в «Параметры».
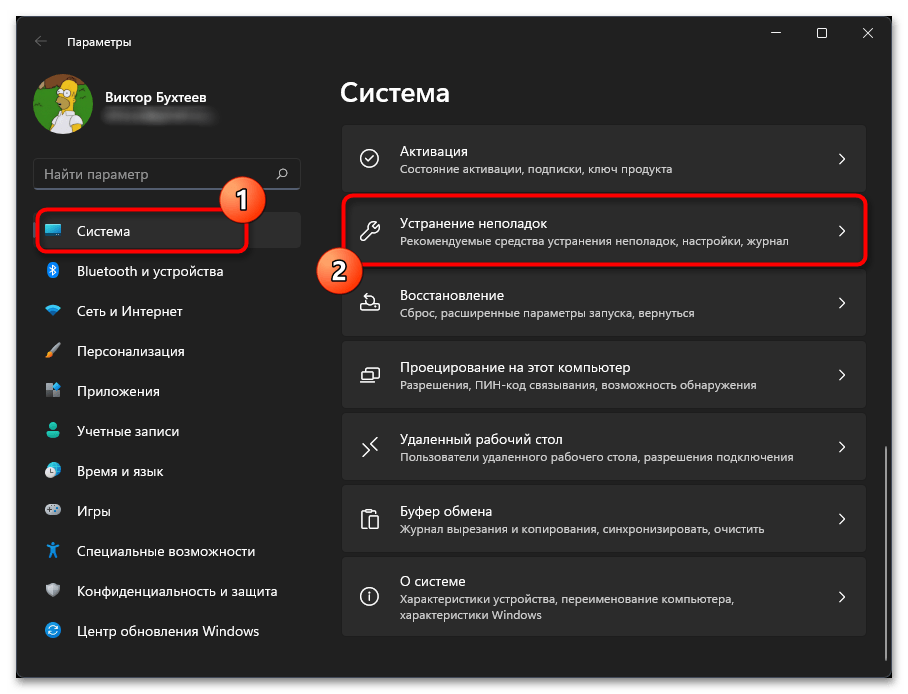
- На панели слева выберите раздел «Система», затем откройте категорию «Устранение неполадок».
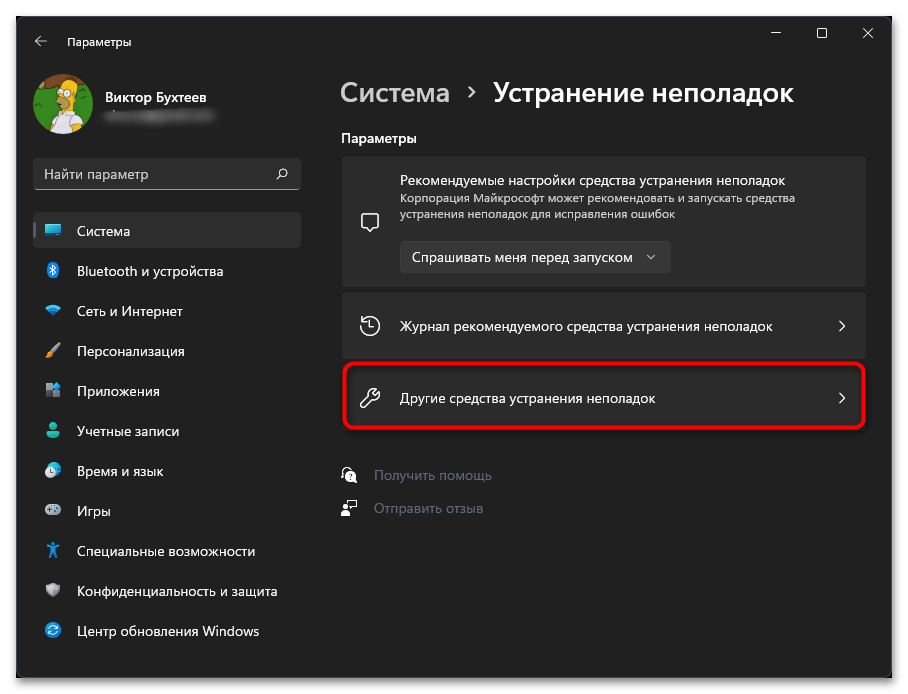
- Для отображения доступных инструментов нужно щелкнуть по «Другие средства устранения неполадок».
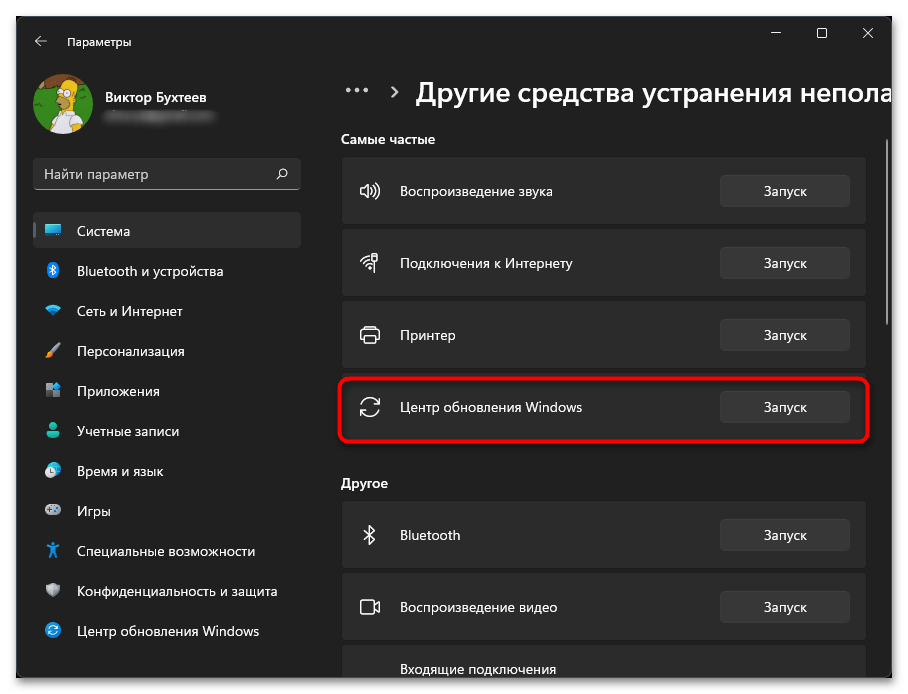
- В списке самых частых отыщите «Центр обновления Windows» и нажмите по кнопке «Запуск» для начала сканирования.
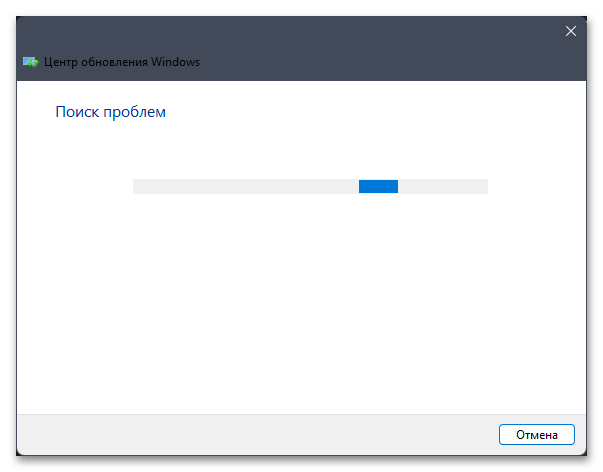
- В отобразившемся окне вы можете следить за прогрессом проверки на ошибки.
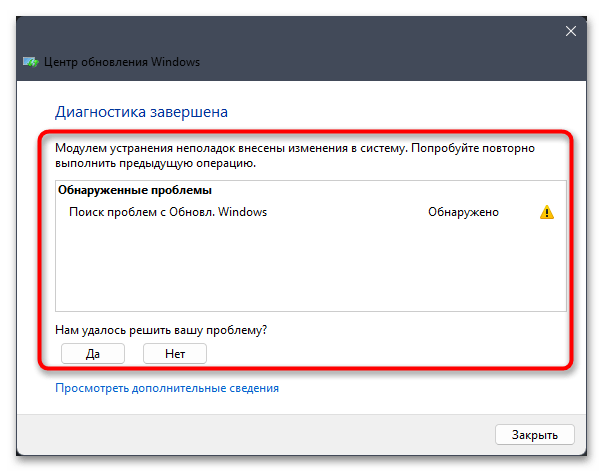
- Через несколько секунд на экране отобразится уведомление, удалось ли найти какие-то проблемы и были ли они исправлены. Если да, попробуйте заново запустить установку обновления и проверьте, завершится ли оно успехом на этот раз.
Способ 2: Проверка состояния связанных служб
Если ошибки не были обнаружены или после их исправления вы все еще получаете уведомление с кодом 0xc190011f, нужно переходить к следующим вариантам исправления. Один из основных подразумевает проверку состояния связанных с установкой обновлений служб. Необходимо самостоятельно просмотреть каждую из них и изменить тип запуска, если это понадобится.
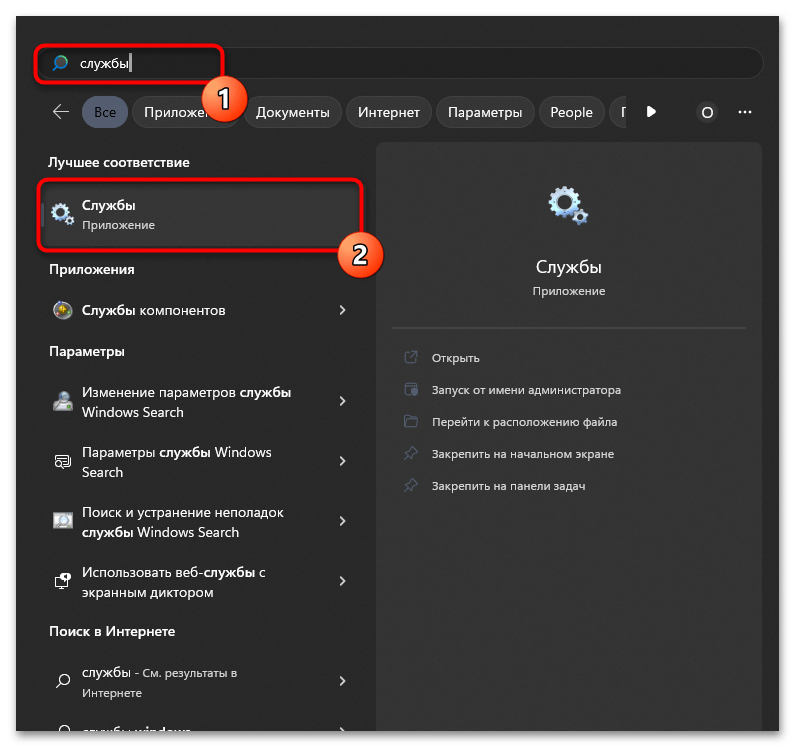
- Запустите приложение «Службы», отыскав его через поиск в «Пуске».
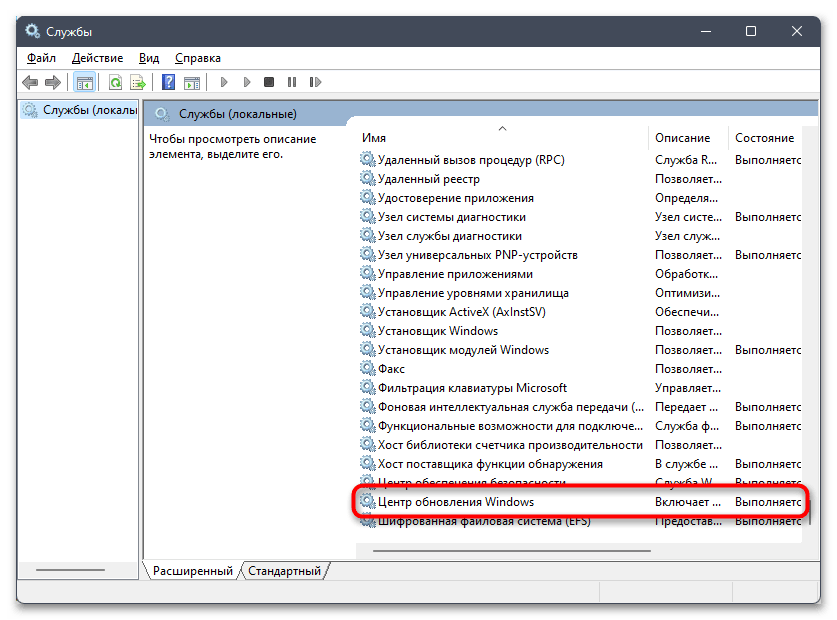
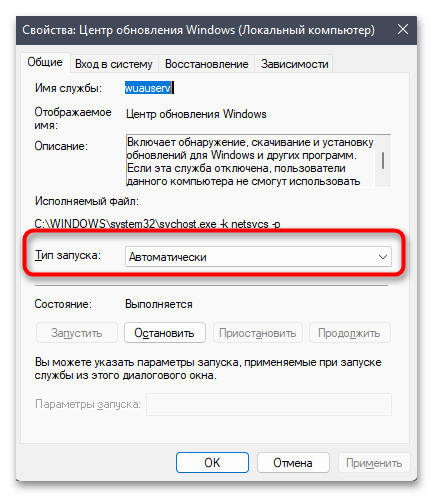
- В первую очередь найдите «Центр обновления Windows» и дважды щелкните левой кнопкой мыши по данной службе.
- Установите тип запуска как «Автоматически» и примените изменения.
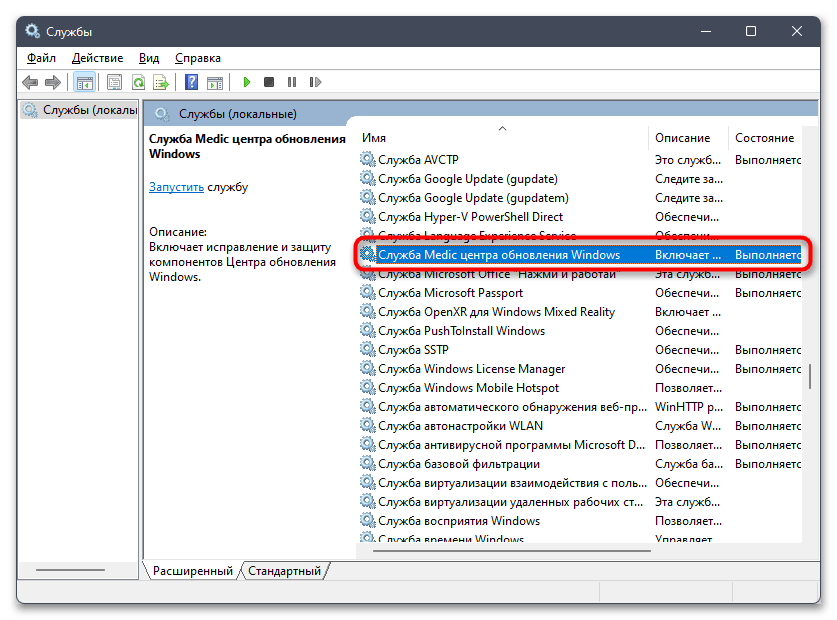
- Однако это еще не все, поскольку есть определенное количество дополнительных служб, работающих вместе и влияющих на инсталляцию апдейтов. Далее найдите «Службу Medic центра обновления Windows» и установите для ее типа запуска значение «Вручную».
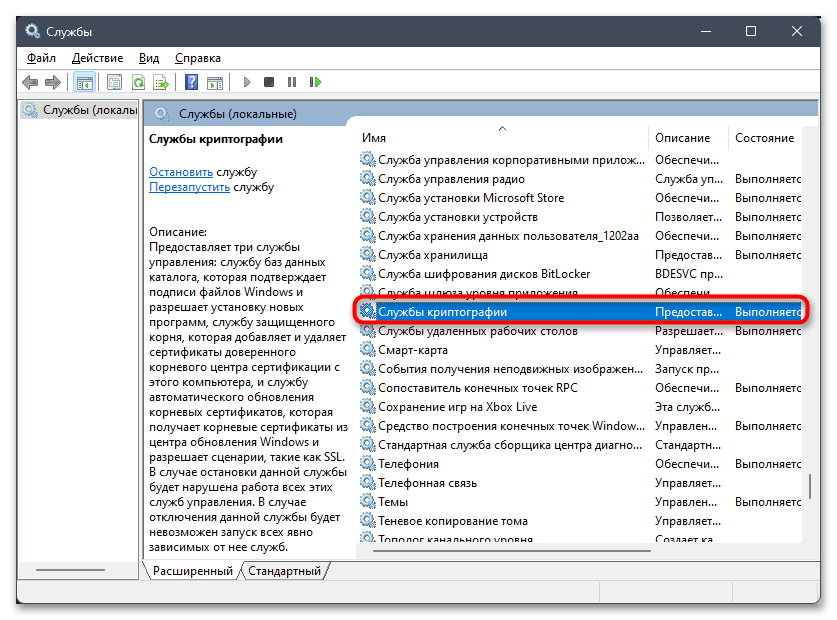
- То же самое сделайте и для «Службы криптографии».
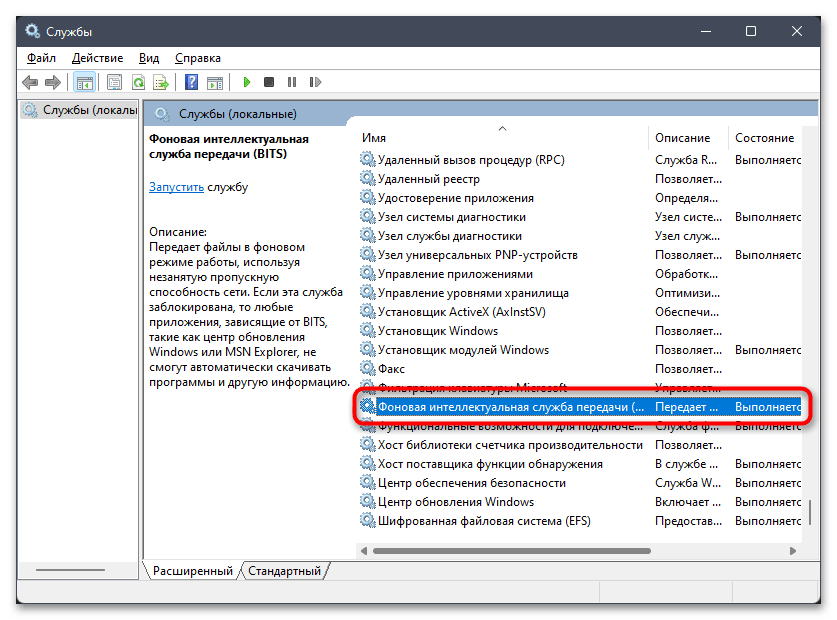
- Для «Фоновой интеллектуальной службы передачи (BITS)» выберите тип запуска «Автоматически».
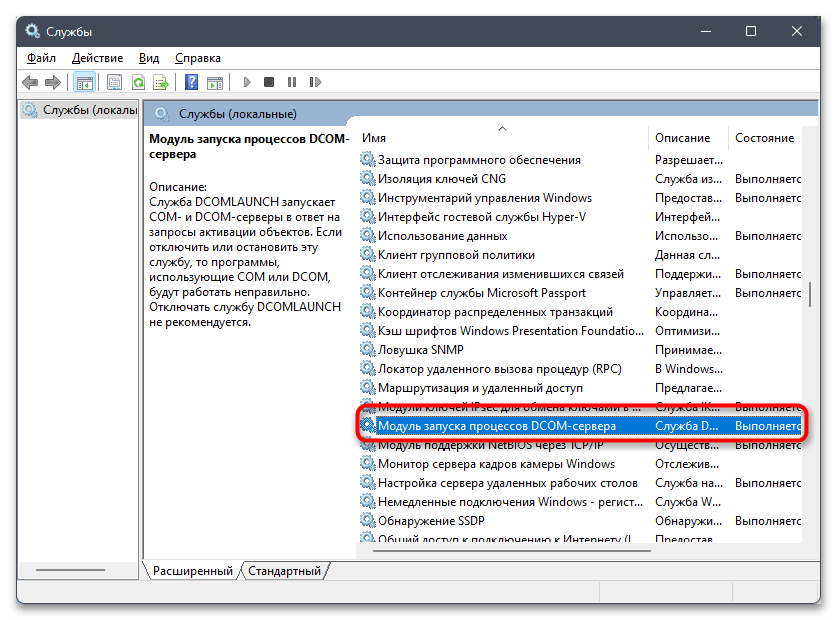
- «Модуль запуска процессов DCOM-сервера» — «Автоматически».
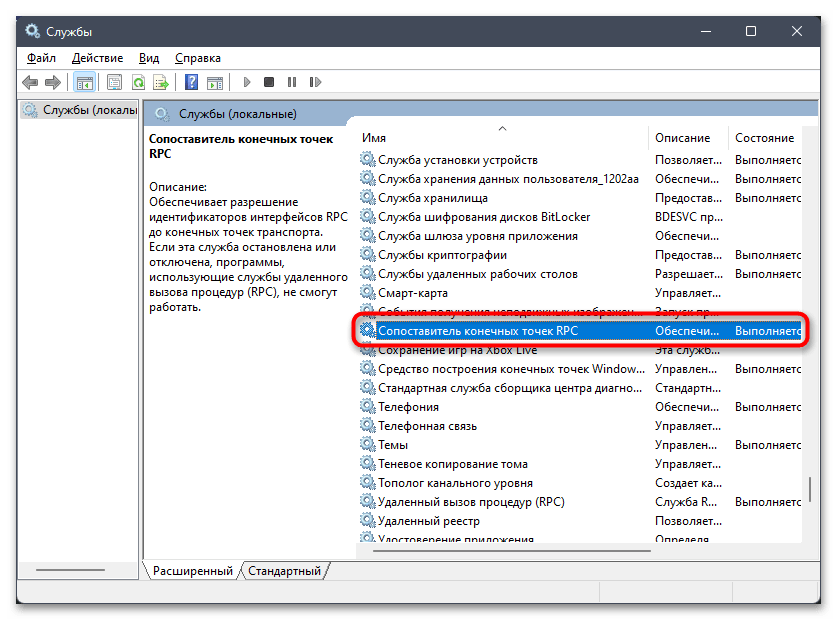
- «Сопоставитель конечных точек RPC» — «Автоматически».
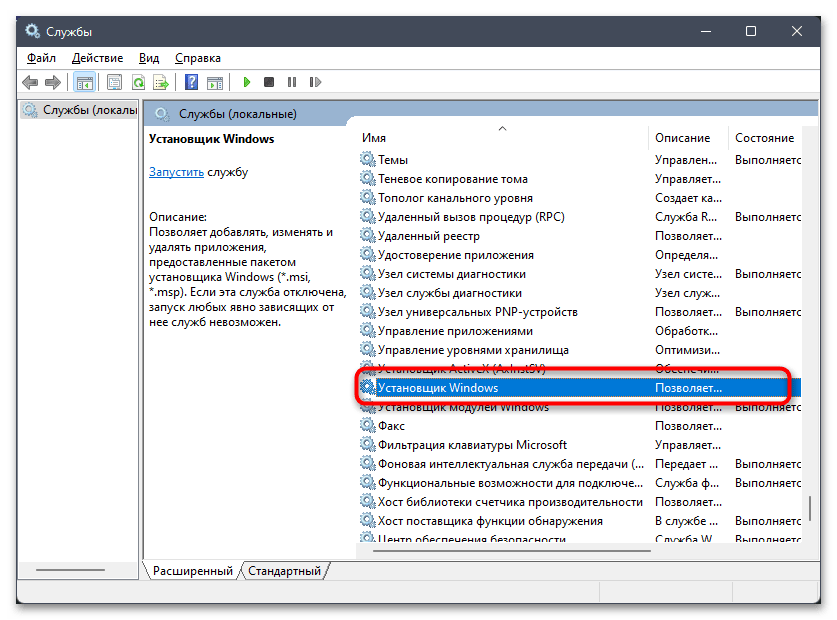
- В завершение найдите «Установщик Windows» и измените тип запуска на «Вручную», если сейчас стоит другой.
Способ 3: Сброс компонентов «Центра обновления Windows»
Иногда проблемы с установкой обновлений в Windows 11 вызваны в сбое работы самого «Центра обновления Windows». Например, некоторые файлы были загружены не полностью из-за прерывания сети или неожиданного завершения работы ОС, что привело к их повреждению и невозможности повторного скачивания. В таких случаях помогает полный сброс компонентов с очисткой текущих файлов обновлений, чтобы они загрузились заново без ошибок.
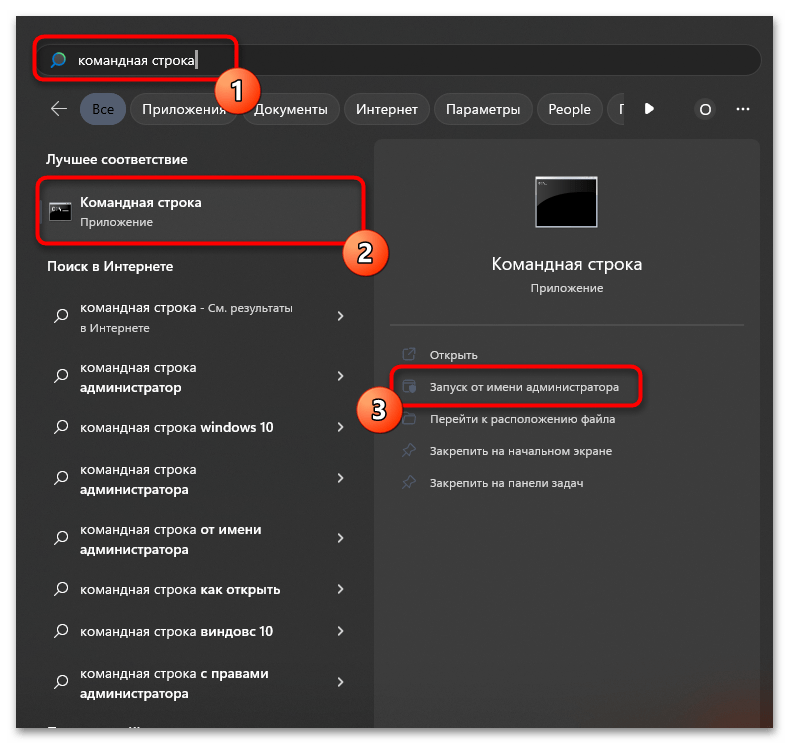
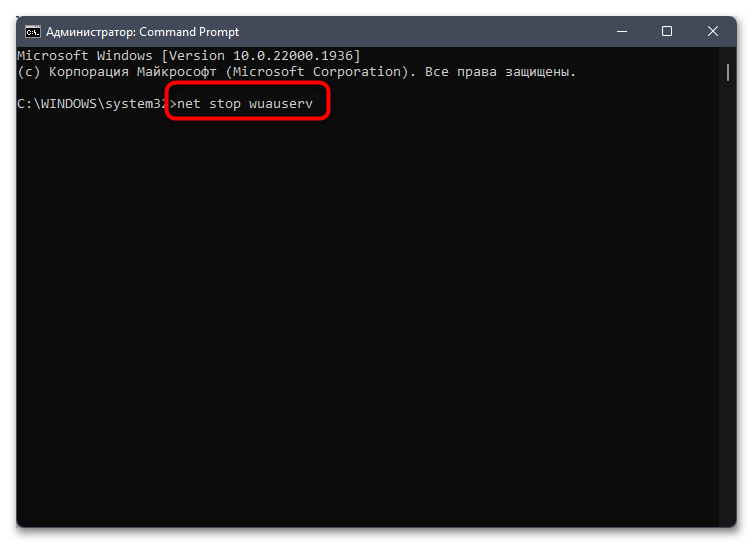
- Откройте «Пуск», отыщите «Командную строку» и запустите ее от имени администратора.
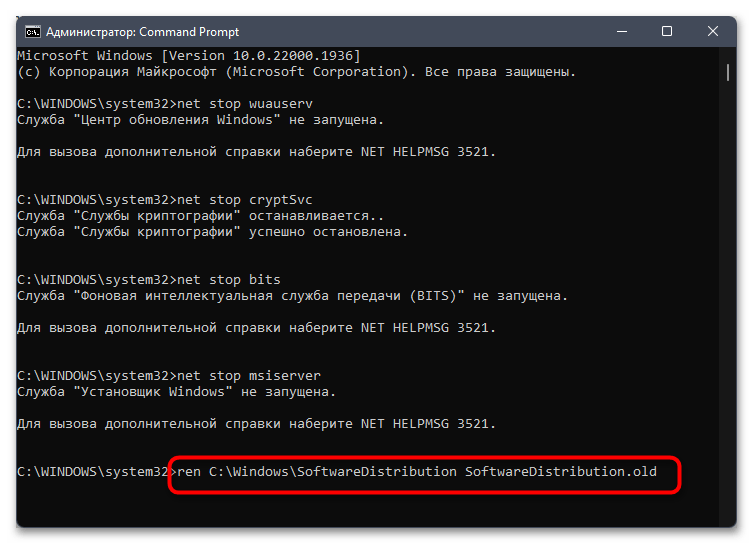
- Для начала остановите службу самого «Центра обновления Windows», введя команду
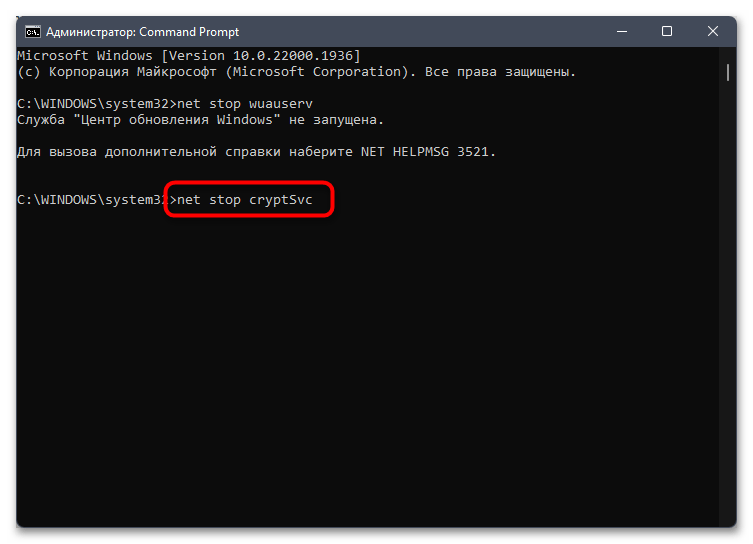
net stop wuauserv. - Далее проверните то же самое со службой криптографии через команду
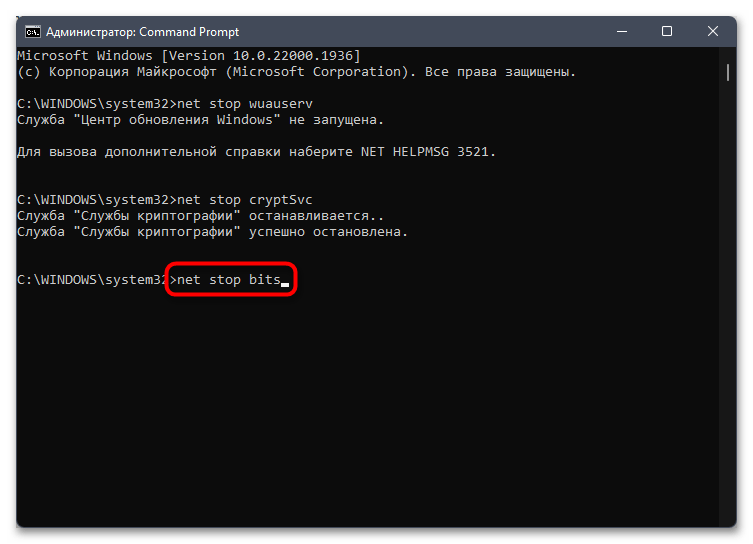
net stop cryptSvc. - Еще одна служба отключается через
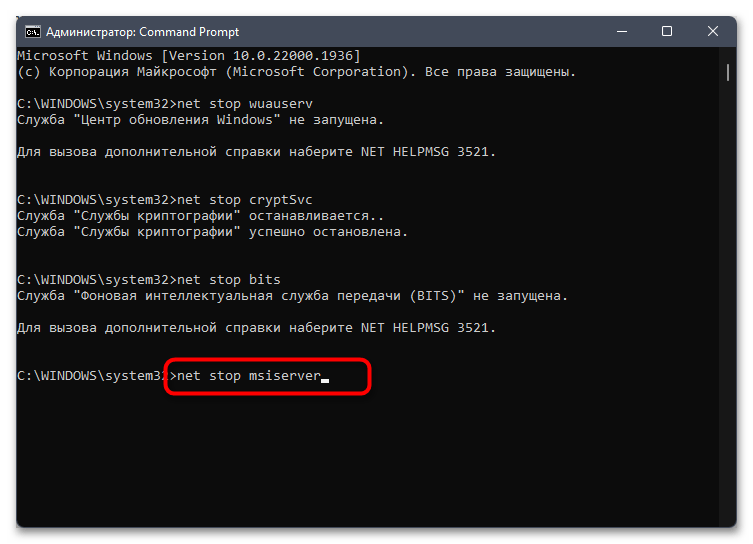
net stop bits. - В завершение отключения связанных служб введите
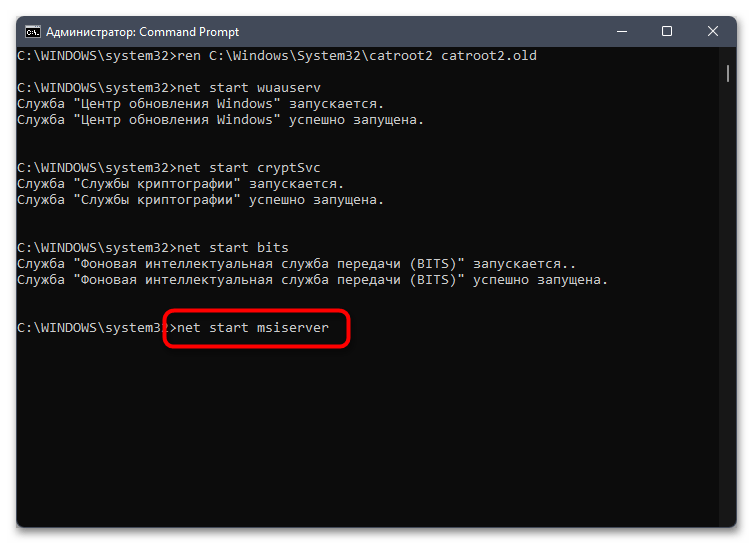
net stop msiserver, активируйте данную команду и переходите к следующему шагу. - Понадобится переименовать каталог с загрузками обновлений, чтобы при следующем запуске сканирования он создался заново. Для этого используется команда
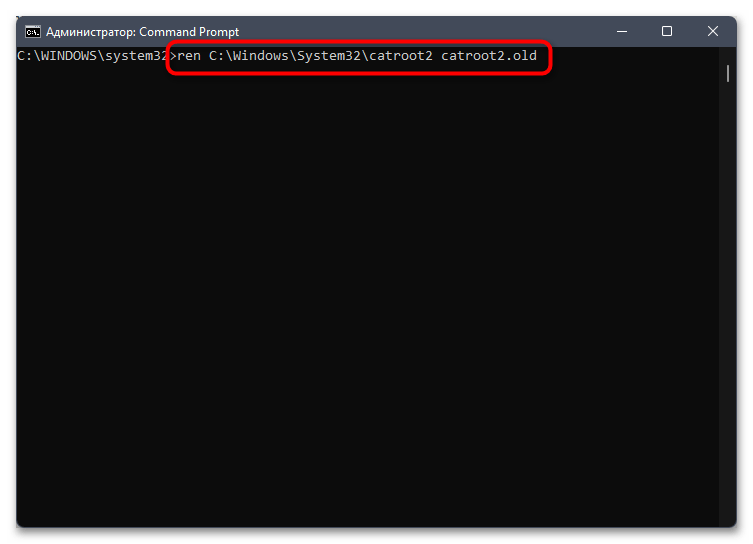
ren C:\Windows\SoftwareDistribution SoftwareDistribution.old. - Еще одна папка переименовывается аналогичным образом через
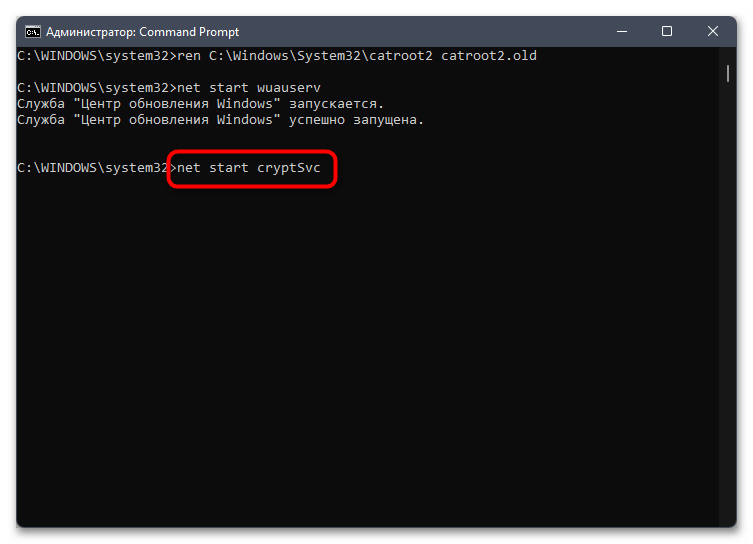
ren C:\Windows\System32\catroot2 catroot2.old. - На этом сброс завершен, поэтому можно включить ранее отключенные службы, начав с
net start wuauserv. - Следом введите команду
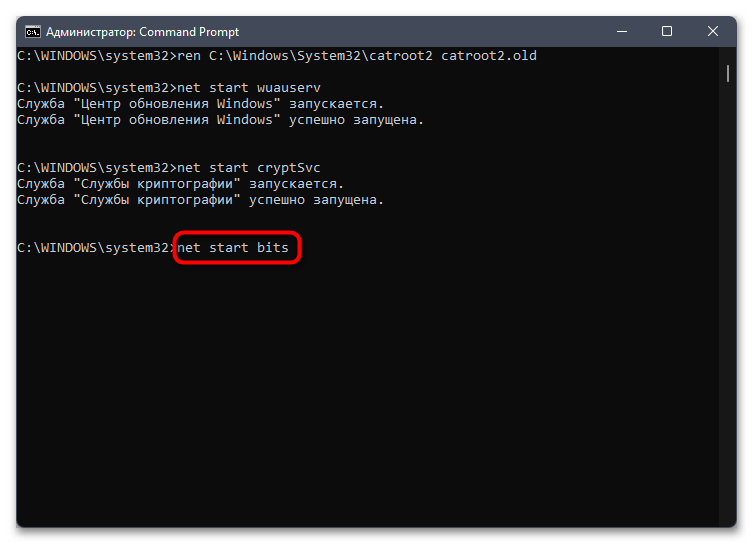
net start cryptSvc. - После появления уведомления об успешном запуске предыдущей службы используйте
net start bits. - Наконец запустите последнюю службу —
net start msiserver. На этом этапе можно закрыть консоль и повторить попытку установки системных апдейтов.

Способ 4: Установка актуальных региональных настроек
Использование региональных настроек, отличающихся от вашего текущего местоположения в Windows, может привести к сбоям во время скачивания файлов с официальных серверов Microsoft, поскольку именно ваш текущий регион учитывается при поиске оптимального источника. Мы бы рекомендовали проверить региональные настройки и изменить их на правильные, если это понадобится.
- Откройте «Пуск» и перейдите в «Параметры».
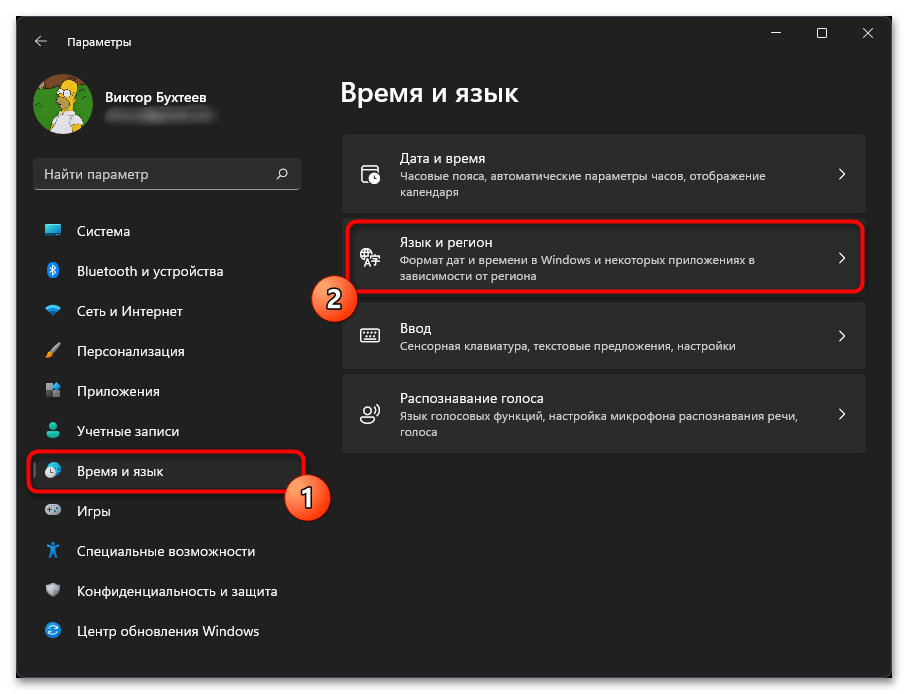
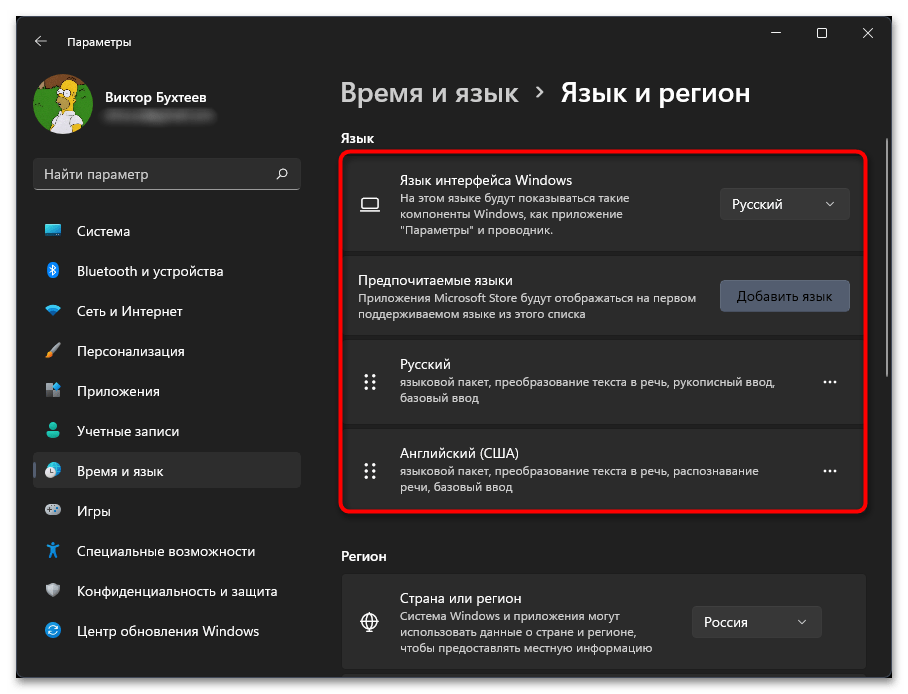
- На панели слева выберите раздел «Время и язык», затем откройте категорию «Язык и регион».
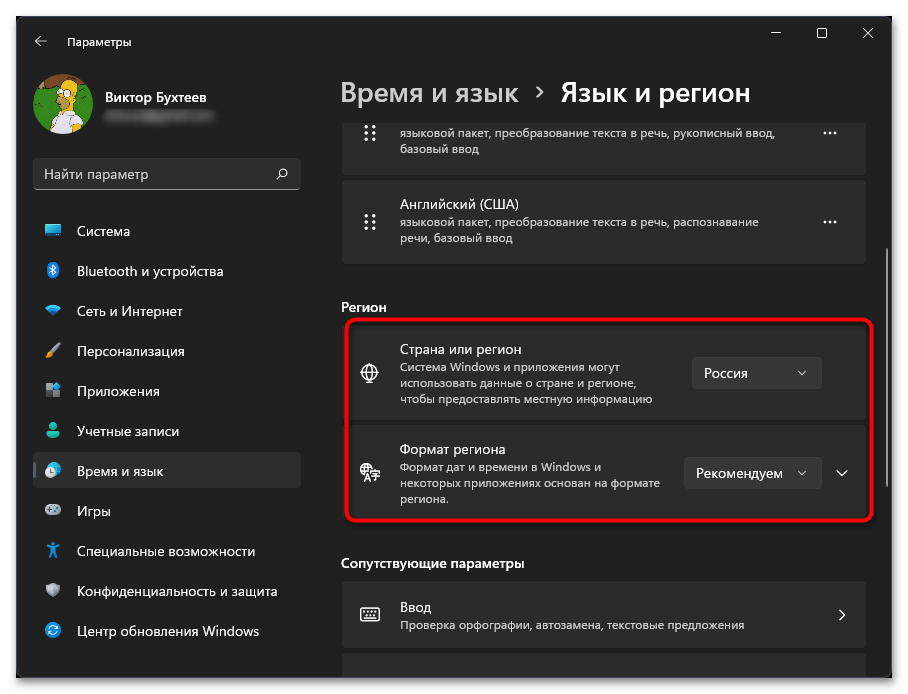
- В качестве региона укажите свою страну, а формат даты и времени оставьте рекомендуемым.
- Если есть необходимость, можно дополнительно поменять язык интерфейса и установить предпочитаемые языки для раскладки, но на итоговый результат в плане поиска апдейтов это повлиять не должно.
Способ 5: Проверка целостности системных файлов
Нарушение целостности системных файлов — одна из возможных причин проблем с работой «Центра обновления Windows». Во время проверки апдейтов могут появляться самые различные ошибки, в том числе и с кодом 0xc190011f. Для решения ситуации оптимально будет использовать стандартные консольные команды, как раз предназначенные для проверки системных файлов и их дальнейшего восстановления. Более детально об этом читайте в другой статье на нашем сайте по следующей ссылке.
Подробнее: Использование и восстановление проверки целостности системных файлов в Windows
Способ 6: Удаление сторонних VPN
Рассматриваемая в данной статье ошибка со скачиванием обновлений часто вызвана различными сетевыми сбоями. Влиять на них могут и сторонние VPN, установленные в качестве программ на компьютер. Многие из них устанавливают свои драйверы для виртуальных сетевых карт, чтобы перенаправлять соединение и подключаться к серверам. Это может повлиять на работу «Центра обновления Windows» в плане получения доступа к библиотекам Microsoft. Мы бы рекомендовали вручную на время удалить используемый VPN, а затем проверить доступность обновлений снова.
Способ 7: Ручная установка обновления
Если ничего из перечисленного выше вам не помогло, но при этом вы точно знаете, с каким именно апдейтом возникают проблемы, возможно, стоит попробовать скачать и установить его вручную, используя другие источники. Есть как минимум три доступных варианта, которые могут оказаться полезными в данной ситуации. Более детально о каждом из них предлагаем прочесть в тематическом руководстве по следующей ссылке.
Подробнее: Установка обновлений в Windows 11 вручную
Способ 8: Сброс Windows 11 до заводских настроек
Самый радикальный метод решения проблемы заключается в возвращении Виндовс 11 к исходному состоянию. Это позволит избавиться от всех программных конфликтов или нарушений системных файлов, которые не были восстановлены предыдущими способами. При сбросе до заводских настроек внимательно следуйте инструкциям, чтобы не удалить важные вам файлы. Переместите их в надежное место или выберите соответствующий режим восстановления, который не будет их задевать.
Подробнее: Сброс Windows 11 к заводским настройкам

Наша группа в TelegramПолезные советы и помощь
Recently we come across an update error code 0xc190011f while upgrading Windows 11 to its latest version 22h2. If you did also encounter the same error code and want to know the reasons why it occurred, read this guide till the end. In addition to the reasons involved, we will also discuss the four fixes that should resolve this issue on your behalf.
What causes this error code 0xc190011f in Windows 11?
This update error mostly occurs when the update components have corrupted somehow. Enabling all update services to run automatically should address this error code. Sometimes, this error could also be the direct result of accumulated stored cache under SoftwareDistribution or catroot2 folders.
Purge both these folders and check if this resolves the update failing on Windows 11. In case you are still struggling with the same error code, consider manually downloading and installing the available updates for your computer.
How to Clean Install Windows 10 22H2
If you are encountering an error code 0xc190011f while updating Windows 11 to version 22h2, attempt the below fixes one after another.
1] Troubleshoot Windows Update
Microsoft includes a great built-in tool that can look for the underlying causes behind an update error and have them resolves resolved. This tool is no other than the Windows Update troubleshooter itself. Here’s how to locate this tool and start troubleshooting with it –
- Launch Settings by pressing Windows + I.
- Go to System > Troubleshoot > Other troubleshooters.
- Under “Most frequent”, locate Windows Update and hit the Run button available on it.

- The troubleshooting window will launch immediately afterward.
Click Next and follow the on-screen instructions to have the error 0xc190011f resolved in Windows 11. After you are done with the troubleshooting process, make sure to reboot your Windows PC.
Windows 11 22H2 FAQs – Frequently Asked Questions
2] Check and Enable All Update Services
Windows 11 update to version 22h2 might fail when the update-related services are either disabled or not running in the background. Go and check the current status of all such services and enable them to run automatically. There are some services that you better leave to run manually or via triggered manual.
Follow the below instructions on what to do with all services which are responsible for a failing update on Windows 11 –
- Launch the Run dialog first by pressing Win + R.
- Type
services.mscon it and hit OK. - On the Services window, scroll down and locate Background Intelligent Transfer Service.
- When found, right-click on it, and select Properties.
- On its properties window, use the drop-down menu next to Startup type and change it to Manual.
- Click Apply and then OK to confirm the recent changes.
- Repeat the above steps for all the following services as well and change their startup types to the one provided next to their names –
Cryptographic Services – Automatic
DCOM Server Process Launcher – Automatic
RPC Endpoint Mapper – Automatic
Windows Installer – Manual
Windows Update Medic Services – Manual
Windows Update Service – Manual (Triggered)
- Assuming you did find and change the above services, close the Services window.
Restart your Windows 11 PC and when it does reboot, check if you can update normally to version 22h2.
3] Reset update Components
If the error code 0xc190011f is still appearing, this must be either because of an unnecessarily stored cache, corrupt update components, or some DLL files missing from your system. You may handle all these issues separately, however, as all of them are related, we recommend resetting the Update components on your computer. Here’s how to perform this task –
- First of all, press Win + X, and select Terminal (Admin).
- The UAC window will appear next, click Yes to authorize opening this built-in command tool.
- Use Ctrl + Shift + 2 to invoke the Command prompt on the same terminal.
- On the elevated console, execute these commands to stop all update services –
net stop bits
net stop wuauserv
net stop cryptSvc

- Now that you have disabled all update services, purge the Windows cache folders. For this, you have to execute the below two commands –
rmdir %systemroot%\SoftwareDistribution /S /Q
rmdir %systemroot%\system32\catroot2 /S /Q
- Running the above two codes will add a .old extension to the folders – SoftwareDistriution and Catroot2. You may use the renamed folders in case something goes wrong on your computer.
- Copy/paste the below command and press Enter to remove all the qmgr*.dat files existing under BITS.
Del "%ALLUSERSPROFILE%\Application Data\Microsoft\Network\Downloader\*.*"
- You may now re-register all DLL files on your computer. You may perform this task by executing the below codes one after another –
regsvr32.exe /s atl.dll
regsvr32.exe /s urlmon.dll
regsvr32.exe /s mshtml.dll
regsvr32.exe /s shdocvw.dll
regsvr32.exe /s browseui.dll
regsvr32.exe /s jscript.dll
regsvr32.exe /s vbscript.dll
regsvr32.exe /s scrrun.dll
regsvr32.exe /s msxml.dll
regsvr32.exe /s msxml3.dll
regsvr32.exe /s msxml6.dll
regsvr32.exe /s actxprxy.dll
regsvr32.exe /s softpub.dll
regsvr32.exe /s wintrust.dll
regsvr32.exe /s dssenh.dll
regsvr32.exe /s rsaenh.dll
regsvr32.exe /s gpkcsp.dll
regsvr32.exe /s sccbase.dll
regsvr32.exe /s slbcsp.dll
regsvr32.exe /s cryptdlg.dll
regsvr32.exe /s oleaut32.dll
regsvr32.exe /s ole32.dll
regsvr32.exe /s shell32.dll
regsvr32.exe /s initpki.dll
regsvr32.exe /s wuapi.dll
regsvr32.exe /s wuaueng.dll
regsvr32.exe /s wuaueng1.dll
regsvr32.exe /s wucltui.dll
regsvr32.exe /s wups.dll
regsvr32.exe /s wups2.dll
regsvr32.exe /s wuweb.dll
regsvr32.exe /s qmgr.dll
regsvr32.exe /s qmgrprxy.dll
regsvr32.exe /s wucltux.dll
regsvr32.exe /s muweb.dll
regsvr32.exe /s wuwebv.dll
- After you successfully re-register all DLL files, make sure to enable the update services that you stopped earlier. To do so, use these commands –
net start wuauserv
net start bits
net start crypytSvc
- Run the below codes to solve any network-related issue on your computer as well –
netsh winsock reset
netsh winsock reset proxy
- Close the Terminal, and restart your PC.
Sign back into your device again and check if you can update to Windows 11, version 22h2 without encountering the same error code 0xc190011f again.
4] Manually download and install pending updates
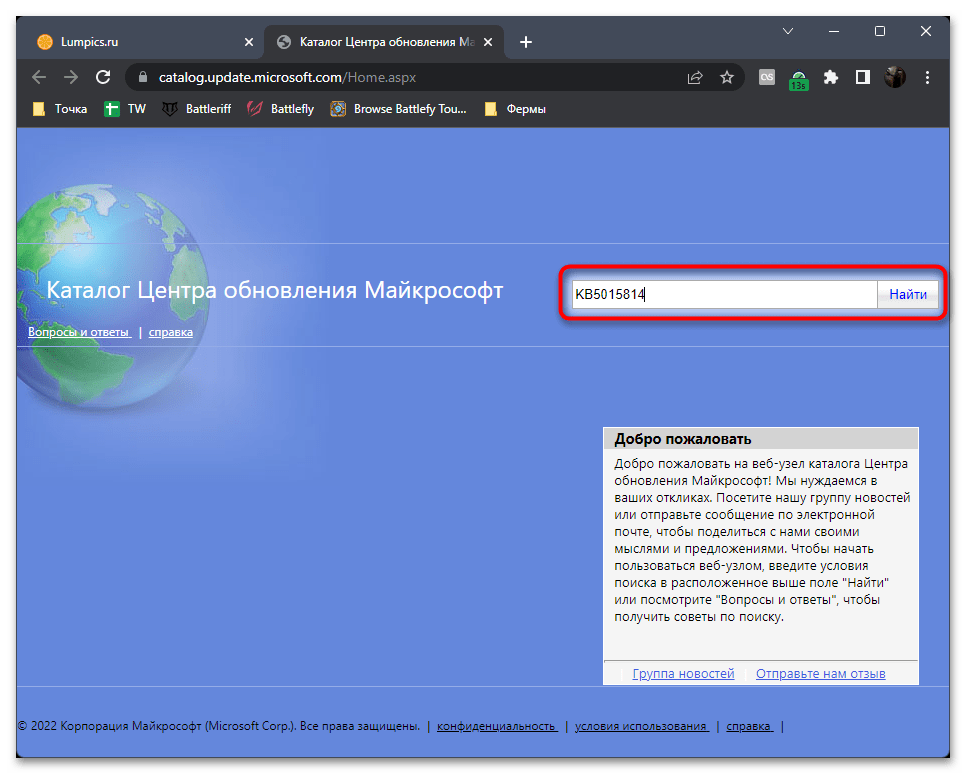
If none of the above solutions help to address the error code 0xc190011f on Windows 11, you should manually download the relevant standalone package from the Microsoft Update catalog. For this, you must know the KB number in advance. Well, you can look for the same by visiting Windows 11 Update history, and picking your own version there.
Here’s a complete guide on how to manually download and install pending updates on Windows 11.
Should I skip updating Windows?
Microsoft releases new security updates, non-security patches, optional updates, and out-of-band updates from time to time for different Windows versions. One should definitely download and install the security update as this improves all Windows components and Microsoft Services.
Nowadays, all driver and firmware updates are included in Windows Update instead of Device Manager. It is because of this reason alone, you should not skip downloading and installing the latest cumulative updates on your PC.
Go for all other updates only when you are finding some issues within your operating system. You may check the update history page of Windows to find if any new bug fixes come for your version.
For how long one can defer updates?
If you are on a limited data pack and don’t want to install updates regularly, you may pause updates for a maximum of 5 weeks. To disable installing updates beyond, you have to configure the local group policy accordingly.
For security purposes only, we don’t recommend disabling updates on Windows 11.
How do I Fix Windows 11 Update Error 0xc1190011f?
Windows update errors mostly occur because of update services not running in the background, update components being corrupted, or due to unnecessarily accumulated cache. Enabling all update-related services, resetting Windows update components, and purging Windows cache folders are effective ways to overcome any update error in Windows.
In case the error 0xc1190011f persists even after this, you should manually download and install the latest standalone package on your Windows 11 PC.
While attempting a Windows update to gain new features, enhanced performance, and updated security are you facing the 0xc190011f error code? This is a typical problem that can arise for a variety of causes, including incompatibilities with third-party antivirus, corrupted cache, incorrect region settings, and broken system files.
Such Windows update error codes can be highly irritating and time-consuming to debug, especially if you are unfamiliar with operating system jargon. Moreover, it can also prevent the update from being correctly installed. Therefore, it is critical to understand the core causes of these problems and how to correct them successfully.
Update Error Code 0xc190011f in Windows 11 or 10
Here is how to fix Update Error Code 0xc190011f in Windows 11 or 10 –
Way-1: Reset the Windows update cache
Corrupted Windows update cache is the major reason behind the installation or downloading failure of build or patch. However, you can use the commands to clean the SoftwareDistribution folder in the stopped state of wuauserv and related services. This will reset the Windows update cache –
- Click on Start and type services.msc.
- Select Services app.
- Find Windows update and right click on it.
- Select Stop.
- Press the Winkeys+R keys.
- Type %windir%\SoftwareDistribution and press Enter.
- Select all the items in the open folder.
- Click on – Delete.
- Restart the computer.
- Go to the Services window and right click on Window update.
- Select – Start.
- Now, go to “Settings => Window Update” and click on “Check for updates”.
Way-2: Use the Troubleshooter
Using Fixit tool or troubleshooter might be the most basic and helpful way to resolve the error code 0xc190011f in your system. The built-in program is known as ‘fix-it tool’ because this helps in identifying and repairing common Windows Update problems.
When you launch the troubleshooter, it searches your system for issues with Windows Update services, damaged system files, and erroneous settings that might be causing failures.
If it finds any problems, it will either recommend that they are fixed automatically or offer instructions on how to handle them manually. As a result, running the Windows Update troubleshooter is a suggested step, and here are the ways to be followed:
On Windows 11
- Press Windows and I keys to access the Settings app.
- From the System tab, select Troubleshoot.
- Select – Other troubleshooters from the next page.
- Navigate to Windows Update and select the option – Run.
On Windows 10
- Launch Settings by following the same step provided for Windows 11.
- Go to Update & Security > Troubleshoot.
- Choose Additional troubleshooters by clicking on it.
- Click on Windows Update and select the option labeled Run the troubleshooter when it appears.
See – Use Common Windows Update Troubleshooter on Windows 11, 10, 8.1, 7.
Way-3: Verify the Region Settings
Checking and correcting your region settings is one of the easiest ways to fix 0xc190011f error code in Windows 11. As, this problem can sometimes be caused by incorrect or mismatched region settings on your system, which can lead to downloading and installing updates failing.
To check it, follow the steps mentioned below:
- Click on Search from the taskbar and type region settings.
- Then, click on “Region settings” shown in the result.
- From the drop-down menu labeled “Country or region” select the correct one.
Way-4: Remove the Software Causing the Problem
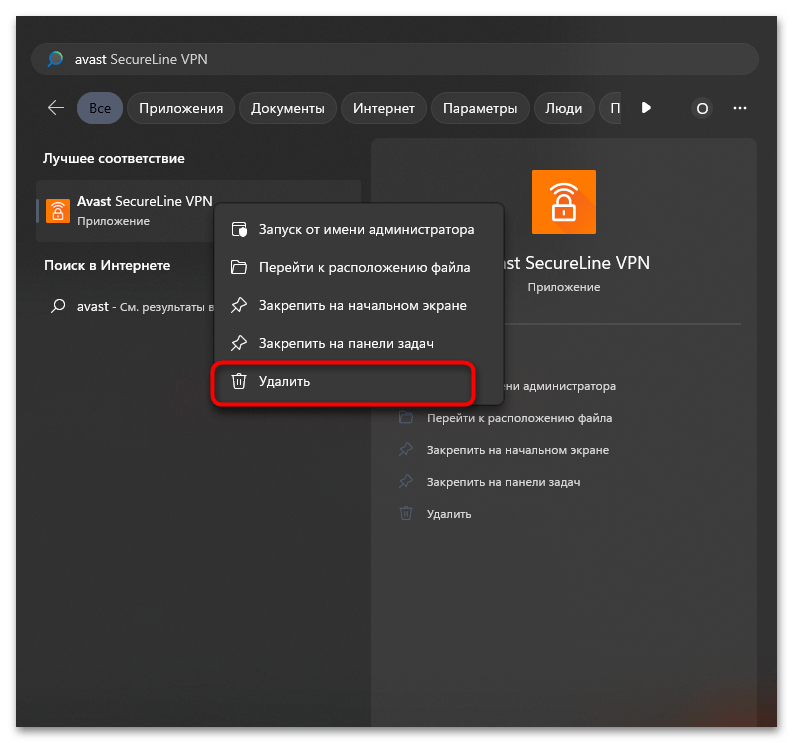
Uninstalling incompatible programs such as VPN, antivirus, or other interfering software may assist in quickly resolving the update error code 0xc190011f. Third-party applications on your system might hamper the process of patching.
In some cases, Esset is found to be a culprit to show this error code. Proceed with the steps below to remove them:
- Open the Run box (Win+I).
- Type appwiz.cpl and then click the OK button.
- You will be able to view the list of applications; choose the third-party program.
- To get rid of the application that is causing problems, select the Uninstall option from the menu.
- Confirm the prompt by clicking on Yes.
Way-5: Look for the System Files Issues
One of the main reasons leading to the 0xc190011f error code is faulty or missing system files, which can cause the Windows Update process to fail. You may use the built-in System File Checker (SFC) program to repair core Windows component issues and errors.
If the utility fails to rectify any glitches in Windows Image format, use the Deployment Image Servicing and Management (DISM) tool for the same. Follow the steps to run both to repair the problems –
- Press the Windows key.
- Type – cmd.exe.
- To launch a Command Prompt with elevated privileges, press the Ctrl, Shift, and Enter keys simultaneously.
- If prompted by the UAC dialog box, select Yes.
- Copy SFC /Scannow and right-click on Command Prompt to paste it.
- Reboot the device and check if the update error is solved.
- In any situation, if the issue continues, open the Command prompt with admin authorities and run the below syntax one at a time without quotes –
"Dism /Online /cleanup-image /checkhealth
Dism /Online /cleanup-image /scanhealth
Dism /Online /cleanup-image /restorehealth"- Restart your PC and hopefully, the problem will end here.
Read SFC /Scannow, DISM.Exe, CHKDSK Windows 10.
Way-6: Reset PC to Fix the Update Error 0xc190011f
Resetting Windows effectively proceed to reinstall the operating system, which can remove any corrupted or missing system files that may be the source of the update problem. Ergo, to solve the issue of 0xc190011f, use this setting by following the steps:
- In the taskbar search, type reset.
- Hold down enter to launch Settings page.
- Click on “Reset PC”.
- Choose the option that says – Keep my files.
- To proceed, click the option – Local reinstall.
- Then, select the Reset option.
- Click – Next.
- Finally, select “Reset”.
Way-7: Perform Clean Boot
Applying the patch or build during clean boot can extricate the failed Windows update that can generate error code 0xc190011f. This problem is usually rendered when there are issues with third-party software or services that interfere with the updating process.
This method starts Windows 11 or 10 with the most possible minimum and basic set of services and startup programs that can run the operating system. To conduct a clean boot, follow the guide:
- Press – Win + R.
- Type – MSConfig and hit Enter.
- This will launch the System Configuration window
- Staying in the General tab, check – Selective startup.
- Uncheck the Load Startup Items box.
- Then, check the boxes for Load System Services and Use Original Boot Configuration.
- Go to the “Services” tab.
- Uncheck the box next to Hide all Microsoft Services.
- Click on Disable all button.
- Then, click OK => Apply.
- Check to see whether Windows Update is working once your PC is started into Clean Boot mode. If you can update your system, just start services manually to see what is causing the problem.
- Once you’ve identified the software causing trouble, just stop its service and delete the software if it’s no longer required.
Way-8: Temporarily Turn Off Security Software, VPN, or Proxy
Another viable option for resolving this error code 0xc190011f could be by temporarily turning off security suites, proxy services or VPN Tools. This failed update is typically caused by third-party software or services that interrupt the process.
Some files or services may be blocked by the security software, VPN or proxy clients, preventing the update from installing effectively.
1] Disable Security Software
- Click on the Show hidden icons up arrow from the right side of the taskbar.
- Right-click on the Security tool icon and choose Disable or Turn Off.
- You may stop Windows Defender by heading to Settings => Privacy & Security => Windows Security => Virus & threat protection => Manage Settings and then unchecking the Real-time protection option.
2] Disconnect your VPN
- If you are using a VPN, disconnect it temporarily. You may do this by selecting Disconnect from the VPN icon in the system tray. Then try to install the Windows update if error 0xc190011f is solved.
3] Disable your Proxy
- If you are using a proxy server, disable it temporarily.
- You can do this by going to Settings > Network & Internet > Proxy, and then toggling off the Use a proxy server option.
We hope that these 8 ways have been useful in resolving the update error code 0xc190011f and have assisted you in updating your Windows operating system without any issues.
Methods:
Way-1: Reset the Windows update cache
Way-2: Use the Troubleshooter
Way-3: Verify the Region Settings
Way-4: Remove the Software Causing the Problem
Way-5: Look for the System Files Issues
Way-6: Reset PC to Fix the Update Error 0xc190011f
Way-7: Perform Clean Boot
Way-8: Temporarily Turn Off Security Software, VPN, or Proxy
That’s all!!
- Причины возникновения ошибки «0xc190011f»
- Запуск средства устранения неполадок «Центра обновления Windows»
- Сброс параметров «Центра обновления Windows»
- Восстановление системных файлов при помощи команд SFC и DISM
- Очистка папки «Software Distribution»
- Смена региона и языка для него
- Если ничего не помогло
Многие пользователи Windows 10, решившие обновиться до 11-й версии операционной системы, столкнулись с препятствием в лице ошибки «0xc190011f», возникающей сразу после попытки запуска обновления.
Причины возникновения ошибки «0xc190011f»
Вот несколько наиболее вероятных причин возникновения сбоя обновления с этим кодом ошибки:
- Сбой в работе системного компонента «Центр обновления Windows». Как оказалось, эта конкретная проблема возникает исключительно в Windows 10. Одно из вероятных решений — использование автоматического средства устранения неполадок «Центра обновления Windows». Как бы и кто скептически не относился к работе этого средства, зачастую не исправляющегося абсолютно ничего, в данной конкретной проблеме оно может помочь.
- Похожая, но немного другого рода проблема — некорректная работа одного из модулей «Центра обновления Windows». Может быть вызвана тем, что один из модулей «застрял» или завис в неопределенном состоянии (вроде бы и работает, но в то же время и нет). Устранить неисправность помогает процедура сброса параметров «Центра обновления Windows» с помощью командной.
- Повреждение системных файлов, относящихся к работе все того же «Центра обновления Windows» или связанных с ним других системных компонентов. Точно определить, что именно было повреждено — задача практически невыполнимая для большинства конечных пользователей Windows. Но проблема может решиться путем использования встроенных в Windows системных утилит SFC (System File Checker) и/или DISM (Deployment Image Servicing and Management).
- «Засорение» папки «Software Distribution», используемой Windows для временного хранения скачиваемых файлов обновления. Очевидное решение — удаление содержимого этой папки. Но просто так ее не удалить — потребуется сначала остановить одну из системных служб.
Теперь приведем инструкции по устранению перечисленных неисправностей.
Запуск средства устранения неполадок «Центра обновления Windows»
Начинать следует именно с этого способа, т.к. он наиболее «щадящий» с точки зрения целостности системных файлов и настроек. Действия следующие:
- Запустите программу «Выполнить», используя комбинацию клавиш «Win + R», впишите в нее без кавычек команду «ms-settings:troubleshoot» и нажмите «ОК»:
- Откроется новое окно. Во вкладке «Устранение неполадок» кликните по кнопке «Запустить средство устранения неполадок»:
- Средство устранения неполадок начнет сканировать «Центр обновления». Если им будет обнаружена проблема, останется нажать на кнопку «Применить это исправление». Если же нет — отобразится окно со следующим содержимым:
Сброс параметров «Центра обновления Windows»
Эта задача решается с использованием командной строки Windows, которую нужно запустить от имени администратора:
- Запустите «Диспетчер задач» нажатием комбинации клавиш «Ctrl + Shift + Esc», затем откройте в нем меню «Файл» и выберите пункт «Запустить новую задачу»:
- Откроется дополнительное окно. Введите в него без кавычек команду «cmd», установите флажок на опции «Создать задачу с правами администратора» и нажмите «ОК»:
- Запустится командная строка (консоль) Windows. Сюда нужно будет поочередно вписать 10 команд. Просто копируйте их и вставляйте в окно консоли, нажимая клавишу Enter после очередной вставки:
- net stop wuauserv
- net stop cryptSvc
- net stop bits
- net stop msiserver
- ren C:\Windows\SoftwareDistribution SoftwareDistribution.old
- ren C:\Windows\System32\catroot2 catroot2.old
- net start wuauserv
- net start cryptSvc
- net start bits
- net start msiserver
Данные команды не нарушат работу системы. Первые четыре — останавливают работу указанных после «net stop» служб. 5 и 6 команды — просто переименовывают папки «SoftwareDistribution» и «catroot2», но Windows создаст их заново (при необходимости можно будет перенести содержимое этих папок во вновь созданные). И последние четыре команды запускают ранее остановленные службы.
По завершению работы с командной строкой перезагрузите компьютер и попробуйте вновь выполнить обновление до Windows 11.
Восстановление системных файлов при помощи команд SFC и DISM
Обе команды предназначены для сканирования системного диска на предмет поврежденных файлов, в т.ч. и тех, что отвечают за работу «Центра обновления Windows». Но делают они это разными способами. Утилита SFC использует локально сохраненный каталог для извлечения из него нужных файлов с целью перезаписи тех, что были повреждены. Средство DISM делает то же самое, только оно скачивает файлы с серверов Microsoft.
Для увеличения шансов устранения ошибки «0xc190011f» рекомендуем поочередно использовать обе утилиты (но этого может и не потребоваться, т.к. есть вероятность устранения проблемы уже после завершения работы первой из утилит):
- Сначала запустите командную строку от имени администратора, используя первые два шага из инструкции предыдущей части статьи.
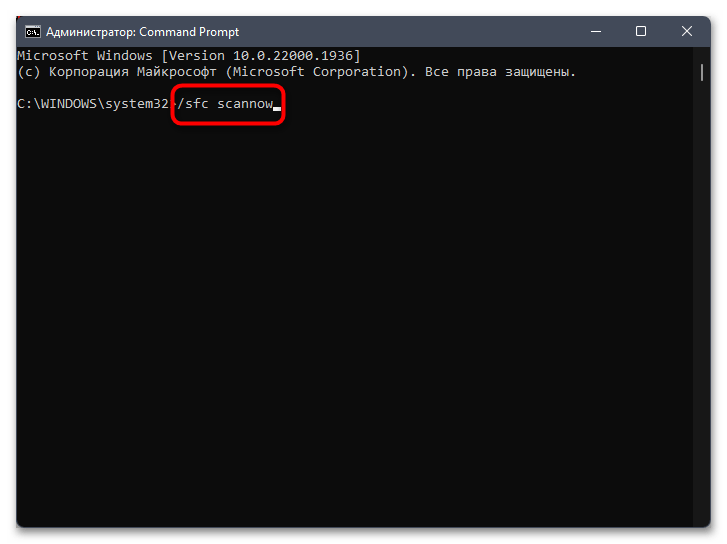
- Оказавшись в окне командной строки, скопируйте в нее без кавычек команду «sfc /scannow» и нажмите Enter:
- Сканирование займет какое-то время — дождитесь окончания процесса.
- Перезапустите компьютер и попробуйте вновь обновиться до Windows 11.
- Если не помогло, снова откройте командную строку от имени администратора. И на этот раз выполните команду — «DISM /Online /Cleanup-Image /RestoreHealth»:
- Для работы этой утилиты требуется стабильное подключение к интернету.
- По завершению работы DISM перезагрузите компьютер.
Очистка папки «Software Distribution»
В предыдущей инструкции мы переименовывали папку «Software Distribution» в «Software Distribution.old», что, в принципе, равнозначно ее очистке. Но эту задачу можно выполнить немного более простым способом:
- Запускаем командную строку Windows от имени администратора по уже описанной выше схеме.
- Копируем и вставляем в нее команду «net stop wuauserv», чтобы временно остановить работу службы «net stop wuauserv»:
- Откройте «Проводник» и перейдите с его помощью в папку «C:\Windows\Software Distribution», выделите все содержимое и удалите его (чтобы осталась возможность восстановления содержимого этой папки, удалите все в «Корзину» при помощи контекстного меню или нажатия клавиши «Del»/«Delete»).
Перезагрузите компьютер.
Смена региона и языка для него
Даже если регион в настройках системы выставлен в соответствии с фактическим местоположением компьютера, не будет лишним попробовать изменить его на «неправильный». Чтобы сделать это:
- Откройте программу «Выполнить» (Win + R), скопируйте в нее без кавычек команду «ms-settings:regionlanguage» и нажмите «ОК»:
- В открывшемся окне перейдите во вкладку «Регион и язык» и проверьте, какая страна выбрана в списке, что в верхней части окна. Если она не совпадает с фактическим местоположением компьютера, выберите правильный вариант из списка. А если там и так указана правильная страна, выберите какую-нибудь другую, например — США:
Попробуйте вновь произвести обновление до Windows 11.
На момент написания статьи — это все существовавшие способы устранения ошибки «0xc190011f» при обновлении до Windows 11.
Если ничего не помогло
Если ни один из рассмотренных выше способов не сработал, операционную систему Windows 11 всего можно установить самостоятельно, используя для этого предварительно скачанный ISO-образ. Как создать загрузочную флешку с этим ISO-образом и выполнить все остальные шаги по установке Windows 11, читайте в этой инструкции.
You may see this Windows Error Code 0xc190011f while updating windows 10/11 through windows update services. Few users also reported about this error while they are trying to enable Windows firewall.
The probable solution for this Windows 10/11 Update error code 0xc190011f to fix windows update services issue. To do it your own you need a little knowledge about Windows registry structure.

Disclaimers: Before you attempt to fix an issue with the windows update, we highly recommend you to take a registry backup and create a system restore point as a precaution method. In case if something goes wrong, we can restore your computer to the same stage and fix the issues. (In case if you not sure how to back it up, talk to an expert for assistance.)
Note: Make sure you have set the correct date and time on your computer, try to install pending updates through other available networks. Run windows update troubleshooter.
Solutions for Windows Update Error code 0xc190011f:-
When the issue is with windows update service, all you need to do is make sure it’s running and active on your machine under services in windows 10 operating system. Windows update service aka wuauserv helps to get the latest updates into your PC. If you have knowledge and interest to fix this Windows 10 Update error code 0xc190011f in windows updates follow these steps.
Open Command Prompt Window as Admin and Type in the Following Commands.
net stop wuauserv
regsvr32 &windor%\system32\wups2.d11
net start wuauserv
You can also do it directly from settings. Type in Windows 10 search bar for “services” and open it.
Then find the windows updates from the list of services, if it’s not showing active/running then restart it (Right-click to see restart/stop/start options)
This will restart windows update services and fix basic issues. If the windows update error code 0xc190011f still exists, follow some more steps to fix the issue.
More Quick Solutions to Fix Windows Update Error Code 0xc190011f While Updating:-
- Perform an SFC scan so that you can fix potentially corrupted or missing files, most of the cases this system file scan fix common issues with the file system.
- To do a restore to healthy previous setup with command prompt to fix potentially corrupted or missing files
- Using windows update troubleshooter fix it a tool, this is also a good tool to automatically fix most common issues.
- By cleaning SDF (Software distribution folder) for a clean slate for Windows Update or renaming so machine itself creates a fresh one in the next update.
- Resetting PC
Simple SFC Scan Method for Common File System Issues to Fix Windows 11 Update Error Code 0xc190011f:-
The system file scanning process is very simple to try while fixing issues with windows issues. Just follow these steps.
- Open command prompt in admin mode, to do this Type CMD in windows start menu search and right-click on CMD application to get through Run as admin option.
- In the command prompt window, type SFC/SCANNOW and press enter.

- The scanning process takes some time to return results.
Using Restore Health Option to fix Corrupted Files:-
For most of the serious issues, and to save your time the best way to fix these critical issues are restoring to good healthy partition. Before doing this stop the windows update services.
Open the command prompt as admin (Mentioned above in SFC scan process), Then instead of running SFC scan now command type this following command in the window.
DISM.exe /Online /Cleanup-image /Restorehealth

After some time your machine will be restored to a good healthy state. Now you can start your windows updates as usual.
Windows Update Troubleshooter/Fix it Tool:-
Microsoft has released several fix it tools/patches for most of the updates issues. Depends on your requirement choose a right fix it tool for your issue and run it on your machine. This will help you when there are simple issues like folder missing errors, permissions related issues.
Download fix it tool- for WINDOWS 10 click here, for window 7/8/8.1 click here.
SDF Cleaning Method:-
In this method, we clean and recreate the software distribution folder by deleting all temporary files in it.
- Go to C:/ drive, then open windows named folder in it.
- Open SoftwareDistribution folder (SDF)
- Open DataStore folder and then delete all files and folders in it.
- Again go back to the SoftwareDistribution folder, open the Download folder and delete all files in it.
Note: while deleting, it may prompt for admin permission. If you are logged in as the admin user. just click on ok to proceed.
Resetting Operating System to fix Error code 0xc190011f in windows 10/11:-
Follow this when you have less knowledge of windows technology about command prompts, files and registry fixing steps.
- If you are using windows 10, just type in “RESET PC” in the Cortana search bar(windows start button search) and select RESET PC from the results.
- Then under the RESET PC, click on get started button to proceed.
- There are two options to keep your files and complete clean. (You must take back up of your desktop files, pictures, downloads, documents before proceeding to completely clean.)
After That,
- After reset, you may do updates cleanly without any issue. This resetting process takes time so please do it when you don’t have any urgent work on your computer.
During installation you may encounter error 0x800f0906, 0x800f0907, or 0x800f081f, in which case refer to .NET Framework 3.5 installation error: 0x800f0906, 0x800f0907, or 0x800f081f. Note that these are possibly resolved by installing security update 3005628.

For additional on Error Code 0xc190011f, support chat with our Technical Support.
Read More Error Codes :
Windows error 0x80070424
Error 0x800700c1
Office 2019 support
Windows latest updates
Tags: 0xc190011f, error 0xc190011f, Error Code 0xc190011f, Windows Error 0xc190011f, Windows Error Code 0xc190011f