
Table of contents
- What Is the Volume Shadow Copy Service?
- How to Fix System Restore Error 0x80042302
- Set the Volume Shadow Copy Service to Automatic
- Disable startup applications
- Go through Settings:
- Go through Task Manager:
- Perform a clean boot
- Follow these steps:
- Enable System Restore in the Group Policy Editor
- Follow these steps to enable System Restore in the Group Policy Editor:
- Fix faulty system files
- Here’s what you need to do:
- Check your hard disk for errors
- Go through the File Explorer:
- Run a full malware scan
- Conclusion
Windows has never been a perfect operating system. Windows issues pop up out of nowhere from time to time, and users have to prepare for the worst by creating backups because some errors can cause irreparable damage.
You can choose to copy personal files to an external drive so that you can replace them in case a system crash wipes out your hard drive. However, you can lose your apps if a crash happens. Backing up the entire system involves creating a Windows backup image, which is a snapshot of your hard drive. It will help you return your system to a previous state and recover your files and apps if something goes wrong.
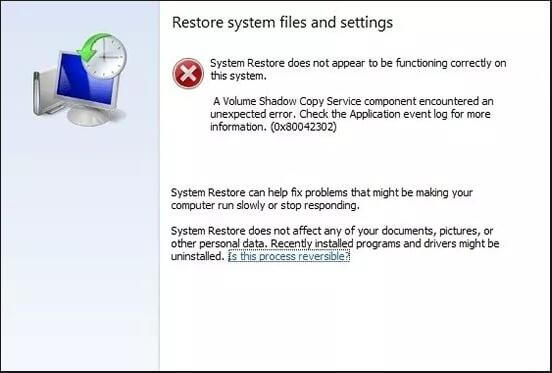
But things don’t always go as planned. You’re currently reading this article because you’re looking for a solution to the “A Volume Shadow Copy Service component encountered an unexpected error. Check the Application event log for more information. (0x80042302)” issue. The problem comes up whenever you try to restore a backed-up Windows image or run the System Restore utility.
You’ll find the solution you’re looking for, as we’ve compiled guides on how to fix the System Restore error 0x80042302.
What Is the Volume Shadow Copy Service?
The Volume Shadow Copy Service is critical to any backup or restore activity you intend to run on your computer. The backup process is complex. You often need to back up data when certain applications and system components are still working with it. The files you’re trying to back up might be large. And multiple system components have to work together to make the backup process successful.
The job of the Volume Shadow Copy Service (VSS) is to make sure these components work together perfectly so that the backup process can be carried out while your applications continue to use the data files they need. It ensures you don’t have to pause whatever you’re doing to create a backup.
How to Fix System Restore Error 0x80042302
There are different underlying causes of the error. The Volume Shadow Copy Service might be turned off or malfunctioning, a startup program or service might be clashing with the service or System Restore utility, or you might be dealing with problematic system files.
The error will go away if you eliminate its cause, which varies from system to system. You can’t know the exact problem you have to get rid of. So, follow the solutions below in the order they are arranged.
Set the Volume Shadow Copy Service to Automatic
If the service is turned off, you are likely to run into the error 0x80042302. You can resolve the problem by restarting the service and setting it to Automatic. The following steps will show you how:
- Go to your keyboard and hit the Windows logo and R buttons together to open the Run dialog window.
- After Run opens, type “services.msc” and click on the OK button to open the Services app. You can also search for “Services” in the Start menu to launch the app.
- After the Services app opens, scroll down to the Volume Shadow Copy Service and double-click it.
- Stay in the General tab of the Volume Shadow Copy Service’s Properties dialog.
- If the service is running, click on the Stop button. Once it’s stopped, go to the Startup Type drop-down menu and select Automatic.
- Next, click on the Start button.
- Click on OK in the dialog window and check if the problem goes away.
You should also ensure that services that VSS depends on to run are also running. To do that, double-click on the Volume Shadow Copy Service to open its Properties dialog window. Once the dialog appears, head to the Dependencies tab. Next, go to the box for “This service depends on the following components.” Take note of the services you find in the box. Click on the plus (+) sign beside the services to see other components. Now, return to the Services app’s main page, locate the services you saw and make sure they’re running and set to Automatic.
If this method does not fix the problem, move on to the next solution.
Disable startup applications
Some third-party applications and services run automatically at startup. They are designed this way to hit the ground running before you start using your computer. You can also configure some apps to start up this way if you want to save time with programs you use regularly.
One of these programs might be clashing with the Volume Shadow Copy Service and producing the error. You can find out if that’s the case by disabling the startup programs so that they don’t automatically run when you restart your system.
We’ll show you how to prevent startup programs from running.
Go through Settings:
- Tap the Windows logo and I buttons on your keyboard to launch Settings. You can also open the Start menu and click on the gear icon to open Settings.
- After the Settings application opens, click on the Apps icon.
- Go to the left pane of the Apps interface and click on Startup.
- Now, go to the right side of the screen and turn off the switch for apps that are configured to run at startup.
Go through Task Manager:
- Right-click on the taskbar and select Task Manager from the menu that pops up. You can also use the Ctrl + Shift + Esc keyboard combo to summon the Task Manager.
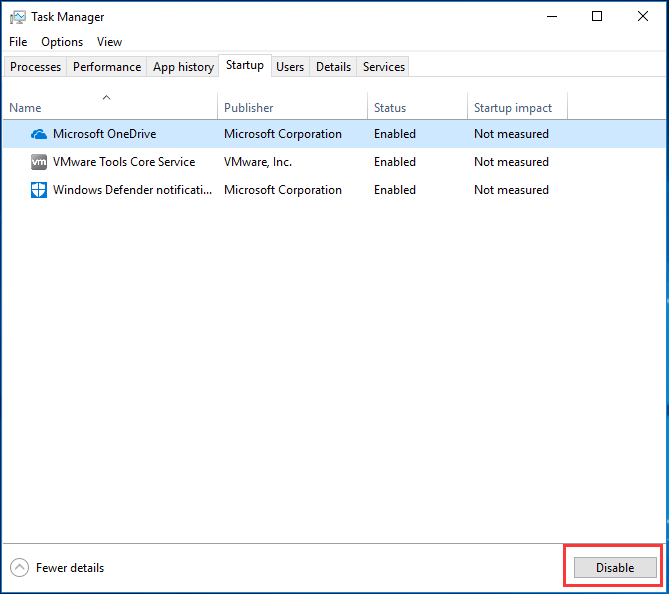
- Once the Task Manager window appears, switch to the Startup tab. If you don’t see the Task Manager’s tabs, click on More Details.
- The Startup tab of the Task Manager displays a list of programs that can run at startup. It has a startup column that shows whether an app is disabled or enabled.
- Locate enabled apps, click on each, and then click on the Disable button.
- Exit the Task Manager and restart your system.
If a startup program is responsible for the error, you won’t encounter System Restore problems once you restart your computer.
Perform a clean boot
A startup service could also cause this problem. To find out for sure, perform a clean boot. When you boot your system in a clean boot state, you’re disabling third-party services that run at startup.
These steps will show you how to clean boot your system and find out which startup service is causing the problem:
- Right-click the Start button to open the Power User menu. Click on Run once the menu appears. You can use the Windows + R combo to launch the Run dialog box.
- Type “msconfig” into the Run text box and click on the OK button.
- Once the System Configuration window appears, go to the Services tab.
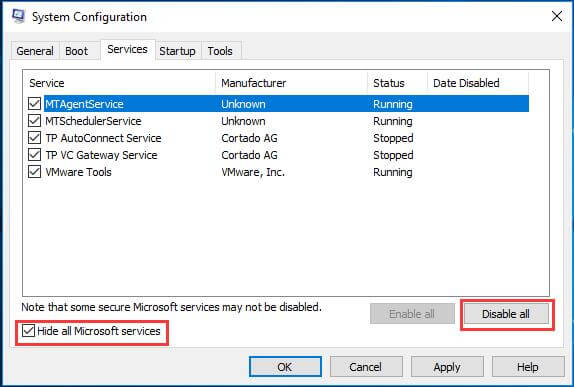
- Head to the Services tab’s bottom-left corner and check the “Hide all Microsoft services” checkbox.
- Next, click on the Disable All button. The marked services will now be prevented from running on your system’s next startup.
- Reboot your computer and check if the error is resolved.
The error message will not surface if one of the services you disabled has been clashing with VSS. You’ll have to enable the services one after the other to isolate the culprit. To do that, go to the System Configuration window and enable one service. Restart your computer and check if the error persists. If the error message comes up, then you’ve found the source of the problem. However, if the first service doesn’t trigger the error, move on to the next one.
You can reduce the stress of going through each service by eliminating possible culprits in batches.
Follow these steps:
- Open the System Configuration dialog window and head to the Services tab.
- Check half of the services and click on the Enable All button.
- Restart your system and see if the problem appears.
- If one of the services you enabled is the cause of the problem, the error will occur again. You now have to check only those services one after the other instead of going through every single service in the System Configuration window.
- On the other hand, if the error doesn’t appear, you’ve checked out those services as possible culprits. Enable the remaining services and check if the error shows up.
Once you figure out which service is responsible, you can either update it or remember to disable it whenever you want to back up or restore your system.
Enable System Restore in the Group Policy Editor
The System Restore Error 0x80042302 could result from a local group policy that prevents your system from running the System Restore utility. Some users noticed that the error had gone away after undoing the policy.
Note that the Group Policy Editor is only available in the Pro and Enterprise editions of Windows 10. So, if you’re running Windows 10 Home, move on to the next solution.
Follow these steps to enable System Restore in the Group Policy Editor:
- Launch the Run dialog window by right-clicking the Start button and clicking on Run in the Power User menu. Pressing the Windows logo and R buttons on your keyboard is another way to launch Run.
- Once you see the dialog box, type “gpedit.msc” and click OK or tap the Enter keyboard button.
- Once the Group Policy Editor opens, go to the left pane and expand Administrative Templates under Computer Configuration.
- Expand the System category and click on System Restore.
- Next, go to the right side of the window and double-click on “Turn off System Restore.”
- Select Not Configured when the Turn Off System Restore dialog appears.
- Click on the OK button.
- Restart your system and check if the error is gone.
Fix faulty system files
The Volume Shadow Copy Service relies on some system files to operate correctly. Some of these system files can begin to cause problems if they’re damaged by malware. In some cases, missing system files are the problem.
You’ll have to repair the system files before the error goes away in this case. The System File Checker is designed to resolve such issues. It’s a command-line utility used to find and replace faulty or missing protected system files. Before running SFC on Windows 10, you have to run the Deployment Image Servicing and Management (DISM) tool, another command-line utility used to service, mount, and manage Windows images. In this case, you’ll be using DISM to provide the files needed for system repair.
Here’s what you need to do:
- Click on the search icon in the taskbar or press the Windows logo and I keyboard buttons together.
- Type “cmd.”
- Once you see Command Prompt in the search results, right-click it and select Run as Administrator. If you don’t see the option, click on More, then select it.
- Select Yes once the User Account Control dialog window opens and requests permission to open the Command Prompt as an administrator.
- After the Command Prompt window appears, type the following line and hit the Enter button to run DISM:
DISM /Online /Cleanup-Image /RestoreHealth
DISM will now provide the repair files using the Windows Update utility as a source. It would be best if you had a stable internet connection for this command to work. If you’re not connected to the internet or are having troubles with Windows Update, you need another repair source. If you have a Windows 10 DVD or bootable USB, use the following command line instead:
DISM.exe /Online /Cleanup-Image /RestoreHealth /Source:C:\RepairSource\Windows /LimitAccess
C:\RepairSource\Windows is merely a placeholder for the path to the Windows directory on the bootable media. So, replace it with the correct line.
- After running DISM successfully, head to the next line in the Command Prompt interface, type “sfc /scannow” (don’t add the quotes), and click on the OK button.
The completion message you’ll see after the command runs will depend on the result of the scan. If the message says, “Windows Resource Protection found corrupt files and successfully repaired them. Details are included in the CBS.Log C:\Windows\Logs\CBS\CBS.log,” then you can restart your computer and see if the error is gone.
However, if the Command Prompt tells you that “Windows Resource Protection could not perform the requested operation,” then you have to boot your system up in Safe Mode and run the command. Follow these steps:
- Open the Start menu and click on the Power icon.
- Hold down the Shift button on your keyboard and click on Restart.
- Your system will now boot into the Advanced Startup environment, where you’ll see the Choose an Option interface.
- Alternatively, you can press Windows + I and click on Update & Security on Settings’ home page. Go to the Restore tab and click on Restart Now under Advanced Startup.
- Once you get to the Choose an Option screen, click on Troubleshoot.
- After the Troubleshoot page opens, click on the Advanced Options tile.
- Next, select Startup Settings after the Advanced Options screen shows up.
- Click the Restart button once the Startup Settings interface appears.
- Your computer will now restart to the Startup Options screen.
- Press the number next to Safe Mode, which should be 4. If you’re going to be using the DISM tool with an internet connection, press 5 or F5 for Safe Mode with Networking.
- Once your PC boots in Safe Mode, head to C:\Windows\WinSxS\Temp to confirm that the PendingDeletes and PendingRenames folders are present.
- Now, launch an elevated Command Prompt window, then run the DISM and SFC tools.
Check your hard disk for errors
Your hard disk contains your system files, application files, and the entire operating system. These files are arranged in the hard drive’s sectors. Those sectors can become damaged and cause issues, like the System Restore error.
Using the CHKDSK utility to find bad hard disk sectors prevents your operating system from using them. While the tool can also attempt to recover healthy files from those bad sectors, nothing is guaranteed, and you should be ready to lose some files for good.
Once you run the CHKDSK utility, you can run the SFC tool to replace files that might have been lost to the bad sectors.
You can run the CHKDSK utility via the File Explorer window or through an elevated Command Prompt.
Go through the File Explorer:
- Use the Windows + E keyboard shortcut to open the File Explorer. You can also right-click the Windows logo in the taskbar and click on File Explorer or click on the folder icon in the taskbar (if you have one).
- Once you see the File Explorer window, switch to the left pane and click on the arrow beside This PC.
- Under This PC, locate the drive where Windows is installed and right-click it.
- Select Properties from the context menu.
- Once the Properties dialog window opens, go to the Tools tab.
- Click on Check under Error Checking.
- Next, select Scan Drive after you see the message that reads, “You don’t need to scan this drive.”
- Windows will now check your hard disk for errors.
- Once the scan is complete, you’ll see the scan results in a dialog window.
If going through the File Explorer does not get rid of the issue, go through an elevated Command Prompt window. The command-line CHKDSK tool runs a more thorough check. Follow the guide below:
- Click on the search icon in the taskbar or press the Windows logo and I keyboard buttons together.
- Type “cmd.”
- Once you see Command Prompt in the search results, right-click it and select Run as Administrator. If you don’t see the option, click on More, then select it.
- Select Yes once the User Account Control dialog window opens and requests permission to open the Command Prompt as an administrator.
- After the Command Prompt window appears, type the following line and hit the Enter button:
chkdsk C: /f /r /x
Note: Replace the letter “C” in the command line with your Windows volume drive letter.
Confused about the command? Here’s a brief rundown:
- The “/x” switch prompts the CHKDSK utility to unmount the drive or partition before running the scan.
- The “/r” parameter allows the tool to recover any readable information while it checks for bad sectors.
- The “/f” switch allows the command-line program to fix any error it detects during the scan.
If the drive is busy because your system is using it, you’ll see the following message:
“Chkdsk cannot run because the volume is in use by another process. Would you like to schedule this volume to be checked the next time the system restarts? (Y/N)”
Hit the Y keyboard button to schedule the scan for your next reboot. Restart your system after that, and the process will begin.
Run a full malware scan
You cannot rule out malware without running a full scan. Some malware programs replace system files to escape detection, while others can compromise core system components. Running a full scan allows your antivirus program to scan protected areas that might be affected by malware.
Note that a full scan can potentially run for hours, so you have to allow the antivirus program to do its job. The steps below show you how to run the full scan in Windows Security:
- Go to the notification area in the taskbar.
- Click on the “Show hidden icons” button.
- After the system tray expands, click on the white shield to open Windows Security.
- Click on Virus & Threat Protection in the Windows Security interface.
- Next, click on Scan Options once you see the Virus & Threat Protection page.
- When you see the Scan Options page, select Full Scan, then click on Scan Now.
- Allow the process to complete, then restart your system and check for the problem.
Conclusion
Restoring your system should now be easy. Please go to the comments section below to ask questions and share your experiences.
You can solve numerous issues on your system by getting rid of junk files and problematic registry entries. Finding and removing these files and registry keys can be difficult even for experts. However, with a program like Auslogics BoostSpeed, you can get rid of them without problems.
The system restore error 0x80042302 may occur when you are making a system restore in Windows 10. And this article will introduce 4 solutions to solve the problem system restore does not appear to be functioning.
About the System Restore Error 0x80042302
Recently, some computer users say they have encountered the system restore error code 0x80040302 when they are making a system restore.
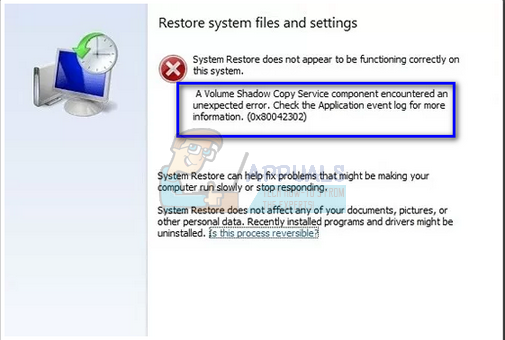
And the detailed error information is ‘System Restore does not appear to be functioning correctly on this system. A Volume Shadow Copy Service component encountered an unexpected error,’ as shown in the following picture.
Causes for System Restore Error 0x80042302
As a matter of fact, there are many reasons that can lead to error 0x80042302. However, the most common reason of the system restore does not appear to be functioning issue is that the Volume Shadow Copy service is disabled.
In addition, system files missing or corrupted can also give rise to the issue system restore does not appear to be functioning correctly. Meanwhile, no matter what the reason is, you can try to use the following methods to try to solve the system restore failed 0x80042302 problem.
4 Solutions to System Restore Error 0x80042302
If you encounter the issue system restore does not appear to be functioning correctly on this system when you are making a system restore, it is a painful experience. And in this part, we will show you how to solve the system restore error 0x80042302 in detail.
Fix #1. Make Volume Shadow Copy Services Automatic
The Volume Shadow Copy is a utility of Windows that allows taking manual or automatic backup copies. So if you encounter the issue system restore not working Windows 10, you can try to check whether the status of Volume Shadow Copy services is disabled. If yes, try changing it.
And now, we will show you how to set Volume Shadow Copy service to automatic step by step with pictures.
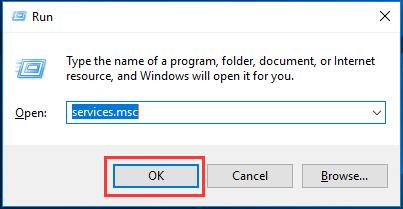
Step 1: Press Windows key and R key together to launch the Run dialog box.
Step 2: Type services.msc in the run box and click OK or hit Enter to continue.
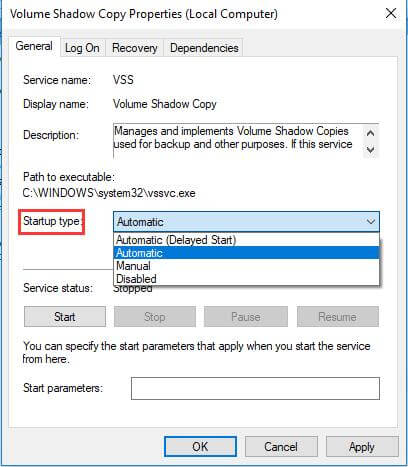
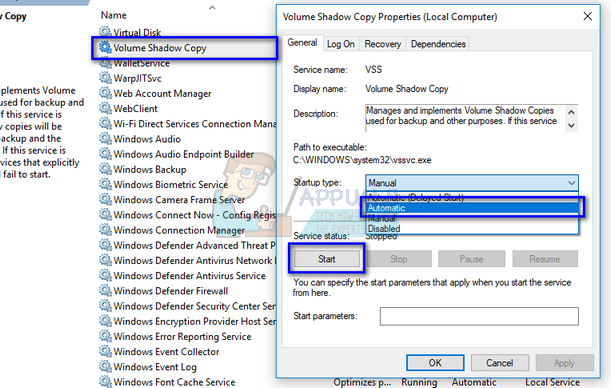
Step 3: And you will see a popup window, you need to choose the Volume Shadow Copy from the list. Then you need to right-click the Volume Shadow Copy and choose Properties from the context menu.

Step 4: You need to check whether the Startup type is automatic. If no, change the Startup type to Automatic from the drop-down menu.
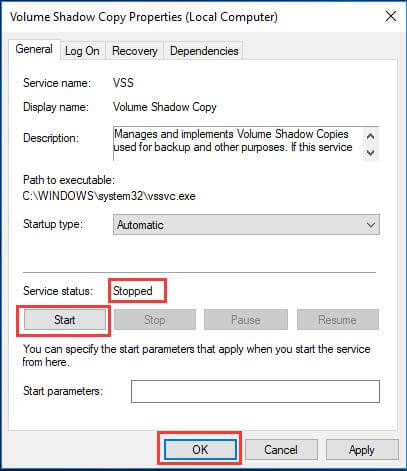
Step 5: If the Services status is stopped, you need to start it by clicking the Start button and click OK to continue.
After that, you can restart your computer and try to check whether the system restore error 0x80042302 is solved.
Tip: If you have some other Volume Shadow Copy services errors, you can refer to the following article: Quickly Solved Volume Shadow Copy Services Errors (for Windows 10/8/7).
Fix #2. Run System File Checker
Corrupted system files may also lead to the system restore error code 0x80042302. So if you encounter the system restore does not appear to be functioning problem, try System File Checker to check and fix the corrupted system files.
Now, we will introduce how to run System File Checker restore corrupted system files step by step.
Step 1: Type Command Prompt in the search bar of Windows 10, then right-click it to select Run as administrator from the context menu.
Step 2: Then in the popup window, you need to type the sfc /scannow command and hit Enter to continue.
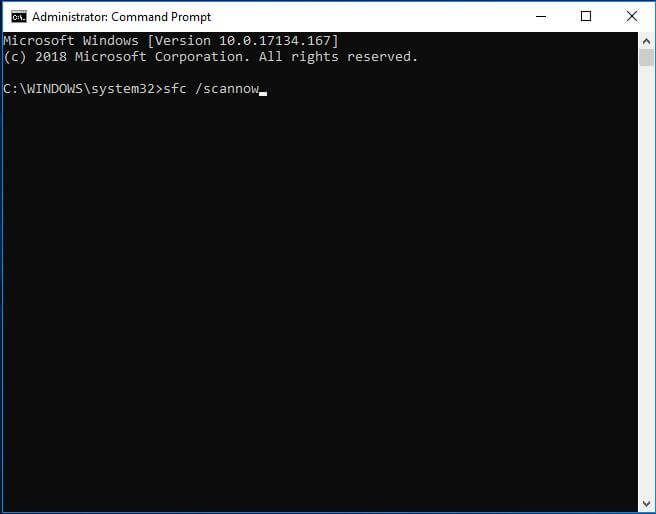
Note: The scanning process will take some time. Thus you can’t close the command window until the verification is 100% completed.
When the scanning finishing, if there are no errors of your system files, you can restart your computer and try to check whether the issue Windows 10 system restore failed is solved.
Quickly Fix – SFC Scannow Not Working (Focus on 2 Cases)
Fix#3. Perform a Clean Boot
In order to solve the issue system restore does not appear to be functioning, you can try to perform a clean boot to solve the error 0x80040302.
Now, we will introduce how to perform a clean boot step by step with pictures.
Step 1: Press Windows key and R key together to open the Run window.
Step 2: Type msconfig.exe in the box and click OK or hit Enter to continue.

Step 3: In the popup window, you need to go to the General tab and uncheck the Load startup items option under the Selective startup section.

Step 4: Then in the Services tab, you need to check Hide all Microsoft services and click Disable all to continue.
Step 5: Then you need to go to the Startup tab and click Open Task Manager to continue.
Step 6: Next, you will see all startup items are listed here. You need to select them and click Disable button. Then close the Task Manager window and click OK to continue.
Step 7: After that, you can see a popup window. Click Restart button to restart your computer.
When you have completed all operation steps, you can make a system restore again and try to check the system restore error 0x80042302 is solved.
Fix#4. Backup System on a Normal Computer and Restore
If the above methods don’t work, you can try to back up system on a normal computer and restore it to the non-working computer to solve the error 0x80042302. Thus, we will introduce the procedure.
As a matter of fact, a piece of third-party software is necessary to restore to a different computer. And MiniTool ShadowMaker, the free backup software, is the best choice of many computer users since it has various powerful features.
For example, it can successfully handle system backup, partition backup, disk backup and so on. In particular, MiniTool ShadowMaker plays an important role when Windows 10 backup not working.
Now, we will introduce how to back up system with the free backup software – MiniTool ShadowMaker.
Back up System on a Normal Computer
First of all, you need to install MiniTool ShadowMaker. Thus, you can get free backup software from the following button.
MiniTool ShadowMaker TrialClick to Download100%Clean & Safe
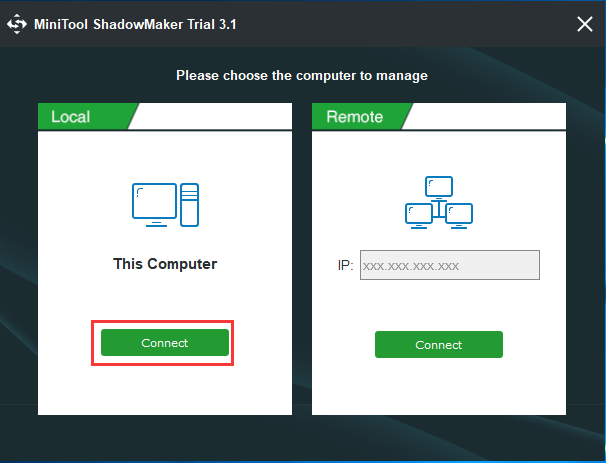
Step 1: Launch it and click Keep Trial to continue. Then click Connect in the Local tab to enter its main interface.
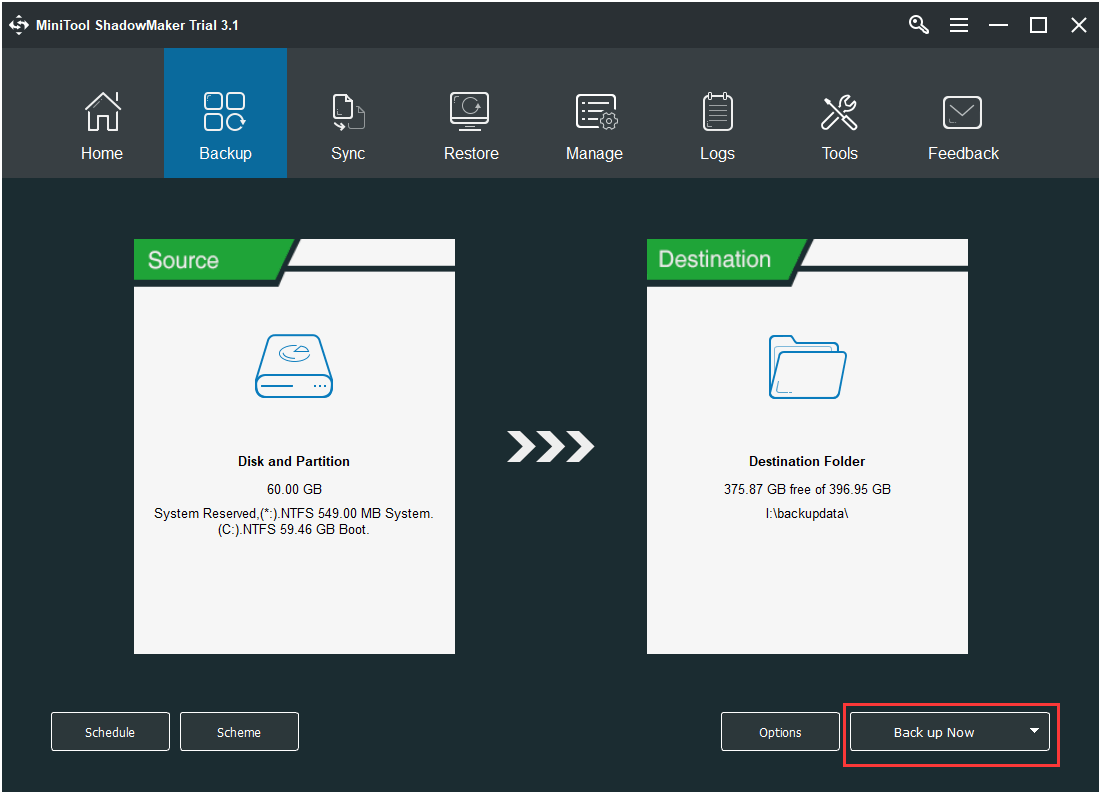
Step 2: After entering its main interface, go to the Backup page. MiniTool ShadowMaker chooses the operating system as the backup source by default.
Thus, you just need to click Destination module to choose a target disk to save the backup image. We suggest you choose an external hard drive.
- Schedule setting can help you to create automatic backup to safeguard your PC well.
- Scheme contains Full Scheme, Incremental Scheme, and Differential Scheme. It is recommended to choose Incremental Scheme.
Then click Back up Now to perform the task immediately.
Create Bootable Media
As for restoring system image created before to another computer with MiniTool ShadowMaker, the bootable media is required.
Step 1: Create a bootable media with Media Builder feature under Tools tab of MiniTool ShadowMaker.
Step 2: Connect the bootable media to the computer encountering system restore does not appear to be functioning. Then boot the computer from it. You can refer to How to Boot from Burned MiniTool Bootable CD/DVD Discs or USB Flash Drive?
Restore the System Image to the Abnormal Computer
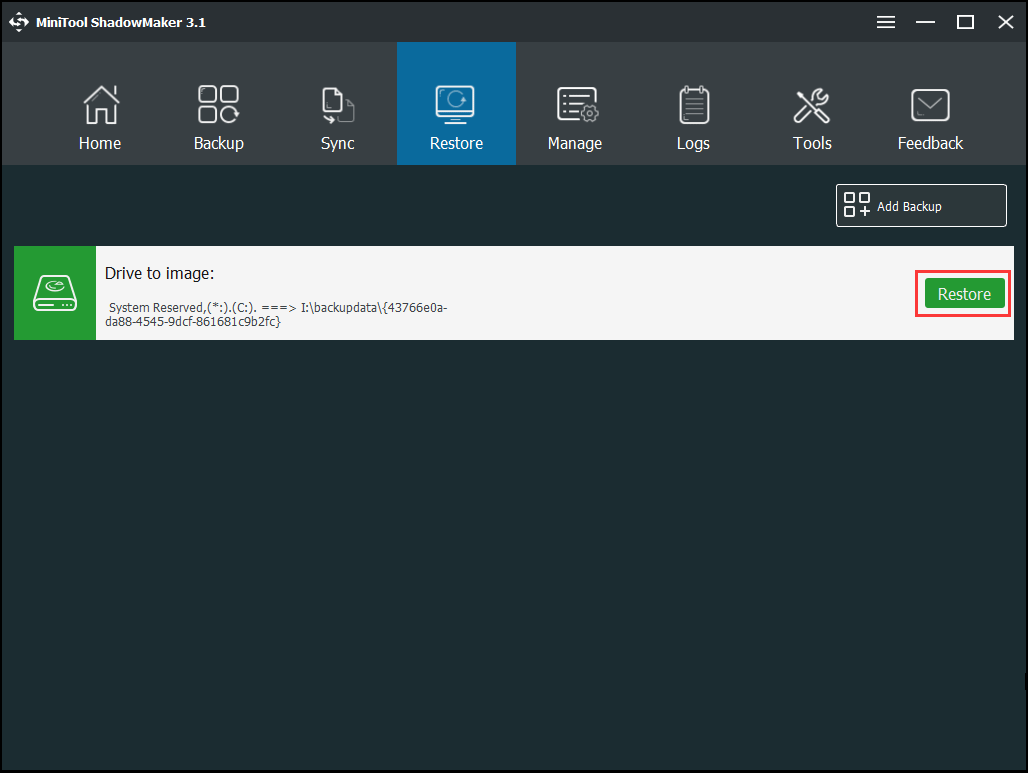
Step 1: After entering the main interface, go to the Restore page. The system image will be listed here. You need to click Restore button to continue.
Tip: If the system image has not been listed here, you can click Add Backup button to find and add one.
Step 2: Next, you are required to choose one backup version and click Next to go on.
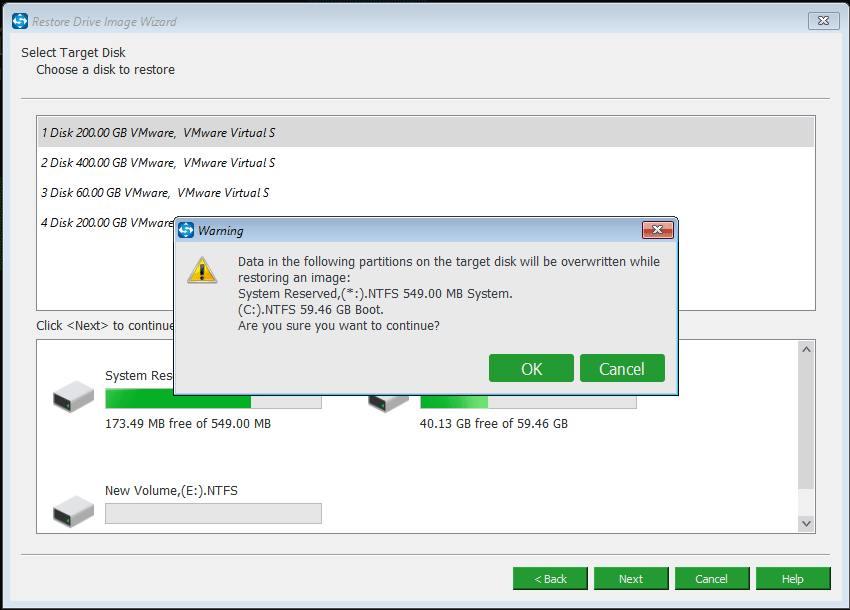
Step 3: In the next popup window, you need to choose the volumes to restore from the selected backup file. Please note that all system related volumes should be selected as well as MBR and Track 0. Otherwise, Windows 10 is unbootable. Then click Next to continue.

Step 4: Now, you need to choose a disk to restore Windows 10 image to. It is recommended to choose the original system disk. Then click Next to button to go on. After that, you will receive a warning message that tells you which partitions on the target disk will be overwritten. Then click OK to continue.
Step 5: MiniTool ShadowMaker will perform the recovery action.
Universal Restore
After you have restored system image to your computer, you may find that your computer still can’t boot. The reason is that the restored operating system is incompatible with your computer, thus you need to go on the following steps.
Step 1: Boot the computer from the bootable media and go to the Tools. Then click Universal Restore to go on.
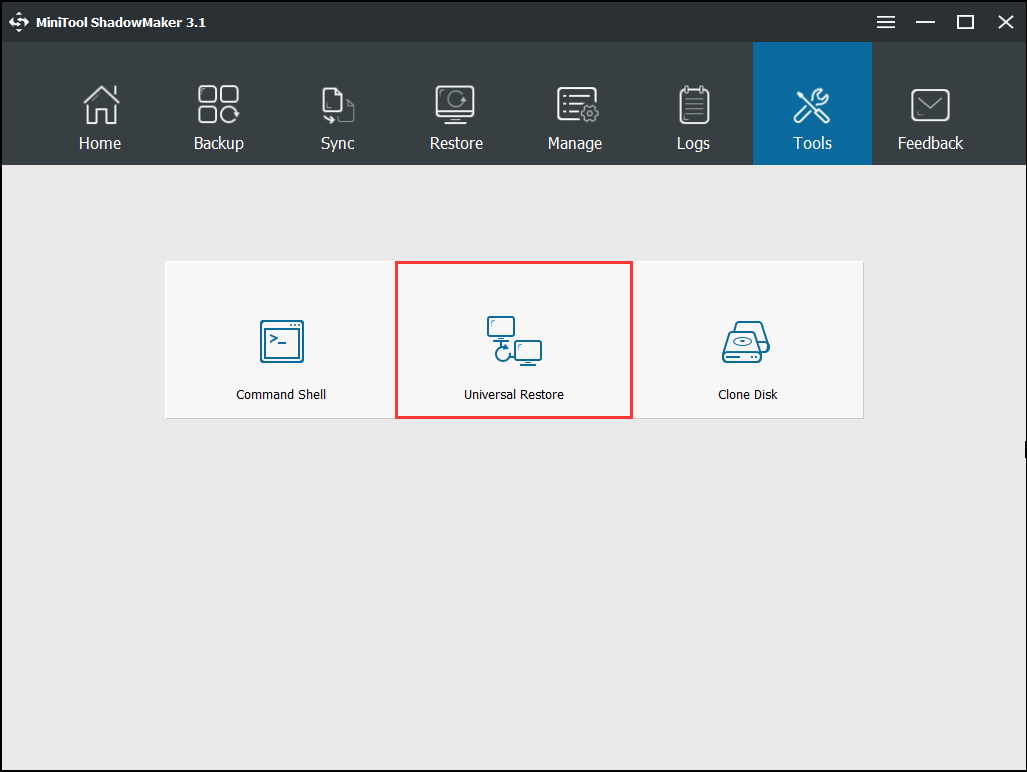
Step 2: This feature will automatically list the operating system on the left pane and you need to click RESTORE button to continue.
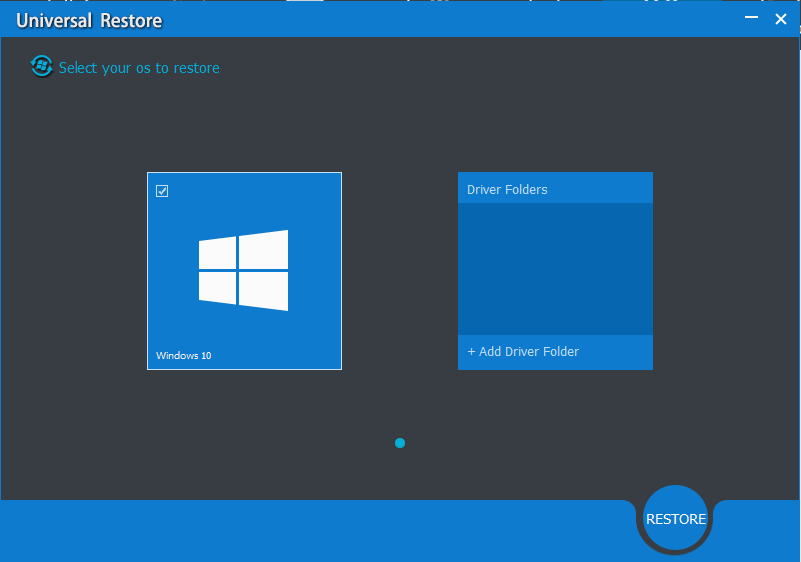
Tip: Besides clicking RESTORE, you can also click Add Driver Folder to add some drive folders when there is a need.
When the universal restore is finished, you can exit MiniTool Recovery Environment and change the boot order to restart your computer and try to check whether the issue system restore does not appear to be functioning is solved.
When you have solved the system image restore failed 0x80042302 issue, you had better create a system image so as to restore to previous state when your computer encounters some accidents.
Have you been attracted by this method? Get the free backup software – MiniTool ShadowMaker now!
MiniTool ShadowMaker TrialClick to Download100%Clean & Safe
I have used MiniTool ShadowMaker to create a system image on a normal computer and restore it to my computer. I have successfully solved Windows 10 system restore not working issue.Click to Tweet
Bottom Line
In conclusion, we have introduced four ways to solve the issue system restore error 0x80042302. You can try to take advantage of any one to solve the system restore does not appear to be functioning.
Now, it is your turn to have a try. In addition, if you have any better solution to solve the issue error 0x80042302, you can share it in the comment zone. If you have any problem with MiniTool ShadowMaker, you can feel free to contact us via the email [email protected].
Users experience the error “0x80042302” when they trying to restore an image of Windows on their PC. The mechanism through which you restore a system image is called System Restore. The full message of the error is:
“The system image restore failed. Error details: A Volume Shadow Copy Service component encountered an unexpected error. Check the Application event log for more information. (0x80042302)”
System Restore allows users to restore their state of windows from an image which is saved earlier on. This feature doesn’t require a large amount of space on your computer and is also quite easy to configure. Until now, the restoration process using System Restore is very easy and doesn’t involve technicalities.
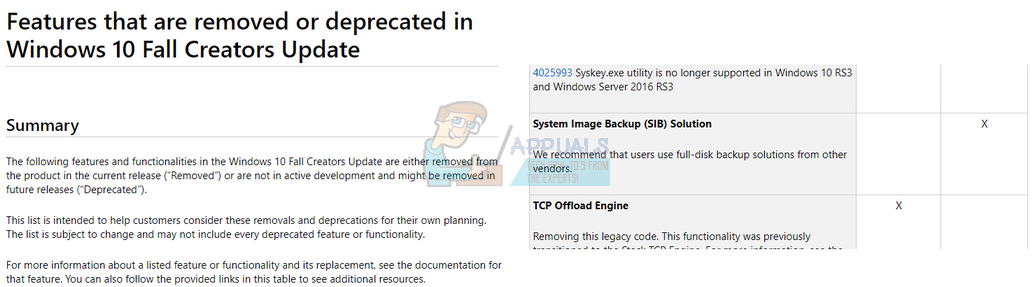
This error became more prominent after the 1709 Fall Creators update. System Image Backup (SIB) has become depreciated. This means that Microsoft has stopped the development and support of the feature but it is still available on various PC’s.
Moving on, there a few workarounds for this problem. Do note that workarounds are different from fixes (fixes are where the problem is completely fixed and workarounds present ways through which you can bypass the problem and accomplish the task at hand). We cannot come up with fixes as the service itself is depreciated.
Solution 1: Using a Third-Party Alternative
Since the service itself is depreciated, it is best if you resort to a third-party alternative. What does depreciated mean? It means that the tool is still present in Windows but its development and support is stopped. You will be using the default tool and if any error is induced (like in this case with 1709), you would have to find other alternatives because there isn’t going to be any development in this issue.
You can resort to third-party alternatives which do the task just as well. One such alternative is Macrium Software. You can easily Google it, download it and follow the easy on-screen instructions to get the job done.

Solution 2: Check if Services are Turned On
A reason why you might be experiencing this problem is that your services are turned off. There are various cases where to troubleshoot an issue, your turn your services off. Furthermore, there are some PC optimization software which turn your services off in order to reduce the CPU usage or ‘optimize’ your computer. This solution works for most previous versions of Windows (Pre Fall Creators Update).
- Press Windows + R, type “services.msc” in the dialogue box and press Enter.
- Once at the services window, check your services and make sure they are not turned off.
- One notable service which you should check is “Volume Shadow Copy”. This is the primary process responsible for managing system images. Set the state as automatic and make sure it is turned on.
- Also, check if the process “Microsoft Software Shadow Copy Provider” is up and running. Navigate to its properties and set its startup state as automatic and make sure it is running.
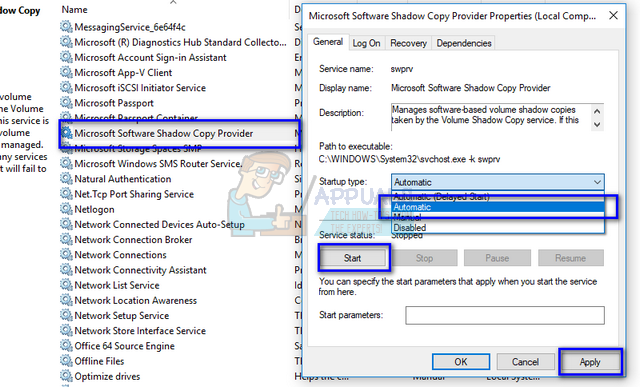
- In addition to these services, also make sure other services are up and running.
Solution 3: Installing new Windows and Mounting the Image Later (Advanced Users)
This solution is for advanced users who know what they are doing. Follow the instructions step by step and make necessary changing according to your system.
Note: We are assuming file paths and directories here for your ease. Make sure to replace the drives when you are actually executing the solution with the correct ones on your computer.
- Disconnect your computer from the Network. This is done to prevent Windows Update from running.
- Input the Installation media and install Windows 10. When asked, select the option “I don’t have a product key”. Also, select the option “Custom: Install Windows Only”. This will create all the partitions on your disk (C: EFI Recovery) and through this, you will have a Windows 10 machine to work on.
- Log into your account.
- Press Windows + E to launch File Explorer. Navigate to Local Disk C, right-click on the empty space and select New > Folder. Name the new folder as “MountedVHDX”.
- Create another new folder named as “WindowsImage” in Local Disk C and copy the folder matching from your backups WindowsImage folder.
- Now connect an external hard drive with your computer. It should have decent empty space (at least as much space as your SIB. Let’s suppose that the external disk is called “E:\”.
- Create a new folder on the hard drive named as “CapturedWIM”.
- Press Windows + S, type “PowerShell” in the dialogue box, right-click on the application and select “Run as administrator”. Now execute the following commands:
Mount-WindowsImage -ImagePath fullpathofvhdxindoublequotes -Path c:\MountedVHDX -Index 1
New-WindowsImage -CapturePath C:\MountedVHDX -Name Win10Backup -ImagePath E:\CapturedWIM\sib.wim -Description “Windows 10 Backup” –Verify
Dismount-WindowsImage -Path C:\MountedVHDX -Discard
Note: Insert the full path of the VHDX in the first command listed instead of “fullpathvhdxindoublequotes”.
- Restart your Windows after executing the commands listed above.
- Now once you are at the login screen, click the power button and further click “Restart” while holding the shift key. This will force your computer to go into recovery mode.
- Select the following options:
Troubleshoot > Advanced > Command Prompt
- When the command prompt pops up, executing the following commands:
Format c:
Dism /Apply-Image /ImageFile:E:\CapturedWIM\sib.wim /Index:1 /ApplyDir:C:\
- Now when you restart your computer, the problem will be solved.
Kevin Arrows
Kevin Arrows is a highly experienced and knowledgeable technology specialist with over a decade of industry experience. He holds a Microsoft Certified Technology Specialist (MCTS) certification and has a deep passion for staying up-to-date on the latest tech developments. Kevin has written extensively on a wide range of tech-related topics, showcasing his expertise and knowledge in areas such as software development, cybersecurity, and cloud computing. His contributions to the tech field have been widely recognized and respected by his peers, and he is highly regarded for his ability to explain complex technical concepts in a clear and concise manner.
В этой статье мы обсудим, как устранить ошибку 0x80042302 в Windows.
Ошибка: «Не удается активировать Windows на этом устройстве в данный момент. Повторите попытку активации позже или перейдите в Магазин, чтобы купить подлинную Windows. (0x80042302)»

Решение:
1. Попробуйте активировать Windows через терминал:
— Для Windows 10: инструкция по активации
— Для Windows 11: инструкция по активации
2. Проблема с ключом активации:
Если активация через терминал не удаётся, проблема может быть связана с вашим ключом активации. В этом случае обратитесь к продавцу, у которого вы приобрели ключ. Если у вас нет лицензионного ключа, вы можете приобрести его в нашем каталоге продуктов для Windows 10 и Windows 11.
Следуя этим рекомендациям, вы сможете решить проблему с ошибкой 0x80042302 в Windows.
Лицензионный ключ активации Windows 11 от