
При установке Windows 11, а также при обновлении до новой версии или установке обновлений в Центре обновления Windows пользователи могут столкнуться с различными ошибками, код которых начинается с 0xc1900101 и может содержать дополнительный код и описания.
В этой инструкции подробно о наиболее частых причинах таких ошибок и способах, которые могут помочь их исправить.
Возможные причины ошибок 0xC1900101 и как её исправить

Ошибки с кодом 0xC1900101 имеют различные дополнительные коды и описания, в частности:
- 0xC1900101 — 0x2000C — ошибка на этапе установки SAFE_OS во время операции APPLY_IMAGE
- 0xC1900101 — 0x20017 — ошибка на этапе установки SAFE_OS во время операции BOOT
- 0xC1900101 — 0x30018 — ошибка на этапе установки FIRST_BOOT во время операции SYSPREP
- 0xC1900101 — 0x3000D — ошибка на этапе установки FIRST_BOOT во время операции MIGRATE_DATA
- 0xC1900101 — 0x4000D — ошибка на этапе установки SECOND_BOOT во время операции MIGRATE_DATA
- 0xC1900101 — 0x40017 — ошибка на этапе установки SECOND_BOOT во время операции BOOT
Несмотря на то, что на официальном сайте Майкрософт сообщается о том, что ошибки 0xc1900101 обычно вызваны драйверами, это — возможная, но не единственная причина.
Далее — по порядку возможные причины и способы исправить различные ошибки 0xC1900101:
- Недостаток места на системном разделе диска для выполнения установки обновления (особенно в случае дополнительного кода 0x2000C). Решение — освободить достаточное количество места, я рекомендую более 20 Гб, поскольку ошибка обычно возникает при установке объёмных обновлений компонентов и новых версий Windows. Начать очистку можно с использования встроенных средств системы.

- Наличие неподписанных или неподдерживаемых новой версией ОС драйверов устройств (в том числе виртуальных), а также драйверов, устанавливаемых программами: сторонними антивирусами, средствами для модификации сетевых подключений и других. Решение: удалить соответствующие драйверы, программы, сторонние антивирусы, отключить от компьютера необязательные периферийные устройства. Если ранее вы устанавливали драйверы устройств с помощью сторонних программ, рекомендую выполнить их установку с официального сайта производителя материнской платы или ноутбука для вашей модели устройства.
- Влияние сторонних служб и фоновых процессов. Можно попробовать выполнить обновление, загрузившись в режиме чистой загрузки.
- Проблемы с конфигурацией разделов на диске, часто — при наличии нескольких разделов с загрузчиком (от актуальной и предыдущих систем), разделе с загрузчиком на отдельном физическом диске. Возможный вариант решения — перенести раздел с загрузчиком на системный диск, избавиться от неиспользуемых EFI-разделов.
- Повреждение системных файлов текущей ОС Windows. Решение — запустить командную строку от имени администратора и по порядку выполнить команды:
dism /online /cleanup-image /restorehealth
sfc /scannow
- Проблемы с файловой системой на системном разделе диска. Попробуйте выполнить проверку диска на ошибки: запустите командную строку от имени администратора, выполните команду
chkdsk C: /f
вам будет предложено выполнить проверку после перезагрузки компьютера. Согласитесь (введите Y и нажмите Enter), после чего перезагрузите компьютер.

- Проблемы в работе устройств и драйверов: откройте диспетчер устройств (правый клик по кнопке «Пуск» — «Диспетчер устройств») и убедитесь, что в списке отсутствуют устройства с ошибками, при наличии — устраните их, посмотрев в свойствах устройства описание ошибки и найдя решение для неё.


Описанные выше методы могут сработать, но не во всегда. Если в вашем случае проблема не решилась, можно попробовать некоторые дополнительные варианты из следующего раздела.
Дополнительная информация
Если очевидных причин ошибки нет, рекомендую изучить журналы обновления Windows, возможно, в них вы найдёте, что именно привело к сбою при обновлении и установке. Подробная информация о расположении файлов журнала доступна на официальном сайте Майкрософт.
В случае, если журналы не помогли или разобраться с ними не получается, ниже — ещё несколько «общих» способов установить Windows 11 или её новую версию при ошибках 0xC1900101:
- Проверьте, производится ли установка, если отключить Secure Boot в БИОС/UEFI
- Загрузите образ ISO с системой, до которой вы хотите обновиться, смонтируйте его в системе (правый клик по ISO-образу — «Подключить»), отключитесь от Интернета и запустите файл setup.exe с подключенного образа. Выполняйте установку без подключения к Интернету и отказавшись от поиска и установки дополнительных обновлений.
- При наличии нескольких дисков на компьютере, физически отключите все кроме системного.
В крайнем случае вы можете выполнить установку новой версии системы путём чистой установки с флешки — этот вариант в большинстве случаев (за исключением проблем с дисками или иным оборудованием) проходит без ошибок.
Readers help support Windows Report. We may get a commission if you buy through our links.
Read our disclosure page to find out how can you help Windows Report sustain the editorial team. Read more
Since the release of Windows 11, many users have upgraded from older Windows editions. Sadly, not every upgrade to Windows 11 will be successful. The Windows 11 second boot error is one of the few errors you may encounter.
This error is similar to the Windows 10-second boot error that users experienced during upgrades to Windows 10.
In this article, you should learn what steps to take to fix a second boot error and precautions to ensure a smooth upgrade from Windows 10 to 11.
How can I avoid a windows error in second boot?
It is recommended that only PCs that meet the minimum Windows 11 installation requirements are upgraded. If your computer does not fall under this category, it becomes more likely to encounter errors during the process.
Additionally, if an ineligible PC is successfully upgraded to windows 11, there are chances that it will begin to malfunction somewhere during use.
To avoid any of these scenarios, you should download and run the PC health check app before a Windows 11 upgrade. This tool checks your PC for core components compatible with Windows 11.
Recommended solutions for Windows 11 error in second boot
1. Check and clean the drive
1.1 Check the drive space
- Open Windows File Explorer by selecting the folder on the taskbar.

- On the left pane of the file explorer, select My PC, then check the installation drive (the one with a Windows logo) on the right pane of the file explorer. If it needs cleaning proceed to step 1.2.


1.2 Clean the drive
- Click on the start menu, type Disk Cleanup, and select the app that displays in the right pane.

- Select the drive to be cleaned from the disk clean up pop up.
- Under the description section, select the Clean up system files option.
- Repeat step 2.
- In the disk cleanup for windows pop up, check any files you want to delete and hit the OK button.

2. Restart the PC and check for updates
- Restart your computer because some updates may need a restart to take effect. If no updates are installed during the restart, proceed to check for updates with the next steps.
- Open the settings app by clicking on the start menu and selecting the Settings icon.

- Select the update and security option at the bottom.

- On the left pane of the settings window, select Windows Update, then Check for updates on the right pane and finally click on Download and install.

- Restart your PC.


3. Update drivers with third-party software
Out of date drivers can trigger several errors while updating to Windows 11. Drivers can be updated using Windows Device Manager, however, you may have to update them one at a time. This is a long tedious process.
Third-party apps like DriveFix can be used to automatically update your drivers at once before proceeding to upgrade to Windows 11.
After installing the DriveFix application, it will automatically scan for out-of-date drivers. These drivers will be updated and it will display an updated status on the right pane in front of every driver.
You should then restart the computer and start the Windows 11 upgrade process afresh.
⇒ Get DriveFix
4. Remove non-essential external hardware
All connected, non-essential external devices should be unplugged. These could include external hard drives, USB drives, headphones, printers, mics, etc.
If your computer is connected to a docking station, undock it. Once every non-essential hardware is unplugged, restart the system and try again.
- Recent Windows 11 update lets you disable profanity filter in voice typing
- Microsoft wants Windows 10 users to upgrade to Windows 11 or Copilot + PCs
- Windows 11 KB5055627 update makes File Explorer more fluid
5. Run scan commands on your command prompt
- Open the command prompt with admin rights by searching for command prompt in the start menu and selecting the option to run as administrator.

- Run a hard drive scan by pasting this code in the command prompt and hitting enter: chkdsk/f C
- When the scan completes run a SFC scan by pasting this code in the command prompt and hitting enter: sfc /scannow
- After the scan has execute, run a DISM scan by pasting this code in the command prompt and hitting enter: DISM.exe /Online /Cleanup-image /RestoreHealth

6. Deactivate any third-party antivirus
- If you use a third-party antivirus, click on the start menu and type the name, then select the unistall option.

- In the control panel, click the name of the antivirus and select the uninstall option.

- after the process completes, restart your PC.


These steps should help you fix the second boot error. Let me know in the comments which of the processes resolved your error problem.
Vladimir Popescu
Being an artist his entire life while also playing handball at a professional level, Vladimir has also developed a passion for all things computer-related.
With an innate fascination for research and analysis, and realizing many other people share his passion for this subject, he delved into writing Windows-related articles, so other people can also benefit from the acquired information.
When not writing kick-ass articles, Vladimir likes to spend his time doing Crossfit and creating art.
В данной статье рассмотрим как решить проблему ошибок «0xc1900101, 0x40017 или ошибка на этапе установки second_boot»
Если у Вас возникает ошибка при обновлении из «Центра обновления Windows», либо при апгрейде на более новую версию Windows 10 данные ошибки, то эти решения определенно Вам помогут.
Путем долгих проб и ошибок удалось найти способ, который помог именно нашим пользователям, возможно и Вам поможет решить данную проблему.
1) Запускаем командную строку от имени администратора: Поиск => CMD => Правой кнопкой мыши => Запуск от имени администратора
Введите следующие команды поочередно (возможно некоторые из них у Вас не будут срабатывать, ничего страшного, следуйте списку):
net stop bits
net stop wuauserv
net stop appidsvc
net stop cryptsvc
DEL «%ALLUSERSPROFILE%\Application Data\Microsoft\Network\Downloader\qmgr*.dat»
move c:\Windows\SoftwareDistribution SoftwareDistribution1
move c:\Windows\system32\catroot2 catroot21
del /F /Q c:\Windows\SoftwareDistribution1\*
rmdir /S /Q c:\Windows\SoftwareDistribution1
sc.exe sdset bits D:(A;;CCLCSWRPWPDTLOCRRC;;;SY)(A;;CCDCLCSWRPWPDTLOCRSDRCWDWO;;;BA)(A;;CCLCSWLOCRRC;;;AU)(A;;CCLCSWRPWPDTLOCRRC;;;PU)
sc.exe sdset wuauserv D:(A;;CCLCSWRPWPDTLOCRRC;;;SY)(A;;CCDCLCSWRPWPDTLOCRSDRCWDWO;;;BA)(A;;CCLCSWLOCRRC;;;AU)(A;;CCLCSWRPWPDTLOCRRC;;;PU)
net start bits
net start wuauserv
net start appidsvc
net start cryptsvc
2) Скачиваете следующие .reg файлы, в эти файлы исправят автоматически некоторые значения в Вашем реестре. Один из них так же у Вас может не запуститься, ничего страшного.
Скачать: Файл-1, Файл-2
После проведения всех 2х процедур перезагрузите ПК и попробуйте повторить обновление системы.
Лицензионный ключ активации Windows 10 от
,
Microsoft released on October 1, 2024 the Windows 11 24H2 update, also known as «Update 2024», which will soon be available for download and installation on all computers running Windows 11 23H2 or 22H2 through Windows Update.
However, some users – including me- who already tried to upgrade their systems to Windows 11 version 24H2, reported that the 24H2 update fails to install with error:
«We couldn’t install Windows 11
We’ve set your PC back to the way it was right before you started installing Windows 11
0XC1900101 – 0x20017
The installation failed in the SAFE_OS phase with an error during BOOT operation»

After encountering the «0XC1900101 – 0x20017″ problem when trying to upgrade Windows 11 23H2 to 24H2 on two physical machines and one VirtualBox virtual machine, I came to the conclusion that the problem is due to the fact that the currently available release of Windows 11 24H2 (October 2024) has and is causing many problems during or after the installation and this is another reason why Microsoft does not recommend to upgrade yet.
Therefore, if you are unable to install Windows 11 24H2 update due to error «0XC1900101– 0x20017: Installation failed in SAFE_OS phase», I suggest you do not update your system yet and wait until Microsoft releases a new version of Windows 11 24H2.
However, if you want to want to troubleshoot the Windows 11 24H2 «0XC1900101 – 0x20017″ update error, follow the instructions below.
How to FIX: 0XC1900101–0x20017 – Installation failed in the SAFE_OS phase, on Windows 11 24H2 update installation. *
* IMPORTANT: Before applying the methods mentioned below to troubleshoot the Windows 11 24H2 «0XC1900101–0x20017» upgrade problem, do the following:
- If you have BitLocker encryption enabled on your system, go ahead and suspend BitLocker before installing the update (very important) and re-enable BitLocker after the update is successfully installed.
-
Make sure you have more than 64 GB of free space on your C: drive before you install the update.
-
Disconnect all USB devices that are not needed for the update. (e.g. USB Drives, USB Flash Disks, USB Printer etc.)
-
Download and install all available Windows updates.
-
Disable -or better- temporarily uninstall all non-Microsoft security software (antivirus, antimalware, firewall, etc.), to avoid installation problems during the upgrade.
* Important note for users with unsupported hardware for Windows 11 24h2: Windows 11 24H2 has one more hardware requirement to install: The Processor must support the SSE4.2 instructions set, otherwise the system may not be able to boot or show the error «0XC1900101 – 0x20017». Therefore, before you try to install Windows 11 v24H2 on the unsupported computer, make sure that its CPU supports SSE4.2 (Intel) or SSE4A (AMD) instructions, with CPU-z.
* Important note for VirtualBox users: If you encounter the mentioned issue after installing Windows 11 24H2 on a VirtualBox virtual machine, download & install the latest version of VirtualBox and then try again to upgrade the VM to Windows 11 version 24H2.

Method 1. Update Device Drivers.
Step 1. Install all Windows & Optional Updates.
1. Navigate to Start -> Settings -> Windows Update and click Check for updates to find and install all Windows updates.
2. Then, in Windows Update screen click Advanced Options and then click Optional Updates under «Additional Options».

3. In Optional updates, check all the checkboxes to install all the available Windows and Driver updates and click Download & install.

Step 2. Download Latest Drivers from Manufacturer’s webpage.
1. Navigate to your device manufacturer’s support site and check if any new drivers are available for your device’s hardware. If so, download and install them.
Method 2. Upgrade to Windows 11 24H2 using the Installation Assistant.
Microsoft’s recommended method to resolve the mentioned issue is to upgrade your Windows 11 system to version 24H2 using the «Windows 11 installation assistant». To do this:
1. Navigate to Windows 11 download site to download the Windows 11 Installation Assistant.

2. Then run the «Windows11InstallationAssistant.exe» and choose YES at the UAC warning
3. Accept the License Terms and then wait the Installation Assistant to download the required files and install the update.

4. When the process is complete, click Restart Now to complete the installation

5. After restart, the installation will continue and after a few minutes will end.
6. Finally, navigate to Windows Update and check if there are any other updates available to install. If so, let Windows to install them and you’re done!
Method 3. Update BIOS/FIRMARE.
An outdated BIOS can also cause the error «0XC1900101 – 0x20017″ in Windows update. So, try to update the BIOS and see if that fixes the problem. To update the BIOS on your device:
1. As soon as you turn ON the PC, press the DEL or F2, or F10 or F12 key to get into the BIOS/UEFI Firmware Settings.
* Note: The way to enter BIOS/UEFI settings varies from manufacturer to manufacturer. If you do not enter the BIOS settings using the above-mentioned keys, check the manufacturer’s instructions for your motherboard (desktop) or device (laptop).
2. Locate the BIOS version information within the BIOS settings. This information is usually found in the «Main» or «General» tab.

3. Then visit the computer or motherboard manufacturer’s support page and check if there is a more updated BIOS/FIRMWARE version than the one you have.
4. Finally, and if your BIOS/Firmware version is old, update the BIOS according to the manufacturer’s instructions.*
* Cautions:
1. The BIOS Update is the last solution to solve computer problems, because if you incorrectly update the BIOS, you ‘ll make your computer unbootable and useless. So, be very careful when updating your BIOS and do not power off your PC during the BIOS update process. If you’re not comfortable doing it yourself, it’s always best to consult a qualified technician to avoid any potential issues.
2. To avoid problems during and after BIOS update, do the following:
a. Backup your files to an external storage device. (e.g. To a a USB disk)
b. Turn off the BitLocker protection.
c. Disable TPM before updating BIOS to avoid Windows 11 activation problems after update.
d. After TPM is disabled, you may not be able to sign-in to Windows using your PIN or fingerprint. So make sure you remember your password so you can log in to Windows.
Method 4. Force Windows to Recreate the Windows Updates Store folder.
A common method to solve errors in Windows Update, is to force Windows to recreate the Windows Update Store folder («C:\Windows\SoftwareDistribution«), which is the location where Windows stores the downloaded updates. To do that:
1a. Press the Windows + R keys to open the Run command box.
1b. In run command box, type «services.msc» and press Enter to open the Windows Services control panel.

2. Right-click on Windows Update service and select Stop.

3. Then, open Windows Explorer, navigate to C:\Windows folder and open it to explore its contents.
4. Select and Delete the “SoftwareDistribution” folder. (Click Continue at «Folder Access Denied» window).
* Notes:
1. After deleting this folder, the next time the Windows Update will run, a new empty «SoftwareDistribution» folder will be automatically created by Windows to store updates.
2. If you cannot delete the folder because of error «Folder in use – try again», then delete it after starting Windows in «Safe Mode».

5. Restart your computer and then try to install updates.
Method 5. Fix Windows Update Error 0XC1900101–0x20017 by repairing system files.
The next method to fix the error 0XC1900101–0x20017 in Windows 11 24H2 update, is to repair the Windows installation and System Files using the DISM and SFC tools.
1. Open Command Prompt as Administrator. (To do that, type «cmd» in Search and then at «Command Prompt» result, select «Run as Administrator»)

2. At the command prompt window, type the following command & press Enter:
- dism.exe /Online /Cleanup-Image /Restorehealth

3. Be patient until ‘Deployment Image Servicing and Management’ (DISM) tool repairs the component store.
4. When the operation is completed, give the command below to repair the system files and press Enter:
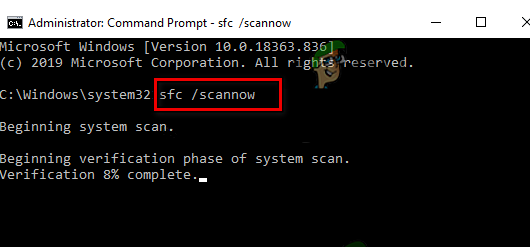
- sfc /scannow

5. When SFC scan is completed, restart your computer.
6. After restarting try to install the Windows 11 24H2 update again.
Method 6. Upgrade to Windows 11 24H2 using Windows 11 ISO file.
Another method to solve the mentioned problem is to repair & upgrade Windows from a Windows ISO file. For this task, read the instructions in the following article:
- How to Repair Windows 11 with an In-Place Upgrade.
Method 7. Clean Install Windows.
The final method to fix the mentioned problem, is to backup your files and to perform a fresh installation of Windows. For this task, read the instructions in the following article:
- How to Clean Install Windows 11.
That’s it! Which method worked for you?
Let me know if this guide has helped you by leaving your comment about your experience. Please like and share this guide to help others.
If this article was useful for you, please consider supporting us by making a donation. Even $1 can a make a huge difference for us in our effort to continue to help others while keeping this site free:
- Author
- Recent Posts
Konstantinos is the founder and administrator of Wintips.org. Since 1995 he works and provides IT support as a computer and network expert to individuals and large companies. He is specialized in solving problems related to Windows or other Microsoft products (Windows Server, Office, Microsoft 365, etc.).
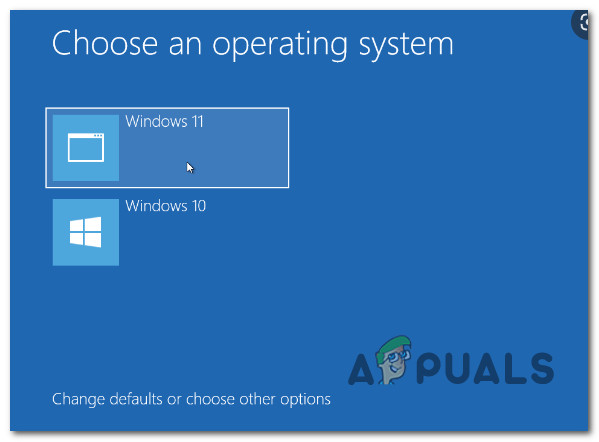
If you’re having difficulties making the dual-boot menu appear on Windows 10 or Windows 11, there are several potential causes why you can expect to deal with this behavior. This article will walk you through all the possible reasons you might deal with this issue and showcase several available fixes that should allow you to correct this behavior.
After investigating this particular issue thoroughly, it turns out that there are several common scenarios that might spawn this error. Here’s a list of culprits that you should troubleshoot when attempting to fix this issue on Windows 11 or Windows 10:
- The boot menu is not activated – The situation when the multi-boot option is truly deactivated is the most frequent reason you can anticipate dealing with this issue. Use an elevated CMD Prompt to verify if the boot menu is enabled if you are confident that the dual boot environment was set up successfully.
- Fast Startup forces the default OS – Windows will lock the installation drive if Fast Startup is chosen. As a direct result of this, Windows may not be able to recognize the operating system on a dual-boot PC. Disable the rapid action functionality if you think the fast startup feature is really what’s causing this behavior.
- The startup and Recovery menu is incorrectly configured – Another circumstance where you could expect to experience this issue is one in which the dual boot menu is presented for a short period of time for you actually to see it. You may resolve this issue by changing the boot sequence using the advanced system settings or utilizing third-party software if you only see the menu for a little moment before the default option takes over.
- Corrupted system files – If you’ve reached this point and are still without a workable fix, you should look into the likelihood that system file corruption has harmed your dual boot arrangement. Applying successive DISM and SFC scans will do this.
Now that we have gone over every potential reason why the dual boot menu doesn’t appear when you boot up your PC (after successfully setting up dual booting on your PC) follow the methods below to troubleshoot the issue.
Note: All the potential fixes below assume that you already have configured a dual boot environment (Windows 10 and 11). If you’re looking for specific instructions on how to do this, follow these steps.
1. Enable the Boot menu via CMD
The most common cause of why you might expect to deal with this issue is a scenario where the multi-boot menu is disabled. If you are sure that the dual boot environment was set up correctly, you should first use an elevated CMD Prompt to check if the boot menu is enabled.
Note: If the dual boot menu is disabled, the boot sequence will automatically boot from the default OS instead of allowing you to select from the available boot options.
If you’re not sure whether the boot menu is enabled on your Windows environment, follow the instructions below for specific instructions on how to enable it:
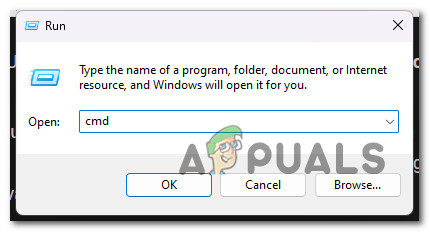
- Press the Windows key + R to open up a Run dialog box.
- Next, type ‘cmd’ inside the Run dialog box and press Ctrl + Shift + Enter to open up an elevated CMD prompt.

Open a CMD window - Click Yes to grant admin access at the User Account Control (UAC).
- Once you’re finally inside the elevated CMD prompt, type or paste the following command to make sure the boot menu is displayed:
bcdedit /set {bootmgr} displaybootmenu yesNote: If you see the ‘operation completed successfully’ message, the boot menu was deactivated, and you’ve just enabled it.
- Restart your PC and see if the dual boot menu appears at the next computer startup.
If this method didn’t work for you or the dual boot menu was already activated in your case, move down to the following method below.
2. Re-configure the Startup & Recovery menu
Another reason why you might expect to see this problem is a scenario where the timeframe in which the dual boot menu is displayed is too small for you to see it. If you briefly see the menu but don’t have time to select anything before the default option kicks in, this method will help you change this behavior.
The Advanced System Settings pane in Windows 10 and Windows 11 gives you the option to pick the operating system that will launch automatically when the computer starts up. It can display a list of operating systems and recovery alternatives during a restart.
By configuring these settings, you may be able to restore a dual boot option that has been removed from Windows 10 or 11.
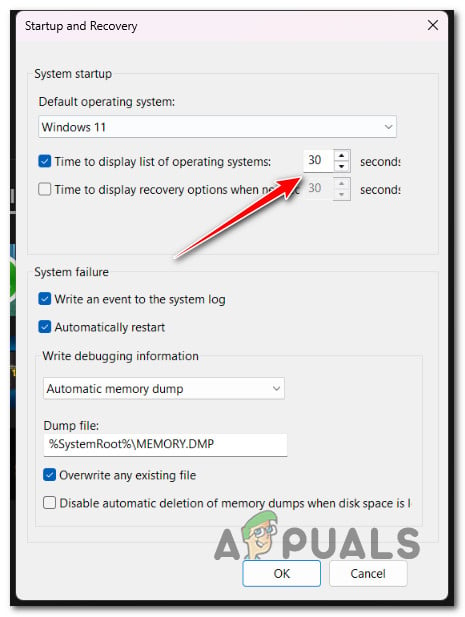
Note: This method involves accessing the Advanced system settings menu (under the About tab) and modifying the Time to display list of operating systems to 30 seconds or more.
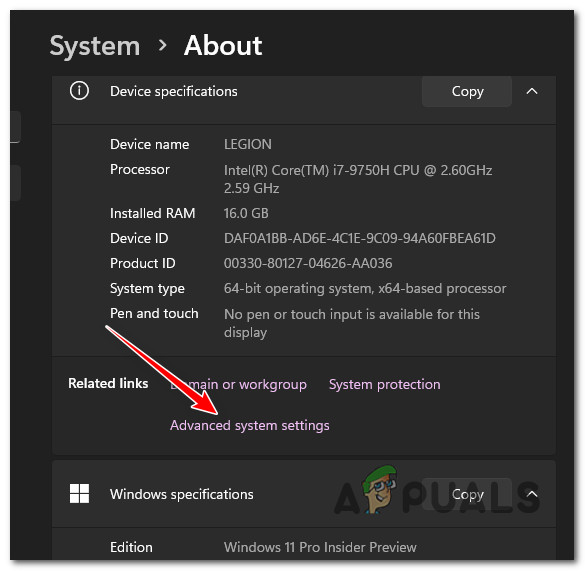
- For Settings to open, press Win + I.
- Then select System from the left-hand menu, and click the About tab.
- Click on Advanced system settings in the Related settings section by scrolling down.

Accessing the Advanced System settings menu Note: On earlier Windows 10 machines, select Advanced system settings from the left pane by going to Control Panel > System and Security.
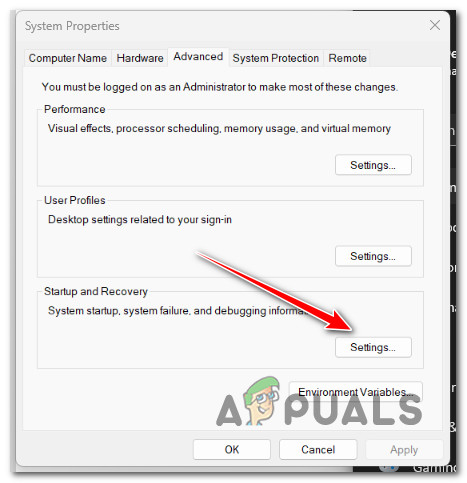
- First, select the Advanced tab, then find the Startup and Recovery section and click the Settings button in the resulting System Properties window.

Accessing the Startup recovery menu - Select your favorite OS by clicking the drop-down arrow next to “Default operating system” in the Startup and Recovery box.
- Then select 30 seconds under the Time to display list of operating systems option. If this setting is used, your computer will display the boot menu for 30 seconds.

Modify the system startup settings Note: The operating system you chose as the default will load once this period of time has passed.
- To save the changes, click OK, reboot your PC, and see if the dual boot menu appears.
If you still aren’t given the option to select between your available operating systems, move down to the following method below.
3. Re-Configure the Boot Manager (using EASYBCD)
The bcdedit command featured in the first method does not always function correctly. Either it is unable to launch the boot menu, or it continues to be inoperable even after displaying the notification that it was successful.
When faced with a scenario such as this, you can use a third-party tool known as EasyBCD to create a boot entry.
Note: EasyBCD is a simple tool that runs on the Windows platform and is available for free in personal and non-business settings.
If you don’t mind using a 3rd party tool, follow the instructions below to reconfigure the boot manager using EasyBCD:
- First, open your default browser, visit the official EASYBCD download page and click on See More.
Note: There are commercial and non-commercial versions of EasyBCD. Click Register to download the free version to get the tool, then provide your login and email address. - Launch the installer, then watch as the program installs itself on your computer.
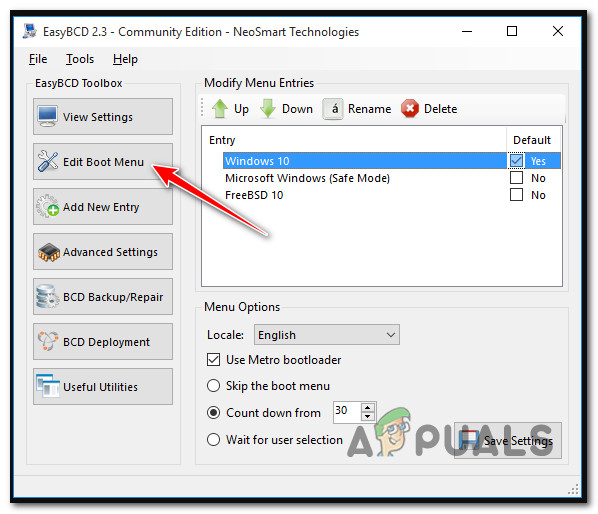
- Open EasyBCD, then choose the Edit Boot Menu option.

Edit Boot Menu - A dual boot entry will, by default, be included here. To change the default OS, check the box next to the entry you wish to make default in the Default column.
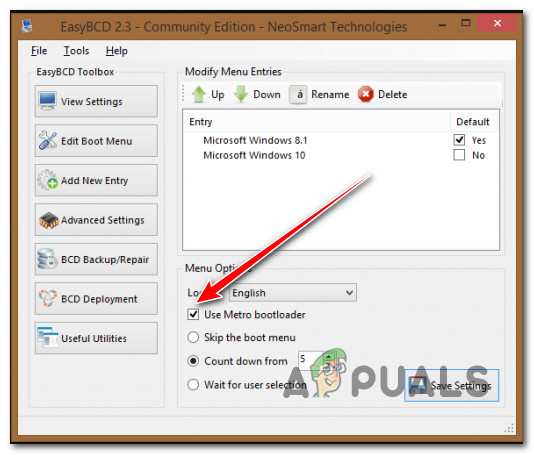
- Check the Use Metro bootloader box under Menu Options.

Use Metro Bootloader - Set the timer to 30 seconds and choose Count down from.
- You will get the Bootloader settings saved notification successfully after clicking Save Settings.
- Once you have successfully modified the BCD process, reboot your PC and see if you can now access the dual boot menu.
4. Disable Windows Fast Startup
The Windows 10 feature known as “Fast Startup” makes it possible for you to start your computer once it has been shut down quickly. When turned on, it will store your operating system in a hibernation file, making booting up much quicker. It is a valuable function on older computers, especially if your system takes all the time in the world to restart, which is one of the situations in which this feature comes in handy.
However, it has certain downsides as well. Windows will lock the installation disk if the Fast Startup option is selected. Consequently, Windows cannot identify the operating system on a computer set up to dual-boot.
If you suspect that the fast startup functionality is causing this behavior, follow the instructions below to disable it:
Note: This method is confirmed to be effective on both Windows 10 and Windows 11.
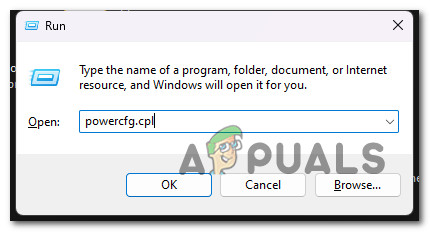
- To enter the Run dialog box and the Power Options menu, press the Windows key + R.
- After that, enter “powercfg.cpl” into the Run menu.
Open the Power Options menu - Select Choose what the power buttons do from the left-side menu in the Power Options window.
- Select Change settings that are not accessible right now from the System Settings menu.
- After that, click Save changes after unchecking the option next to Turn on quick startup (recommended) (at the bottom of this window).

Turn on Fast Startup - Restart your computer, and see if the dual boot menu appears on the initial screen.

If the same problem still occurs, move to the following method below.
5. Use the System Configuration tool
If customizing the Startup and Recovery option does not produce the desired results, you may use the System Configuration tool to modify the boot menu. You can control and choose your preferred operating system (OS) in a dual boot configuration and set a timeout for the boot menu.
To configure the boot menu with the use of the tool for system configuration, follow these steps:
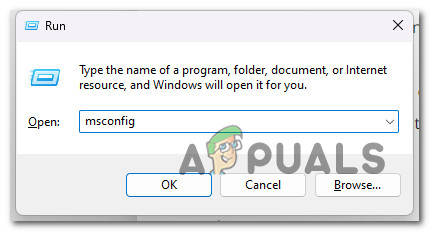
- Start by opening a Run dialog box. You can do this by pressing the Win key + R.
- To launch the System Configuration tool, enter msconfig and hit OK.
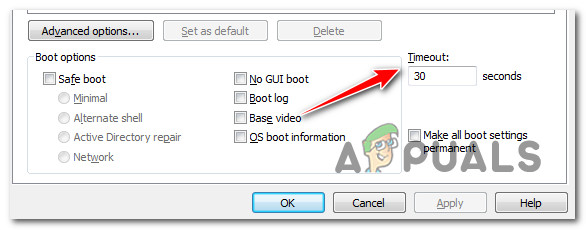
Open the System Configuration menu - Once you’re inside, open the Boot tab. It will display all the installed operating systems on your PC (if you have a dual boot configuration).
- Click the Set as default button after choosing the OS that isn’t already the default.
- Next, enter 30 or 60 in the Timeout column.

Timeout Column msconfig Note: These settings are expressed in seconds, so if you set it to 30, the boot manager will hold off loading the default OS for 30 seconds.
- To save the changes, click OK and Apply. Pick Restart if a request to restart displays.
- The dual boot option will appear as soon as your computer restarts.
- To load the operating system, enter after selecting the OS with the arrow keys.
6. Deploy DISM & SFC scans
If you’ve come to this stage and still haven’t found a practical solution, you should investigate the possibility that your dual boot configuration has been negatively impacted by system file corruption.
Unless you want to go the third-party route, it would be prudent to use a few built-in tools (SFC and DISM).
Note: These two built-in tools can be used to resolve system file corruption that may prevent your OS from addressing dependencies used by Windows Update.
The most common sorts of corruption that might cause this kind of issue can be fixed by the two built-in tools, System File Checker and Deployment Image Servicing and Management.
The best place to begin is with a System File Checker scan because it can be done without an ongoing internet connection.
Note: System File Checker uses a locally stored cache to swap broken system file components with functional ones. To avoid making any further logical errors, this process shouldn’t be halted until it’s finished.
If you’re using an outdated HDD rather than a more modern SSD, this process might take up to an hour or more, depending on your read and write speeds.
Important: Do not close the window before the real-time tracking has resumed if the System File Checker scan in your case, temporarily stalls while running.
Once the SFC scan is complete, restart your computer to see whether the voice mixer issue has been fixed.
If the problem is still there, run a DISM scan.
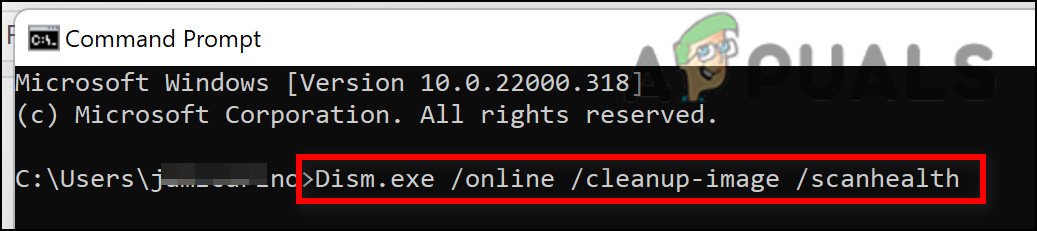
Before starting this process, take note: Since DISM uses a portion of Windows Update to replace corrupted files with equivalents free of corruption, make sure your Internet connection is steady.
After doing the SFC and DISM checks, restart your computer to see whether the dual boot issues have been resolved.