
При установке Windows 11, а также при обновлении до новой версии или установке обновлений в Центре обновления Windows пользователи могут столкнуться с различными ошибками, код которых начинается с 0xc1900101 и может содержать дополнительный код и описания.
В этой инструкции подробно о наиболее частых причинах таких ошибок и способах, которые могут помочь их исправить.
Возможные причины ошибок 0xC1900101 и как её исправить

Ошибки с кодом 0xC1900101 имеют различные дополнительные коды и описания, в частности:
- 0xC1900101 — 0x2000C — ошибка на этапе установки SAFE_OS во время операции APPLY_IMAGE
- 0xC1900101 — 0x20017 — ошибка на этапе установки SAFE_OS во время операции BOOT
- 0xC1900101 — 0x30018 — ошибка на этапе установки FIRST_BOOT во время операции SYSPREP
- 0xC1900101 — 0x3000D — ошибка на этапе установки FIRST_BOOT во время операции MIGRATE_DATA
- 0xC1900101 — 0x4000D — ошибка на этапе установки SECOND_BOOT во время операции MIGRATE_DATA
- 0xC1900101 — 0x40017 — ошибка на этапе установки SECOND_BOOT во время операции BOOT
Несмотря на то, что на официальном сайте Майкрософт сообщается о том, что ошибки 0xc1900101 обычно вызваны драйверами, это — возможная, но не единственная причина.
Далее — по порядку возможные причины и способы исправить различные ошибки 0xC1900101:
- Недостаток места на системном разделе диска для выполнения установки обновления (особенно в случае дополнительного кода 0x2000C). Решение — освободить достаточное количество места, я рекомендую более 20 Гб, поскольку ошибка обычно возникает при установке объёмных обновлений компонентов и новых версий Windows. Начать очистку можно с использования встроенных средств системы.

- Наличие неподписанных или неподдерживаемых новой версией ОС драйверов устройств (в том числе виртуальных), а также драйверов, устанавливаемых программами: сторонними антивирусами, средствами для модификации сетевых подключений и других. Решение: удалить соответствующие драйверы, программы, сторонние антивирусы, отключить от компьютера необязательные периферийные устройства. Если ранее вы устанавливали драйверы устройств с помощью сторонних программ, рекомендую выполнить их установку с официального сайта производителя материнской платы или ноутбука для вашей модели устройства.
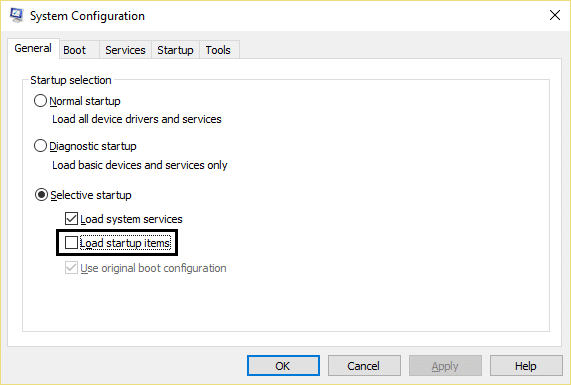
- Влияние сторонних служб и фоновых процессов. Можно попробовать выполнить обновление, загрузившись в режиме чистой загрузки.
- Проблемы с конфигурацией разделов на диске, часто — при наличии нескольких разделов с загрузчиком (от актуальной и предыдущих систем), разделе с загрузчиком на отдельном физическом диске. Возможный вариант решения — перенести раздел с загрузчиком на системный диск, избавиться от неиспользуемых EFI-разделов.
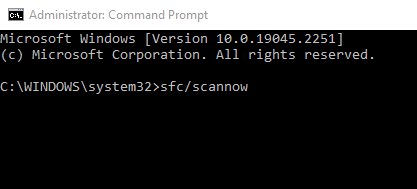
- Повреждение системных файлов текущей ОС Windows. Решение — запустить командную строку от имени администратора и по порядку выполнить команды:
dism /online /cleanup-image /restorehealth
sfc /scannow
- Проблемы с файловой системой на системном разделе диска. Попробуйте выполнить проверку диска на ошибки: запустите командную строку от имени администратора, выполните команду
chkdsk C: /f
вам будет предложено выполнить проверку после перезагрузки компьютера. Согласитесь (введите Y и нажмите Enter), после чего перезагрузите компьютер.

- Проблемы в работе устройств и драйверов: откройте диспетчер устройств (правый клик по кнопке «Пуск» — «Диспетчер устройств») и убедитесь, что в списке отсутствуют устройства с ошибками, при наличии — устраните их, посмотрев в свойствах устройства описание ошибки и найдя решение для неё.


Описанные выше методы могут сработать, но не во всегда. Если в вашем случае проблема не решилась, можно попробовать некоторые дополнительные варианты из следующего раздела.
Дополнительная информация
Если очевидных причин ошибки нет, рекомендую изучить журналы обновления Windows, возможно, в них вы найдёте, что именно привело к сбою при обновлении и установке. Подробная информация о расположении файлов журнала доступна на официальном сайте Майкрософт.
В случае, если журналы не помогли или разобраться с ними не получается, ниже — ещё несколько «общих» способов установить Windows 11 или её новую версию при ошибках 0xC1900101:
- Проверьте, производится ли установка, если отключить Secure Boot в БИОС/UEFI
- Загрузите образ ISO с системой, до которой вы хотите обновиться, смонтируйте его в системе (правый клик по ISO-образу — «Подключить»), отключитесь от Интернета и запустите файл setup.exe с подключенного образа. Выполняйте установку без подключения к Интернету и отказавшись от поиска и установки дополнительных обновлений.
- При наличии нескольких дисков на компьютере, физически отключите все кроме системного.
В крайнем случае вы можете выполнить установку новой версии системы путём чистой установки с флешки — этот вариант в большинстве случаев (за исключением проблем с дисками или иным оборудованием) проходит без ошибок.

-
Microsoft Support & Malware Removal
-
Windows Update
You should upgrade or use an alternative browser.
[SOLVED] 0xc1900101 — 0x30018 installation failed at FIRST_BOOT phase with a error during SYSPREP_SPECIALIZE
-
Thread starter
Thread starterkeenanj
-
Start date
Start date
- Joined
- Nov 14, 2021
- Posts
- 62
-
-
#1
Also get the same error when I try windows update Feature update to Windows 10, version 20H2 has failed multiple times in the same way
Maxstar
Moderator, Windows Update Expert, Security Analyst
-
-
#2
I will look into your problem. But first, follow all the steps in the Posting Instructions.
Please also check if the following files exists? If so attach these files also to your next reply.
C:\$Windows.~BT\Sources\Panther\Setupact.log
C:\$Windows.~BT\Sources\Rollback\Setupact.log
C:\$Windows.~bt\Sources\Rollback\setupapi\setupapi.dev.log
- Joined
- Nov 14, 2021
- Posts
- 62
-
-
#3
setupact.log
thank you so much been trying to upgrade forever!
Maxstar
Moderator, Windows Update Expert, Security Analyst
-
-
#4
Please attach also the requested files from the posting instructions (See this link).
- Joined
- Nov 14, 2021
- Posts
- 62
-
-
#5
here is the CBS log
CBS.zip
- Joined
- Nov 14, 2021
- Posts
- 62
-
-
#6
Maxstar
Moderator, Windows Update Expert, Security Analyst
-
-
#7
Sorry for the delay. Fixing this problem can take a long time, so the quickest way to resolve this problem is to perform a clean install.
Please let me know what you prefer, a clean install or trying to fix it.
- Joined
- Nov 14, 2021
- Posts
- 62
-
-
#8
If I cant upgrade I would just say at this win 10 build for as long as possible.
Maxstar
Moderator, Windows Update Expert, Security Analyst
-
-
#9
Okay, but this version of Windows 1803 is not supported anymore since November 2019.
- Open Windows Explorer and browse to the C:\Windows\INF folder.
- Right-click on the file setupapi.dev and choose Send to > Compressed (zipped) folder.
- Now the message will appear, «Windows cannot create the Compressed (zipped) Folder here. Do you want it to be placed on the desktop instead?»
- Click on the Yes button here.
- Attach the file setupapi.dev.zip in your nex reply.
- Joined
- Nov 14, 2021
- Posts
- 62
- Joined
- Nov 14, 2021
- Posts
- 62
-
-
#11
Maxstar
Moderator, Windows Update Expert, Security Analyst
-
-
#12
Yes but I am waiting for approval of my fix.
Maxstar
Moderator, Windows Update Expert, Security Analyst
-
-
#13
Download the
Farbar Recovery Scan Tool and save it to your Desktop:
Download the 64 bit version: — Farbar Recovery Scan Tool Link
Warning: This script was written specifically for this system. Do not run this script on another system.
- Download the attachment fixlist.txt and save it to your desktop.
- Right-click on FRST.exe and select «Run as administrator».
- Press the Fix button.
- If for some reason the tool needs a restart, please make sure you let the system restart normally.
- When finished, a log called Fixlog.txt will appear in the same directory the tool is run from.
- Post the logfile Fixlog.txt as attachment in your next reply.
Attachments
-
Fixlist.txt
- Joined
- Nov 14, 2021
- Posts
- 62
Maxstar
Moderator, Windows Update Expert, Security Analyst
-
-
#15
Start the
Farbar Recovery Scan Tool again and perform a scan.
- Note: Your antivirus program may report FRST incorrectly as an infection. If so, disable the real-time protection when downloading and running FRST.
- Right-click to run the tool as administrator. When the tool opens click Yes to disclaimer.
- Note: Ensure that the Addition.txt check box is checked at the bottom of the form within the Optional Scan area.
- Press the Scan button.
- Please wait for the tool to finish. It will produce two logfiles called FRST.txt and Addition.txt in the same directory the tool is run from (which should be the desktop)
- Post the logfiles FRST.txt and Addition.txt as attachment in your next reply.
Maxstar
Moderator, Windows Update Expert, Security Analyst
-
-
#17
Unfortunately there is evidence of a illegal version of Windows (or Office) and other (Adobe) software on your computer.
I am going to request you completely uninstall all the illegal software for which you do not have a valid license before I provide further assistance.
If you prefer to leave the program(s) on your computer let me know that.
- Joined
- Nov 14, 2021
- Posts
- 62
-
-
#18
Maxstar
Moderator, Windows Update Expert, Security Analyst
-
-
#19
Please do so, and perform the intructions in post #15 again. Then I’ll look at the new log files.
Be aware that all the remnants of KMS files and other tweaks will be removed!
- Joined
- Nov 14, 2021
- Posts
- 62
-
-
#20
Attachments
-
Addition.txt
-
FRST.txt
Has Sysnative Forums helped you? Please consider donating to help us support the site!
-
Microsoft Support & Malware Removal
-
Windows Update
Readers help support Windows Report. We may get a commission if you buy through our links.
Read our disclosure page to find out how can you help Windows Report sustain the editorial team. Read more
Many people have reported that they were stuck with installation failed in the first boot phase with an error during Sysprep operation while updating their Windows computer. The issue could have been caused due several reasons.
Here, in this guide, we will discuss the available fixes to resolve the Windows 10 first boot error right after examining the reasons for the same.
What causes the installation failed in the first boot phase error?
There could be several reasons for the error to occur; we have mentioned some of the popular ones here:
- Hardware issues – You might get this error if your RAM or hard drive is damaged or faulty.
- Wrong system configuration – If your computer has incorrect BIOS settings or bad drivers installed, you can get this error while updating your PC.
- The installation process was interrupted – If there is a power failure or system crash during installation of the update, you might see this error.
- Installation media is corrupt – The error could have appeared because of the corrupted installation drive or disc used to upgrade your Windows computer.
- Computer infected with malware or virus – The malware or virus infection on your computer might corrupt the system files or configuration, hence the error.
How to fix the installation failed in the first boot phase error?
Before moving ahead with the troubleshooting steps, make sure you go through these preliminary checks:
- First, remove all the external devices except the necessary peripherals.
- Run Disk Cleanup.
- Make sure you have at least 20 GB of space on your hard drive.
- Run your computer in a clean boot environment and try the installation.
- Disable Antivirus.
If none of these worked for you, let us check out the detailed troubleshooting methods to fix the issue:
1. Rename the Software distribution folder
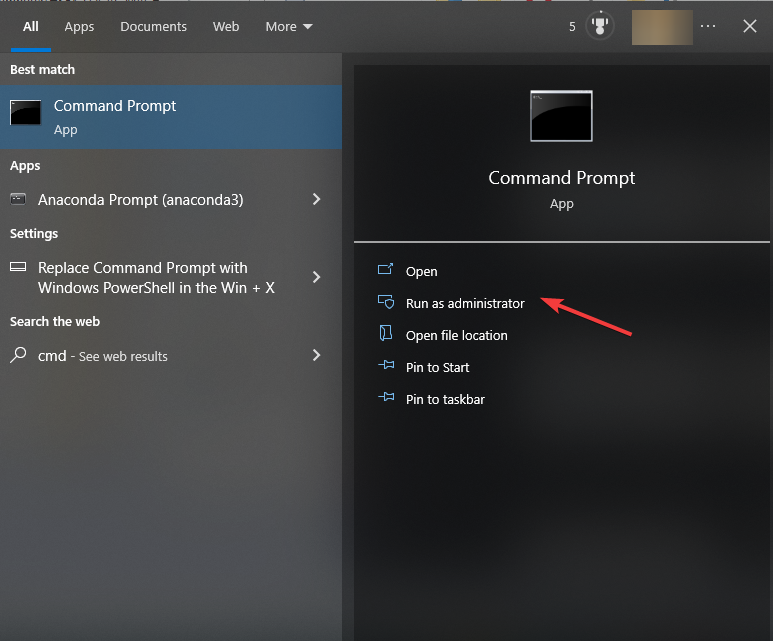
- Go to the Search bar, type CMD and click Run as administrator.

- Copy and paste the following commands one by one and press Enter after every command:
net stop wuauservnet stop cryptSvcnet stop bitsnet stop msiserverrename c:\windows\SoftwareDistribution SoftwareDistribution.baknet start wuauservnet start cryptSvcnet start bitsnet start msiserver - Close the Command Prompt window.
2. Run the Windows Update troubleshooter
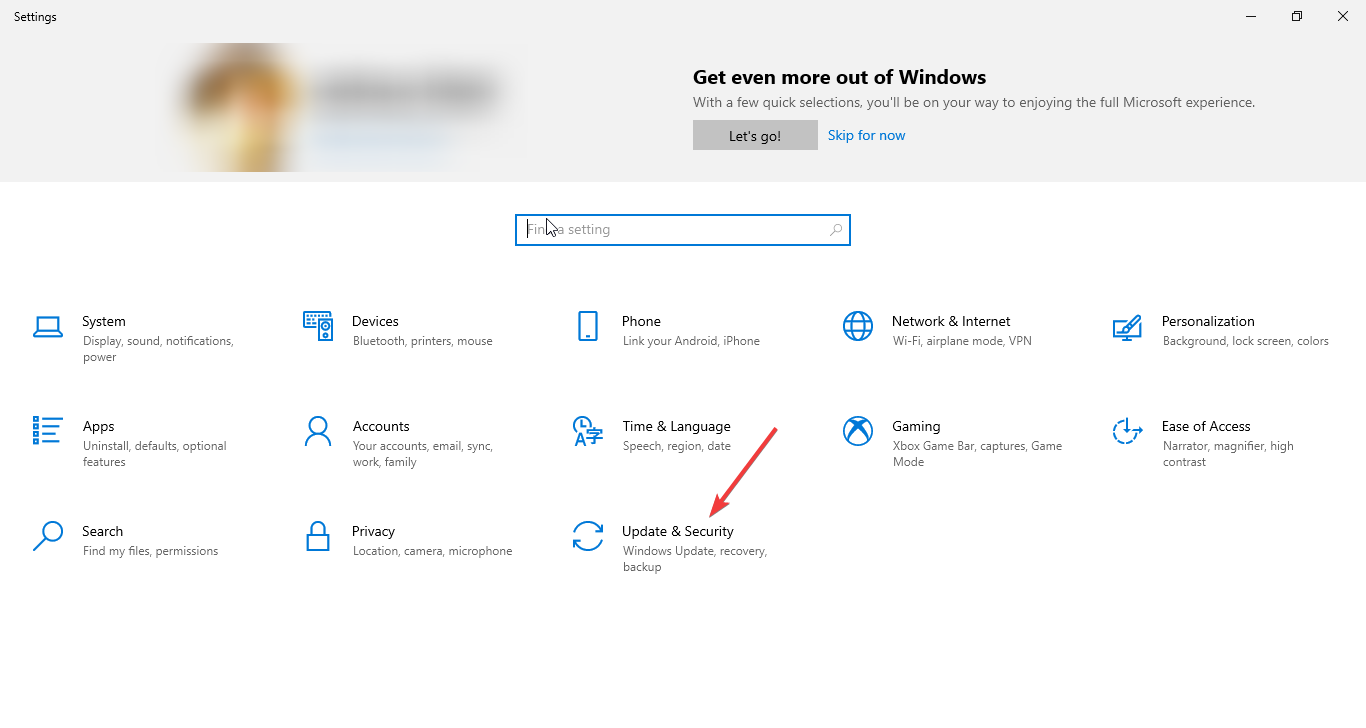
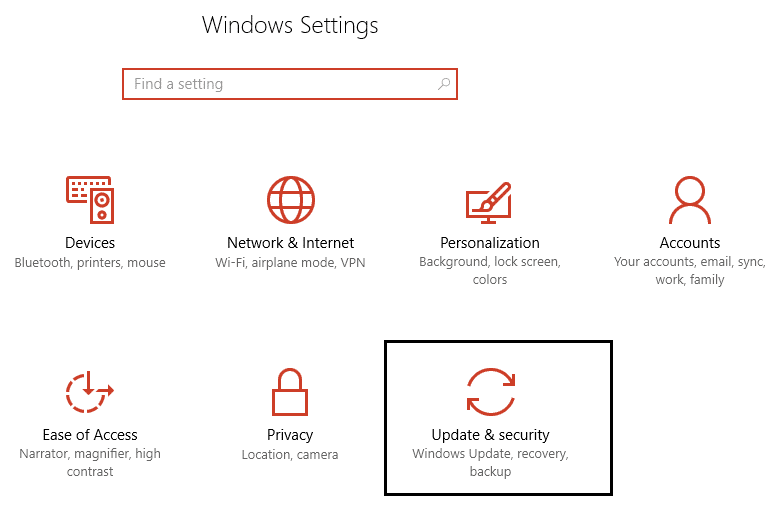
- Press Windows + I to get Settings.
- Go to Update & Security.

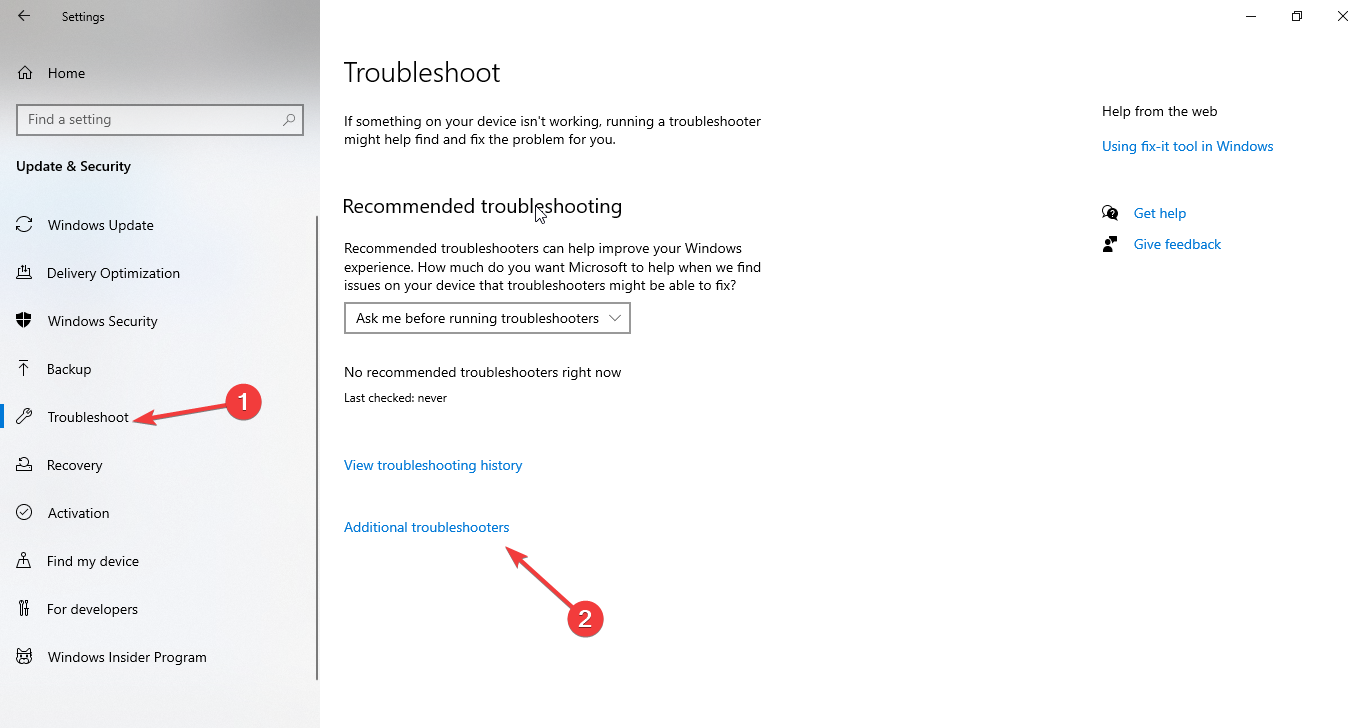
- Now, select Troubleshooting from the left pane, and click Additional troubleshooters.
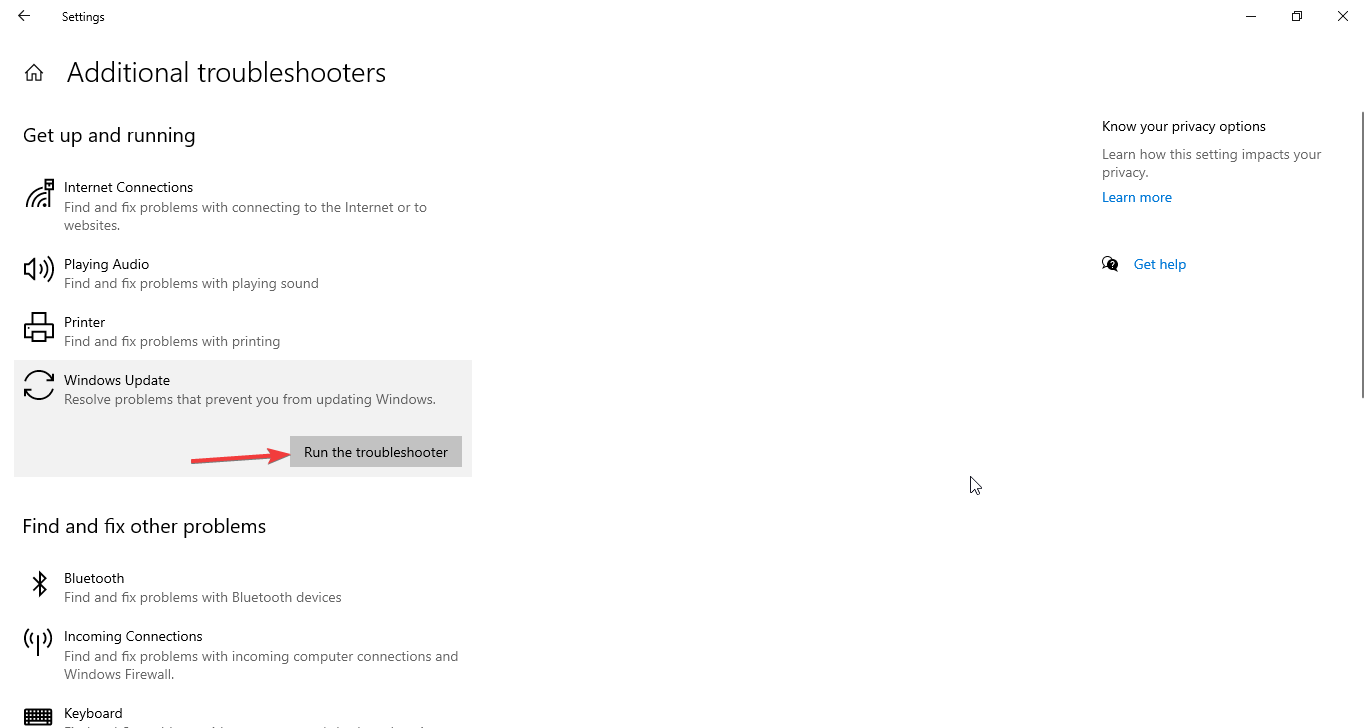
- Under Get up and running, select Windows Update and click Run the troubleshooter.
- Follow the on-screen instructions to complete the process.
3. Make changes in Registry Editor
- Press Windows + R to open the Run window.
- Type regedit and press Enter to open the Registry Editor.
- Go to the following path:
Computer\HKEY_LOCAL_MACHINE\SOFTWARE\Microsoft\WindowsUpdate\OSUpgrade - Right-click the OSUpgrade folder, select New, and then click DWORD (32-bit) Value.

- Rename it AllowOSUpgrade. Double-click it and set the Value data to 1 and click OK.

- Close Registry Editor and restart your computer.


- Recent Windows 11 update lets you disable profanity filter in voice typing
- Microsoft wants Windows 10 users to upgrade to Windows 11 or Copilot + PCs
- Windows 11 KB5055627 update makes File Explorer more fluid
- A few keyboard settings are moving from Control Panel to Settings app in Windows 11
- Microsoft finally launches the controversial Recall feature after a long delay
4. Disable Secure Boot
- Press Windows + I to open Settings. Go to Update & Security.
- Click on Recovery and go to Advanced startup and click Restart now.
- From the Choose an option page, click Troubleshoot.

- Now click Advanced Settings.

- On the Advanced Settings page, click UEFI Firmware Settings.

- Click Restart from the next page.

- Now select the appropriate option to enter BIOS.
- Go to System configuration, then select Secure Boot and disable it.


5. Scan and fix corrupted files
- Go to the Search bar, type CMD and click Run as administrator.
- Type the following command and press Enter: chkdsk volume:/r

- Once the process is complete, copy and paste the following command and press Enter: sfc/scannow

- As the process completes, type the following commands and press Enter after every command:
DISM /Online /Cleanup-Image /CheckHealthDISM/Online /Cleanup-Image /ScanHealthDISM/Online /Cleanup-Image /RestoreHealth

6. Perform old devices and drivers cleanup
- Go to the Search bar, type CMD and click Run as administrator.
- Type the following commands and press Enter after every command:
rundll32.exe pnpclean.dll,RunDLL_PnpClean /DRIVERS /MAXCLEANexit
- Restart your computer and try to update again.

So, you can use these methods to fix the installation that failed in the first boot phase with an error during the Sysprep operation. Try them and let us know what worked for you in the comments below.
Loredana Harsana
Windows Software Expert
Loredana is a passionate writer with a keen interest in PC software and technology. She started off writing about mobile phones back when Samsung Galaxy S II was on top of the world and she fell in love with tech of all sorts.
Whenever she’s not at her work desk, you’ll find her enjoying refreshing tea flavors, spilling stories on paper, and listening to the radio.
Fix The Installation Failed In The First Boot Phase Error: If you are upgrading to Windows 10 or upgrading to a new major update from Microsoft then chances are the installation may fail and you will be left with an error message saying “We couldn’t install Windows 10.” If you look closely you will find some additional information at the bottom which would be an error code 0xC1900101 – 0x30018 or 0x80070004 – 0x3000D depending upon the type of error. So these are the following error which you can receive:
0x80070004 – 0x3000D
The installation failed in the FIRST_BOOT phase with an error during MIGRATE_DATE operation.
0xC1900101 – 0x30018
The installation failed in the FIRST_BOOT phase with the error during SYSPREP operation.
0xC1900101-0x30017
The installation failed in the FIRST_BOOT phase with an error during BOOT operation.

Now all the above errors are either caused due to incorrect registry configuration or due to device drivers conflict. Sometimes 3rd party software can also cause the above errors, so we need to troubleshoot the issue and fix the cause in order to resolve this error. So without wasting any time let’s see how to actually Fix The Installation Failed In The First Boot Phase Error with the help of below-listed troubleshooting guide.
Table of Contents
Make sure to create a restore point just in case something goes wrong.
Note: Make sure to disconnect any external devices connected to PC.
Method 1: Temporarily Disable Antivirus and Firewall
1.Right-click on the Antivirus Program icon from the system tray and select Disable.
2.Next, select the time frame for which the Antivirus will remain disabled.

Note: Choose the smallest amount of time possible for example 15 minutes or 30 minutes.
3.Once done, again try to connect to the WiFi network and check if the error resolves or not.
4.Press Windows Key + I then select Control Panel.
5.Next, click on System and Security.
6.Then click on Windows Firewall.

7.Now from the left window pane click on Turn Windows Firewall on or off.
8.Select Turn off Windows Firewall and restart your PC. Again try to open Google Chrome and see if you’re able to Fix The Installation Failed In The First Boot Phase Error.
If the above method doesn’t work make sure to follow the exact same steps to turn on your Firewall again.
Method 2: Check for Windows Update
1.Press Windows Key + I then select Update & Security.
2.Next, again click Check for updates and make sure to install any pending updates.

3.After the updates are installed reboot your PC and see if you’re able to Fix The Installation Failed In The First Boot Phase Error.
Method 3: Run Official Windows Update Troubleshooter
If nothing works till now then you should definitely try running Windows Update Troubleshooter from Microsoft Website itself and see if you’re able to Fix The Installation Failed In The First Boot Phase Error.
Method 4: Run Windows Update in Clean Boot
This would make sure that if any 3rd party application is conflicting with Windows update then you will be able to successfully install Windows Updates inside Clean Boot. Sometimes 3rd party software can conflict with Windows Update and therefore cause Windows Update to be Stuck. In order Fix The Installation Failed In The First Boot Phase Error, you need to perform a clean boot in your PC and diagnose the issue step by step.
Method 5: Make sure you have enough Disc Space
In order to install Windows update/upgrade successfully, you will need at least 20GB of free space on your hard disk. It not likely that the update will consume all the space but it’s a good idea to free at least 20GB of space on your system drive in order for the installation to complete without any problems.

Method 6: Rename SoftwareDistribution Folder
1.Press Windows Key + X then select Command Prompt (Admin).
2.Now type the following commands to stop Windows Update Services and then hit Enter after each one:
net stop wuauserv
net stop cryptSvc
net stop bits
net stop msiserver

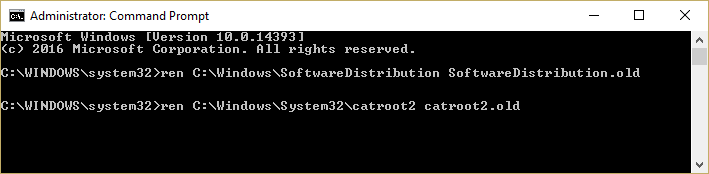
3.Next, type the following command to rename SoftwareDistribution Folder and then hit Enter:
ren C:\Windows\SoftwareDistribution SoftwareDistribution.old
ren C:\Windows\System32\catroot2 catroot2.old
4.Finally, type the following command to start Windows Update Services and hit Enter after each one:
net start wuauserv
net start cryptSvc
net start bits
net start msiserver

5.Reboot your PC to save changes.
Method 7: Registry Fix
1.Press Windows Key + R then type regedit and hit Enter to open Registry Editor.
2.Navigate to the following registry key:
Computer\HKEY_LOCAL_MACHINE\SOFTWARE\Microsoft\Windows\CurrentVersion\WindowsUpdate\OSUpgrade
3.If you don’t find the OSUpgrade key then right-click on WindowsUpdate and select New > Key.

4.Name this key as OSUpgrade and hit Enter.
5.Now make sure you have selected OSUpgrade and then in the right window pane right-click anywhere in the empty area and select New > DWORD (32-bit) value.

6.Name this key as AllowOSUpgrade and double click on it to change it’s value to 1.
7.Again try to install the updates or re-run the upgrade process and see if you’re able to Fix The Installation Failed In The First Boot Phase Error.
Method 8: Delete a particular file messing with upgrade
1.Navigate to the following directory:
C:\Users\UserName\AppData\Roaming\Microsoft\Windows\Start Menu\Programs\Orbx

Note: In order to see AppData folder you need to check mark show hidden files and folders from Folder Options.
2.Alternatively, you could press Windows Key + R then type %appdata%\Microsoft\Windows\Start Menu\Programs\Orbx and hit Enter to directly open AppData folder.
3.Now under Orbx folder, find a file called Todo, if the file exists make sure to permanently delete it.
4.Reboot your PC and again try the upgrade process.
Method 9: Update BIOS
Performing BIOS update is a critical task and if something goes wrong it can seriously damage your system, therefore, an expert supervision is recommended.
1.The first step is to identify your BIOS version, to do so press Windows Key + R then type “msinfo32” (without quotes) and hit enter to open System Information.
2.Once the System Information window opens locate BIOS Version/Date then note down the manufacturer and BIOS version.

3.Next, go to your manufacturer’s website for e.g in my case it’s Dell so I will go to Dell website and then I will enter my computer serial number or click on the auto detect option.
4.Now from the list of drivers shown I will click on BIOS and will download the recommended update.
Note: Do not turn off your computer or disconnect from your power source while updating the BIOS or you may harm your computer. During the update, your computer will restart and you will briefly see a black screen.
5.Once the file is downloaded, just double-click on the Exe file to run it.
6.Finally, you have updated your BIOS and this may also Fix The Installation Failed In The First Boot Phase Error.
Method 10: Disable Secure Boot
1.Restart your PC.
2.When the system restart Enter the BIOS setup by pressing a key during the bootup sequence.
3.Find the Secure Boot setting, and if possible, set it to Enabled. This option is usually in either the Security tab, the Boot tab, or the Authentication tab.

#WARNING: After disabling Secure Boot it may be difficult to re-activate Secure Boot without restoring your PC to the factory state.
4.Restart your PC and see if you’re able to Fix The Installation Failed In The First Boot Phase Error.
5.Again Enable the Secure Boot option from BIOS setup.
Method 11: Run CCleaner and Malwarebytes
1.Download and install CCleaner & Malwarebytes.
2.Run Malwarebytes and let it scan your system for harmful files.
3.If malware is found it will automatically remove them.
4.Now run CCleaner and in the “Cleaner” section, under the Windows tab, we suggest checking the following selections to be cleaned:
5.Once you’ve made certain the proper points are checked, simply click Run Cleaner, and let CCleaner run its course.
6.To clean your system further select the Registry tab and ensure the following are checked:
7.Select Scan for Issue and allow CCleaner to scan, then click Fix Selected Issues.
8.When CCleaner asks “Do you want backup changes to the registry?” select Yes.
9.Once your backup has completed, select Fix All Selected Issues.
10.Restart your PC to save changes and this would Fix The Installation Failed In The First Boot Phase Error, if not then continue with the next method.
Method 12: Run System File Checker and DISM Tool
1.Press Windows Key + X then click on Command Prompt(Admin).
2.Now type the following in the cmd and hit enter:
Sfc /scannow
sfc /scannow /offbootdir=c:\ /offwindir=c:\windows (If above fails then try this one)

3.Wait for the above process to finish and once done restart your PC.
4.Again open cmd and type the following command and hit enter after each one:
a) Dism /Online /Cleanup-Image /CheckHealth
b) Dism /Online /Cleanup-Image /ScanHealth
c) Dism /Online /Cleanup-Image /RestoreHealth

5.Let the DISM command run and wait for it to finish.
6. If the above command doesn’t work then try on the below:
Dism /Image:C:\offline /Cleanup-Image /RestoreHealth /Source:c:\test\mount\windows
Dism /Online /Cleanup-Image /RestoreHealth /Source:c:\test\mount\windows /LimitAccess
Note: Replace the C:\RepairSource\Windows with the location of your repair source (Windows Installation or Recovery Disc).
7.Reboot your PC to save changes.
Method 13: Troubleshooting
1.Press Windows Key + X then select Command Prompt (Admin).
2.Type the following command into cmd as it (copy and paste it) and hit Enter after each one:
takeown /f C:\$Windows.~BT\Sources\Panther\setuperr.log\setuperr.log
icacls C:\$Windows.~BT\Sources\Panther\setuperr.log\setuperr.log /reset /T
notepad C:\$Windows.~BT\Sources\Panther\setuperr.log

3.Now navigate to the following directory:
C:\$Windows.~BT\Sources\Panther
Note: You need to check mark “Show hidden files and folders” and uncheck “Hide operating system files” in Folder Options in order to see the above folder.
4.Double click on the file setuperr.log, in order to open it.
5.The error file will have information like this:
2017-07-07 13:24:01, Error [0x0808fe] MIG Plugin {0b23c863-4410-4153-8733-a60c9b1990fb}: LoadRegFromFile :: OpenFile error (C:\$WINDOWS.~BT\Work\MachineIndependent\Working\srcworking\agentmgr\CCSIAgent\005A4BDD\HKLM-E0xxxx04IME.reg) gle=2
2017-07-07 13:24:07, Error SP Error WRITE, 0x00000005 while gathering/applying object: File, C:\Windows\System32\Tasks [avast! Emergency Update]. Will return 0[gle=0x00000005]
2017-07-07 13:24:07, Error MIG Error 5 while applying object C:\Windows\System32\Tasks\avast! Emergency Update. Shell application requested abort[gle=0x00000005]
2017-07-07 13:24:07, Error [0x08097b] MIG Abandoning apply due to error for object: C:\Windows\System32\Tasks\avast! Emergency Update[gle=0x00000005]
2017-07-07 13:24:08, Error Apply failed. Last error: 0x00000000
2017-07-07 13:24:08, Error SP pSPDoOnlineApply: Apply operation failed. Error: 0x0000002C
2017-07-07 13:24:09, Error SP Apply: Migration phase failed. Result: 44
2017-07-07 13:24:09, Error SP Operation failed: OOBE boot apply. Error: 0x8007002C[gle=0x000000b7]
2017-07-07 13:24:09, Error SP Operation execution failed: 13. hr = 0x8007002C[gle=0x000000b7]
2017-07-07 13:24:09, Error SP Operation execution failed.[gle=0x000000b7]
2017-07-07 13:24:09, Error SP CSetupPlatformPrivate::Execute: Failed to deserialize/execute pre-OOBEBoot operations. Error: 0x8007002C[gle=0x000000b7]


2017-07-07 17:24:01, Error [SetupHost.Exe] ReAgentXMLParser::ParseConfigFile (xml file: C:\$WINDOWS.~BT\Sources\SafeOS\ReAgent.xml) returning 0X2
2017-07-07 17:24:06, Error SP CInstallDUUpdatesOffline::FindOperation: No info found in section DynamicUpdate.Drivers of file C:\$Windows.~BT\Updates\Critical\SetupPlatform.ini[gle=0x00000002]
2017-07-07 17:24:06, Error SP CInstallDUUpdatesOffline::FindOperation: No info found in section DynamicUpdate.GDRs of file C:\$Windows.~BT\Updates\Critical\SetupPlatform.ini[gle=0x00000002]
2017-07-07 17:24:06, Error SP CInstallDUUpdatesOffline::FindOperation: No info found in section DynamicUpdate.Langpacks of file C:\$Windows.~BT\Updates\Critical\SetupPlatform.ini[gle=0x00000002]
2017-07-07 17:24:06, Error SP CInstallDUUpdatesOffline::FindOperation: No info found in section DynamicUpdate.FeaturesOnDemand of file C:\$Windows.~BT\Updates\Critical\SetupPlatform.ini[gle=0x00000002]
2017-07-08 13:30:12, Error SP pSPRemoveUpgradeRegTree: failed to delete reg tree HKLM\SYSTEM\Setup\Upgrade[gle=0x00000005]
2017-07-08 13:30:19, Error [0x080831] MIG CSIAgent: Invalid xml format: FormatException: "id" attribute is mandatory. void __cdecl Mig::CMXEMigrationXml::LoadSupportedComponent(class UnBCL::XmlNode *,int,class Mig::CMXEMigrationXml *,class Mig::CMXEXmlComponent *)
2017-07-08 13:30:21, Error [0x080831] MIG CSIAgent: Invalid xml format: FormatException: Component with display name: Plugin/{39CC25F3-AF21-4C42-854D-0524249F02CE} already loaded __cdecl Mig::CMXEMigrationXml::CMXEMigrationXml(class Mig::CPlatform *,class UnBCL::String *,class UnBCL::XmlDocument *,class UnBCL::String *,class UnBCL::String *)
2017-07-08 13:30:40, Error [0x0808fe] MIG Plugin {65cbf70b-1d78-4cac-8400-9acd65ced94a}: CreateProcess(s) failed. GLE = d
2017-07-08 13:31:32, Error [0x0808fe] MIG Plugin {526D451C-721A-4b97-AD34-DCE5D8CD22C5}: [shmig] Failed to get preferred homegroup with hr=0x80070490
2017-07-08 13:31:32, Error [0x0808fe] MIG Plugin {ee036dc0-f9b7-4d2d-bb94-3dd3102c5804}: BRIDGEMIG: CBrgUnattend::CollectBridgeSettings failed: 0x1, 0
2017-07-08 13:31:38, Error [0x0808fe] MIG Plugin {D12A3141-A1FF-4DAD-BF67-1B664DE1CBD6}: WSLicensing: Failed to read machine binding, hr=0x80070002
2017-07-08 13:31:38, Error [0x0808fe] MIG Plugin {D12A3141-A1FF-4DAD-BF67-1B664DE1CBD6}: WSLicensing: Error reading Server Info hr=0x80070490
2017-07-08 13:31:41, Error CSetupAutomation::Resurrect: File not found: C:\$Windows.~BT\Sources\Panther\automation.dat[gle=0x00000002]
2017-07-08 13:31:41, Error SP CSetupPlatform::ResurrectAutomation: Failed to resurrect automation: 0x80070002[gle=0x00000002]
2017-07-08 13:32:03, Error MOUPG CSetupHost::ReportEventW(1618): Result = 0x8024F005
2017-07-08 13:32:03, Error MOUPG SetupHost: Reporting pending reboot event failed: hr = [0x8024F005]
2017-07-08 13:32:03, Error MOUPG CDlpManager::AsyncSerializeDisable(471): Result = 0x80070216
6.Find out what is stopping the install, address it by uninstalling, disabling or updating and retry the installation.
7.In the above file if you will look closely the issue is created by Avast and hence uninstalling it fixed the issue.
Recommended for you:
- Fix Printer Installation Error 0x000003eb
- How To Fix NETWORK_FAILED in Chrome
- Fix Google Chrome error He’s Dead, Jim!
- Fix Windows Settings won’t open
That’s it you have successfully Fix The Installation Failed In The First Boot Phase Error but if you still have any queries regarding this guide then feel free to ask them in the comment’s section.
***Join the hot discussion for fixing Windows 11 cumulative update failed to download and install
In the process of providing solutions to help Windows users resolve Windows 11 update issues, the error of ‘Windows 11 installation has failed’ seems happening frequently on Windows computers.
To help you get rid of this error, follow through with this guide and you’ll be able to install Windows 11 on your computer successfully on your own.
| Workable Solutions | Step-by-step Troubleshooting |
|---|---|
| Fix 1. Configure PC | Check and configure PC to be compatible with Windows 11…Full steps |
| Fix 2. Remove 0xC1900101 | Unplug the external device, remove GUP driver, configure startup…Full steps |
| Fix 3. Upgrade System Disk | Extend system drive volume, or upgrade Windows to new HDD/SSD…Full steps |
| Fix 4. Redownload Windows 11 | Download Windows 11 ISO and create installation media…Full steps |
The «Windows 11 installation has failed» error often happens when you run Windows Setup to configure a hard disk drive for installing a new Windows operating system like Windows 11.
Some unknown issues caused or stops the installation process of Windows 11, then the computer prompts this error message, notifying Windows users that the installation of Windows OS has failed.
So how do you fix this error? Let’s figure out the reasons why has the installation of Windows 11 failed on your computer and fix this issue immediately.
Why Has Windows 11 Installation Failed
Multiple possible reasons could prevent you from installing Windows 11 successfully on the computer.
Here is a list that you can follow to see if your Windows 11 installation task was blocked for the same reasons.
Causes of ‘Windows 11 installation has failed’ Error:
- External hard drives connected to PC.
- Driver conflict or drivers are outdated.
- PC is not compatible with Windows 11 or PC doesn’t meet Windows 11 requirements.
- Windows 11 installation failed in the safe_OS phase error
- Error code 0xC1900101
- This PC can’t run Windows 11 due to secure boot, UEFI, or MBR disk issues.
- Downloaded faulty Windows 11 ISO files or problematic insider preview build.
- More…
So how to get rid of this error and make Windows 11 installed on your computer successfully? Follow the guide on the next part, you’ll get this issue resolved on your own. Let’s move forward and see the details.
💡Read More: How to Fix Total Identified Windows Installations 0
How Do I Fix Windows 11 Installation Has Failed Error? Fix It Now
To get rid of the ‘Windows 11 installation has failed’ error, we have some quick check tips and a complete fix plan here. Please follow the tips and solutions one by one so to get rid of this error, complete Windows 11 installation on your PC.
Quick Tips to Fix ‘Windows 11 Installation Has Failed’ Error:
- Remove connected external hard drives, USB drives, or SD cards from PC.
- Update disk drivers or uninstall/reinstall disk drivers.
- Check if Windows 11 download is complete or genuine.
- Clean up malware or virus from PC.
After this, please restart your computer and retry to install Windows 11 on your computer again. If the installation completes, you can stop here. If not, relax and you can now move forward to get rid of the ‘Windows 11 installation has failed’ error from your computer successfully.
Solutions below can be applied to fix this error on Windows 10/8.1/8/7/XP/Vista.
Fix 1. Check and Configure PC to Be Compatible with Windows 11
Many Windows users who can’t install Windows 11 on their computers are because their computer doesn’t meet the Windows 11 system requirements.
So how to check if your computer meets the spec and Windows 11 requirements? Here, a reliable PC health checker — EaseUS Windows 11 Checker app can help.
This software will automatically check and inform you if your computer device is fully compatible with Windows 11. Let’s see:
Step 1. Launch EaseUS Partition Master and click «Toolkit».
Step 2. Click «Win11 Checker» to open this feature. Then click the Check Now button to start.
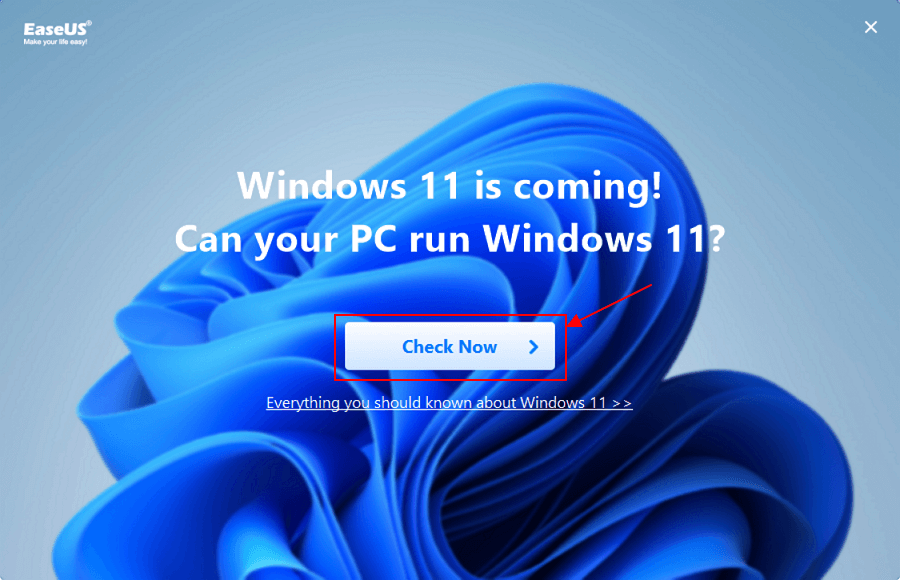
Step 3. The Windows 11 compatibility result window will soon appear. All the incompatible and compatible configuration items will be listed.
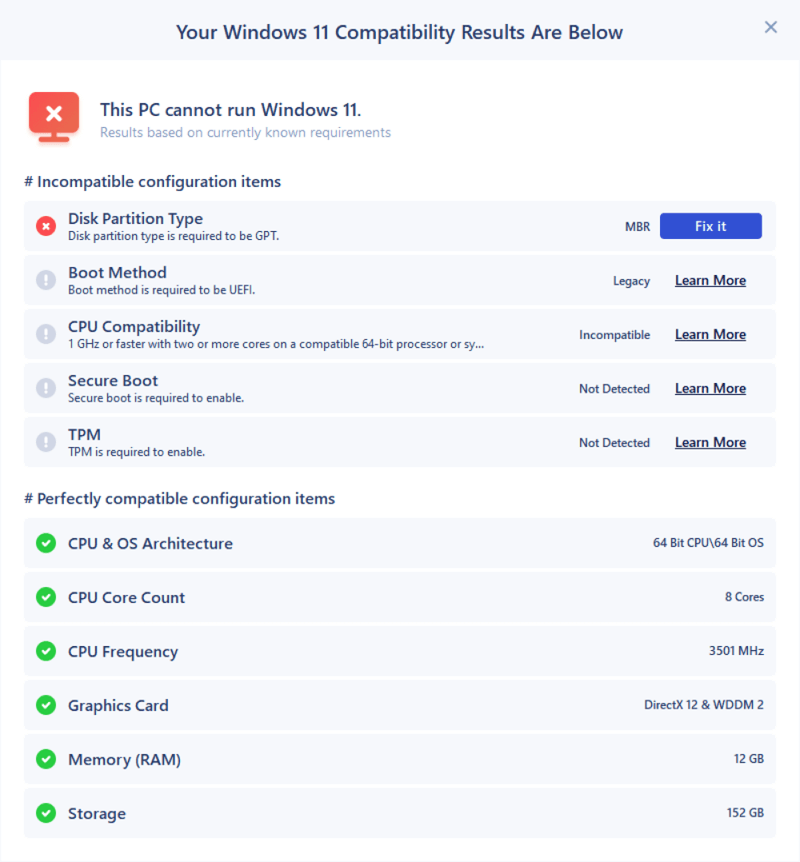
If the Windows 11 Checker found some issues on your computer, don’t panic. You can try the tips here for help:
#1. Boot Method — The boot method is required to be UEFI.
This notice means that your computer is not configured as UEFI boot mode. To install Windows 11 successfully, you should set the computer to UEFI boot mode first.
Enable UEFI Boot Mode
If you’re having trouble enable or configure Windows UEFI boot mode, here’s how you can disable or enable it within Windows.
#2. Disk Partition Type — Disk partition type is required to be GPT.
This notice means that your current target disk to be installed Windows 11 is with MBR disk type. However, Windows 11 requires GPT disk type to update or install. This is another common reason that so many people fail to install the latest Windows OS on their PCs.
To do so, you’ll need to apply the disk conversion feature in EaseUS Partition Master for help.
Video Guide: Convert MBR to GPT for Windows 11 Installation
#3. Secure Boot — Secure boot is required to enable.
Besides UEFI boot mode, Windows 11 installation also requires that your computer is configured to a secure boot mode. To do so, you can follow this tutorial for help:
Enable Secure Boot
In this article, we will focus on secure boot, telling you how to enable secure boot for the Windows 11 installation.
#4. TPM — TPM is required to enable.
Windows 11 installation also requires a TPM 2.0 chip to be enabled. Follow to see how to check and enable TPM 2.0 on your PC.
It doesn’t matter if your computer currently doesn’t have or doesn’t support the TPM 2.0 chip. You can follow this guide to bypass this setting:
Windows 11 Download without TPM 2.0
If you’re interested in downloading the latest version of Windows 11 on a TPM 2.0 unsupported computer from a bootable USB, try this method here.
When you complete the computer configuration, you should be able to download and install Windows 11 then.
Fix 2. Fix Windows 11 Installation Has Failed in Safe_OS Phase: 0xc1900101
When you get a message saying ‘The installation failed in the SAFE_OS phase with an error during BOOT operation’ while installing Windows 11, it could be faulty peripherals, corrupted drivers, buggy registry entries, even wrong system settings, or malfunctioning hardware, even not enough disk space that caused this issue.
Try the while guide steps here one by one until you get rid of this issue from your PC:
Step 1. Unplug all external devices connected to the computer.
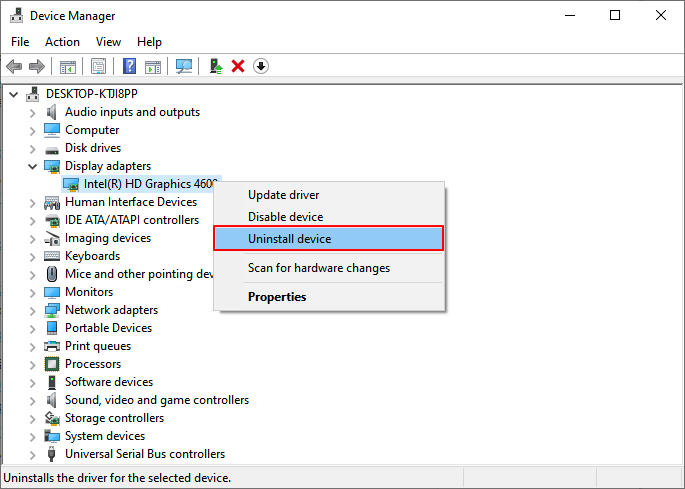
Step 2. Remove GPU driver:
Open Device Manager > Extend Display adapters > Right-click Intel(R) UHD Graphics and select «Uninstall device».
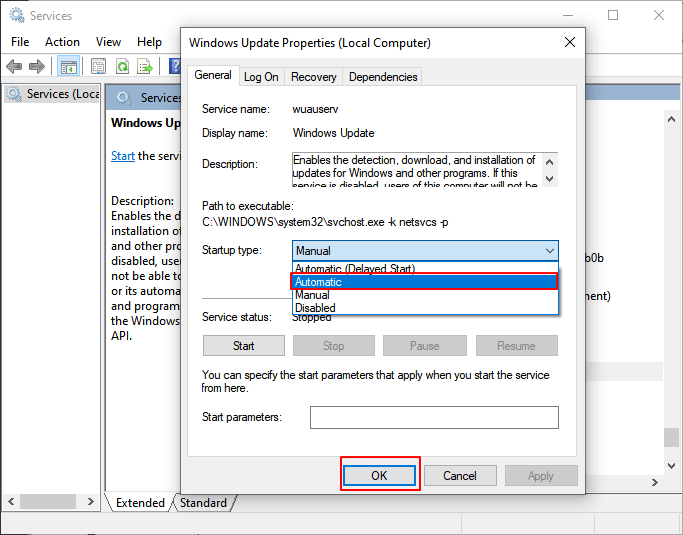
Step 3. Improve startup settings:
Type services.msc in Run dialog > Right-click BITS, Windows Update Services, Cryptographic Service to enter their Properties settings > Set Startup to «Automatic» and click «OK».
Step 4. Upgrade or add RAM if necessary.
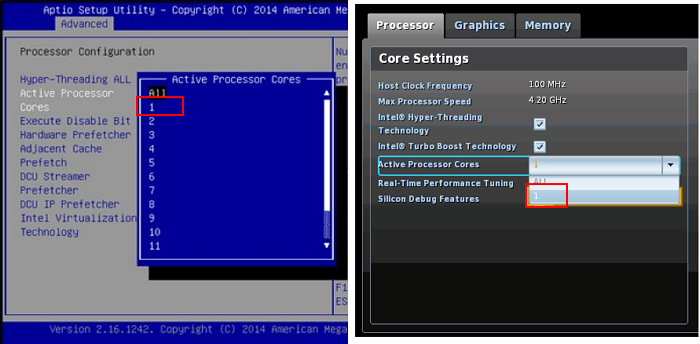
Step 5. Set BIOS active core settings to 1:
Enter BIOS > Locate Active Core Settings > Change the number of active processor cores to 1 > Save and exit BIOS.
After this, restart your PC and try if you can complete installing Windows 11 on your computer.
Fix 3. Upgrade System Disk to Complete Windows 11 Installation
Low system disk space, too old or malfunctioning mechanical hard disk drive could be the barrier that blocks Windows 11 from installing successfully on your computer.
To fix this issue, you can upgrade your target system disk to complete Windows 11 installation with the help of EaseUS Partition Master.
#1. Extend System Drive to Fix Low Disk Space Error for Windows 11
Step 1. Launch EaseUS Partition Master and click «Toolkit».
Step 2. Click «Win11 Checker» to open this feature. Then click the Check Now button to start.
Step 3. The Windows 11 compatibility result window will soon appear. All the incompatible and compatible configuration items will be listed.
#2. Upgrade/Migrate OS to New SSD
Fix 4. Download and Clean Install Genuine Windows 11 ISO
Faulty or buggy Windows 11 insider ISO files not only can’t ensure that your PC obtain the latest OS update but also could cause program or software malfunction issues.
To fix the ‘Windows 11 installation has failed’ error caused due to faulty ISO file, we suggest that you download and complete Windows 11 installation with a genuine build. EaseUS Win11 Builder can help here.
#1. Create Windows 11 Installation USB
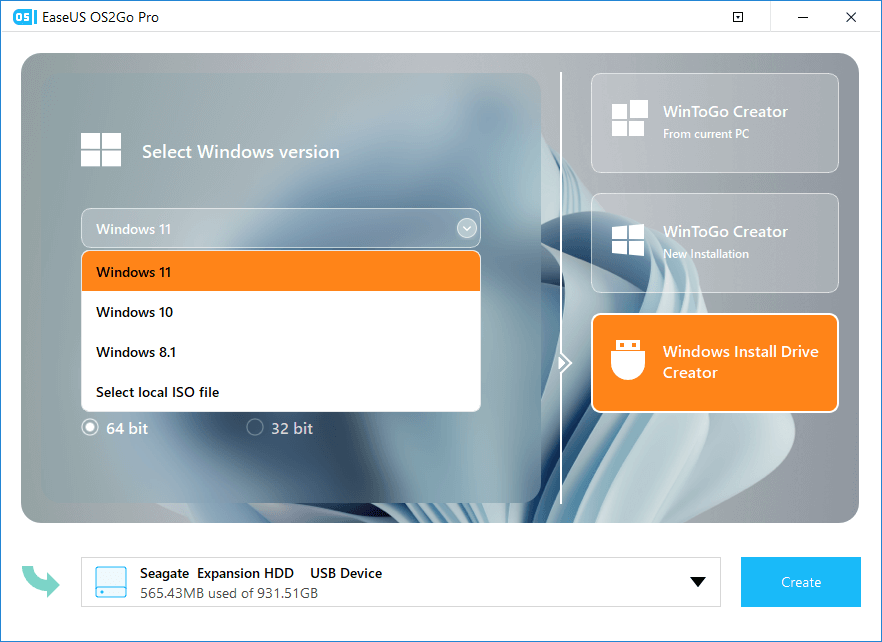
Step 1. Launch OS2Go after installation, and click Windows Install Drive Creator. The obtained system information is available on the home screen, and it keeps updating all the time. Apart from Windows 11, Win11 builder also supports you to download Windows 10/8.1.
Step 2. Connect your USB flash drive to the computer. Win11 builder will automatically detect your USB device, so all you need to do is click the Create button.
Step 3. The software will empty your USB drive data if it’s a used one. Once the downloading process begins, wait there until it finished or leave for a while to do you own job.
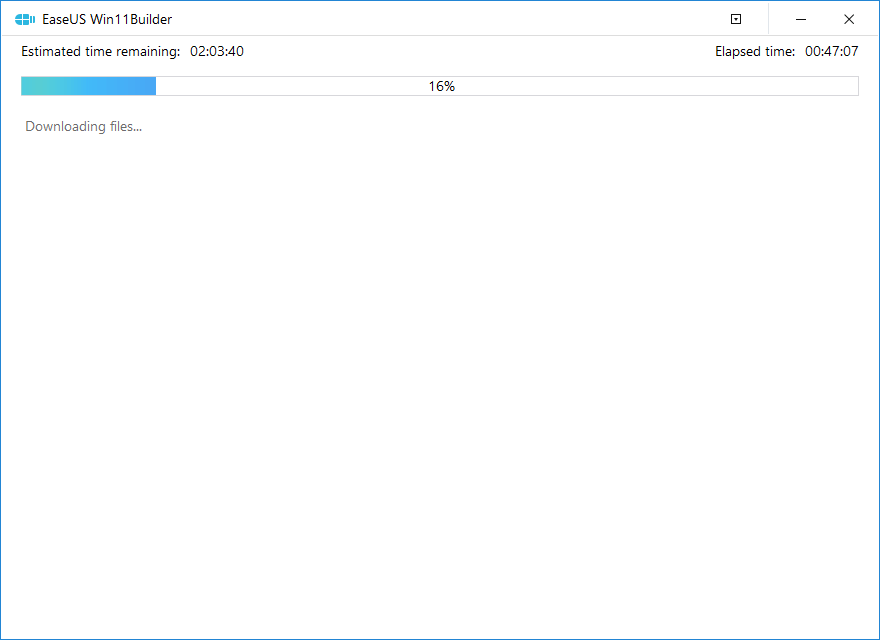
Step 4. After successfully downloading the Windows 11 iso image file on the USB drive, start to install Windows 11 from the bootable USB drive on your computer by following the installation wizard step by step.
#2. Clean Install Windows 11 from Installation USB
Step 1. Reboot PC and enter BIOS, setting the USB drive as the boot drive.
Step 2. Once the computer boots on the USB disk, follow the onscreen instructions to install the new OS.
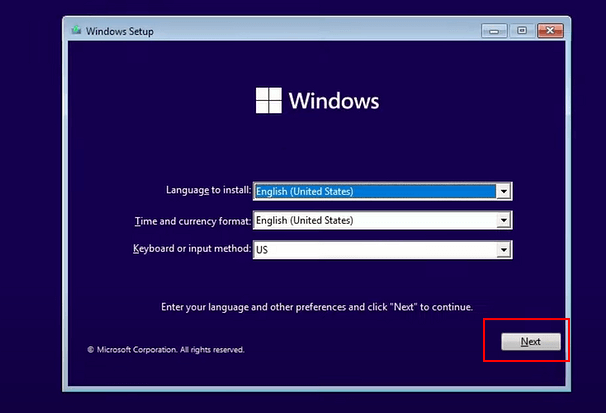
Step 3. Set Language, Time and currency format, Keyboard or input method, and click «Next».
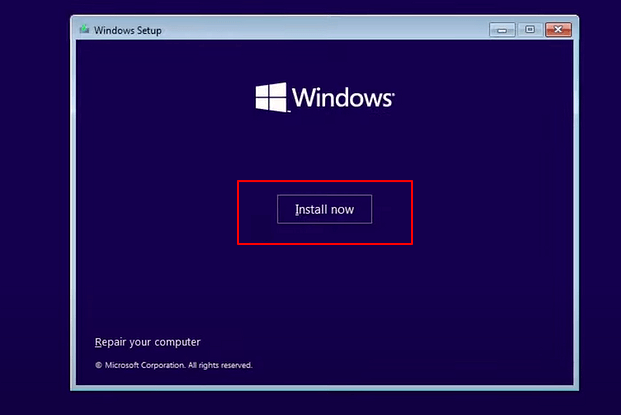
Step 4. Click Install Now to enter the next step.
Step 5. Click I don’t have a product key to continue.
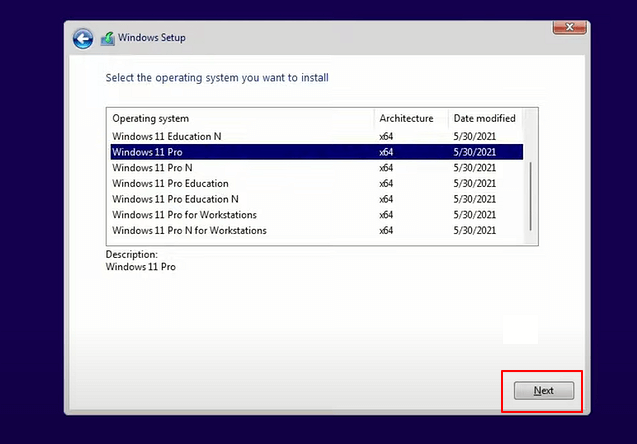
Step 6. Select Windows 11 edition that you want to install and click Next to continue.
Step 7. Click to accept the Microsoft License Term and click Next.
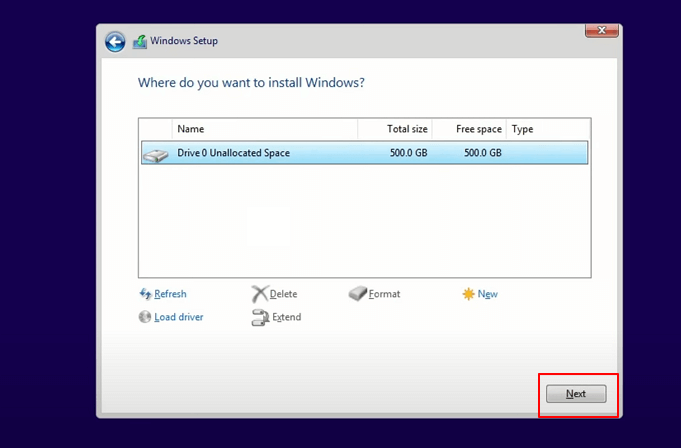
Step 8. Click Custome: Install Windows only on the new disk.

Step 9. Select the OS disk and click Next to continue.
Step 10. Wait for the installing process to complete, the computer will restart automatically.
Then follow the on-screen guide to set up the computer. If your computer doesn’t boot on the new drive, follow the next guide to enable it and set it to boot from the target disk.
Windows 11 Installation FAQs
It doesn’t matter if you know the causes of the ‘Windows 11 installation has failed’ error. You can simply follow through with solutions on this page to make Windows 11 installed on your computer successfully.
Aside from this issue, we also collected other types of issues while installing Windows 11. If you have the same issue, follow to see the solutions here:
1. How to Fix Windows 11 Installation Stuck at 35%, 85%, 100%?
When you are trying to upgrade to Windows 11 but the installation process gets stuck, don’t worry. You can find effective solutions to fix Windows 11 installation stuck at 35%, 85%, 100%.
2. How to Fix Windows 11 Black Screen of Death?
Windows 11 BSOD, black screen of death, comes with ‘Your PC ran into a problem and needs to restart’ error message, displaying a certain error code, such as CRITICAL_PROCESS_DIED, VIDEO_TDR_TIMEOUT_DETECTED, etc. You can fix it by rebooting the PC into safe mode, uninstall bad drivers, fix BDC, and remove viruses.
See how to fix it:
Windows 11 BSOD Error Fix
The black screen of death on Windows 11 is caused by many reasons. Follow to figure out the causes and fixes for Windows 11 BIOS error on your own.
3. Windows 11 Update Not Enough Space, How to Fix?
When old computers retain very small free space on the system disk, Windows update not enough space error will occur. To fix this issue, you can delete old Windows files, clean up system junk files, add more space to the system c drive and even merge a big partition to the C drive.
Among these fixes, extending the C drive will work immediately and you can do this by applying EaseUS Partition Master for help.