Ошибка агента обновлений windows 8024401c

У одного из заказчиков столкнулись с проблемой обновлений новых ПК с Windows 10 1607 и Windows Server 2016 с внутреннего WSUS сервера (на Windows Server 2012 R2). Компьютеры Windows 10 появляются в консоли WSUS, но при запуске поиска обновлений, клиент очень долго пытается их найти и возвращает ошибку 0x8024401c.

There were some problems installing updates, but we’ll try again later. If you keep seeing this and want to search the web or contact support for information, this may help: (0x8024401c)

windows 10 ошибка поиска обновлений на wsus 0x8024401c

Согласно списка кодов ошибок центра обновления Windows ошибка 0x8024401C означает превышение таймаута ответа от клиента: WU_E_PT_HTTP_STATUS_REQUEST_TIMEOUT — HTTP status 408 — the server timed out waiting for the request.

В новом журнале логов службы Windows Update Windows 10 при этом также периодически фиксируется ошибка, связанная с таймаутом ответа WSUS.

2017-05-30 14:11:24:870  816 1244 WS WARNING: There was an error communicating with the endpoint at 'http://msk-wsus:8530/ClientWebService/client.asmx'.
2017-05-30 14:11:24:870  816 1244 WS WARNING: There was an error receiving the HTTP reply.
2017-05-30 14:11:24:870  816 1244 WS WARNING: The operation did not complete within the time allotted.
2017-05-30 14:11:24:870  816 1244 WS WARNING: The operation timed out

Сама страница ‘
http://msk-wsus:8530/ClientWebService/client.asmx
‘ при этом с клиента доступна и открывается, т.е. возникает такое ощущение, что сервер WSUS или клиент просто не успевают выполнить некую операцию и клиент отваливается по таймауту. Возможно при инициирующем сканировании, новому клиенту WSUS прилетает слишком большой список обновлений, в результате чего достигаются некие лимиты рабочего процесса IIS.

Чтобы решить проблему с клиентами, мне пришлось сначала установить на сервере WSUS обновление KB3159706 (на сервере должен быть установлен Wndows Server 2012 R2 Update 1).

В статье KB3159706 (Update enables ESD decryption provision in WSUS in Windows Server 2012 and Windows Server 2012 R2) обратите внимание на ручные действия, которые нужно выполнить после установки обновления (иначе может перестать открываться консоль WSUS).

  1. Выполнить команду
    "C:\Program Files\Update Services\Tools\wsusutil.exe" postinstall /servicing

    "C:\Program Files\Update Services\Tools\wsusutil.exe" postinstall /servicing

  2. Проверить, установлен ли компонент.NET Framework 4.5 -> HTTP Activation (
    Get-WindowsFeature -Name NET-WCF-HTTP-Activation45
    ), и если он отсутствует, установить:

    компонент .NET Framework 4.5 - data-lazy-src=

  • Если на WSUS используется SSL, нужно выполнить редактирование файла C:\Program Files\Update Services\WebServices\ClientWebService\Web.config в соответствии с рекомендациями в статье (в нашем случае этот пункт выполнять не пришлось).
  • Отредактируйте файл config ( C:\Program Files\Update Services\WebServices\ClientWebService\web.config ), заменив строку
    <httpRuntime maxRequestLength="4096" />
    на
    <httpRuntime maxRequestLength="204800" executionTimeout="7200"/>
  • Осталось перезапустить службу WSUS с помощь PoSh:
    Get-Service -Name WsusService | Restart-Service -Verbose
  • Далее с помощью консоли IIS Manager нужно внести следующие изменения в настройки пула WsusPool (Application Pools -> WsusPool -> Advanced settings)

    Application Pools - data-lazy-src=

    • Private Memory Limit (KB)0 (было 1258015, убирается лимит на использование памяти рабочим процессов WSUS, в результате служба может использовать более 1,2 Гб памяти)
    • Queue Length — 25000 (увеличиваем длину очереди к пулу приложения с 10000)
    • Limit Interval (minutes)15 (увеличиваем с 5 минут до 15 минут время для сброса счетчиков и выполнения CPU Throttling)
    • Service Unavailable Response — TcpLevel (при старом значение HttpLevel клиенту возвращается ошибка HTTP 503, теперь соединение просто сбрасывается)

    лимиты пула iis

    Затем в настройках сайта WSUS Administration -> Advanced settings нужно изменить значение Connection Time-out со 180 до 320.

    натсройки таймаутов wsus

    Осталось перезапустить IIS:

    IISReset

    Теперь мы увеличили таймауты и ресурсы сервера, требуемые клиентам Windows 10 для поиска и проверки обновлений на сервере обновлений WSUS. На следующий день – все клиенты смогли обнаружить и установить все требуемые обновления.

    Microsoft regularly releases updates for Windows that your computer needs in order to take advantage of the latest security patches and hotfixes. On most PCs, the Windows Update service is scheduled to run automatically, prompting you about pending updates that require your attention.

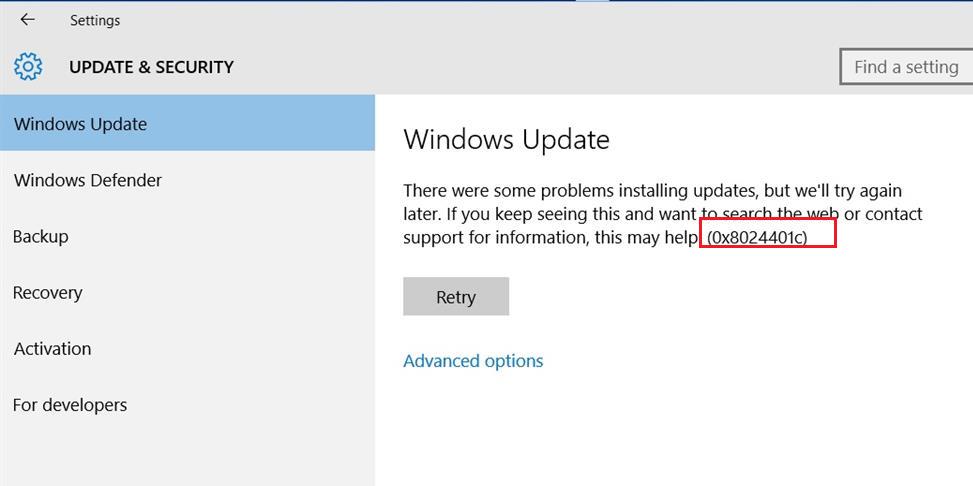
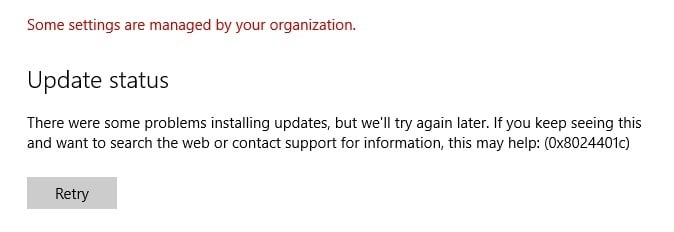
    Unfortunately, the updating service doesn’t always work as expected, throwing errors such as 0x8024401c as a result. If system updates are blocked on your PC due to error code 0x8024401c, find out how to fix this problem without having to turn to a professional for help.

    Some of the following solutions need you to tinker with the system registry settings. So it’s a good idea to create a system restore point before starting the troubleshooting operation. In case you make any mistakes, you can roll back Windows 10 and begin again.

    1. Use the Windows Update troubleshooter

    The Windows Update troubleshooter runs a quick scan on your computer to identify and resolve common problems that prevent the system’s updating tool from working properly. Here’s how you can use it:

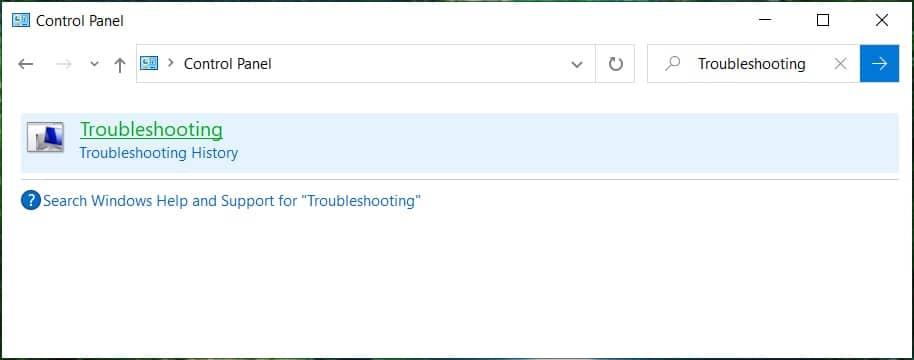
    1. Press the Win key, search for Troubleshoot settings, and press Enter
    2. Click Additional troubleshooters
    3. Find and select Windows Update
    4. Click the Run the troubleshooter button
    5. Follow the wizard steps and allow Windows to apply any fixes

    2. Use Windows Update Diagnostic

    More Windows Update issues can be resolved by Windows Update Diagnostic:

    1. Sign in to Windows 10 using an admin account
    2. Download Windows Update Diagnostic from the official website
    3. Start the app and select Windows Update
    4. Click Next and follow the step-by-step instructions
    5. Launch the app again and choose Windows Network Diagnostics
    6. Click Next and follow the remaining steps
    7. Restart your computer

    3. Check Services

    Some system services are tied to Windows Update and must be allowed to run. Others might clash with the app and should be disabled to stay on the safe side. Here’s what you have to do:

    1. Click the Start button, write Services, and open this app
    2. Right-click Windows Update and go to Properties
    3. Set Startup type to Automatic (Delayed Start) and click the Start button
    4. Click Apply
    5. Find the Background Intelligent Transfer Service and App Readiness entries and set the same options
    6. Find Network List Service and access its properties
    7. Set Startup type to Disabled and click Stop
    8. Click Apply and quit to the desktop

    4. Check Group Policy

    You should head over to the Local Group Policy Editor to make sure that Windows Update is allowed to run on your computer. Otherwise, you could end up with error 0x8024401c.

    1. Click the Start button, search for edit group policy, and hit Enter
    2. Go to the following location: Computer Configuration > Administrative Templates > Windows Components > Windows Update
    3. Double-click Configure Automatic Updates to view its properties
    4. Select Enabled, click Apply, and exit to the desktop

    5. Reset Windows Update from Command Prompt

    You can clear the Windows Update cache by resetting all software components involved in its services, thanks to the command-line environment:

    1. Make sure to log in to Windows 10 using an admin account
    2. Press the Windows key, type cmd, and open the Command Prompt app
    3. Enter these commands and press Enter after each line:
      • net stop wuauserv
      • net stop cryptSvc
      • net stop bits
      • net stop msiserver
      • ren C:\Windows\SoftwareDistribution SoftwareDistribution.old
      • ren C:\Windows\System32\catroot2 Catroot2.old
      • net start wuauserv
      • net start cryptSvc
      • net start bits
      • net start msiserver
    4. Restart your PC

    6. Check registry settings

    Using Registry Editor, you should inspect some entries that affect Windows Update, in order to make sure that everything is in working order. Here’s what you need to do:

    1. Press Windows key + R, write regedit, and hit Enter to open Registry Editor. If prompted by UAC (User Account Control), click Yes
    2. Open the File menu and select Export
    3. Create a registry backup file by specifying the file name and saving directory
    4. Go to the following location:
      Computer\HKEY_LOCAL_MACHINE\SOFTWARE\Microsoft\Windows\CurrentVersion\WindowsUpdate\Auto Update

    5. Check whether or not EnableFeaturedSoftware exists. If so, ensure that Data is set to 0x00000001 (1). Otherwise, double-click its entry, set Value data to 1 and Base to Hexadecimal, then click OK
    6. However, if EnableFeaturedSoftware doesn’t exist, you must create it:
      1. Select Edit > New > DWORD (32-bit) Value
      2. Enter the EnableFeaturedSoftware entry and double-click it
      3. Set Value data to 1 and Base to Hexadecimal, then click OK
    7. Head over to this location:
      HKEY_LOCAL_MACHINE\SOFTWARE\Microsoft\WindowsUpdate\UX
    8. Double-click IsConvergedUpdateStackEnabled, set Value data to 0 and Base to Hexadecimal, then click OK
    9. Now, head over to this destination:
      HKEY_LOCAL_MACHINE\SOFTWARE\Microsoft\WindowsUpdate\UX\Settings

    10. Double-click UxOption, set Value data to 0 and Base to Hexadecimal, then click OK
    11. Next, visit:
      HKEY_LOCAL_MACHINE\SOFTWARE\Policies\Microsoft\SystemCertificates

    12. Check whether or not CopyFileBufferedSynchronousIo exists. It so, make sure its Data is set to 0x00000001 (1). Else, double-click the entry, set Value data to 1 and Base to Hexadecimal, then click OK
    13. If CopyFileBufferedSynchronousIo doesn’t exist:
      • Select Edit > New > DWORD (32-bit) Value
      • Rename the entry to CopyFileBufferedSynchronousIo and double-click it
      • Set Value data to 1 and Base to Hexadecimal, then click OK
    14. Quit to the desktop

    7. Update your network drivers

    If you’re experiencing network connectivity issues, you should check your network drivers since they might be outdated, especially if you still have the stock drivers because you never performed an update.

    The quickest and safest way is to use a driver updating application for updating all obsolete drivers at the same time. However, if you don’t want to install any third-party programs, you can turn to Device Manager:

    1. Press Windows key + R, type devmgmt.msc, and press Enter
    2. Click the arrow button next to Network adapters to expand this group
    3. Right-click your network interface and select Update driver
    4. Click Search automatically for drivers and wait

    If the online search doesn’t return anything, you can visit the manufacturer website of your network adapter in order to find, download and install the latest version. It’s risky, though, because you could accidentally set up an unsupported driver.

    8. Roll back your network drivers

    On the other hand, you might have accidentally downloaded and installed a driver that’s not compatible with your network adapter or operating system. It could hurt your entire Internet connections, so it’s better to roll back to the previous version. Here’s how:

    1. Right-click the Start button and select Device Manager
    2. Double-click your network adapter to access its properties
    3. Switch to the Driver tab
    4. Click the Roll Back Driver button and follow the step-by-step instructions

    If you can’t click Roll Back Driver because the button is greyed out, it’s impossible to go through with the rollback because there’s no previous driver saved on your PC.

    9. Unplug peripheral devices

    Hardware components that were recently attached to your desktop or laptop might not fully support your operating system. In turn, this could affect your applications, Internet connections, and system tools like Windows Update, resulting in error 0x8024401c.

    Consider any new pieces of hardware that you connected to your PC, like a webcam, a Wi-Fi adapter, a pen drive, or a memory card. Remove their cables, restart your computer, and check if you can run Windows Update. You should also try plugging the devices into other USB ports in case they are not working properly.

    10. Reinstall devices

    Another way to deal with peripheral devices is by reinstalling them on your Windows 10 PC. This is made possible through Device Manager since you just have to uninstall the adapters. After restarting your computer, Windows will make sure to automatically install all missing devices. Here’s what you need to do:

    1. Click the Start button, search for Device Manager, and press Enter
    2. Look for any devices with a yellow exclamation mark
    3. Right-click it and select Uninstall device
    4. Open the Action menu and choose Scan for hardware changes
    5. Reboot your Windows PC

    11. Check your hard disk for errors

    Your HDD or SSD might be experiencing hardware failure or bad sectors. It could affect your entire system, including the Windows Update service. But you can turn to CHKDSK (Check Disk) to find and fix any problems:

    1. Click the Start button, search for Command Prompt, and select Run as administrator (click Yes if prompted by UAC)
    2. Take into account the partition letter of Windows and enter chkdsk c: /f /r (if it’s not c:, replace it with the correct letter)
    3. CHKDSK will ask you to confirm scheduling the tool at the next Windows boot. Agree by typing y and pressing Enter
    4. Restart your PC and wait for CHKDSK to do its job

    12. Fix corrupt system files

    Windows 10 might have damaged, modified or missing files that are essential for Windows Update. Without taking measures, you will keep seeing error code 0x8024401c. But you can fix this problem by running DISM (Deployment Image Servicing and Management) and then SFC (System File Checker):

    1. Press the Win key, type CMD, select Command Prompt, and click Run as administrator
    2. Write DISM /online /cleanup-image /scanhealth and press Enter
    3. If it finds any issues, run DISM /online /cleanup-image /restorehealth to fix them
    4. Reboot your PC and launch Command Prompt with elevated rights
    5. Type sfc /scannow and hit the Enter key
    6. Restart your workstation before trying Windows Update

    13. Check firewall settings

    Your firewall filters Internet traffic by allowing and denying access to processes and services. If you have accidentally messed up the firewall settings, this could explain why Windows Update throws you errors like 0x8024401c. Unless you have a third-party firewall tool installed, here’s what you can do with Windows Defender Firewall.

    How to temporarily disable your firewall:

    1. Make sure you’re signed in with an admin account on Windows 10
    2. Click the Start button, type check firewall status, and press Enter
    3. Click Turn Windows Defender Firewall on or off
    4. At Private network settings and Public network settings, select Turn off Windows Defender Firewall and click OK

    Try to run Windows Update now. If it turns out to be a successful move, you shouldn’t keep your firewall disabled because it means leaving your PC vulnerable to malware attacks. Instead, you can restore firewall settings to default, in order to undo any customized preferences that could’ve triggered the Windows Update error.

    How to restore firewall settings to default:

    1. Press the Win key, type firewall, and open Firewall & network protection
    2. Scroll down to the bottom of the page and click Restore firewalls to default
    3. Click Restore defaults and click Yes to confirm

    14. Run a malware scan

    A malicious agent could have hijacked your PC and deactivated critical files that Windows Update needs to work properly. Unless you have a third-party security solution installed, here’s how to find and remove malware using Windows Defender:

    1. Click the Start button, write Windows Security, and open this tool
    2. Pick Virus & threat protection
    3. Click Scan options
    4. Select Quick scan and click Scan now
    5. If the scanner doesn’t find any threats, pick Windows Defender Offline scan and click Scan now
    6. Make sure to quarantine or remove any files identified as threats by Defender. If you think it makes a mistake, add those files to the whitelist to exclude them from further scans
    7. Restart your PC

    15. Uninstall recent software

    Programs you installed on your computer lately might cause software conflicts with Windows Update which culminate in error 0x8024401c. So you should uninstall any recent and suspicious applications, especially if you started experiencing Windows Update issues right after adding them to your PC. Here’s how:

    1. Right-click the Start button and select Apps and Features
    2. Click Sort by and select Install date to view recent programs first
    3. Select the first app in the list and click Uninstall
    4. Click Uninstall again to confirm
    5. Restart your computer

    16. Uninstall system updates

    Certain Windows updates can cripple your operating system and prevent it from accessing further updates. You should remove it from your PC to get rid of error code 0x8024401c. Here’s what you need to do:

    1. Press Win key + R, enter appwiz.cpl, and hit the Enter key
    2. Click View installed updates
    3. Click the Installed On column to view the newest updates first
    4. In the Microsoft Windows category, double-click the first update
    5. Click Yes to confirm the update
    6. Reboot your PC

    17. Check the disk space

    If you don’t have enough free space on the system drive, Windows Update won’t be able to download and install anything. But you can fix this problem by increasing the volume size with the help of a partition manager like Disk Management.

    How to use Disk Management:

    1. Right-click the Start button and go to Disk Management
    2. Select a local drive where Windows is not installed
    3. Right-click the entry and choose Shrink Volume
    4. Set the new partition size and click Shrink
    5. Return to the main window and select the Windows partition
    6. Right-click the entry and pick Extend Volume
    7. Follow the on-screen instructions and restart your computer

    If you don’t have enough room on another volume to increase the Windows drive size, you can uninstall large applications and games you don’t play anymore, in order to clear up your disk space.

    Furthermore, you should move large files to an external disk, burn them to DVDs, or upload them to a cloud storage account. As far as junk files and unnecessary data is concerned, you can turn to a system cleaner like Disk Cleanup.

    How to use Disk Cleanup:

    1. Sign in to Windows 10 using an administrator account
    2. Go to Downloads and Recycle Bin. Make sure to copy or restore any important files since these folders will be cleared
    3. Press Win key + R, type control panel, and press Enter
    4. Select Administrative Tools
    5. Double-click to open Disk Cleanup
    6. Choose the partition where Windows is installed (default C:) and click OK
    7. Select all items at Files to delete and click Clean up system files
    8. Disk Cleanup starts a file search. Once it finishes, pick all items again and click OK
    9. Patiently wait while Windows deletes all junk files. Then, restart your computer

    18. Check your Internet connection

    Windows Update error 0x800705b4 could be caused by network connectivity problems, so you should verify the stability of your Internet connection and make it faster. Here are some suggestions:

    • Reboot your router
    • Move your device closer to the router
    • Connect to a 5Ghz Wi-Fi network
    • Disconnect other devices from your wireless network
    • Terminate applications that use a lot of network bandwidth, such as torrenting clients and streaming services
    • Run the Internet Connections troubleshooter
    • Empty the DNS cache or change DNS servers
    • Set up a wired Internet connection
    • Run a ping test in both wired and wireless mode
    • Check your VPN or proxy settings
    • Contact our ISP

    19. Use System Restore

    If you can’t identify the software event that led to Windows Update error 0x8024401c, you can use System Restore to roll back Windows 10 to a checkpoint that was recorded before you started having PC problems. But you will lose all applications installed after recording the restore point.

    How to use System Restore:

    1. Click the Start button, search for Control Panel, and open this app
    2. Visit the Recovery section
    3. Click Open System Restore (you need administrator rights)
    4. Select a restore point or click Show more restore points for more options. You can also click Scan for affected programs to see which applications will disappear
    5. Click Next and follow the steps
    6. Your PC will reboot after the system restore

    20. Reset your PC

    If System Restore fails to work, you can reset Windows 10 to factory mode without losing your personal files. However, this will uninstall all your applications and restore all computer settings to default, which means that you will have to spend a little time to set up your PC afterward. Here’s what you need to do:

    1. Press the Win key, search for Recovery options, and hit the Enter key
    2. At Reset this PC, click Get started
    3. Choose Keep my files and follow the step-by-step instructions

    Windows Update error 0x8024401c can be solved

    To recap, 0x8024401c is a Windows 10 error code that stops Windows Update and blocks system updates on your computer. However, you can try to fix it by using the Windows Update troubleshooter and Windows Update Diagnostic, as well as by checking Services, Group Policy and system registry settings.

    It’s also a good idea to reset Windows Update from the Command Prompt, update or roll back your network drivers, unplug peripheral devices, reinstall devices, check your hard disk and operating system for errors and file corruption, verify firewall settings, or run a malware scan.

    Moreover, you can uninstall recent software and malfunctioning system updates, check your free disk space, verify the quality of your Internet connection, roll back Windows 10 to a previous checkpoint using System Restore, and reset your PC to default settings if everything else fails.

    How did you finally manage to get rid of error 0x8024401c and restore Windows Update? Let us know in the comments below.

    default avatar image

    Ошибка 0x8024401c не дает Windows 10 установить обновления. Это случается как для ПК, которые качают апдейты с серверов Microsoft, так и клиентских машин, обновляющихся по закрытой сети организации. Такая неполадка означает, что превышен лимит ожидания ответа сервера.

    Методы решения ошибки 0x8024401c

    0x8024401c

    Первоочередно убедитесь, что соединение с сервером не блокируется чем-либо. Это может быть файрвол или вредоносное ПО. Далее переходите к следующим способам.

    №1: копаемся в реестре

    Запускаем Редактор реестра, переходим в ветку HKEY_LOCAL_MACHINE\Software\Policies\Microsoft\Windows\WindowsUpdate. В правом окне отыскиваем в этой ветке строку UseWUServer. Убедитесь, что в ней установлено значение 0. Перегружаем ПК, повторяем попытку обновления.

    №2: применяем другое сетевое устройство

    Иногда помогает использование иного роутера, сетевой платы или модема.

    №3: играемся с обновлениями (при обновлении внутри рабочей сети)

    В некоторых случаях отмечалось — если вручную обновить клиентские ПК на Windows 10 build 1703 и запустить предварительно установленное Средство устранения неполадок Центра обновления Windows, то проблема исчезала.

    №4: изменяем настройки сервера обновления (при обновлении внутри рабочей сети)

    Увеличьте таймауты и свободные ресурсы сервера, с которого устанавливают обновления клиентские компьютеры. Зачастую ошибка 0x8024401c возникает из-за того, что клиент и сервер на некотором этапе застопориваются и процедура автоматически прекращается.

    If you are facing error code 0x8024401c while trying to update Windows 10, then you are at the right place as today we are going to discuss how to resolve this issue. Basically, you won’t be able to download or install any updates because of this error 0x8024401c. Windows updates are an essential part of your system to easily prevent your PC from vulnerabilities, leading to malware or virus, spyware, or adware installed on your system. Depending upon user’s system configuration, you could face the following error:

    There were some problems installing updates, but we’ll try again later. If you keep seeing this and want to search the web or contact support for information, this may help: (0x8024401c)

    Windows Updates Error 0x8024401c Fix

    Now you could face this error message because of a number of reasons such as corrupt registry entries, corrupted system files, outdated or incompatible drivers, incomplete installation or uninstallation of a program etc. So without wasting any time let’s see how to actually Fix Windows Updates Error 0x8024401c with the help of below-listed steps.

    Table of Contents

    Make sure to create a restore point just in case something goes wrong.

    Method 1: Run Windows Update Troubleshooter

    1. Open control panel and search Troubleshooting in the Search Bar on the top right side and click on Troubleshooting.

    Search Troubleshoot and click on Troubleshooting | Windows Updates Error 0x8024401c Fix

    2. Next, from the left window, pane select View all.

    3. Then from the Troubleshoot computer problems list select Windows Update.

    Scroll all the way down to find Windows Update and double-click on it

    4. Follow on-screen instruction and let the Windows Update Troubleshoot run.

    5. Restart your PC, and you may be able to Fix Windows Updates Error 0x8024401c.

    Method 2: Run SFC and CHKDSK

    1. Open Command Prompt. The user can perform this step by searching for ‘cmd’ and then press Enter.

    Open Command Prompt. The user can perform this step by searching for ‘cmd’ and then press Enter.

    2. Now type the following in the cmd and hit enter:

    Sfc /scannow
    sfc /scannow /offbootdir=c:\ /offwindir=c:\windows

    SFC scan now command prompt | Windows Updates Error 0x8024401c Fix

    3. Wait for the above process to finish and once done, restart your PC.

    4. Next, run CHKDSK to Fix File System Errors.

    5. Let the above process complete and again reboot your PC to save changes.

    Method 3: Run DISM

    1. Open Command Prompt. The user can perform this step by searching for ‘cmd’ and then press Enter.

    2. Now type the following in the cmd and hit enter after each one:

    Dism /Online /Cleanup-Image /CheckHealth
    Dism /Online /Cleanup-Image /ScanHealth
    Dism /Online /Cleanup-Image /RestoreHealth

    DISM restore health system

    3. Let the DISM command run and wait for it to finish.

    4. If the above command doesn’t work, then try on the below:

    Dism /Image:C:\offline /Cleanup-Image /RestoreHealth /Source:c:\test\mount\windows
    Dism /Online /Cleanup-Image /RestoreHealth /Source:c:\test\mount\windows /LimitAccess

    Note: Replace the C:\RepairSource\Windows with your repair source (Windows Installation or Recovery Disc).

    5. Reboot your PC to save changes and see if you’re able to Fix Windows Updates Error 0x8024401c.

    Method 4: Disable IPv6

    1. Right-click on the WiFi icon on the system tray and then click on “Open Network and Sharing Center.

    2. Now click on your current connection to open Settings.

    Note: If you can’t connect to your network, then use an Ethernet cable to connect and then follow this step.

    3. Click the Properties button in the window that just open.

    wifi connection properties | Windows Updates Error 0x8024401c Fix

    4. Make sure to uncheck Internet Protocol Version 6 (TCP/IP).

    5. Click OK, then click Close. Reboot your PC to save changes.

    Method 5: Run System Restore

    1. Press Windows Key + R and type system.cpl then hit enter.

    2. Select the System Protection tab and choose System Restore.

    system restore in system properties

    3. Click Next and choose the desired System Restore point.

    system-restore

    4. Follow the on-screen instruction to complete system restore.

    5. After reboot, you may be able to Fix Windows Updates Error 0x8024401c.

    Method 6: Registry Fix

    1. Press Windows Key + R then type regedit and hit Enter to open Registry Editor.

    2. Navigate to the following registry key:

    Computer\HKEY_LOCAL_MACHINE\SOFTWARE\Policies\Microsoft\Windows\WindowsUpdate\AU

    change the value of UseWUServer to 0

    3. Make sure to select AU than in the right window pane double click on UseWUServer DWORD.

    Note: If you can’t find the above DWORD then you need to create it manually. Right-click on AU then select New > DWORD (32-bit) value. Name this key as UseWUServer and hit Enter.

    4. Now, in the Value data field, enter 0 and click on OK.

    change the value of UseWUServer to 0 | Windows Updates Error 0x8024401c Fix

    5. Reboot your PC to save changes.

    Method 7: Use Google DNS

    You can use Google’s DNS instead of the default DNS set by your Internet Service Provider or the network adapter manufacturer. This will ensure that the DNS your browser is using has nothing to do with the YouTube video not loading. To do so,

    1. Right-click on the network (LAN) icon in the right end of the taskbar, and click on Open Network & Internet Settings.

    Right-click on the Wi-Fi or Ethernet icon then select Open Network & Internet Settings

    2. In the settings app that opens, click on Change adapter options in the right pane.

    Click Change adapter options

    3. Right-click on the network you want to configure, and click on Properties.

    Right-click on your Network Connection and then click on Properties

    4. Click on Internet Protocol Version 4 (IPv4) in the list and then click on Properties.

    Select Internet Protocol Version 4 (TCPIPv4) and again click on the Properties button

    Also Read: Fix Your DNS Server might be unavailable error

    5. Under the General tab, choose ‘Use the following DNS server addresses’ and put the following DNS addresses.

    Preferred DNS Server: 8.8.8.8
    Alternate DNS Server: 8.8.4.4

    use the following DNS server addresses in IPv4 settings | Windows Updates Error 0x8024401c Fix

    6. Finally, click OK at the bottom of the window to save changes.

    7. Reboot your PC and once the system restart, see if you’re able to Fix Windows Updates Error 0x8024401c.

    Method 8: Perform a Clean Boot

    Sometimes 3rd party software can conflict with Windows and can cause Windows Update error. To Fix Windows Updates Error 0x8024401c, you need to perform a clean boot on your PC and diagnose the issue step by step.

    Under the General tab, enable Selective startup by clicking on the radio button next to it

    Recommended:

    • Fix This Program Is Blocked by Group Policy Error
    • Fix The exception unknown software exception (0xc0000417)
    • How to Fix Windows Update Error 0xc8000222
    • Fix The exception unknown software exception (0x40000015)

    That’s it you have successfully Fix Windows Updates Error 0x8024401c but if you still have any questions regarding this guide then feel free to ask them in the comment’s section.

    Windows Update serves as a platform for new updates to Windows. It helps to ensure that your computer is running with the latest features and security updates. But recently some users reported experiencing error code 0x8024401c when running the Windows Update on their computer.

    Your Windows 11/10 computer might receive this error for a number of reasons. One of the most common reasons is that your computer doesn’t have a working internet connection. In this post, we will show you how to fix Windows Update Error Code 0x8024401c so you can update your computer again.

    This error is accompanied by the following message:

    There were some problems installing updates, but we’ll try again later. If you keep seeing this and want to search the web or contact support for information, this may help (0x8024401c)

    What do Windows Updates do?

    Windows Update keeps various Microsoft programs up-to-date, including Windows itself. It includes security patches and feature enhancements to protect Windows from malware attacks and others. The Windows Update service also allows you to view the update history, which displays all the updates that have been downloaded and installed on the computer.

    There are some solutions that require you to make changes to the system registry. Therefore, we recommend creating a system restore point before you proceed. This will help you roll back your Windows if anything goes wrong. To fix Windows Update Error code 0x80244o1c, use the following suggestions:

    1. Run Windows Update troubleshooter
    2. Modify the Registry Editor
    3. Change the Network Settings
    4. Run System File Checker
    5. Perform a clean boot

    Let’s now see them in detail:

    1] Run Windows Update troubleshooter

    There are various types of troubleshooters built into Windows, which are useful for fixing different types of problems. Running the Windows Update troubleshooter is your first step when you encounter a Windows Update error. To do so, follow these steps:

    • Use the Windows+I keyboard shortcut to open the Settings app
    • Select the System tab from the left pane.
    • Then scroll down and click on Troubleshoot section.
    • On the next page, click Run next to the Windows Update option
    • This might solve your problem once the troubleshooting process is complete.

    2] Modify the Registry Editor

    In order to fix 0x8024401c on your computer, you can modify the settings in Registry Editor. But be careful while modifying the registry editor as incorrectly editing your registry may severely damage your system. In case you are not very good at editing the registry, ask someone for assistance or skip this method and try another one. If you want to continue, the steps are as follows:

    1. Open the Registry Editor.
    2. Navigate to the following key – \WindowsUpdate\AU
    3. In the right pane, locate and double click on UseWUServer.
    4. Change the Value data 0 and click on the OK button.
    5. Now close the Registry Editor and restart your PC.

    Here is a more detailed explanation of the above process:

    To get it started, you will first need to open the Registry Editor. For this, click on the Start button, type Registry Editor, and press Enter.

    When the User Account Control window prompts on your screen, click on the Yes button to give your approval.

    In the Registry Editor window, navigate to the path:

    HKEY_LOCAL_MACHINE\SOFTWARE\Policies\Microsoft\Windows\WindowsUpdate\AU

    Alternatively, you can copy the above path and paste it into the Registry Editor’s address bar.

    Select the AU folder and then move to the right pane.

    In the right pane, look for the registry file called UseWUServer.

    Once you find it, double click on it for modification. If it is not available there, create a new 32-bit DWORD value, and name it UseWUServer.

    After that, set the value data 0 and then click on the OK button to apply the changes.

    Now close the window and restart your computer.

    3] Change the Network Settings

    Users reported that when they switched the network connection, the problem got fixed. Here are the steps you can use to do so:

    Fix Windows Update Error code 0x8024401c for WSUS

    1. Open the Windows Settings.
    2. Select Network & internet from the left pane.
    3. Scroll down to the bottom and click on Advanced network settings.
    4. Under the Related settings section, click on More network adapter options.
    5. Right-click the connection to which you are currently connected, and then select Properties.
    6. On the Networking tab, uncheck the option stating Internet Protocol Version 6 (TCP/IPv6).
    7. Then click on the OK button to save the changes.

    Now restart your Windows and check if it resolved the problem.

    4] Run System File Checker

    System File Checker (SFC) is a Windows tool that users can use to scan system files for corruption and restore them if needed. There is a possibility that some of the files that are necessary for Windows Update are damaged, modified, or missing. If you have missing or corrupt system files, you need to use System File Checker and then the Deployment Image Servicing and Management (DISM) tool to restore them.

    To run the SFC and DISM, follow the below suggestions:

    • Open an elevated Command Prompt.

    Run sfc scannow

    • Now type in the command sfc /scannow and then hit Enter.
    • The procedure will take a few minutes to complete. Therefore, as long as the text code is scanned by the system, you are free to perform any other tasks.
    • Once the SFC scan is complete, restart your computer and see if it works.
    • Restart your computer and see if the issue is solved now. When that does not resolve the issue, run the DISM tool to repair the corrupted files.
    • In the elevated Command Prompt window, copy and paste the following command:

    Run DISM tool

    DISM.exe /Online /Cleanup-image /Restorehealth
    • Start your computer again and the error should be resolved.

    5] Troubleshoot in Clean Boot State

    There are times when Windows Update issues are actually caused by third-party applications. This problem can be resolved by troubleshooting your computer in a clean boot state in which only the most essential files and services are loaded. This procedure is as follows:

    • Right-click on Start and select Run from the menu.
    • Type MSConfig in the search box and press Enter.
    • In the System Configuration window, navigate to the Services tab.

    Error code 0x8024401c for WSUS

    • Check the box next to Hide all Microsoft services and click Disable all.
    • Click OK to save the changes.
    • You should now go to the Startup tab and click the Open Task Manager link.
    • Make sure the Startup tab is selected in the Task Manager window.
    • After selecting each startup service, click Disable to stop them.
    • Now restart your computer and see if the problem has been resolved.
    • After that, you need to launch the System Configuration tool.

    Windows Update Error code 0x8024401c for WSUS

    • Go to the General tab, select the Load system services checkbox.
    • Press Apply > OK to save your changes and restart the computer.
    • After the problem is resolved, you can enable the services one at a time.

    How can I fix errors with Windows Update?

    There might be a number of causes that can lead to Windows Update errors. Sometimes, WiFi issues and fluctuating signals can also result in Windows Update errors. If you encounter a Windows Update error, here are some general methods you can use.

    When should Windows Update components be reset?

    Windows Update components play a crucial role in the operation of Windows Update. If these components get corrupted, you may encounter different types of errors while trying to update Windows. If this situation occurs, Windows Update errors can be corrected by resetting the Windows Update components.

    Понравилась статья? Поделить с друзьями:
    0 0 голоса
    Рейтинг статьи
    Подписаться
    Уведомить о
    guest

    0 комментариев
    Старые
    Новые Популярные
    Межтекстовые Отзывы
    Посмотреть все комментарии
  • Создание загрузочной флешки windows 10 rufus mbr
  • Windows console change drive
  • Удаление пароля при входе в windows 10 про
  • Nginx для windows server
  • Windows admin password hack windows 10