
При установке компонентов .NET Framework 3.5 или других версий как через Панель управления, так и путем загрузки установщика с официального сайта, вы можете столкнуться с сообщением об ошибке 0x8024402C или же бесконечным ожиданием на этапе «Скачивание необходимых файлов».
В этой инструкции о том, чем может быть вызвана такая ошибка в Windows 11 и Windows 10 и способах её исправить. Коды ошибки 0x80072EFD, 0x80072EE2, 0x80072EF3, а также эти коды ошибки в других расположениях, таких как Центр обновления или Microsoft Store обычно имеют те же причины.
Прокси-сервер и другие проблемы подключения

Как правило, как бесконечное скачивание необходимых файлов, так и ошибка вызваны проблемами с подключением к серверам Майкрософт, с которых происходит загрузки, что может быть вызвано:
- Использованием VPN и настройками прокси-сервера
- Работой сторонних файрволлов или средств защиты в Интернете сторонних антивирусах
- Целенаправленной блокировкой доступа к серверам Майкрософт в нелицензионных версиях Windows
Чаще всего причина именно в настройках прокси-сервера, причем сам по себе Интернет может исправно работать. Решение в данном случае состоит из следующих шагов:
- Отмените установку .NET Framework (может отменяться долго, «зависнуть», но в результате отменяется).
- Нажмите клавиши Win+R на клавиатуре, введите inetcpl.cpl и нажмите Enter.
- Перейдите на вкладку «Подключения» и нажмите кнопку «Настройка сети».

- Снимите все отметки, включая «Автоматическое определение параметров», примените настройки и закройте окно.
- Запустите командную строку от имени администратора (способы это сделать), после чего введите команду
netsh winhttp import proxy source=ie
и нажмите Enter.

- Закройте командную строку и снова попробуйте выполнить установку необходимых компонентов.


Если это не сработало, рекомендую дополнительно проверить файл hosts на наличие блокировок серверов Майкрософт (и убрать их при наличии), попробовать временно отключить брандмауэр Windows. При наличии сторонних файроволлов, средств защиты в Интернете в антивирусах, попробуйте отключить и их тоже.
Установка из образа вручную
Если предыдущий подход не сработал, вы можете выполнить установку .NET Framework 3.5 с локального образа, для этого:
- Подключите флешку с установочными файлами Windows, либо смонтируйте в системе ISO образ с вашей версией Windows 11 или 10 (способы скачать Windows 11 ISO или Windows 10, различия в сборках с установленной системой обычно не играют роли) — для этого нажмите по образу ISO правой кнопкой мыши и выберите пункт «Подключить».
- Введите команду (заменив букву диска D: на фактическую букву подключенного накопителя):
DISM /online /enable-feature /featurename:NetFx3 /All /Source:D:\sources\sxs /LimitAccess
и нажмите Enter.

- Дождитесь завершения установки.
- В результате компонент .NET Framework 3.5 будет установлен:

Если проблема сохраняется, опишите ситуацию в деталях в комментариях ниже, я постараюсь помочь с решением.
When you launch Windows Update, it makes an effort to connect to the internet to update your PC, and this problem can show up: 0x8024402c. How to fix the error? Here is the quick navigation.
| Workable Solutions | Step-by-step Troubleshooting |
|---|---|
| Fix 1. Enable Automatic Network | In the first method, we shall enable automatic network detection settings via Windows Settings…Full steps |
| Fix 2. Disable Windows Firewall | By temporarily disabling Windows Defender Firewall, check whether the error code 0x8024402c…Full steps |
| Fix 3. Delete Distribution | In this method, you should delete software distribution to eliminate the error…Full steps |
| Fix 4. Restart to Clean the Boot | We will perform a Clean Boot via System Configuration to eliminate the error…Full steps |
| More Fixes | The other 2 fixes are available here for you to fix Windows update error 0x8024402c…Full steps |
What Is Windows Error Code 0x8024402c
This occurs when the PC cannot correctly connect to the Windows Update Server, which then confuses the system and ultimately causes it to crash and display the blue screen of death. An incorrect network setting, LAN setting, or update setting that does not comply with the update requirements could cause this issue. By approving the Automatically detected connection settings, it can be stopped.
The connection between the PC and the Windows Updates servers may break down if the firewall or proxy settings are misconfigured, another possible reason for this issue. Given below are more causes on why the Windows update error 0x8024402c occurs:
- ⏳Pending updates
- ⚙️Incorrect time setting on your PC
- 📃Damaged files
- 🚮Junk files that contain active threats
- 🧱Incorrect firewall configuration preventing critical computer updates
So, these are the possible causes of the error 0x8024402c Windows 10 or 11 error. Now, let us move on to the solutions to solve the error.
There are several methods to fix the Windows 11/10 error 0x8024402c. Check out the solutions below for the error code and a detailed video.
- 00: 22 — Disable Proxy Settings
- 00: 57 — Reset Proxy
- 01: 46 — Install Windows Updates
- 02: 18 — Automatically detect LAN Settings
So, I hope this video helped you understand more about Windows 11/10 error 0x8024402c. Now, let us move on to the detailed solutions for this error.
- Fix 1. Enabling Automatic Network Detection Settings
- Fix 2. Temporarily Disable Windows Defender Firewall
- Fix 3. Delete Software Distribution
- Fix 4. Restart to Access Clean Boot
- Fix 5. Removing the Invalid Characters in the Proxy Exception List
- Fix 6. Changing the DNS Servers
Fix 1. Enabling Automatic Network Detection Settings
In the first method, we shall allow automatic network detection settings via Windows Settings. Here is how to go about it:
Step 1. Press the Windows key + I to open Settings.
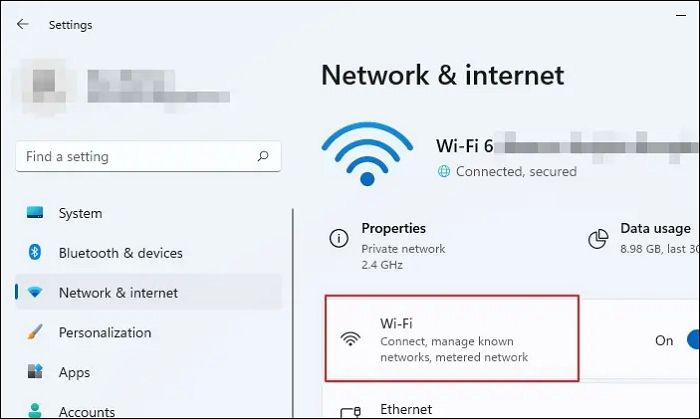
Step 2. Choose Network & Internet from the left pane.
Step 3. Click on Wi-Fi. Next, click on the Wi-Fi properties you are connected to.
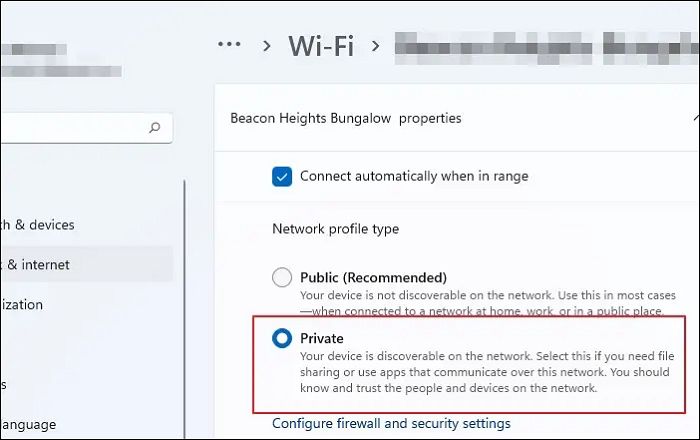
Step 4. Under the Network profile type, click the «radio» button next to the Private option to enable automatic network detection. This will make your PC discoverable and may help eliminate the Windows error code 0x8024402c.
Fix 2. Temporarily Disable Windows Defender Firewall
By temporarily disabling Windows Defender Firewall, check whether the error code 0x8024402c gets eliminated. This is how you go about it:
Step 1. Type firewall.cpl into the Windows search bar and press Enter.
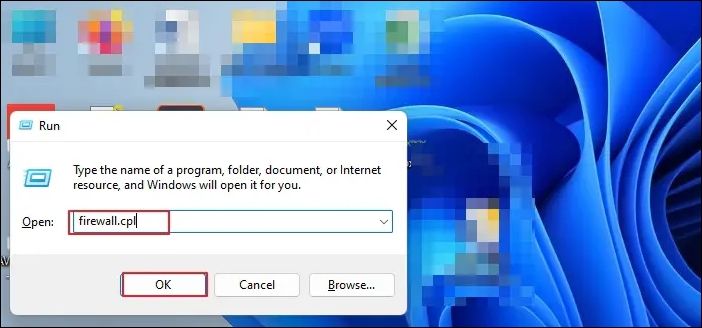
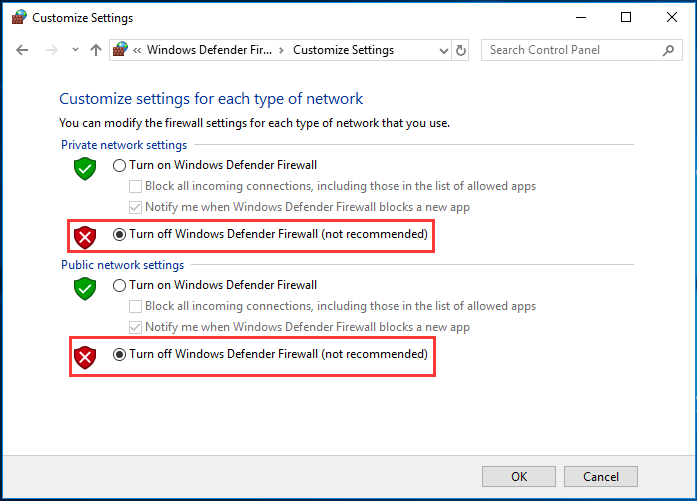
Step 2. On the left side of the windows, click the «Turn Windows Defender Firewall» on or off option.
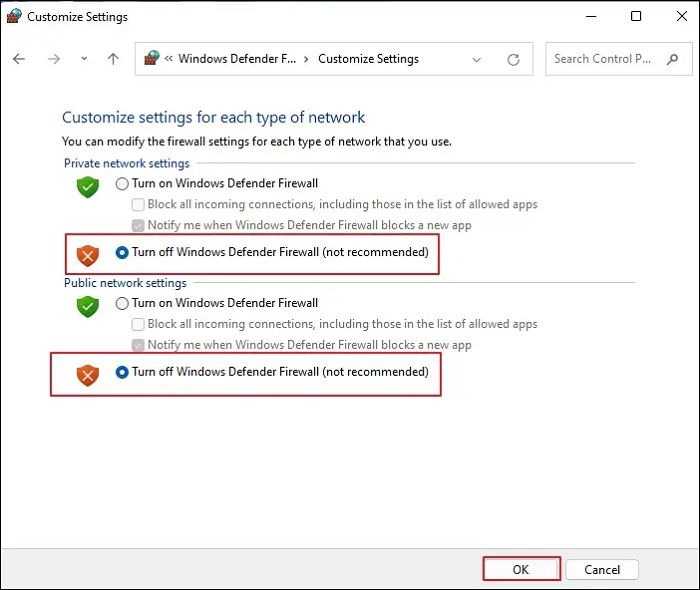
Step 3. Under Private Network Settings, click the «radio» button next to Turn off «Windows Defender Firewall». Do the same for Public Network Settings and click «OK» to save the changes.
You should now check the Windows updates and see whether the issue is fixed.
Fix 3. Delete Software Distribution
In this method, you should delete software distribution to eliminate the error. This is how you go about it:
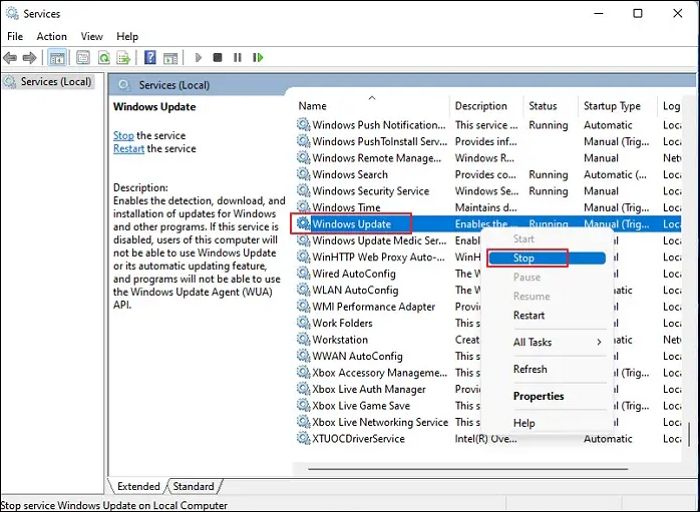
Step 1. Type Services into the Windows search bar, right-click on the result and choose the Run as administrator option.
Step 2. In the Services window, please scroll down and locate the Windows Update option, right-click on it, and choose the «Stop» option from the context menu.
Step 3. After it stops, click on File Explorer and choose Local Disk (C:).
Step 4. Click on the «Windows folder». Next, please scroll down and locate the SoftwareDistribution folder, right-click on it, and choose the Delete option from the context menu.
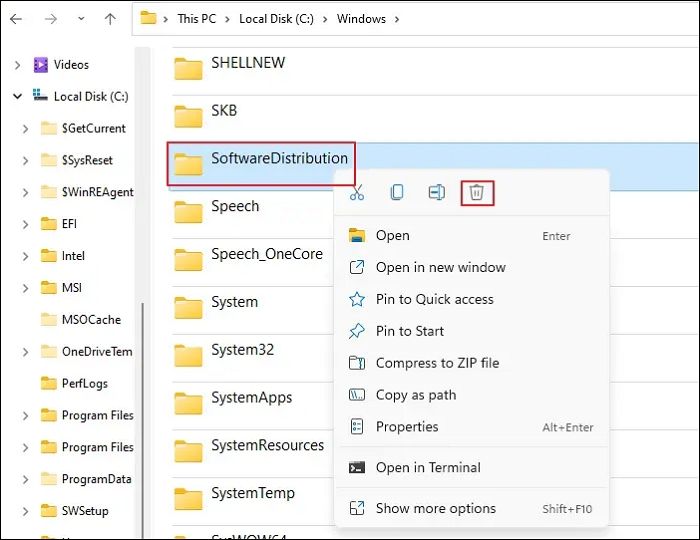
After removing the contents from the SoftwareDistribution folder, check whether the Windows 11/10 error 0x8024402c disappears.
Fix 4. Restart to Access Clean Boot
We will perform a Clean Boot via System Configuration to eliminate the error. Let us see how to go about it:
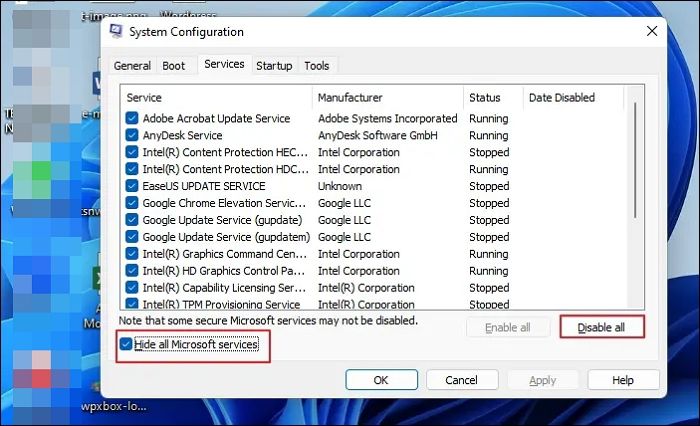
Step 1. Press Windows key + R to open the Run dialogue box. Type msconfig into the text box and press OK. This will open the System Configuration window.
Step 2. Click the «Services» tab and the check box next to «Hide all Microsoft services» to enable it. Next, click the «Disable al»l button and «Apply».
Step 3. Click on the Startup tab and click on «Open Task Manager». Next, please find all the application that has the Enabled status, right-click on them, and choose the Disabled option.
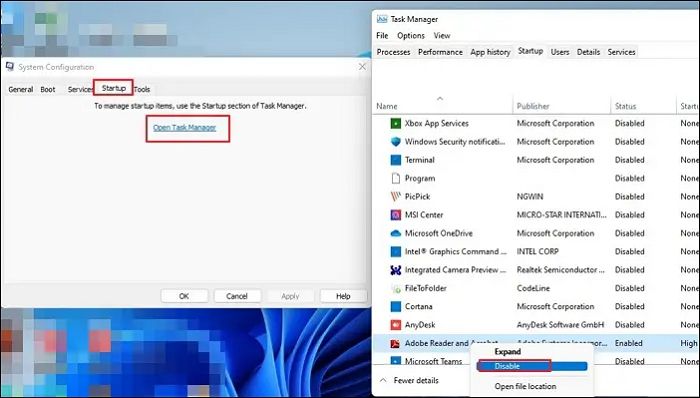
Step 4. Close the window and click OK. Click the Restart button to apply the changes in the System Configuration prompt.
Fix 5. Removing the Invalid Characters in the Proxy Exception List
In the proxy exception list, remove all the invalid characters. This is how you go about it:
Step 1. Type internet options into the Windows search bar and click on the result to open the Internet Properties window.
Step 2. Click on the «Connections» tab and the LAN settings button.
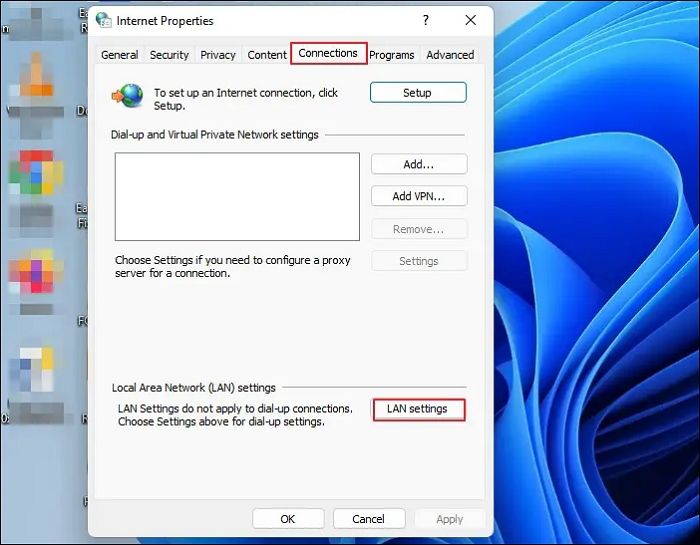
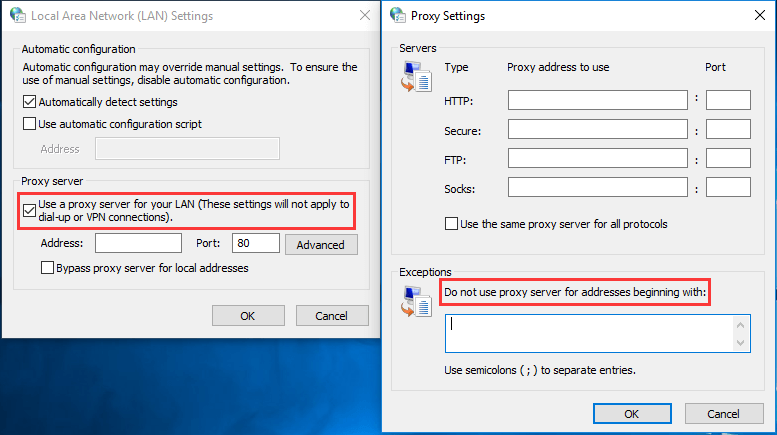
Step 3. In the next window, click on the radio button next to Use a proxy server for your LAN and click on the Advanced button to open Proxy Settings.
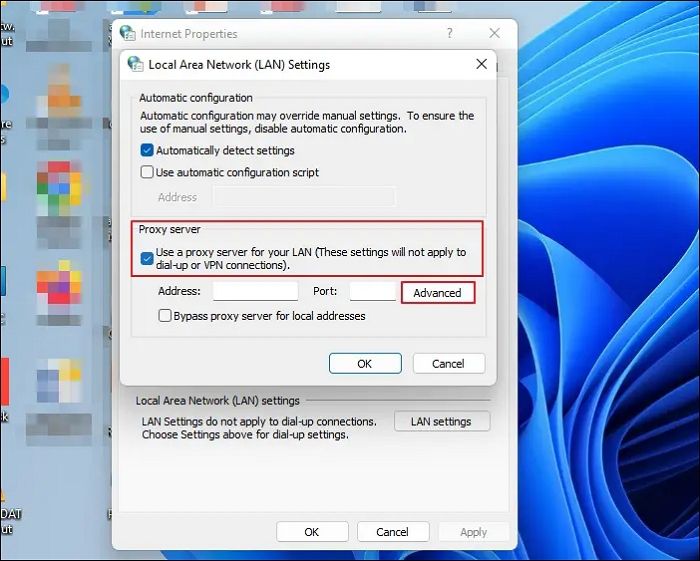
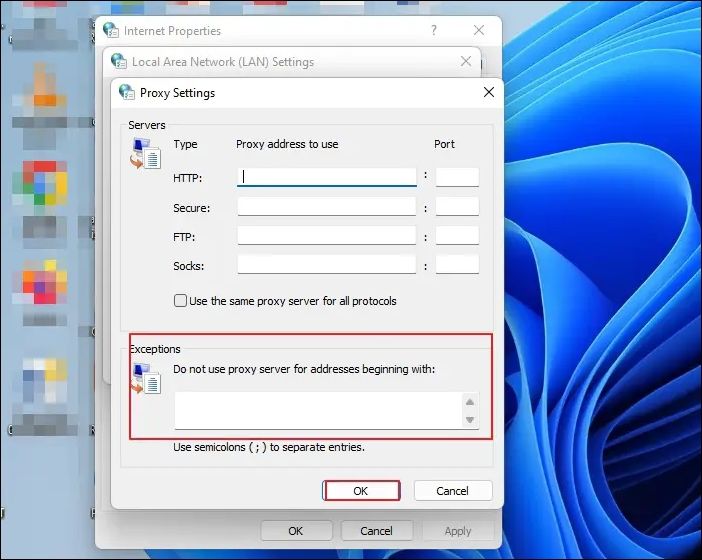
Step 4. Delete everything in the Do not use a proxy server for addresses beginning with the field, press OK in the prompt window, and OK again to close the LAN settings window.
The next step is to clear the proxy cache. Here is how to go about it:
Step 1. Right-click on the Windows logo and click on Windows Terminal (Admin).
Step 2. Press Enter after typing each command line one by one:
netsh winhttp reset proxy net stop wuauserv net start wuauserv
The error code 0x8024402c should be resolved after it is finished.
Fix 6. Changing the DNS Servers
In this method, change DNS servers to fix the 0x8024402c error. Let us see how to go about it:
Step 1. Press the Windows key + R to open the Run command box and type ncpa.cpl into the text box and press Enter to open the Wi-Fi-Status window.
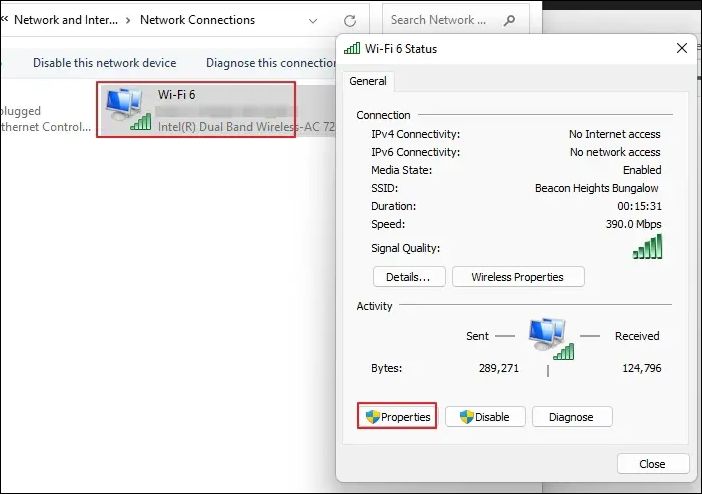
Step 2. Click on the Properties button. Next, locate the Internet Protocol Version 4 option and double-click on t to open its properties.
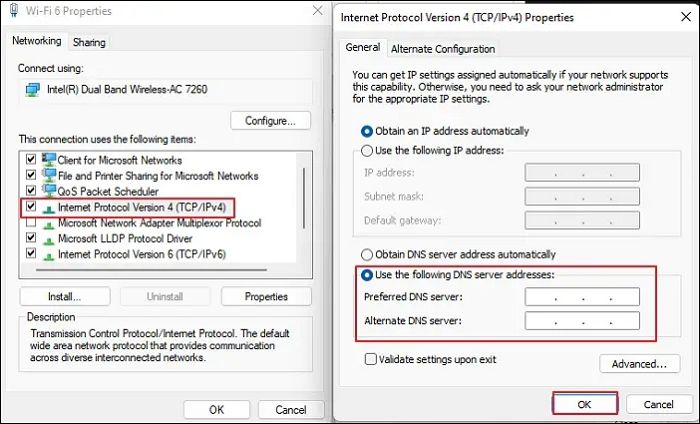
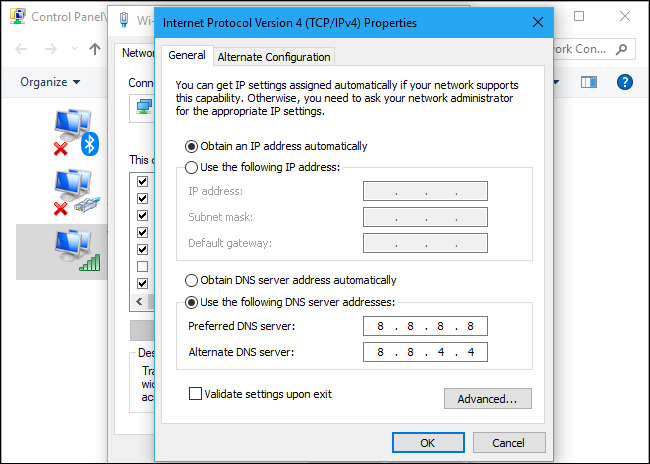
Step 3. Click on the radio button next to Use the following DNS server addresses and type in the following addresses:
- Preferred DNS server: 8.8.8.8
- Alternate DNS server: 8.8.4.4
Step 4. Click OK to update the changes and check whether the Windows error code 0x8024402c has disappeared.
Windows users have proved the efficacy of these fixes. If one of the methods helps fix the Windows update error 0x8024402c, share it on Facebook, Twitter, Instagram, and other social media platforms!
How to Recover Data When Fixing Error 0x8024402c
Windows users may lose data after fixing error code 0x8024402c. So, to recover deleted files from Windows 11/10/8/7, I recommend using EaseUS Data Recovery Wizard. It was created to aid in the recovery of data lost as a result of a file system malfunction, system crashes, and unintended file deletion. Even novice users can recover files quickly because of the software’s user-friendly interface.
EaseUS Data Recovery Wizard
- It can recover lost photos, videos, music files, documents, and other files with simple clicks.
- This software recovers data from external hard drives, SSD, USB flash drive, and pen drive.
- It makes restoring a partition’s data simple, even if it has been completely lost or the system cannot recognize it.
Download it now and follow the guide below to restore data from your PC quickly.
Note: To guarantee a high data recovery chance, install EaseUS data recovery software on another disk instead of the original disk where you lost files.
Step 1. Launch EaseUS Data Recovery Wizard on your Windows 11, Windows 10, Windows 8, or Windows 7 computer. Select the disk partition or storage location where you lost data and click «Search for Lost Data».

Step 2. This recovery software will start scanning the disk to find all lost and deleted files. When the scan process completes, click «Filter» > «Type» to specify lost file types. If you remember the file name, you can also search in the search box, which is the fastest way to find the target file.

Step 3. Preview and restore lost Windows files. You can double-click to preview the scanned files. Then, select the target data and click the «Recover» button to save them to another safe spot in the PC or Cloud drive.

Conclusion
The abovementioned techniques can resolve the Windows Update error code 0x8024402c.
You can also consider setting up a time sync between your PC and the internet, then restarting Windows Updates. When updates stop working due to malware, you can run security software. You should also be aware that Windows Updates is a compassionate application; if it has problems, the system will be adversely affected and may start to run slowly or improperly. So, follow the solutions given in this article carefully for a smooth and successful completion of the Windows update without any errors.
Also, note that after fixing the error code 0x8024402c, you may lose some data on your PC. So, download and use the data recovery tool EaseUS Data Recovery Wizard to save all your lost files. So that is it! I hope this article helped you resolve the error code issue!
Windows Update Error Code 0x8024402c FAQs
Do you have more questions on the Windows update error code 0x8024402c? Check out the frequently asked questions and their answers given below:
1. What does 0x8024401c mean?
You might encounter various issues when connecting to Microsoft’s Windows Update servers. It usually happens when you attempt to install updates, but the proxy, firewall, or other network settings are incorrect. 0x8024402C is one of these error codes. The error code is displayed on the screen when a user checks for updates.
2. How do I get rid of the error-checking drive?
On your Windows PC. Right-click on the Windows logo and choose Windows Terminal (Admin). Click Yes on User Account Control prompt and type chkdsk into the Windows Terminal window. Press Enter. CHKDSK will scan for drive errors and let you know if it finds any issues that need repair. Remember that it will not fix the errors without a command.
3. What does the Windows Update client fail to detect with error 0x8024402c?
An incorrect network setting, LAN setting, or update setting that does not comply with the update requirements could cause this issue. By approving the Automatically detected connection settings, it can be stopped.
4. What is error 0x8024402c for feature installation?
Not sure what this is feature installation. Kindly send me a message about it.
Many users have recently reported experiencing the error 0x8024402c when trying to update their operating systems. You may also encounter this problem when you are trying to download software from the Microsoft Store. In this post, we will see the problems and their causes, as well as solutions to fix them.
Please follow the sections below, based on when you are experiencing this error code:
- Error Code 0x8024402c while updating Windows 10
- Error 0x8024402c while opening or installing Store apps
- Solve Windows Defender Error 8024402c
Here are some workarounds that may help fix the 0x8024402c update error in Windows 10 –
1. Disable Windows Firewall
To download the files you need for an update, your PC must connect to Microsoft’s servers. However, in some cases, Windows Defender may block this access and result in update-related problems. The solution to such issues is to disable the Windows Firewall. Here’s how you do it –
- Open the Control Panel.
- Locate “View by” on the top-right corner and select Large icons by pulling down the drop-down menu.
- Click Windows Defender Firewall.
- Select “Turn Windows Defender Firewall on or off” on the left pane.
- Tick the checkbox – Turn off Windows Defender Firewall (not recommended) under both Private and Public Network Settings.

- In the end, hit Apply then OK to confirm the above changes.
Reboot your computer and check if you can now update Windows without getting into trouble like 0x8024402c. If not, follow the next set of solutions.
2. Troubleshoot Windows Update
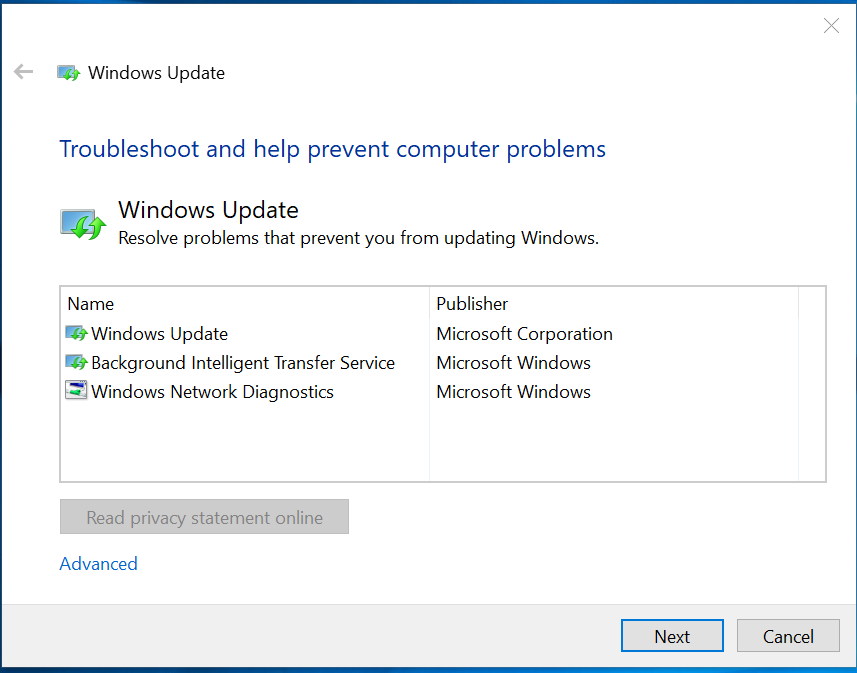
As we’ve already mentioned in a few articles, troubleshooters are powerful tools for resolving many types of errors. As of now, Microsoft provides a specific Windows Update Troubleshooter for managing update errors. You might be able to fix this issue with the help of this utility. Take a look at it and see if it can help you. Below are the steps you need to take –
- Navigate to the following location –
Windows Settings > Update & Security > Troubleshoot
- Head over to the right page and click Additional troubleshooters.
- Click to expand Windows Update and hit Run the troubleshooter.

- Now, follow the on-screen instructions to resolve the 0x8024402c error.
- If this troubleshooter provides an “Apply this fix” option, click on it.
3. Download and Install the Latest .NET Framework Update
.Net Framework should remain updated in order to avoid any type of network issues on Windows 10. In case you haven’t updated this network for a long time, we recommend upgrading the same. There’s an easy way to download and install the latest framework update from the Microsoft Update Catalog.
- Visit the official website and search for the “.NET Framework” for the respective Windows 10 version.
- Afterward, click once on the Last Updated column to get the latest update.
- Pick the system architecture that you are having on your device, and hit the Download button.

- On the next screen, hit the top link to start downloading the recent .NET Framework.
- After the download completes, open the folder containing this file, and double-click the setup.
4. Reset Proxy Settings to fix 0x8024402c
Many a time, an incorrect proxy may also result in different update-related issues on the computer. To resolve this, you must reset the Proxy using the below steps –
- Make a right-click on the Windows icon and select Run.
- When the Run window comes into view, type “cmd” and press Ctrl + Shift + Enter keys together.
- Doing so will invoke the Command Prompt with administrative rights.
- Next, execute the below codes one by one followed by the Enter key separately –
netsh winhttp reset proxy
- Now that you have reset the Proxy settings, go back to Settings > Update & Security > Windows Update, and hit the Check for updates button. The update process should work without any issues.
5. Modify the registry – UseWUServer
If you are still encountering the 0x8024402c error, you must modify a key DWORD entry i.e. UseWUServer.
Note: Make sure to create a system backup before following the below guideline –
- Press Win + S and type “registry” in the text field.
- Right-click on the top result and choose to
Run as Administrator. - Subsequently, reach out to the following location –
HKEY_LOCAL_MACHINE > SOFTWARE > Policies > Microsoft > Windows > WindowsUpdate > AU
- Jump to the right side and look for a key entry with the title “UseWUServer“. By default, this has a value of “1”. Change the value data field to “0” instead of “1”.
6. Reset Windows Update Components
If none of the above methods work to solve the 0x8024402c issue, try resetting Windows 10 update components using the following steps –
- Launch Command Prompt having right Admin rights.
- Stop the basic services related to Windows Update i.e. BITS, Cryptographic, and others. To do so, all you require is to execute the following commands –
net stop bits
net stop wuauserv
net stop cryptsvc
net stop appidsvc
- In order to reset all Windows 10 update components, you must run the below line. Running this code will clear all the junk files (not-in-use) from the system
Del “%ALLUSERSPROFILE%\Application Data\Microsoft\Network\Downloader\qmgr*.dat”
- Or, you may rename the update-related folders to something backup or old. Two such folders are – SoftwareDistribution and catroot2.
Ren %systemroot%\SoftwareDistribution SoftwareDistribution.bak
Ren %systemroot%\system32\catroot2 catroot2.bak
- Although you have cleared off all the update components, there is a possibility of the registry attaching to the old values. One may fix them by deleting all such entries. Open the Run command by pressing the WinKey + R. Type “
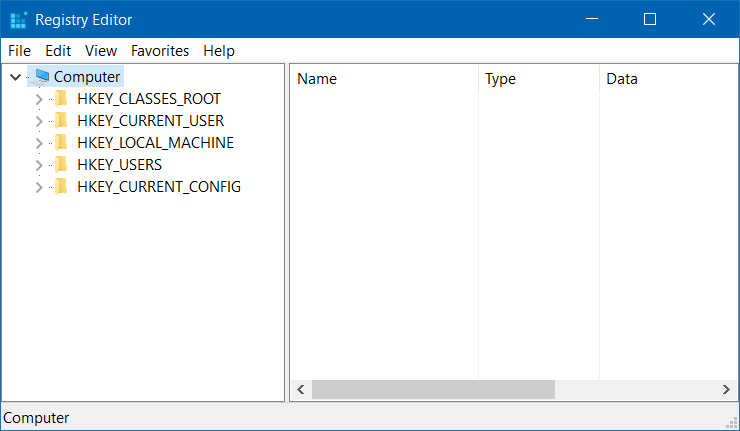
regedit” in the text bar and press OK. When the UAC window comes into the display, hit Yes. - Navigate to “
HKEY_LOCAL_MACHINE\COMPONENTS” and look for the following entries on the right pane. If you do find any one or all of them, right-click separately on each one of these, and choose to delete.
PendingXmlIdentifier
NextQueueEntryIndex
AdvancedInstallersNeedResolving
Note: If you don’t find the “Components” section under the HKEY_Local_Machine, you may skip deleting the above entries.
You may add the Components folder to the registry by following the below steps –
- Click HKEY_Local_Machine > File > Load Hive.
- Reach out to the path – “C:\Windows\System32\config”.
- Select ‘components’ (file type=file) and hit ‘Open’.
- Type “COMPONENTS” as the key name and hit OK again.
- Since this issue is related to network connection, we suggest resetting Windows Store and Proxy as well.
netsh winsock reset
netsh winhttp reset proxy
- Now that you have updated all Windows 10 components, restart the services that you stopped earlier. Make sure to press the Enter key at the end of each command –
net start bits
net start wuauserv
net start cryptsvc
net start appidsvc
- Lastly, restart Windows to incorporate the above changes. I hope this time, you do succeed in solving the 0x8024402c issue on your computer.
Microsoft Store Error 0x8024402c Solutions
If you are getting this error while installing apps from the Microsoft Store, you may try out these suggestions –
1. Reset Microsoft Store
- Open the Search window by pressing Win + S keys altogether.
- Type “
wsreset” in the text field. - Right-click on the top result and hit Run as Administrator.
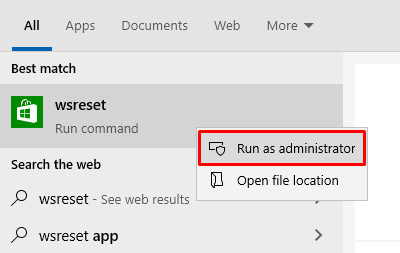
- This will start running the code “wsreset.exe” in the command prompt and may take a few seconds.
- Once over, Microsoft Store is reset on your computer, and the same launches on the display screen.
2. Reinstall Windows Store via PowerShell
If the above workaround doesn’t address this error 0x8024402c, you should reinstall the Store app. Reinstalling Microsoft Store isn’t possible using the normal ways as this is a system app. So, you need to launch PowerShell as an administrator and run a few codes on it. Here’s how to reinstall Store using Windows PowerShell.
How do I solve Windows Defender Error 8024402c?
If you are getting an error 8024402c while updating Windows Defender, check if any Windows updates are pending on your computer. For this, open Settings > Update & Security > Windows Update, and hit Check for updates.
In case there aren’t any updates available for your device, disable and re-enable Windows Defender. Now, try again to update Windows Defender.
Note: Windows Defender also fails to update when you have set your PC as a metered connection. If that’s the case, you need to first remove this setting on your device. Press Win + I, and reach out to the below path –
Network & Internet > Wi-Fi > XYZ
Scroll down to Metered Connection and turn off its toggle switch. That’s it, I hope this guide helps to resolve the error code 0x8024402c on your Windows PC.
Updated May 2025: Stop error messages and fix your computer problem with this tool. Get it now at this link
- Download and install the software.
- It will scan your computer for problems.
- The tool will then fix the issues that were found.
Windows Update is essential for your PC to function properly. For this reason, an update error can be a big problem. Windows Update error 8024402c is one of the most common ways a Windows Update problem appears.
It will appear on your computer screen as the following message:
Windows was unable to check for new updates.
An error occurred when searching for your computer.
Found the error:
Code 8024402C Windows Update Center found an unknown error.
What Causes Windows Update Error 8024402c
This error occurs when Windows Update is unable to connect to Microsoft’s update servers. If you are using Windows Update or a scheduled update is running and you do not have an Internet connection or this connection is blocked, there is a high chance that you will see error 8024402c.
There are many reasons why a computer cannot connect. Then there are more technical reasons that are more difficult to pinpoint.
The trick is to find out who it is. These four are the most common technical causes for error 8024402c.
Reset the proxy settings
This solution can be very useful because it is easy to do and can solve the problem by resetting your computer’s proxy server settings that have been damaged since the last update. Follow the instructions below to solve the problem.
Use Windows + X to open a menu where you need to select the command line (administrator) option. You can also right-click on the Start menu for the same effect or just find the command line, right-click and select “Run as administrator”.
Type in the commands listed below and press Enter after each command to execute it correctly.
- network
- broken
- Reset Proxy
Go back to the Windows Update Center and see if the problem persists on your computer.
Run Windows Update Troubleshooter
- Run the Windows Update troubleshooter.
- Accept the license agreement on the first screen.
- Click Detect Issues and apply the fixes (recommended).
- Wait while the program finds and fixes problems with Windows Update.
- Restart your computer and see if error code 8024402C disappears.
Updated: May 2025
We highly recommend that you use this tool for your error. Furthermore, this tool detects and removes common computer errors, protects you from loss of files, malware, and hardware failures, and optimizes your device for maximum performance. This software will help you fix your PC problems and prevent others from happening again:
- Step 1 : Install PC Repair & Optimizer Tool (Windows 11, 10, 8, 7, XP, Vista).
- Step 2 : Click Start Scan to find out what issues are causing PC problems.
- Step 3 : Click on Repair All to correct all issues.
Change your DNS address
If your ISP does cause these problems, other solutions may be useless as they cannot resolve the fact that your current DNS address is simply incompatible with Microsoft servers. Fortunately, changing your DNS address is very easy if you follow these instructions carefully. You can just interrupt the process if something goes wrong.
- Open the Run dialog by simultaneously pressing the keys with the Windows + R logo. Then type “ncpa.cpl” and press “OK”.
- When the Internet connection window opens, double-click the active network card.
- Then click on “Properties” and double-click on “Internet Protocol Version 4 (TCP / IPv4)”.
- Search Use the following option for DNS server addresses.
- Set the preferred DNS server to 8.8.8.8.
- Set the alternative DNS server to 8.8.4.4.
Turn off the antivirus software
Temporary disconnect the security software and see if the problem persists.
a: click the Windows + Q logo to open the search box.
b: Now click “Settings”, go to Support Center and press Enter.
c: Click on the chevron next to “Security”.
d: Disable any anti-virus protection installed on your computer.
Warning: Antivirus software may protect your computer from viruses and other security threats. In most cases, you should not turn off your antivirus software. If you need to temporarily turn it off to install other software, you should turn it back on when you are done. If you are connected to the Internet or network with antivirus software turned off, your computer is vulnerable to attack.
Use Regedit
This process requires modifying your registry, which can be very useful but also dangerous. It is recommended that you close all running programs before proceeding with this solution. It is recommended that you back up your registry in case something goes wrong during editing.
- Open the Run dialog box by pressing the Windows logo key + R keys at the same time. Then type regedit and click OK. Click Yes when prompted for User Account Control.
- In the Registry Editor window, navigate to HKEY_LOCAL_MACHINE >> SOFTWARE >> Policies >> Microsoft >> Windows >> WindowsUpdate >> AU.
- In the right pane of the AU button, double-click UseWUServer, change the data value to 0, and click OK.
If you cannot find WindowsUpdate, you need to create it. Follow the instructions below.
- Right-click the Windows folder, then choose New> Key and name the new key WindowsUpdate.
- Right click on the Windows Update folder then select New >> Key and name the new key AU.
- Right-click on the right side of the AU button and select New >> DWORD (32-bit) Value. Name the new value UseWUServer. Set the value to 0.
- Now try installing Windows updates.
RECOMMENATION: Click here for help with Windows errors.
What causes the error 0x8024402c? How to fix the Windows update error 0x8024402c? This post from MiniTool will show you how to solve the error code 0x8024402c. In addition, you can visit MiniTool to find more Windows tips and solutions.
What Causes the Error Code 0x8024402c?
As is well known, updating the operating system is able to fix some bugs and solve some problems. But when updating Windows, you may come across the error code 0x8024402c. However, do you know what causes the Windows update error 0x8024402c?
In general, the error code 0x8024402c may be caused by the following reasons:
- Proxy server problem
- Incorrect Firewall settings
- Junk files
- Incorrect time settings
- The computer is connected to a local computer
However, do you know how to fix this Windows update error 0x8024402c? So, in the following section, we will show you the reliable solutions.
Top 6 Solutions to Windows Update Error 0x8024402c
In this section, we will show you how to fix the error code 0x8024402c.
Way 1. Fix the Proxy Issues
In order to fix the Windows update error 0x8024402c, you can choose to fix the proxy issues.
Now, here is the tutorial.
1. Open the Control Panel.
2. Choose Network and Internet.
3. In the pop-up window, choose Internet Options.
4. Then go to the Connections tab and select LAN settings.
5. Check the option Use a proxy server for your LAN.
6. Then click Advanced.
7. Then delete everything in the Do not use proxy server for addresses beginning with.
8. Then click OK to save the changes.
9. Then open Command Prompt as administrator.
10. Then type the following commands and hit Enter after each command:
netsh winhttp reset proxy
net stop wuauserv
net start wuauserv
After all steps are finished, reboot your computer and check whether the error code 0x8024402c is fixed.
Way 2. Temporarily Disable Windows Defender Firewall
In order to fix the Windows update error 0x8024402c, you can choose to disable Windows Defender Firewall temporarily.
Now, here is the tutorial.
- Open Control Panel.
- Then choose System and Security.
- Then choose Windows Defender Firewall.
- In the pop-up window, choose Turn Windows Defender Firewall on or off on the left pane.
- Under Private Network Settings, choose Turn off Windows Defender Firewall. Under Public Network Settings, choose Turn off Windows Defender Firewall.
- Then click OK to save the changes.
After that, reboot your computer and check whether the Windows update error 0x8024402c is fixed.
Way 3. Remove Junk Files
In order to solve the error of Windows update error 0x8024402c, you can also choose to remove junk files.
Now, here is the tutorial.
- Open Command Prompt as administrator.
- Then type cleanmgr in the command line and hit Enter to continue.
- Then wait until the tool to complete the process.
Once all steps are finished, reboot your computer and check whether the error 0x8024402c is fixed.
Way 4. Enable Automatic Settings Detection
Enabling automatic settings detection might help to fix the Windows update error 0x8024402c. So, in order to fix this error, you can try this way.
Now, here is the tutorial.
- Open Control Panel.
- Choose Network and Internet.
- In the pop-up window, choose Internet Options.
- Then go to the Connections tab and click LAN settings.
- Then check Automatically detect settings under Automatic Configuration.
- Then click OK to save the changes.
Once all steps are finished, reboot your computer and check whether the Windows update error 0x8024402c is fixed.
Way 5. Run Windows Update Troubleshooter
If the above solutions cannot fix the Windows update error code 0x8024402c, you can try running Windows Update troubleshooter.
Now, here is the tutorial.
- Press Windows key and I key together to open Settings.
- Then choose Update & Security.
- In the pop-up window, go to the Troubleshoot Then scroll down and choose Windows Update.
- Click Run the troubleshooter.
- Then follow the on-screen wizard to continue.
Once all steps are finished, reboot your computer and check whether the error code 0x8024402c is fixed.
Way 6. Configure Updates Client
In order to fix the error 0x8024402c, you can also choose to configure updates client. But you need to know modify registry may damage your system, so you had better back up your computer before proceeding.
Now, here is the tutorial.
- Press Windows key and R key together to open Run dialog.
- Type regedit in the box and click OK to continue.
- Then navigate to the path: HKEY_LOCAL_MACHINE > SOFTWARE > Policies > Microsoft > Windows > WindowsUpdate > AU
- Double-click on UseWUServe on the left panel and then change its value data to 0.
After all steps are finished, reboot your computer and check whether the Windows update error 0x8024402c is fixed.
Final Words
To sum up, in order to fix the Windows update error 0x8024402c, this post has shown 6 solutions. If you have any better ideas to fix it, you can share it in the comment zone.