
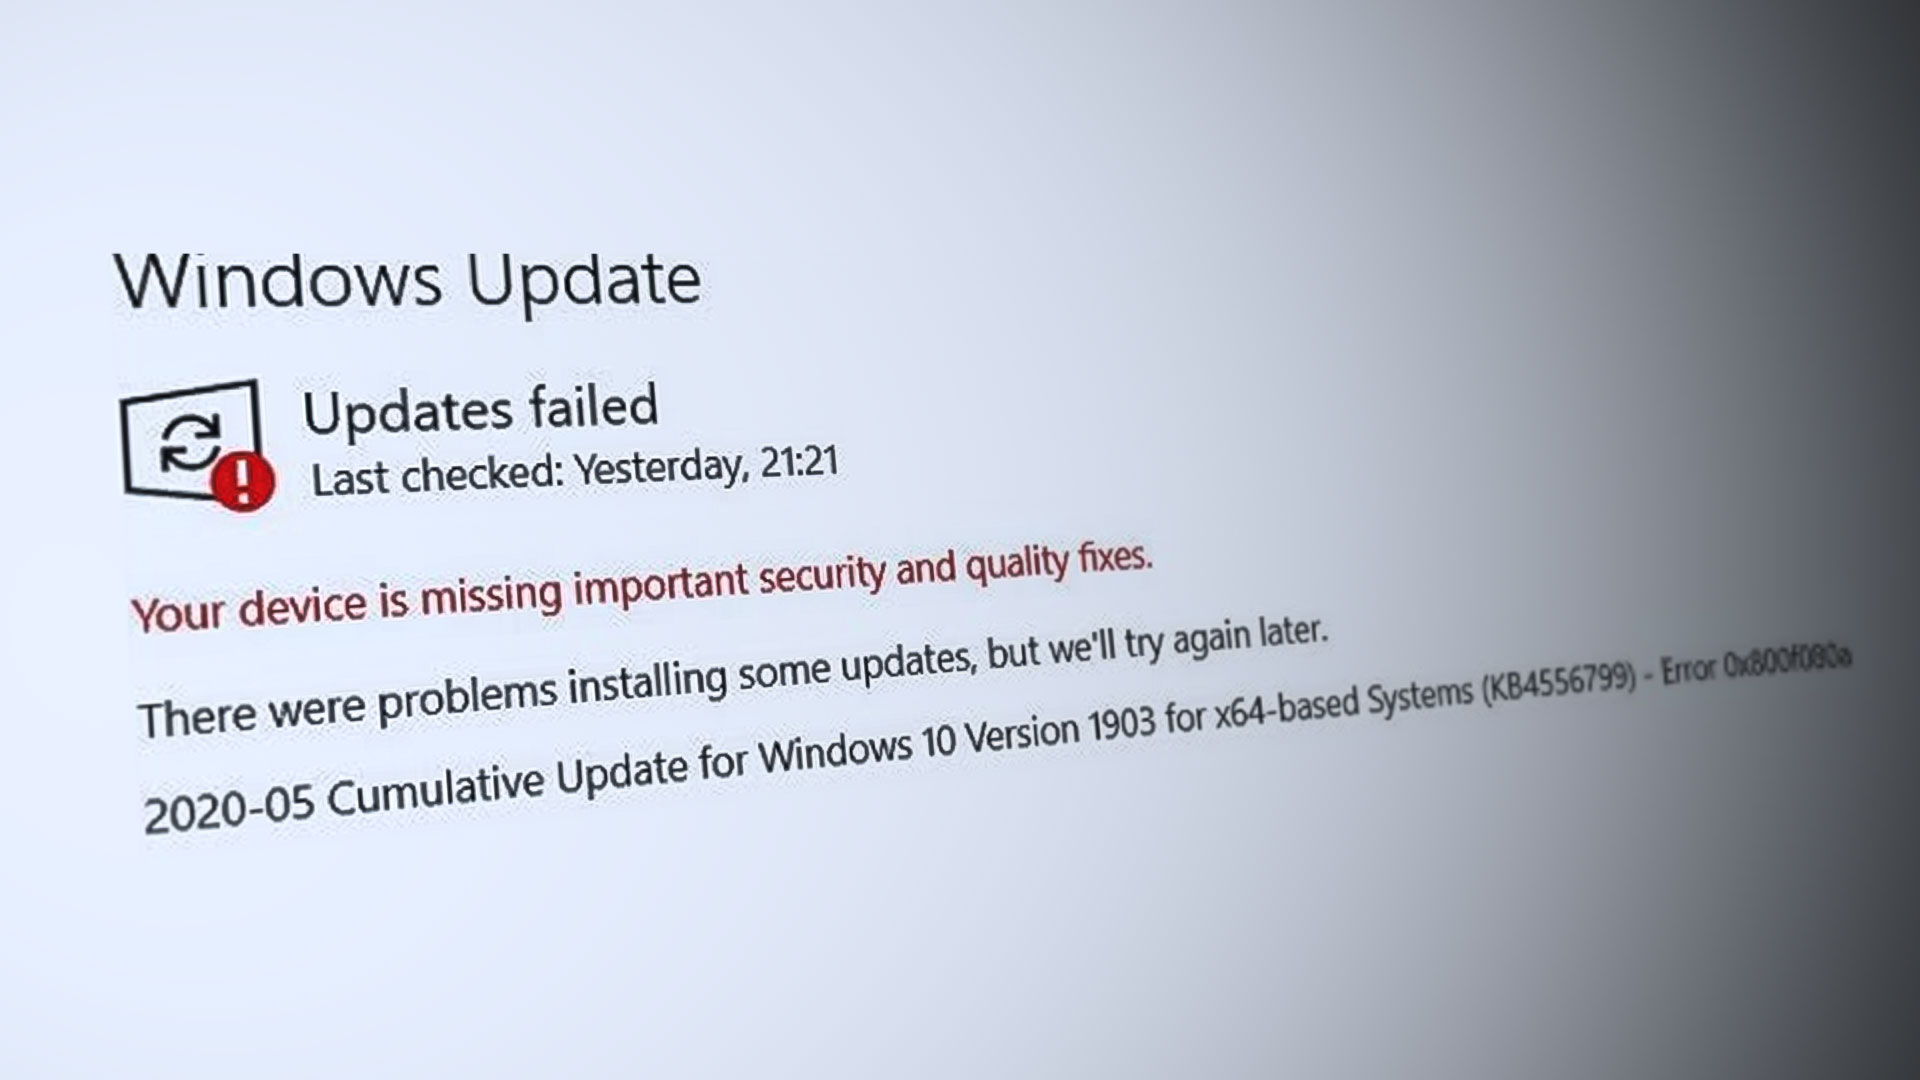
Windows 11/10 receives updates quite regularly and maybe this fast pushing of patches from Microsoft is the reason for the superfluity of errors. Though most of the packages include new improvements and bug fixes sadly they fail to get installed. Error 0x800f080a is one such code that appears when the PC attempts to install a cumulative update. In most cases, it makes some progress and then gets stuck at a certain percentage and then fails.
Windows 11 or 10 Update Error Code 0x800f080a doesn’t prevent all updates from being installed; mostly it appears for a specific KB version. Such issues usually originate from corrupted Windows update components broken or misplaced system files and stopped update services may cause the same too.
Windows 11 and 10 Update Error Code 0x800f080a
Here is how to fix Windows 11 or 10 Update Error Code 0x800f080a –
Way-1: Run Windows Update troubleshooter
Update errors are pretty common in Windows OS and that is the reason why the operating system bestows a troubleshooter dedicated to deal with these issues. This Fixit tool helps users in resolving most of the fatal codes they conflict while installing updates. To run the utility –
- Press – Windows + S.
- Type in – troubleshoot.
- Hit – Enter.
- From the right-pane, click the link that says – Additional troubleshooters. In case of Windows 11, click – Other troubleshooters.
- Select – Windows update.
- Click – Run the troubleshooter. Windows 11 users need to click Run straightaway.
- Follow on-screen guidelines if any.
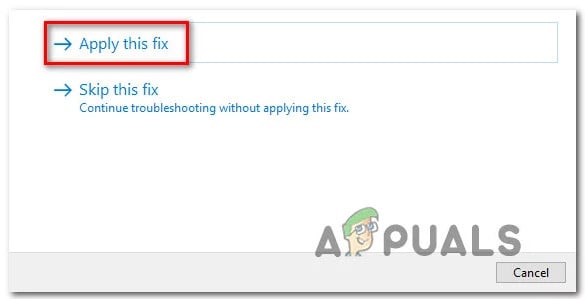
- When the utility detects any issue and suggests a fix, click – Apply this fix.
- Close the troubleshooter.
- Reboot Windows PC.
Way-2: Reset update components to fix 0x800f080a
Windows 11/10 Update Error Code 0x800f080a may rise up if the update agent related components are corrupted and purging the components work immediately in this case. This way is extremely handy in repairing almost every issue that occurs while downloading or installing patches or builds. Let’s check out the steps straightway –
- Click search icon present on the taskbar.
- Type in – cmd.
- Press – Ctrl + Shift + Enter.
- When User Account Control prompts for your consent, click – Yes.
- In the elevated Command Prompt, insert the following commands successively and hit Enter after each –
net stop wuauserv
net stop bits
net stop appidsvc
ren %systemroot%\SoftwareDistribution SoftwareDistribution.bak
ren %systemroot%\system32\catroot2 catroot2.bak
The above commands will stop services that have relations with Windows update right away, rename the existing SoftwareDistribution and Catroot2 folder, and create a fresh one. SoftwareDistribution folder stores all temporary update files in it and helps the system in carrying out the updating process when needed.
On the other hand, catroot2 folder reserves the signatures of the update patches which helps the installation process. Both folders play a significant role to ensure a smooth process of an automatic Windows update. That’s why resetting them often works like a tweak for update errors. However, you need to start the update services again that you stopped earlier therefore execute below commands –
net start wuauserv
net start bits
net start appidsvc
net start cryptsvc
- Exit Command Prompt.
- Reboot the PC and check if the update error shows up anymore.
Way-3: Check Windows update services
Windows update services are set to Started status by default and they are responsible for receiving the latest patches on your PC. The process is autonomous too. When any of the services is disabled whether intentionally or accidentally, the system may trigger Update Error Code 0x800f080a. Since, these are critical components of Windows and help in keeping your PC up-to-date with vital security patches, keeping them started is necessary.
- Click – Start button.
- Type – services.
- Press – Enter key.
- When the Services console shows up, find – Windows Update.
- Double-click the same to open its properties.
- Set the Startup type to Automatic.
- If the service is not running, click – Start.
- Shift to – Log on tab.
- Select the radio button set for Local System account.
- Uncheck the box present before Allow service to interact with desktop.
- Click Apply and then OK.
- After that, check Background Intelligent Transfer Service, Event Log, and Remote Procedure Call (RPC) services by following similar process.
Way-4: Resolve system corruption to fix 0x800f080a
System elements are required to be integrated to ensure every operation that Windows performs is correct. If any files go missing or become corrupted, various issues may rise up including update errors. Therefore, you need to make sure your system has no corruption in it. By chance, if it happens System File Checker is the best option to opt for in this concern. This command-line utility helps to resolve existing corruption and also recover the missing elements. To fix such issues, follow the way –
- Press – Windows key.
- Type in – cmd.exe.
- Select – Run as administrator.
- To approve User Account Control, click – Yes.
- In the black pane, insert – sfc /scannow.
- Hit – Enter.
- Once the scanning process hits 100%, check the report thoroughly.
- If the corruption is fixed, restart the PC.
There might be a time when System File checker won’t be able to fix the found corruption because of some unknown obstructions. In that case, you will have to employ DISM tool. Once you execute this utility in elevated Command Prompt, it scans your entire system moreover repair and make Windows image including Windows RE, Windows Setup, and Windows PE ready.
- Open Command Prompt as administrator.
- Insert DISM /Online /Cleanup-Image /RestoreHealth at the base of the winking cursor.
- Hit – Enter.
- Once the scanning process ends, run sfc /scannow command once again.
Way-5: Download and install troublesome KB version manually
Generally, Windows 10 as well as 11 downloads and installs Microsoft-created patches automatically if your PC is connected to an active internet connection. Though the process usually takes place smoothly, sudden power outages and a lost internet connection can hinder the procedure and end up causing Windows 11 or 10 Update Error Code 0x800f080a. Hence, try downloading the version that was giving the error code manually at a convenient time. Steps are as followed –
- If you already don’t know, check PC specs first.
- After that, visit the update catalog page of Microsoft.
- In its specific search bar, insert the KB number you want to get.
- Click – Search.
- Look for the version that matches your PC specs.
- Click Download present next to the desired KB number.
- Double-click the downloaded item.
- Comply with on-screen instructions to finish the installation.
Get help from – How to Download and Install Update from Microsoft update catalog on Windows 10
Methods list
Way-1:] Run Windows Update troubleshooter
Way-2:] Reset update components
Way-3:] Check Windows update services
Way-4:] Resolve system corruption
Way-5:] Download and install troublesome KB version manually
That’s all!!
The error 0x800f080A appears when Windows users attempt to install cumulative, feature updates, or optional updates directly from the Windows Update pane. This problem is confirmed to occur on both Windows 10 and Windows 11.
Although this problem is most commonly caused by a local inconsistency affecting the WU component, there are several scenarios where the problem can actually be traced back to some kind of system file corruption affecting Windows Updates or an associated system dependency.
If you’re just starting to troubleshoot this issue, start by leveraging the built-in repair tools to see if you can fix the issue – Windows Update Troubleshooter, SFC (System File Checker), DISM (Deployment Image Servicing & Management).
However, this problem can also be related to some kind of 3rd party interference. As you’ll find out below, there’s a sizable list of 3rd party programs that are confirmed to interfere with the WU component in different capacities.
Another possibility is corrupted temporary data affecting a WU component or dependency – In this case, resetting the WU component or refreshing every Windows file are two reliable ways of fixing the 0x800f080A error.
Below you’ll find a collection of confirmed methods that other affected users have successfully used to troubleshoot this issue.
1. Restart & Reinitiate the installation
Before you start following any of the other potential fixes featured in this article, the first thing you should do is reboot your system and retry the installation of the failing update after the next startup.
A lot of affected users that started to experience this issue immediately after a feature or cumulative update failed to install have confirmed that the installation was completed successfully after the restart.
Note: There’s no official confirmation on why this is effective, but the Windows community suspects that certain WU updates need to be installed right after a successful boot when there aren’t any potentially conflicting 3rd party services that could influence the installation.
If you haven’t tried this already, initiate a system restart and re-try the installation of the failing update as soon as the next startup is complete.
2. Run the Windows Update Troubleshooter
If you’re getting the 0x800f080a problem because of a typical WU discrepancy, running the Windows Update Troubleshooter and implementing the recommended fixing method should help. Most of the time, you don’t even have to do anything since most of the recommended fixes will be automated and require minimal intervention from your side.
Note: The Windows Update Troubleshooter includes a set of automatic repair options that may be used to remedy the most common causes of a failing Windows update.
If Windows Update Troubleshooter is able to pinpoint the source of the problem, follow the on-screen instructions to implement the recommended remedy.
Follow these steps to run the Windows Update Troubleshooter and apply the recommended fix:
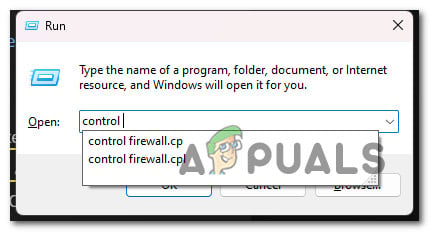
- Open the Run dialog box by pressing the Windows key + R.
- Enter the Control Panel interface by typing “control” and pressing the Enter key.

Open the classic Control Panel menu - When asked by User Account Control, click “Yes” to allow administrator rights.
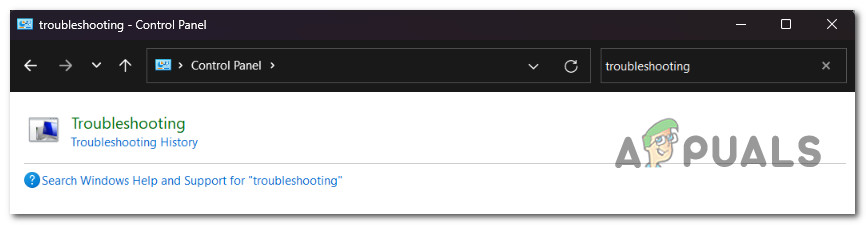
- Use the Control Panel’s search feature and search for “troubleshooting” (Type in the bar located on the top-right corner of the screen).
- Select Troubleshooting from the list of search results.

Troubleshooting - Next, you’ll see a list of troubleshooters. Scroll down and Run the Windows Update troubleshooter.

Run the Windows Update troubleshooter Note: Unless you’re using Windows 11, this screen will be different as the Troubleshooters are still part of the classic Control Panel menu.
- When the Windows Update Troubleshooter prompts you, click Next and wait for the initial scan to finish.
- If you identify a suitable solution, click Apply this Fix to put it into action in the present scenario.

Apply the fix - After the fix has been enforced, reboot your PC and see if the problem is now fixed by attempting to install the pending update once again.
3. Install KB5000808 update manually
If you’re looking for a quick fix that will allow you to install the failing update without necessarily finding & fixing the root cause of the issue, utilizing the Windows Update Catalog is the easiest and quickest way of circumventing the 0x800f080a error.
Important: Going this route will not address the root cause of this issue. Even if you are able to overcome the error and apply the faulty update, this will not fix the underlying source of the problem.
Even if you manage to ‘sideload’ the failing update via the Windows Update Catalog, there’s a chance the problem will return with the next pending update from Microsoft.
Our recommendation is to continue troubleshooting with the other ways below even if this method allows you to install the failing update.
Update: A lot of users have confirmed that they used this method successfully to install the KB5000808 update after the conventional way of installing the WU update failed.
To get around the 0x800f080a problem by utilizing Windows Update Catalog, follow the instructions below:
- Open the Microsoft Update Catalog homepage in your web browser.
- Use the search box in the upper-right corner of the Microsoft Update Catalog page to locate the failed update.

Searching for the missing update via the Microsoft Update Catalog Note: The updated code may be found in the WU error notice on the Windows Update page.
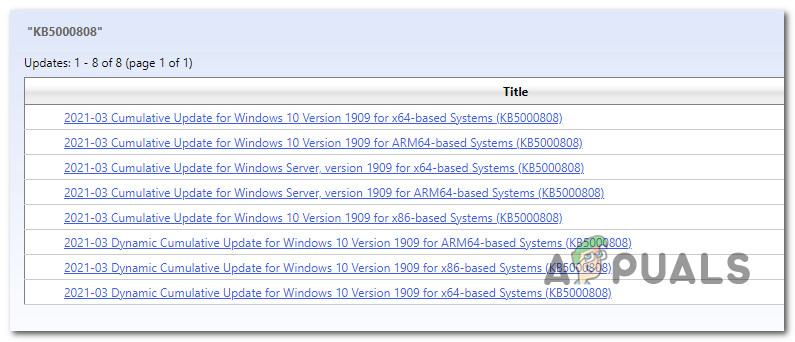
- From the list of results, identify the update appropriate to your Windows version.

Downloading the Windows Update catalog Note: Consider the CPU architecture and Windows version while seeking for a relevant update, after assessing the data.
- Once you’ve identified the necessary update, click the Download button and wait for it to finish downloading.
Downloading the correct update - Once the download is finished, double-click the executable file from the Downloads folder.
- Complete the sideloading of the next Windows update by following the on-screen instructions.
- Now that the update has been installed, restart your computer and check to see whether the 0x800f080a has vanished from the Windows update screen.

4. Perform SFC and DISM scans
The 0x800f080a Windows Update issue might potentially be caused by system file corruption affecting a system file.
Fortunately, Windows has a set of tools (SFC & DISM) that allow you to identify common system file corruption and repair the great majority of them without any required intervention on your part.
You may run both of these programs from an elevated Command Prompt window in fast succession to solve the underlying reasons for the 0x800f080a Windows Update error.
Here’s a simple step-by-step approach to conducting System File Checker and Deployment Image Servicing & Management scans:
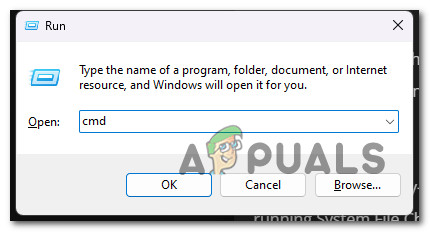
- To open the Run dialog box, press the Windows key + R.
- Next, type “cmd” and press Ctrl + Shift + Enter to open a Command Prompt with elevated permissions.
Open an elevated CMD window - To grant administrator access, click Yes on the User Account Control (UAC) box.
- Enter the following command at the elevated CMD line and press Enter to run the initial SFC scan:
sfc /scannow
Note: The SFC tool has a tendency to stall in the middle of a scan, even if the scan is still running in the background. If you see this behavior during the scan, DO NOT stop it – doing so may result in logical problems on your OS disk. Wait a few minutes, and the utility should unfreeze on its own.
- Let’s run a DISM scan when the SFC scan is finished. To do so, use the following command:
Dism /Online /Cleanup-Image /CheckHealth
Important: DSM uses a subcomponent of Windows Update to download healthy versions of broken system files; hence, an internet connection is required to run this type of scan.
- Once both types of scans have been performed successfully, restart your computer and install the pending update once again to see if the issue is now fixed.
5. Uninstall potential conflicting programs (if applicable)
Even though Windows Update is supposed to be an isolated OS component that can’t be affected by a 3rd party process or startup items, there are a lot of confirmed cases where 3rd party applications are actually responsible for the 0x800f080a error.
Typically, security programs or system management programs are responsible for interfering with the installation of pending Windows updates.
Here’s a short list of programs that other users have confirmed to cause this issue:
- CCleaner
- Tune Up Utilities
- Win Optimizer
- Advanced System Care
- Argente Utilities
- System Mechanic
- Simplitec
- ReImager
- AVG TuneUp
- Glary Utilities
- Daemon Tools
- Speccy
If you’re currently using any of the programs listed above, follow the instructions below to temporarily uninstall them and see if the failing update now installs without the 0x800f080a error:
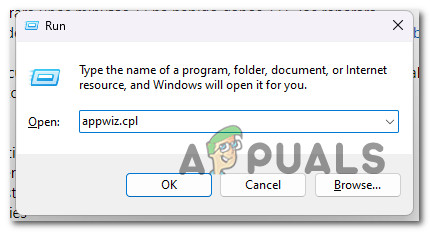
- Press Windows key + R to open up a Run dialog box.
- Next, type ‘appwiz.cpl’ inside the text box, then press Ctrl + Shift + Enter to open up the Programs and Features menu.
Open up the Programs and Features menu - At the User Account Control (UAC), click Yes to grant admin access.
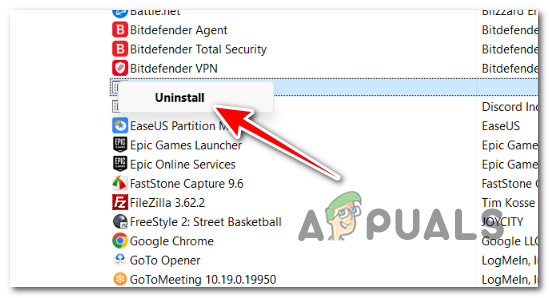
- Once you’re inside the Programs and Features menu, scroll down through the list of installed programs and locate the installation that you suspect might be causing the 0x800f080a error.
- Right-click on the problematic program, then click on Uninstall from the context menu.

Uninstall the problematic program - Follow the on-screen instructions to complete the uninstallation.
- Reboot your Windows PC and see if the update is now installing without issues.
6. Refresh every Windows Component
Another reason why you might experience this problem is an inconsistency related to Windows Update or an associated dependency.
Before you move down to other methods that will produce ever-lasting effects on your system, a quick and effective way to make sure that no temporary WU files are causing the 0x800f080a error is to refresh every Windows Update component & download folder with a series of terminal commands (performed from an elevated CMD prompt).
Note: Microsoft released several ‘bad’ updates in the past that ended up creating installation problems with certain builds. The problem with these bad updates is that even if Microsoft addressed the issue quickly, there’s a chance the ‘bad’ update installation files are already physically present in one of the two folders (catroot2 and SoftwareDistribution) that Windows Update is using to store temporary files.
If you haven’t tried this yet, follow the instructions below to refresh every relevant WU component and clear the contents of the two Windows Update folders (Catroot2 & SoftwareDistribution):
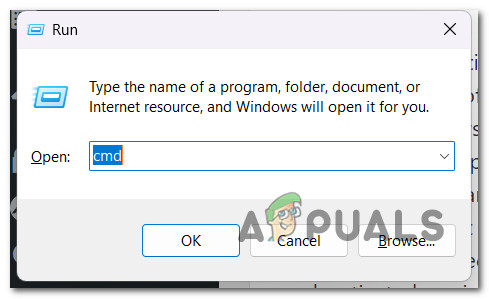
- Begin by pressing the Windows key + R to bring up the Run dialog box.
- Then, in the text box that just appeared, write “cmd” and hit Ctrl + Shift + Enter to start an elevated Command Prompt terminal window.

Open a CMD window with admin access - When you see the UAC (User Account Control) window, click or tap on Yes to grant the necessary access.
- Once inside the elevated Command Prompt, enter the following CMD commands in the same order as listed below and press Enter after each one to stop any WU-related services:
net stop wuauserv

net stop cryptSvc

net stop bits

net stop msiserver
Note: To clarify what you’re actually telling the terminal to do – These instructions will halt the Windows Update Services, MSI Installer, Cryptographic services, and BITS services.
- After stopping all necessary services, use the following commands to clean and rename the SoftwareDistribution and Catroot2 folders:
ren C:\Windows\SoftwareDistribution SoftwareDistribution.old
ren C:\Windows\System32\catroot2 Catroot2.old
Note: These folders are in charge of storing updated files used by the WU component. Since you can’t delete them conventionally, renaming these directories will drive your operating system to produce new healthy counterparts. This will happen the next time you initiate the download of a pending Windows update.
- Now that the directories have been renamed, use the following commands to re-enable the previously deactivated services:
net start wuauserv

net start cryptSvc

net start bits

net start msiserver
- Restart your computer and install the pending update once again to force your OS to create new download folders. See if the 0x800f080A is now fixed.
7. Repair install or Clean install
If none of the solutions listed above were successful in resolving the 0x800f080a error while installing certain Windows Updates, you can assume that your problem is caused by an underlying system corruption issue that cannot be resolved without targeting the entire OS installation (with DISM and SFC scans).
If you’ve come this far without a resolution, replacing every Windows file with a healthy equivalent is the only option left. This can be accomplished by either an in-place fix (repair install) or a clean install.
A clean install is a simpler method, but the primary disadvantage is that you won’t be able to save your personal data (applications, games, personal media, etc.) unless you back them up first.
If, on the other hand, you choose a repair install, the process is somewhat more time-consuming, but the key benefit is that you get to preserve all of your personal data, including apps, games, personal media, and even certain user settings.
Several users complained of receiving an update error 0x800f080a when they were trying to install pending updates on their PCs. If you are one such user and don’t know what to do next, read this guide till the end.
In this post, we have discussed the reasons behind its occurrence, along with six ways that should address this problem. Moreover, the solutions discussed work for both Windows 11 as well as Windows 10. So, you may apply the same workaround irrespective of which version of Windows you are currently using. Try the solutions and check if they resolve this issue on your Windows 11/10 PC.
What may trigger Update Error 0x800f080a in Windows 11/10?
If you are facing trouble installing the recent Windows Updates, it might be because of one or a combination of the below issues –
- Internal glitches: Troubleshoot Windows Update and check if the problem is resolved.
- Using a third-party antivirus program
- Corruption inside System files or folders: Try SFC/DISM
- Disabled Windows Update Service
- Corrupted Update Components
To resolve Windows updates failing on an error code 0x800f080a, attempt these solutions sequentially –
- Troubleshoot Windows Update
- Reinstall Wireless Adapter
- Check Windows Update Service
- Run SFC/DISM Scans
- Reset Windows Update Components
- Manually Install pending updates
Let’s explore these solutions in detail –
1] Troubleshoot Windows Update
When you are facing trouble installing Windows updates, the first thing that you should do is run Windows Update Troubleshooter. This is an in-built tool that diagnoses underlying causes and resolves them. Here’s how to run this utility program –
On Windows 11:
- Press Windows & I, and browse to the below location.
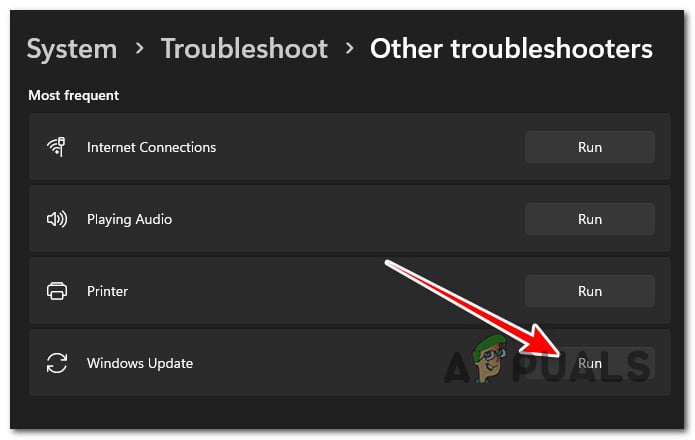
System > Troubleshoot > Other troubleshooters
- Under Most frequent, hit the Run button available beside Windows Update.

- Now, follow the onscreen instructions to complete the troubleshooting.
On Windows 10:
If you are encountering this error code while installing updates on Windows 10, do the following –
- Press Win + I, and select Update & Security.
- Select Troubleshoot on the left navigation.
- Head over to the right pane and click Additional troubleshooters.
- Click to expand Windows Update and hit Run the troubleshooter.

- Now, follow the onscreen instructions to complete troubleshooting Windows Update.
Note: This tool will check for the probable issues preventing Windows Update from occurring smoothly. If that comes under its scope, the same gets resolved automatically. Else, this will suggest ways that can resolve this issue on your computer.
2] Reinstall Wireless Adapter
There is quite a possibility that no problem actually exists on your device, yet the updates are failing to download or install. Though you have to find reasons why it fails to install, a slow network may prevent downloading pending updates.
Launch your default web browser and check if you can surf online. If you are able to browse different topics quite easily over your browser, the problem may lie within your Wireless adapter. Several users confirmed that they were able to resolve the 0x800f080a issue simply by reinstalling the Wireless adapter. Here’s how to update it on Windows 11/10 PC –
- Right-click on the Windows icon and select Device Manager.
- Click “>” left of Network adapters to expand this section.
- Right-click on your WiFi adapter and hit the option – Uninstall device.
- The chosen driver will no longer appear under “Network adapters”.
- Locate the “Scan for hardware changes” icon under the toolbar and click on it.
- Device Manager will refresh soon afterward and bring back the uninstalled driver.
Restart your PC and check if the update error 0x800f080a is resolved by now.
Can you update drivers using Device Manager in Windows 11?
With recent changes in Windows 10 21h2 and Windows 11, there is no way you can update the concerned driver. So, you are left only with two options to choose from.
The first one is to download and install optional driver updates on your PC. It is quite easy to perform this task by navigating to the Windows Update and checking for optional updates. The second way is to visit the manufacturer’s official site and check if there are any recent driver updates for Wireless adapters.
3] Check Windows Update Services
Many a time, Windows Updates might fail because the update services are disabled on your computer. Go and check the current status of Windows Update and enable it back when found disabled. Here’s how to perform this task –
- Press Win + R, type “
services.msc“, and hit OK. - When the Services window comes into the display, scroll down to Windows Update and check its current status.
- If this service is turned off, you can’t install pending updates on your computer.
- Right-click over this service, and choose the option – “Start“.
When its status change from Stopped to Running, you may close the Services window, and restart your PC. Sign back into your device again and see if you can now update your Windows OS.
4] Run SFC/DISM Scans
Third-party antivirus programs are known to interact with the system files/folders and make them corrupt. If you do use any external security app, disable that first, and repair file corruption on your PC. To do so, you may take the help of utility programs like – SFC/DISM.
To try SFC and DISM scans, do the following –
- Launch Command Prompt as administrator.
- On the elevated console, type the following, and press Enter –
sfc /scannow
- Wait for 15-20 minutes while the file corruption is being taken care of by SFC.
- Once this is over, run DISM on the same prompt. All you require is to run this code next –
DISM /Online /Cleanup-Image /RestoreHealth

- Just like SFC, DISM will also take 15-20 minutes to find and resolve issues under your System Image.
When the repair completes, reboot your PC and check if the update error 0x800f080a resolves. The timing may increase a bit depending on the level of file corruption.
5] Reset Update Components
If you are still unable to update Windows normally, clear the contents inside the SoftwareDistribution and Catroot2 folders. These two folders store all the information of the updates that you ever perform on your computer. When the stored data exceeds the permissible limit, this may create problems installing new updates.
Purge the contents inside both these folders. Before you begin clearing the stored data, make sure to stop all update-related services. The services that you need to stop are as follows –
- Background Intelligent Transfer Service (BITS)
- Windows Update
- Cryptographic Service
You may locate the two cache folders at the following location –
- SoftwareDistribution: C:\Windows
- Catroot2: C:\Windows\System32
After clearing the stored cache, restart all the services that you had stopped earlier. Reboot your PC and check if you can now install pending updates on your device.
Tip: Alternatively, you may reset update components as well.
6] Manually install pending updates
I hope you were able to resolve the update error 0x800f080a by following the above tricks. In case you don’t, this workaround will work. In this, you will need to download the standalone package from the Microsoft Update Catalog that comes along with each security, non-security, or optional update.
- Windows 11 users may follow this tutorial on how to apply updates manually.
- Here’s how to perform the manual installation of updates on Windows 10.
How do I fix Windows Update Error 0x800706be?
The update errors on Windows 10 are alike in nature, so you may apply the above workarounds to resolve update error 0x800706be. This error normally occurs because of the disabled Windows Update service, missing/damaged system files, or corrupted Update components.
Привет! У меня не устанавливается обновление к Windows 10. Показывается сообщение с кодом ошибки 0x800f080a. Конечно, я проверил основные моменты – включены ли службы и есть ли место на диске. С этим проблем нет. Нигде в сети не нашел никакой информации по поводу моей ошибки 0x800f080a. Может кто-то что-то знает? Буду благодарен за помощь.
#Windows 10
Автор статьиАртем Сергеев
Have a question in mind why do some of the Windows updates just refuse to install? When you open Windows update history, you might notice it shows that some Windows updates failed to install with different errors such as 0x800f080a or 0x800f0904. If you are experiencing a similar problem Windows Update Won’t Install Updates or Windows 10 update failed to install or it’s stuck downloading you are right on track. In this post, we discuss some of the unique solutions you can apply to make Windows install updates again.
Contents
- 1 Windows update failed to install
- 2 Why does Windows update fail to install?
- 3 How to fix Windows update problems?
- 3.1 Check internet connection
- 3.2 Free up some disk space
- 3.3 Try to install the Windows update again
- 3.4 Start Windows clean boot State
- 3.5 Try Windows Update Troubleshooter
- 3.6 Reset Windows Update cache
- 3.7 Switch Google DNS
- 3.8 Repair Corrupted Windows System Files
- 3.9 Update Windows 10 Offline
Recently, Microsoft has released Windows update KB5055518 for devices running the latest Windows 10 version 22H2. Installing KB5055518 bumps OS to Windows 10 Build 19045.5608 and focuses on security and non-security fixes. However, several Windows users report Windows 10 update KB5055518 fails to install with different errors 0x800f0922, 0x8000ffff, and 0x800f0826.
Many users describe the problem on Microsoft’s forum
There were problems installing some updates, but we’ll try again later. If you keep seeing this and want to search the web or contact support for information, this may help:
2025-04 Cumulative Update for Windows 10 Version 22H2 for x64-based Systems (KB5055518) – Error 0x800f0831, 0x800f0900 or 0x80070005″
Why does Windows update fail to install?
Many possible things can cause Windows 10 Updates to fail over and over. A slow internet connection that may fail to download Windows updates from the Microsoft server or a Computer that doesn’t have enough free drive space to complete Windows 10 updates, are common. Again Corrupt update files, due to some reason update service is not started, and third-party software or antivirus conflict also causes Windows update failed to install on your computer.
- Restart your computer and check for updates again, probably help fix the problem.
- You need to free up disk space, disable security software and try to install Windows updates
- Ensure the Internet connection is stable and disconnect VPN (If configured on your computer)
- Running Windows update troubleshooter automatically diagnoses and fixes the related problem on Windows 10.
- Restart Windows update service and Clear Windows update cache helps most users fix such problems.
How to fix Windows update problems?
The first thing we recommend is to reboot your PC, check for and try to install the Windows update again. When you reboot your PC, not only refreshes the operating system but also clears temporary glitches present there that prevent Windows updates download or apply.
Open the command prompt as administrator and run this command SC config trustedinstaller start=auto Now try to install the Windows update again.
Check internet connection
The next thing you need to check is your internet connection. Yes, make sure you have a stable internet connection to download Windows update files from the Microsoft server.
- You can check your internet speed at fast.com or speedtest.net.
- Press Windows key + R, type ping google.com -t, and click ok to check if continuously getting ping replay from the Google server.
If ping replay breaks you need to troubleshoot the internet connection before downloading or installing Windows updates.
In addition, disconnect the VPN if configured on your device and temporarily disable security software before trying to install Windows updates.
Free up some disk space
You need to check and make sure you have enough free space on the system drive to download and apply the latest Windows updates. It’s important, especially if you have SSD drive installed.
- Press the Windows key + E to open Files Explorer, then click on This PC,
- Look at the system drive (usually C)for a minimum of 10 GB of free space there. If not you need to free up some disk space.
- To free up disk space on your system drive, you can move some download files to an external drive.
- You can also reclaim a lot of storage by uninstalling apps and Games you rarely use.
- In addition, run Disk Cleanup or read how to delete temporary files automatically on Windows 10.
Pro tip – Disconnect nonessential devices such as USB flash drives or external HDDs, headphones or printers before checking for Windows updates.
Try to install the Windows update again
As per Microsoft experts, the most common cause of Windows Update failed messages is that there are two updates waiting. If one is a servicing stack update, it has to install first, and the machine has to restart before it can install the next update. Restart Windows and try running Windows Update again, yes this is very effective for most users.
- Press the Windows key + X and select settings,
- Click on Update & Security hit the check for updates button.
- Also, make sure to click on the download and install link under optional updates (If available)
- This will start the download and install Windows updates from the Microsoft server,
- You only need to restart your PC to apply Windows updates.
Start Windows clean boot State
Clean booting your computer may also help. If any third-party software causes conflict while downloading & installing Windows updates.
Here’s how to do this:
- Go to the search box > type msconfig
- Select System Configuration > Go to the Services tab
- Select Hide all Microsoft services > Disable all
- Go to the Startup tab and click on Open Task Manager
- Disable all the unnecessary services running there.
- Restart your computer and check for updates.
Now open Windows update settings and hit the check for updates button.
Try Windows Update Troubleshooter
Run the built-in Windows Update Troubleshooter that attempts to identify and fix any problems that exist that might prevent Windows 10 from downloading and installing the latest Windows Updates.
The process will automatically scan for and detect problems within your system, which can take a few minutes to complete.
To run the update troubleshooter
- Press Windows key + x and select settings,
- Go to Update & Security, then Troubleshoot, click on the additional troubleshooter link.
- Locate Windows Update, select it and then click on Run the troubleshooter.
- The diagnosis process checks the status of Windows Update and its related Services and repairs and resets Windows Update components.
- In Addition, the troubleshooter clears the Windows Update cache and related temporary files, checks for pending updates, and more.
- Once the troubleshooting is complete, restart your computer and check for Windows updates again.
Reset Windows Update cache
If the problem continues after running the troubleshooter, the Windows update stuck download 100 or fails to install then reset Windows update components following the steps below.
Open the Command Prompt as administrator, enter the following commands and hit Enter after each one:
- net stop wuauserv
- net stop cryptSvc
- net stop bits
- net stop msiserver
- Ren C:\WindowsSoftwareDistribution SoftwareDistribution.old
- net start wuauserv
- net start cryptSvc
- net start bits
- net start msiserver
These commands will first stop the Windows update service and its related services. Then rename the SoftwareDistribution folder to SoftwareDistribution.old (Where Windows stores update files). If any files in this folder get corrupted this may cause Windows updates fail to install. After that restart the Windows update and its related services.
If you are not comfortable with a command prompt then
- Open the Windows services console using services.msc
- Stop Windows Update service and its related services (BITS)
- Now open File Explorer using Windows key + E and Go to the following location. C:\Windows\SoftwareDistribution\Download
- Delete everything in the folder, but do not delete the folder itself.
- To do so, press CTRL + A to select everything and then press Delete to remove the files.
Or rename the Software Distribution folder (C:\Windows\). After that restart the services you previously stopped. and check for Windows updates again.
Switch Google DNS
If you notice Windows updates won’t download or are stuck downloading updates, then change your DNS address following the steps below. Several users recommended this as a working solution when Windows updates are stuck downloading.
- Press Windows key + R, type ncpa.cpl and click ok,
- This will open the network connections window,
- Locate your active network adapter, right-click and select properties,
- Double-click on Internet Protocol Version 4 (TCP/IPv4) to open its properties.
- Select the radio button, use the following DNS server address then set preferred DNS server 8.8.8.8 and Alternate DNS server 8.8.4.4.
- Checkmark on validate settings upon exit, click ok, apply and ok
Now try to install Windows updates again and check its status.
Repair Corrupted Windows System Files
Corrupted system files might prevent new Windows updates to apply and result Windows 10 update fails to install or is stuck download. Run DISM (Deployment Image Servicing and Management) and sfc (System file checker) utility help detect and repair missing system files automatically.
- Open the command prompt as administrator,
- First, run the DISM command DISM.exe /Online /Cleanup-image /Restorehealth
- Once the command is executed, run sfc /scannow command
- Both commands check system image health and check for corruption in system files if found, it will restore them with the correct one.
- Let the scanning process complete 100%, Once done, restart your PC and try to install the Windows update again.
Update Windows 10 Offline
Also, you can resolve Windows update installation problems by manually installing the latest Windows 10 updates.
- Visit the Windows 10 update history webpage, where you can notice the logs of all the previous Windows updates that have been released.
- For the most recently released update, note down the KB number.
- Now use the Windows Update Catalog Website to search for the update specified by the KB number you noted down. (for example, KB5055518) Download the update depending on if your machine is 32-bit = x86 or 64-bit = x64.
- Open the downloaded file to install the update.
That’s all after installing the updates simply restart the computer to apply the changes. Also, If you are getting Windows Update stuck while upgrading the process, simply use the official media creation tool to upgrade to Windows 10 version 22H2 without any error or problem.
Did these solutions help to fix the Windows 10 update error 0x800f0900? Let us know in the comments below.
Also, read
- Windows 11 upgrade or installation failed? 9 Things to Try
- Solved: Windows 10 black screen with cursor after sleep
- Solved: An operating system wasn’t found on Windows 10
- Solved: Windows 10 start menu search not working after update
- Windows 11 Photos App not opening or Not working? Try these solutions