
Are you encountering the 0x800B0109 error code on your Windows PC? It comes with an error message “Some update files aren’t signed correctly.” If you’re getting this and unable to download Windows updates, here is what you need to know.
This error is often associated with a missing update file or an invalid security certificate. When it occurs, you can’t download cumulative updates or patch fixes.
You might know Windows updates are vital for the stability, security, and overall performance of your system. They provide bug fixes, feature enhancements, and important security patches to keep your PC running smoothly. That’s why troubleshooting the 0x800B0109 error is crucial.
So, here we will walk you through the step-by-step process to fix the 0x800B0109 error in your Windows PC. No matter whether you’re using Windows 11, 10, or an older version, you will get a solution here. Have a look.
What is The 0x800B0109 Error in Windows?

The 0x800B0109 error is a common issue that Windows users may come across when trying to update their system. This error typically occurs when there is a problem with the security certificate used for verifying the authenticity and integrity of Windows updates.
When the certificate is invalid or not trusted, the update process gets disrupted, leading to the 0x800B0109 error.
However, apart from the security certificate, there can be different reasons that lead to this Windows update error. Whether or not you will get this error entirely depends on your system’s health.
What Causes The 0x800B0109 Error in Windows?

There can be several factors to trigger the 0x800B0109 error. Our experts have done in-depth research to identify the potential reasons. Understanding these causes can help you troubleshoot the issue more effectively. Here are some common causes of this error:
1. This error can occur when the security certificate used to verify the authenticity and integrity of Windows updates has expired or is invalid. If the certificate is not trusted, the update process will be disrupted, resulting in the 0x800B0109 error.
2. Corrupted or damaged Windows Update components can also trigger the 0x800B0109 error. Issues with files and settings related to Windows Update can prevent the update process from functioning correctly.
3. Sometimes, third-party firewalls or antivirus software can interfere with the Windows update process and cause this update error. The security measures implemented by these programs may conflict with the update process, leading to the error.
4. A problematic internet connection can also contribute to the 0x800B0109 error. If your connection is unstable or experiencing interruptions, the update process may fail to complete successfully.
Resolving the 0x800B0109 error ensures that you can install the latest Windows updates, which protects your system against potential vulnerabilities and keep it up to date with new features. Now, let’s dive into the workarounds to fix this error:
Check Date and Time Settings
The incorrect date and time settings on your PC can cause the 0x800B0109 error. If your system is set to download the updates automatically and its date doesn’t align with the update release dates, you may encounter this error. It is important to ensure that your system’s date and time are set correctly. To fix this, follow these steps:
1. Right-click on the date and time display in the bottom-right corner of your screen.
2. Select Adjust date and time or a similar option.
3. In the Date & Time settings, toggle on the Set time automatically option.

4. Now, choose the Time zone from the drop-down list. This allows your system to synchronize with the correct date and time.
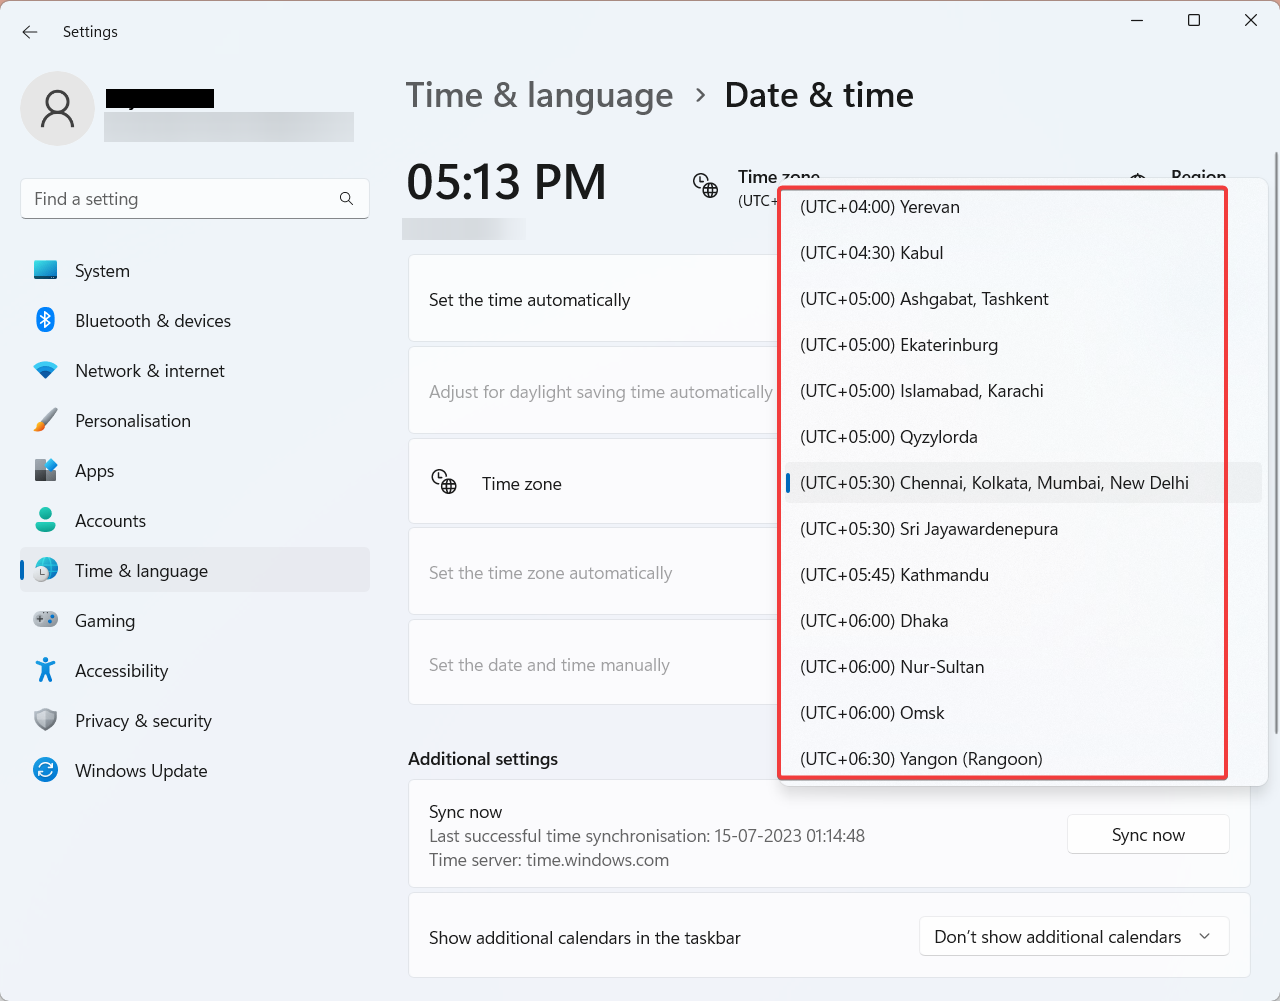
5. Once the settings are adjusted, restart your computer.
6. Try updating your Windows system again to see if the error is resolved.
Install Missing Root Certificates
The 0x800B0109 error can also occur when your system is missing the necessary root certificates required to validate the authenticity of Windows updates. Installing these missing root certificates can help resolve the issue. Follow the below steps to do so.
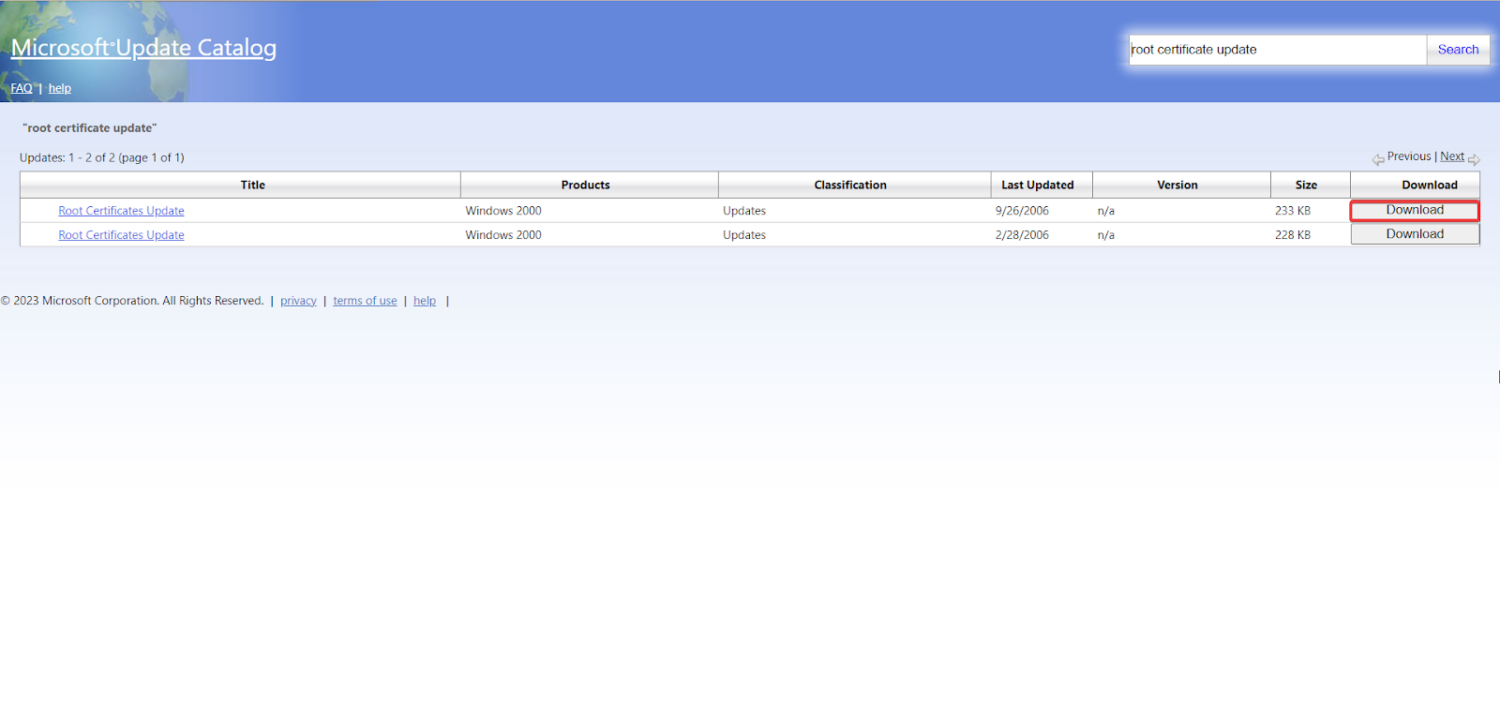
1. Open a web browser and visit the Microsoft Update Catalog.
2. In the search bar, enter root certificate update and press Enter.
3. From the search results, locate the appropriate root certificate update for your operating system version and architecture.
4. Click on the Download button next to the appropriate root certificate update.
5. Now, the Download window will open.
6. Click the Root Certificates Update link.
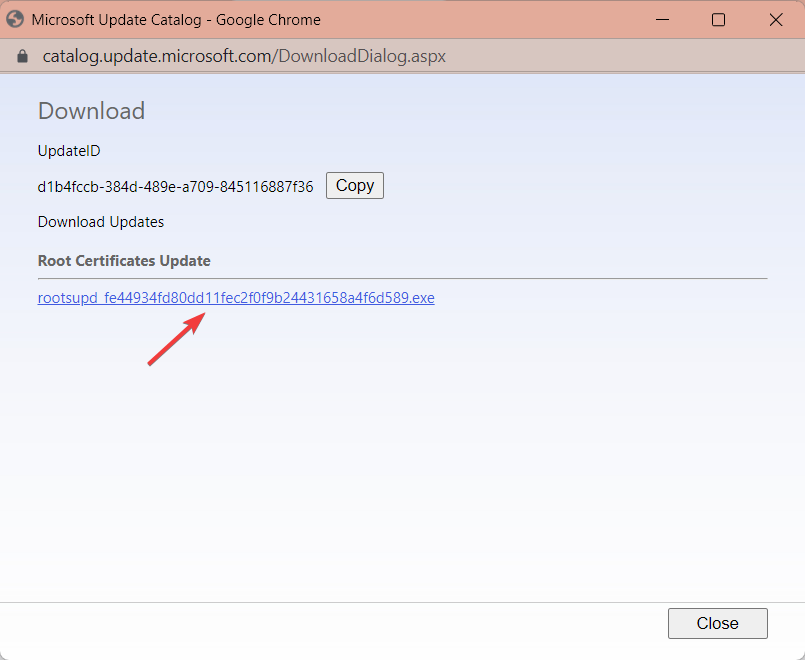
7. The “.exe” file will be downloaded now. Locate and double-click on it to run the installation.
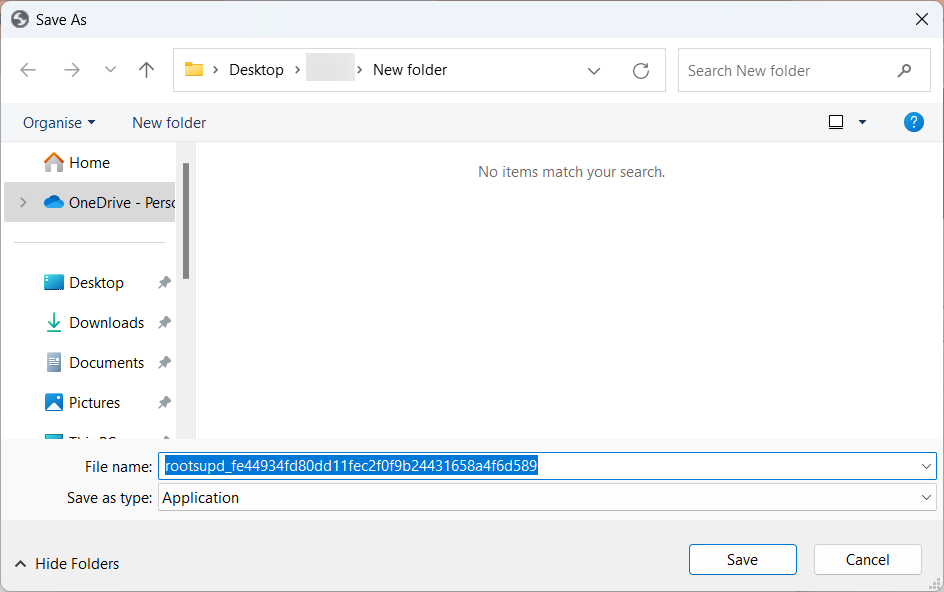
8. Follow the on-screen instructions to complete the installation of the root certificate update.
9. After the installation is finished, restart your computer.
10. Try updating your Windows system again to see if the error is resolved.
Disable Third-Party Firewall/Antivirus
Disabling the third-party firewall or antivirus software temporarily is important, as these security programs can sometimes interfere with the Windows update process on your system. Once you temporarily disable them, you can determine if they are the root cause of the issue. Follow the process below for the same:
1. Locate the third-party firewall or antivirus software icon in your system tray, usually found in the bottom-right corner of your screen.
2. Right-click on the icon and look for options related to disabling or turning off the program temporarily.
3. The specific steps may vary depending on the software you are using.
4. Once disabled, attempt the Windows update again to see if the error is resolved.
5. After completing the update, remember to re-enable the firewall or antivirus software to ensure continued protection.
Reset Windows Update Components
Resetting Windows Update components is important as it helps resolve issues related to corrupted or incomplete update files, which can be a common cause of the 0x800B0109 error. After resetting these components, you can start fresh and eliminate any underlying problems. Here’s how to do so:
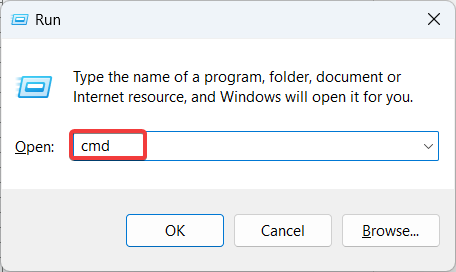
1. Press the Windows key + R to open the Run dialog box.
2. Type “cmd” and press Enter to open the elevated Command Prompt.
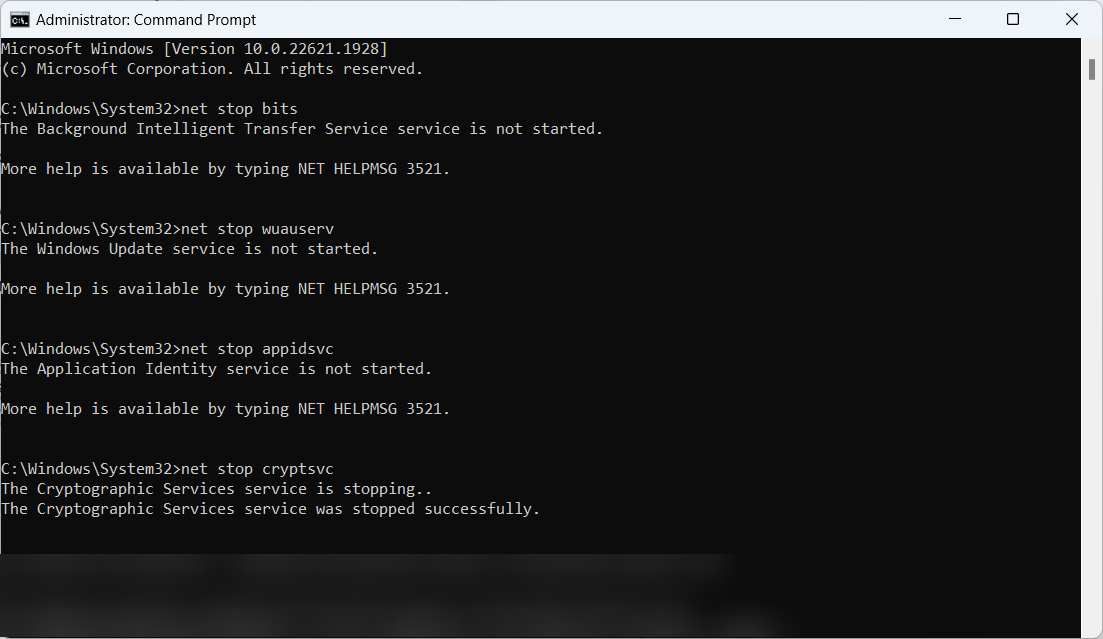
3. In this window, type the following commands one by one and press Enter after each:
- net stop wuauserv
- net stop cryptsvc
- net stop bits
- net stop msiserver
4. After stopping the services, type the following commands to rename the SoftwareDistribution and Catroot2 folders:
5. ren C:\Windows\SoftwareDistribution SoftwareDistribution.old
6. ren C:\Windows\System32\catroot2 Catroot2.old
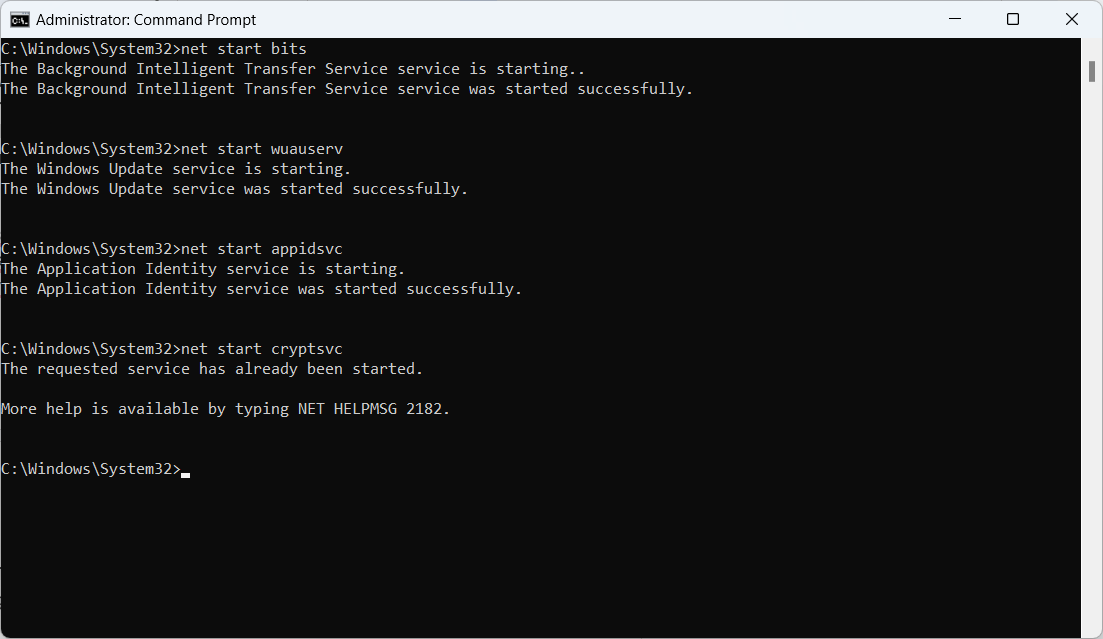
7. Once the folders are renamed, restart the services by entering the following commands:
- net start wuauserv
- net start cryptsvc
- net start bits
- net start msiserver
8. Close the Command Prompt window and restart your computer.
9. Try updating your Windows system again to see if the error is resolved.
Run the Windows Update Troubleshooter
Running the Windows Update Troubleshooter is important as it is a built-in tool designed to detect and fix issues with the Windows update service. With this troubleshooter, you can automatically identify and resolve problems that may be causing the 0x800B0109 error. Follow the below steps to run the troubleshooter:
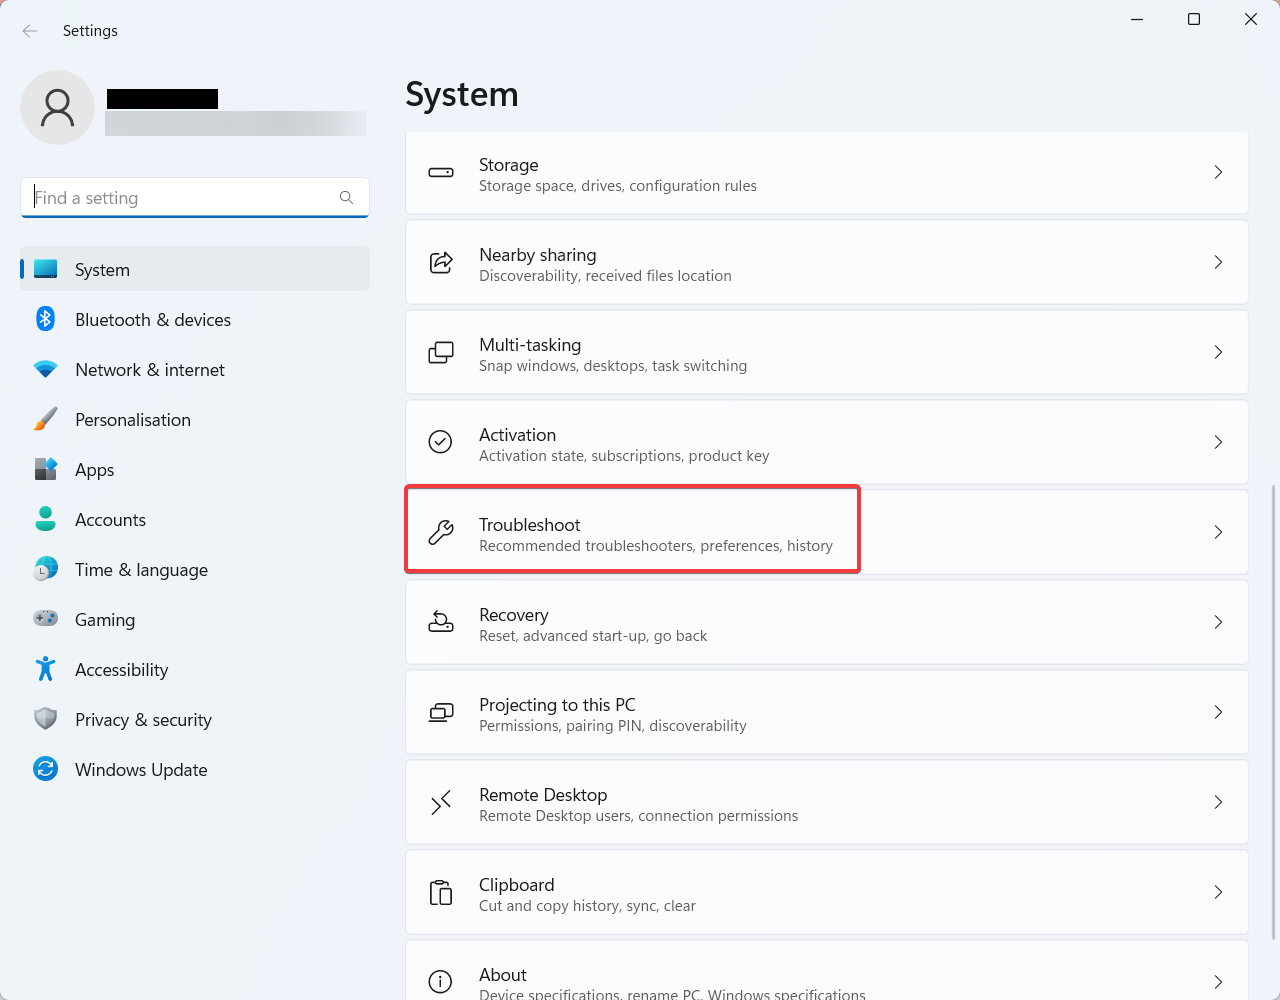
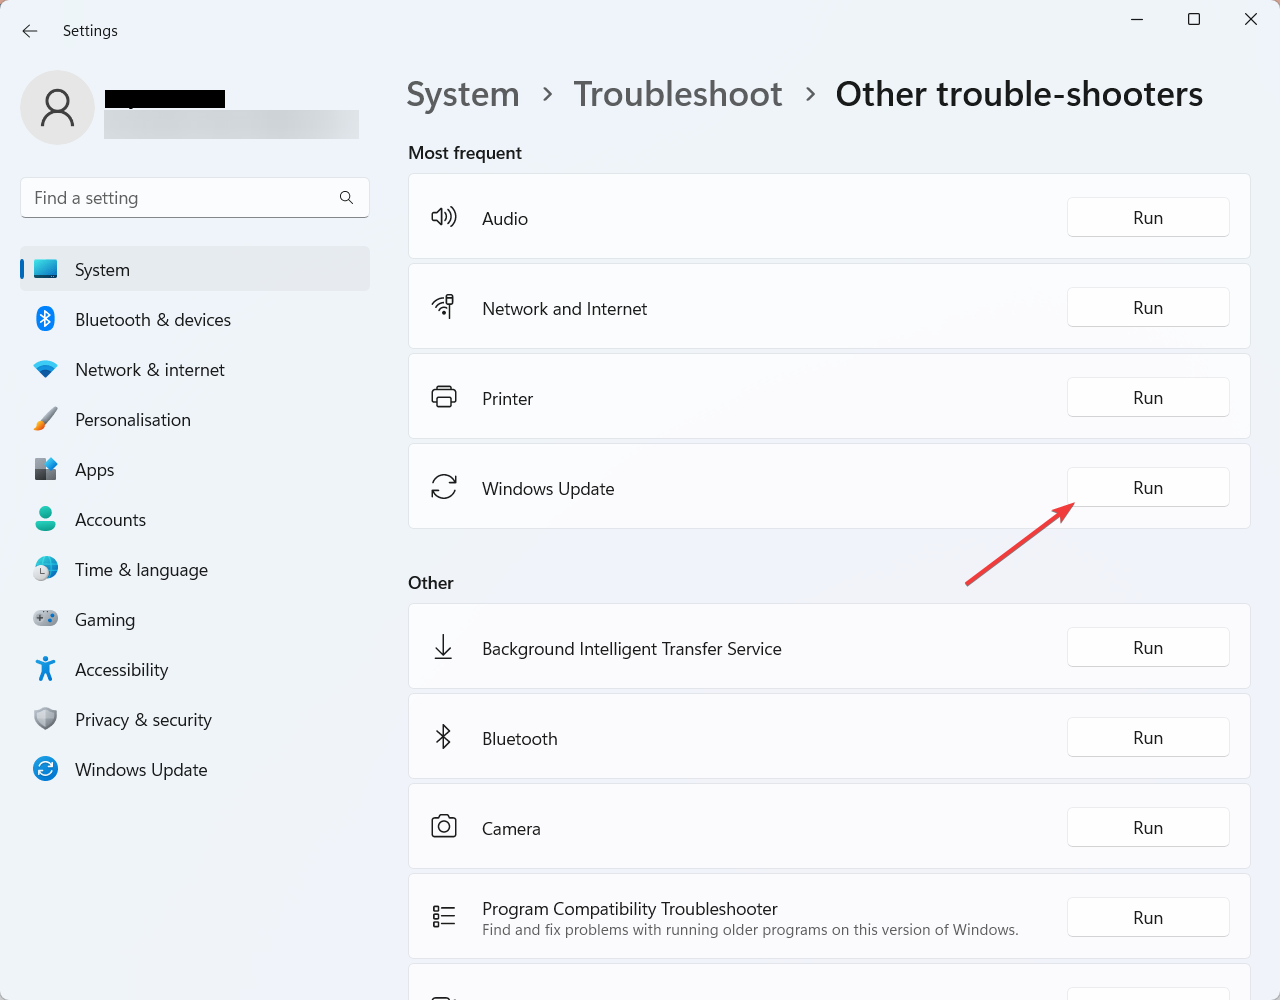
1. Press the Windows key + I to open the Settings app.
2. Click on System and select the Troubleshoot option from the right pane.
3. In the Troubleshoot tab, locate and click on Other trouble-shooters.
4. On the next screen, click the Run button right beside the Windows Update option.
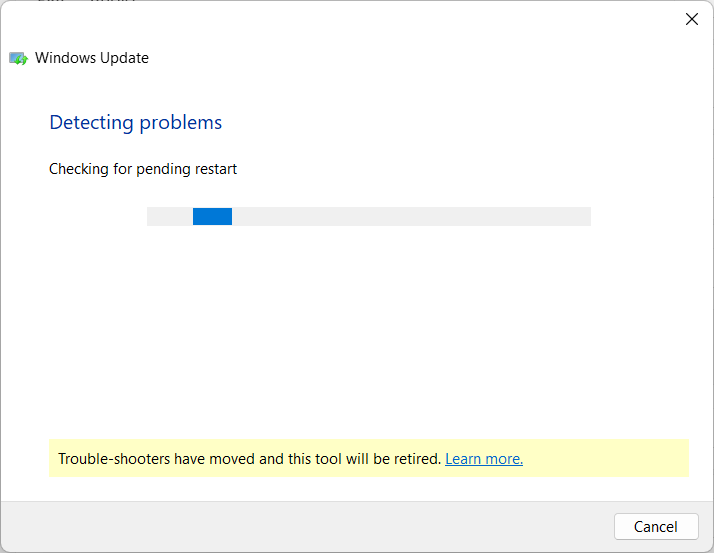
5. Wait for the troubleshooter to detect and resolve any issues with Windows Update.
6. After the troubleshooting process completes, restart your computer.
7. Try to update your Windows system again to see if the error is resolved.
Temporarily Disable Proxy Settings
Temporarily disabling proxy settings is important as misconfigured proxy settings can sometimes interfere with the Windows update process and lead to the update error. Once you disable the proxy settings temporarily, you can check if it is causing the issue. Follow the below steps to perform this solution:
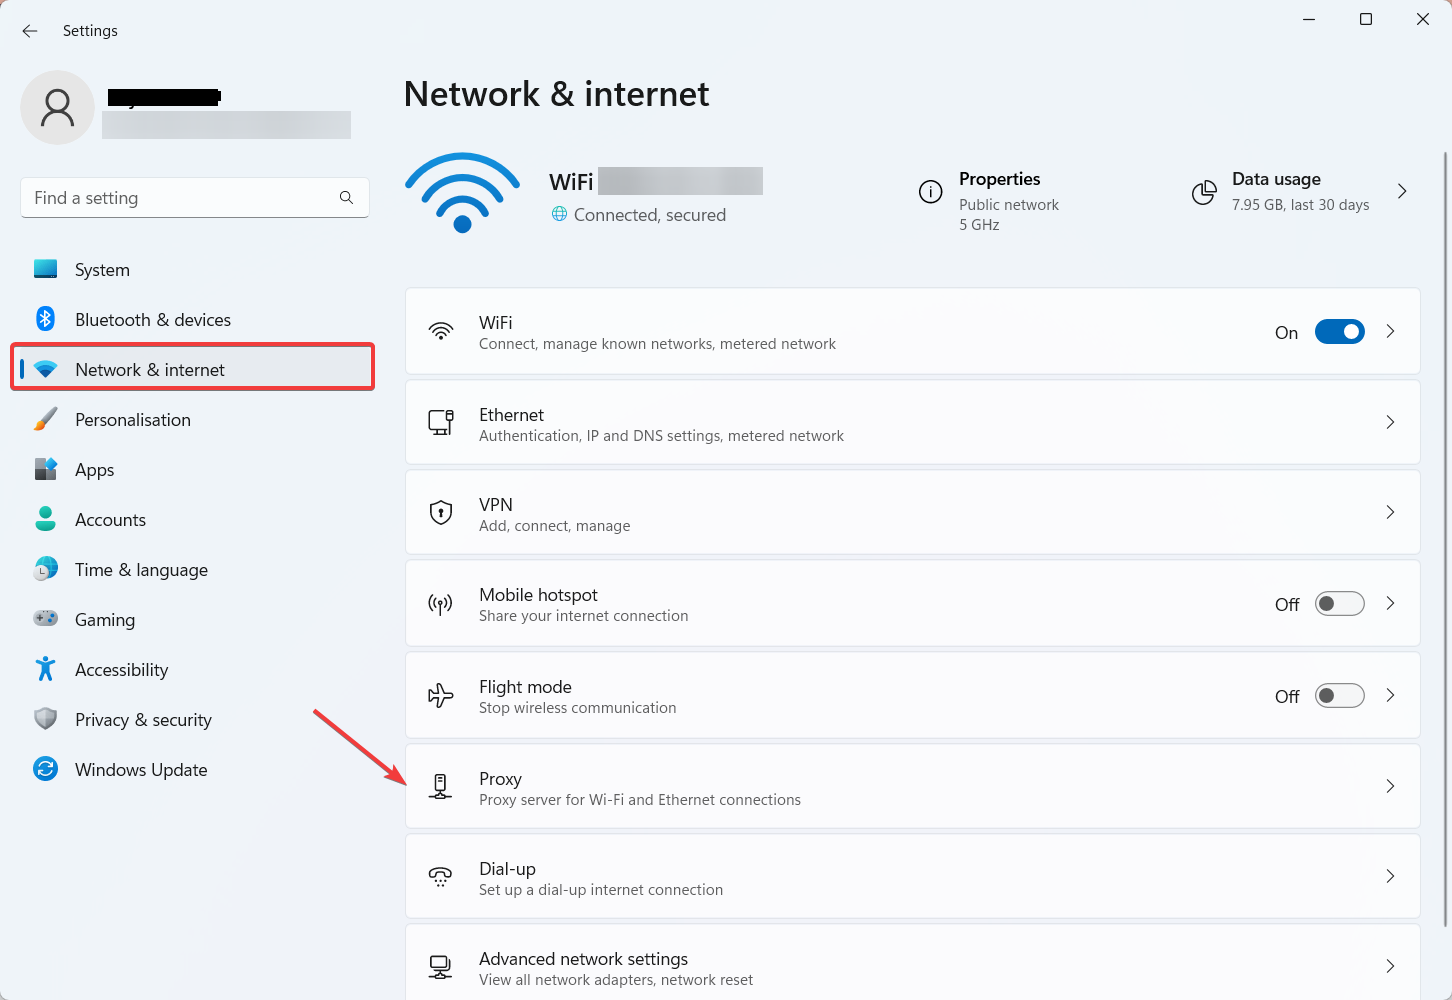
1. Press the Windows key + I to open the Settings app.
2. Click on Network & Internet and select the Proxy tab from the right pane.
3. In the Proxy settings window, click Edit next to Use a proxy server option.
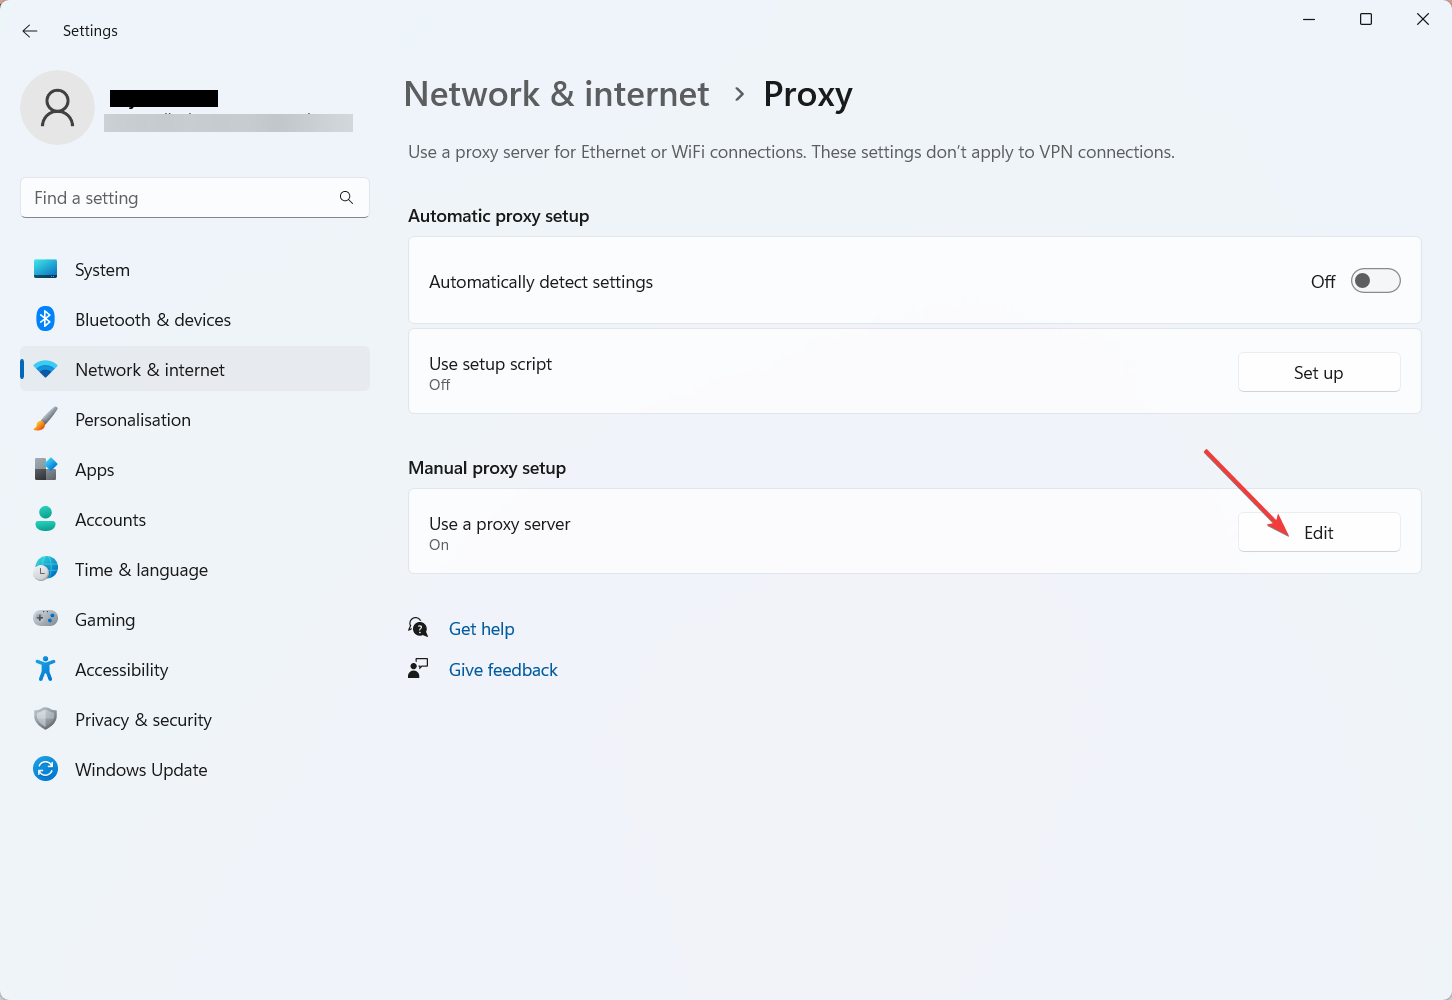
4. Now, in the Edit proxy server window, toggle off the Use a proxy server option.
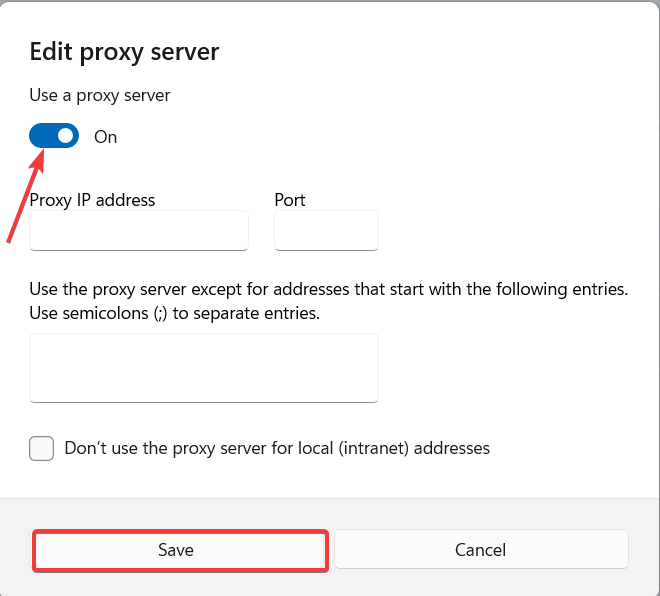
5. Click Save next and close Settings.
6. Now, update your Windows system again to see if the error is resolved.
Perform a Clean Boot
Performing a clean boot is important as it helps identify and resolve conflicts between startup services and the Windows update process. You can create a clean environment for Windows Update with a clean boot. Here are the steps for the same:
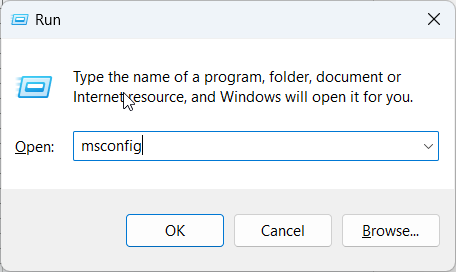
1. Press the Windows key + R to open the Run dialog box.
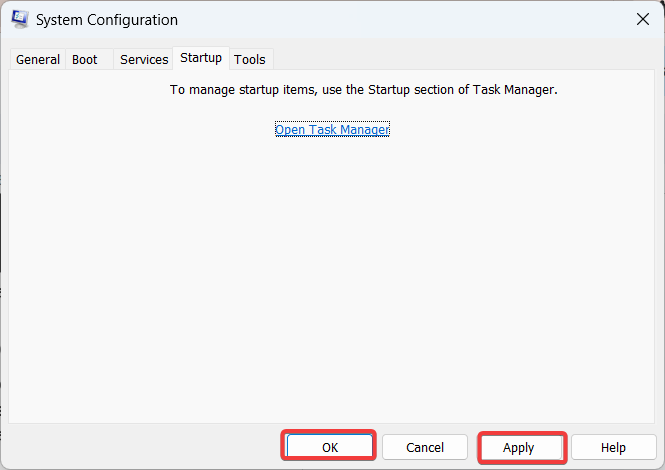
2. Type “msconfig” and hit Enter to open the System Configuration window.
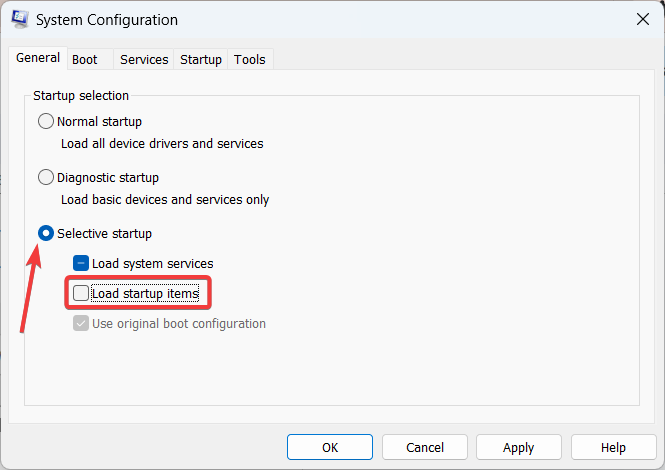
3. In the General tab, select Selective startup and uncheck the box that says Load startup items.
4. Go to the Services tab and check the box that says Hide all Microsoft services.

5. Click on Disable all to all the non-Microsoft services.
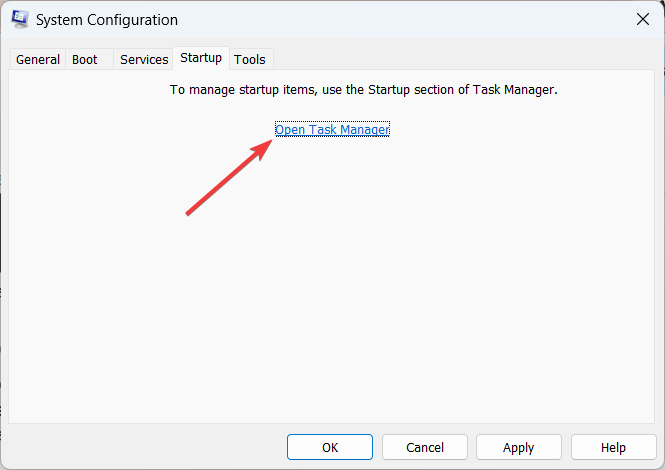
6. Go to the Startup tab and click on Open Task Manager.
7. In the Task Manager, disable each startup application by right-clicking on it and selecting Disable.
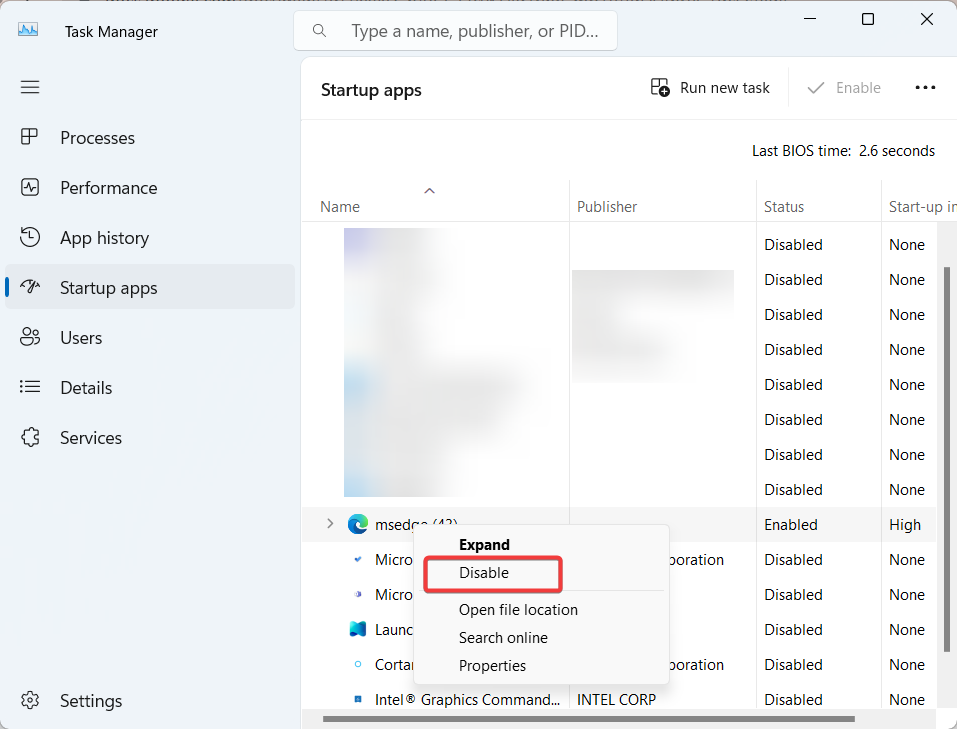
8. Close the Task Manager and click Apply, followed by OK in the System Configuration window.
9. Restart your computer.
10. Try updating your Windows system again to see if the error is resolved.
Clear the Windows Update Cache
Clearing the Windows Update cache is important as it can resolve issues related to corrupted or outdated update files. With it, you can ensure a clean update process. Here’s how to clear the Windows Update cache; follow the below steps.
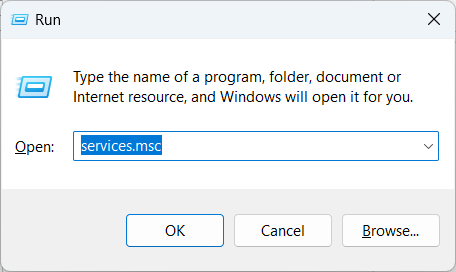
1. Press the Windows key + R to open the Run dialog box.
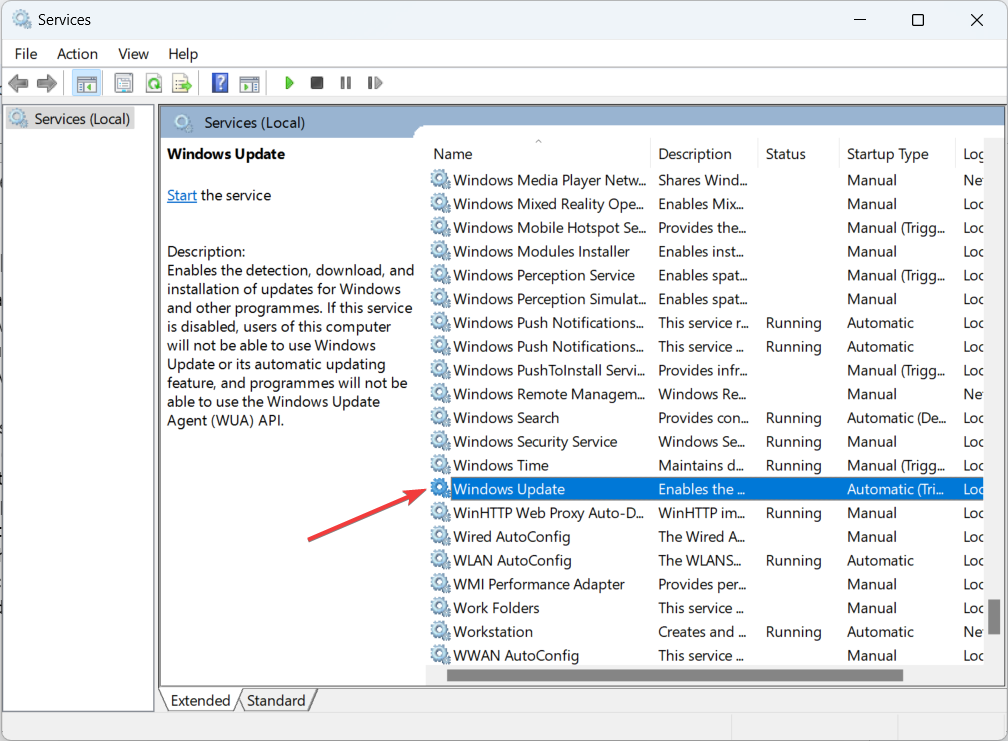
2. Type services.msc and hit Enter to open the Services window.
3. Scroll down and locate the Windows Update service.
4. Right-click on Windows Update and select Stop to temporarily stop the service.
5. Minimize the Services window and open File Explorer.
6. Navigate to the following directory: C:\Windows\SoftwareDistribution
7. Select all the files and folders inside the SoftwareDistribution folder and delete them.
Note: You may need administrator permission to delete these files.
8. Maximize the Services window again, right-click on Windows Update, and select Start to restart the service.
9. Restart your computer.
10. Try updating your Windows system again to see if the error is resolved.
Prevention Tips to Avoid the 0x800B0109 Error in the Future
Unlock vital prevention tips to safeguard against the 0x800B0109 error. This concise guide reveals actionable strategies to prevent future occurrences, guaranteeing seamless digital experiences and fortified system stability. Follow these expert tips and avoid encountering the 0x800B0109 error again.
1. Regularly Update Windows: Keeping your Windows operating system up to date is essential for maintaining security and performance. Enable automatic updates or manually check for updates periodically to ensure you have the latest patches and enhancements.
2. Use Trusted Security Software: Install reputable antivirus or antimalware software and keep it updated. Regularly scan your system for malware to detect and remove any threats that could interfere with the update process.
3. Enable Automatic Time Synchronization: Ensure that your system’s date and time settings are set to update automatically. This helps avoid potential issues related to certificate verification during the update process.
4. Maintain a Reliable Internet Connection: A stable and reliable network connection is crucial for successful updates. Ensure your internet connection is stable and troubleshoot any network connectivity issues that may arise.
5. Back up your data regularly: Backing up your data regularly will help you to recover your data if the 0x800B0109 error does occur.
6. Use a trusted source to download updates. Avoid downloading updates from untrusted sources, as these may contain malware or other malicious software.
7. Restart your computer regularly. This will help to clear out any temporary files or other issues that may be causing the 0x800B0109 error.
Conclusion
By following the aforementioned steps and suggestions, rectifying Windows error 0x800B0109 becomes a straightforward process. It is crucial to promptly examine your internet connection upon encountering the error.
Additionally, activating the automatic update feature in Windows will enable the installation of consistent operating system updates provided by Microsoft. Implementing these measures guarantees a smooth and trouble-free user experience. Thank you for reading; cheers!
You may also explore how to fix Windows 0x80004005 error and Error 0x8007045d.
At times, while trying to update any file using Windows Update, you may come across a Windows error 0x800B0109 “Some update files are not signed correctly” that might be annoying.
Usually, this happens when Windows continuously fail to search for an update or cannot install the updates.
Now, the question arises ‘How to fix this Windows Update error?’. Today we’ll see how our Experts fix this error for our customers.
Here at Bobcares, we have seen several such Windows-related errors as part of our Server Management Services for web hosts and online service providers.
What causes windows update error 0x800B0109 to occur
Sometimes, when a Windows update is trying to install an update it may throw an error message 0x800B0109. This happens if the file that Windows is trying to update is either damaged or missing. This happens in most cases, be it a security update or a cumulative update.
There can be many reasons for this error to occur, that include Windows Registry, Windows Filesystem, internet access, Windows Update service, file corruption, misconfiguration, Adware, virus, and Malware
In almost all cases, no matter how many times we restart the computer, the update will continue to fail constantly and we will not be able to update it no matter what.
How we fix the Windows error 0x800B0109 “Some update files are not signed correctly”
Now let’s take a look at how our Support Engineers resolve this error message to our customers.
Method 1: Clean the Windows Update temporary cache folder
Step 1: Stop Windows Update service
- First, in the Run prompt, we type “services.msc”.
- A new window will open containing all Windows services on the system.
- Here, we search for “Windows Update”.
- Then we right-click on the “Windows Update” and then click Stop.
Step 2: Clean the Windows Update temporary cache folder
- Now, we type %windir%\SoftwareDistribution\DataStore in the Run prompt and click OK.
- As a result, it will open Windows Explorer in the correct location.
- Then we delete all contents of this folder.
Step 3: Start Windows Update service
- We type “services.msc” in the Run prompt.
- A new window will open containing all Windows services on the system.
- Here, we search for “Windows Update”.
- Finally we right-click on the “Windows Update” and then click Start.
Method 2: Run SFC utility to fix 0x800B0109 error
We run the System File Checker (SFC) utility if the problem still persists.
- First, we click Start type “cmd”.
- In the search results, cmd will show up with a black icon.
- Now, we right-click on it and select Run as administrator.
- If prompted for the admin password, we enter the password and click OK.
- A new completely black window will open where we type sfc/scannow and press Enter.
- This process will take a long time. Once the SFC process finishes, we restart the computer. After the restart, we search for Updates again.
Method 3: Clean Windows Update download path
The Registry Editor is a very powerful tool. We suggest taking a backup before modifying anything, as it may cause problems, and we want to have a safe solution. After opening it, we just click File on the top left corner and choose Export. Then we set the settings and save a backup of the registry.
- First, we type “regedit” in the Run prompt and press Enter
- Next, we expand HKLM, then Software, Policies, Microsoft, Windows, and finally Windows Update.
- After finding it, we search for WUServer and WIStatusServer in the right-hand pane.
- If they are not listed, we cannot clean the download path. Otherwise, we delete both.
- Finally, we restart the server.
Method 4: Run the Windows Update troubleshooter to fix 0x800B0109 error
This issue with Windows Update can be solved by running the Windows Update troubleshooter.
For that, we run Windows Update troubleshooter from Control Panel >> Troubleshooting >> View all and we select Windows Update and follow the on-screen instructions.
[Need any further assistance in fixing Windows errors? – We are here to help you]
Conclusion
Today, we saw how our Support Engineers fix the windows update error 0x800B0109
PREVENT YOUR SERVER FROM CRASHING!
Never again lose customers to poor server speed! Let us help you.
Our server experts will monitor & maintain your server 24/7 so that it remains lightning fast and secure.
GET STARTED
var google_conversion_label = «owonCMyG5nEQ0aD71QM»;
Readers help support Windows Report. We may get a commission if you buy through our links.
Read our disclosure page to find out how can you help Windows Report sustain the editorial team. Read more
Errors while trying to install Windows updates or when updating a Windows component are quite common. Some of these might prove more challenging than others, as is the case for 800B0109 Error.
Having worked with many computer systems over the years, I have encountered many of the errors Windows operating systems can throw at you, including the 800B0109 Error.
In this article, I will guide you through some quick and easy-to-follow steps to fix this pesky issue so you can just go and enjoy the latest Windows updates.
What causes the 800b0109 Windows update error?
Some notable factors that can cause the Error(s) found: Code 800B0109 Windows Update encountered an unknown error on your PC are:
- Corrupt system files – You can run into errors due to corrupt system files. They become inaccessible when invoked by the system and can prevent the Windows update process from using them when needed. Hence, the Windows update error 800b0109 will appear.
- Windows update Temporary Cache folder – Old updates on your PC are stored in the Windows updates installer patch files as update cache files in the Temp cache folder. They can be corrupted when kept for long, interfering with Windows update services.
- Issues with the signing certificate for the Windows Update – If there’s an issue with the certificate on the update, this may lead to this error.
- Issues with Windows Update components – Updating Windows requires certain services to run on your computer. If these update services are not running correctly or intact, it can cause issues with the update you’re trying to install.
These factors can vary on different computers depending on the circumstances. Regardless, you can resolve the error by following the troubleshooting steps below.
How can I fix the 800b0109 Windows update error?
1. Run an SFC scan
- Left-click the Start button, type Command Prompt, and click the Run as administrator option.

- Click Yes on the User Account Control (UAC) prompt.
- Type the following and press Enter:
sfc /scannow
- Restart your PC and check if the update error persists.


Running an SFC scan will find and repair corrupt system files causing the Windows update error. You can check our article on fixing SFC scannow not working on your PC.
In addition, it’s more practical to repair damaged files using dedicated system repair tools. That is because it will fully detect system issues and repair them only by pressing Start Repairing.
2. Reset the timezone and time correctly
- Press Windows + I key to open Settings.
- Select Time & language and click on Date and time.

- Disable Set time zone automatically. Then, select the drop-down beside the Time zone in the new window and click on your correct zone.

- Click the Change button beside Set date & time manually.
- Choose the correct time and click on Change.


Doubling down and fixing the issues with time zone and time has been claimed to work by some users. Also, do not hesitate to consult this guide if the time keeps changing on your Windows PC.
- Microsoft talks about lawsuit against AI hackers over explicit image abuse
- File sharing in Microsoft 365 just got smarter with Hero Links
- OneNote new UI update gives you more canvas space and cleaner layout
- The latest Edge update fixes Microsoft Editor issue & a Chronium vulnerability
- Visual Studio Code 1.100 is here GPT 4.1, custom Chat feature & more
3. Perform an in-place upgrade
- Go to Microsoft’s official website, choose the installed OS edition, and click Download.

- Select the product language from the dropdown menu, and click Confirm. Now, click on the download button to get the Windows 11 ISO.

- Once downloaded, double-click on the ISO file and click Open in the confirmation prompt.
- Now, run the setup.exe file and click on Next to continue.

- Click Accept to agree to Microsoft’s license terms.
- Finally, verify that the setup reads Keep personal files and apps. Click on Install to start the in-place update, and wait for the process to complete.


Performing this in-place upgrade will automatically reset the PC and add new files and updates. However, you are guaranteed the safety of your data since everything is secured.
If you tried all of the above and you still have issues you could also try the following:
- Restart Windows in Safe Mode – It will start Windows in a basic state, using a limited set of files and drivers, and fix temporary issues impeding its performance.
- Disable or uninstall antivirus software – It is common for antivirus software to interfere with or block the Windows update process. So, disabling it can resolve the error.
- Run a system restore – A system restore will backdate the computer to a previous point where it runs without errors. It will reverse system changes interfering with the update process.
Alternatively, you may be interested in our article about how to fix the 0x800f0900 Windows Update error on Windows 11. Also, check our guide about fixing Windows Update Error 0x80242017 on your PC.
If you have further questions or suggestions, kindly drop them in the comments section.
Henderson Jayden Harper
Windows Software Expert
Passionate about technology, Crypto, software, Windows, and everything computer-related, he spends most of his time developing new skills and learning more about the tech world.
He also enjoys gaming, writing, walking his dog, and reading and learning about new cultures. He also enjoys spending private time connecting with nature.
-
Home
-
News
- How to Fix Windows Update Error Code 0x800b0109? (4 Ways)
How to Fix Windows Update Error Code 0x800b0109? (4 Ways)
By Vera | Follow |
Last Updated
Get the message saying “Some update files aren’t signed correctly. Error code: (0x800b0109)” in Windows 10 update? Relax! You can find multiple methods collected by MiniTool to fix this update error. Now, let’s go to look through them and try them one by one to help you out.
Sometimes when trying to download and install updates in Settings, you may run into an annoying error code 0x800b0109. On the computer screen, you see the message “Some update files aren’t signed correctly. Error code: (0x800b0109)”. This means that the Windows service is not able to verify.
If update files are damaged or missing, this situation may appear, no matter whether you install security updates or cumulative updates. In addition, the reasons for this error code are various, for example, Windows registry, incorrect configurations, file system issues, etc.
No matter how many times you restart the PC, the update fails with this error code. Fortunately, you can take measures to help you out.
Fixes for Error 0x800b0109
Run Windows Update Troubleshooter
In some cases, the built-in troubleshooters can be run to fix some minor/basic issues. If you are hit by error code: 0x800b0109 in Windows 10, you can also run the Windows Update troubleshooter to fix the update issue. See how to do the fix:
Step 1: Open the Settings app by pressing Win + I.
Tips:
Sometimes you fail to launch this app. But don’t worry, go to find solutions from our related post — What to Do When Windows 10/11 Settings App Is Not Opening.
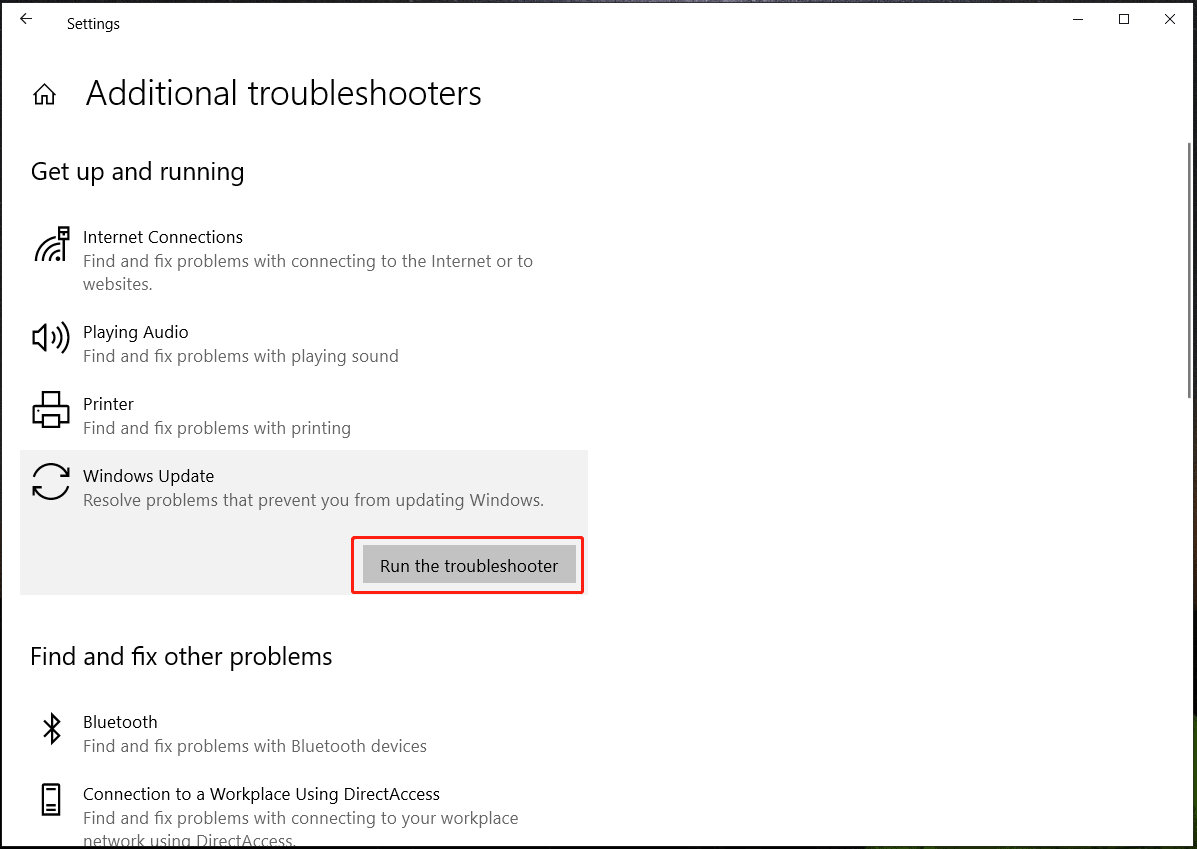
Step 2: Click on Update & Security > Troubleshoot > Additional troubleshooters.
Step 3: Locate Windows Update and click the Run the troubleshooter button to start the fix.
Run SFC and DISM
Corrupt or missing system files may also lead to Windows update error code 0x800b0109, thus, you can try System File Checker (SFC) and Deployment Image Servicing and Management (DISM) to perform the repair. See the given-below guide:
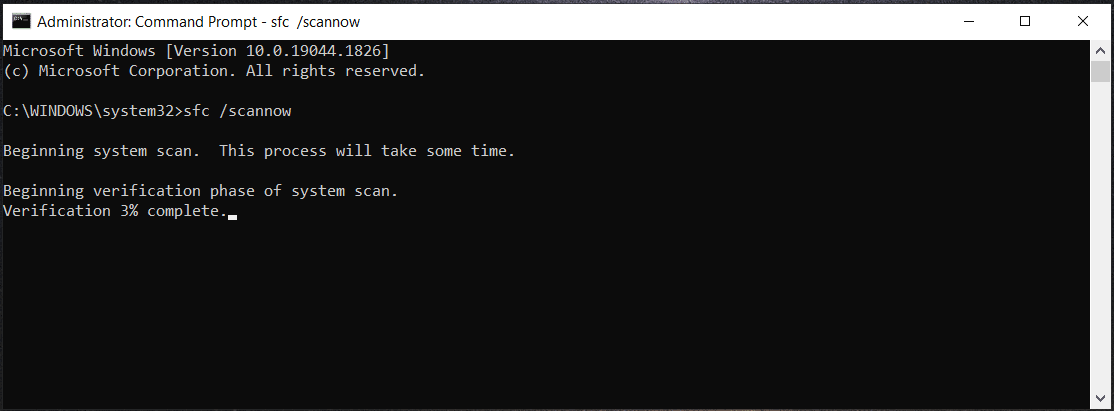
Step 1: Type CMD to the search box in Windows 10 and click Run as administrator from the right pane to launch Command Prompt with admin permissions.
Step 2: Type sfc /scannow and press Enter to scan the entire system for corruption and repair it.
Tips:
What if your PC is stuck in running the SFC scan? Find solutions from this post — Windows 10 SFC /Scannow Stuck at 4/5/30/40/73, etc.? Try 7 Ways.
Step 3: After the process finishes, run the DISM scan via these commands:
dism.exe /online /cleanup-image /scanhealth
dism.exe /online /cleanup-image /restorehealth
Wait patiently until the scan finishes. Then, go to update Windows to check if error code: (0x800b0109) is fixed.
Use the Registry Editor
Before you proceed with this operation, make sure you have backed up the registry since mistaken operations may lead to a system failure. See the related post – How to Back up Individual Registry Keys Windows 10/11.
Then, start the following steps:
Step 1: Type regedit to the search box and click Registry Editor to open it.
Step 2: Go to Computer\HKEY_LOCAL_MACHINE\SOFTWARE\Policies\Microsoft\Windows Update.
Step 3: Delete the Windows Update entry.
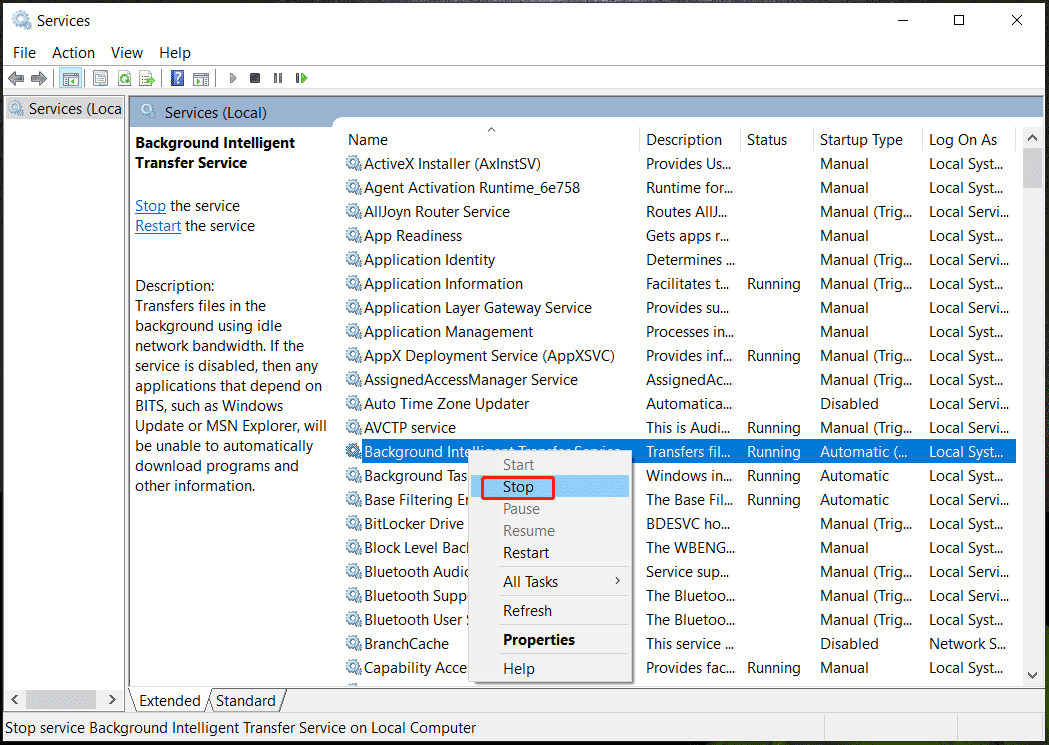
Step 4: Press Win + R, enter services.msc and click OK.
Step 5: Locate Background Intelligent Transfer Service, right-click on it and choose Stop. Do the same thing for the Windows Update service.
Step 6: Right-click on each service and then choose Start to restart them. Then, go to update Windows and you may not run into error 0x800b0109.
Run Command Using Notepad
If you still cannot update Windows 10 with 0x800b0109, you can run some commands using Notepad as a batch file.
Step 1: Right-click on Desktop and choose New > Text Document.
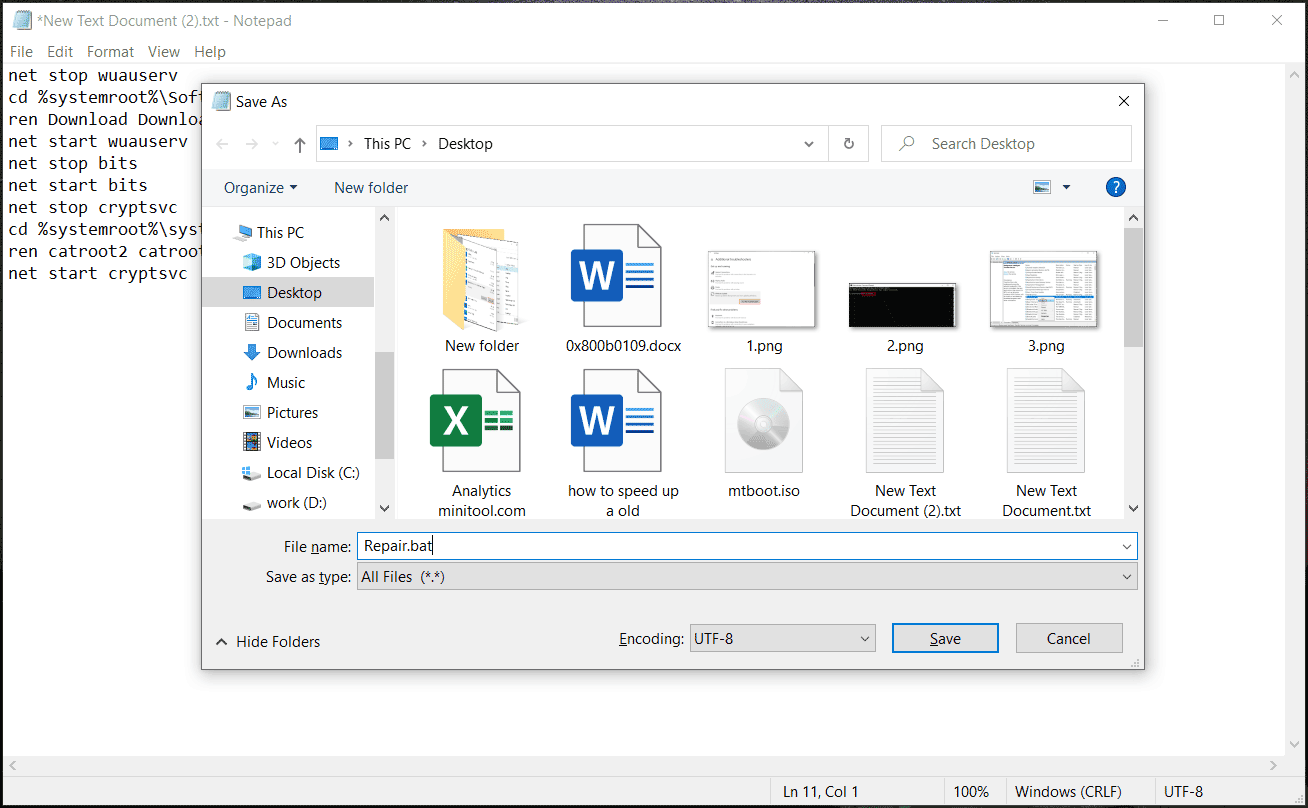
Step 2: Copy and paste the following words to the text file.
net stop wuauserv
cd %systemroot%\SoftwareDistribution
ren Download Download.old
net start wuauserv
net stop bits
net start bits
net stop cryptsvc
cd %systemroot%\system32
ren catroot2 catroot2old
net start cryptsvc
Step 3: Save this file – click File > Save As. Then, name it as a .bat file and choose All Files as the type.
Step 4: Right-click on this file and choose Run as administrator to execute the commands in that file.
These are the common fixes to solve Windows update error 0x800b0109. Try them and you should fix it and update Windows smoothly. If you find some other useful fixes, let us know in the comment.
About The Author
Position: Columnist
Vera is an editor of the MiniTool Team since 2016 who has more than 7 years’ writing experiences in the field of technical articles. Her articles mainly focus on disk & partition management, PC data recovery, video conversion, as well as PC backup & restore, helping users to solve some errors and issues when using their computers. In her spare times, she likes shopping, playing games and reading some articles.
Ошибка появляется при установке обновлений системы, компонентов, или защитника windows. (windows defender / microsoft security essentials).
Причина — необходима поддержка механизма подписи sha-2 пакетов msi.
Затронутые системы Windows server 2008, 2008r2, windows 7 всех редакций.
Решение — установка обновления kb4474419.
Статья на сайте Майкрософт — https://support.microsoft.com/en-us/topic/sha-2-code-signing-support-update-for-windows-server-2008-r2-windows-7-and-windows-server-2008-september-23-2019-84a8aad5-d8d9-2d5c-6d78-34f9aa5f8339
Каталог обновлений Microsoft — https://www.catalog.update.microsoft.com/Search.aspx?q=4474419