
Windows users have reported encountering error 0x800704c7 during a Windows update. Besides, you may also encounter error 0x800704c7 when you’re undertaking routine PC tasks such as browsing, etc. Some users reported encountering this error when using Chrome.
This error can prevent your system from getting important Windows updates, and it is not something to ignore.
In this article, you’ll learn the meaning, causes, and ways to fix Windows Update error 0x800704c7.
What Is Error 0x800704c7?
The error code 0x800704c7 is a Windows Update error. It typically occurs during a Windows update but can also occur when you are working on your machine normally.
It can occur on different Windows OS platforms, including:
- Windows 10
- Windows 8 and 8.1
- Windows 7
What Causes the Windows Update Error 0x800704c7?
If you have encountered error 0x800704c7 on your PC, it denoted a malfunction in system operation. The error can occur because of different reasons, including:
- Corrupted or missing files that prevent your system from operating normally
- Incorrectly configured system settings
- Background processes, such as antivirus, etc., interfering with your system processes
- Irregular entries in the registry can cause the error
Take note that the reasons above do not apply to error 0x800704c7 alone. Thwy can trigger other Windows Update errors, such as error code 0x8000ffff, error code 0x8007000d, and error 0x8007010b.
How to Fix the Windows Update Error 0x800704c7
Use these solutions to fix error 0x800704c7:
Fix #1: Wait Out the Windows Update
You can decide to wait out the update when you experience error 0x800704c7. Sometimes, your Windows Update is experiencing a delay from the server side or it might be a slow network. If your update is stuck, you can give it some hours and see if it proceeds to completion.
Fix #2: Disable Your Antivirus Software
If you are operating a third-party antivirus, it could be causing error 0x800704c7, preventing you from installing important Windows updates. Some third-party AV software can interfere with your system, prevent the installation of Windows updates and cause the 0x800704c7 error. Disable the AV, then try to run the update again.
Fix #3: Run SFC to Fix Corrupt or Missing System Files
One of the leading causes of error 0x800704c7 is Windows system files corruption. If that is the case, you can repair the files using two command-line utilities – SFC (System File Checker) and DISM (Deployment Image Servicing and Management).
These are Windows built-in utilities that scan and repair Windows errors.
If there are errors that SFC cannot fix, the DISM utility will come in handy.
To use SFC utility to fix corrupted files:
- Press the Win + S keys.
- Type
cmdin the search bar. - In Windows 10, click ‘Run as administrator’. In other Windows OS versions, right-click ‘cmd’ and select ‘Run as administrator’.
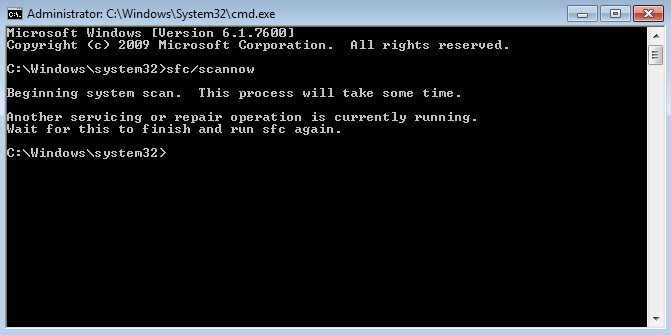
- In the Command Prompt window, type (or copy-paste)
sfc /scannow. Ensure there is a space between ‘c’ and ‘/’ (the forward slash). - Press Enter and wait for the SFC tool to scan and repair your PC
Fix #4: Run DISM to Fix Error 0x800704c7
If SFC could not fix the error, proceed to run the DISM tool through the Command Prompt. DISM performs a thorough scan of your system to identify the corrupted files.
It is important to ensure you have a stable network when running a DISM scan.
Restart your PC and see if you are able to continue installing the Windows updates.
Fix #5: Update Windows Manually by Downloading the Recent KB
- If the Windows Update error 0x800704c7 still exists, you may consider manually downloading the most recent KB. Use this process to download any recent KB:
- Press the Win + I keys to open Settings.
- Click Update & Security.
- On the right pane, locate Windows Update and click ‘View update history’.
- Locate the most recent KB (you should see it at the top) and copy the code.
- Go to the Microsoft Update website and paste the KB code you copied, then click ‘search’.
- Download the update for your Windows OS and install it once the download finishes.
Once you’re done, restart your PC to save the Windows update changes.
Fix #6: Use MCT
Use this method if all the other methods fail to solve the Windows Update error 0x800704c7. The Media Creation Tool (MCT) should be the last resort. MCT is a Microsoft built tool to help users update/upgrade their system to the latest Windows version, or in some cases, perform a fresh Windows installation. To use the MCT:
Note: This process will upgrade your Windows operating system to Windows 10. So, if your PC is not already running Windows 10, some of your programs may cease to work after the upgrade is completed because of compatibility issues.
Do you get the Windows Update Error 0x800704c7 while installing Windows update?
The problem mostly occurs when your Windows operating system is being updated. However, it can be that your system is unable to search for updates or is unable to install them. Either way, in this guide, we are going to fix the error 0x800704c7.
What Causes Windows Update Error 0x800704c7?
Although this error can be caused by multiple reasons, the most prominent ones are:
- Background processes interfering with the operating system procedures.
- Missing or corrupt OS files can cause error 0x800704c7.
- Conflict with third-party applications can cause Windows update errors.

Table of Contents
Method 1: Wait for stuck updates to end
Sometimes, the update may get delayed due to server-side issues or a slow internet connection. You can check for pending updates in the Update & Security tab in the Settings window. Therefore, if your update is stuck, you can wait it out.
Method 2: Run SFC scan
Since this issue is frequently triggered by missing or corrupt system files, we will attempt to run an in-built tool to identify and fix them.
1. Type cmd in the search bar to bring up Command Prompt in the search results.
2. Choose Run as administrator as shown.

3. When the console appears, enter the sfc/scannow command and press Enter.

4. Restart your computer once the scan is completed.
You can now attempt to install the Windows update again. If the issue persists, proceed to the method listed below.
Also Read: Fix Restore Point Not Working in Windows 10
Method 3: Clean Windows Components
Sometimes overloaded Windows library can also cause this issue. The library gets stuffed with unnecessary files over a prolonged period of time. Therefore, it is recommended to clear these on periodic intervals.
Option 1: Via Task Manager
1. Press Windows + R keys together to bring up the Run box.
2. Type taskschd.msc and click on OK, as shown.

3. Navigate to Task Scheduler Library > Microsoft > Windows > Servicing as depicted below.

4. Now, click on StartComponentCleanup. Then, click on Run in the right-pane as shown.

Let the process finish, then restart the computer and try to install the pending updates.
Option 2: Via DISM
Deployment Image Servicing and Management or DISM is a command-line application included in Windows 10 operating system. It helps to repair or modify system images. It is often used when the SFC command fails to fix corrupt or altered system files.
1. Launch Command Prompt with administrator rights, as we did earlier.

2. Type the command: dism /online /cleanup-image /startcomponentcleanup and hit Enter to execute it.
Note: Do not close the window while the command is running.

3. Restart the computer to confirm the changes.
Method 4: Disable Antivirus
Third-party software, such as antivirus programs, has been known to cause various problems. Often, antivirus software mistakenly blacklists and/or block programs & applications on your computer. It is probable that Windows Update services are unable to perform the required task because of third-party antivirus software installed on your desktop/laptop.
Here, we will discuss how to disable the Kaspersky antivirus.
Note: Similar steps can be performed with any antivirus software.
1. Click the upward arrow on the taskbar from the home screen to bring up hidden icons.
2. Next, right-click on the Kaspersky antivirus icon and choose Pause protection, as depicted.

3. Select the time period over which you want the protection to be suspended from the three available alternatives.
4. Finally, click Pause protection to disable Kaspersky temporarily.
Now, check if updates are taking place smoothly. If they are, then uninstall your antivirus software and choose one which doesn’t cause conflicts with Windows OS. If not, then proceed to the next method.
Also Read: Fix Windows Update Error 0x80070643
Method 5: Download the latest KB Update
You can also try downloading the latest update from the Microsoft Update Catalog. Since it includes frequently reported issues & their solutions, this can prove to be helpful in solving Windows update error 0x800704c7.
1. Open Settings on the computer by pressing Windows + I keys together.
2. Click Update & Security section as shown.

3. Click on View update history as shown below.

4. Copy the code from the latest KB as depicted below.

5. Navigate to the Microsoft Update website and look for the KB code.

6. Download the particular KB for your Windows version.
7. When the download is complete, double-click the file to install it. Follow the on-screen instructions as and when prompted to install it.
This should definitely fix the Windows update error 0x800704c7. If it does not, then try the succeeding methods.
Method 6: Use the Media Creation tool
Another alternative to installing Windows updates is using the Media Creation Tool. It allows users to upgrade their system to the latest version without affecting any of their personal data.
1. Go to the Microsoft website and download the Media Creation Tool.
2. Then, Run the downloaded file.
3. After agreeing to the Terms of Service, choose to Upgrade this PC now.

4. Select Keep Personal Files to ensure that they are not overwritten.
Finally, wait for the process to finish. This should fix Windows update error 0x800704c7.
Method 7: Perform a System Restore
If none of the above-mentioned methods have worked for you, the only option left is to perform a System Restore. This process will return your system to a previous state, to a point in time in which the error didn’t exist.
1. Press Windows Key + S to bring up the search menu then search for Control Panel as shown.

2. In the Control Panel search box, type Recovery and hit Enter.

3. Click on Open System Restore in the Recovery window.

4. Now, follow the System Restore wizard prompts and click on Next.
5. In the window that now pops up, select Choose a different restore point and click Next.

6. Now, select an earlier date and time where the computer was working fine. If you don’t see previous restore points, then checkmark “Show more restore points.”

7. By default, the system will choose Automatic Restore Point, as illustrated below. You can choose to continue with this option as well.

8. Restart the computer and verify if the changes have taken place.
Frequently Asked Questions (FAQ)
Q1. Does Windows 10 install updates automatically?
By default, Windows 10 upgrades the operating system automatically. It is, however, safer to ensure manually that OS is updated from time to time.
Q2. What is error code 0x800704c7?
Error 0x800704c7 typically appears when the computer is unstable and key system files cease to respond or are overlooked. It can also occur when an anti-virus application prevents Windows from installing updates.
Q3. Why is the Windows update taking so much time?
This problem can be caused by out-of-date or faulty drivers on your computer. These may slow down the download speed, making Windows updates take considerably longer than usual. You must upgrade your drivers to fix this issue.
Recommended:
- Fix Windows 7 Updates Not Downloading
- Fix HDMI Sound Not Working in Windows 10
- How to Fix Avast not opening on Windows
- Fix Omegle Error Connecting to Server
We hope that this guide was helpful and you were able to fix Windows update error 0x800704c7. Let us know which method worked for you. If you have any queries/ suggestions, drop them in the comment box.
Did you encounter an update error 0x800704c7 while installing pending updates on your Windows 11/10 PC? If yes, and you are searching for the reasons behind it, you have come to the right place. Here, in this post, we will discuss three different solutions that might help you overcome this update error.

If you are failing to install pending updates because of an error code 0x800704c7, consider applying the below fixes, and have this problem resolved.
- Run Windows Update Troubleshooter
- Try SFC and DISM Scans
- Reset Windows Update Components
- Manually download and install pending updates
1] Run Windows Update Troubleshooter
The most effective way to solve an update-related error is by running the Update troubleshooter. This tool checks for the underlying causes and provides some handy solutions to overcome the same error code. The correct approach to run this tool on Windows is as follows –
Windows 11:
- Open Settings (Win + I) and navigate to the below path on it –
System > Troubleshoot > Other troubleshooters
- Locate Windows Update under Most Frequent and hit the Run button.

- This tool will check for possible causes behind this error code and resolve them as well.
- Even in cases, where this tool fails to provide resolutions to an error 0x800704c7, this will tell you ways how to overcome this error code on Windows 11.
- Follow those tricks and have this problem resolved.
- Make sure to restart your computer after you follow any of the suggestions mentioned by this troubleshooting tool.
Windows 10:
The steps are more or less similar to what we have provided in the above section. The only difference in Windows 10 is the location where you can find this troubleshooting tool. Well, you find the same by reaching out to the below path –
Settings > Update & Security > Troubleshooters > Additional troubleshooters
- Click on Windows update to expand its box, and hit Run the troubleshooter.

Now, follow the on-screen instructions to complete the troubleshooting. After this is over, restart your Windows 10 PC.
2] Try SFC and DISM Scans
If you use third-party antivirus, the update error 0x800704c7 could be the direct result of interactions between the system files and the antivirus program. Uninstall or at least such apps on your computer first and then try running System File Checker or DISM utility.
Here’s how to run both of these tools on the same console –
- Launch Command Prompt as administrator first.
- On the elevated console, copy/paste the below command, and press Enter.
sfc /scannow
- Wait for the next 10-15 minutes while the scanning and repairing of system files are going on.
- When the SFC scan completes, run this DISM command –
DISM /Online /Cleanup-Image /RestoreHealth

- Just like SFC, DISM also takes some time to find and repair any issues within the System Image.
- Once you execute both SFC and DISM commands, close Command Prompt, and restart your computer.
Sign back into your device and check if you can update Windows normally now.
3] Reset Windows Update Components
Over a while, Windows cache folders get filled with unnecessary files and folders that are not relevant to your recent updates. These non-essential data often interact with the system processes like updating Windows and prevent an update from ever happening.
You can never be sure of this unless and until you repair all your system files and folders. Instead of repairing these files, it’s better to reset all components of Windows Update. Well, follow these steps to purge the Windows Cache folders.
- First of all, disable all update-related services.
- To do so, open Run (Win + R), type CMD on it and hit Ctrl + Shift + Enter.
- The UAC window will prompt next, hit Yes to authorize accessing the Command Prompt.
- Copy/paste these commands on it and press Enter to ensure disabling all update services.
net stop wuauserv
net stop cryptSvc
net stop bits
net stop msiserver
- After you have successfully disabled all services, purge both SoftwareDistribution and Catroot2 folders. To do this, you must run these two codes next –
ren C:WindowsSoftwareDistribution SoftwareDistribution.old
ren C:WindowsSystem32catroot2 Catroot2.old
- The above codes will add an .old extension to their existing names.
- Assuming you have already renamed both these folders successfully, make sure to re-enable all services that you have stopped before. To do so, run these codes one after another –
net start wuauserv
net start cryptSvc
net start bits
net start msiserver
Restart your PC next and check if you can update Windows normally now.
4] Manually download and install pending updates
If the error code 0x800704c7 still occurs, consider manually downloading and installing the pending updates. For this, you require the KB number that is failing on your computer. Go to Windows 10 Update history or Windows 11 Update history pages, and note down the latest cumulative update number for your Windows version.
Now, visit Microsoft’s Update catalog, and search for the noted-down “KB” number. Pick the standalone package that best matches your system architecture and hit the Download button. Moving forward, click the top link. Doing so will download the recent cumulative update in .msu file format. Double-click on the downloaded file to begin upgrading to the chosen OS Build.
Here’s a complete guideline on how to download and install pending updates manually on Windows 11 or Windows 10.
Download Windows Speedup Tool to fix errors and make PC run faster
When you encounter the Windows Update error code 0x800704c7, you’ll be unable to install that particular update for your system. In this post, we will identify the possible causes as well as provide the appropriate solutions you can try to remediate the issue.

The error is caused by missing or corrupted files and background processes conflicting with the update, which prevents you from getting the update.
Windows failed to install an update with error 0x800704c7
If you’re faced with this Windows Update Error 0x800704c7 issue, you can try our recommended solutions below in no particular order and see if that helps to resolve the issue.

- Run Windows Update Troubleshooter
- Manually clear the Windows Update cache/components
- Disable your antivirus
- Download the update from the Microsoft Update Catalog
- Directly download the Windows 11/10 ISO or use the Media Creation Tool
Let’s take a look at the description of the process involved concerning each of the listed solutions.
1] Run Windows Update Troubleshooter

This solution requires you to run the inbuilt Windows Update Troubleshooter. After running the troubleshooter, you can try updating again and see if the and see if you can upgrade successfully without the Windows Update error 0x800704c7 occurring. Else, try the next solution.
2] Manually clear the Windows Update cache/components
The Software Distribution folder in the Windows 11/10 operating system is a folder located in the Windows directory and used to temporarily store files that may be required to install Windows Update on your computer.

Clear the contents of the Software Distribution folder and see if that helps to resolve the issue. Otherwise, continue with the next solution.
3] Disable your antivirus

Sometimes, antivirus causes issues with Windows Updates and prevents Windows OS from installing the latest updates. This can be the case with you. To check this, you can disable your antivirus and see if it helps. If this works, you can re-enable your antivirus after installing the Windows Update.
4] Download the update from the Microsoft Update Catalog

Microsoft Update Catalog is an official Microsoft website from where you can download Windows Update packages and install them manually. If a Windows Update keeps failing to install on your system, you can download it from the Microsoft Update Catalog, provided you have its KB number. You can view the Windows Update KB number on the Windows Update page in your system settings.
Read: Windows Update Service missing in Services.msc.
5] Directly download the Windows 11/10 ISO or use the Media Creation Tool

This solution entails you directly download the Windows ISO image file from the Microsoft website. Once you have downloaded the ISO to a location (preferably the desktop) on your device, double-click the ISO image to mount it as a virtual drive then double-click the setup.exe file to start the in-place upgrade process.
Alternatively, you may use the Windows Update Assistant to install the Feature Update.
How to fix the Windows 11 installation assistant error 0x8007007f?
If you get the Windows Installation Assistant error code 0x8007007f on your system, there might be permission issues for Windows 11 Installation Assistant, or your third-party antivirus might be blocking it. To fix this error, you can try some fixes, like disabling your antivirus, updating the graphics card driver, repairing the corrupted system image files, etc.
How to fix Windows Update failed?
There can be many reasons why a Windows Update fails. However, you can try some general fixes if a Windows Update fails to install on your system, like disabling your antivirus, disconnecting external hardware, renaming software distribution folders, etc.
PS: More tips here to Troubleshoot Windows Updates Errors in Windows.
Obinna has completed B.Tech in Information & Communication Technology. He has worked as a System Support Engineer, primarily on User Endpoint Administration, as well as a Technical Analyst, primarily on Server/System Administration. He also has experience as a Network and Communications Officer. He has been a Windows Insider MVP (2020) and currently owns and runs a Computer Clinic.
Reader Interactions
When users try to upgrade Windows on their system, the error code 0x800704c7 occurs. Many users of Windows 7, 8 or 8.1 and 10 have faced this issue. Generally, poor maintenance of the system forces this error to pop up. Some of the symptoms of error 0x800704c7 include:
– Inability to upgrade your Windows operating system.

Error code 0x800704c7 – Windows Update
– Message box with error code 0x800704c7.
Causes of Error code 0x800704c7
– Corrupted or missing system files.
– Malicious programs affecting your system.
– Several programs running in the background of while the user attempts to run the update.
Let’s look up to the methods that can fix the issue.
Methods to fix Error code 0x800704c7
Method 1: Scan Your System for Missing or Corrupt System Files
To check for missing or corrupt system files, System File Checker Tool (SFC) is widely used in Windows. To run SFC:
- Click on the Start menu.
- Type “cmd“. When you see Command Prompt appear in the menu above, right click on it and select Run as administrator.
- In Command Prompt, type “sfc /scannow” and press Enter.
4. Wait for the scan to complete.
After running these procedures, check if the error code has been resolved. Go to Settings > Update & security > Windows Update. Update your Windows operating system. If error code 0x800704c7 reoccurs, you will need to try the next method below.
Method 2: Run System Restore
- Press the power button until your PC shuts down, then press it again to switch on your PC.
- Navigate to the Run in Safe Mode option and hit Enter.
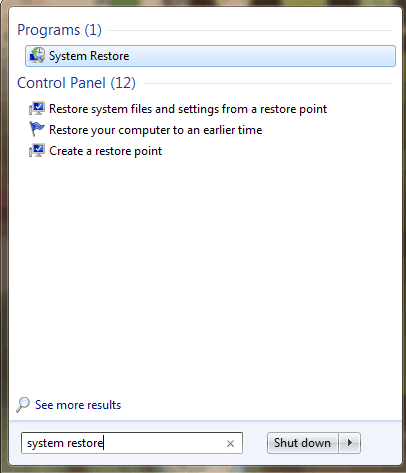
- Go to Start > Type system restore and then hit Enter.
4. Follow the prompts to revert back to a certain restore point.
5. Wait for the process to complete, and then reboot.
Only choose this option as a last resort because it will delete your personal data from the PC.
Loading…
By Dr. Joseph H Volker
|
On August 8, 2018