
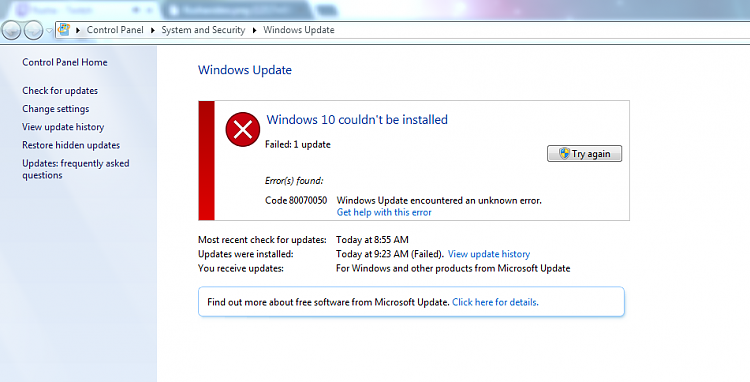
The error 0x80070050 is basically an update-related issue and it prevents users from installing the recent cumulative updates on their PCs. If you are one such user and wondering what do to next, read this guide till the end. One may easily address this issue by manually installing pending Windows Updates. However, we suggest trying this as the last resolution. Otherwise, the error remains as it is and it may appear the next time you try updating your operating system.
What causes Update Error 0x80070050 in Windows?
This error normally mostly occurs because of a failing hardware component or when the system files become corrupted. Run CHKDSK and SFC tools and check if the problem resolves. In case it still persists, this must be due to the following reasons –
- Missing DLL files
- Incorrect registry entries
- Incorrect Date & Time
To overcome this issue, apply the workarounds in the exact order as discussed below –
If you are getting an error code 0x80070050 while installing Windows 10 updates, applying the below solutions may fix it on your PC –
- Run Windows Update Troubleshooter
- Check Date and Time
- Scan for malware
- Use System File Checker
- Purge the Windows updates cache folder
- Manually install pending updates
1] Run Windows Update Troubleshooter
The troubleshooter is one of the best tools to find and resolve any update-related problems on either Windows 11 or 10 PC. To run this tool, you may follow the below guideline –
To troubleshoot Windows Updates in Windows 11, do the following –
- Press Win + I, and select System.
- Go to the right pane, scroll down and click Troubleshoot.
- Click to expand Other troubleshooters and locate Windows Update.
- You may find this setting under “Most frequent”.
- When found, click the Run button available on its right end.

- Now, wait while this tool inspects and resolves this issue automatically.
Here’s how to troubleshoot Windows 10 –
- Press “Windows key + I” to launch the Settings window.
- Select the Update and Security option.
- From the left pane on your display screen, select Troubleshoot.
- Go to the right pane and hit on the Additional Troubleshooters option.
- Click to enlarge the Windows Update box and hit Run the troubleshooter.

- This process will take a few minutes to scan and repair problematic files on your device. If it does provide any fix, hit the option – Apply this fix.
- Come out of the troubleshooter window, and restart your PC.
I hope you are now able to update Windows without getting into any bugs or errors.
2] Check Date and Time
The error 0x80070050 may also occur because of an incorrect Date or Time. When the device time doesn’t sync with your regional time, the system is prone to decline updates eventually leading to different error codes. In order to fix this, you must ensure that the date & time on your computer is accurate and match your respective time zone. Here’s how to correct them –
- Right-click on the Windows icon and select Settings.
- Select Time and Language.
- Head over to the right pane and see if your device is displaying the actual date and time.
- If not, turn On both the toggle switches – Set time automatically and Set time zone automatically.
- Lastly, hit the Sync now button.

In case the automatic selection doesn’t work, you need to manually edit the Date & Time. Here’s how to do this –
- First of all, turn off both the toggle switches explained above.
- This way, the grayed-out “Set the date and time manually” becomes editable.
- Click on the Change button and modify them as per your zonal date and time.
You may take the help of this website https://www.timeanddate.com/ to know the exact timing in your locale.
3] Scan PC For Malware
Nowadays, malware is very common and found everywhere. Many bad sites inject trojans or viruses in some other form to steal the data of their visitors. Once your PC is infected, it is quite impossible to install new updates on the computer, hence the error 0x80070050. To fix this, you may take the help of a good antivirus program.
We don’t advise installing any third-party antivirus software that is free in nature. Because such apps do more harm than good. Instead, you can take the help of a built-in program i.e. Windows Defender. Here’s how to find and remove threats on your device –
- On the taskbar, click to expand up arrow key and select the shield icon.
- Doing so will invoke the Windows Security app.
- Select Virus and threat protection on the left pane next.
- Click Scan options then on the right-wing.
- You may now choose between the available options.
- Mark the radio button left of Full Scan and hit Scan now.

- The system immediately starts searching for possible malware and quarantining them if it finds any.
- Restart Windows 10 next and check if this helps to resolve error 0x80070050 on your device.
4] Run System File Checker
System file corruption is another possibility that may restrict the update process from occurring smoothly and throw an error code. In such a scenario, use SFC /SCANNOW to repair missing files and correct the corrupted ones. Here’s how to use this tool –
- Launch Command Prompt as an Administrator.
- Type “
sfc /scannow” and press Enter –

- Wait for a few minutes while this tool scans and repairs the corrupted system files on your device.
- Once this is over, restart your PC.
5] Purge Windows Update Cache Folder
Many a time, such errors occur just because of accumulated cache inside the Update folders. If you haven’t purged the Cache folders for a long time, performing this task should fix the error 0x80070050 on your computer.
Resetting Windows Components is the perfect way of doing this as it includes the stop and restart of all update-related services. After you reset the components successfully, restart your PC and check if doing so fixes the above error or if the bug is still appearing.
6] Manually download and install pending updates
In case the error 0x80070050 is still occurring, one should manually download and install the pending updates on Windows 10 PC. Proceeding this way fixes the problem temporarily, so the error may occur again while installing updates in the future.
I hope this tutorial was useful and easy to follow.
-
Home
-
News
- How to Fix WslRegisterDistribution Failed with Error: 0x80070050
By Daisy | Follow |
Last Updated
Some users report that when they try to update WSL, they encounter the “WslRegisterDistribution failed with error: 0x80070050” issue. How to fix the issue? Don’t worry! This post from MiniTool tells you how to fix the error.
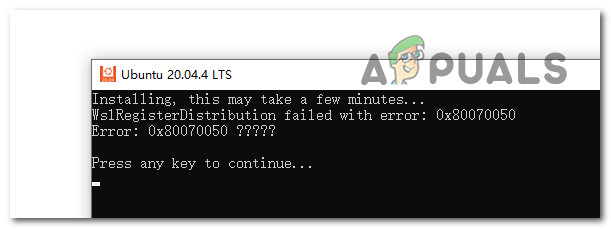
WSL stands for Windows Subsystem for Linux for Windows 10. It allows developers to run Linux platforms on Windows devices. However, sometimes when they try to update WSL, the “WslRegisterDistribution failed with error: 0x80070050” message appears. This indicates that WSL failed to start. The following is the full error message:
Installing, this may take a few minutes…
WslRegisterDistribution failed with error: 0x80070032
Error: 0x80070032 The request is not supported.
Press any key to continue…
What Causes WslRegisterDistribution failed with error: 0x80070050
What causes the “WslRegisterDistribution failed with error: 0x80070050” issue? If your virtual machine platform is disabled, the issue can appear. Besides, the virus and malware can also trigger the issue. If WSL lacks basic support for Windows 10 features, the issue can also be caused.
Now, this post provides 5 solutions for you to get rid of the “error code 0x80070050”.
Method 1: Check for Virus and Malware
Since the “WSL error code 0x80070050” can be caused by virus and malware, it’s recommended to check for virus and malware via Windows Defender.
Step 1: Open Settings by pressing Windows + I keys. Click Updater & Security.
Step 2: Click the Windows Security part. Then, click Open Windows Security.
Step 3: Choose the Virus and threat protection option and click Quick Scan. Or, you can choose Scan options based on your needs. and there are four options – Quick scan, Full scan, Custom scan, and Microsoft Defender Offline scan.

Step 4: Then, it will start to scan for virus and malware.
Method 2: Enable WSL Via Control Panel
You can also choose to enable WSL via Control Panel to fix the “WslRegisterDistribution failed with error: 0x80070050”. Follow the guide:
Step 1: Type Turn Windows Features on or off in the Search box to open it.
Step 2: Check the Windows Subsystem for Linux box and click OK.
Step 3: It will automatically search and install some required system files. Then, you need to
restart your PC to take effects.
Method 3: Enable Virtual Machine Platform via Control Panel
You can also choose to enalbe Virtual Machine Platform via Control Panel to fix the “WslRegisterDistribution failed with error: 0x80070050”. Follow the guide:
Step 1: Type Turn Windows Features on or off in the Search box to open it.
Step 2: Check the Virtual Machine Platform box and click OK.
Method 4: Restart the LxssManager Service
If the “WslRegisterDistribution failed with error: 0x80070050” issue still appears, you can try to restart the LxssManager service.
Step 1: Type Services in the Search box to open the application.
Step 2: Find LxssManager and click it to choose Stop.
Step 3: After several minutes, you can click it again to choose Start.
Method 5: Launch WSL from Microsoft Store
If the above methods are not working, you can try to launch WSL from Microsoft Store.
Step 1: Type Microsoft Store in the Search boxand press the Enter button to open it.
Step 2: In the upper-right corner of the window, click the three-dotted menu. Select My Library.
Step 3: Go to the left pane of the window and click Installed.
Step 4: Next, go back to the right pane and choose your Linux Distribution app.
Step 5: Click the Launch button and see if the problem is resolved.
Final Words
This post introduces 5 ways for you to get rid of the “WslRegisterDistribution failed with error: 0x80070050” issue. You can try them one by one until you fix the issue. I hope that this post can be helpful to you.
About The Author
Position: Columnist
Having been an editor at MiniTool since graduating college as an English major, Daisy specializes in writing about data backups, disk cloning, and file syncing as well as general computer knowledge and issues. In her free time, Daisy enjoys running and going with friends to the amusement park.
What is 0x80070050?
0x80070050 is a kind of Windows error that is found in the Microsoft Windows operating systems. The file can be found for Windows Operating System. Error 0x80070050 has a popularity rating of 1 / 10.
Errors
This tutorial contains information on 0x80070050 or otherwise known as Error 0x80070050. Errors such as Error 0x80070050 indicate your machine has faulty hardware or software that should be fixed when possible. Below is information on how to repair 0x80070050 and get your computer back to normal.
Signs of 0x80070050:
- When your computer freezes or locks up at random.
- When your computer crashes when you are running Windows Operating System.
- If Error 0x80070050 pops up and causes a program to shutdown or your computer to crash.
- Your computer is running slow, taking a long time to boot up, and you suspect 0x80070050 by Windows Operating System is the cause.
What Causes Windows Errors Like 0x80070050?
There are a number of possibilities to consider. Often times it is a miscommunication between the hardware and the software. In this case, a corruption likely occurred when Windows Operating System was installed or happened later while running the program. 0x80070050 can also be caused by corrupt keys in the Windows registry or due to another application or virus deleting files related to Windows Operating System.
How to Fix Error 0x80070050
Follow the step by step instructions below to fix the 0x80070050 problem. We recommend you do each in order. If you wish to skip these steps because they are too time consuming or you are not a computer expert, see our easier solution below.
Step 1 — Uninstall and Reinstall Windows Operating System
If the Error 0x80070050 is a result of using Windows Operating System, you may want to try reinstalling it and see if the problem is fixed. Please follow these steps:
Windows XP
- Click “Start Menu”.
- Click “Control Panel”.
- Select the “Add or Remove” program icon.
- Find the 0x80070050 associated program.
- Click the Change/Remove button on the right side.
- The uninstaller pop up will give you instructions. Click “okay” or “next” or “yes” until it is complete.
- Reinstall the software.
Windows 7 and Windows Vista
- Click “Start Menu”.
- Click “Control Panel”.
- Click “Uninstall a Program” which is under the “Programs” header.
- Find the 0x80070050 associated program.
- Right click on it and select “Uninstall”.
- The uninstaller pop up will give you instructions. Click “okay” or “next” or “yes” until it is complete.
- Reinstall the software and run the program.
Windows 8, 8.1, and 10
- Click “Start Menu”.
- Click “Programs and Features”.
- Find the software that is linked to **insert file name**.
- Click Uninstall/Change.
- The uninstaller will pop up and give you instructions. Click “okay” and “next” until it is complete.
- Restart your computer.
- Reinstall the software and run the program.
Step 2 — Remove Registry Entry related to 0x80070050
WARNING: Do NOT edit the Windows Registry unless you absolutely know what you are doing. You may end up causing more trouble than you start with. Proceed at your OWN RISK.
- Create a backup of registry files.
- Click “Start”.
- Type regedit, select it, and grant permission in order to proceed.
- Click HKEY LOCAL MACHINE>>SOFTWARE>>Microsoft>>Windows>>Current Version>>Uninstall.
- Find the Error 0x80070050 software from the list you wish to uninstall.
- Select the software and double click the UninstallString icon on the right side.
- Copy the highlighted text.
- Exit and go to the search field.
- Paste the data.
- Select Okay in order to uninstall the program.
- Reinstall the software.
Step 3 – Ensure Junk Isn’t Causing Error 0x80070050
Any space that isn’t regularly cleaned out tends to accumulate junk. Your personal computer is no exception. Constant web browsing, installation of applications, and even browser thumbnail caches slow down your device and in the absence of adequate memory, can also trigger a Error 0x80070050 error.
So how do you get around this problem?
- You can either use the Disk Cleanup Tool that comes baked into your Windows operating system.
- Or you can use a more specialized hard drive clean up solution that does a thorough job and flushes the most stubborn temporary files from your system.
Both solutions may take several minutes to complete the processing of your system data if you haven’t conducted a clean up in a while.
The browser caches are almost a lost cause because they tend to fill up quite rapidly, thanks to our constantly connected and on the go lifestyle.
Here’s how you can run the Window’s Disk Cleanup Tool, without performance issues or surprises.
- For Windows XP and Windows 7, the program can be ran from “Start” and from the “Command Prompt”.
- Click “Start”, go to All Programs > Accessories > System Tools, click Disk Cleanup. Next choose the type of files you wish to remove, click OK, followed by “Delete Files”.
- Open up the Command Prompt, type “c:\windows\cleanmgr.exe /d” for XP and “cleanmgr” for Windows 7. Finish by pressing “Enter”.
- For Windows 8 and Windows 8.1, the Disk Cleanup Tool can be accessed directly from “Settings”. Click “Control Panel” and then “Administrative Tools”. You can select the drive that you want to run the clean up on. Select the files you want to get rid of and then click “OK” and “Delete Files”.
- For Windows 10, the process is simplified further. Type Disk Cleanup directly in the search bar and press “Enter”. Choose the drive and then the files that you wish to wipe. Click “OK”, followed by “Delete Files”.
The progressive ease with which the Cleanup Tool can be used points to the growing importance of regularly deleting temporary files and its place in preventing Error 0x80070050.
PRO TIP:
Remember to run the Disk Cleanup as an administrator.
Step 4 – Fix Infections and Eliminate Malware in Your PC
How do you gauge if your system is infected with a malware and virus?
Well, for one, you may find certain applications misbehaving.
And you may also see the occurrence of 0x80070050.
Infections and malware are the result of:
- Browsing the Internet using open or unencrypted public Wi-Fi connections
- Downloading applications from unknown and untrustworthy sources
- Intentional planting of viruses in your home and office networks
But thankfully, their impact can be contained.
- Enter “safe mode” by pressing the F8 key repeatedly when your device is restarting. Choose “Safe Mode with Networking” from the Advanced Boot Options menu.
- Back up all the data in your device to a secure location. This is preferably a storage unit that is not connected to your existing network.
- Leave program files as is. They are where the infection generally spreads from and may have been compromised.
- Run a thorough full-system scan or check of an on-demand scanner. If you already have an antivirus or anti-malware program installed, let it do the heavy lifting.
- Restart your computer once the process has run its course.
- Lastly, change all your passwords and update your drivers and operating system.
PRO TIP: Are you annoyed by the frequent updates to your antivirus program? Don’t be! These regular updates add new virus signatures to your software database for exponentially better protection.
Step 5 – Return to the Past to Eliminate 0x80070050
The steps outlined up until this point in the tutorial should have fixed Error 0x80070050 error. But the process of tracking what has caused an error is a series of educated guesses. So in case the situation persists, move to Step 5.
Windows devices give users the ability to travel back in time and restore system settings to an uncorrupted, error free state.
This can be done through the convenient “System Restore” program. The best part of the process is the fact that using System Restore doesn’t affect your personal data. There is no need to take backups of new songs and pictures in your hard drive.
- Open “Control Panel” and click on “System & Security”.
- Choose the option “System”.
- To the left of the modal, click on “System Protection”.
- The System Properties window should pop-up. You’ll be able to see the option “System Restore”. Click on it.
- Go with “Recommended restore” for the path of least hassles and surprises.
- Choose a system restore point (by date) that will guarantee taking your device back to the time when 0x80070050 hasn’t been triggered yet.
- Tap “Next” and wrap up by clicking “Finish”.
If you’re using Windows 7 OS, you can reach “System Restore” by following the path Start > All Programs > Accessories > System Tools.
Step 6 — 0x80070050 Caused by Outdated Drivers
Updating a driver is not as common as updating your operating system or an application used to run front-end interface tasks.
Drivers are software snippets in charge of the different hardware units that keep your device functional.
So when you detect an Error 0x80070050 error, updating your drivers may be a good bet. But it is time consuming and shouldn’t be viewed as a quick fix.
Here’s the step-by-step process you can go through to update drivers for Windows 8, Windows 8.1 and Windows 10.
- Check the site of your hardware maker for the latest versions of all the drivers you need. Download and extract them. We strongly advice going with original drivers. In most cases, they are available for free on the vendor website. Installing an incompatible driver causes more problems than it can ever fix.
- Open “Device Manager” from the Control Panel.
- Go through the various hardware component groupings and choose the ones you would like to update.
- On Windows 10 and Windows 8, right-click on the icon of the hardware you would like to update and click “Update Driver”.
- On Windows 7 and Vista, you right-click the hardware icon, choose “Properties”, navigate to the Driver panel, and then click “Update Driver”.
- Next you can let your device automatically search for the most compatible drivers, or you can choose to update the drivers from the versions you have on your hard drive. If you have an installer disk, then the latter should be your preferred course of action. The former may often get the driver selection incorrect.
- You may need to navigate a host of warnings from the Windows OS as you finalize the driver update. These include “Windows can’t verify that the driver is compatible” and “Windows can’t verify the publisher of this driver”. If you know that you have the right one in line, click “Yes”.
- Restart the system and hopefully the Error 0x80070050 error should have been fixed.
Step 7 – Call the Windows System File Checker into Action
By now the Error 0x80070050 plaguing your device should have been fixed. But if you haven’t resolved the issue yet, you can explore the Windows File Checker option.
With the Windows File Checker, you can audit all the system files your device needs to operate, locate missing ones, and restore them.
Sound familiar? It is almost like “System Restore”, but not quite. The System Restore essentially takes you back in time to a supposedly perfect set up of system files. The File Checker is more exhaustive.
It identifies what is amiss and fills the gaps.
- First and foremost, open up an elevated command prompt.
- Next, if you are using Windows 8, 8.1 or 10, enter “DISM.exe /Online /Cleanup-image /Restorehealth” into the window and press Enter.
- The process of running the Deployment Image Servicing and Management (DISM) tool may take several minutes.
- Once it completes, type the following command into the prompt “sfc /scannow”.
- Your device will now go through all protected files and if it detects an anomaly, it will replace the compromised version with a cached version that resides at %WinDir%\System32\dllcache.
Step 8 – Is your RAM Corrupted? Find Out.
Is it possible? Can the memory sticks of your device trigger 0x80070050?
It is unlikely – because the RAM chips have no moving parts and consume little power. But at this stage, if all else has failed, diagnosing your RAM may be a good move.
You can use the Windows Memory Diagnostics Tool to get the job done. Users who are on a Linux or Mac and are experiencing crashes can use memtest86.
- Open up your device and go straight to the “Control Panel”.
- Click on “Administrative Tools”.
- Choose “Windows Memory Diagnostic”.
- What this built-in option does is it burns an ISO image of your RAM and boots the computer from this image.
- The process takes a while to complete. Once it is done, the “Status” field at the bottom of the screen populates with the result of the diagnosis. If there are no issues with your RAM/memory, you’ll see “No problems have been detected”.
One drawback of the Windows Memory Diagnostic tool pertains to the number of passes it runs and the RAM segments it checks.
Memtest86 methodically goes over all the segments of your memory – irrespective of whether it is occupied or not.
But the Windows alternative only checks the occupied memory segments and may be ineffective in gauging the cause of the Error 0x80070050 error.
Step 9 – Is your Hard Drive Corrupted? Find Out.
Your RAM or working memory isn’t the only culprit that may precipitate an Error 0x80070050 error. The hard drive of your device also warrants close inspection.
The symptoms of hard drive error and corruption span:
- Frequent crashes and the Blue Screen of Death (BSoD).
- Performance issues like excessively slow responses.
- Errors like 0x80070050.
Hard drives are definitely robust, but they don’t last forever.
There are three things that you can do to diagnose the health of your permanent memory.
- It is possible that your device may have a hard time reading your drive. This can be the cause of an Error 0x80070050 error. You should eliminate this possibility by connecting your drive to another device and checking for the recurrence of the issue. If nothing happens, your drive health is okay.
- Collect S.M.A.R.T data by using the WMIC (Windows Management Instrumentation Command-line) in the command prompt. To do this, simply type “wmic” into the command prompt and press Enter. Next follow it up with “diskdrive get status”. The S.M.A.R.T status reading is a reliable indicator of the longevity of your drive.
- Fix what’s corrupt. Let’s assume you do find that all isn’t well with your hard drive. Before you invest in an expensive replacement, using Check Disk or chkdsk is worth a shot.
- Open the command prompt. Make sure you are in Admin mode.
- Type “chkdsk C: /F /X /R” and press “Enter”. “C” here is the drive letter and “R” recovers data, if possible, from the bad sectors.
- Allow the system to restart if the prompt shows up.
- And you should be done.
These steps can lead to the resolution you’re seeking. Otherwise the Error 0x80070050 may appear again. If it does, move to Step 10.
Step 10 – Update Windows OS
Like the software applications you use to render specific tasks on your device, the Operating System also requires periodic updates.
Yes, we’ve all heard the troubling stories.
Devices often develop problems post unfinished updates that do not go through. But these OS updates include important security patches. Not having them applied to your system leaves it vulnerable to viruses and malware.
And may also trigger 0x80070050.
So here’s how Windows 7, Windows 8, Windows 8.1 and Windows 10 users can check for the latest updates and push them through:
- Click the “Start” button on the lower left-hand corner of your device.
- Type “Updates” in the search bar. There should be a “Windows Update” or “Check for Updates” option, based on the OS version you’re using.
- Click it. The system will let you know if any updates are available.
- You have the convenience of choosing the components of the update you’d like to push through. Always prioritize the security updates.
- Click “OK” followed by “Install Updates”.
Step 11 – Refresh the OS to Eliminate Persistent Error 0x80070050 Error
“Windows Refresh” is a lifesaver.
For those of you who are still with us and nothing has worked to eliminate the 0x80070050, until recently, a fresh install of Windows would have been the only option.
Not anymore.
The Windows Refresh is similar to reinstalling your Windows OS, but without touching your personal data. That’s hours of backup time saved in a jiffy.
Through the Refresh, all your system files become good as new. The only minor annoyance is the fact that any custom apps you’ve installed are gone and the system applications you had uninstalled are back.
Still, it is the best bet as the final step of this process.
- Enter the “Settings” of your PC and click on “Change Settings”.
- Click “Update and recovery” and then choose “Recovery”.
- Select “Keep my files”. This removes apps and settings, but lets your personal files live on.
- You’ll get some warning messages about the apps that will be uninstalled. If you’ve gone through a recent OS upgrade, the Refresh process makes it so that you can’t go back to your previous OS version – if you should ever feel the need to do it.
- Click the “Refresh” button.
Are you using an older version of Windows that doesn’t come with the power to “Refresh”?
Maybe it is time to start from scratch.
- Enter your BIOS set-up.
- This is where you need to change your computer’s boot order. Make it so that the boot happens not from the existing system files, but from the CD/DVD Drive.
- Place the original Windows disk in the CD/DVD drive.
- Turn on or restart the device.
- Choose where you’d like the system files to be installed.
- Your PC will restart several times as the process runs its course.
FAQ’s
What is the Windows Registry?
Windows Registry points to a kind of hierarchical database type, which oversees the storing of the desirable system settings for the Windows OS. These settings are referenced by a range of multiple system applications, which are reliant upon the registry for carrying on the required system operations. Think of the registry as the engine of your car, keep it well maintained and it will run well.
Will Resolving 0x80070050 Improve My Start Up Speed?
The startup performance is usually not directly related with Error 0x80070050 but some users have found that upon fixing their Windows errors, they have noticed an improvement in overall performance. Often times when running a computer repair software, you will find other issues that may be slowing down your start up speed.
How Can I Keep My Computer Running Fast and Error Free?
Key to fast and error-free computer performance is to ensure its regular maintenance. Make sure always that a quality antivirus program is installed and updated. Regular computer scans for detecting and removing malware and corrupted computer files is highly recommended. The automatic maintenance features of your system could be maximized here for hassle-free maintenance.
Start Download Now
Author:
Curtis Hansen has been using, fiddling with, and repairing computers ever since he was a little kid. He contributes to this website to help others solve their computer issues without having to buy a new one.
Ошибка 0x80070050 возникает в двух случаях: при установке обновлений Windows и при архивации гостевой виртуальной машины на ПК-узле в серверной версии Windows. Столкнувшись с данной ошибкой в любом из этих случаев, воспользуйтесь нижеуказанными шагами для ее решения.
Решение ошибки 0x80070050
Если ошибка появилась при обновлении Виндовс, то устраняется следующим образом:
- зайдите под своим аккаунтом в систему;
- отыщите директорию C:\Users\ХХХ\AppData\Local\Temp, где ХХХ — ваше имя пользователя;
- выйдите из аккаунта и зайдите под аккаунтом локального администратора, а если такого профиля нет, то создайте его;
- перейдите в ранее указанную папку и переименуйте ее на C:\Users\ХХХ\AppData\Local\Temp2;
- возвратитесь обратно в свой аккаунт и повторно запустите обновление.
Если ошибка 0x80070050 возникла при попытке архивации гостевой виртуальной машины на компьютере-узле в серверной версии Windows, то переименуйте или удалите файл Autorecovery.avhdx. Перед этим создайте бэкап, поскольку это временная мера, а Microsoft не представила официального способа решения сбоя.
Some Windows 10 and Windows 11 users are reporting that whenever they attempt to update the Windows Subsystem for Linus (WSL) they end up with the error message ‘WslRegisterDistribution Failed with Error: 0x80070050‘. This problem is reported to occur on both Windows 10 and Windows 11.
After we’ve investigated this issue thoroughly, it turns out that there are several different scenarios that might directly or indirectly cause this type of behavior. Here’s what you should be on the lookout for:
- LXSS Manager is stuck in a limbo state – According to some affected users, you can expect to deal with this issue in situations where the LXX Manager service is neither opened nor closed and thus inaccessible. You can fix this particular issue by accessing the Services screen and restarting the service altogether.
- The Status of LXSS Manager is not set to Automatic – As it turns out, if you want the WSL updating process to be carried over seamlessly, one of the first things you need to do is ensure that the status of the LXSS Manager service is set to Automatic. You can do this from the Services screen of your Windows installation or using Registry Editor.
- The Windows Subsystem for Linux is Disabled – Another reason why you might expect to deal with this issue is a scenario in which the Windows Subsystem for Linux is actually disabled at a system level and thus cannot be updated. To fix this, access the Windows Features menu and re-enable this component. Additionally, you can do this from an elevated powershell window.
- Recent system change – If you only noticed the apparition of this problem after performing a certain driver installation or after an unexpected system interruption, it’s possible that a recent system change actually caused this behavior. In this case, you can try reverting your PC back to a state in which everything was functioning properly.
- Outdated driver fleet – As it turns out, you can expect the Windows Subsystem for Linux component to act up if you have outdated drivers that you’re currently using. Several affected users have managed to fix the issue by updating all your driver components to the latest versions.
- Outdated Windows installation – If you have pending Windows updates that you keep postponing, it might be wise to install them first before you try to update the WSL component. Several affected users have confirmed that the problem was resolved immediately after they brought their Windows installation to the latest build available.
- System file corruption – According to a lot of affected users, system file corruption can also be responsible for this particular issue. Our advice is to deploy a CHKDSK scan first to ensure that there aren’t any failing sectors, then deploy SFC & DISM scans in quick succession in order to repair corrupted system components. As a last resort, you should also consider going for a repair install or clean install.
- 3rd party interference – As it turns out, there are a lot of potential tools & 3rd party programs that might ultimately end up interfering with the Windows Subsystem for Linux. To make sure none of them are actually causing this behavior on your Windows installation, achieve a clean boot state and see if you are still unable to update the WSL component.
Now that we went over every potential reason why you might expect to experience this problem, let’s go over a series of fixes that other affected users have successfully used to get past this problem that prevented them from updating the Windows Subsystem for Linux.
1. Restart the LXSS Manager
Some impacted users claim that you should anticipate coping with this problem while the LXX Manager service is unavailable because it is neither opened nor closed. By going to the Services page and restarting the service from scratch, you can resolve this specific problem.
Note: This is one of the most commonly reported fixes that affected users have reported. But keep in mind that it’s likely that the fix is only temporary as you will be experiencing the same type of issue the next time WSL needs updating.
If you haven’t tried restarting the LXSS Manager yet, follow the instructions below for specific instructions on how to do this:
- Press Windows key + R to open up a Run dialog box. Next, type ‘services.msc‘ inside the text box and press Ctrl + Shift + Enter to open up the Services screen.

Open the Services screen - At the User Account Control (UAC), click Yes to grant admin access.
- Once you’re inside the Services screen, scroll down through the list of services and locate the entry named LxssManager.
- After you locate LxssManager, right-click on it and click on Stop to effectively stop the service.
- Wait for a full minute before right-clicking on LxssManager once again and click on Start to effectively restart the service.

If this problem didn’t allow you to fix the issue, move down to the next method below.
2. Modify the behavior of LxssManager
It turns out that one of the first things you need to do is make sure the LXSS Manager service’s status is set to Automatic if you want the WSL update process to proceed without a hitch. Using Registry Editor or the Services interface of your Windows installation, you can accomplish this.
Since one of the sub-methods might be unfollowable in your case, we decided to cover both potential scenarios so you have two different ways of modifying the status of Lxss Manager.
2.1. Modify the behavior of LxssManager from the Services Screen
If you can access the Services screen, this is certainly the easier method of modifying the behavior of LxssManager. All you need to do is access the Services screen and set the startup type of LxxManager to Automatic.
Follow the instructions below for the complete steps of doing this:
- Press Windows key + R to open up a Run dialog box. Next, type ‘services.msc‘ inside the text box and press Ctrl + Shift + Enter to open up the Services screen.
Open the Services screen - At the User Account Control (UAC), click Yes to grant admin access.
- Once you’re inside the Services screen, scroll down through the list of services and locate the entry named LxssManager.
- Right-click on LxssManager and click on Properties from the context menu that just appeared.
- Next, once you’re inside the Properties screen, access the General tab and change the Startup type to Automatic and click on Apply to save the changes.
- Reboot your PC and see if the problem is now fixed.
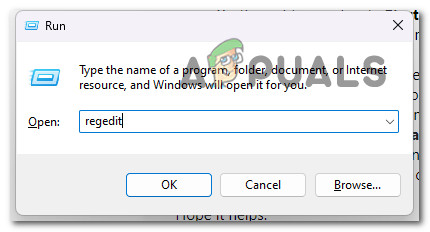
2.2. Modify the behavior of Lxss Manager via Registry Editor
A harder thing of doing the same thing as the method above is to rely on Registry Editor to modify the startup behavior of Lxss Manager.
Follow the instructions below for specific steps on navigating to the location of LxssManager via Registry Editor and change its value data to 2:
- Press Windows key + R to open up a Run dialog box. Next, type ‘regedit’ inside the text box and press Ctrl + Shift + Enter to open up the Registry Editor with admin access.

Open the Registry Editor - At the User Account Control (UAC), click Yes to grant admin access.
- Once you’re inside the Registry Editor, navigate to the following location using the menu on the left-hand side:
HKEY_LOCAL_MACHINE\SYSTEM\CurrentControlSet\Services\LxssManager
Note: You can either navigate to this location manually or you can paste the location directly into the nav bar at the top and press Enter to get there instantly.
- Once you’re inside the correct location, move over to the right-hand section and double-click on Start
- Next, set the base of Start to Hexadecimal and the Value to 2 before clicking Ok to save the changes.
- After the operation is completed, close the Registry Editor and see if the problem is now fixed.
If the same kind of problem is still occurring, move down to the next method below.
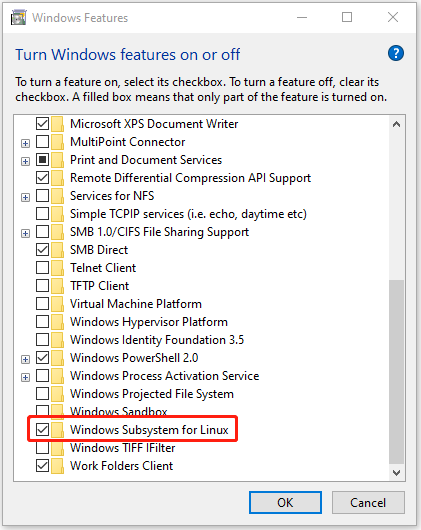
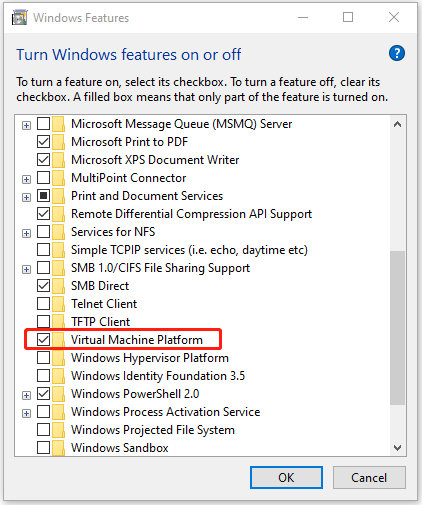
3. Enable Windows Subsystem for Linux & Virtual Machine Platform
A situation in which the Windows Subsystem for Linux is truly disabled at a system level and cannot be upgraded is another reason why you might anticipate having to deal with this problem. Re-enabling this component from the Windows Features menu will resolve this. Additionally, a powershell window that has been elevated can be used for this.
UPDATE: As it turns out, there’s one dependency (Virtual Machine Platform) that needs to be enabled to in order for the WSL component to be updated without issues.
In what follows, we will show you how to enable these components via the Windows Features screen and from an elevated Powershell. Feel free to follow whichever guide you feel most comfortable with.
3.1. Enable WSL & Virtual Machine Platform via Windows Features
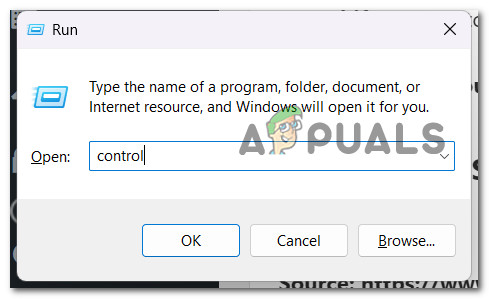
In order to access the Windows Features screen and perform these modifications, you need to first access the classic Control Panel menu.
Here’s a quick step-by-step guide on how to do this:
- Press Windows key + R to open up a Run dialog box. Next, type ‘control’ inside the text box and press Ctrl + Shift + Enter to open up an elevated Control Panel window.
Open the classic Control Panel menu - At the User Account Control (UAC), click Yes to grant admin access.
- Once you’re inside the classic Control Panel menu, search for ‘apps’, then click on Programs and Features.
- Next, click on Turn Windows Features on or off from the left-hand side menu.
Turn Windows Features on or Off - From the Windows Features screen, check the boxes associated with Windows Subsystem for Linux and Virtual Machine Platform then click Ok to enable it.
- Reboot your PC to enforce the changes, then attempt to update WSL once again and see if the problem is now fixed.
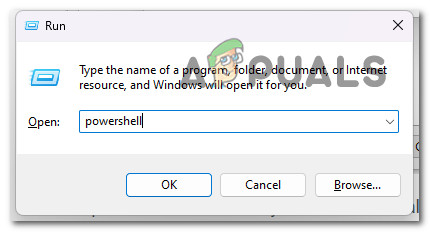
3.2. Enable WSL & Virtual Machine Platform via Powershell
If you want to save yourself some time and you are comfortable with getting things done from a terminal, you can also enable WSL & Virtual Machine Platform from an elevated Powershell command.
Follow the instructions below for steps on how to do this:
- Press Windows key + R to open up a Run dialog box.
- Once you’re inside the Run dialog box, type ‘powershell’, then press Ctrl + Shift + Enter to open up an elevated Powershell window.
Access the Powershell window - At the User Account Control (UAC), click Yes to grant admin access.
- Once you’re inside the Powershell window, type the following command and press Enter to enable WSL + every required dependency:
Enable-WindowsOptionalFeature -Online -FeatureName Microsoft-Windows-Subsystem-Linux
- Reboot your PC and see if the problem is now fixed.
If the same kind of issue is still occurring, move down to the next method below.
4. Use the System Restore utility
It’s likely that a recent system modification actually caused this behavior if you only became aware of it after installing a specific driver or after an unplanned system outage. In this situation, you might attempt to return your PC to a time when everything was working as it should.
This has assisted numerous folks in solving their issue.
By using Windows System Restore tool, you can return your computer to a prior condition. This can be used to fix problems like malfunctioning systems where updating the WSL component is impossible.
Observe these methods to fix your computer and get it back in working order:
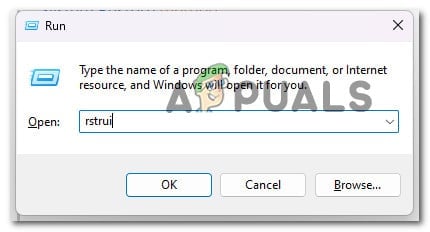
- Press the Windows key + R to start the Run command.
- Type “rstrui” in the Run box and hit Enter to start the System Restore wizard.
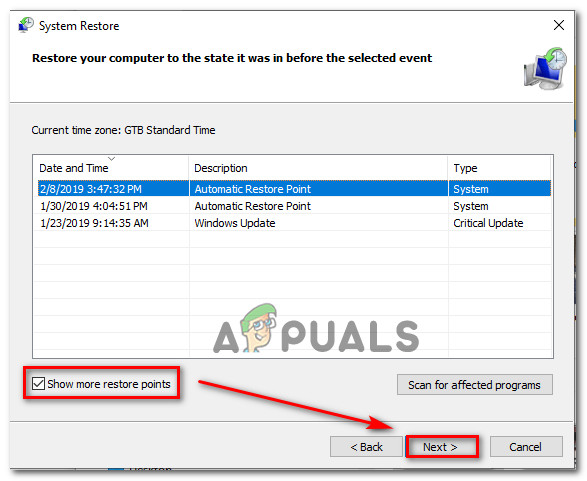
Open up the System Restore menu - On the next screen, select a different restoration point before pressing the Next button.

Open a Restore point Note: Select a restore point that was established before you realized this error, then click Next again.
- Click Finish when the restoration procedure has started, then watch as your computer restarts.
- Restart your Windows computer and see if you can update the WSL component.
If the problem is still not solved, proceed to the technique below.
5. Install every pending Windows Update
Installing any pending Windows updates before attempting to update the WSL component may be a good idea if you keep putting them off. A number of impacted users have indicated that the issue was quickly fixed once they updated their Windows installations to the most recent release.
Given that this problem extends back to Windows 10, Microsoft has had plenty of time to fix it. (even if unsuccessfully). Their most recent initiatives included several hotfixes that were distributed as cumulative updates for both Windows 10 and Windows 11. To see if the issue is fixed for you, install the missing hotfixes on your Windows machine.
Applying all pending Windows updates will allegedly frequently completely remedy the problem, according to many customers who have reported the Shell Infrastructure Host CPU resource hoarding issue.
This is the prospective solution you ought to test initially considering that Microsoft has previously issued a few upgrades designed to lessen this kind of problem.
To fix this problem, make sure you’re running the most recent build of your version of Windows 11 by utilizing the Windows Update feature.
To resolve the ‘WslRegisterDistribution Failed with Error: 0x80070050’, follow these steps to update Windows Update to the most recent version of Windows 11:
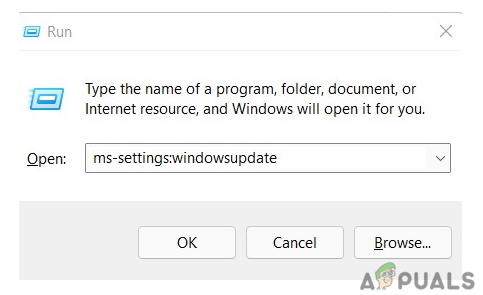
- Press Windows key + R to open the Run dialog box.
- In the text box, enter “ms-settings:windowsupdate” to open the Windows Update tab of the Settings application.

Access the Windows update Note: You may now encounter an account control prompt if you haven’t adjusted the default UAC settings. Click Yes to grant admin access in this instance.
- Next, choose to Check for Updates from the menu on the right side of the screen.

Checking for updates - Click Install Now to launch the local installation of the update after it has finished downloading locally.
- Check to see if the problem has been fixed by restarting your computer.

If you’ve installed every scheduled Windows update and you still have the issue, keep reading for the next potential fix below.
6. Deploy a CHKDSK scan
If you are still utilizing a hard disk drive (HDD), you should run CHKDSK to determine if the abnormal behavior is related to a failing disk sector. After this sort of scan, the damaged sectors are swapped out for their unutilized equivalents.
By doing a CHKDSK scan to swap out bad storage sectors for good ones, you may keep your storage hardware running for longer and confirm this scenario (for a few more months).
Running a Check Disk Scan will help you extend the life of your HDD in this situation by replacing damaged sectors with healthy ones. To rule out this scenario, try running a CHKDSK scan from an elevated CMD prompt.
Note: Fortunately, the built-in CHKDSK application in Windows can scan for faults and corruptions and repair any logical errors and damaged data that might have been left behind by a forcible deletion attempt.
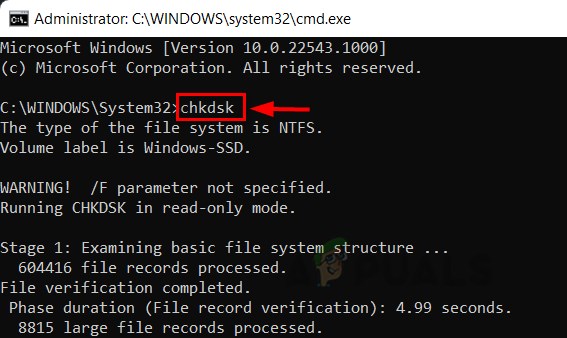
IMPORTANT: To grant CHKDSK the permissions it requires to repair damaged files, open it in an elevated CMD window. No matter what version of Windows you’re using, the procedures should function.
Once the CHKDSK scan is complete, restart your computer to see if the “WslRegisterDistribution Failed with Error: 0x80070050″ error is still visible.
If the same error is still occurring, move down to the next method below.
7. Perform a clean boot operation
It turns out that there are a lot of potential tools and third-party applications that could eventually interfere with the Windows Subsystem for Linux. Make sure your Windows installation is in a clean boot state and check to see if you can still update the WSL component. If not, one or more of them may be the real culprits behind this behavior.
If you’ve got this far without finding a workable solution, you should start focusing on a possible 3rd party offender who may be involved in the instability to update the WSL component.
You can anticipate dealing with this kind of problem as a result of an overly defensive security suite or as a result of a system optimizer program that ultimately has an impact on the power-related Kernel functions, according to other affected customers.
If this issue keeps coming up whenever you try to upgrade the WSL component, you should try a clean boot and see if the critical crashes are still happening.
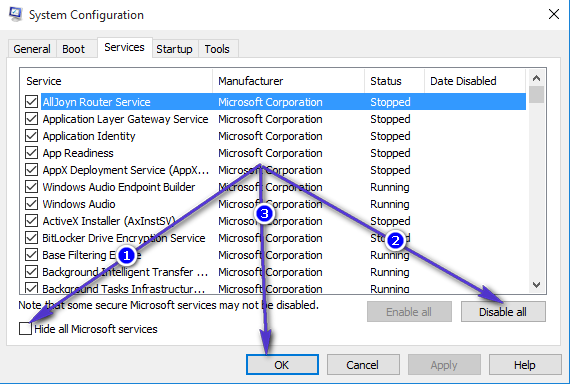
It is evident that a third-party processor starting service is the problem if you obtain a clean boot state and the error stops happening. Finding the problem is now just a matter of progressively re-enabling every previously deactivated item until you see the error reoccurring.
On the other hand, proceed to the next potential cure below if the same type of problem persists even after a clean boot state.
8. Deploy an SFC and DISM Scan
Investigating any system corruption issues should be your next step if you’re still unable to upgrade the WSL component.
The vast majority of possible problems that could be the cause of this error code can be fixed by immediately running SFC (System File Checker) and DISM (Deployment Image Servicing and Management) checks.
The two built-in utilities are essentially equal, but to enhance your chances of fixing the problem without having to perform a clean install or repair install, we advise running both types of scans quickly one after the other.
An SFC scan should be your first course of action. There is NO requirement for an Internet connection because this scan will use a local archive to replace damaged Windows files with intact ones.
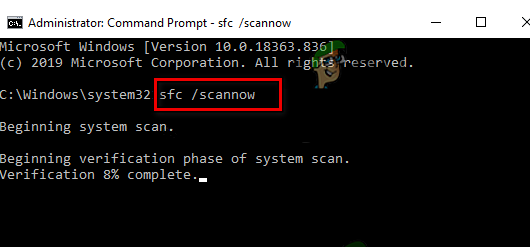
Avoid stopping, restarting, or closing the elevated CMD window once this procedure has begun.
You run the risk of causing additional local problems for your PC’s HDD or SSD by doing this.
Restart your machine after the SFC scan is complete, and when it comes back up, start the DISM scan.
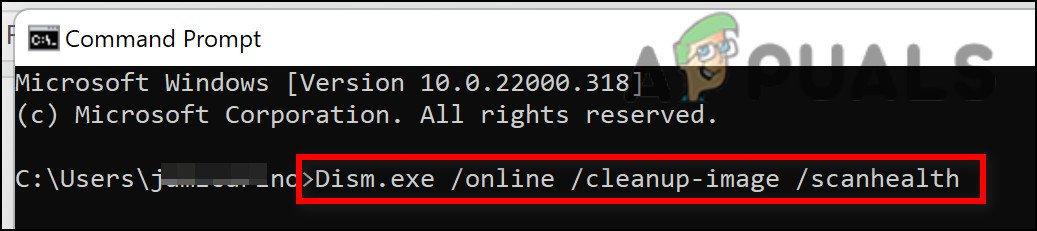
Notably, unlike an SFC check, DISM needs an ongoing Internet connection in order to replace corrupted files with their healthy counterparts. This is required because DISM receives fresh copies that are uncorrupted via a function of Windows Update, unlike SFC, which uses a local file archive.
Restart your computer once more to see if the issue has been resolved when the DISM scan is finished.
Continue to the next suggested solution below if the issue is still present.
9. Perform a Clean install or Repair install
If none of the aforementioned modifications have improved your situation, you likely have a serious system file corruption that is beyond the scope of typical techniques. If this is the case, you should simply reset any pertinent Windows components that might ultimately have an effect on the WSL component.
To do this, you can either execute a full OS drive wipe or just pick out the files associated with your operating system:
• Clean Install – This is the easier of the two procedures to carry out because you can do it directly from your Windows version’s menus and without the use of installation discs. Only if you don’t care what happens to the sensitive data you’re currently storing on the drive is this recommended.
• Repair install – This method, also known as an in-place repair, is suggested if the OS drive (C:) currently stores crucial information that you just cannot afford to lose. However, keep in mind that you must use appropriate installation media in order for this to function. The main advantage of this strategy is the preservation of all of your personal content, including games, apps, and user preferences.